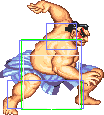
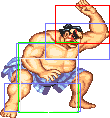
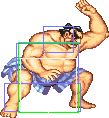
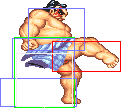
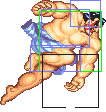
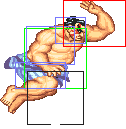
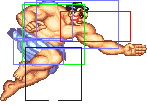
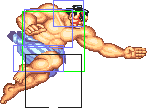
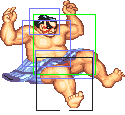
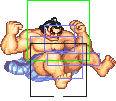
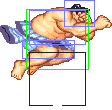
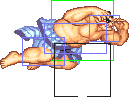
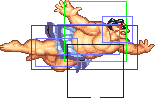
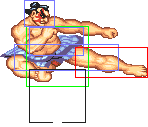
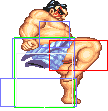
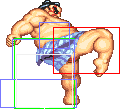
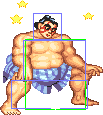
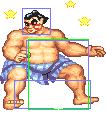
Street Fighter 2: Champion Edition/E Honda

From SuperCombo Wiki
Street Fighter 2: Champion EditionSf2ce-logo.png
Street Fighter 2: Champion Edition#Game ElementsStreet Fighter 2: Champion Edition#Game ElementsStreet Fighter 2: Champion Edition#CharactersStreet Fighter 2: Champion Edition#System InfoStreet Fighter 2: Champion Edition#MiscellaneousStreet Fighter 2: Champion Edition#Basic StrategyMvC3HeaderButtons.png

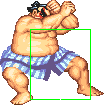
Sf2ceEhonda.gif Can't you do better than that?

Introduction

A Sumo Master who wants to show the world that Sumo Wrestling is the best martial art.

He can be considered a buffed character compared to WW. His normals are basically intact, his specials gained priority, the Hunred Slaps attack is easier to execute along with the new move ability, the Sumo Headbutt has a better hitbox at start and you can use it as an anti-air. Also Honda has overall better hitboxes for aerial normals.

Color Options

Start Default
Ehonda-mp.gif Ehonda-old1.gif

Moves List

Normal Moves

  • Bear Hug: close, b or f + Hard Punch
  • Sumo Throw: close, b or f + Medium Punch
  • Knee Bash: close, b or f + Hard Kick

Special Moves

  • Hundred Hand Slap: Punch button rapidly
  • Sumo Headbutt: b~f + Punch

The Basics

  • Anti-Airs: far standing Hard Punch,close standing Hard Kick
  • High Pokes: standing Medium Punch
  • Low Pokes: crouching Hard Punch

Pros

  • Buffed walking Slaps
  • Good Throw and Hold options

Cons

  • Lack of Anti Air Options
  • Projectile Eater at long distance

Combos

  • j.MP,s.HK/cr.HP/MP H.Harite
  • cross up j.MK,(s.MP,c.HP)
  • LP,LP H.Harite

Hitboxes

Standing Normals

  • Standing LP:
Damage 16 Sf2ce-ehonda-lp-s0.png Sf2ce-ehonda-lp-s1.png Sf2ce-ehonda-lp-a1.png Sf2ce-ehonda-lp-s1.png Sf2ce-ehonda-lp-s0.png
Stun 1~7
Stun Timer 40
Chain Cancel No
Special Cancel Yes
Frame Advantage +7
Frame Count 2 2 4 2 1
Frame Count 1+4 4 3
  • Standing MP:
Damage 20 Sf2ce-ehonda-lp-s0.png Sf2ce-ehonda-mp-s1.png Sf2ce-ehonda-mp-s2.png Sf2ce-ehonda-mp-a1.png Sf2ce-ehonda-mp-s2.png Sf2ce-ehonda-mp-s1.png Sf2ce-ehonda-lp-s0.png
Stun 5~11
Stun Timer 60
Chain Cancel No
Special Cancel No
Frame Advantage +10
Frame Count 2 2 2 4 2 2 1
Frame Count 1+6 4 5
  • Standing HP:
Damage 26 Sf2ce-ehonda-lp-s0.png Sf2ce-ehonda-hp-s1.png Sf2ce-ehonda-hp-a1.png Sf2ce-ehonda-hp-a2.png Sf2ce-ehonda-hp-r1.png Sf2ce-ehonda-hp-r2.png Sf2ce-ehonda-hp-r3.png Sf2ce-ehonda-hp-s1.png Sf2ce-ehonda-lp-s0.png
Stun 11~17
Stun Timer 80
Chain Cancel No
Special Cancel No
Frame Advantage -2
Frame Count 3 3 3 4 7 5 3 2 1
Frame Count 1+6 4 18


  • Standing LK:
Damage 14 Sf2ce-ehonda-lp-s0.png Sf2ce-ehonda-lk-s1.png Sf2ce-ehonda-lk-s2.png Sf2ce-ehonda-lk-a1.png Sf2ce-ehonda-lk-s2.png Sf2ce-ehonda-lk-s1.png Sf2ce-ehonda-lp-s0.png
Stun 1~7
Stun Timer 40
Chain Cancel No
Special Cancel No
Frame Advantage +4
Frame Count 3 3 3 4 3 3 1
Frame Count 1+9 4 7
  • Standing MK:
Damage 18 Sf2ce-ehonda-lp-s0.png Sf2ce-ehonda-lk-s1.png Sf2ce-ehonda-lk-s2.png Sf2ce-ehonda-mk-a1.png Sf2ce-ehonda-lk-s2.png Sf2ce-ehonda-lk-s1.png Sf2ce-ehonda-lp-s0.png
Stun 5~11
Stun Timer 60
Chain Cancel No
Special Cancel No
Frame Advantage +4
Frame Count 3 3 3 4 5 6 1
Frame Count 1+9 4 12
  • Standing HK:
Damage 24 Sf2ce-ehonda-lp-s0.png Sf2ce-ehonda-lk-s1.png Sf2ce-ehonda-lk-s2.png Sf2ce-ehonda-hk-a1.png Sf2ce-ehonda-lk-s2.png Sf2ce-ehonda-lk-s1.png Sf2ce-ehonda-lp-s0.png
Stun 11~17
Stun Timer 80
Chain Cancel No
Special Cancel No
Frame Advantage -1
Frame Count 3 3 3 6 8 10 1
Frame Count 1+9 6 19

Close Standing Normals

  • Close LK:
Damage 16 Sf2ce-ehonda-lp-s0.png Sf2ce-ehonda-cllk-s4-6.png Sf2ce-ehonda-cllk-a7-9.png Sf2ce-ehonda-cllk-s4-6.png Sf2ce-ehonda-lp-s0.png
Stun 1~7
Stun Timer 40
Chain Cancel No
Special Cancel No
Frame Advantage +7
Frame Count 3 3 3 3 1
Frame Count 1+6 3 4
  • Close MK:
Damage 20 Sf2ce-ehonda-lp-s0.png Sf2ce-ehonda-cllk-s4-6.png Sf2ce-ehonda-clmk-a7-11.png Sf2ce-ehonda-cllk-s4-6.png Sf2ce-ehonda-lp-s0.png
Stun 5~11
Stun Timer 60
Chain Cancel No
Special Cancel No
Frame Advantage +6
Frame Count 3 3 5 7 1
Frame Count 1+6 5 8
  • Close HK:
Damage 26,18 Sf2ce-ehonda-lp-s0.png Sf2ce-ehonda-clhk-r30-32.png Sf2ce-ehonda-clhk-r24-29.png Sf2ce-ehonda-clhk-a8-10.png Sf2ce-ehonda-clhk-a11-15.png Sf2ce-ehonda-clhk-r16-23.png Sf2ce-ehonda-clhk-r24-29.png Sf2ce-ehonda-clhk-r30-32.png Sf2ce-ehonda-lp-s0.png
Stun 11~17
Stun Timer 80
Chain Cancel No
Special Cancel No
Frame Advantage +1
Frame Count 2 2 3 3 5 8 6 3 1
Frame Count 1+7 8 18

Crouching Normals

  • Crouching LP:
Damage 14 Sf2ce-ehonda-crmp-s1-2.png Sf2ce-ehonda-crlp-s3-4.png Sf2ce-ehonda-lp-ehonda-crlp-a5-12.png Sf2ce-ehonda-crlp-s3-4.png Sf2ce-ehonda-crmp-s1-2.png
Stun 1~7
Stun Timer 40
Chain Cancel No
Special Cancel No
Frame Advantage +3
Frame Count 2 2 8 2 1
Frame Count 1+4 8 3
  • Crouching MP:
Damage 18 Sf2ce-ehonda-crmp-s1-2.png Sf2ce-ehonda-crmp-s3-4.png Sf2ce-ehonda-crmp-s5-6.png Sf2ce-lp-ehonda-crmp-a7-14.png Sf2ce-ehonda-crmp-s5-6.png Sf2ce-ehonda-crmp-s3-4.png Sf2ce-ehonda-crmp-s1-2.png
Stun 5~11
Stun Timer 60
Chain Cancel No
Special Cancel No
Frame Advantage +0
Frame Count 2 2 2 8 6 4 1
Frame Count 1+6 8 11
  • Crouching HP:
Damage 24 Sf2ce-ehonda-crmp-s1-2.png Sf2ce-ehonda-crhp-s3-5.png Sf2ce-lp-ehonda-crhp-a6-9.png Sf2ce-ehonda-crhp-r10-15.png Sf2ce-ehonda-crhp-r16-23.png Sf2ce-ehonda-crhp-r10-15.png Sf2ce-ehonda-crhp-r30-33.png Sf2ce-ehonda-crhp-r34-36.png Sf2ce-ehonda-crmp-s1-2.png
Stun 11~17
Stun Timer 80
Chain Cancel No
Special Cancel No
Frame Advantage -8
Frame Count 2 3 4 6 8 6 4 3 1
Frame Count 1+5 4 28
  • Crouching LK:
Damage 14 Sf2ce-ehonda-crmp-s1-2.png Sf2ce-lp-ehonda-crlk-s4-6.png Sf2ce-lp-ehonda-crlk-s7-9.png Sf2ce-ehonda-lp-ehonda-crlk-a10-12.png Sf2ce-lp-ehonda-crlk-s7-9.png Sf2ce-lp-ehonda-crlk-s4-6.png Sf2ce-ehonda-crmp-s1-2.png
Stun 1~7
Stun Timer 40
Chain Cancel No
Special Cancel No
Frame Advantage +4
Frame Count 3 3 3 3 3 3 1
Frame Count 1+9 3 7
  • Crouching MK:
Damage 18,18 Sf2ce-ehonda-crmp-s1-2.png Sf2ce-lp-ehonda-crlk-s4-6.png Sf2ce-ehonda-lp-ehonda-crmk-a7-9.png Sf2ce-ehonda-lp-ehonda-crmk-a10-15.png Sf2ce-lp-ehonda-crlk-s7-9.png Sf2ce-lp-ehonda-crlk-s4-6.png Sf2ce-ehonda-crmp-s1-2.png
Stun 5~11
Stun Timer 60
Chain Cancel No
Special Cancel No
Frame Advantage +2
Frame Count 3 3 3 6 5 4 1
Frame Count 1+6 9 10
  • Crouching HK:
Damage 24 Sf2ce-ehonda-crmp-s1-2.png Sf2ce-ehonda-crhk-s4-7.png Sf2ce-ehonda-crhk-a8-13.png Sf2ce-ehonda-crhk-a14-9.png Sf2ce-ehonda-crhk-a10-17.png Sf2ce-ehonda-crhk-r18-23.png Sf2ce-ehonda-crmp-s1-2.png
Stun 11~17
Stun Timer 80
Chain Cancel No
Special Cancel No
Frame Advantage -1
Frame Count 3 4 6 4 8 6 1
Frame Count 1+7 18 7

Aerial Normals

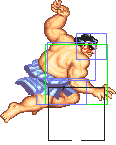
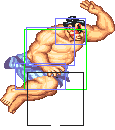
  • Neutral Jumping LP:
Damage 18 Sf2ce-honda-djlp-s0-2.png Sf2ce-honda-djlp-s3-6.png Sf2ce-honda-djlp-s7-10.png Sf2ce-honda-njlp-a11-40.png Sf2ce-honda-djlp-r.png
Stun 1~7
Stun Timer 40
Frame Count 3 4 4 30
Simplified 11 30
  • Neutral Jumping MP:
Damage 22 Sf2ce-honda-djlp-s0-2.png Sf2ce-honda-djlp-s3-6.png Sf2ce-honda-djmp-a7-10.png Sf2ce-honda-djmp-a11-22.png Sf2ce-honda-djlp-r.png Sf2ce-honda-djmp-r31-34.png Sf2ce-honda-djlp-s7-10.png Sf2ce-honda-djlp-s3-6.png
Stun 5~11
Stun Timer 50
Frame Count 3 4 4 12 8 4 4
Simplified 7 16
  • Neutral Jumping HP:
Damage 28 Sf2ce-honda-djlp-s0-2.png Sf2ce-honda-djhp-r25-28.png Sf2ce-honda-djhp-a7-12.png Sf2ce-honda-djhp-r13-20.png Sf2ce-honda-djhp-r21-24.png Sf2ce-honda-djhp-r25-28.png Sf2ce-honda-djlp-s0-2.png
Stun 11~17
Stun Timer 60
Frame Count 3 4 6 8 4 4
Simplified 7 6
  • Neutral Jumping LK:
Damage 18 Sf2ce-honda-djhk-s0-2.png Sf2ce-honda-djhk-s3-6.png Sf2ce-honda-njlk-a7-36.png Sf2ce-honda-djhk-s3-6.png Sf2ce-honda-djhk-s0-2.png
Stun 1~7
Stun Timer 40
Frame Count 3 4 30 4
Simplified 7 30
  • Neutral Jumping MK:
Damage 22 Sf2ce-honda-djhk-s0-2.png Sf2ce-honda-djhk-s3-6.png Sf2ce-honda-njmk-a7-18.png Sf2ce-honda-djhk-s3-6.png Sf2ce-honda-djhk-s0-2.png Sf2ce-honda-djhk-r27-30.png Sf2ce-honda-djhk-r31-34.png Sf2ce-honda-njmk-r35-38.png Sf2ce-honda-djlp-s0-2.png
Stun 5~11
Stun Timer 50
Frame Count 3 4 12 4 4 4 4 4
Simplified 7 12
  • Neutral Jumping HK:
Damage 28 Sf2ce-honda-djhk-s0-2.png Sf2ce-honda-djhk-s3-6.png Sf2ce-honda-njhk-a7-12.png Sf2ce-honda-djhk-s3-6.png Sf2ce-honda-djhk-s0-2.png Sf2ce-honda-djhk-r27-30.png Sf2ce-honda-djhk-r31-34.png Sf2ce-honda-njmk-r35-38.png Sf2ce-honda-djlp-s0-2.png
Stun 11~17
Stun Timer 60
Frame Count 2 4 6 4 4 4 4 4
Frame Count 7 6
  • Diagonal Jumping LP:
Damage 18 Sf2ce-honda-djlp-s0-2.png Sf2ce-honda-djlp-s3-6.png Sf2ce-honda-djlp-s7-10.png Sf2ce-honda-djlp-a11-40.png Sf2ce-honda-djlp-r.png
Stun 1~7
Stun Timer 40
Frame Count 3 4 4 30
Simplified 11 30
  • Diagonal Jumping MP:
Damage 22 Sf2ce-honda-djlp-s0-2.png Sf2ce-honda-djlp-s3-6.png Sf2ce-honda-djmp-a7-10.png Sf2ce-honda-djmp-a11-22.png Sf2ce-honda-djlp-r.png Sf2ce-honda-djmp-r31-34.png Sf2ce-honda-djlp-s7-10.png Sf2ce-honda-djlp-s3-6.png
Stun 5~11
Stun Timer 50
Frame Count 3 4 4 12 8 4 4
Simplified 7 16
  • Diagonal Jumping HP:
Damage 28 Sf2ce-honda-djlp-s0-2.png Sf2ce-honda-djhp-r25-28.png Sf2ce-honda-djhp-a7-12.png Sf2ce-honda-djhp-r13-20.png Sf2ce-honda-djhp-r21-24.png Sf2ce-honda-djhp-r25-28.png Sf2ce-honda-djlp-s0-2.png
Stun 11~17
Stun Timer 60
Frame Count 3 4 6 8 4 4
Simplified 7 6
  • Diagonal Jumping LK:
Damage 18 Sf2ce-honda-djlk-s0-2.png Sf2ce-honda-djlk-s3-6.png Sf2ce-honda-djlk-a7-Infinity.png
Stun 1~7
Stun Timer 40
Frame Count 3 4
Simplified 7
  • Diagonal Jumping MK:
Damage 22 Sf2ce-honda-djmk-s0-2.png Sf2ce-honda-djmk-s3-6.png Sf2ce-honda-djmk-a7-Infinity.png
Stun 5~11
Stun Timer 50
Frame Count 3 4
Simplified 7
  • Diagonal Jumping HK:
Damage 28 Sf2ce-honda-djhk-s0-2.png Sf2ce-honda-djhk-s3-6.png Sf2ce-honda-djhk-a7-18.png Sf2ce-honda-djhk-s3-6.png Sf2ce-honda-djhk-s0-2.png Sf2ce-honda-djhk-r27-30.png Sf2ce-honda-djhk-r31-34.png Sf2ce-honda-njmk-r35-38.png Sf2ce-honda-djlp-s0-2.png
Stun 11~17
Stun Timer 60
Frame Count 3 4 12 4 4 4 4 4
Simplified 7 12

Unique Normals

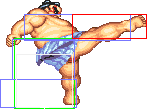
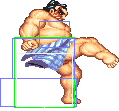
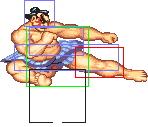
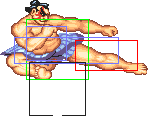
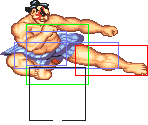
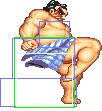
  • Hiza Geri aka Double Knee:
Damage 22,22 Sf2ce-ehonda-lp-s0.png Sf2ce-ehonda-lk-s1.png Sf2ce-ehonda-clhk-r24-29.png Sf2ce-ehonda-fmk-a10-12.png Sf2ce-ehonda-fmk-a13-15.png Sf2ce-ehonda-fmk-r16-17.png Sf2ce-ehonda-clhk-r24-29.png Sf2ce-ehonda-lk-s1.png Sf2ce-ehonda-lp-s0.png
Stun 5~11,8
Stun Timer 60,60
Chain Cancel No
Special Cancel No
Frame Advantage +8
Frame Count 3 3 3 3 3 2 2 2 1
Simplified 1+9 6 7

Throw

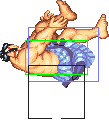
Tawara Nage: (←/→ + Strong) , Saba Ori: (←/→ + Fierce) and Sekkan Kyaku: (←/→ + Roundhouse)

Throw Hold Sf2ce-honda-throw.png
Damage 32 Damage 22+(4*n)
Duration - Duration 300
Stun 7~13 Stun 7~13
Stun Timer 100 Stun Timer -
Range (from axis) 64 Range (from axis) 64
Range advantage 36 Range advantage 36

Special Moves

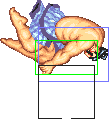
  • Sumo Headbutt: (Charge ←, →, P) [charge time: 59f]
Damage 18/26/28 Sf2ce-honda-hblp-s0-2.png Sf2ce-honda-hblp-s3-6.png Sf2ce-honda-hblp-s7-12.png Sf2ce-honda-hblp-a0-2.png Sf2ce-honda-hblp-a3-5.png Sf2ce-honda-hblp-a6-8.png
Stun 13~19
Stun Timer 120
Frame Advantage -11/-14,KD/-4
Jab 3 4 6 3 3 22
Jab Simplified 13 28
Strong 1 3 4 2 2 53
Strong Simplified 9 55
Fierce 1 4 1 1 63
Fierce Simplified 5 65
Sf2ce-honda-hblp-r0-3f.png Sf2ce-honda-hblp-r4-7f.png Sf2ce-honda-hblp-r8-11f.png Sf2ce-honda-hblp-r12.png Sf2ce-honda-hblp-r13.png Sf2ce-honda-hblp-r14.png Sf2ce-honda-hblp-r15.png
Jab 4 4 4 8 2 2 1
25
Strong 4 4 4 8 2 2 1
25
Fierce 4 4 4 8 2 2 1
25

Isn't changed so much from World Warrior, but lack of anti air and some invincible frames are useful against projectile spammers.

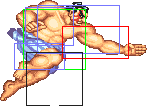
  • One Hundred Slaps: Press Punch Repeatedly

Startup:

Sf2ce-honda-ohs-s1.png Sf2ce-honda-ohs-s2.png
Jab 1 3
Strong 3 4
Fierce 4 6

Active:

Damage 24/26/28 Sf2ce-honda-ohh-a1.png Sf2ce-honda-ohh-a2.png Sf2ce-honda-a3.png Sf2ce-honda-ohh-a4.png Sf2ce-honda-ohh-a5.png Sf2ce-honda-ohh-a6.png
Stun 13~19
Stun Timer 120
Frame Advantage ?
Jab 4 4 4 4 4 4
Strong 2 2 2 2 2 2
Fierce 1 1 1 1 1 1

Recovery

Sf2ce-honda-ohs-s2.png Sf2ce-honda-ohs-s1.png
Jab 1 1
Strong 3 1
Fierce 5 1

Compared to World Warrior, now you can advance with this special and its easier to use, commonly used for corner trap setups or after a crossup , also can enter with a 2-in-1 jumping Strong.

Misc Animations

Walk back Neutral Walk Fwd Crouch
Sf2ce-honda-bwd.png Sf2ce-honda-lp-s0.png Sf2ce-honda-fwd.png Sf2ce-honda-cr.png
  • Standing reel:
Sf2ce-honda-reel1.png Sf2ce-honda-reel2.png Sf2ce-honda-reel3.png
  • Standing gut reel:
Sf2ce-honda-gutreel1.png Sf2ce-honda-gutreel2.png Sf2ce-honda-gutreel3.png
  • Crouching reel:
Sf2ce-honda-creel1.png Sf2ce-honda-creel2.png
  • Dizzy:
Sf2ce-honda-dizzy1.png Sf2ce-honda-dizzy2.png Sf2ce-honda-dizzy3.png


Advanced Strategy

E. Honda is a poke and throw character based in high damage hits and turtling at the same time.

However, being a heavy char with limited speed and jumping capabilities, Honda suffers from the same problem as some other CE chars: he lacks a zoning move and a proper anti-air attack, which makes him a low-tier. Even if he has a huge amount of moves and grabs, Honda can't survive a long-range assault unless the enemy makes a mistake. In CE, the good Honda player must know how to take advantage of block stunts and whiffed moves in order to do a massive attack and win the match.

The Sumo Headbutt has limited anti-air and anti-fireball properties, so use it carefully, because if you're not 100% sure the move will free your way to the counter attack, then it's better not even try. Punish can be shameful. At close range, it will result most of time in a trade, but to your advantage. And the Hundred Slaps, altough good for normal/chip damage, isn't match for most special (and even some normal) attacks.

The main Honda advantage is his grabbing potential. Every of his throws/grabs have great priority so don't be affraid to use it whenever you can. Throw loops? Sure!

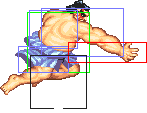
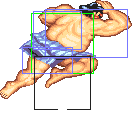
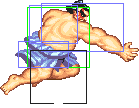
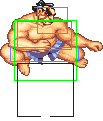
Honda's Sumo Splash is a normal move that is perfect for initiate your run to the victory, since it's almost impossible to avoid it being connected to a throw/grab. Not to mention its amazing crossup capabilities. And the diagonal j. LK (a.k.a. butt slam) is good for this task too, but preferably on corners. As said, throw loops FTW.

Things become complicated if the opponent is successful in gettin' away from you. As said, the lack of a zoning tool and an anti-air makes Honda an easy prey for fireball/anti-air patterns or even chip damage. Jumping fireballs is a pain and even if Honda is sucessful in doing this, he most probably will fall right in the enemy's sweeping leg.

The best strategy will always be corner pressure: Honda's moves are somewhat long reaching and can not only corner the enemy but also surprise him when he's planning a fireball or an escape routine. A right fireball jump can pretty much mean victory if the throw loop succeeds. If it fails, Hundred Slaps for at least some chip damage.

Match-Ups

E. Honda's match-ups according the "official" SF2CE Tier List:

  • against Ryu: 2
  • against Ken: 2
  • against Chun Li: 6
  • against E. Honda: 5
  • against Zangief: 7
  • against Blanka: 6
  • against Dhalsim: 3
  • against Guile: 2
  • against Balrog: 8
  • against Vega: 6
  • against Sagat: 2
  • against M. Bison: 4


Vs. Ryu

His strategy will be spamming Hadoken and then foot sweeping you when you land, try getting as close as you can to the spiritball before jumping and as you land do a fierce punch swat, this should hit the patterning Ryu's body. Don't rely to heavily on this strategy for it doesn't always work.

The best thing to do is try to push your opponent in to the corner with your headbutt and then slap him. A good way to do this is foot sweeps, Honda unlike the other characters does not have to duck before sweeping.

The best one to use is the far short sweep for although it doesn't do much damage it will knock them down and is so fast it is hard to block. Best time to use it is just as Ryu starts to throw a Hadoken.


Vs. Ken

He is similar to Ryu,but you need to be moderated with your jumps due that he had a weaker Hadoken but a stronger Shoryuken than Ryu, so use sweeps and Far Kicks agaisnt him at medium-close range instead.

Vs. E.Honda

Lots of ducking fierce punches and headbutts are your best bet here. Or jump in roundhouse so just your foot hits them then hit them with a few fist-o-fury. If you hit them out of the air do not get to close to them as they stand up for Honda's throw range is very large and you may get grabbed. Finally for more experienced players you can headbutt him out of a headbutt without losing any damage yourself. Just as he nears you (about 1 inch) execute your headbutt. His will stop as you are invincible to front and high attacks and yours will hit him as he regains his footing.

Vs. Chun Li

Her fast throw and speedy and good range normals will be your main problem at close combat, use your Slaps first as soon as she goes to you,at air vs ground combat she can use her Stomp ,you can use close fierce if you are cornered or block and then sweep her if she is so close to you and at midscreeb, if she goes to corner after the Stomp you can trap her with Slaps or Hold.

Spinning Bird Kick at long range combat it can be stopped with a ducking punch attack easily,Headbutt will be your main anti air at midscreen if she doesn't use Stomp or when she learned your Corner Slap Trap at midscreen,jumping against her isn't necessary due that her only anti air is a slow startup move,but a good option after block Hyakuretsu Kyaku and punish her with a jumping roundhouse.

Vs. Blanka

As Blanka its similar to Chun Li about his normals and jumping speed but with a better special move and hold,block his roll and then punish him with your headbutt or a far jab.

Blanka had better anti airs and he will use Fierce or Roundhouse to poke you due to your slow jump,its a hold and charge vs hold and charge match,anyway you had a better mashing move and can use your far kicks to kill his electricity attack.

Vs. Zangief

Your best attack against Zan is your long range footsweeps. Since you don't have to duck first to use them he has no warning and will usually be swept, this attack will also keep you out of 360 range. If he happens to time a jump over the sweep and is approaching fast try to swat him out of the air and if that won't work jump up into his attack (no matter what he does in the air it will take less damage than the 360 he'll get if he lands) and if he hits you charge a headbutt incase he attacks again.

Vs. Guile

Guile is most likely the hardest opponent for Honda to defeat especially if all he does is foot sweep and throw sonic booms. The best method to use against this most common type of guile player is to constantly walk toward him and drive him to the corner. Block all the sonic booms you can and use the ducking fierce punch to hit his forward leg sweep. Another good attack are the leg sweeps. As stated before Honda doesn't need to crouch to sweep people and this will greatly ad you in your fight with Guile. Stay about three body widths away and as soon as you see the flames appearing in his hands as he start a sonic boom use the sweep. It will most often hit him clean if not you get hit by a sonic boom and lose less. Once in the corner use the fist-of-fury ever time you knock him done to take off as much damage as possible. One last tactic that works well is to jump over the sonic booms and follow in with the fist-o-fury.

Vs. Dhalsim

Dhalsim's range makes him one of Honda's hardest opponents also. His fireballs and leg attacks as you jump can be infuriating. There isn't much Honda can do against this patterner but when you jump the fireballs use the swan dive attack to at least take mutual damage. He will lose more. Once you get in never let him escape you. Use the fist-o-fury to take of damage the swan dive attack (forward kick and down) and then the ducking forward to press the attack. Getting in however is very difficult and will usually come about by Dhalsim making a mistake. If he ever jumps walk towards take his hit and then jump attack, this usually gets you in close. A good way to counter his arm and leg attacks is to charge a headbutt and let it fly just before his attack connects.

Vs. Boxer

When he charges the best thing to do is ducking fierce punch, then fist-o-fury. Beware his standing fierce punch for it can hit you from a massive range. If you can time it your fierce punch will knock him out of his. If he continues to play defensively jump in as you would on Blanka so your foot barely hits him then fists-o-fury. If as you jump he starts an upward charge punch use the fierce punch. Don't neglect your headbutt. This will knock him out of ANY ground attack if you can time it right.

Vs. Claw

Attack as you would Chun Li. You can headbutt him out of both his wall attack and roll. If you head butt him out of the wall attack use the close fierce punch him out of the air. Try never to take a hit form Vega for he can combo just by hitting the forward button his arms are so fast. Your main problem will be that he had a better air gameplan than you,but you can answer with anti air game with headbutt instead.

Keeping away him isn't a problem,your sweeps are bigger than his slide.

Vs. Sagat

Fight like you would Ryu with one difference his low tigerballs. The best thing to do is block a few and headbutt over them to hit Sagat.(Headbutt goes over low tigers.) Another good way to counter his low tigers is to jump and hold your attack until you are as close to the ground and then roundhouse, if it connects try for a ducking fierce punch, if not go for the fist-o-fury.

Vs. Dictador

The key to beating a Bison Player is constant attack followed by fists-o-fury. If he ever gets his torpedo body going you have three options. 1- Have a headbutt charged and execute it just as he approaches (about 2 inches) you will both get hit but he will take more and you will be out of he cheesy pattern. 2- Block his torpedo and as he gets half way through you switch to direction of your block so you have a headbutt charged in the right direction and let it loose behind him or wait for him to come back and use method 1. 3-(best near corner) start like 2 but instead of charging a headbutt start the fist-o-fury.

Game Navigation

General
Controls
Notation
HUD
Glossary
System
FAQ
Characters
Balrog (boxer)
Blanka
Chun-li
Dhalsim
E Honda
Guile
Ken
M. Bison (dictator)
Ryu
Sagat
Vega (claw)
Zangief