

Introduction
Yokishiro Ono in disguise, I said, a son of a single mom named Jimmy that was lost in the amazonian forest and then became a wildboy and learned electricity putting a Pikachu in his ass before he was famous and love to travel rolling.
Blanka didn't get changed too much from WW to CE, but the changes he did get were massive. A few of his normal moves now don't have WW priority like st.HP, but now his Rolls don't have counter-hit damage and stop at the opponent properly. E;ectricity is also easier to mash out Anyway, besides losing his double close st.HP which was not very good anyways, he mostly got buffed and has great combos. He is effectively diet HF Blanka, and ends up a mid-tier character.
Color Options
| Start | Default |
 |

|
Moves List
Normal Moves
- Double Head Butt: f + Medium Punch
- Double Knee: close, f + Medium Punch
- Head Bite: close, b or f + Hard Punch
Special Moves
- Electricity: Punch button rapidly
- Rolling Attack: b~f + Punch
The Basics
- Anti-Airs: crouching Hard Punch,close standing Medium Punch and standing Hard Kick
- High Pokes: far standing Medium Punch
- Low Pokes: crouching Medium or Hard Kick
Pros
- Electricity Buff
- Longest Sweep
Cons
- Rolling Attack Easy countered
- Bad Anti Air Options
Combos
- j.MP,MP E.Thunder
- j.HK,s.MP,cr.HK/cr.HP
Hitboxes
Standing Normals
- Standing LP:
| Damage | 14 |  |
 |
 |
 |
 |

|
| Stun | 1~7 | ||||||
| Stun Timer | 40 | ||||||
| Chain Cancel | No | ||||||
| Special Cancel | No | ||||||
| Frame Advantage | +0 | ||||||
| Frame Count | 2 | 3 | 4 | 3 | 3 | 1 | |
| Simplified | 3+2 | 3 | 11* | ||||
- Standing MP:
| Damage | 18 |  |
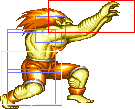 |
 |
 |

|
| Stun | 5~11 | |||||
| Stun Timer | 60 | |||||
| Chain Cancel | No | |||||
| Special Cancel | No | |||||
| Frame Advantage | +10 | |||||
| Frame Count | 2 | 2 | 3 | 3 | 1 | |
| Simplified | 4+2 | 2 | 7* | |||
- Standing HP:
| Damage | 22 |  |
 |
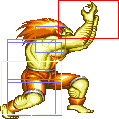 |
 |
 |

|
| Stun | 11~17 | ||||||
| Stun Timer | 80 | ||||||
| Chain Cancel | No | ||||||
| Special Cancel | No | ||||||
| Frame Advantage | -5 | ||||||
| Frame Count | 3 | 4 | 6 | 10 | 7 | 1 | |
| Frame Count | 3+3 | 10 | 18* | ||||
- Standing LK:
| Damage | 14 |  |
 |
 |
 |
 |

|
| Stun | 1~7 | ||||||
| Stun Timer | 40 | ||||||
| Chain Cancel | No | ||||||
| Special Cancel | No | ||||||
| Frame Advantage | +3 | ||||||
| Frame Count | 2 | 2 | 4 | 3 | 3 | 1 | |
| Simplified | 3+4 | 4 | 7* | ||||
- Standing MK:
| Damage | 18 |  |
 |
 |
 |
 |

|
| Stun | 5~11 | ||||||
| Stun Timer | 60 | ||||||
| Chain Cancel | No | ||||||
| Special Cancel | No | ||||||
| Frame Advantage | +1 | ||||||
| Frame Count | 2 | 2 | 4 | 3 | 3 | 1 | |
| Simplified | 3+4 | 4 | 7* | ||||
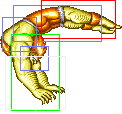
- Standing HK:
| Damage | 22 | 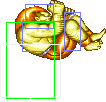 |
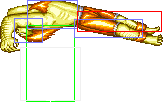 |
 |
 |
 |
 |
 |

|
| Stun | 11~17 | ||||||||
| Stun Timer | 80 | ||||||||
| Chain Cancel | No | ||||||||
| Special Cancel | No | ||||||||
| Frame Advantage | -9 | ||||||||
| Frame Count | 3 | 6 | 5 | 5 | 5 | 5 | 5 | 1 | |
| Simplified | 4+3 | 11 | 21* | ||||||
Close Standing Normals
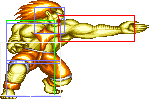
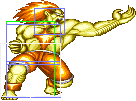
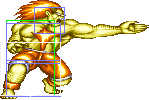
- Close Standing LP:
| Damage | 16 |  |
 |
 |
 |
 |
 |

|
| Stun | 1~7 | |||||||
| Stun Timer | 40 | |||||||
| Chain Cancel | No | |||||||
| Special Cancel | No | |||||||
| Frame Advantage | +6 | |||||||
| Frame Count | 3 | 2 | 2 | 2 | 4 | 2 | 1 | |
| Simplified | 1+5 | 2 | 9* | |||||
- Close Standing MP:
| Damage | 16 |  |
 |
 |

|
| Stun | 1~7 | ||||
| Stun Timer | 40 | ||||
| Chain Cancel | No | ||||
| Special Cancel | Yes | ||||
| Frame Advantage | +6 | ||||
| Frame Count | 2 | 4 | 2 | 1 | |
| Simplified | 1+2 | 4 | 3* | ||
- Close Standing LK:
| Damage | 16 |  |
 |
 |
 |
 |
 |
 |
 |
 |
 |

|
| Stun | 1~7 | |||||||||||
| Stun Timer | 40 | |||||||||||
| Chain Cancel | No | |||||||||||
| Special Cancel | No | |||||||||||
| Frame Advantage | +6 | |||||||||||
| Frame Count | 3 | 3 | 3 | 2 | 2 | 4 | 3 | 3 | 3 | 3 | 1 | |
| Simplified | 1+13 | 4 | 13* | |||||||||
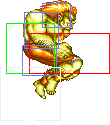
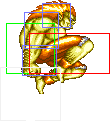
- Close Standing MK:
| Damage | 20,20 |  |
 |
 |
 |
 |
 |
 |
 |
 |
 |

|
| Stun | 1~7 | |||||||||||
| Stun Timer | 40 | |||||||||||
| Chain Cancel | No | |||||||||||
| Special Cancel | No | |||||||||||
| Frame Advantage | +8 | |||||||||||
| Frame Count | 3 | 3 | 3 | 2 | 2 | 4 | 3 | 3 | 3 | 3 | 1 | |
| Simplified | 1+11 | 6 | 13* | |||||||||
Crouching Normals
- Crouching LP:
| Damage | 14 |  |
 |
 |
 |
 |

|
| Stun | 1~7 | ||||||
| Stun Timer | 40 | ||||||
| Chain Cancel | No | ||||||
| Special Cancel | No | ||||||
| Frame Advantage | +4 | ||||||
| Frame Count | 2 | 4 | 3 | 3 | 3 | 1 | |
| Simplified | 3+6 | 3 | 7* | ||||
- Crouching MP:
| Damage | 18 |  |
 |
 |
 |
 |
 |
 |

|
| Stun | 5~11 | ||||||||
| Stun Timer | 60 | ||||||||
| Chain Cancel | No | ||||||||
| Special Cancel | No | ||||||||
| Frame Advantage | -1 | ||||||||
| Frame Count | 3 | 3 | 3 | 7 | 3 | 3 | 3 | 1 | |
| Simplified | 1+6 | 3 | 17* | ||||||
- Crouching HP:
| Damage | 22 |  |
 |
 |
 |
 |

|
| Stun | 11~17 | ||||||
| Stun Timer | 80 | ||||||
| Chain Cancel | No | ||||||
| Special Cancel | No | ||||||
| Frame Advantage | -1 | ||||||
| Frame Count | 3 | 4 | 6 | 10 | 7 | 1 | |
| Simplified | 1+7 | 6 | 18* | ||||
- Crouching LK:
| Damage | 14 |  |
 |
 |
 |
 |

|
| Stun | 1~7 | ||||||
| Stun Timer | 40 | ||||||
| Chain Cancel | No | ||||||
| Special Cancel | No | ||||||
| Frame Advantage | +3 | ||||||
| Frame Count | 2 | 2 | 4 | 3 | 3 | 1 | |
| Simplified | 1+4 | 4 | 7* | ||||
- Crouching MK:
| Damage | 18 |  |
 |
 |
 |
 |

|
| Stun | 5~11 | ||||||
| Stun Timer | 60 | ||||||
| Chain Cancel | No | ||||||
| Special Cancel | No | ||||||
| Frame Advantage | +8 | ||||||
| Frame Count | 2 | 2 | 4 | 3 | 3 | 1 | |
| Simplified | 1+4 | 4 | 7* | ||||
- Crouching HK:
| Damage | 22 |  |
 |
 |
 |
 |

|
| Stun | 11~17 | ||||||
| Stun Timer | 80 | ||||||
| Chain Cancel | No | ||||||
| Special Cancel | No | ||||||
| Frame Advantage | +1 | ||||||
| Frame Count | 2 | 3 | 4 | 10 | 7 | 1 | |
| Simplified | 1+7 | 4 | 18* | ||||
Aerial Normals
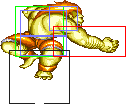
- Neutral/Diagonal Jumping LP:
| Damage | 16 |  |
 |
 |
 |

|
| Stun | 1~7 | |||||
| Stun Timer | 40 | |||||
| Frame Count | 2 | 3 | 20 | 3 | ∞ | |
| Simplified | 5 | 20 | ∞ | |||
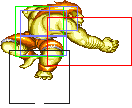
- Neutral/Diagonal Jumping MP:
| Damage | 20 |  |
 |
 |
 |

|
| Stun | 5~11 | |||||
| Stun Timer | 50 | |||||
| Frame Count | 2 | 3 | 12 | 3 | ∞ | |
| Simplified | 5 | 12 | ∞ | |||
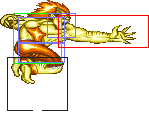
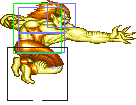
- Neutral Jumping HP:
| Damage | 24 | 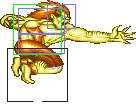 |
 |
 |
 |
 |
 |

|
| Stun | 11~17 | |||||||
| Stun Timer | 60 | |||||||
| Frame Count | 1 | 3 | 3 | 6 | 3 | 3 | ∞ | |
| Simplified | 1* | 3* | ∞ | |||||
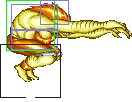
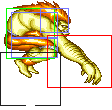
- Diagonal Jumping HP:
| Damage | 22 |  |
 |
 |

|
| Stun | 11~17 | ||||
| Stun Timer | 60 | ||||
| Frame Count | 2 | 3 | 6 | ∞ | |
| Simplified | 5 | 6 | ∞ | ||
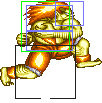
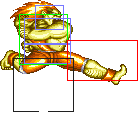
- Neutral Jumping LK:
| Damage | 16 |  |
 |
 |
 |

|
| Stun | 1~7 | |||||
| Stun Timer | 40 | |||||
| Frame Count | 2 | 3 | 20 | 3 | ∞ | |
| Simplified | 5 | 20 | ∞ | |||
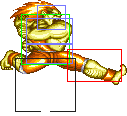
- Diagonal Jumping LK:
| Damage | 14 |  |
 |
 |
 |

|
| Stun | 1~7 | |||||
| Stun Timer | 40 | |||||
| Frame Count | 2 | 3 | 20 | 3 | ∞ | |
| Simplified | 5 | 20 | ∞ | |||
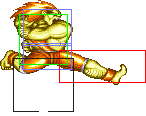
- Neutral Jumping MK:
| Damage | 20 |  |
 |
 |
 |

|
| Stun | 5~11 | |||||
| Stun Timer | 50 | |||||
| Frame Count | 2 | 3 | 12 | 3 | ∞ | |
| Simplified | 5 | 12 | ∞ | |||
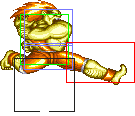
- Diagonal Jumping MK:
| Damage | 18 |  |
 |
 |
 |

|
| Stun | 5~11 | |||||
| Stun Timer | 50 | |||||
| Frame Count | 2 | 3 | 12 | 3 | ∞ | |
| Simplified | 5 | 12 | ∞ | |||
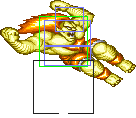
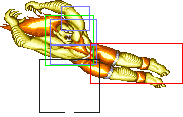
- Neutral Jumping HK:
| Damage | 24 |  |
 |
 |
 |

|
| Stun | 11~17 | |||||
| Stun Timer | 60 | |||||
| Frame Count | 2 | 3 | 6 | 3 | ∞ | |
| Simplified | 5 | 6 | ∞ | |||
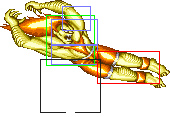
- Diagonal Jumping HK:
| Damage | 22 |  |
 |
 |
 |

|
| Stun | 11~17 | |||||
| Stun Timer | 60 | |||||
| Frame Count | 2 | 3 | 6 | 3 | ∞ | |
| Simplified | 5 | 6 | ∞ | |||
Unique Moves
- Rock Crush a.k.a. Headbutt: (On ground and close, ←/→ + MP)
| Damage | 18,18 |  |
 |
 |
 |
 |
 |
 |
 |

|
| Stun | 5~11 | |||||||||
| Stun Timer | 60 | |||||||||
| Chain Cancel | No | |||||||||
| Special Cancel | No | |||||||||
| Frame Advantage | +3/+4 | |||||||||
| Frame Count | 5 | 4 | 4 | 3 | 2 | 5 | 4 | 3 | 1 | |
| Simplified | 9 | 7 | 2 | 13 | ||||||
Throws
- Wild Fang a.k.a. Bite: (←/→ + HP)
| Damage | 20+(4*n) | 
| |
| Duration | 130 | ||
| Stun | - | ||
| Stun Timer | - | ||
| Range (from axis) | 64 | ||
| Range advantage | 35 | ||
Special Moves
- Electric Thunder: press any single Punch repeatedly
LP version:
| Damage | 28 |  |

|
| Stun | 13~19 | ||
| Stun Timer | 120 | ||
| Frame Advantage | -23 | ||
| Frame Count | 3 | 52+ | |
MP version:
| Damage | 32 |  |

|
| Stun | 13~19 | ||
| Stun Timer | 120 | ||
| Frame Advantage | KD/-4 | ||
| Frame Count | 5 | 34+ | |
HP version:
| Damage | 36 |  |

|
| Stun | 13~19 | ||
| Stun Timer | 120 | ||
| Frame Advantage | +9 | ||
| Frame Count | 7 | 25+ | |
+9 on block if is blocked 3 times (point blank). +4 for 2 blocks.
A buffed special of World Warrior because its easier to button mashup with some piano inputs, useful as mind game after knock down or a seudo anti air at medium distance.
- Rolling Attack: charge ←, → + Punch (charge 60f)
LP/MP versions (whiff):
| Damage | 22/24 | 
|
| Stun | 13~19 | |
| Stun Timer | 120 | |
| Frame Advantage | -17 | |
| Frame Count | 25 | |
HP version (whiff):
| Damage | 26 | 
|
| Stun | 13~19 | |
| Stun Timer | 120 | |
| Frame Advantage | -17 | |
| Frame Count | ∞ | |
Compared to the suicide World Warrior version, its a great approach or surprise special against non projectile characters...
Misc Animations
| Walk back | Neutral | Walk Fwd | Crouch |
 |
 |
 |

|
- Standing reel:
 |
 |
 |

|
- Standing gut reel:
 |
 |
 |

|
- Crouching reel:
 |
 |

|
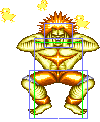
- Dizzy:
 |
 |
 |
 |

|
Advanced Strategy
Blanka's gameplan is about jumping-crouching hit and run at medium combat or charge for his roll at far one,and when is close to the opponent he must use his hold-to-roll traps.
His objetive is about keep away your opponent with his crouching Roundhouse or Fierce and then charge for your roll or use your hold if it gets close,standing attacks are fast and your main attack is Far Strong due to his acceptable range and fast startup, and also he can cancel his Far or Close Jab into Electricity,but you are vulnerable for projectiles ,lows and sweeps.
When you are cornered the best option is your Hold and then switch sides with the Rolling Attack, midscreen is your best zone for your main game.
Random you jumping attacks are a great option due to his fast jump along with his Diagonal Roundhouse,its the you main tool against projectile characters,his Hold is one of the best along with E.Honda one,but he had more set up options,like a Rolling Attack charge, meaty Electricity or crouching Roundhouse,due that his speed are better than E.Honda crossups.
Electric Attack is buffered from the old revision because is now easier to connect with a Jumping Attack and it can be safe block. Rolling Attacks are buffered too and the best one, now you don't take double damage if your hit a unsafe opponent,and you stop when you hit a blocked one and with a short recovery enough to surprise hime with your Hold, but meaty ones are only useful against a cornered opponent.
Unfortunately,he doesn't had good anti air options outside of his Far Roundhouse or Fierce ,blocking is better than poke one, a Rolling Attack isn't a bad decision but a risky anti air one, also fighting against projectile spammers can be another problem because lack of options at far range combat, anyway his buffed Rolling Attack with Fierce is fast enough to surprise them.
Match-Ups
Blanka's match-ups according the "official" SF2CE Tier List:
- against Ryu: 5
- against Ken: 6
- against Chun Li: 7
- against E. Honda: 4
- against Zangief: 5
- against Blanka: 5
- against Dhalsim: 7
- against Guile: 6
- against Balrog: 2
- against Vega: 5
- against Sagat: 7
- against M. Bison: 3
Vs. Ryu
The key to defeating Ryu is footsweeps and the ability to execute attacks with combos when he throws spiritballs. Stay just out of roundhouse sweep range and use your roundhouse sweep just after he executes and kick (save jab) this will knock him down as he recovers from his foot sweep. You can also use this technique to knock him out of spiritballs if you use it just as he startsÔthe projectile starts to form otherwise you may be in trouble.
If you jump in from close range use your main combo. From medium range simple use the roundhouse kick before he gets off a dragonpunch. Finally from long range it is best not to attack so that if he uppercuts he will miss your body, then hit him when he lands. Last but not least the best way to get out of his spiritball roundhouse sweep as you jump over pattern is to use either the fierce punch or forward kick just before you land.
Vs. Ken
Fight very much like Ryu except it is not wise to jump in at him from long range for even if you don't attack when he uppercuts you will still be hit. A good way to get hit him if he is constantly jap punching the air so you can't ball try a slow ball then pull out of it and ducking fierce punch him. This will fool most players. If your opponent has good timing and keeps jumping in on you as you recover from a knock down and knocking you out of a ball try waiting for them to be just inside you before executing the ball for this will hit them or at least take mutual damage. Another good move for stomping opponents as they jump in is the ducking fierce punch. This lowers your body enough that you usually go below their attack and the massive range of your punch will hit them just before they land.
Vs. E.Honda
It is best to stay ground based on this character for his headbutt, and fierce chop will knock you out of the air most of the time. The ducking fierce punch is a good attack to keep him of guard as is the ball, but beware his jab and strong punch are well aimed at knocking you out of the ball. When you do jump in try to time your jump so that when you attack from the air you just barely hit him, this will 1- help you to avoid his fierce chop and 2- guard against the headbutt. When you do attack make sure you are close to the ground so that if he starts a headbutt you can hold your attack and block, or if he starts it to late jump it and go for the bite. If you are coming down from a straight up jump and he is torpedoing towards you the roundhouse kick will knock him out of his move if you hit the front part of his body.
Vs. Chun Li
A constant air attack is best when fighting Chun, never let her get on the offensive or you could be in trouble. When you jump attack try to make sure that you are about two to three body lengths away or she may be able to walk under your attack and throw you, or worse jump up and air-slam you. When you jump in try using the combos and or the ball after word for this will let you keep a safe distance between you and her. You standing fierce punch is a very effective air defense that only superior timing or her head stomp can penetrate. If she does head stomp you jump up behind her and roundhouse kick her (Don't jump up after her to soon or she may head stomp you again). Finally a good way out of her neck kick is to wait for her to start to flip over you and simply jump straight up and fierce punch.
Vs. Blanka
Good timing on your jumping attacks is best here, here are a few pointers. As you jump in remember that a roundhouse kick can knock him out of a ball (other moves will work but this is most effective). If he is attacking you the best defense is a simple fierce punch as you jump straight up. As you attack him your forward kick is very hard to counter. Finally the key to knocking him out of his ball after you have blocked it and he is going backward is to wait until you hear the sound of the ball again. (it makes a blocking sound as he hits you then the ball noise re-appears, now execute your ball, it should hit)
Vs. Zangief
Be sure to use combos for if you don't you will most likely be 360d. Combo #1 works best here. Also throw in a ball or to for there is little he can do to stop this except block, if he does somehow luck a jab punch so what you loose a couple of lines. If a ground game is more your style use lots of forward kicks and ducking fierce punches, with an occasional roundhouse sweep thrown in to keep him off balance. If he jumps in the ball is an almost guaranteed hit. Don't use the electricity very often for he can easily knock you out of it( or even 360).
Vs. Guile
Guile is one of the hardest characters for Blanka to face basically because he is so defensive. If he constantly crouching jabs to block the ball then throws out an occasional sonic boom to make you jump or take off some minor damage try backing him into a corner. The best way to do this is to ducking fierce punch him as he jabs (he'll lose energy but you won't) or if you can get close enough (best when he is already in the corner) use the roundhouse sweep to knock him out of the sonic boom just as you see it begin to form. Another good attack is to jump in and roundhouse him right after he sonic booms for he won't have time to axe-kick, he may block it but you can either ball him for slight damage or simple hold your ground (you are close now and most Guile players can't handle being close to Blanka, do be careful not to simply block or he might pause a second and then throw you.) Another good move after you jump in is to electrocute him, he will probably block but will still lose some damage.(the problem with this is that you may not be able to shut the electricity off before you are axed or sonic boomed.
Vs. Dhalsim
Like Zangief a non-stop attack is best here. You excellent speed and angled attacks make you a Dhalsim nightmare. Your forward kick will easily knock him out of his slide as you jump in, it will also stop his ducking fierce punch. You may also use the fierce punch or roundhouse kick. If he jumps straight up or backwards and fierce kicks you in the air wait until he starts to reach his peak and fierce punch his leg( or you can strong punch him but you will probably also take damage)
Vs. Boxer
Balrog can also be a problem mostly because people underestimate him. Beware his standing fierce punch (it can hit you from a massive range) and try not to ball to much for after he blocks he will most likely charging punch you. When you jump in use the same distance technique as with Chun for his standing strong punch, or a charging uppercut will also hit you out of most things. The key to hitting him is to execute your attack just as he starts to move. A few other pointers are that your ducking fierce punch will knock him out of his super punch, simple execute the move as soon as he starts his( you will hit him as he starts to turn. Be careful this takes a little getting used to.) Your electricity attack is very effective even if you just sit there. It takes almost perfect distance application for him to knock you out of it without taking damage himself. Your best tactic is to get as close to him as possible before jumping in. Almost all of his attacks will extend out at least an inch or so before they strike, this makes Balrog very vulnerable to attacks that are based close to his head and shoulders.
Vs. Claw
Attack much as you would Chun for his throw is just as deadly. If you land close combo 1 is best while roundhouse kick is better from a distance. The best way to get out of his wall attack is to jump back and roundhouse kick him as he approaches or jump back fierce punch if he is going for the wall behind you. If he some how gets you by surprise the best defense is the ball, or if you don't have time to charge it at least ducking fierce punch him (hit about 50% of time)
Vs. Sagat
A good air attack is also best against Sagat. One thing to note is that when you jump in try to just barely hit him as you would Honda for if you get to far over him he will tigeruppercut you. If he throws low tigers to best attack is to jump them an use the roundhouse kick and then the forward one, if theÔtigers you can either walk, yes walk under them and do an attack (bite is good up close) or jump over and attack (combo #1 is best). The best way to counter his tiger knee if he uses it to hit you out of your jumps is the fierce punch as you start to descend.
Vs. Dictador
Like most of your other opponents a good offense is your best defense. Try to keep Bison on the defensive so he can't get his torpedo going. When jumping in try to get above him for if you are on the same level he will most likely have priority. Strong punches and forward kicks are best here. Like Honda you can knock him out of his torpedo if you hit the front part of his body. If he does happen to get you in his torpedo pattern handle it much as Honda would. Switch the direction of you block as he passes through you so you can have a ball charged, a ball can knock him out of the torpedo if you hit him just as he starts it. Like Balrog don't use to many balls for he can scissor kick you out of it as you retreat or torpedo you.(you should be able to block the torpedo but it still takes of a good amount of damage.) Lastly beware his standing roundhouse it is very much like Balrog's standing fierce punch.
