Introduction
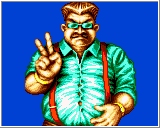
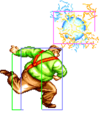
An unorthodox zoner with tricky special moves. He can lob his fireball over enemy projectiles or have it curve to hit low profiles, and he has a great CD anti-air to punish jumps with. After scoring a knockdown, he can lock down the opponent with his fireball's lasting explosion after it touches the ground, and he is great at punishing from a distance with his instant rolling attack. However, his basic movement is very sluggish and he lacks damaging combos, making it difficult for him to deal with higher tier zoners.
| Pros | Cons |
|---|---|
|
|
Move List
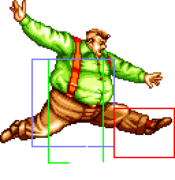
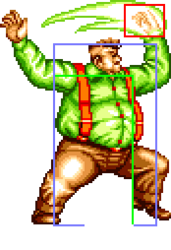
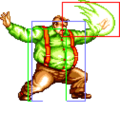
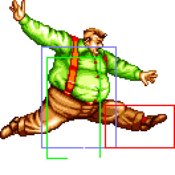
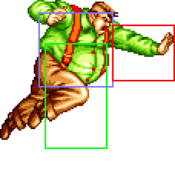
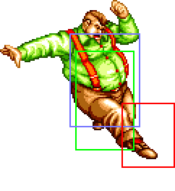
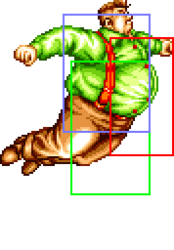
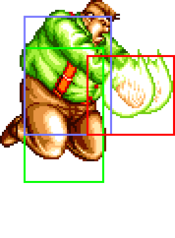
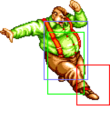
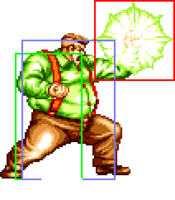
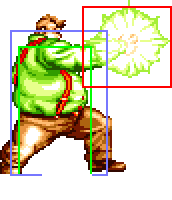
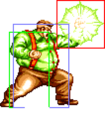
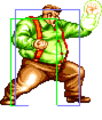
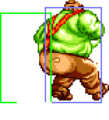
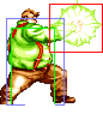
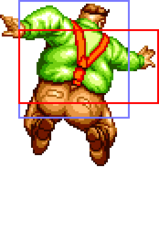
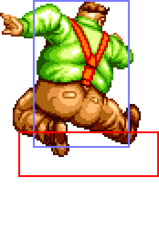
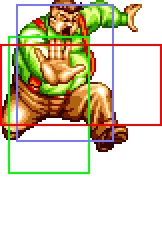
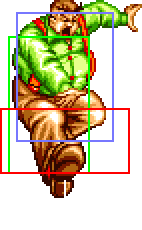
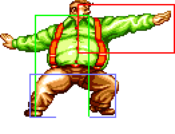
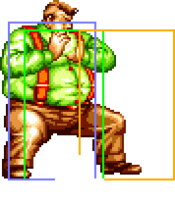
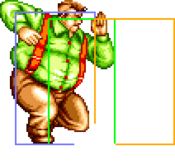
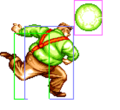
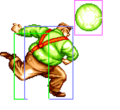
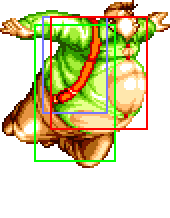
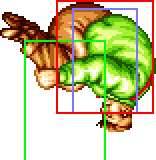
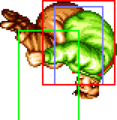
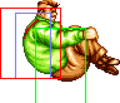
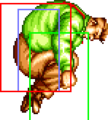
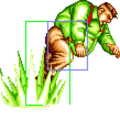
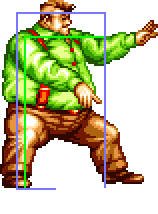
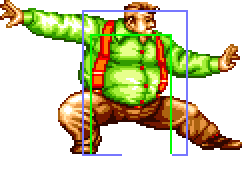
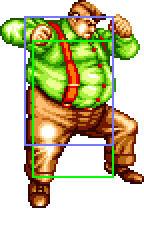
General Hurtboxes
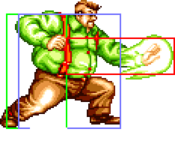
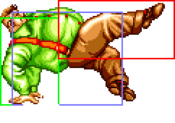
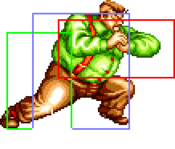
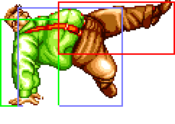
| Standing | Crouching | Jumping | Taunting |
 |
 |
 |
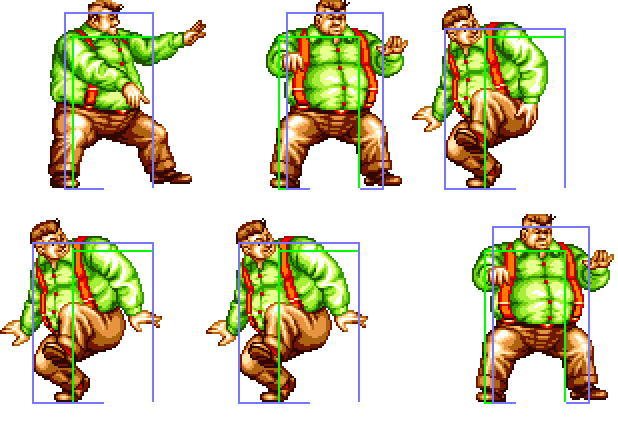
|
| 58F (4+51+3) duration, tied for the slowest jump in the game. |
Close Standing Normals
c5A
| Damage | Stun | Guard | Startup | Active | Recovery | Total | Hit Adv | Block Adv | Property | |
|---|---|---|---|---|---|---|---|---|---|---|
| 8 | 2 | Mid | 3 | 4 | 4 | 10 | +8 | +9 | Kara Cancel | |
|
Essential move in Cheng's combos. Very fast startup and links to itself multiple times.
| ||||||||||
c5B
c5C
| Damage | Stun | Guard | Startup | Active | Recovery | Total | Hit Adv | Block Adv | Property | |
|---|---|---|---|---|---|---|---|---|---|---|
| 20 | 4 | Mid | 11 | 7 | 14 | 31 | +3 | +2 | Kara Cancel | |
|
Works as an anti-air, but close D and C+D are much better options. | ||||||||||
c5D
Far Standing Normals
f5A
| Damage | Stun | Guard | Startup | Active | Recovery | Total | Hit Adv | Block Adv | Property | |
|---|---|---|---|---|---|---|---|---|---|---|
| 6 | 2 | Mid | 10 | 5 | 12 | 26 | -1 | 0 | Kara Cancel | |
|
Very slow startup for a light normal. Even though the hitbox is decent, you're better off using 2A instead. | ||||||||||
f5B
| Damage | Stun | Guard | Startup | Active | Recovery | Total | Hit Adv | Block Adv | Property | |
|---|---|---|---|---|---|---|---|---|---|---|
| 4 | 2 | Low | 5 | 9 | 7 | 20 | -1 | +6 | Airborne 6-13F | |
| ||||||||||
f5C
f5D
| Damage | Stun | Guard | Startup | Active | Recovery | Total | Hit Adv | Block Adv | Property | |
|---|---|---|---|---|---|---|---|---|---|---|
| 16 | 4 | Low | 7 | 14 | 10 | 33 | -1 | -2 | Airborne 8-19F | |
| ||||||||||
Crouching Normals
2A
| Damage | Stun | Guard | Startup | Active | Recovery | Total | Hit Adv | Block Adv | Property | |
|---|---|---|---|---|---|---|---|---|---|---|
| 6 | 2 | Mid | 5 | 6 | 11 | 21 | -1 | 0 | Kara Cancel | |
| ||||||||||
2B
| Damage | Stun | Guard | Startup | Active | Recovery | Total | Hit Adv | Block Adv | Property | |
|---|---|---|---|---|---|---|---|---|---|---|
| 6 | 2 | Low | 10 | 7 | 12 | 28 | -3 | -2 | Kara Cancel | |
| ||||||||||
2C
| Damage | Stun | Guard | Startup | Active | Recovery | Total | Hit Adv | Block Adv | Property | |
|---|---|---|---|---|---|---|---|---|---|---|
| 18 | 4 | Mid | 8 | 7 | 17 | 31 | 0 | -1 | Kara Cancel | |
| ||||||||||
2D
| Damage | Stun | Guard | Startup | Active | Recovery | Total | Hit Adv | Block Adv | Property | |
|---|---|---|---|---|---|---|---|---|---|---|
| 13 | 4 | Low, Low | 10 | 8 (4) 11 | 14 | 46 | KD | -3 | Kara Cancel | |
Jumping Normals
jA
| Damage | Stun | Guard | Startup | Active | Recovery | Total | Hit Adv | Block Adv | Property | |
|---|---|---|---|---|---|---|---|---|---|---|
| 8 | 2 | Overhead | 6 | ∞ | / | / | - | - | - | |
| ||||||||||
jB
| Version | Damage | Stun | Guard | Startup | Active | Recovery | Total | Hit Adv | Block Adv | Property | |
|---|---|---|---|---|---|---|---|---|---|---|---|
| Diagonal Jump | 6 | 2 | Overhead | 6 | ∞ | / | / | - | - | - | |
| |||||||||||
| Neutral Jump | 6 | 2 | Overhead | 7 | ∞ | / | / | - | - | - | |
jC
| Version | Damage | Stun | Guard | Startup | Active | Recovery | Total | Hit Adv | Block Adv | Property | |
|---|---|---|---|---|---|---|---|---|---|---|---|
| Diagonal Jump Taikobara-uchi/太鼓腹打ち |
20 | 4 | Overhead | 6 | 31 | / | / | - | - | - | |
| |||||||||||
| Neutral Jump Rakushousouda/落掌双打 |
20 | 4 | Overhead | 6 | 22 | / | / | - | - | - | |
| |||||||||||
jD
| Version | Damage | Stun | Guard | Startup | Active | Recovery | Total | Hit Adv | Block Adv | Property | |
|---|---|---|---|---|---|---|---|---|---|---|---|
| Diagonal Jump | 13x2 | 4x2 | Overhead, Overhead | 8 | 7 (4) 17 | / | / | - | - | - | |
| |||||||||||
| Neutral Jump | 13x2 | 4x2 | Overhead, Overhead | 6 | 8 (3) 14 | / | / | - | - | - | |
| |||||||||||
Universal Mechanics
Lane Blast (CD)
| Version | Damage | Stun | Guard | Startup | Active | Recovery | Total | Hit Adv | Block Adv | Property | |
|---|---|---|---|---|---|---|---|---|---|---|---|
| Front Lane | 22 | 5 | Mid | 14 | 9 (3) 3 (3) 3 (3) 3 | 10 | 50 | KD | -18 | Cancel, Lane Shift | |
| Back Lane | 22 | 5 | Mid | 17 | 9 (3) 3 (3) 3 | 13 | 50 | KD | -15 | Cancel, Lane Shift | |
Lane Attack
| Version | Damage | Stun | Guard | Startup | Active | Recovery | Total | Hit Adv | Block Adv | Property | |
|---|---|---|---|---|---|---|---|---|---|---|---|
| A 飛掌打 |
22 | 2 | Overhead | 9 | - | 4 | - | - | - | / | |
| |||||||||||
| B 飛刀脚 |
22 | 2 | Overhead | 9 | - | 4 | - | - | - | / | |
| |||||||||||
| C 飛掌打 |
22 | 4 | Overhead | 9 | - | 4 | - | - | - | / | |
| |||||||||||
| D 飛刀脚 |
22 | 4 | Overhead | 9 | - | 4 | - | - | - | / | |
| |||||||||||
Dodge Attack
Throws
Aiki Nage (4/6C)
Zutsuki Satsu (4/6D)
Special Moves
Ki Rai Hou (236P)
| Version | Damage | Stun | Guard | Startup | Active | Recovery | Total | Hit Adv | Block Adv | Property | |
|---|---|---|---|---|---|---|---|---|---|---|---|
| A | 16 (4) | 3 | Mid, Low | 21 | 22+20 | 33 | - | -1 | -4 | / | |
| C | 22 (5) | 6 | Mid, Low | 25 | 27+20 | 36 | - | +4 | -2 | / | |
Dai Taiko-bara Uchi ([2]8P)
| Version | Damage | Stun | Guard | Startup | Active | Recovery | Total | Hit Adv | Block Adv | Property | |
|---|---|---|---|---|---|---|---|---|---|---|---|
| A | 18 (4) | 3 | Mid | 10 | 51 | 10+26 | - | -16 | -16 | Invincible 1-6F | |
| |||||||||||
| C | 26 (6) | 6 | Mid | 13 | 28 | 10+26 | - | KD | -19 | Invincible 1-8F | |
| |||||||||||
Ha Gan Geki ([4]6K)
| Version | Damage | Stun | Guard | Startup | Active | Recovery | Total | Hit Adv | Block Adv | Property | |
|---|---|---|---|---|---|---|---|---|---|---|---|
| B | 16 (4) | 3 | Low | 1 | 18 | 16 | 34 | KD (+31) | -8 | - | |
| D | 22 (5) | 6 | Low | 34 | 20 | 21 | 74 | KD (+61) | -17 | Invincible 1-16F | |
Desperation Move
Bakurai Hou ([1]26BC)
| Damage | Stun | Guard | Startup | Active | Recovery | Total | Hit Adv | Block Adv | Property | |
|---|---|---|---|---|---|---|---|---|---|---|
| 48 (12) | 4 | Mid, Low | 32 | 23+20 | 36 | - | KD | +6 | - | |
| ||||||||||
Combos
Note: c5A will whiff against crouching Tung and crouching/dizzy Duck King, Jubei, and Mai
- c5AxN, f5D - 43 damage, 12 stun (N = 4)
Requires that D be pressed from far enough that c5D won't come out, but also close enough that the first active frame of f5D will reach (which may not work depending on opponent's hitstun hurtbox)
- c5AxN, 2A > [4]6B - 43 damage, 13 stun (N = 4)
Knocks down and is more consistent but requires charge and is harder to use with microwalking.
- 2C > [4]6B - 32 damage, 10 stun
2C is a good poke and this combo works from a much farther distance than c5A and has no issues against crouching characters.
- (meaty) 236P, [4]6B - 30 damage, 6 stun with 236A, 36 damage and 9 stun with 236C
Done from a 2D > 236A meaty or when a jumping opponent lands on top of an exploding fireball.
Strategy
The Basics
Advanced Strategy
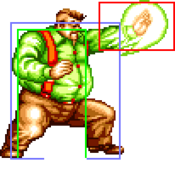
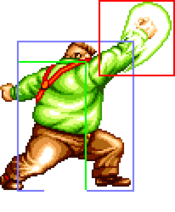
- The C+D (knock into the back line) attack, the one where Cheng gathers Chi around his fist is an excellent anti air for attacks coming in at 45 degrees, the same attack on the back line isn't as good.
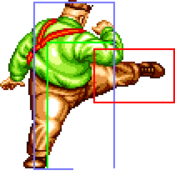
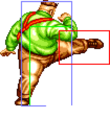
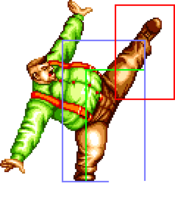
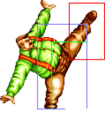
- His standing "Hop Kick" Roundhouse is an excellent footsie weapon when used at full range. Try to hit the tip of low attacks with it. If an opponent tries to trip you with a long range sweep, kick his feet with the Hop Kick. Very effective! This footsie will cleanly beat just about any low attack. Experiment with this and the standing Short(when you need a quicker attack) against other attacks. They can beat things like Tung's lunge punch, I think even Duck's Ball. Incredible priority. Still experimenting but I think this could be one of the best attacks in the game.
- Against Duck's Ball attack the crouching Roundhouse is best and sets up a good meaty fireball.
- At closer ranges on the ground I like his standing Jab, its fast and has good range also you can immediatly cancel into the Hegan Geki (roll attack) for two hits even at full range.
- Crouching Jab has better range, can snuff many attacks and can cancel into Kirai Hoh also. Because its performed croucching you are charged for all other specials. You cannot chain low jabs together though.
- His jumping Jab has good range and priority for air to air combat. The Crouching double hit Roundhouse is a good pushout move.
- And can be cancelled into the Kirai Hoh or Super after the first or second hits.
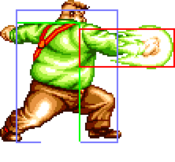
- For me Chengs strong suit is the Kirai Hoh fireball. Because of its arcing motion its much more intimidating and harder to aviod than a normal fireball plus it explodes on impact with the ground, this is very usefull. Opponents jumping in at certain angles can be shot down with a well timed Kirai Hoh also remember that if you are ahead on energy you can always trade hits with certain fireballs (like Terry's) cause it flies over the top. The explosion frames have a number of uses, it is great as a meaty attack, allowing you to follow up with an almost instantanious fireball or roll (Im the type of player who will score any chip damage they can get). Opponents can't (so well) do the traditional jump straight up over the Kirai Hoh to negate fireball pressure cause they land on the explosion frames. Opponents jumping in at long range can be landed on the explosion frames as well as opponents who try the quick escape (double tap back) to avoid fireballs. I like to throw a Jab Kirai Hoh short of an opponent when I anticipate some sort of dashing attack from full screen distance, they will dash into the explosion frames.
- Remember the Bakurai Hoh (Super) works just like the Feirce fireball so you can use these tactics with it as well.
- The tactic I mentioned about trading hits with other fireballs cause Cheng's fireball flies over the top means that when you can do the Super this totaly shuts down many characters long range fireball game! Remember also Cheng's must be the easiest Super in the game, also it only 'seems' to need the same charge time as the normal fireball 2 secs not 3 as quoted in the FAQ.
- The Short Hegan Geki (roll attack) is good for punishing whiffed attacks and covering distance quickly. I also like to whiff the Short Hegan Geki just short of an opponent and then throw them, just like Blanka's whiffed Ball into throw in SF2. The Roundhouse Hegan Geki is too slow and telegraphed to punish anything other than the largest openings.
- The throw is great cause you can follow up with a meaty Kirai Hoh and then have options.
- The standing Feirce, Roundhouse and short are all usefull for positioning, especialy for setting up meaty fireballs after throws.
- The hold and headbutt throw is usefull for putting alot of distance between you and your opponent.
- The Fierce Dai-Taikobarauchi (Flying Belly Blast) is great if you anticipate a fireball and can be used as an anti air. The Jab version can be manipulated heavily in flight to confuse your opponent like Bisons flying fist thingie in ST (it certainly confuses CPU AI Billy Cane!). If you hold back with this you will go back down the same as you came up after reaching the height of the jump, so you can bait opponents into whiffing anti airs then punish them with a Short roll. I will have to experiment with this move much more cause I'm sure its got some really good uses. Anyone?
- The great thing about both the roll and the belly blast is that they knock down, this sets up Cheng's meaty game which is very strong thanks to those wonderfull explosion frames.
- Cheng, although he has a fireball motion should always be charging downback unless you need to use a standing attack. That way you can go into Belly Blast and Super at any time.
- Thats all I can think of right now, anyone else please add. Overall I think Cheng is a very strong character, although much of his fireball pressure game is negated if you use the line system. He is certainly MY srongest character.*
- Just to add a little to my Cheng SinZan profile. After experimenting more with the standing Roundhouse "hop kick" it seems more and more like DJ's crouching Strong in ST. Its strange, it can snuff alot of moves (even high ones) without even seeming to make contact. Ofcourse proper vs play is essential to test out its true uses but it seems really good.
Credit to Crayfish
- Cheng's fireball is way weaker in Special. The good thing is that it travels a lot farther than it did in FF2, and is more floaty and travels more slowly. However, it has WAY more startup *and* recovery time than in FF2. Like I said, that move was lethal in FF2 because he could throw like 5 or 6 of them in a row; the FB had no recovery and almost no startup time. Seeing the fireball in Special now is just...ugh. One other major loss he suffered is that his far standing C is no longer bufferable; in FF2 it was, and far standing C -> fireball was a great tactic.
Credit to Josh-TheFunkDOC
Matchups
Vs. Andy Bogard
4 - 6
Andy's fireball has a long startup, making it one of the easiest projectiles to counter with [2]8C. 5B and 5D are your best moves against Zaneiken, while CD beats Kuuha Dan.
Vs. Axel Hawk
6 - 4
[2]8C makes for a very good counter against Tornado Upper.
Vs. Big Bear
7 - 3
Kirai Hou is excellent in this matchup as it's pretty much impossible for Bear to avoid with his tackle, and it can beat Super Drop Kick as well. You can also use 5D to beat tackle attempts.
Vs. Billy Kane
3.5 - 6.5
Vs. Cheng Sinzan
5 - 5
Vs. Duck King
6.5 - 3.5
Keep your distance as Duck is deadly up close and can easily stun you in one combo. Zone him with Kirai Hou and anti-air jumps with CD or close D. 5D counters his slide kick. Light Hagan Geki is great for breaking out of blockstring pressure.
Vs. Geese Howard
5 - 5
Vs. Joe Higashi
3.5 - 6.5
Hurricane Upper has fast recovery, so countering it with [2]8C requires a good read on your part. Jump B and D beat Joe's slide anti-air, but you still need to watch out for his 5D and Tiger Kick.
Vs. Jubei Yamada
3.5 - 6.5
Jump B/D can beat Jubei's low profile anti-airs, while 5D is great against slide kicks on ground.
Vs. Kim Kaphwan
4 - 6
CD and neutral jump A are good divekick counters.
Vs. Laurence Blood
5 - 5
Vs. Mai Shiranui
4 - 6
Vs. Ryo Sakazaki
Vs. Terry Bogard
4.5 - 5.5
Vs. Tung Fu Rue
6 - 4
Vs. Wolfgang Krauser
4 - 6
