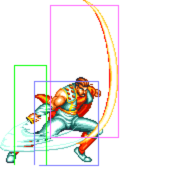
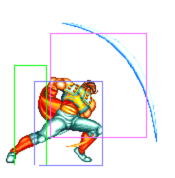
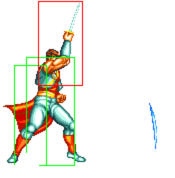
Introduction
Laurence has great pokes and fantastic air-to-airs which help him keep aggressive opponents in check — somewhat like a matador, which Laurence happens to be. His special moves and DM can also serve as safe chip tools if spaced correctly. Though oppressive at times, he is still a low tier. Laurence is tall and his movement stiff, so even with two (flawed) anti-fireball tools, he still lags behind in such matchups. Additionally, no matter how good his air normals are, he is still susceptible to anti-airs, and he has no reversals barring backdash. Laurence is designed for defensive play, but some matchups can leave him overwhelmed.
| Pros | Cons |
|---|---|
|
|
Move List
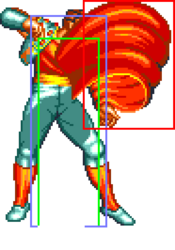
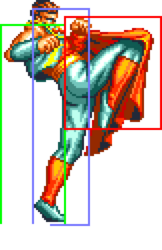
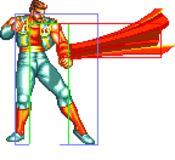
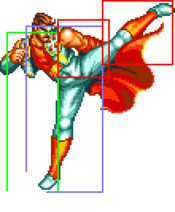
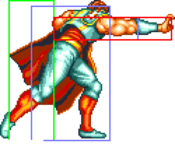
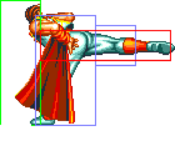
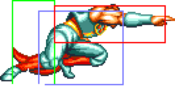
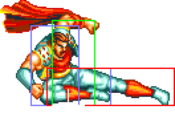
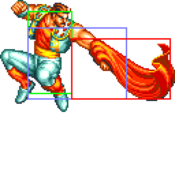
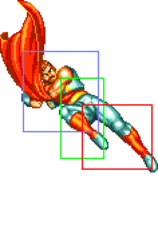
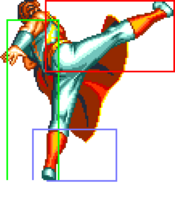
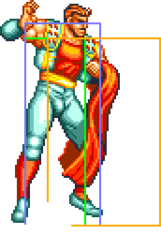
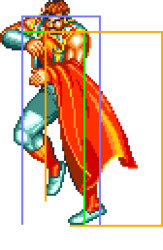
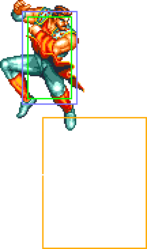
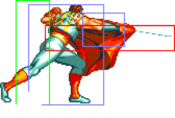
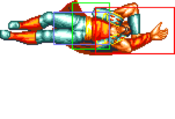
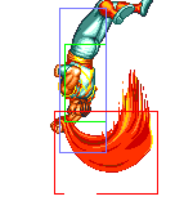
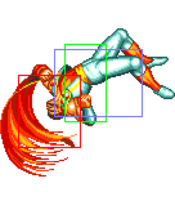
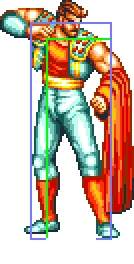
General Hurtboxes
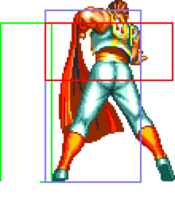
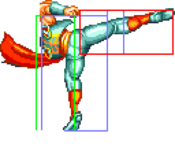
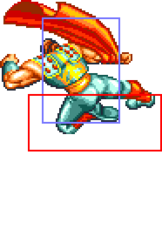
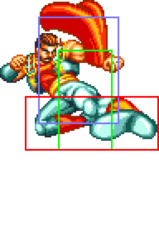
| Standing | Crouching | Crawling | Jumping | Taunting |
 |
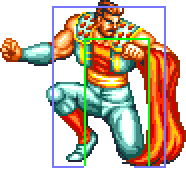 |
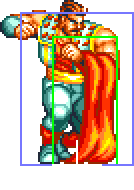 |
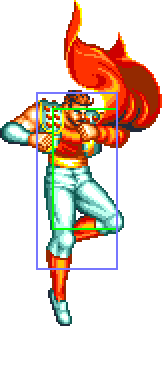 |
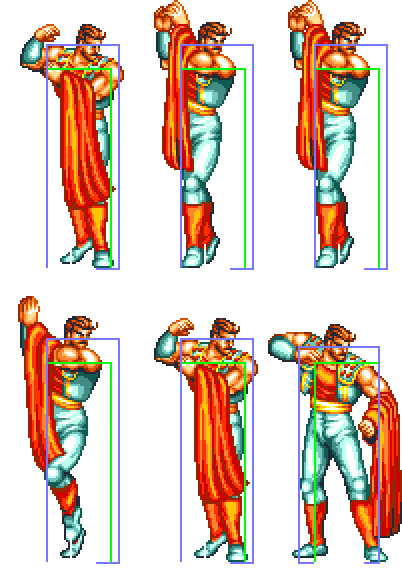
|
| 58F (4+51+3) duration, tied for the slowest jump in the game. |
Close Standing Normals
c5A
| Damage | Stun | Guard | Startup | Active | Recovery | Total | Hit Adv | Block Adv | Property | |
|---|---|---|---|---|---|---|---|---|---|---|
| 8 | 2 | Mid | 6 | 5 | 8 | 18 | +3 | +4 | Kara Cancel | |
|
Doesn't link into anything so Laurence can't spam it. | ||||||||||
c5B
| Damage | Stun | Guard | Startup | Active | Recovery | Total | Hit Adv | Block Adv | Property | |
|---|---|---|---|---|---|---|---|---|---|---|
| 10 | 2 | Mid | 4 | 8 | 6 | 17 | +2 | +3 | Kara Cancel, Upper: 1-3 | |
|
Links into c5D as a meaty. Just be mindful of throw range. | ||||||||||
c5C
| Damage | Stun | Guard | Startup | Active | Recovery | Total | Hit Adv | Block Adv | Property | |
|---|---|---|---|---|---|---|---|---|---|---|
| 18 | 4 | Mid | 6 | 7 | 18 | 30 | -1 | -2 | Kara Cancel | |
|
Comes out a frame faster than 2C, but risks getting f5C instead which you'll never want. This can, however, combo into DM if you're fast enough, as can c5D. | ||||||||||
c5D
| Damage | Stun | Guard | Startup | Active | Recovery | Total | Hit Adv | Block Adv | Property | |
|---|---|---|---|---|---|---|---|---|---|---|
| 20 | 4 | Mid | 6 | 15 | 11 | 31 | -2 | -3 | Kara Cancel, Upper: 1-5 | |
|
This and c5B have lowered hitboxes during the startup, but they become normal once the move is active. Susceptible to trades and proximity not giving you the move you want. | ||||||||||
Far Standing Normals
f5A
| Damage | Stun | Guard | Startup | Active | Recovery | Total | Hit Adv | Block Adv | Property | |
|---|---|---|---|---|---|---|---|---|---|---|
| 6 | 2 | Mid | 12 | 5 | 11 | 27 | 0 | +1 | Kara Cancel | |
|
Whiffs on crouchers and isn't fast, but it has long range and a disjointed hitbox. It's not seen often, but it can be used as a stuffing tool. | ||||||||||
f5B
| Damage | Stun | Guard | Startup | Active | Recovery | Total | Hit Adv | Block Adv | Property | |
|---|---|---|---|---|---|---|---|---|---|---|
| 8 | 2 | Mid | 8 | 13 | 13 | 33 | -10 | -9 | Kara Cancel | |
|
Laurence has bad anti-airs, but this is the best he's got. Air-to-airs are how he handles air control. I hope you have a Pokédex to fill, as this move will trade a lot. | ||||||||||
f5C
| Damage | Stun | Guard | Startup | Active | Recovery | Total | Hit Adv | Block Adv | Property | |
|---|---|---|---|---|---|---|---|---|---|---|
| 16 | 4 | Mid | 6 | 9 | 28 | 42 | -14 | -15 | - | |
|
This move has the same range as 2C, can't be cancelled, misses crouchers and gets hit by dodge attacks. f5D is a better poke. | ||||||||||
f5D
| Damage | Stun | Guard | Startup | Active | Recovery | Total | Hit Adv | Block Adv | Property | |
|---|---|---|---|---|---|---|---|---|---|---|
| 16 | 4 | Mid | 6 | 13 | 22 | 40 | -12 | -13 | - | |
|
This has the most range out of any of these normals, it's fast and it's safe at the ranges you'll want to use it. You can often use it from a late jump-in or after light Bloody Spin is blocked, where most opponents don't have the range to contest it even at disadvantage (Laurence himself will, however, thanks to this move). The hurtbox means you can't use it for tricky anti-airs, so it is best used on the ground to cap off a string. | ||||||||||
Crouching Normals
2A
| Damage | Stun | Guard | Startup | Active | Recovery | Total | Hit Adv | Block Adv | Property | |
|---|---|---|---|---|---|---|---|---|---|---|
| 8 | 2 | Mid | 5 | 7 | 8 | 19 | +1 | +2 | Kara Cancel | |
|
Laurence's crouch normals have the priority of lights and the range of heavies, and thus they're all exceptional. This one is very easy to spam. Laurence cannot link any of his lights together, but he can still use this to pressure and stagger. | ||||||||||
2B
| Damage | Stun | Guard | Startup | Active | Recovery | Total | Hit Adv | Block Adv | Property | |
|---|---|---|---|---|---|---|---|---|---|---|
| 10 | 2 | Low | 10 | 5 | 7 | 21 | +4 | +5 | Kara Cancel | |
|
The startup lacks and you won't be using this for wicked high/lows or anything, but it's a great tool to start Laurence's pressure. It will also help lead to tick throws. It's also vital against Geese, who can counter 2A and get you in the corner when it's your turn. | ||||||||||
2C
| Damage | Stun | Guard | Startup | Active | Recovery | Total | Hit Adv | Block Adv | Property | |
|---|---|---|---|---|---|---|---|---|---|---|
| 18 | 4 | Mid | 7 | 11 | 12 | 29 | +1 | 0 | Kara Cancel | |
|
Staple in Laurence's kit as a poke which special cancels, whether it be for combos or to help jail into Bloody Flash. | ||||||||||
2D
| Damage | Stun | Guard | Startup | Active | Recovery | Total | Hit Adv | Block Adv | Property | |
|---|---|---|---|---|---|---|---|---|---|---|
| 16 | 4 | Low | 11 | 9 | 21 | 40 | KD | -8 | - | |
|
This move is a slide, and being such, you will die if you sneak this into your pressure. If you choose to use it as a trip, you have to space it. His hurtbox is also tall, so unlike some other slides in the game, this move doesn't anti-air or low profile anything. | ||||||||||
Jumping Normals
jA
| Damage | Stun | Guard | Startup | Active | Recovery | Total | Hit Adv | Block Adv | Property | |
|---|---|---|---|---|---|---|---|---|---|---|
| 8 | 2 | High | 7 | ∞ | - | - | - | - | - | |
|
Laurence has exceptional air normals, and this is one of them. The range and priority is so good, and because it's a light, it stays out forever, so you can let it out early and draw its hitbox over huge portions of the screen. If you're on a lifelead and you've got the opponent cornered, you can neutral jump and use this as a wall. What keeps it in check is the floatiness of Laurence's jump, as well as jumping light attacks' inherent weaknesses. Dies to slides, of course. | ||||||||||
jB
| Damage | Stun | Guard | Startup | Active | Recovery | Total | Hit Adv | Block Adv | Property | |
|---|---|---|---|---|---|---|---|---|---|---|
| 10 | 2 | High | 5 | ∞ | - | - | - | - | - | |
|
Another oppressive air normal which covers a different angle, but doesn't reach as far. This beats his jA. You'll want to use this when the opponent is closer, given it is less susceptible to anti-airs. | ||||||||||
jC
| Damage | Stun | Guard | Startup | Active | Recovery | Total | Hit Adv | Block Adv | Property | |
|---|---|---|---|---|---|---|---|---|---|---|
| 18 | 4 | High | 10 | 12 | - | - | - | - | - | |
|
Not as useful as jA, given it doesn't stay out forever, but it is still an air-to-air. This option selects with his air throw for a win-win if you get it or not. | ||||||||||
jD
| Damage | Stun | Guard | Startup | Active | Recovery | Total | Hit Adv | Block Adv | Property | |
|---|---|---|---|---|---|---|---|---|---|---|
| 20 | 4 | High | 5 | 17 | - | - | - | - | - | |
|
Laurence's jump-in of choice. | ||||||||||
Universal Mechanics
Lane Blast (CD)
| Version | Damage | Stun | Guard | Startup | Active | Recovery | Total | Hit Adv | Block Adv | Property | |
|---|---|---|---|---|---|---|---|---|---|---|---|
| Front Lane | 22 | 5 | Mid | 18 | 11 | 16 | 44 | KD | -8 | Cancel, Lane Shift | |
|
Laurence is not blessed in this department at all, considering the startup takes forever. The range isn't great for your troubles, either. This move doesn't serve his gameplan anyway, so it's easy to ignore. | |||||||||||
| Back Lane | 22 | 5 | Mid | 13 | 9 | 15 | 27 | KD | -5 | Cancel, Lane Shift | |
|
A much better CD — it even has anti-air potential. It whiffs on crouchers, but Laurence has good pokes as is. Shame he doesn't get to use this on his own stage… | |||||||||||
Lane Attack
| Version | Damage | Stun | Guard | Startup | Active | Recovery | Total | Hit Adv | Block Adv | Property | |
|---|---|---|---|---|---|---|---|---|---|---|---|
| A/B | 20 | 2 | Overhead | 13 | 18 | 4 | 34 | +5 | +12 | / | |
| |||||||||||
| C/D | 20 | 4 | Overhead | 13 | 39 | 4 | 55 | +4 | +11 | / | |
| |||||||||||
| Lane Sway | 20 | 3 | Unblockable | - | - | - | - | - | - | / | |
|
Laurence is the only character who has a hitbox on his normal lane switch animation, but only when going from the front lane to the back.
| |||||||||||
Dodge Attack
| Damage | Stun | Guard | Startup | Active | Recovery | Total | Hit Adv | Block Adv | Property | |
|---|---|---|---|---|---|---|---|---|---|---|
| 11 | 5 | Mid | 23 | 10 | 15 | 47 | Air (+15) | -6 | Kara Cancel, Upper-Body Invuln 1-32F | |
|
The hitbox makes it look like an anti-air, but it's so slow to come out it's impractical — even against early jump lights. Its upward angle also makes it unsuitable for counterpokes. Instead, this move is designed to dodge fireballs; whether fast or slow, Laurence can tap this at fullscreen whenever a fireball comes close to him, and chances are it'll phase right through him. In theory, if the opponent jumps behind their fireball, the hitbox is geared to catch them (this never happens). However, if Laurence commits to this too much, he runs the risk of letting the opponent approach — especially if he reacts late every time. Best used if Laurence is at a lifelead. | ||||||||||
Throws
Poncho Throw (4/6C)
Poncho Breaker (4/6D)
| Damage | Stun | Guard | Startup | Active | Recovery | Total | Hit Adv | Block Adv | Property | |
|---|---|---|---|---|---|---|---|---|---|---|
| 16~32 (4 × 4~8) | 0 | Throw | 1 | 1 | / | - | - | / | - | |
| ||||||||||
Flying Buster (j2C)
Special Moves
Bloody Saber (41236P)
| Version | Damage | Stun | Guard | Startup | Active | Recovery | Total | Hit Adv | Block Adv | Property | |
|---|---|---|---|---|---|---|---|---|---|---|---|
| A | 16 (4) | 3 | Mid | 14 | 10 | 24 | 47 | KD | -16 | - | |
|
A sword! This sees use as a way to end combos, particularly from 2C. This can combo from lights if you cancel fast enough. At the tip of 2C's range, it will miss, but the heavy version serves him there — or at least will net some chip. Bloody Spin is the better chip tool, as it isn't death on block, but this can be used to chip if you space it. It also blows through Geese's counters. | |||||||||||
| C | 22 (5) | 6 | Mid | 17 | 23 | 30 | 69 | KD | -31 | - | |
|
This is a forward movement option. It doesn't go fullscreen like either of the Bloody Spins, but after a knockdown, this can get you to midscreen, which you may prefer. If the combo is guaranteed, use this from 2C over the light version for its greater damage. This is awful on block no matter how you space it, so use this sparingly. | |||||||||||
Bloody Spin ([4]6K)
| Version | Damage | Stun | Guard | Startup | Active | Recovery | Total | Hit Adv | Block Adv | Property | |
|---|---|---|---|---|---|---|---|---|---|---|---|
| B | 12 (3x2) | 3 | Mid | 16 | 4+(4)+4+(4)+4 | 22 | 57 | Air (-3) | -1 | - | |
|
As a Psycho Crusher, this move serves as a mobility option after a knockdown or as a chipping tool. Laurence will be left at a minor disadvantage after the latter, but where the spacing leaves him, most characters will not be able to beat his pokes. You can use it to chip at range, but like most moves of this nature, it's designed to get beat by dodge attacks. Not a combo tool. | |||||||||||
| D | 18 (4x2) | 6 | Mid | 20 | [3 (3)]×4+3 | 25 | 71 | KD | -5 | - | |
|
Lands him further than the light version, although both travel fullscreen. Deals more chip but it's not as safe. | |||||||||||
Bloody Cutter ([2]8C)
| Damage | Stun | Guard | Startup | Active | Recovery | Total | Hit Adv | Block Adv | Property | |
|---|---|---|---|---|---|---|---|---|---|---|
| 24 (6) | 6 | Mid | 33 | 11 | 16 | 59 | KD | -9 | - | |
|
YOLO. This move tracks the opponent's position and is designed to call out fireballs, but it's easy to mess with if the opponent simply hesitates. It's a guaranteed punish on block; either you'll get thrown or you'll eat a full combo — depends on the opponent's reactions. Either way, you're screwed. Additionally, it has no air-to-air capacity whatsoever, so the opponent can beat it if they're jumping. This attack should only be used if you have to take risks or if you have a really good read on the opponent's patterns; as good as Dodge Attack is for avoiding fireball chip, it doesn't make any progress. Either way, it's best to play the game of inches with the priority of his normals if you can. As a final note, the attack is a mid, but on crouchers, it will hit frontal if they're tall, behind for everyone else and whiff if they're short. | ||||||||||
Desperation Move
Bloody Flash (34123616BD)
| Damage | Stun | Guard | Startup | Active | Recovery | Total | Hit Adv | Block Adv | Property | |
|---|---|---|---|---|---|---|---|---|---|---|
| 48 (12×3) | 4 | Mid | 18 | 16+9 (5) 7 | 25 | 79 | KD | -2 | Projectile | |
|
The input makes it way too unwieldly to use as an anti-air on command, but the DM still works as a chipping tool. It combos from his close heavies if you're fast enough, but the window for this is very small, so it is much easier to get it as a string ender from 2C, which lets you start with 3. As far as chipping goes, there are three points of impact: the first swing with short range, the second swing with long range and the non-projectile hitbox at the end which won't hit anyone. Most likely, you will only get the second of these; this leaves a gap for the opponent to backdash, but this risks getting hit when performed too early. In the corner, you can do this raw just outside of throw range, and they won't be able to backdash out. Wherever he lands it, if blocked, he'll be pushed fullscreen, so you can forget about punishing him. This is a very good move to make progress with, but it still requires practice — especially at crucial points, where its input can lead to fluster. | ||||||||||
Combos
- Any light > 41236A
- c5C/c5D/2C > 41236C
- jD, c5C/c5D > 34123616BD
- Meaty c5B, c5D > 41236C
Strategy
The Basics
2A is Laurence's best poke for pressure, which you can use with crawl to stagger. 2B is better as a start for its better frame data and how it hits low, but it's also slower to come out. 2C is a prime ground poke for its priority, range and ability to cancel. f5D can be used to end strings, usually after blocked Bloody Spin against most characters. 2D is a gamble and isn't worth it most of the time.
Laurence's anti-airs are c5D and f5B — both of which will often trade. It is often better to paint the air with jA and jB instead. Laurence's air throw is also good, as it overlaps with jC, which has the exact same hitbox as jA; being a heavy, though, it lacks permanence. Laurence can use his air normals to control space in the corner and stop his opponent's approach, but he takes forever to land and he's a target for anti-airs.
Bloody Spin and spaced Bloody Saber are decent tools to chip. Bloody Saber is your combo ender, but it should be confirmed into as it is horrible on block. Light Bloody Spin leaves Laurence at a slight disadvantage, but he can usually press f5D or 2A.
To avoid fireballs, Laurence can of course jump or lane shift, but he can also use his Dodge Attack, where his upper body is invincible for half a second. This, however, makes zero progress, so it's only good when he can stall on a life lead. He can also use Bloody Cutter for hard callouts, but it's punishable and often the only thing Laurence has at the ranges he'll fish for it. It is tempting for its high damage, but it often isn't worth it.
Advanced Strategy
On low health, Laurence can use this sequence to chip: jD 2C 34123616BD. There is a gap between 2C and the DM for the opponent to backdash out of, but if mistimed, they eat the DM. If they time it, they're now closer to the corner, so it's a win-win. A meaty DM chips off a quarter of their health when close, and in the corner, they cannot backdash to escape. He can still be hit by reversals.

