| Character breakdown in progress
Akuma is a new character! This page is currently under construction and information might be inaccurate, incomplete, or missing entirely. 🤝 Want to help us out? Join the SF6 Resource Hub for more info on editing and other ways you can potentially help with this resource. |
Introduction
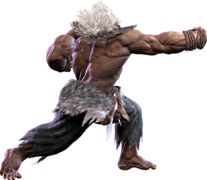
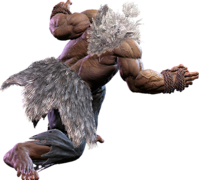
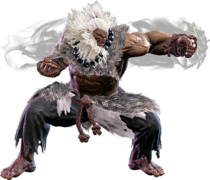
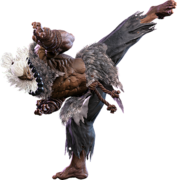
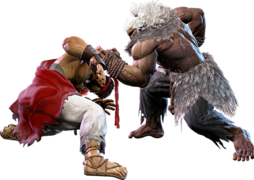
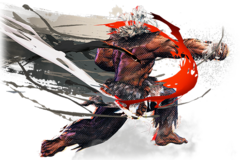
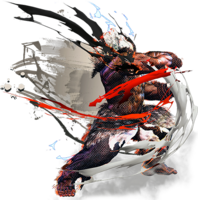
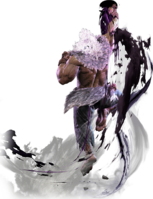
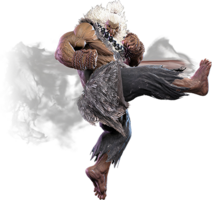
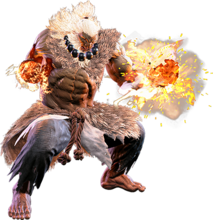
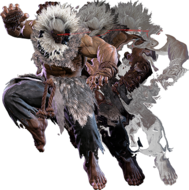
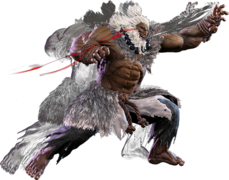
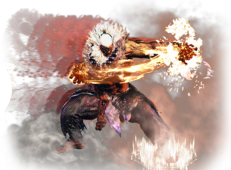
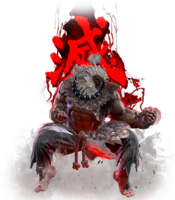
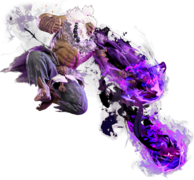
A demon of combat that has welcomed the Satsui no Hado into his being in his quest to become the ultimate master of the fist.
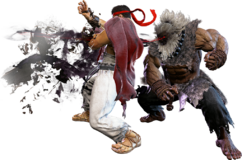
Akuma has an incredibly versatile toolkit, with strong, far-reaching normals and a high walkspeed to control space, multiple projectiles to force or shield an approach, and incredible corner carry to force his foes into the most dangerous of situations. He's especially good at maintaining his advantageous positions, with certain knockdowns leading to a potentially rewarding vortex that can loop back into itself. All this is counterbalanced by his lower health, a massive drawback that makes each mistake that much more costly and forces him to use each tool in his arsenal wisely to avoid inviting his own destruction.
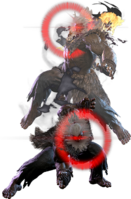
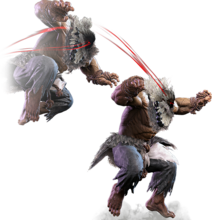
While Akuma has the traditional shoto toolkit (fireball, DP, tatsu, shoto normals), he puts his own dark spin on them, encouraging peerless aggression. His Gou Hadoken has three vastly different speeds it can be fired at, and can be charged for additional hits. His fireball also has a unique air version called Zanku Hadoken, which can be used to counter DP attempts or set up for continued pressure. His Gou Shoryuken acts as a great combo ender and anti-air, with an OD version that leaves opponents close on hit. His Tatsumaki Zanku-kyaku goes through fireballs like Ryu's, but the heavy version goes into the air, allowing him to cruelly punish bad jumpins. What really sets Akuma apart from the other shotos is his signature Demon Raid. Upon pressing this special, Akuma leaps into the air and can perform a series of followups. He has an overhead, a low, and a divekick, and each option can leave Akuma plus. If opponents try to parry through the followups, Akuma can always call this out by landing and throwing them for a Punish Counter Throw. Demon Raid is an incredible special for allowing Akuma to get his gameplan started, and the OD version even allows Akuma to throw a fireball and counter attempts to stuff his approach. While Demon Raid is strong, it can be easily anti-aired on reaction, requiring Akuma to be very considerate with where he unleashes it.
In the neutral, Akuma leverages his shoto normals of 2MK, 5HP and 5LP/5LK to control space. His fast walkspeed and strong pokes give him a dominating neutral presence. He also has some strong command normals for counterpoking, including the powerful 6MK snap kick and 6HP lunging punch. Once he's gotten you in the corner, Akuma excels at a diverse and threatening offense. He has many ways to be plus, including his 5MP and 5HK, though the latter can be ducked and punished. Akuma can use his new Adamant Flame special to set up shimmys and crush your opponent's Drive Gauge. Successful hits can be brutally effective, as Akuma's combo game is very strong with excellent juggle points OD special extensions. His devastating Empyrean's End Level 2 super leads to combo extensions, and his Level 3 is easy to combo into, allowing him to pile on the damage. On top of all of this, Akuma also has an alternate CA called Shun Goku Satsu, a 0f comboable command grab that deals incredible damage when it connects. Truly, Akuma is the master of violence.
Akuma's low vitality is a genuine concern in this game, as he has 9000 health compared to the standard 10,000. This might not seem like a lot, but it is a noticeable con, as Akuma can be two-touched by most of the cast. While opponents may fear his rewarding and dominating offense, Akuma carries much risk in basic play. Opponents who find an opening or make a specific read can punish Akuma harder than anyone else in the cast, especially if they have a Level 3 charged up. Akuma lives and dies by the mastery of the person playing him. If you can pilot him well, he will reward your efforts tenfold. If you like offense-oriented characters and can stay calm on the razor's edge, then embrace the demon with Akuma.
| Pick if you like: | Avoid if you dislike: |
|---|---|
|
|
Classic & Modern Versions Comparison
| Missing Normals |
|
|---|---|
| Missing Command Normals |
|
| Shortcut-Only Specials |
|
| Assist Combos |
|
| Miscellaneous Changes |
|
| Akuma | |
|---|---|
| Vitals | |
| Life Points | 9000 |
| Ground Movement | |
| Forward Walk Speed | 0.052 |
| Backward Walk Speed | 0.035 |
| Forward Dash Speed | 19 |
| Backward Dash Speed | 23 |
| Forward Dash Distance | 1.352 |
| Backward Dash Distance | 0.923 |
| Drive Rush Min. Distance (Throw) | 0.880 |
| Drive Rush Min. Distance (Block) | 2.121 |
| Drive Rush Max Distance | 3.425 |
| Jumping | |
| Jump Speed | 4+38+3 |
| Jump Apex | 2.115 |
| Forward Jump Distance | 1.90 |
| Backward Jump Distance | 1.52 |
| Throws | |
| Throw Range | 0.8 |
| Throw Hurtbox | 0.33 |
| Frame Data Glossary - SF6 | |
|---|---|
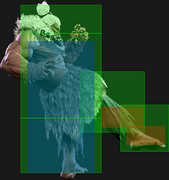
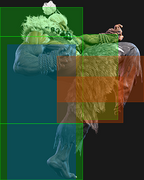
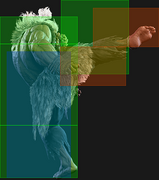
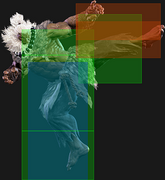
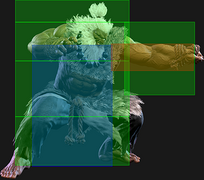
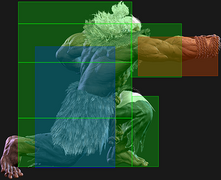
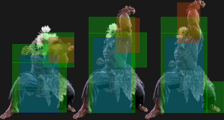
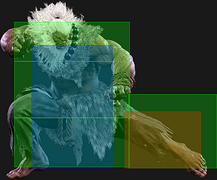
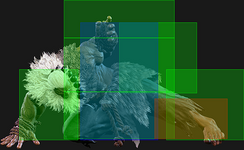
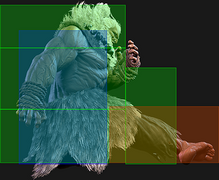
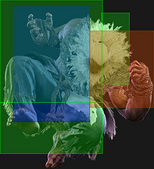
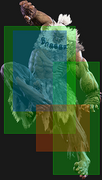
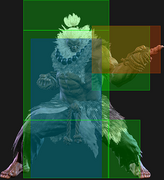
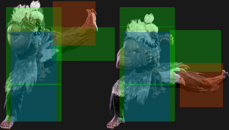
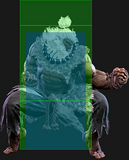
| Hitbox Images |
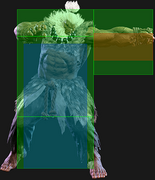
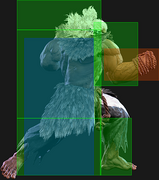
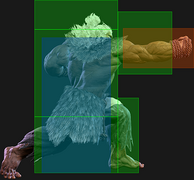
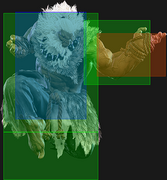
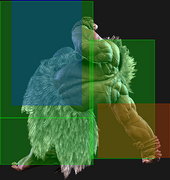
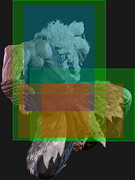
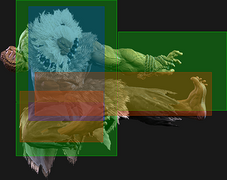
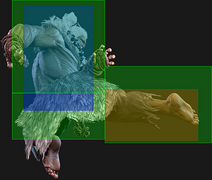
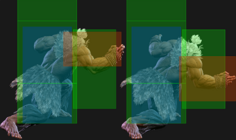
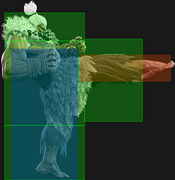
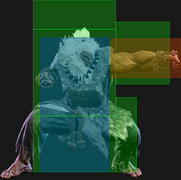
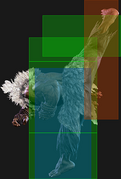
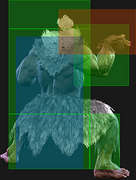
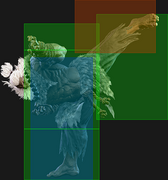
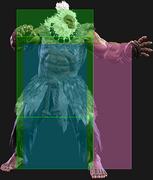
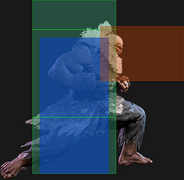
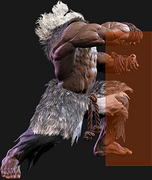
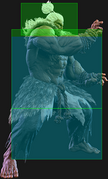
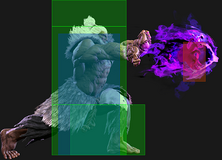
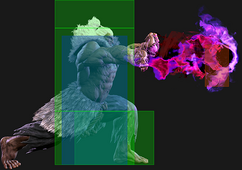
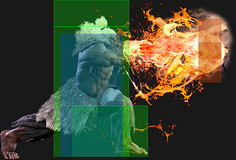
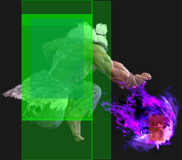
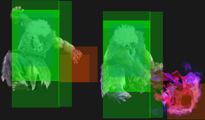
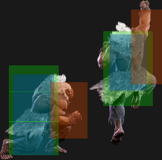
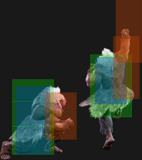
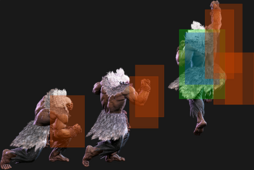
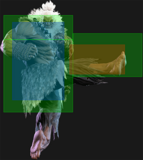
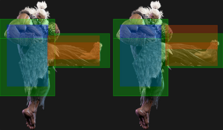
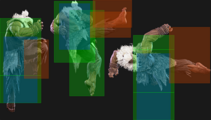
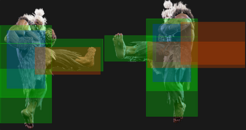
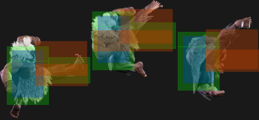
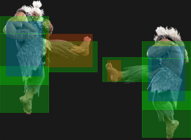
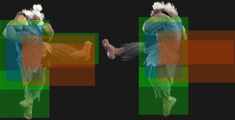
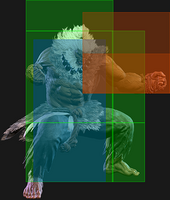
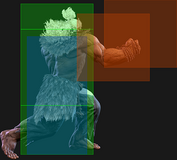
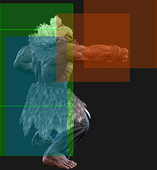
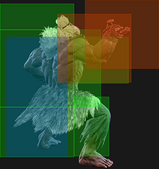
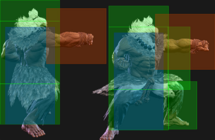
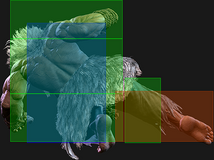
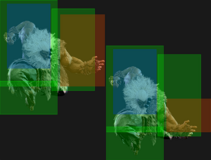
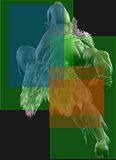
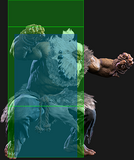
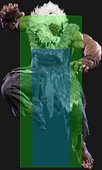
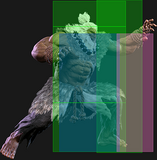
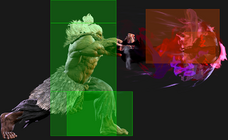
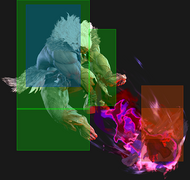
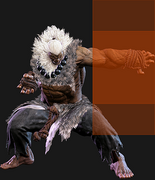
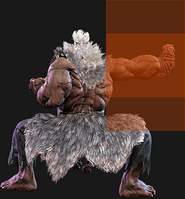
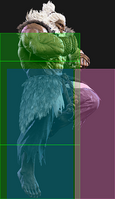
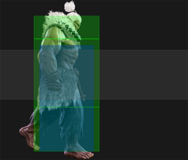
🟥 (Red): Attack hitbox
🟩 (Green): Vulnerable hurtbox that can be hit by strikes/projectiles
🟦 (Blue): Vulnerable throw hurtbox
|
| Active |
How many frames a move remains active (can hurt opponents) for. For projectiles with a maximum active period, a value may be listed in [brackets], but this number is not factored into the move's total frame count.
|
| Cancel |
Available options for canceling one move into another move.
|
| Cancel Hitconfirm Windows |
Hitconfirm reaction windows into Special Moves, Target Combos, and Super Arts.
|
| Damage |
Attack damage on hit. Multi-hit moves may have the damage listed for individual hits as X,Y (or sometimes X*Y). Sometimes a move's damage changes depending on which active frame connects, or on cinematic vs. non-cinematic hits; in this case, multiple values may be listed, and it will be clarified in the move description.
|
| Damage Scaling |
Some moves cause additional damage scaling in combos. Refer to Game Data page for a more detailed breakdown. Scaling Types:
|
| Drive Rush Cancel Advantage |
Refers to the frame advantage when canceling a normal, command normal, or Target Combo into Drive Rush on hit or block (abbreviated as DRC for Drive Rush Cancel). This is calculated at the moment a follow-up attack can be input, not at the moment the character can block or perform movement options. An attack that with DRC +8 on Hit can link into an 8-frame attack, and DRC +4 on Block can create a true blockstring into a 4-frame attack. Note that any DRC on Block worse than +4 cannot form a true blockstring, allowing the opponent to interrupt with an invincible reversal. Most light normals are slightly negative after a DRC on block, meaning the opponent can mash their fastest normal to guarantee a counter-hit (though this requires fast reactions). The attacking character could punish this with Light > DRC into an immediate invincible attack, but this would be an incredibly expensive and high-risk gambit.
|
| Forced Knockdown |
Most airborne command normals, special moves, and Super Arts put the user in a "Forced Knockdown" state. While in this state, an air knockdown will occur when being hit by any attack, even if it would otherwise cause an air reset. As an example, Ryu's 2HP causes an air reset when used as an anti-air. Against a move like Cammy's Hooligan Combination, however, the 2HP puts her into an air knockdown state. This allows Ryu to successfully cancel 2HP into Shoryuken for a juggle, similar to how a Drive Impact wall splat works. Taking advantage of Forced Knockdown juggles is important for dealing with moves like Ken's Dragonlash, Dhalsim's Air Teleport, or Kimberly's 6HK~Hop sequence. Moves that already cause an air knockdown, like most j.MP air-to-airs, will not display the "Forced Knockdown" message.
|
| Guard |
Refers to the direction an attack must be blocked. L is for Low attacks (must be blocked crouching), H is for High attacks/overheads (must be blocked standing), LH is for attacks that can be blocked crouching or standing. T is for Throw attacks which cannot be blocked.
|
| Juggles |
When a character is put into an Air Knockdown state, it is often possible to follow up with a Juggle attack before they hit the ground. In the simplest terms, there are 2 main juggle states:
The following is a more detailed overview of the SF6 juggle system:
Juggle Start (JS): When starting a juggle, the opponent's JC will be set to this value. May be different vs. standing and airborne opponents.
Juggle Increase (JI): When opponent is already in a juggle state, attacks will increase the opponent's JC by this amount.
Juggle Limit (JL): Property of an attack hitbox that determines whether it connects on a juggled opponent. The JL must be ≥ the opponent's JC to hit successfully.
An example to tie everything together:
Drive Rush notes:
More recently, the official definitions used by Capcom are slightly different than these community-designated terms. When reading official patch notes, the following terms are used instead:
|
| On Hit/Block |
These are frame advantage values when the attack hits or is blocked. If the number is positive, then the move will recover before the defender can act again. If the number is negative, the defender will be able to act before the attacker and maybe even punish. KD refers to knockdown on hit, and the listed KD Advantage refers to how many frames the attacker can act before the defender finishes their wakeup animation.
|
| Recovery |
How many frames it takes for a move to finish after the active frames have finished. For projectiles, recovery is considered to begin after the first active frame.
|
| Startup |
How many frames it takes before the move becomes 'active' or have a hit box. The last startup frame and the first active frame are the same frame, meaning all values are written as Startup + 1.
|
| IASA / Actionable Recovery |
Some moves play out an extended recovery animation when no other button/direction is input (for crouching moves, it applies when holding any down direction). These are often referred to as "actionable recovery" frames; in some games, the term IASA (Interruptible As Soon As) refers to the frame that Actionable Recovery begins. Letting the Actionable Recovery frames play out can change the character's position, potentially setting up spacing traps by recovering farther away. For example, Manon 5HP will recover much farther away from the opponent if no input is performed immediately after her recovery; holding back or down-back to block will keep her much closer to the opponent.
|
Normals
Standing Normals
5LP
| Startup | Active | Recovery | Cancel | Damage | Guard | On Hit | On Block |
|---|---|---|---|---|---|---|---|
| 4 | 3 | 7 | Chn Sp SA | 300 | LH | +4 | -1 |
5MP
| Startup | Active | Recovery | Cancel | Damage | Guard | On Hit | On Block |
|---|---|---|---|---|---|---|---|
| 6 | 4 | 11 | Sp SA TC | 600 | LH | +4 | +1 |
Akuma's main pressure normal aside from his light normals. Plus on block and frame traps into said lights. Comes with a TC attached for combos.
On counter-hit be linked into 5MP~MP TC at point blank range for extra damage. At longer ranges can be linked into 2MP (whiff at max range) and 5LK to be safer on block for less damage. It may be more practical to use 5MP~MP TC and cancel into 236P for safety instead.
5HP
| Startup | Active | Recovery | Cancel | Damage | Guard | On Hit | On Block |
|---|---|---|---|---|---|---|---|
| 9 | 5 | 18 | Sp SA | 800 | LH | +3 | -3 |
Long reaching, special cancelable and fast shoto-style 5HP. Very easy for Akuma to bully opponents with, especially considering his swift walk speed.
Most reliable damage cancel is 214HP and 214PP in the corner. 214HP will be blocked if cancelled even 1f too late (needs to come out after 3rd active frame). It can also combo into 214HK tatsu, but this will whiff at further ranges.
On Punish Counter links into 5MK at close range.
5LK
| Startup | Active | Recovery | Cancel | Damage | Guard | On Hit | On Block |
|---|---|---|---|---|---|---|---|
| 5 | 3 | 11 | Sp SA | 300 | LH | +2 | -4 |
5MK
| Startup | Active | Recovery | Cancel | Damage | Guard | On Hit | On Block |
|---|---|---|---|---|---|---|---|
| 7 | 5 | 15 | Sp SA TC | 700 | LH | +3 | -3 |
- Forces stand on hit.
Force stand property makes this an important combo tool to cancel into 214LK and 214MK
5HK
| Startup | Active | Recovery | Cancel | Damage | Guard | On Hit | On Block |
|---|---|---|---|---|---|---|---|
| 13(24) | 3(8)4 | 15(16) | - | 400x2 | LH | +7 | +3(-13) |
- Second hit can be ducked if the first hit is blocked.
- Ducking the second hit leaves Akuma -13.
- Forces stand on hit.
Crouching Normals
2LP
| Startup | Active | Recovery | Cancel | Damage | Guard | On Hit | On Block |
|---|---|---|---|---|---|---|---|
| 4 | 2 | 9 | Chn Sp SA | 300 | LH | +5 | -1 |
2MP
| Startup | Active | Recovery | Cancel | Damage | Guard | On Hit | On Block |
|---|---|---|---|---|---|---|---|
| 6 | 3 | 14 | Sp SA | 600 | LH | +6 | -1 |
Similar to Luke's 2MP, this button is incredible with a disjointed hitbox. While it's not +oB, it is extremely +oH, linking into itself at mid range.
Most reliable cancel is into 214MP~6P. Cancel into 236LP for spacing and 214HK at point blank range. Cancel into 214PP~6P in the corner for wallsplat extensions.
On CH can combo into 5MK for optimal combos or 2MK at max range if the former would whiff.
On PC can combo into 5HP making this a great shimmy button. At max range when whiff punishing, can cancel directly into 214HP~6P
In DR can link into 5HP too.
2HP
| Startup | Active | Recovery | Cancel | Damage | Guard | On Hit | On Block |
|---|---|---|---|---|---|---|---|
| 8 | 8 | 19 | Sp SA | 900 | LH | 0 | -8 |
- Forces stand on hit.
Another button that forces stand so you can confirm into your various Tatsus. Great combo filler due to the high damage and it cancels to almost any special.
2LK
| Startup | Active | Recovery | Cancel | Damage | Guard | On Hit | On Block |
|---|---|---|---|---|---|---|---|
| 5 | 2 | 10 | Chn | 200 | L | +3 | -3 |
2MK
| Startup | Active | Recovery | Cancel | Damage | Guard | On Hit | On Block |
|---|---|---|---|---|---|---|---|
| 8 | 3 | 19 | Sp SA | 500 | L | +1 | -6 |
2HK
| Startup | Active | Recovery | Cancel | Damage | Guard | On Hit | On Block |
|---|---|---|---|---|---|---|---|
| 9 | 3 | 23(29) | - | 900 | L | HKD +32 | -12 |
Sweep. Has some juggle potential, and can be used as a combo ender after 214LK, which gives you incredible oki or even a safejump.
Jumping Normals
j.LP
| Startup | Active | Recovery | Cancel | Damage | Guard | On Hit | On Block |
|---|---|---|---|---|---|---|---|
| 4 | 10 | 3 land | - | 300 | H | +4(+9) | 0(+5) |
j.MP
| Startup | Active | Recovery | Cancel | Damage | Guard | On Hit | On Block |
|---|---|---|---|---|---|---|---|
| 8 | 4 | 3 land | Sp SA1 | 700 | H | +9(+11) | +5(+7) |
Akuma's prime air to air button. Allows for air to ground conversions by using j.214KK, j.236P series, or Air Level 1 Super.
j.HP
| Startup | Active | Recovery | Cancel | Damage | Guard | On Hit | On Block |
|---|---|---|---|---|---|---|---|
| 9 | 6 | 3 land | - | 800 | H | +8(+15) | +4(+11) |
j.LK
| Startup | Active | Recovery | Cancel | Damage | Guard | On Hit | On Block |
|---|---|---|---|---|---|---|---|
| 6 | 10 | 3 land | - | 300 | H | +5(+10) | +1(+6) |
j.MK
| Startup | Active | Recovery | Cancel | Damage | Guard | On Hit | On Block |
|---|---|---|---|---|---|---|---|
| 7 | 6 | 3 land | - | 500 | H | +8(+13) | +4(+9) |
j.HK
| Startup | Active | Recovery | Cancel | Damage | Guard | On Hit | On Block |
|---|---|---|---|---|---|---|---|
| 12 | 6 | 3 land | - | 800 | H | +9(+15) | +5(+11) |
Command Normals
6MP
| Startup | Active | Recovery | Cancel | Damage | Guard | On Hit | On Block |
|---|---|---|---|---|---|---|---|
| 20 | 1(1)3 | 18 | - | 200,400 | H,H | +3 | -1 |
Akuma's overhead to start his offense. Has good range.
DR 6MP links into 2MP or 5MK, the latter link being very important becauses it forces stand as this move is very likely to hit them crouching, allowing Akuma to combo into 214LK.
6MK
| Startup | Active | Recovery | Cancel | Damage | Guard | On Hit | On Block |
|---|---|---|---|---|---|---|---|
| 10 | 3 | 15(18/19) | - | 700 | LH | +5 | -4 |
A solid poking normal with great range, but little reward on hit. On Punish Counter notably links into 2HK for a knockdown, or Level 2 Super for a potential combo near the corner, however these have a tendency to whiff near the kick's max range.
6HP
| Startup | Active | Recovery | Cancel | Damage | Guard | On Hit | On Block |
|---|---|---|---|---|---|---|---|
| 13 | 4 | 20 | TC | 800 | LH | +4 | -3 |
Akuma steps forward while punching, making this button one of his farthest reaching pokes. Hitconfirms into 6HP~6HK target combo.
Due to scaling, 6HP is the preferred link in DRC over 5HK.
4HK
| Startup | Active | Recovery | Cancel | Damage | Guard | On Hit | On Block |
|---|---|---|---|---|---|---|---|
| 12 | 5 | 27 | Sp SA | 800 | LH | KD +47 | -15 |
- Puts airborne opponents into limited juggle state.
A very rewarding anti-air and combo filler button. Forces limited juggle on hit, allowing Akuma to combo further. In the corner, the usual extension is 4HK > Level 2 fireball > H Shoryu or Tatsu, but you can also do 4HK > 236K~K > H Shoryu or Tatsu for slightly less damage.
When used as an anti-air, 4HK is very slow but highly rewarding. Since it can be special cancelled, Akuma can get strong midscreen conversions. An example is 4HK > Level 2 fireball > Parry Drive Rush > 5HK > M Tatsu.
j.2MK
| Startup | Active | Recovery | Cancel | Damage | Guard | On Hit | On Block |
|---|---|---|---|---|---|---|---|
| 16 | until land | 7(13) land | - | 800 | LH | +1(+11) | -4(+6) |
Target Combos
5MP~MP
| Startup | Active | Recovery | Cancel | Damage | Guard | On Hit | On Block |
|---|---|---|---|---|---|---|---|
| 7 | 3 | 21 | Sp SA | 700 | LH | -1 | -6 |
5MK~HK
| Startup | Active | Recovery | Cancel | Damage | Guard | On Hit | On Block |
|---|---|---|---|---|---|---|---|
| 20 | 3 | 20 | - | 600 | H | +1 | -3 |
Somewhat sneaky, safe on block overhead. Has situational use during combos: if used from a Drive Rush, causes a ground bounce on air hit.
6HP~6HP~HK
| Startup | Active | Recovery | Cancel | Damage | Guard | On Hit | On Block |
|---|---|---|---|---|---|---|---|
| 10 | 3 | 21(24) | TC | 600 | LH | KD +39 | -10 |
| Startup | Active | Recovery | Cancel | Damage | Guard | On Hit | On Block |
|---|---|---|---|---|---|---|---|
| 9 | 3 | 24 | - | 875(700) | LH | KD +35 | -13 |
Key hit-confirmable TC for Akuma. 6HP~6HP can be finished into 623MP for more damage in the corner.
Throws
Forward Throw (LPLK)
| Startup | Active | Recovery | Cancel | Damage | Guard | On Hit | On Block |
|---|---|---|---|---|---|---|---|
| 5 | 3 | 23 | - | 1200 (2040) | T | KD + 28 | - |
- Punish Counter: HKD +?
Back Throw (4LPLK)
| Startup | Active | Recovery | Cancel | Damage | Guard | On Hit | On Block |
|---|---|---|---|---|---|---|---|
| 5 | 3 | 23 | - | 1200 (2040) | T | KD + 14 | - |
- Side switches
- Punish Counter: HKD +?
Drive System
Drive Impact (HPHK)
| Startup | Active | Recovery | Cancel | Damage | Guard | On Hit | On Block |
|---|---|---|---|---|---|---|---|
| 26 | 2 | 35 | - | 800 | LH | KD +35 / Wall Splat KD +65 | -3 / Wall Splat HKD +72 |
- Armor (2-hit): 1-27f
- Applies 20% damage scaling to next hit when beginning a combo (including Wall Splat on block)
- Combos when canceled from -- (no corner wallsplat)
- Useful for draining opponent's Drive gauge, especially after Perfect Parry
See Drive Impact on the Gauges page for more details.
When canceled from a normal, these are the important blockstring gaps; a gap of N will trade with an N-frame startup attack; [] = Burnout
- 2HP 8[4]
- 5HP 9[5]
- 4HK, 5MP~MP, 5MK 10[6]
- 5MP, 2MP 11[7]
- 2MK 13[9]
- Note: A gap ≥ 6f can be thrown, and a gap ≥ 9f can be jumped out of by most characters
Against the following characters in Burnout:
- JP (22K), frame 3 counter
- Marisa (214K), frame 3 armor
- Zangief (5[HP]), frame 4 armor
It's important to use a blockstring that cannot be absorbed by their armor/counter moves. Ideally, the string should also not be a true combo, or it will cause a Lock and prevent Stun. Note that if the opponent mashes buttons on wakeup, the counter-hit will cause DI to Lock.
- DR~5HP > DI: 1f blockstring gap prevents opponent from absorbing the hit
- DR~2HP > DI: 1f blockstring gap prevents opponent from absorbing the hit if cancel is delayed
- DR~4HK/5MK > DI: 2f blockstring gap prevents opponent from absorbing the hit
- DR~5MP/2MP > DI: 3f blockstring gap prevents Zangief 5[HP] from absorbing the hit
Drive Reversal (6HPHK)
| Startup | Active | Recovery | Cancel | Damage | Guard | On Hit | On Block |
|---|---|---|---|---|---|---|---|
| 20 | 3 | 26(31) | - | 500 recoverable | LH | KD +23 | -6 |
- Full Invuln: 1-22f; Armor Break
- 5f extra recovery on hit
See Drive Reversal on the Gauges page for more details.
Drive Parry (MPMK)
| Startup | Active | Recovery | Cancel | Damage | Guard | On Hit | On Block |
|---|---|---|---|---|---|---|---|
| 1 | 12 or until released | 33(1)(11) | - | - | - | - | - |
See Drive Parry on the Gauges page for more details.
- Perfect Parry:
- Applies a 50% damage scaling multiplier to any punish afterwards
- vs. strikes, has only 1f recovery and prevents the opponent from canceling their attack
- vs. projectiles, puts you into a fixed 11f recovery
Drive Rush (66)
No results
- Applies 15% damage scaling multiplier to any follow-up hits when used mid-combo
- Only applies scaling once per combo; does not apply when an enhanced Drive Rush attack starts the combo
See Drive Rush on the Gauges page for more details. Frame data shown in (parentheses) refers to Parry Drive Rush.
- Distance:
- 0.880 (min, cancel into immediate Throw)
- 2.112 (min, earliest blocking/movement frame)
- 3.425 (max, final DR frame)
- See Strategy page for Blockstring Gaps and Combo Routes
Special Moves
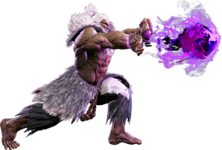
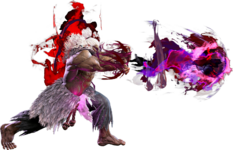
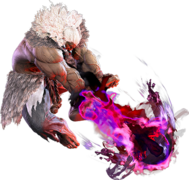
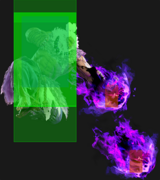
Gou Hadoken (236P)
| Startup | Active | Recovery | Cancel | Damage | Guard | On Hit | On Block |
|---|---|---|---|---|---|---|---|
| 16~32 | - | 30 | SA3 | 700 | LH | 0 | -4 |
| Startup | Active | Recovery | Cancel | Damage | Guard | On Hit | On Block |
|---|---|---|---|---|---|---|---|
| 14~30 | - | 32 | SA3 | 700 | LH | -2 | -6 |
| Startup | Active | Recovery | Cancel | Damage | Guard | On Hit | On Block |
|---|---|---|---|---|---|---|---|
| 12~28 | - | 34 | SA3 | 700 | LH | -4 | -8 |
| Startup | Active | Recovery | Cancel | Damage | Guard | On Hit | On Block |
|---|---|---|---|---|---|---|---|
| 12~27 | - | 29 | SA2 SA3 | 400,600 | LH | KD +55 | +2 |
Gou Hadoken Lv.2 (236{P})
No results
No results
No results
No results
- Earliest possible charge frame: 31f
- When Level 2 fireball is ready, Akuma will pose with his arms outstretched. His fireball changes colour from a deep purple to a reddish-purple.
Akuma's Level 2 fireball is a very useful tool when used both midscreen and in the corner. Midscreen, Akuma can use it to punish poor jump-ins against those who are trying to jump over his fireball zoning. It leaves him plus on block, allowing him to either Drive Rush in for further pressure or simply maintain his distance and observe.
In the corner, all of Akuma's basic combo enders give him just enough time to apply meaty Level 2 fireball as okizeme. In particular, 214LK > 2HK and 214HK in the corner both lead to meaty Level 2 fireballs. On hit, Akuma can follow up with 214HK, 623HP > Level 3, or even an air Drive Rush extension.
Lastly, Level 2 fireball can be used in combos for an additional juggle in the corner. 4HK > Level 2 fireball > 623HP is one such example.
Gou Hadoken Lv.3 (236[P])
No results
No results No results
| Startup | Active | Recovery | Cancel | Damage | Guard | On Hit | On Block |
|---|---|---|---|---|---|---|---|
| 31 | - | 28 | SA2 SA3 | 300x2,600 (1200) | LH | KD +57 | +5 |
Zanku Hadoken (j.236P)
| Startup | Active | Recovery | Cancel | Damage | Guard | On Hit | On Block |
|---|---|---|---|---|---|---|---|
| 13 | - | 9(2) land | - | 600 | LH | varies | varies |
| Startup | Active | Recovery | Cancel | Damage | Guard | On Hit | On Block |
|---|---|---|---|---|---|---|---|
| 6(21) | - | 9(2) land | - | 300x3 | LH | KD~ | varies |
- Earliest possible jump cancel point: 12f
- Latest possible jump cancel point: 33f
Akuma's essential space control tool for keeping his own approach safe. No other member of the cast has a move like this, allowing Akuma unique neutral opportunities. Akuma can shoot out the fireball at variable speeds just like his grounded version. LP is good for making a projectile wall to protect himself, while M and H are good for stuffing anti-air attempts.
Primarily, air fireball is used as a way for Akuma to grab space for jumpins. If done at the earliest possible point, it can stuff most DPs without full invulnerability. This can be a good tool for conditioning Demon Raid. If opponents block air fireball, then Akuma is variably plus (up to 23f, minimum 7f), allowing him to engage in pressure. However, air fireball can be DP'd if the opponent acts fast enough, which will defuse the fireball completely.
If the fireball hits a grounded opponent, Akuma can Parry Drive Rush up for additional combo extensions. The safest option is 5LP > M Tatsu, but depending on his landing height and the speed of the fireball he can also get a 5HP confirm. Air fireball can also be a combo tool from air to airs. j.MP > j.236HP can combo, and be further extended with a Drive Rush on the ground. In the corner, j.5MP > j.236LP must be used instead.
OD Zanku is a two-hit version that keeps Akuma in the air for much longer, and can be used from a neutral jump. Despite the potential neutral uses, OD Zanku doesn't do much that the normal Zanku can't already do. Instead, it can uniquely be used as a jump callout in the corner. At tip 5LK range, a forward jump or neutral jump will catch most opponent jumpout attempts, including with buttons (such as Luke's j.MP or j.HP). You can then meterlessly combo into 4HK for extensions.
Gou Shoryuken (623P)
| Startup | Active | Recovery | Cancel | Damage | Guard | On Hit | On Block |
|---|---|---|---|---|---|---|---|
| 5 | 10 | 21+12 land | SA3 | 1100(800) | LH | KD +38 | -23 |
| Startup | Active | Recovery | Cancel | Damage | Guard | On Hit | On Block |
|---|---|---|---|---|---|---|---|
| 6 | 2,8 | 30+12 land | SA3 | 700,600 (1300) | LH | KD +32 | -30 |
| Startup | Active | Recovery | Cancel | Damage | Guard | On Hit | On Block |
|---|---|---|---|---|---|---|---|
| 7 | 2,3,6 | 35+15 land | SA3 | 600,500,400 (1500) | LH | KD +30 | -36(-39) |
| Startup | Active | Recovery | Cancel | Damage | Guard | On Hit | On Block |
|---|---|---|---|---|---|---|---|
| 6 | 2,2,7 | 37+15 land | - | 300x3,700 (1700) | LH | KD +14 | -39(-41) |
Tatsumaki Zanku-Kyaku (214K)
| Startup | Active | Recovery | Cancel | Damage | Guard | On Hit | On Block |
|---|---|---|---|---|---|---|---|
| 12 | 2 | 14+7(13) land | - | 600 | LH | KD +50 | -13 |
| Startup | Active | Recovery | Cancel | Damage | Guard | On Hit | On Block |
|---|---|---|---|---|---|---|---|
| 11 | 2(13)2 | 11+20 land | - | 500x2 (1000) | LH | KD +41(38) | -13(-28) |
| Startup | Active | Recovery | Cancel | Damage | Guard | On Hit | On Block |
|---|---|---|---|---|---|---|---|
| 7 | 3(6)3(9)3(18)3 | 21+14(20) land | - | 400,300x2,600 (1600) | LH | KD +34 | -59 |
| Startup | Active | Recovery | Cancel | Damage | Guard | On Hit | On Block |
|---|---|---|---|---|---|---|---|
| 13 | 2(4)2(4)2(3)2(4)2 | 7+19 land | - | 200x3,100,300 (1000) | LH | KD +47 | -17(-35) |
Light and Medium versions will whiff on crouching opponents. Start combos with 5HK or use 5MK or 2HP to force stand.
214LK can combo into 623HP for damage or 2HK for a safejump.
Ending corner combos with 214HK does slightly more damage than 623HP, and has a few more frames of knockdown advantage.
Both the grounded and air OD versions cause a ground bounce that can be followed up with Light, Medium, or OD Shoryuken.
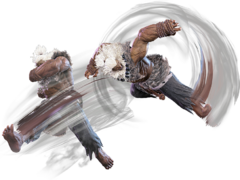
Aerial Tatsumaki Zanku-Kyaku (j.214K)
| Startup | Active | Recovery | Cancel | Damage | Guard | On Hit | On Block |
|---|---|---|---|---|---|---|---|
| 11 | 2(5)2(5)2 | 16 land | - | 900 | LH | KD +46(+52) | -2(+3) Front -6(-1) Back |
| Startup | Active | Recovery | Cancel | Damage | Guard | On Hit | On Block |
|---|---|---|---|---|---|---|---|
| 11 | 2(1)3(1)3(1)3(2)2 | 16 land | - | 200x4,500 (1300) | - | KD +40(+53) | - |
Can cross-up if performed from a jump over close to the ground.
Adamant Flame (214P)
| Startup | Active | Recovery | Cancel | Damage | Guard | On Hit | On Block |
|---|---|---|---|---|---|---|---|
| 15 | 3 | 23 | SA3 | 700 | LH | +1 | -8 |
| Startup | Active | Recovery | Cancel | Damage | Guard | On Hit | On Block |
|---|---|---|---|---|---|---|---|
| 19 | 3 | 20(23) | SA3 | 800 | LH | +2 | -4 |
| Startup | Active | Recovery | Cancel | Damage | Guard | On Hit | On Block |
|---|---|---|---|---|---|---|---|
| 23 | 3 | 19(21) | SA3 | 900 | LH | +3 | -2 |
| Startup | Active | Recovery | Cancel | Damage | Guard | On Hit | On Block |
|---|---|---|---|---|---|---|---|
| 18 | 3 | 23 | SA2 SA3 | 700 | LH | +1 | -3 |
Akuma leans back before delivering a powerful chest strike. Use for crouching conversions if you forgot to make the opponent stand, or in the corner for additional damage.
Shifts Akuma backwards during startup. Can be used to shimmy, but can't be point blank as you will get grabbed in startup. On PC, Medium and Heavy versions put you +10/+12 on first hit respectively, allowing you to link to your best extensions.
When used as a DP punish starter, Akuma can link it into whatever followup he wants. H Adamant Flame is Akuma's best starter for punishing OD DP's, while M Adamant Flame is useful for punishing wakeup Level 1 supers like Ryu's Shinku Hadouken or Luke's Vulcan Blast.
OD Adamant Flame is Akuma's metered combo extender in the corner, giving him a wallsplat with the followup or a cancel point into his Level 2. Notably, while the move looks incredibly unsafe, it's actually only -3, allowing Akuma to bait a reversal if he messes up a confirm. In burnout, Adamant Flame becomes plus, allowing Akuma to consistently loop it and deal excellent chip.
Adamant Flame Follow-Up (214P~6P)
| Startup | Active | Recovery | Cancel | Damage | Guard | On Hit | On Block |
|---|---|---|---|---|---|---|---|
| 7 | 4 | 18(22) | SA3 | 500 | LH | +3 | -10 |
| Startup | Active | Recovery | Cancel | Damage | Guard | On Hit | On Block |
|---|---|---|---|---|---|---|---|
| 7 | 4 | 32 | SA3 | 600 | LH | KD +32 | -18 |
| Startup | Active | Recovery | Cancel | Damage | Guard | On Hit | On Block |
|---|---|---|---|---|---|---|---|
| 11 | 4 | 28 | SA3 | 600 | LH | KD +47 | -14 |
| Startup | Active | Recovery | Cancel | Damage | Guard | On Hit | On Block |
|---|---|---|---|---|---|---|---|
| 7 | 4(4)3 | 25(31) | SA2 SA3 | 300,400 (240,320) | LH | HKD +45(+63) | -18 |
All version count as an additional hit for combo damage and scaling. So 5HPxx214P~6P is 100/100/80.
Light version leaves the opponent standing, useful for Raging Demon combos. Sets up a perfect strike/throw opportunity as well.
Medium version lets you knockdown when you can't force stand on an opponent.
Heavy version will lead to a 623HP or 214HK follow up in the corner. It count as 3 hit for scaling purposes (So 5HPxx214P~6P,623HP is 100/100/80/50). At midscreen, this version can lead into an okizeme situation with 236HK~2 chase that leaves Akuma +2 and in grab range.
OD version wallsplats and is an important combo tool to maximize corner damage. If used as a combo starter, it counts for two hit for scaling purposes (so the next hits will be at 80/70/60 scaling etc). If used mid-combo, it doesn't. OD followup also has incredible corner carry- if used before a launch, it can wallsplat from slightly further than midscreen. Akuma can follow this up with a Drive Rush 5HK or 5P to extend the combo further, both of which can lead into any tatsu or DP for an ender.
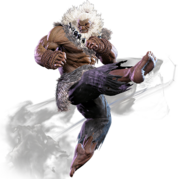
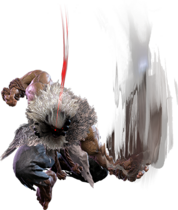
Demon Raid (236K)
| Startup | Active | Recovery | Cancel | Damage | Guard | On Hit | On Block |
|---|---|---|---|---|---|---|---|
| 18~40 | - | - | - | - | - | - | - |
| Startup | Active | Recovery | Cancel | Damage | Guard | On Hit | On Block |
|---|---|---|---|---|---|---|---|
| 16~40 | - | - | - | - | - | - | - |
- Earliest actionable followup: 33f
- Latest actionable followup: 55f
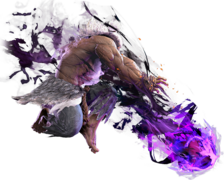
Akuma's signature "demon flip". A command jump that leaves Akuma airborne and has four possible followups: an overhead, a divekick, a sweep, and a feint.
Each button strength changes Akuma's approach angle. LK leaves him at one character length away, MK puts him about halfscreen, and HK sends him fullscreen. Akuma is airbone for at minimum 33f before he can commit to a followup, making this a much faster jump than the standard 45f. That said, Akuma can still be anti-aired on reaction, as any DP will cut through his followups.
When Akuma uses Demon Raid, he puts the opponent in an RPS. Either they can hold Drive Parry to defuse the incoming three-way mixup, or Akuma can land and PC Throw them. Each followup can leave Akuma plus, making this a fairly skewed situation in his favor. As Akuma can cancel into this special from any special-cancellable button, he can blitz his opponents quite quickly.
OD Demon Raid causes Akuma to track to the opponent's location at the same speed, making it an effective tool for calling out fullscreen zoning. As well, he gains two additional followups: Demon Gou Zankou and Demon Gou Rasen, both of which can call out opponent's attempts to anti-air Demon Raid. The former even gives Akuma a combo on hit, making it very effective.
Demon Low Slash (236K~No Input)
| Startup | Active | Recovery | Cancel | Damage | Guard | On Hit | On Block |
|---|---|---|---|---|---|---|---|
| 53 | 4 | 15(19) | - | 1000 | L | HKD +39(+42) | +2(+5) |
| Startup | Active | Recovery | Cancel | Damage | Guard | On Hit | On Block |
|---|---|---|---|---|---|---|---|
| 53 | 4 | 15(19) | - | 1000 | L | HKD +39 | +2 |
Demon Guillotine (236K~P)
| Startup | Active | Recovery | Cancel | Damage | Guard | On Hit | On Block |
|---|---|---|---|---|---|---|---|
| 18+16 | until land | 9 land | - | 1300 | H | KD +37(+41) | +3(+7) |
| Startup | Active | Recovery | Cancel | Damage | Guard | On Hit | On Block |
|---|---|---|---|---|---|---|---|
| 16+16 | until land | 9 land | - | 1300 | H | KD +37(+41) | +3(+7) |
Demon Blade Kick (236K~K)
| Startup | Active | Recovery | Cancel | Damage | Guard | On Hit | On Block |
|---|---|---|---|---|---|---|---|
| 18+13 | until land | 9(14) land | - | 700 | LH | 0(+10) | -5(+5) |
| Startup | Active | Recovery | Cancel | Damage | Guard | On Hit | On Block |
|---|---|---|---|---|---|---|---|
| 16+13 | until land | 9(14) land | - | 700 | LH | 0(+10) | -5(+5) |
Demon Swoop (236K~[2])
| Startup | Active | Recovery | Cancel | Damage | Guard | On Hit | On Block |
|---|---|---|---|---|---|---|---|
| 40 | - | 2+3(8) land | - | - | - | - | - |
| Startup | Active | Recovery | Cancel | Damage | Guard | On Hit | On Block |
|---|---|---|---|---|---|---|---|
| 40 | - | 2+3(8) land | - | - | - | - | - |
Demon Gou Zanku (236KK~j.236P)
| Startup | Active | Recovery | Cancel | Damage | Guard | On Hit | On Block |
|---|---|---|---|---|---|---|---|
| 16+6(21) | - | 9(2) land | - | 300x3 (900) | LH | KD~ (varies) | -3~ (varies) |
Demon Gou Rasen (236KK~j.214K)
| Startup | Active | Recovery | Cancel | Damage | Guard | On Hit | On Block |
|---|---|---|---|---|---|---|---|
| 16+5 | 2(2)3(2)3(1)3(1)2 | 10 land | - | 200x4,500 (1300) | - | KD +46(+53) | - |
Ashura Senku (6KKK or 4KKK)
| Startup | Active | Recovery | Cancel | Damage | Guard | On Hit | On Block |
|---|---|---|---|---|---|---|---|
| (23~) | - | 51 | Sp* | - | - | - | - |
| Startup | Active | Recovery | Cancel | Damage | Guard | On Hit | On Block |
|---|---|---|---|---|---|---|---|
| - | - | 49 total | - | - | - | - | - |
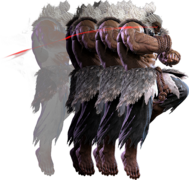
Akuma's classic "teleport" returns, but with no invincibility. Akuma quickly travels forwards or backwards and will pass through opponents during traversal.
Can be used as a situational movement option, such as after a midscreen 214PP~6P to quickly reach the corner. The pass through can sometimes cause an opponent's attack to whiff on the side Akuma was traveling from, possibly creating a punish opportunity.
Oboro Throw (6KKK~LPLK)
| Startup | Active | Recovery | Cancel | Damage | Guard | On Hit | On Block |
|---|---|---|---|---|---|---|---|
| (23~37)+8 | 3 | 50 | - | 2200 (2900) | T | HKD +20 | - |
A tricky but slow and short ranged command grab from Ashura Senku.
Can sometimes be effective at calling out opponents using Drive Parry after conditioning with fireball spam. Or as a tricky meaty option from high frame advantage knockdowns such as 623HP or 214HK in the corner, where the animation for Ashura Senku is not as obvious.
Super Arts
Level 1 Super (236236P)
| Startup | Active | Recovery | Cancel | Damage | Guard | On Hit | On Block |
|---|---|---|---|---|---|---|---|
| 10 | - | 96 | - | 400x4,600 (2200) | LH | KD +9 | -41 |
Level 1 Super (j.236236K)
| Startup | Active | Recovery | Cancel | Damage | Guard | On Hit | On Block |
|---|---|---|---|---|---|---|---|
| 14 | - | 23(33) land | - | 400x5 (2000) | LH | KD +49~ | -28~ |
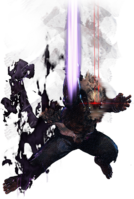
Level 2 Super (214214P)
| Startup | Active | Recovery | Cancel | Damage | Guard | On Hit | On Block |
|---|---|---|---|---|---|---|---|
| 9 | 3 | 52 | - | 2800 | LH | HKD +29 (HKD +97 Wallsplat) | -35 |
Level 3 Super (236236K)
| Startup | Active | Recovery | Cancel | Damage | Guard | On Hit | On Block |
|---|---|---|---|---|---|---|---|
| 8(2) | 4 | 58 | - | 4000 | LH | HKD +18 | -41 |
| Startup | Active | Recovery | Cancel | Damage | Guard | On Hit | On Block |
|---|---|---|---|---|---|---|---|
| 8(2) | 4 | 58 | - | 4500 | LH | HKD +18 | -41 |
- 2 frame startup when cancelled into from Gou Shoryuken and Adamant Flame
Shun Goku Satsu (LP~LP~6LK~HP)
| Startup | Active | Recovery | Cancel | Damage | Guard | On Hit | On Block |
|---|---|---|---|---|---|---|---|
| 6+0 | 21 | 57 | - | 4700 | T | HKD + 18 | - |
- 0f after the super flash, can be comboed into
- Can be hit out of startup after meter is spent. Projectile invincible
- Only available in CA state (sub 30% HP)
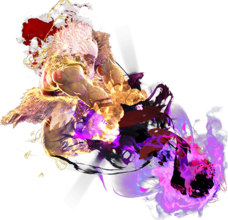
Akuma's secret weapon, the iconic Raging Demon. A 0f after the superflash at minimum range, comboable, travelling, high damage command grab. Does a preposterous 4700 damage on raw hit. If it will KO, Akuma will recite a poem during the attack: "Usurp the heavens, embrace the sorrow, become the demon!"
Shun Goku Satsu can only be used when Akuma is in CA state, making it a last resort. It immediately makes him threatening even if he's on the back foot, but the move cannot be used as a reversal thanks to the odd input. As well, opponents can jump the super upon seeing the cinematic animation that signals it, making in unwise to use in the midrange. Instead, cancelling into it from a Drive Rush or on hit is key to using it.
The move is also projectile invincible, allowing Akuma to zoot through projectiles and punish their use. Again, this is unwise outside of being a direct callout.
Taunts
Neutral Taunt (5PPPKKK)
| Startup | Active | Recovery | Cancel | Damage | Guard | On Hit | On Block |
|---|---|---|---|---|---|---|---|
| 433 (total) | - | - | - | - | - | - | - |
Forward Taunt (6PPPKKK)
| Startup | Active | Recovery | Cancel | Damage | Guard | On Hit | On Block |
|---|---|---|---|---|---|---|---|
| 570(514) (total) | - | - | - | - | - | - | - |
- Triggers proximity guard on frames ?-? (prevents opponent from walking back)
- Special dialogue if opponent jumps over Akuma
Back Taunt (4PPPKKK)
"I'm satiated." HIDDEN ARTS UNLOCKED
| Startup | Active | Recovery | Cancel | Damage | Guard | On Hit | On Block |
|---|---|---|---|---|---|---|---|
| 765 (total) | - | - | - | - | - | - | - |
- Inputting 2PPPKKK while he turns his head back will trigger a unique extended taunt, once completed Akuma will gain access to two Hidden Super Arts and one Hidden Special Move.
Down Taunt (2PPPKKK)
| Startup | Active | Recovery | Cancel | Damage | Guard | On Hit | On Block |
|---|---|---|---|---|---|---|---|
| 123 (total) | - | - | - | - | - | - | - |
Hidden Arts
Double Zanku Hadoken (j.214PP)
| Startup | Active | Recovery | Cancel | Damage | Guard | On Hit | On Block |
|---|---|---|---|---|---|---|---|
| 8(21) | - | 9(2) land | - | 600x2 | LH | varies | varies |
- Only accessible after performing secret taunt input.
- Can only be performed from a forward jump.
Level 2 Super (214214K)
| Startup | Active | Recovery | Cancel | Damage | Guard | On Hit | On Block |
|---|---|---|---|---|---|---|---|
| 5(9~10) | 7 | 88(85) | - | 2900 | LH | KD +25(26) | -58(-57) |
- Only accessible after performing secret taunt input.
- Costs 2 bars to perform.
Level 2 Super (22PPP)
| Startup | Active | Recovery | Cancel | Damage | Guard | On Hit | On Block |
|---|---|---|---|---|---|---|---|
| 8 | 30 | 41 | - | 330x8,360 (3000) | LH | KD +38 | -39 |
- Only accessible after performing secret taunt input.
- Costs 2 bars to perform.


