Introduction
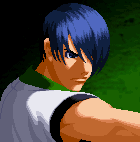
Kim Jae Hoon is the younger brother of Kim Dong Hwan, both of them together are the sons of Taekwondo Master, Kim Kaphwan. Unlike his older brother, Kim Jae Hoon is much more serious with Taekwondo and believes firmly in his fathers ideals of justice. Jae Hoon uses many of the same techniques his father before him used, such has the Hangetsu Zan and Hou'ou Kyaku, with a bit of an original spin of his own, adding his element of fire to his attacks to amplify the power behind his blows.
Jae Hoon enters the Maximum Mayhem tournament with his older brother Dong Hwan after their father, whom was visiting the newly re-built Second South, was attacked by an very strong oppenent and was injured. Jae Hoon swears to avenge his fathers defeat, and so, dragging Dong Hwan with him, the two compete in the Maximum Mayhem tournament with hope that one of them will be able to face the monster that defeated their father.
| Pros | Cons |
|---|---|
|
|
Character Colors
Move List
Frame Data Source : http://www13.atwiki.jp/garoumow/pages/82.html and Howard's Arena
| Data Help | |
|---|---|
| Disclaimer: This is meant to teach basic terminology used when describing moves. | |
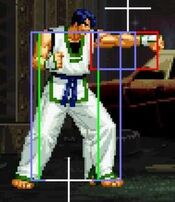
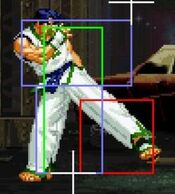
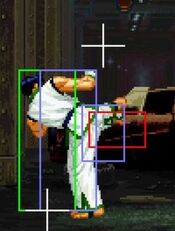
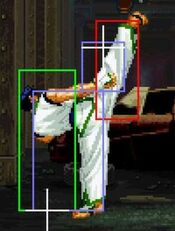
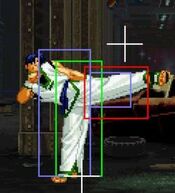
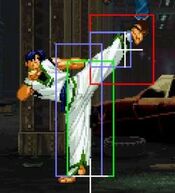
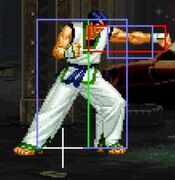
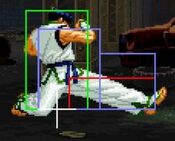
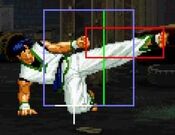
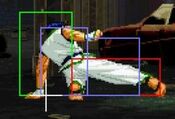
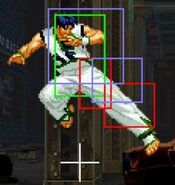
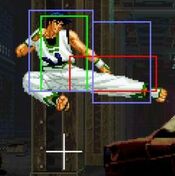
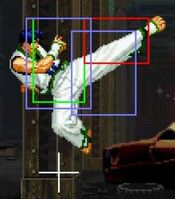
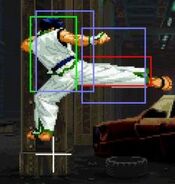
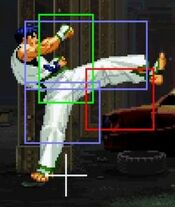
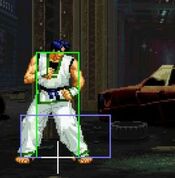
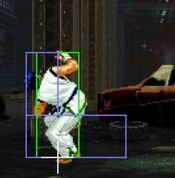
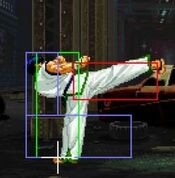
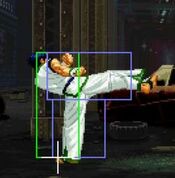
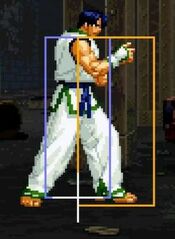
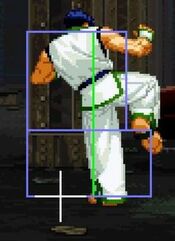
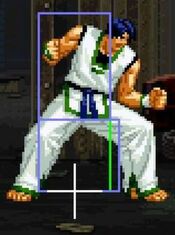
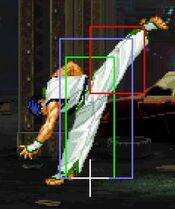
| Hitbox: | A predefined area (usually a rectangle or rectangles) that tells the game how any given attack can come in contact with a character. Hitboxes are invisible to the player when normally playing. |
| Hurtbox: | A predefined area (usually a group of rectangles) that tell the game how your character is allowed to get hit by any incoming attack. Specifically, you'll get hit by (or block) an attack if that attack's hitbox ever overlaps your hurtbox. |
| Throw Box/Range: | Active throw frames and range. Your opponent will be thrown in this field if not in block or hit stun. |
| Projectile Box: | Hitbox on a projectile attack. |
| Guard/Counter Box: | The Guard Box or Counter Box. This appears when blocking or using a counter move. |
| Push Box: | Has no bearing on hit/hurt boxes. Just prevents characters to not pass through each other. (Also known as "Collision Box".) |
| Startup | The number of frames before an attack can hit the opponent. Does not include the first active frame. |
| Guard | The way this move must be blocked.
High or H or Overhead (especially when from the ground) -- must be blocked standing. |
| Damage | "Basic" damage -- Unmodified damage values
"Correct" damage -- Damage values accounting for damage scaling, TOP multiplier, and defense rate |
| Guard Crush Value | Decreases the defender's guard durability gauge by this value. |
| +X | Attacker has X number of advantage frames. |
| -X | Attacker has X number of disadvantage frames. |
| KD | Short for "knockdown", knocks down opponent on hit. |
| ◯ | Cancelable on both hit and block. |
| ∞ | Chain cancelable with the same button (renda cancel). |
| ※ | Cancelable on the first hit/part only. |
| 《X》OR «X» OR <<X>> OR (X) | X number of inactive frames between hits of multihit moves. |
| △ | Only cancelable on block. |
| ▽ | Only cancelable on hit. |
| × OR X | Not cancelable. |
Close Standing Normals
| Damage | Guard | Startup | Active | Recovery | Total |
|---|---|---|---|---|---|
| - | - | 3 | 4 | - | - |
| Hit Adv | Block Adv | Cancel on Hit | Cancel on Block | Guard Crush Value | |
| +6 | +6 | Yes/chainable | Yes/chainable | 4 | |
|
Pretty much the same as far A, but in proximity form - which means its great, and a primary tool for pressure, combos and poking | |||||
| Damage | Guard | Startup | Active | Recovery | Total |
|---|---|---|---|---|---|
| - | - | 4 | - | - | - |
| Hit Adv | Block Adv | Cancel on Hit | Cancel on Block | Guard Crush Value | |
| +4 | +4 | Yes | Yes | - | |
|
outdone by cl.a in most situation, but in the corner you could link into standing A and get a combo after | |||||
| Damage | Guard | Startup | Active | Recovery | Total |
|---|---|---|---|---|---|
| - | - | 5 | - | - | - |
| Hit Adv | Block Adv | Cancel on Hit | Cancel on Block | Guard Crush Value | |
| -5 | -5 | Yes (1st hit) | Yes (1st hit) | - | |
|
Solid move for pressure after FCing it, mostly in the corner | |||||
| Damage | Guard | Startup | Active | Recovery | Total |
|---|---|---|---|---|---|
| - | - | 4 | 1 (3) 5 | - | - |
| Hit Adv | Block Adv | Cancel on Hit | Cancel on Block | Guard Crush Value | |
| -6 | -6 | Yes (1st hit) | Yes (1st hit) | - | |
|
You can insert the first hit in some punish combos, its best used is in his corner infinite using its big advantage on FC. Cant be JDed crouching. | |||||
Far Standing Normals
| Damage | Guard | Startup | Active | Recovery | Total |
|---|---|---|---|---|---|
| - | - | 3 | 4 | - | - |
| Hit Adv | Block Adv | Cancel on Hit | Cancel on Block | Guard Crush Value | |
| +6 | +6 | Yes | Yes | 4 | |
|
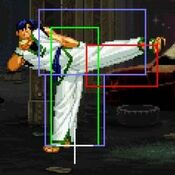
Very big hitbox for a jab, amazing speed and advantage on block, its good for pressure and basic antiairing/jabbing. Used a lot for safe poking and pressure - its so plus on block you can microwalk in the corner after hitting this move and still link a second one as a true combo. | |||||
| Damage | Guard | Startup | Active | Recovery | Total |
|---|---|---|---|---|---|
| - | - | 4 | 3 | - | - |
| Hit Adv | Block Adv | Cancel on Hit | Cancel on Block | Guard Crush Value | |
| 0 | 0 | Yes | Yes | 4 | |
|
An okay poke at far range | |||||
| Damage | Guard | Startup | Active | Recovery | Total |
|---|---|---|---|---|---|
| - | - | 12 | - | - | - |
| Hit Adv | Block Adv | Cancel on Hit | Cancel on Block | Guard Crush Value | |
| -10 | -10 | No | Yes | - | |
|
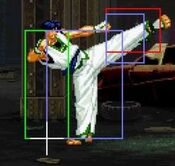
Too slow to be a reliable anti air, despite the hitbox. don't use this move | |||||
| Damage | Guard | Startup | Active | Recovery | Total |
|---|---|---|---|---|---|
| - | - | 13 | - | - | - |
| Hit Adv | Block Adv | Cancel on Hit | Cancel on Block | Guard Crush Value | |
| -3 | -3 | No | No | - | |
|
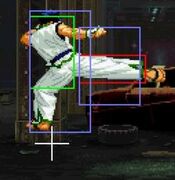
Will go over low pokes but its not rewarding and very slow | |||||
Crouching Normals
| Damage | Guard | Startup | Active | Recovery | Total |
|---|---|---|---|---|---|
| - | - | 5 | 4 | - | - |
| Hit Adv | Block Adv | Cancel on Hit | Cancel on Block | Guard Crush Value | |
| +3 | +3 | No | No | - | |
|
Would be so good if you could cancel. you can chain 3 of these midscreen and it's plus on block. thanks to its plus frames and how fast your kick super is, though, you can still potentially link it afterwards for a combo. Even without the cancel its just generally a crazy poke that stacks up damage over time. | |||||
| Damage | Guard | Startup | Active | Recovery | Total |
|---|---|---|---|---|---|
| - | - | 4 | - | - | - |
| Hit Adv | Block Adv | Cancel on Hit | Cancel on Block | Guard Crush Value | |
| +6 | +6 | Yes | Yes | - | |
|
The core of your pressure, poking and many combos. Low, fast, self chains and links into many normals including 2c, 5a and 5b | |||||
| Damage | Guard | Startup | Active | Recovery | Total |
|---|---|---|---|---|---|
| - | - | 5 | - | - | - |
| Hit Adv | Block Adv | Cancel on Hit | Cancel on Block | Guard Crush Value | |
| +1 | +1 | Yes | Yes | - | |
|
Great normal, as its fast, damaging, plus on block, and has decent range. used in many combos, poking, pressure (very plus if FCed), etc. | |||||
| Damage | Guard | Startup | Active | Recovery | Total |
|---|---|---|---|---|---|
| - | - | 7 | - | - | - |
| Hit Adv | Block Adv | Cancel on Hit | Cancel on Block | Guard Crush Value | |
| KD | -8 | No | No | - | |
|
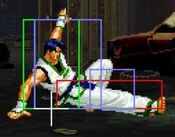
Typical sweep, which means it aint that good. heavy knockdown is nice and the range is nice but its quite unsafe on block with no cancel options | |||||
Jumping Normals
| Damage | Guard | Startup | Active | Recovery | Total |
|---|---|---|---|---|---|
| - | - | 6 | 5 | - | - |
| Hit Adv | Block Adv | Cancel on Hit | Cancel on Block | Guard Crush Value | |
| - | - | Yes | Yes | - | |
|
Probably your best jump in due to its good active frames, great speed and hitbox. the hitstun aint that long so its hard to get significany advantage after, the key is to hit it right before landing. Also your only crossup. | |||||
| Damage | Guard | Startup | Active | Recovery | Total |
|---|---|---|---|---|---|
| - | - | 6 | 8 | - | - |
| Hit Adv | Block Adv | Cancel on Hit | Cancel on Block | Guard Crush Value | |
| - | - | Yes | Yes | - | |
|
An alternative option, has a worse hitbox for jumping ins but instead is very active and reaches further. also a great air to air potentially, and is also a crossup option, albeit a harder one | |||||
| Damage | Guard | Startup | Active | Recovery | Total |
|---|---|---|---|---|---|
| - | - | - | 6 | 6 | - |
| Hit Adv | Block Adv | Cancel on Hit | Cancel on Block | Guard Crush Value | |
| - | - | Yes | Yes | - | |
|
Hits above Jae moon. Weird normal overall, don't use it much | |||||
| Damage | Guard | Startup | Active | Recovery | Total |
|---|---|---|---|---|---|
| - | - | 8 | 6 | - | - |
| Hit Adv | Block Adv | Cancel on Hit | Cancel on Block | Guard Crush Value | |
| - | - | Yes | Yes | - | |
|
Your best heavy jump in and with massive range and an exceptional air poke. Hopped j.d compliments his ground low pokes really well | |||||
Command Normals
| Damage | Guard | Startup | Active | Recovery | Total |
|---|---|---|---|---|---|
| - | - | 25 | - | - | - |
| Hit Adv | Block Adv | Cancel on Hit | Cancel on Block | Guard Crush Value | |
| -1 | +5 | No | No | - |
| Damage | Guard | Startup | Active | Recovery | Total |
|---|---|---|---|---|---|
| - | - | 11 | - | - | - |
| Hit Adv | Block Adv | Cancel on Hit | Cancel on Block | Guard Crush Value | |
| -3 | -3 | Yes | No | - | |
|
Decent range and its cancelable, along with its excellent hitbox. Decent fot occassional poking snd you get a combo with ease. | |||||
| Damage | Guard | Startup | Active | Recovery | Total |
|---|---|---|---|---|---|
| - | - | 30 | - | - | - |
| Hit Adv | Block Adv | Cancel on Hit | Cancel on Block | Guard Crush Value | |
| KD | -1 | KD | -1 | 25 | |
|
Very slow overhead, but nearly instant recovery. However it doesnt hit overhead if cancelled into and might not knockdown zt further ranges. Bad | |||||
Shou-kyaku Hou (Phoenix Cannon): Press B during Back-step
Throws
| Damage | Guard | Startup | Active | Recovery | Total |
|---|---|---|---|---|---|
| - | - | - | - | - | - |
| Hit Adv | Block Adv | Cancel on Hit | Cancel on Block | Guard Crush Value | |
| - | - | - | - | - | |
|
Basic throw damage, but the sdvantage and distance let Jae Moon set solid left right mixups midscreen with jump a (microwalk slightly more to get a crossup), and very ambiguous ones in the corner (microwalk j.a will crossup, microwalk j.b wont). | |||||
Feint Cancels
| Damage | Guard | Startup | Active | Recovery | Total |
|---|---|---|---|---|---|
| - | - | - | - | - | - |
| Hit Adv | Block Adv | Cancel on Hit | Cancel on Block | Guard Crush Value | |
| - | - | - | - | - |
| Damage | Guard | Startup | Active | Recovery | Total |
|---|---|---|---|---|---|
| - | - | - | - | - | - |
| Hit Adv | Block Adv | Cancel on Hit | Cancel on Block | Guard Crush Value | |
| - | - | - | - | - |
Special Moves
| Damage | Guard | Startup | Active | Recovery | Total |
|---|---|---|---|---|---|
| - | - | 45 | - | - | - |
| Hit Adv | Block Adv | Cancel on Hit | Cancel on Block | Guard Crush Value | |
| KD | -9 | Yes | Yes | - | |
|
Weird move - you backdash, then lunge forward with a launching kick. rewarding on hit and the backdash might let you dodge some shit but its too slow, stubby and unsafe to be useful | |||||
Super Moves
Combos
Anywhere
Basic hitconfirms
cr.![]() , cr.
, cr.![]() ,
, ![]() +
+ ![]() 35 damage
35 damage
cl.![]() , cr.
, cr.![]() ,
, ![]() +
+ ![]() 33 damage
33 damage
cl.![]() 6ac, cr.
6ac, cr.![]()
![]() +
+ ![]() 40 damage
40 damage
j.![]() , cr.
, cr.![]()
![]() +
+ ![]() 45 damage
45 damage
Super hitconfirms
cr.![]() , cr.
, cr.![]()
![]() ,
, ![]() +
+ ![]() /
/![]() 51/67 damage
51/67 damage
cl![]() , cr.
, cr.![]()
![]() ,
, ![]() +
+ ![]() /
/![]() 49/65 damage
49/65 damage
cl.![]() , s.
, s.![]() ,
, ![]() ,
, ![]() +
+ ![]() /
/![]() 44/59 damage
44/59 damage
(Note this can be done as a link)
cr.![]() , c
, c![]() ,
, ![]() ,
, ![]() +
+ ![]() /
/![]() 51/66 damage
51/66 damage
(Note is much more easily done as a link)
cr.![]() ,
, ![]() ,
, ![]() +
+ ![]() ,
, ![]() ,
, ![]() +
+ ![]() 71~ damage
71~ damage
(need to be close for punch super to hit).
Corner only
s![]() , c
, c![]() , c
, c![]() ,
, ![]() +
+ ![]() 35 damage
35 damage
s![]() , c
, c![]() , c
, c![]() ,
, ![]() +
+ ![]() 32 damage
32 damage
s![]() , c
, c![]() , c
, c![]() ,
, ![]() +
+ ![]() 30 damage
30 damage
s![]() , c
, c![]() , c
, c![]() ,
, ![]() ,
, ![]() +
+ ![]() 53 damage
53 damage
s![]() , c
, c![]() , c
, c![]() ,
, ![]() ,
, ![]() +
+ ![]() 68 damage
68 damage
c![]() , c
, c![]() , c
, c![]() , c
, c![]() ,
, ![]() ,
, ![]() +
+ ![]() 55 damage
55 damage
c![]() , c
, c![]() , c
, c![]() , c
, c![]() ,
, ![]() ,
, ![]() +
+ ![]() 70 damage
70 damage
j![]() ,
, ![]() , j
, j![]() , d
, d![]() +
+ ![]() ,
, ![]() +
+ ![]() 39 damage
39 damage
c![]() , charge
, charge![]() ,
,![]() +
+ ![]() (1 hit),
(1 hit), ![]()
![]() ,
, ![]() ,
, ![]() +
+ ![]() ,
, ![]() ,
, ![]() +
+ ![]() 80 damage
80 damage
T.O.P. Notes
Jae Hoon performs a Neri Chagi (Axe Kick), it has a slow start up, but it has a near-instant recovery time after the kick is dealt, and it's an overhead.
Basic Strategy
Kim Jae Hoon plays a bit similiar to his father Kim Kaphwan in Real Bout Fatal Fury 2 in that he is mostly a close/mid range fighter and puts up an exceptional offense, and plays a fairly decent counter attack game. Jae Hoon can greatly punish his opponents when they leave themselves undefended, or throw themselves akwardly into an attack towards Jae Hoon, not to mention he has some exceptional mix up with his attacks.
His great array of normals help Jae feel comfortable in most situations. He has a great variety of pokes, many of which can convert into good damage with ease - 2b, 2c, j.d and 5a are the most exceptional, with other great options ike 2a, j.b and 5b seeing occassional use. In pressure, he has his variety of fast and plus on block light normals, along with his cl.c, cl.d and 2c which can be Feint Cancelled to gain significant advantage, making them essential for combos and pressure.
Jae Moon is greatly enabled in the corner, being able to tick throw more appropriately, getting more ambogious left/right mixups after throw, and getting longer combos due to more link options - he even gets an infinite! (cl.d 6ac microdash cl.d...)
However, Jae Moon's biggest weakness are his bad set of specials - aside from 236d thats used to end combos and [2]8b/d which are his breakable DPs, his specials are all pretty bad. This in turn makes his meter gain quite slow, especially considering his tool of choice to farm meter, [2]8b-br, is still quite slow and risky. This meter issue is significant due to how much his kick super compliments his gameplan.
His execution fundamentally is super, so Jae is easy to pikc up, but he has a high skill ceiling with heavy feint cancel combos in the corner and using kara cancels to chain lights in supers. While not nessecary at first, these are very rewarding techniques to land to play the character to his fullest potential.
With enough practice, patience, and dedication, Jae Hoon can be a fairly strong and effective character againest almost any opponent.
Advanced Tactics
In-depth video lecture on Jae Hoon. Please use the timestamps to navigate the topics. It does in-depth about the utility of all of Jae's specials and normals as well as many techniques such as his combos, kara cancelling and his gameplan
Matchup Notes
To come.
