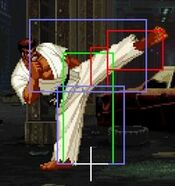
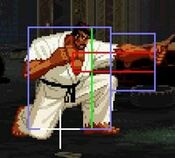
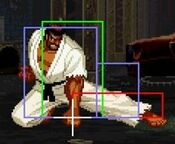
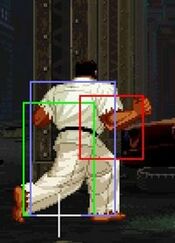
Introduction
To come.
Pros
Cons
Character Colors
Gameplay Overview
Kushnood has many tools at his disposal to answer anything an opponent might do. With a 0 frame anti-air super, the fastest projectiles in the game, special moves that all knock down and quickly pressure into a corner, and a special move that does super level punishment damage, he has a lot going for him.
Kushnood's main drawback is his randomness. Brake'ing his dragon punch can be unreliable outside of certain combos because the window to brake changes based on when the move connects, and may connect and not juggle the opponent up. Played with precision, this can be avoided.
Bait a mistake, knock 'em down, then get in close and keep the pressure on.
FrameData from Howard's Arena
Move List
| Data Help | |
|---|---|
| Disclaimer: This is meant to teach basic terminology used when describing moves. | |
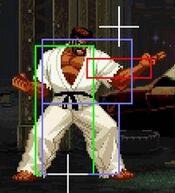
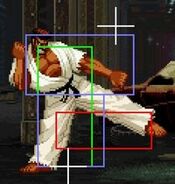
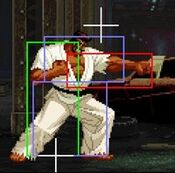
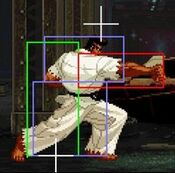
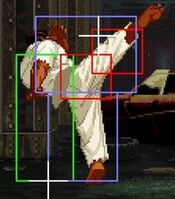
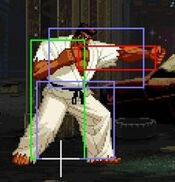
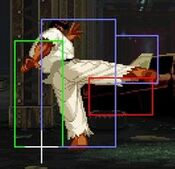
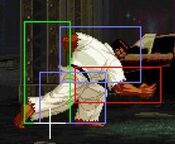
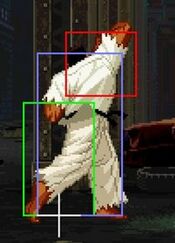
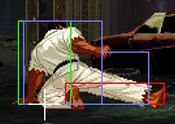
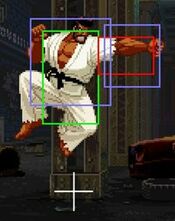
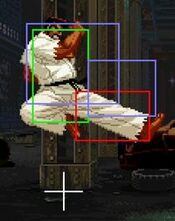
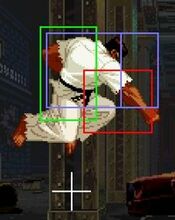
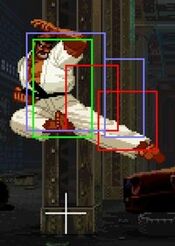
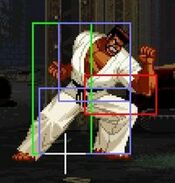
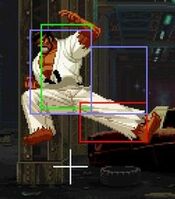
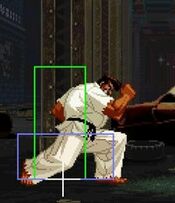
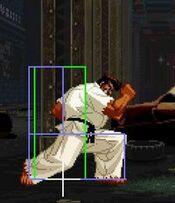
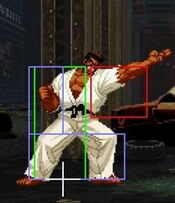
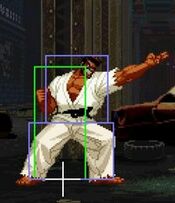
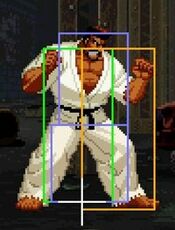
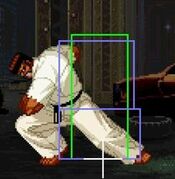
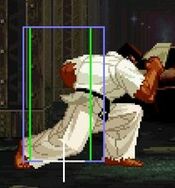
| Hitbox: | A predefined area (usually a rectangle or rectangles) that tells the game how any given attack can come in contact with a character. Hitboxes are invisible to the player when normally playing. |
| Hurtbox: | A predefined area (usually a group of rectangles) that tell the game how your character is allowed to get hit by any incoming attack. Specifically, you'll get hit by (or block) an attack if that attack's hitbox ever overlaps your hurtbox. |
| Throw Box/Range: | Active throw frames and range. Your opponent will be thrown in this field if not in block or hit stun. |
| Projectile Box: | Hitbox on a projectile attack. |
| Guard/Counter Box: | The Guard Box or Counter Box. This appears when blocking or using a counter move. |
| Push Box: | Has no bearing on hit/hurt boxes. Just prevents characters to not pass through each other. (Also known as "Collision Box".) |
| Startup | The number of frames before an attack can hit the opponent. Does not include the first active frame. |
| Guard | The way this move must be blocked.
High or H or Overhead (especially when from the ground) -- must be blocked standing. |
| Damage | "Basic" damage -- Unmodified damage values
"Correct" damage -- Damage values accounting for damage scaling, TOP multiplier, and defense rate |
| Guard Crush Value | Decreases the defender's guard durability gauge by this value. |
| +X | Attacker has X number of advantage frames. |
| -X | Attacker has X number of disadvantage frames. |
| KD | Short for "knockdown", knocks down opponent on hit. |
| ◯ | Cancelable on both hit and block. |
| ∞ | Chain cancelable with the same button (renda cancel). |
| ※ | Cancelable on the first hit/part only. |
| 《X》OR «X» OR <<X>> OR (X) | X number of inactive frames between hits of multihit moves. |
| △ | Only cancelable on block. |
| ▽ | Only cancelable on hit. |
| × OR X | Not cancelable. |
Close Standing Normals
| Damage | Guard | Startup | Active | Recovery | Total |
|---|---|---|---|---|---|
| - | - | 4 | - | - | - |
| Hit Adv | Block Adv | Cancel on Hit | Cancel on Block | Guard Crush Value | |
| +4 | +4 | No | Yes | - |
| Damage | Guard | Startup | Active | Recovery | Total |
|---|---|---|---|---|---|
| - | - | 7 | - | - | - |
| Hit Adv | Block Adv | Cancel on Hit | Cancel on Block | Guard Crush Value | |
| -4 | -4 | Yes | Yes | - |
| Damage | Guard | Startup | Active | Recovery | Total |
|---|---|---|---|---|---|
| - | - | 5 | - | - | - |
| Hit Adv | Block Adv | Cancel on Hit | Cancel on Block | Guard Crush Value | |
| -9 | -9 | Yes | No | - |
Far Standing Normals
| Damage | Guard | Startup | Active | Recovery | Total |
|---|---|---|---|---|---|
| - | - | 3 | - | - | - |
| Hit Adv | Block Adv | Cancel on Hit | Cancel on Block | Guard Crush Value | |
| +4 | +4 | No | Yes | - |
| Damage | Guard | Startup | Active | Recovery | Total |
|---|---|---|---|---|---|
| - | - | 5 | - | - | - |
| Hit Adv | Block Adv | Cancel on Hit | Cancel on Block | Guard Crush Value | |
| -4 | -4 | No | Yes | - |
| Damage | Guard | Startup | Active | Recovery | Total |
|---|---|---|---|---|---|
| - | - | 11 | - | - | - |
| Hit Adv | Block Adv | Cancel on Hit | Cancel on Block | Guard Crush Value | |
| -5 | -5 | No | No | - |
| Damage | Guard | Startup | Active | Recovery | Total |
|---|---|---|---|---|---|
| - | - | 11 | - | - | - |
| Hit Adv | Block Adv | Cancel on Hit | Cancel on Block | Guard Crush Value | |
| -7 | -7 | No | Yes | - |
Crouching Normals
| Damage | Guard | Startup | Active | Recovery | Total |
|---|---|---|---|---|---|
| - | - | 4 | - | - | - |
| Hit Adv | Block Adv | Cancel on Hit | Cancel on Block | Guard Crush Value | |
| +6 | +6 | No | No | - |
| Damage | Guard | Startup | Active | Recovery | Total |
|---|---|---|---|---|---|
| - | - | 4 | - | - | - |
| Hit Adv | Block Adv | Cancel on Hit | Cancel on Block | Guard Crush Value | |
| +5 | +5 | No | No | - |
| Damage | Guard | Startup | Active | Recovery | Total |
|---|---|---|---|---|---|
| - | - | 5 | - | - | - |
| Hit Adv | Block Adv | Cancel on Hit | Cancel on Block | Guard Crush Value | |
| -5 | -5 | Yes | Yes | - |
| Damage | Guard | Startup | Active | Recovery | Total |
|---|---|---|---|---|---|
| - | - | 8 | - | - | - |
| Hit Adv | Block Adv | Cancel on Hit | Cancel on Block | Guard Crush Value | |
| KD | -5 | No | No | - |
Jumping Normals
| Damage | Guard | Startup | Active | Recovery | Total |
|---|---|---|---|---|---|
| - | - | 5 | - | - | - |
| Hit Adv | Block Adv | Cancel on Hit | Cancel on Block | Guard Crush Value | |
| - | - | - | - | - |
| Damage | Guard | Startup | Active | Recovery | Total |
|---|---|---|---|---|---|
| - | - | 9 | - | - | - |
| Hit Adv | Block Adv | Cancel on Hit | Cancel on Block | Guard Crush Value | |
| - | - | - | - | - |
| Damage | Guard | Startup | Active | Recovery | Total |
|---|---|---|---|---|---|
| - | - | 12 | - | - | - |
| Hit Adv | Block Adv | Cancel on Hit | Cancel on Block | Guard Crush Value | |
| - | - | - | - | - |
| Damage | Guard | Startup | Active | Recovery | Total |
|---|---|---|---|---|---|
| - | - | 9 | - | - | - |
| Hit Adv | Block Adv | Cancel on Hit | Cancel on Block | Guard Crush Value | |
| - | - | - | - | - |
Command Normals
| Damage | Guard | Startup | Active | Recovery | Total |
|---|---|---|---|---|---|
| - | - | 15 | - | - | - |
| Hit Adv | Block Adv | Cancel on Hit | Cancel on Block | Guard Crush Value | |
| +6 | +6 | No | No | - |
| Damage | Guard | Startup | Active | Recovery | Total |
|---|---|---|---|---|---|
| - | - | 24 | - | - | - |
| Hit Adv | Block Adv | Cancel on Hit | Cancel on Block | Guard Crush Value | |
| 0 | +6 | - | - | - |
| Damage | Guard | Startup | Active | Recovery | Total |
|---|---|---|---|---|---|
| - | - | 9 | - | - | - |
| Hit Adv | Block Adv | Cancel on Hit | Cancel on Block | Guard Crush Value | |
| -6 | 0 | Yes | No | - |
| Damage | Guard | Startup | Active | Recovery | Total |
|---|---|---|---|---|---|
| - | - | 10 | - | - | - |
| Hit Adv | Block Adv | Cancel on Hit | Cancel on Block | Guard Crush Value | |
| KD | -24 | - | - | - |
Throws
| Damage | Guard | Startup | Active | Recovery | Total |
|---|---|---|---|---|---|
| - | - | - | - | - | - |
| Hit Adv | Block Adv | Cancel on Hit | Cancel on Block | Guard Crush Value | |
| - | - | - | - | - |
Feint Cancels
| Damage | Guard | Startup | Active | Recovery | Total |
|---|---|---|---|---|---|
| - | - | - | - | - | - |
| Hit Adv | Block Adv | Cancel on Hit | Cancel on Block | Guard Crush Value | |
| - | - | - | - | - |
| Damage | Guard | Startup | Active | Recovery | Total |
|---|---|---|---|---|---|
| - | - | - | - | - | - |
| Hit Adv | Block Adv | Cancel on Hit | Cancel on Block | Guard Crush Value | |
| - | - | - | - | - |
Special Moves
| Lv1 | Damage | Guard | Startup | Active | Recovery | Total |
|---|---|---|---|---|---|---|
| 15 | - | 12 | - | - | - | |
| Hit Adv | Block Adv | Cancel on Hit | Cancel on Block | Guard Crush Value | ||
| KD | -9 | - | - | - | ||
| Lv2 | Damage | Guard | Startup | Active | Recovery | Total |
| 18 | - | 14 | - | - | - | |
| Hit Adv | Block Adv | Cancel on Hit | Cancel on Block | Guard Crush Value | ||
| KD | -9 | - | - | - | ||
| Lv3 | Damage | Guard | Startup | Active | Recovery | Total |
| 22 | - | 14 | - | - | - | |
| Hit Adv | Block Adv | Cancel on Hit | Cancel on Block | Guard Crush Value | ||
| KD | -9 | - | - | - | ||
| Lv4 | Damage | Guard | Startup | Active | Recovery | Total |
| 27 | - | 11 | - | - | - | |
| Hit Adv | Block Adv | Cancel on Hit | Cancel on Block | Guard Crush Value | ||
| KD | -11 | - | - | - |
| Lv1 | Damage | Guard | Startup | Active | Recovery | Total |
|---|---|---|---|---|---|---|
| 15 | - | 14 | - | - | - | |
| Hit Adv | Block Adv | Cancel on Hit | Cancel on Block | Guard Crush Value | ||
| KD | -8 | - | - | - | ||
| Lv2 | Damage | Guard | Startup | Active | Recovery | Total |
| 18 | - | 14 | - | - | - | |
| Hit Adv | Block Adv | Cancel on Hit | Cancel on Block | Guard Crush Value | ||
| KD | -8 | - | - | - | ||
| Lv3 | Damage | Guard | Startup | Active | Recovery | Total |
| 22 | - | 14 | - | - | - | |
| Hit Adv | Block Adv | Cancel on Hit | Cancel on Block | Guard Crush Value | ||
| KD | -8 | - | - | - | ||
| Lv4 | Damage | Guard | Startup | Active | Recovery | Total |
| 27 | - | 14 | - | - | - | |
| Hit Adv | Block Adv | Cancel on Hit | Cancel on Block | Guard Crush Value | ||
| KD | -6 | - | - | - |
Super Moves
| Lv1 | Damage | Guard | Startup | Active | Recovery | Total |
|---|---|---|---|---|---|---|
| 31 | - | 0 | - | - | - | |
| Hit Adv | Block Adv | Cancel on Hit | Cancel on Block | Guard Crush Value | ||
| KD | -42 | - | - | - | ||
| Lv2 | Damage | Guard | Startup | Active | Recovery | Total |
| 43 | - | 0 | - | - | - | |
| Hit Adv | Block Adv | Cancel on Hit | Cancel on Block | Guard Crush Value | ||
| KD | -48 | - | - | - | ||
| Lv3 | Damage | Guard | Startup | Active | Recovery | Total |
| 55 | - | 0 | - | - | - | |
| Hit Adv | Block Adv | Cancel on Hit | Cancel on Block | Guard Crush Value | ||
| KD | -48 | - | - | - | ||
| Lv4 | Damage | Guard | Startup | Active | Recovery | Total |
| 61 | - | 3 | - | - | - | |
| Hit Adv | Block Adv | Cancel on Hit | Cancel on Block | Guard Crush Value | ||
| KD | -40 | - | - | - |
Command Normal Moves
"Advancing D Dance Cancel"
D, cancel with C (can only be done approximately 1/4+ screen from opponent)
Attack Notes
Jumping D is Khushnood's best jump-in, and only crossup normal. Jumping A is a good air-to-air, and D is his usual move after a air JD.
The qcf+B is high risk; be certain to confirm it will hit or you will eat a super in recovery. With that said, sc.D xx qcf+B will be your main bread'n'butter combo and punisher.
None of Khushnood's light attacks (A's and B's) are cancellable. The only cancellable normals are crouching C, the first hit of close standing C, close standing D, and far standing D (on block/JD only).
Two air chains: B>A, and B>C. Forget about B>C entirely; the C will whiff on all standing opponents, and attempting it will leave you vulnerable. The only reason to even try it if your opponent wants to jump and Just Defend your attack, or you are attempting a throw. The B>A chain will only connect on tall standing characters. It is recommended you stick to D for all jump-ins that aren't an attempted throw setup.
Kushnood has a serious problem with randomness. Two of his major forces, the kick super and dragon punch, can hit and not juggle them off the ground as normally expected, and leave you very vulnerable. While many possibilities exist to link his weak attacks into dragon punches and kick supers, it is recommended to stick with the ones listed in the basic combos to avoid this random factor. When creating your own combos, practice when the range is known, such as using a point blank meaty attack, after a crossup, or cornered. When the range isn't so precise, avoid links to the dragon punch and super dragon punch.
The frame advantage on his AB overhead attack is very important. On block, you have massive advantage, and Kushnood is one of the only two characters with a safe overhead even on hit (+0, even frame advantage). This also means that any AB overhead that hits as a meaty will link to a kick super or hidden C super (lvl 1-3). So after a knock down, get in close and time a very meaty AB overhead. If you time it to whiff, you can bait wake up anti-air supers from Hotaru, B. Jenet, Gato, and other Kushnoods for sure. If you time it as a very meaty hit, you will have massive frame advantage if blocked, and a free super if hit.
Combos
Anywhere
j.![]() ,s.
,s.![]() ,QCF+
,QCF+![]()
j.![]() ,s.
,s.![]() ,QCFx2+P (Recommended as his Kick super might not connect)
,QCFx2+P (Recommended as his Kick super might not connect)
s.![]() or cr.
or cr.![]() or cr.
or cr.![]()
![]() ,QCFx2+
,QCFx2+![]()
Corner only
j.![]() ,s.
,s.![]() ,F, D, DF+
,F, D, DF+![]() ,
, ![]()
![]() ,QCF+
,QCF+![]() ,QCFx2+K
,QCFx2+K
Even though it looks like the kick super won't connect; it will so long as you input it as Butt is recovering from the QCF+![]() .
.
T.O.P. Notes
Butt's T.O.P. attack is the traditional Kyokugenryu Zanretsuken. It's the most damaging non-super followup to a braked ![]() DP. If done immediately after a braked
DP. If done immediately after a braked ![]() DP the last hit will whiff and leave the opponent in a super slow floating state that is extremely easy to combo into Super.
DP the last hit will whiff and leave the opponent in a super slow floating state that is extremely easy to combo into Super.
Overall Strategy
In-depth video lecture on Marco. Please use the timestamps to navigate the topics.
Matchup Notes
To come.
Advanced Tactics
One option for play is to always have C held down and charged. A charged 'C' attack is an amazing tool to have at your disposal, allowing almost full screen punishment with super level damage.
Pros:
- Very fast, full screen punishment of slow whiffs
- Amazing damage
- Super easy Guard Cancels
- Combo'able from any cancel move or juggle
Cons:
- Lose C attacks.
- Lose feints.
Since the B super should be used far more than any other super, both for combos and as anti-air, losing the hidden super and C fireball super is very acceptable when you get a much easier to combo, no meter, super-level damage attack in a fully charged C release. Loss of the c.C, sc.C, and dp+C is is a little more of a dent, but, in my opinion, well worth it. Because of distance issues with the kick super and dp+P moves, feints are close to worthless. Khushnood will continue to have his pressure arsonal available, trading in a couple of rarely used moves for one very strong, easy to use move.
All of the comments and strategies listed for a charged C release also apply to a charged D release. However, continuing to hold D down in a fight is just too costly. You lose Kushnood's best jump-in and his best up close, cancellable normal. This trade off is just not worth it.
Charged C Release Notes
With a startup time of 11 to 14 frames, this is not a move you can link into. Because of the precious time needed to charge, it should only be used when guaranteed. You should not waste a single moment worrying if you never released C during a round; you made sure it wasn't wasted, and after getting hit by it just once, your opponent will know it's waiting to strike.
Using the C release as a guard cancel attack is a lot of fun, and putting the fear of attacking into your opponent will only help your pressure and rushdown game. Because of the 11 to 14 frame startup, and lack of invulnerability, you cannot expect to use it on every single guard cancel. Using it to guard cancel non-crossup jump-ins is very good, unless the opponent has air chains; you'll see this most against Gato's constant j.B>j.A jumpin, when you'll lose your charge and get punched in the face. You also want to have the Guard Cancel happen at the last hit of multi-hit attacks. Releasing C after JD'ing the first hit of B. Jenet's ground tornado projectile should get you laughed and ridiculed for losing a charge and taking damage when you could have just held the stick and blocked to keep both your charge and your health. JD'ing all three hits and guard canceling the last into the released C is a much better option.


