Introduction
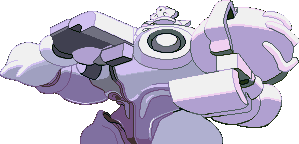
A Mexican robot that is a keepaway and projectile spammer.
Moves List
Normal Moves
Standing LP - Whiff crouching opponents
Standing close MP - whiff crouching opponents
Standing far MP - good for anti air
Standing HP - Decent for anti air
Standing LK - hits crouching opponents
Standing Far MK - large hitbox
Standing Close MK - hits crouching opponents
Standing HK - Large anti air hitbox
Crouching LP - Good crouching combo starter
Crouching HP - Large hitbox combo ender
Crouching HK - Low Large hitbox combo ender
Jumping HP - Nice hitbox for cross ups
Jumping MK - Good horizontal range for overhead
Jumping HK - Good vertical range for overhead
Special Moves
Float: Press UB or U or UF
Huitzil does not have a normal jump but instead he floats in the air.
>Cancel: Press DB or D or DF
Eventually Huitzil will land, or you can cancel the float by press down in any direction. The only way to accomplish a normal jump is to simply press up in any direction then immediately pressing down in any direction.
Air Dash: Press b, b or f, f
Huitzil can air dash during his floating state in any direction.
Crawling: Press and hold db or df
By doing this Huitzil performs a slow moving low walk.
Plasma Beam: QCF + P [ES]
A laser beam attack that goes max range and changes it's firing position depending on the strength you use. LP will shoot a low beam, this is useful in that it shrinks Huitzil's hit box and hits all grounded opponents, but can be easily jumped over. MP will shoot a high, standing beam that most everyone can crouch under. HP will shoot a beam straight up that can only hits opponents who are jumping right on top of you. The Plasma Beam cannot be comboed, but knocks down, leaving Huitzil with a good amount of frame advantage. Best to use at max range, for it has alot of recovery and is dangerous is blocked at close range.
ES version fires a thicker beam, slightly higher than the LP version but still hitting crouching opponents. It does much more damage, but also cannot be comboed, has a little more start-up and a ton of recovery. Best to use from max range and make sure you hit with it. Even though it knocks down you have a negative 7 hit disadvantage.
- Both the Plasma Beam and ES Plasma Beam have the advantage of not being held by usual projectiles constraints - 1) they are not scaled down for damage by distance, 2) Anakaris cannot swallow them and 3) Hsien-Ko cannot reflect them. In addition, the Plasma Beam beats all projectiles except ES projectiles which it will just trade hits with. An ES Plasma Beam is needed to defeat an ES projectile.
Mighty Launcher: QCF + K [ES]
Similar to the Plasma Beam in that it does the same damage and cannot be comboed into. However it has slightly less start-up and some hit advantage on block. This slow moving projectile stays pretty close to the ground thus you can easily jump over it. Each strength fires the projectile a different distance LK fires 1/3rd of the screen, MK fires half the screen and HK fires 3/4th of the screen away.
The ES version fires a full-screen, more damaging projectile. The projectile or the explosion can hit the opponent, resulting in a knock down. It does 3 hits, therefore if one of the hits whiff on a jumping opponent they will be in a limited juggle state. The ES version gets even more block advantage.
Genocide Vulcan: B, D, DB + P [ES]
The only special move that can be comboed into. This is Huitzil's anti-air and although it's quick, damaging and knocks down it can carry alot of recovery, especially on block. This specials stays out for a while, making Huitzil susceptible to punishment.
The ES version is essentially the same in every aspect except that it does more damage.
Circuit Scrapper: Close, HCB + MP or HP [ES]
This command throw is the same as his normal throw, except it cannot be teched, throws the opponent further and opens up for a pursuit attack. Circuit Scrapper throws the opponent forward, where the normal throw only throws the opponent behind.
The ES version is essentially the same in every aspect except that it does more damage.
Reflect Wall: During block, F, D, DF + P (useable in air) (Guard Reversal)
This technique is a Guard Reversal only. It results in no damage as it pushes the opponent back to max screen distance. The start-up is nearly instant, with lots of invincibility and frame advantage.
Super Moves
Final Guardian: HCB + 2K
This super only hits jumping opponents. It can be difficult to hit with for max damage, since it fires in a sweeping like motion. With that said hits can whiff. With its hefty start-up, this isn't the best anti-air option. Plus, ES Genocide Vulcan roughly does the same amount of damage in shorter start-up.
Confusioner: F, D, DF + 2K
Huitzil fires a fast spaced projectile across the screen, that travels max range. Upon hit, it will put the opponent into a floating state where they can still attack but not move or block. This gives you the chance to land some free damage. The projectile portion itself can be comboed and is relatively safe on block.
Combos
Crouching MK, Genocide Vulcan - 15 hits, 26% damage
Crouching MK, ES Genocide Vulcan - 27 hits, 35% damage
Crouching LK, Standing MK, Crouching HK - 6 hits, 25% damage
Crouching LP, LK, MP, HP - 5 hits, 33% damage
Crouching MK, Confusioner - 2 hits, 29% damage
The Basics
If you love to spam projectiles this is your best choice, far combat will be your strong strategy, but in close combat you need to Command Grab immediately.
Advanced Strategy
Instant Air Dash
As he have air dash he can tap uf,uf for air dash at the minimum attitude, its recommended for cross up resets.
Frame Data
| Normals | ||||||||||
| Strenght | Startup | Active | Recovery | Hit | Guard | Gauge Increase ((miss/hit/equivalent)) |
Guard Height | Cancel | Notes | |
近立ち |
LP | 6 | 2(6)2 | 6 | +6 | +4 | // | LM | ○+× | |
| MP | 7 | 3(10)3 | 13 | +3 | +1 | // | LM | ○+× | ||
| HP | 9 | 11 | 26 | -11 | -13 | // | LM | × | ||
| LK | 6 | 3 | 7 | +4 | +2 | // | LM | ○ | ||
| MK | 8 | 2・2・12 | 21 | -14 | -16 | // | LM | ×x3 | ||
| HK | 12 | 12 | 26 | -15 | -17 | // | LM | × | 空中ヒット時KD | |
遠立ち |
LP | 6 | 2(6)2 | 6 | +6 | +4 | // | LM | ○+× | |
| MP | 10 | 3 | 26 | -10 | -12 | // | LM | × | ||
| HP | 15 | 6 | 27 | -10 | -12 | // | LM | × | ||
| LK | 6 | 3 | 7 | +4 | +2 | // | LM | ○ | 空中ヒット時KD | |
| MK | 9 | 3 | 21 | -5 | -7 | // | LM | × | ||
| HK | 13 | 6 | 27 | -10 | -12 | // | LM | × | 空中ヒット時KD | |
| Crouching | LP | 7 | 3 | 8 | +3 | +1 | // | LM | ○ | 空中ヒット時KD |
| MP | 8 | 4 | 21 | -6 | -8 | // | LM | × | 空中ヒット時KD | |
| HP | 13 | 3・6 | 28 | -11 | -13 | // | LM | ×x2 | ||
| LK | 6 | 3 | 6 | +5 | +3 | // | L | ○ | ||
| MK | 7 | 4 | 20 | -5 | -7 | // | L | ○ | ||
| HK | 12 | 3(6)3 | 32 | Fall | -11 | // | L | ×x2 | ||
| Jumping Normals | ||||||||||
| Strenght | Startup | Active | Recovery | Hit | Guard | Gauge Increase ((miss/hit/equivalent)) |
Guard Height | Cancel | Notes | |
垂直め |
LP | 6 | 8 | 6 | - | - | // | HM | × | |
| MP | 9 | 6 | 17 | Fall | - | // | HM | × | ||
| HP | 9 | 10 | 16 | - | - | // | HM | × | ||
| LK | 7 | 8 | 4 | - | - | // | HM | × | ||
| MK | 11 | 9 | 7 | - | - | // | HM | × | Activeの後半3Fは腰部分に数ドットのみStartup | |
| HK | 11 | 6 | 11 | - | - | // | HM | × | ||
| Supers | |||||||
| コンフュージョナー |
Startup | Active | Recovery | Hit | Guard | Guard Height | Notes |
| 弾:11 | - | Total:28 | 拘束 | +14 | HML | ||
| ファイナルガーディアン |
Startup | Active | Recovery | Hit | Guard | Guard Height | Notes |
| 弾:31 | - | Total:113 | KD | HML | |||
| Throws | ||||||||
| Close |
Startup | Active | Recovery | 投げ成立 | Throw Escape | Gauge Increase | 投げ方向 | Notes |
| 2 | 1(2)1(1)1(1)1(2)1(2)1(2)1(1)1 | 40 | KD | 不可 | 後方 | |||
| <A name="throw-air"></A>Air Throw | ||||||||
| お互い空中&相手の近くで |
Startup | Active | Recovery | 投げ成立 | Throw Escape | Gauge Increase | 投げ方向 | Notes |
| 1 | KD | 不可 | 前方 | |||||
| 追い討ち攻撃</ | ||||||
| 相手KD or Fall時に |
Strenght | Startup | Active | Recovery | Gauge Increase (空/当) |
Notes |
| ノーマル | 25 | 15 | 着地12 | / | ||
| ES | 32 | 15 | 着地12 | 0/ 0 | ||


