Introduction
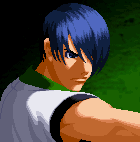
Kim Jae Hoon is the younger brother of Kim Dong Hwan, both of them together are the sons of Taekwondo Master, Kim Kaphwan. Unlike his older brother, Kim Jae Hoon is much more serious with Taekwondo and believes firmly in his fathers ideals of justice. Jae Hoon uses many of the same techniques his father before him used, such has the Hangetsu Zan and Hou'ou Kyaku, with a bit of an original spin of his own, adding his element of fire to his attacks to amplify the power behind his blows.
Jae Hoon enters the Maximum Mayhem tournament with his older brother Dong Hwan after their father, whom was visiting the newly re-built Second South, was attacked by an very strong oppenent and was injured. Jae Hoon swears to avenge his fathers defeat, and so, dragging Dong Hwan with him, the two compete in the Maximum Mayhem tournament with hope that one of them will be able to face the monster that defeated their father.
| Pros | Cons |
|---|---|
|
|
Character Colors
Move List
Esoterics
Frame Data Source : http://www13.atwiki.jp/garoumow/pages/82.html
Legend:
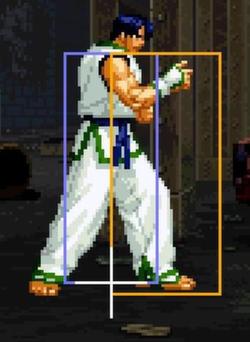
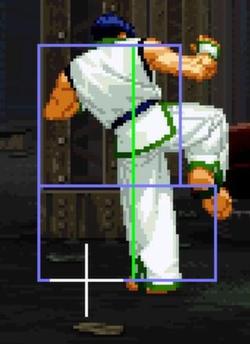
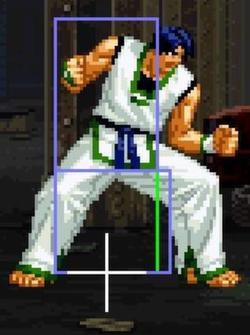
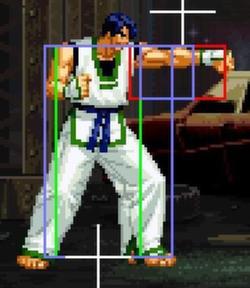
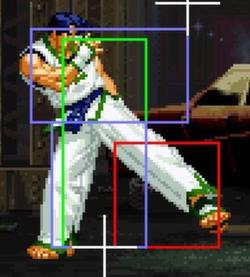
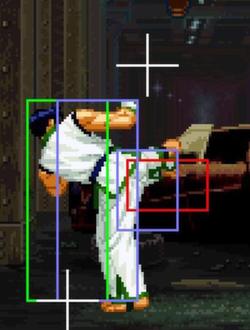
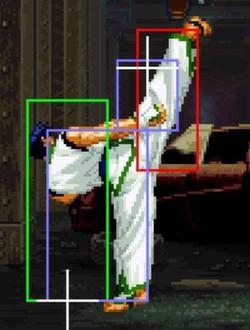
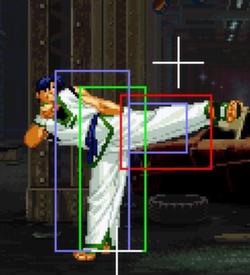
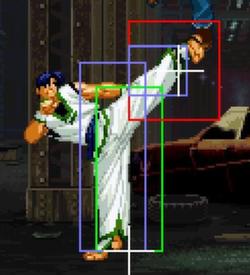
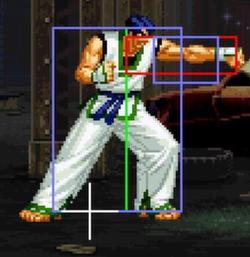
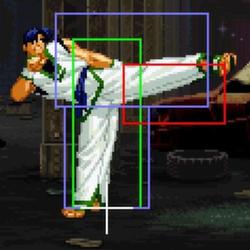
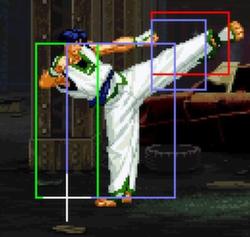
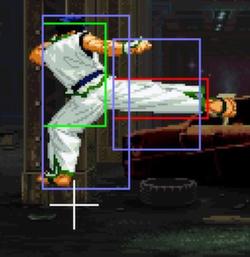
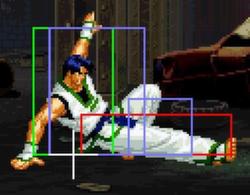
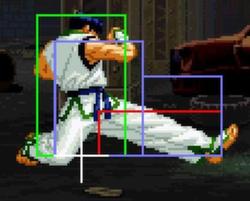
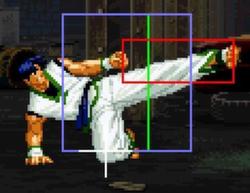
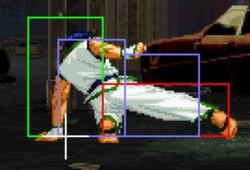
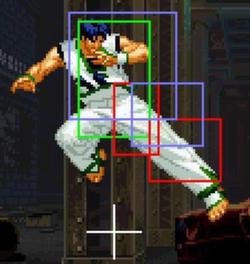
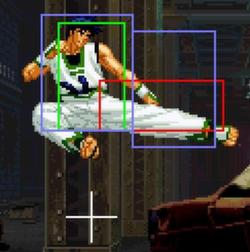
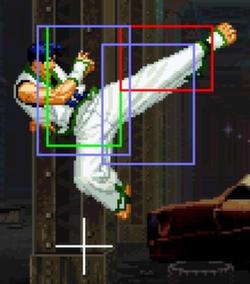
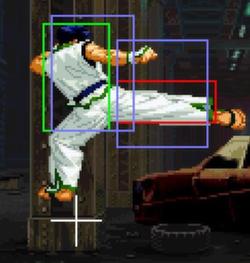
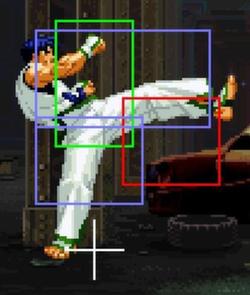
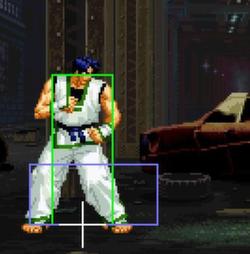
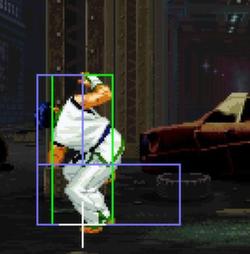
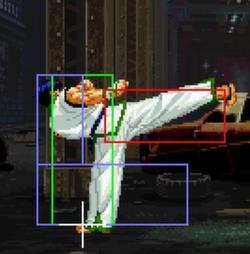
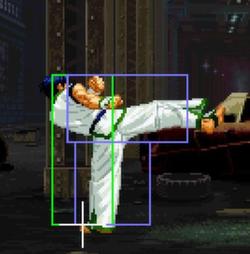
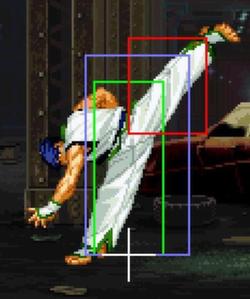
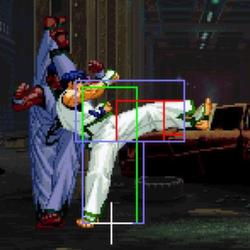
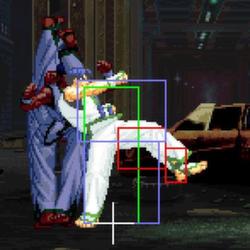
- Hit Box: Area that will hit the opponent
- Hurt Box: Area where you can get hit. A move is invincible if the Hurt Box is absent.
- Throw Box/Range: Active throw frames and range. Your opponent will be thrown in this field if not in block or hit stun.
- Projectile Box: Hit box on a projectile attack.
- Guard/Counter Box: The Guard Box or Counter Box. This appears when blocking or using a counter move.
- Push Box: Has no bearing on hurt/hit boxes. Just allows characters to not pass through each other.
- Command = the input for the attack.
- Start Up = How many start up frames a move/attack has.
- Hit = When the attack hits.
- Block = When the attack is blocked.
- + signifies how many advantage frames the attacker has.
- - signifies how many disadvantage frames the attacker has.
- KD means the attack will knock the opponent down.
Close Standing Normals
| Damage | Guard | Startup | Active | Recovery | Total |
|---|---|---|---|---|---|
| - | - | - | - | - | - |
| Hit Adv | Block Adv | Cancel on Hit | Cancel on Block | Guard Crush Value | |
| - | - | - | - | - | |
|
Standing jab. | |||||
| Damage | Guard | Startup | Active | Recovery | Total |
|---|---|---|---|---|---|
| - | - | - | - | - | - |
| Hit Adv | Block Adv | Cancel on Hit | Cancel on Block | Guard Crush Value | |
| - | - | - | - | - |
| Damage | Guard | Startup | Active | Recovery | Total |
|---|---|---|---|---|---|
| - | - | - | - | - | - |
| Hit Adv | Block Adv | Cancel on Hit | Cancel on Block | Guard Crush Value | |
| - | - | - | - | - |
| Damage | Guard | Startup | Active | Recovery | Total |
|---|---|---|---|---|---|
| - | - | - | - | - | - |
| Hit Adv | Block Adv | Cancel on Hit | Cancel on Block | Guard Crush Value | |
| - | - | - | - | - |
Far Standing Normals
| Damage | Guard | Startup | Active | Recovery | Total |
|---|---|---|---|---|---|
| - | - | - | - | - | - |
| Hit Adv | Block Adv | Cancel on Hit | Cancel on Block | Guard Crush Value | |
| - | - | - | - | - |
| Damage | Guard | Startup | Active | Recovery | Total |
|---|---|---|---|---|---|
| - | - | - | - | - | - |
| Hit Adv | Block Adv | Cancel on Hit | Cancel on Block | Guard Crush Value | |
| - | - | - | - | - |
| Damage | Guard | Startup | Active | Recovery | Total |
|---|---|---|---|---|---|
| - | - | - | - | - | - |
| Hit Adv | Block Adv | Cancel on Hit | Cancel on Block | Guard Crush Value | |
| - | - | - | - | - |
| Damage | Guard | Startup | Active | Recovery | Total |
|---|---|---|---|---|---|
| - | - | - | - | - | - |
| Hit Adv | Block Adv | Cancel on Hit | Cancel on Block | Guard Crush Value | |
| - | - | - | - | - |
Crouching Normals
| Damage | Guard | Startup | Active | Recovery | Total |
|---|---|---|---|---|---|
| - | - | - | - | - | - |
| Hit Adv | Block Adv | Cancel on Hit | Cancel on Block | Guard Crush Value | |
| - | - | - | - | - |
| Damage | Guard | Startup | Active | Recovery | Total |
|---|---|---|---|---|---|
| - | - | - | - | - | - |
| Hit Adv | Block Adv | Cancel on Hit | Cancel on Block | Guard Crush Value | |
| - | - | - | - | - |
| Damage | Guard | Startup | Active | Recovery | Total |
|---|---|---|---|---|---|
| - | - | - | - | - | - |
| Hit Adv | Block Adv | Cancel on Hit | Cancel on Block | Guard Crush Value | |
| - | - | - | - | - |
| Damage | Guard | Startup | Active | Recovery | Total |
|---|---|---|---|---|---|
| - | - | - | - | - | - |
| Hit Adv | Block Adv | Cancel on Hit | Cancel on Block | Guard Crush Value | |
| - | - | - | - | - |
Jumping Normals
| Damage | Guard | Startup | Active | Recovery | Total |
|---|---|---|---|---|---|
| - | - | - | - | - | - |
| Hit Adv | Block Adv | Cancel on Hit | Cancel on Block | Guard Crush Value | |
| - | - | - | - | - |
| Damage | Guard | Startup | Active | Recovery | Total |
|---|---|---|---|---|---|
| - | - | - | - | - | - |
| Hit Adv | Block Adv | Cancel on Hit | Cancel on Block | Guard Crush Value | |
| - | - | - | - | - |
| Damage | Guard | Startup | Active | Recovery | Total |
|---|---|---|---|---|---|
| - | - | - | - | - | - |
| Hit Adv | Block Adv | Cancel on Hit | Cancel on Block | Guard Crush Value | |
| - | - | - | - | - |
| Damage | Guard | Startup | Active | Recovery | Total |
|---|---|---|---|---|---|
| - | - | - | - | - | - |
| Hit Adv | Block Adv | Cancel on Hit | Cancel on Block | Guard Crush Value | |
| - | - | - | - | - |
Command Normals
Shou-kyaku Hou (Phoenix Cannon): Press B during Back-step
Throws
Feint Cancels
Special Moves
Super Moves
Attributes
When a move can be canceled, it can either be canceled into a special/super/feint. Some moves that can't be canceled when they hit can be canceled when the opponent blocks while some moves that can be Special/Super canceled cannot be Feint Canceled.
Frame Data
Legend :
Command = the input for the attack.
Start Up = How many start up frames an attack has.
Hit = When the attack hits.
Block = When the attack is blocked.
+ signifies how many advantage frames the attacker has.
- signifies how many disadvantage frames the attacker has.
KD means the attack will knock the opponent down.
Data from Howard's Arena
Hitboxes
| Command | Total Frames |
| Close |
x |
| Command | Total Frames |
| x |
| Command | Total Frames |
| x |
| Command | Start Up | Hit | Guard |
| Close |
3 | +6 | +6 |
| Command | Start Up | Hit | Guard |
| Close |
4 | +4 | +4 |
| Command | Start Up | Hit | Guard |
| Close |
5 | -5 | -5 |
| Command | Start Up | Hit | Guard |
| Close |
4 | -6 | -6 |
| Command | Start Up | Hit | Guard |
| Far |
3 | +6 | +6 |
| Command | Start Up | Hit | Guard |
| Far |
4 | 0 | 0 |
| Command | Start Up | Hit | Guard |
| Far |
12 | -10 | -10 |
| Command | Start Up | Hit | Guard |
| Far |
13 | -3 | -3 |
| Command | Start Up | Hit | Guard |
| 5 | +3 | +3 |
| Command | Start Up | Hit | Guard |
| 4 | +6 | +6 |
| Command | Start Up | Hit | Guard |
| 5 | +1 | +1 |
| Command | Start Up | Hit | Guard |
| 7 | KD | -8 |
| Command | Start Up | Hit | Guard |
| Jumping |
6 | ? | ? |
| Command | Start Up | Hit | Guard |
| Jumping |
6 | ? | ? |
| Command | Start Up | Hit | Guard |
| Jumping |
6 | ? | ? |
| Command | Start Up | Hit | Guard |
| Jumping |
8 | ? | ? |
| Command | Start Up | Hit | Guard |
| 25 | -1 | +5 |
| Command | Start Up | Hit | Guard |
| 11 | -3 | -3 |
| Command | Start Up | Hit | Guard |
| 45 | KD | -9 |
| Command | Start Up | Hit | Guard |
| 31 | KD | -1 |
Attack Notes
Shakka-shuu - This move has an auto-guard property against high attacks when you hold it. This is a great move to take advantage of against characters that use a lot of high attacks. After guarding a move, release the button to smash your opponent! Just keep in mind that when you perform the Shakka-shu, it takes about a second for Jae Hoon to take up his stance and he will automatically release it if you hold it for too long.
Its usually best to try to anticipate when and where your opponent will strike before using this move to get the most out of it. It makes an exceptional guard cancel has well. This can be Jae Hoon's best defense when used properly, and occasionally a decent surprise offensive attack when your opponent isn't expecting it.
Hishou-kyaku: After inputing the command for the move, you can Hold DF and keep tapping K rapidly to get the sliding kick finisher.
Houyoku Tenshou Kyaku - If you hold down C while performing the P-Power version, after Jae Hoon lands he will yell and begin to charge up flames. If you let go of the C button on time has your opponent falls, you can get in one extra hit that packs quite a punch, or foot rather. If you use the S-Power version, it is possible to connect a Hou'ou Kyaku after you land and before your opponent lands. However, the window to connect is very small and it must be done very quickly.
Combos
Anywhere
c![]() , c
, c![]() ,
, ![]() +
+ ![]() 35 damage
35 damage
s![]() , c
, c![]() ,
, ![]() +
+ ![]() 33 damage
33 damage
c![]() , c
, c![]() ,
, ![]() +
+ ![]() 31 damage
31 damage
s![]() , c
, c![]() ,
, ![]() +
+ ![]() 29 damage
29 damage
c![]() , c
, c![]() ,
, ![]() ,
, ![]() +
+ ![]() 51 damage
51 damage
s![]() , c
, c![]() ,
, ![]() ,
, ![]() +
+ ![]() 49 damage
49 damage
c![]() , c
, c![]() ,
, ![]() ,
, ![]() +
+ ![]() 67 damage
67 damage
s![]() , c
, c![]() ,
, ![]() ,
, ![]() +
+ ![]() 65 damage
65 damage
s![]() , s
, s![]() ,
, ![]() ,
, ![]() +
+ ![]() 44 damage
44 damage
s![]() , s
, s![]() ,
, ![]() ,
, ![]() +
+ ![]() 59 damage
59 damage
c![]() , c
, c![]() , c
, c![]() ,
, ![]() ,
, ![]() +
+ ![]() 51 damage
51 damage
c![]() , c
, c![]() , c
, c![]() ,
, ![]() ,
, ![]() +
+ ![]() 66 damage
66 damage
s![]() ,
, ![]() ,
, ![]() +
+ ![]() 35 damage
35 damage
s![]() ,
, ![]() ,
, ![]() +
+ ![]() 45/63(hold
45/63(hold ![]() ender) damage
ender) damage
s![]() ,
, ![]() ,
, ![]() +
+ ![]() ,
, ![]() ,
, ![]() +
+ ![]() 71 damage
71 damage
Corner only
s![]() , c
, c![]() , c
, c![]() ,
, ![]() +
+ ![]() 35 damage
35 damage
s![]() , c
, c![]() , c
, c![]() ,
, ![]() +
+ ![]() 32 damage
32 damage
s![]() , c
, c![]() , c
, c![]() ,
, ![]() +
+ ![]() 30 damage
30 damage
s![]() , c
, c![]() , c
, c![]() ,
, ![]() ,
, ![]() +
+ ![]() 53 damage
53 damage
s![]() , c
, c![]() , c
, c![]() ,
, ![]() ,
, ![]() +
+ ![]() 68 damage
68 damage
c![]() , c
, c![]() , c
, c![]() , c
, c![]() ,
, ![]() ,
, ![]() +
+ ![]() 55 damage
55 damage
c![]() , c
, c![]() , c
, c![]() , c
, c![]() ,
, ![]() ,
, ![]() +
+ ![]() 70 damage
70 damage
j![]() ,
, ![]() , j
, j![]() , d
, d![]() +
+ ![]() ,
, ![]() +
+ ![]() 39 damage
39 damage
c![]() , charge
, charge![]() ,
,![]() +
+ ![]() (1 hit),
(1 hit), ![]()
![]() ,
, ![]() ,
, ![]() +
+ ![]() ,
, ![]() ,
, ![]() +
+ ![]() 80 damage
80 damage
T.O.P. Notes
Jae Hoon performs a Neri Chagi (Axe Kick), it has a slow start up, but it has a near-instant recovery time after the kick is dealt, and it's an overhead.
Basic Strategy
Kim Jae Hoon plays a bit similiar to his father Kim Kaphwan in Real Bout Fatal Fury 2 in that he is mostly a close/mid range fighter and puts up an exceptional offense, and plays a fairly decent counter attack game. Jae Hoon can greatly punish his opponents when they leave themselves undefended, or throw themselves akwardly into an attack towards Jae Hoon, not to mention he has some exceptional mix up with his attacks.
Many of Jae Hoon's moves come out fast and many can be canceled with ease, making for some simple bread and butter combos (Ex- Jumping D, Crouching C, QCF+D), which is probably one of his high points. However it's important to note the sometimes akward recovery time between some of Jae Hoon's techniques, has this can make him or break him.
He has no real 100% "safe" moves, thus it's vital you take movement with caution and plan your attacks ahead, since Jae is left with a dash instead of a run, and lacks a super jump like Dong Hwan. Getting close enough to your opponent is very important, don't wait and let them come to you, or they will most likely waste you. Charge them carefully, even if you have to Just Defend a few projectiles to get close enough. When your within range, you can unleash all the mayhem you want, with caution of course.
With enough practice, patience, and dedication, Jae Hoon can be a fairly strong and effective character againest almost any opponent.
Advanced Tactics
In-depth video lecture on Jae Hoon. Please use the timestamps to navigate the topics.
Matchup Notes
To come.
