Introduction
To come.
| Pros | Cons |
|---|---|
|
|
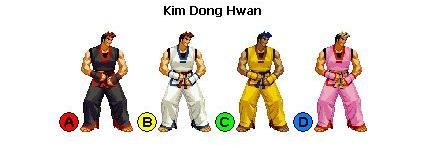
Character Colors
Move List
Esoterics
Frame Data Source : http://www13.atwiki.jp/garoumow/pages/21.html
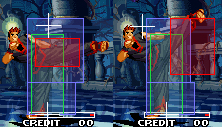
Legend:
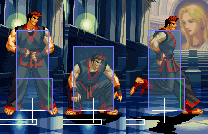
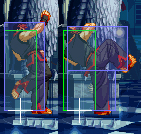
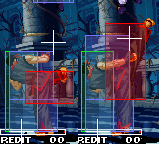
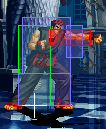
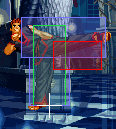
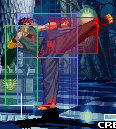
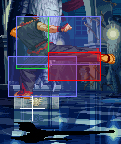
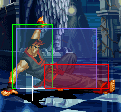
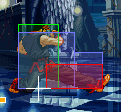
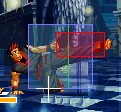
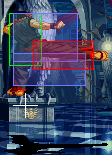
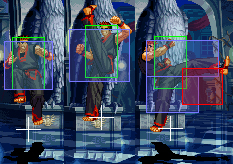
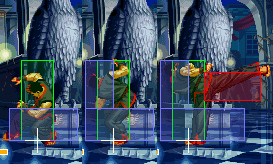
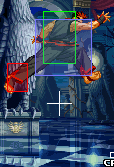
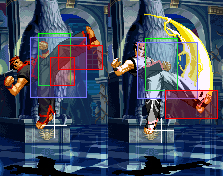
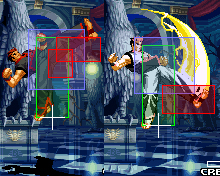
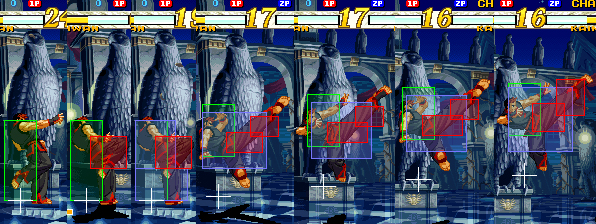
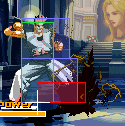
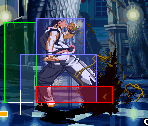
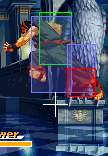
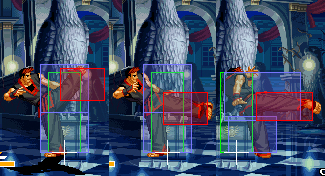
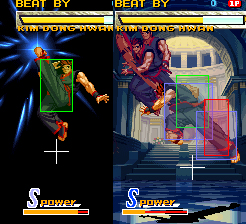
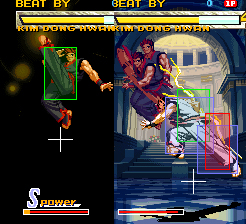
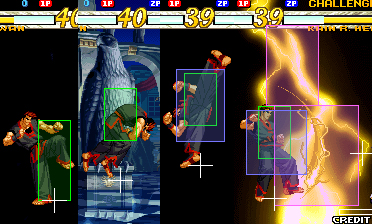
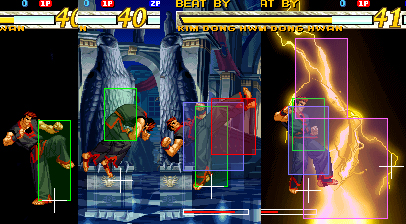
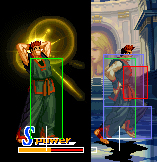
- Hit Box: Area that will hit the opponent
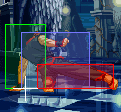
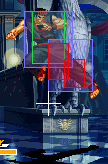
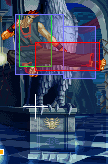
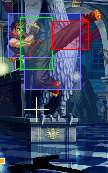
- Hurt Box: Area where you can get hit. A move is invincible if the Hurt Box is absent.
- Throw Box/Range: Active throw frames and range. Your opponent will be thrown in this field if not in block or hit stun.
- Projectile Box: Hit box on a projectile attack.
- Guard/Counter Box: The Guard Box or Counter Box. This appears when blocking or using a counter move.
- Push Box: Has no bearing on hurt/hit boxes. Just allows characters to not pass through each other.
- Command = the input for the attack.
- Start Up = How many start up frames a move/attack has.
- Hit = When the attack hits.
- Block = When the attack is blocked.
- + signifies how many advantage frames the attacker has.
- - signifies how many disadvantage frames the attacker has.
- KD means the attack will knock the opponent down.
Close Standing Normals
| Damage | Guard | Startup | Active | Recovery | Total |
|---|---|---|---|---|---|
| - | - | - | - | - | - |
| Hit Adv | Block Adv | Cancel on Hit | Cancel on Block | Guard Crush Value | |
| - | - | - | - | - | |
|
Standing jab. | |||||
| Damage | Guard | Startup | Active | Recovery | Total |
|---|---|---|---|---|---|
| - | - | - | - | - | - |
| Hit Adv | Block Adv | Cancel on Hit | Cancel on Block | Guard Crush Value | |
| - | - | - | - | - |
| Damage | Guard | Startup | Active | Recovery | Total |
|---|---|---|---|---|---|
| - | - | - | - | - | - |
| Hit Adv | Block Adv | Cancel on Hit | Cancel on Block | Guard Crush Value | |
| - | - | - | - | - |
| Damage | Guard | Startup | Active | Recovery | Total |
|---|---|---|---|---|---|
| - | - | - | - | - | - |
| Hit Adv | Block Adv | Cancel on Hit | Cancel on Block | Guard Crush Value | |
| - | - | - | - | - |
Far Standing Normals
| Damage | Guard | Startup | Active | Recovery | Total |
|---|---|---|---|---|---|
| - | - | - | - | - | - |
| Hit Adv | Block Adv | Cancel on Hit | Cancel on Block | Guard Crush Value | |
| - | - | - | - | - |
| Damage | Guard | Startup | Active | Recovery | Total |
|---|---|---|---|---|---|
| - | - | - | - | - | - |
| Hit Adv | Block Adv | Cancel on Hit | Cancel on Block | Guard Crush Value | |
| - | - | - | - | - |
| Damage | Guard | Startup | Active | Recovery | Total |
|---|---|---|---|---|---|
| - | - | - | - | - | - |
| Hit Adv | Block Adv | Cancel on Hit | Cancel on Block | Guard Crush Value | |
| - | - | - | - | - |
| Damage | Guard | Startup | Active | Recovery | Total |
|---|---|---|---|---|---|
| - | - | - | - | - | - |
| Hit Adv | Block Adv | Cancel on Hit | Cancel on Block | Guard Crush Value | |
| - | - | - | - | - |
Crouching Normals
| Damage | Guard | Startup | Active | Recovery | Total |
|---|---|---|---|---|---|
| - | - | - | - | - | - |
| Hit Adv | Block Adv | Cancel on Hit | Cancel on Block | Guard Crush Value | |
| - | - | - | - | - |
| Damage | Guard | Startup | Active | Recovery | Total |
|---|---|---|---|---|---|
| - | - | - | - | - | - |
| Hit Adv | Block Adv | Cancel on Hit | Cancel on Block | Guard Crush Value | |
| - | - | - | - | - |
| Damage | Guard | Startup | Active | Recovery | Total |
|---|---|---|---|---|---|
| - | - | - | - | - | - |
| Hit Adv | Block Adv | Cancel on Hit | Cancel on Block | Guard Crush Value | |
| - | - | - | - | - |
| Damage | Guard | Startup | Active | Recovery | Total |
|---|---|---|---|---|---|
| - | - | - | - | - | - |
| Hit Adv | Block Adv | Cancel on Hit | Cancel on Block | Guard Crush Value | |
| - | - | - | - | - |
Jumping Normals
| Damage | Guard | Startup | Active | Recovery | Total |
|---|---|---|---|---|---|
| - | - | - | - | - | - |
| Hit Adv | Block Adv | Cancel on Hit | Cancel on Block | Guard Crush Value | |
| - | - | - | - | - |
| Damage | Guard | Startup | Active | Recovery | Total |
|---|---|---|---|---|---|
| - | - | - | - | - | - |
| Hit Adv | Block Adv | Cancel on Hit | Cancel on Block | Guard Crush Value | |
| - | - | - | - | - |
| Damage | Guard | Startup | Active | Recovery | Total |
|---|---|---|---|---|---|
| - | - | - | - | - | - |
| Hit Adv | Block Adv | Cancel on Hit | Cancel on Block | Guard Crush Value | |
| - | - | - | - | - |
| Damage | Guard | Startup | Active | Recovery | Total |
|---|---|---|---|---|---|
| - | - | - | - | - | - |
| Hit Adv | Block Adv | Cancel on Hit | Cancel on Block | Guard Crush Value | |
| - | - | - | - | - |
Command Normals
Super Jump: Press ![]() , then
, then ![]() /
/![]() /
/![]()
Wall Jump: Jump towards a wall and then press the opposite direction to it
Ushiro-geri (BacKick): ![]() +
+![]() in the air
in the air
Throws
Feint Cancels
Special Moves
Super Moves
Frame Data
Source : http://www13.atwiki.jp/garoumow/pages/21.html
| Move | Startup | Guard Adv. | Hit Adv. | GC Value | Cancellation | Remarks |
| Near Standing A | 3 | +6 | +6 | 4 | Chain / ◯ | |
| Near Standing B | 4 | +4 | +4 | 4 | ◯ | |
| Near Standing C | 5 | -5 | -5 | 3,3 | ※ ◯ | |
| Near Standing D | 4 | -6 | -6 | 3,3 | ※ ◯ | |
| Far Standing A | 3 | +6 | +6 | 4 | ◯ | |
| Far Standing B | 4 | 0 | 0 | 4 | ◯ | |
| Far Standing C | 12 | -10 | -10 | 5 | △ | |
| Far Standing D | 13 | -1 | -1 | 5 | × Note | |
| Crouched A | 5 | +2 | +2 | 4 | Chain / × | |
| Crouched B | 4 | +6 | +6 | 4 | Chain / ◯ | |
| Crouched C | 5 | +4 | +4 | 5 | ◯ | |
| Crouched D | 7 | -8 | down | 5 | × | |
| Jump A | 5 | 4 | ◯ | |||
| Jump B | 6 | 4 | ◯ | |||
| Jump C | 6 | 5 | ◯ | |||
| Jump D | 8 | 5 | ◯ | |||
| Upper avoid attack | 10 | +4 | -2 | 6 | ▽ | 1 ~ 5F upper body invincible |
| Lower avoid attack | 25 | +5 | -1 | 6 | × | |
| Kick back | 4 | 9 | ◯ |
| Move | Startup | Guard Adv. | Hit Adv. | GC Value | Remarks |
| Zan weak-thunder | 19 | -1 | -1 | 3,3 | |
| Strength-thunder Zan | 25 | -2 | -2 | 4,4 | |
| Weak-empty dust | 4 | -30 (-6) | down | 3,2 × 3 | 1 ~ 5F invincible |
| Strength-empty dust | 4 | -29 (-6) | down | 3,2 × 4,5 | 1 ~ 5F invincible |
| Weak-flying leg | 7 | 0 or more | 0 or more | 2 × 4 | |
| Strength-flying leg | 9 | 0 or more | 0 or more | 2 × 4 | |
| Weak-Shiden'ashi | 22 | +13 | +13 | 7 | |
| Strength-Shiden'ashi | 25 | +9 | down | 8 | |
| Foot Face Slapping | 7 | -9 | down | 1 × 7 | |
| Rotation Don Juan | 8 | -9 | down | 2,3 × 4 | |
| Super Don Juan leg A | 0 | -39 | down | 5 × 6 | |
| Super Don Juan legs C | 0 | -69 | down | 10,7 × 7 | |
| Thunder bullet B | 19 | -5 | down | 20 | 1 ~ 13F invincible, missile decision |
| Thunder bullet D | 17 | +5 | down | 10,10,20,30 | 1 ~ 15F invincible, the final stage missile decision |
| I like Phoenix leg | 0 | -10 | down | 20 | 1F invincible |
Hit Boxes and Frame Data
Legend:
Hit Box: Area that will hit the opponent
Hurt Box: Area where you can get hit. A move is invincible if the Hurt Box is absent.
Throw Box/Range: Active throw frames and range. Your opponent will be thrown in this field if not in block or hit stun.
Projectile Box: Hit box on a projectile attack
Guard/Counter Box: The Guard Box or Counter Box. This appears when blocking or using a counter move.
Push Box: Has no bearing on hurt/hit boxes. Just allows characters to not pass through each other.
Command = the input for the attack.
Start Up = How many start up frames a move/attack has.
Hit = When the attack hits.
Block = When the attack is blocked.
+ signifies how many advantage frames the attacker has.
- signifies how many disadvantage frames the attacker has.
KD means the attack will knock the opponent down.
Standing, Crouching and Running
Taunt
Wall jump : Dong retain his air JD ability after wall jump => good tool to corner escape
Super Jump : Dong cannot JD during a superjump, allowing opponent to anti air
| Command | Total Frames |
| Normal |
35 |
| Command | Total Frames |
| Close |
9 |
| Command | Total Frames |
| 10 |
| Command | Total Frames |
| 10 |
Try to use this feint for Dong, it has less pushback.
| Command | Start Up | Hit | Guard |
| Close |
3 | +6 | +6 |
| Command | Start Up | Hit | Guard |
| Close |
4 | +4 | +4 |
| Command | Start Up | Hit | Guard |
| Close |
5 | -5 | -5 |
It can anti-air jump startups when trying to throw, is double hit and you can feint cancel it to get a combo.
| Command | Start Up | Hit | Guard |
| Close |
4 | -6 | -6 |
| Command | Start Up | Hit | Guard |
| Far |
3 | +6 | +6 |
Amazing poke.
| Command | Start Up | Hit | Guard |
| Far |
4 | 0 | 0 |
| Command | Start Up | Hit | Guard |
| Far |
12 | -10 | -10 |
| Command | Start Up | Hit | Guard |
| Far |
13 | -1 | -1 |
| Command | Start Up | Hit | Guard |
| 5 | +2 | +2 |
Amazing poke.
| Command | Start Up | Hit | Guard |
| 4 | +6 | +6 |
| Command | Start Up | Hit | Guard |
| 5 | -4 | -4 |
| Command | Start Up | Hit | Guard |
| 7 | KD | -8 |
One of the best sweep in the game. Can be punished with supers or when not spaced properly.
| Command |
| Command |
| Command |
| Command |
| Command | Start Up | Hit | Guard |
| 25 | -1 | +5 |
| Command | Start Up | Hit | Guard |
| 10 | -2 | +4 |
| Command | Start Up | Hit | Guard |
| Air |
29 | KD | -16 |
| Command | Start Up | Hit | Guard |
| 8 | KD | -9 |
| Command | Start Up | Hit | Guard |
| 19 | -1 | -1 |
| Command | Start Up | Hit | Guard |
| 27 | -2 | -2 |
| Command | Start Up | Hit | Guard |
| 4 | KD | -30 | |
| 4 | KD | -6 | |
| 4 | KD | -29 | |
| 4 | KD | -6 |
| Command | Start Up | Hit | Guard |
| 22 | +13 | +13 |
| Command | Start Up | Hit | Guard |
| 25 | KD | +9 |
| Command | Start Up | Hit | Guard |
| air |
6 | 0, -5 | 0, -5 |
| air |
9 | 0, -5 | 0, -5 |
| Command | Start Up | Hit | Guard |
| 7 | KD | -9 |
| Command | Start Up | Hit | Guard |
| air |
0 | KD | -39 |
| Command | Start Up | Hit | Guard |
| air |
0 | KD | -69 |
| Command | Start Up | Hit | Guard |
| 19 | KD | -5 |
| Command | Start Up | Hit | Guard |
| 17 | KD | +5 |
| Command | Start Up | Hit | Guard |
| 0 | KD | -10 |
Combos
Close range
- D xx 63214 C => highest non meter damage, however it is unsafe on block and requires very close range
- jA>C (air target) > D xx 214 B (less damage but safer if unsure about hit or guard)
- 236 B > run D xx 63214 C (You can skip the D if not close enough)
- 236 B > run A xx 623 A (You can skip the A if not close enough)
- A > 2C xx 6AC > 2D (More consistant on P2 where there is less pushback. You can also do a very short walk after the feint)
Far range
- far A > 2A
- 236 D > run > DP C (can cross under before the DP to switch sides)
Hop
- hop A/B/C/D > DP C
Landing Super
- 2B > 2C xx 236236B
- 2B > 2C xx 2AC 2362369 A (tigerknee air super)
- DP break 236236236 C
- D xx 2AC > jA 236236 A (only on standing)
- C xx 2AC > 2362369 A
- jA>C > jA 236236 A
- far A > cr A xx 236236236 C~A (kara cancelling the crA)
- unblockable after air reset : 2362369 A or 236236236 C
- j4C crossup (iori kick) > 2C xx 236236B
- Note : after air super, you can link another air super, followed by a DP (in the corner)
Basic Strategy
General Overview
Kim Dong Hwan is a character that is speciallized in aerial and anti air moves.
His normals are shorts but quick,but the main game will be about charge for his Aerial Super Move and attack the opponent with a overhead jump in and combo it and finishing with his anti aerial special.
He is a top-mid tier due that his speed is very fast and effective, and also he doesn't need feint cancel to make more damage, his weakness can be about long and middle range, due that his options are more about air overhead than rushdowns.
His main tool for low pokes will be his stomp specials, due that they had a good recovery to combo a normal in middle range combat or special in close combat.
And also he had a useful P-Power Only Move to rushdown but sadly its the only effective and useful one.
Kim Dong Hwan is a hit and run character. The advantage he has over other characters is his ability to easily attack his opponent no matter where he is or what he is doing. He has a special low and a special overhead allowing him to create some annoying mixups. Big damage comes when Dong has meter, but it is difficult for him to build meter. Be patient and find the time to throw in a safe special to build meter while playing keep away and unpredictably run or jump in when you need to create an opening.
Offensive Tools
- st A It is quite positive on block/hit, allowing you to run back in after one and reapply pressure.
- tick throws are viable with Dong, his clC goes up and option-selects against escape jumps. Don't forget to feint cancel your throws, just in case they didn't throw.
- hops Can be confirmed into DP. Take advantage of his good air normals.
- QCB+K Whether this hits or is guarded, you're at -1 frame. The safest thing to do is usually to JD or backdash. The double hit makes it annoying to jd + guard cancel, and when cancelled from a normal it is an annoying tool that prevents jump outs.
- QCF+B This stomp is a strong rushdown tool, but you must be close for it to land. Try do cancel it from clD. You have a massive +13 frames on hit or block, you can run in a bit and remain in blockstring/combo. If they hold up, Dong will recover in time from the stomp to anti-air. Being a special move, it's a good counterhit tool against people randomly mashing during your pressure string.
- QCF+D This has more range than the lk version, however it is slower and only gives +9 frames on block. use from time to time to catch people off guard.
- Feint Feinting will take away the recovery of your normal and allow you more options. Generally it's used to allow you to get in closer again.
- j b+C to cross up your opponent, when they roll toward you on their wakeup it can be very tricky. Use it on reaction, for example jump to chase a backdash, if they didn't backdash you will crossup and react with this, otherwise use another air move to land on the backdash recovery. React with this when people try to cross down.
- Corner Dong has an infinite with D feint run D. He can use it to guard crush, however mashing A will likely crush fast enough without risking execution failure.
- j.A>C target combo the prefered jumpin as it is double hit, preventing many guard cancels. The 2nd hit whiff on crouchers, but you can input j A>C~A, so that if the jC whiff you get a jA>stA blockstring.
Keep Away
You can probably forget about rushing, Dong is all about running away. He is notorious for his ability to run away. It is extra frustrating for the opponent as, at any moment, he can change his mind and attack. Here is a list of his most notable tools :
- backdash very good, allows Dong to run away for free unless hard predicted.
- walljump Dong retain his air JD ability when walljumping, a simple but efficient gameplan is to slowly run from a corner to another using this tool, letting the clock run down.
- iori kick j b+C (hits behind him), allows you to punish people trying to cross you down.
- air throw when someone jumps at Dong, simply do 8741+C, it will either air JD or airthrow, giving Dong good control over the air.
- DP another anti-air... Also a "get off me" tool, but keep in mind it is unsafe even after break. The lp version of dp+p has more pushback than the hp version.
- far A and cr A extremely fast and good range, to prevent ground approaches, or run in and poke with it.
- 0f air super Dong can whiff punish anything when in the air with his air 0F, it is a very scary tool that will make the opponent think twice before chasing after an airborne Dong. Remember to build meter when possible with his qcfB stomp to get this ready.
- 0f hidden super Have fun with the execution (qcf x3 + C) but it's still a 0F super, allowing many punishes.
Weaknesses
His most notable weakness would probably be his lack of damage output and his meter building ability is quite slow.
Unsafe Moves
- Dp+p Even if you break this, you are at -6 frames. You can exploit it with the lp version (more pushback) against character who can't really punish hard from a distance, but that is very situational (say they can only punish with a lp, the risk/reward is in your favor)
- Qcb+k Whether it's on hit or block you're at -1 frame, technically punishable by 0F supers => there is a way to escape this : Buffer an invincible move before the freeze, then press B+D so it doesn't come out. If you see a freeze, press your button for the invincible special to come out. (showcase : https://www.youtube.com/watch?v=YGg-PWL7gwc)
- j.d+k Depending on where his last kick lands, you'll be at a greater or lesser disadvantage, +0 at best. Somewhat safe unless the opponent has a 0F super. Also negative if you hit someone in the air
- Others His TOP, qcf,qcf+lk, j.qcf,qcf+p, and hcb+hp are all highly unsafe on block.
Advanced Strategy
In-depth video lecture on Dong Hwan. Please use the timestamps to navigate the topics.
Matchup Strategies
To come.
