| Pre-release information
This page is under construction based on pre-release data. Join the SF6 Resource Hub for info on editing. |
Introduction
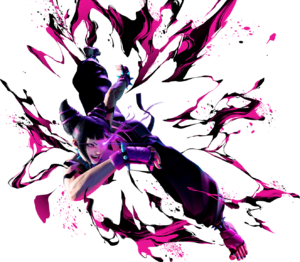
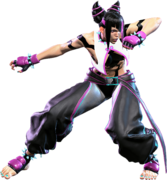
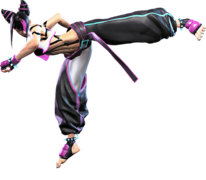
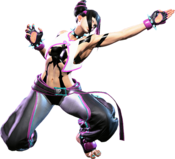
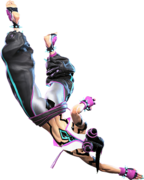
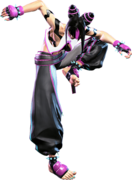
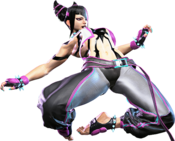
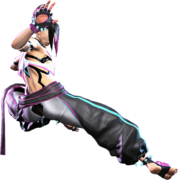
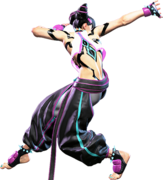
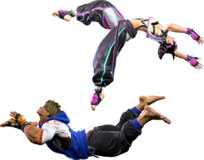
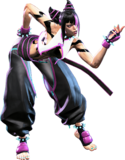
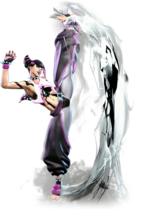
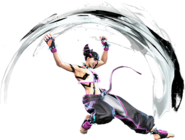
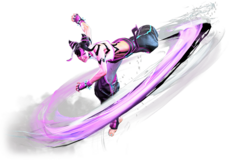
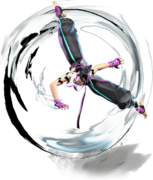
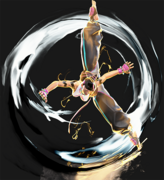
This sadistic thrillseeker enjoys the strife and suffering of others, taking immense joy in obliterating her foes. Without revenge against M. Bison as a motivator, she whiles away her time in a gloomy haze.
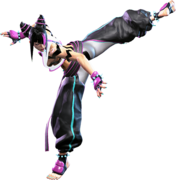
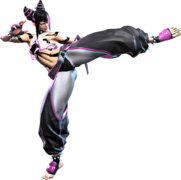
Juri is well suited to explosive, aggressive rushdown and strike/throw mix that's empowered by space control with her ground normals and storing up stocks to improve her special moves, making her a menace at close and mid range. She can also get some very massive and flashy combos off of her hits, making her a great pick for someone who loves pulling off long combo strings.
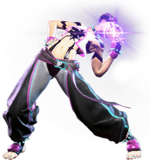
The core of Juri's playstyle is centered around Fuhajin, which grants Juri a special stock (up to a maximum of 3). These stocks will separately enhance three of her other special moves; Saihasho is a ground-based projectile that travels much farther when enhanced, Ankensatsu is an advancing kick that has more hitstun for combo extensions when enhanced, and Go Ohsatsu is a lunging roundhouse that gains another kick when enhanced, increasing its corner carry potential. Juri can also cancel between these three moves if she has a stock available, using their enhanced versions when she does so, and her Level 1 Super Art, Sakkai Fuhazan, can be enhanced for extra damage on the last hit by holding down the button with a stock available.
Aside from those moves, Juri's ground and anti-air game are quite powerful. Her dash covers a lot of space at a time, making her strike/throw game especially dangerous, and many of her buttons either cover a lot of space in front of her (5MK, 5HK), convert into a Fuhajin knockdown either directly or through combos (6MP, 2MK), or do both (5HP). She can also shut down a ton of air approaches with 2HP as well as her dedicated anti-air special Tensenrin, particularly its HP version. Juri's powerful ground presence is also enhanced by the speed and length of Juri's Drive Rush; getting caught by Drive Rush normals from her usually results in her cashing out for a fair bit of damage and at minimum getting a Fuhajin stock.
Juri's most powerful and unique tool, however, is her Level 2 Super Art, the Feng Shui Engine. While it's active, Juri can chain her normals together in ascending order so long as she doesn't use the same button twice, similar to the magic series of the Darkstalkers games, and many of her normals gain new properties and cancel points that they lack otherwise, opening up FSE-exclusive combo routes and letting her crank out even stronger pressure. She can also choose to start it off with a dash that does damage and breaks through armor, allowing her to bully through enemies that try to Drive Impact or otherwise push through when she initially engages it.
While Juri has a lot going for her, there are a few things to keep in mind when playing her. Managing her Fuhajin stocks is critical to maximizing her effectiveness -- she's not so dependent on them that lacking them will completely ruin her offense, but not having any does shut out some options for her and can make her a little less threatening. Similarly, while she doesn't strictly need Feng Shui Engine to be effective, it offers a wide range of benefits for both combos and pressure, so mastering its use means learning and labbing out its chains in order to seize any opportunity the opponent gives her. If you enjoy the rush of kicking your opponents when they're down and crushing their defenses, Juri is the riotous rider for you.
| Pick if you like: | Avoid if you dislike: |
|---|---|
|
|
Classic & Modern Versions Comparison
| Missing Normals |
|
|---|---|
| Missing Command Normals |
|
| Shortcut-Only Specials |
|
| Assist Combos |
|
| Miscellaneous Changes |
|
| Juri | |
|---|---|
| Vitals | |
| Life Points | 10000 |
| Ground Movement | |
| Forward Walk Speed | 0.047 |
| Backward Walk Speed | 0.032 |
| Forward Dash Speed | 22 |
| Backward Dash Speed | 23 |
| Forward Dash Distance | 1.903 |
| Backward Dash Distance | 1.114 |
| Drive Rush Min. Distance (Throw) | 0.641 |
| Drive Rush Min. Distance (Block) | 2.479 |
| Drive Rush Max Distance | 3.999 |
| Jumping | |
| Jump Speed | 4+38+3 |
| Jump Apex | 2.115 |
| Forward Jump Distance | 1.90 |
| Backward Jump Distance | 1.52 |
| Throws | |
| Throw Range | 0.8 |
| Throw Hurtbox | 0.33 |
| Frame Data Glossary - SF6 | |
|---|---|
| Hitbox Images |
🟥 (Red): Attack hitbox
🟩 (Green): Vulnerable hurtbox that can be hit by strikes/projectiles
🟦 (Blue): Vulnerable throw hurtbox
|
| Active |
How many frames a move remains active (can hurt opponents) for. For projectiles with a maximum active period, a value may be listed in [brackets], but this number is not factored into the move's total frame count.
|
| Cancel |
Available options for canceling one move into another move.
|
| Cancel Hitconfirm Windows |
Hitconfirm reaction windows into Special Moves, Target Combos, and Super Arts.
|
| Damage |
Attack damage on hit. Multi-hit moves may have the damage listed for individual hits as X,Y (or sometimes X*Y). Sometimes a move's damage changes depending on which active frame connects, or on cinematic vs. non-cinematic hits; in this case, multiple values may be listed, and it will be clarified in the move description.
|
| Damage Scaling |
Some moves cause additional damage scaling in combos. Refer to Game Data page for a more detailed breakdown. Scaling Types:
|
| Drive Rush Cancel Advantage |
Refers to the frame advantage when canceling a normal, command normal, or Target Combo into Drive Rush on hit or block (abbreviated as DRC for Drive Rush Cancel). This is calculated at the moment a follow-up attack can be input, not at the moment the character can block or perform movement options. An attack that with DRC +8 on Hit can link into an 8-frame attack, and DRC +4 on Block can create a true blockstring into a 4-frame attack. Note that any DRC on Block worse than +4 cannot form a true blockstring, allowing the opponent to interrupt with an invincible reversal. Most light normals are slightly negative after a DRC on block, meaning the opponent can mash their fastest normal to guarantee a counter-hit (though this requires fast reactions). The attacking character could punish this with Light > DRC into an immediate invincible attack, but this would be an incredibly expensive and high-risk gambit.
|
| Forced Knockdown |
Most airborne command normals, special moves, and Super Arts put the user in a "Forced Knockdown" state. While in this state, an air knockdown will occur when being hit by any attack, even if it would otherwise cause an air reset. As an example, Ryu's 2HP causes an air reset when used as an anti-air. Against a move like Cammy's Hooligan Combination, however, the 2HP puts her into an air knockdown state. This allows Ryu to successfully cancel 2HP into Shoryuken for a juggle, similar to how a Drive Impact wall splat works. Taking advantage of Forced Knockdown juggles is important for dealing with moves like Ken's Dragonlash, Dhalsim's Air Teleport, or Kimberly's 6HK~Hop sequence. Moves that already cause an air knockdown, like most j.MP air-to-airs, will not display the "Forced Knockdown" message.
|
| Guard |
Refers to the direction an attack must be blocked. L is for Low attacks (must be blocked crouching), H is for High attacks/overheads (must be blocked standing), LH is for attacks that can be blocked crouching or standing. T is for Throw attacks which cannot be blocked.
|
| Juggles |
When a character is put into an Air Knockdown state, it is often possible to follow up with a Juggle attack before they hit the ground. In the simplest terms, there are 2 main juggle states:
The following is a more detailed overview of the SF6 juggle system:
Juggle Start (JS): When starting a juggle, the opponent's JC will be set to this value. May be different vs. standing and airborne opponents.
Juggle Increase (JI): When opponent is already in a juggle state, attacks will increase the opponent's JC by this amount.
Juggle Limit (JL): Property of an attack hitbox that determines whether it connects on a juggled opponent. The JL must be ≥ the opponent's JC to hit successfully.
An example to tie everything together:
Drive Rush notes:
More recently, the official definitions used by Capcom are slightly different than these community-designated terms. When reading official patch notes, the following terms are used instead:
|
| On Hit/Block |
These are frame advantage values when the attack hits or is blocked. If the number is positive, then the move will recover before the defender can act again. If the number is negative, the defender will be able to act before the attacker and maybe even punish. KD refers to knockdown on hit, and the listed KD Advantage refers to how many frames the attacker can act before the defender finishes their wakeup animation.
|
| Recovery |
How many frames it takes for a move to finish after the active frames have finished. For projectiles, recovery is considered to begin after the first active frame.
|
| Startup |
How many frames it takes before the move becomes 'active' or have a hit box. The last startup frame and the first active frame are the same frame, meaning all values are written as Startup + 1.
|
| IASA / Actionable Recovery |
Some moves play out an extended recovery animation when no other button/direction is input (for crouching moves, it applies when holding any down direction). These are often referred to as "actionable recovery" frames; in some games, the term IASA (Interruptible As Soon As) refers to the frame that Actionable Recovery begins. Letting the Actionable Recovery frames play out can change the character's position, potentially setting up spacing traps by recovering farther away. For example, Manon 5HP will recover much farther away from the opponent if no input is performed immediately after her recovery; holding back or down-back to block will keep her much closer to the opponent.
|
Normals
Standing Normals
5LP
| Startup | Active | Recovery | Cancel | Damage | Guard | On Hit | On Block |
|---|---|---|---|---|---|---|---|
| 4 | 4 | 7 | Chn Sp SA | 300 | LH | +5 | -2 |
| Startup | Active | Recovery | Cancel | Damage | Guard | On Hit | On Block |
|---|---|---|---|---|---|---|---|
| 4 | 4 | 7 | Chn Sp SA | 100 | LH | +5 | -2 |
- Chains into 5LP/2LP/2LK
- High active frames makes it great for meaty pressure (up to +8/+1 advantage)
- Cancel reaction window: f
- xx Lv.2 Super: +8/+1
5MP
| Startup | Active | Recovery | Cancel | Damage | Guard | On Hit | On Block |
|---|---|---|---|---|---|---|---|
| 6 | 4 | 12 | Sp SA TC | 600 | LH | +7 | +2 |
| Startup | Active | Recovery | Cancel | Damage | Guard | On Hit | On Block |
|---|---|---|---|---|---|---|---|
| 6 | 4 | 12 | Chn Sp SA | 400 | LH | +7 | +2 |
- High active frames makes it great for meaty pressure (up to +10/+5 advantage)
- Cancel reaction window: f
- xx Lv.2 Super: +14/+9
5HP
| Startup | Active | Recovery | Cancel | Damage | Guard | On Hit | On Block |
|---|---|---|---|---|---|---|---|
| 10 | 3 | 24 | Sp SA | 800 | LH | -1 | -5 |
- Forces stand on hit
- Cancel reaction window: f
- xx Lv.2 Super: +18/+14
| Startup | Active | Recovery | Cancel | Damage | Guard | On Hit | On Block |
|---|---|---|---|---|---|---|---|
| 10 | 3 | 24 | Chn Sp SA | 600 | LH | KD +29 | -5 |
- Chained version during Lv.2 Super (FSE)
5LK
| Startup | Active | Recovery | Cancel | Damage | Guard | On Hit | On Block |
|---|---|---|---|---|---|---|---|
| 5 | 3 | 9 | Sp SA | 300 | LH | +2 | -3 |
| Startup | Active | Recovery | Cancel | Damage | Guard | On Hit | On Block |
|---|---|---|---|---|---|---|---|
| 5 | 3 | 9 | Chn Sp SA | 100 | LH | +2 | -3 |
- Cancel reaction window: f
- xx Lv.2 Super: +5/-1
5MK
| Startup | Active | Recovery | Cancel | Damage | Guard | On Hit | On Block |
|---|---|---|---|---|---|---|---|
| 5(8) | 2(1)3 | 17 | Sp SA (1st) | 400,300 (700) | LH | +3 | -4 |
| Startup | Active | Recovery | Cancel | Damage | Guard | On Hit | On Block |
|---|---|---|---|---|---|---|---|
| 5(8) | 2(1)3 | 17 | Chn Sp SA | 300,200 | LH | +3 | -4 |
- The first hit can link from 5LP; it has enormous hitstun and can even combo into HK Fuha Store
- If the first hit whiffs, the second hit connects on frame 8
- Cancel reaction window: f
- xx Lv.2 Super: +19(15)/+7(8)
5HK
| Startup | Active | Recovery | Cancel | Damage | Guard | On Hit | On Block |
|---|---|---|---|---|---|---|---|
| 17 | 4 | 19 | - | 900 | LH | +2(+5) | -3(0) |
- Becomes fully cancellable during FSE, even when not chained into
| Startup | Active | Recovery | Cancel | Damage | Guard | On Hit | On Block |
|---|---|---|---|---|---|---|---|
| 17 | 4 | 19 | Chn Sp SA | 700 | LH | KD +34 | -3 |
- Chained version during Lv.2 Super (FSE)
- Cancel reaction window: f
Crouching Normals
2LP
| Startup | Active | Recovery | Cancel | Damage | Guard | On Hit | On Block |
|---|---|---|---|---|---|---|---|
| 4 | 3 | 8 | Chn Sp SA | 300 | LH | +4 | -1 |
| Startup | Active | Recovery | Cancel | Damage | Guard | On Hit | On Block |
|---|---|---|---|---|---|---|---|
| 4 | 3 | 8 | Chn Sp SA | 100 | LH | +4 | -1 |
- Chains into 5LP/2LP/2LK
- Cancel reaction window: f
- xx Lv.2 Super: +7/+2
2MP
| Startup | Active | Recovery | Cancel | Damage | Guard | On Hit | On Block |
|---|---|---|---|---|---|---|---|
| 6 | 4 | 14 | Sp SA | 600 | LH | +5 | -2 |
| Startup | Active | Recovery | Cancel | Damage | Guard | On Hit | On Block |
|---|---|---|---|---|---|---|---|
| 6 | 4 | 14 | Chn Sp SA | 400 | LH | +5 | -2 |
- Cancel reaction window: f
- xx Lv.2 Super: +15/+8
2HP
| Startup | Active | Recovery | Cancel | Damage | Guard | On Hit | On Block |
|---|---|---|---|---|---|---|---|
| 8 | 4 | 23 | Sp SA | 900 | LH | +3 | -11 |
- Forces stand on hit
- All active frames are cancellable
- Cancel reaction window: f
- xx Lv.2 Super: +22/+12
| Startup | Active | Recovery | Cancel | Damage | Guard | On Hit | On Block |
|---|---|---|---|---|---|---|---|
| 8 | 4 | 23 | Sp SA Jmp | 700 | LH | KD +34 | -11 |
- Chained version during Lv.2 Super (FSE)
- Launches opponent into a juggle state, jump cancellable on hit/block
2LK
| Startup | Active | Recovery | Cancel | Damage | Guard | On Hit | On Block |
|---|---|---|---|---|---|---|---|
| 5 | 3 | 8 | Chn | 200 | L | +3 | -1 |
| Startup | Active | Recovery | Cancel | Damage | Guard | On Hit | On Block |
|---|---|---|---|---|---|---|---|
| 5 | 3 | 8 | Chn Sp SA | 100 | L | +3 | -1 |
- Chains into 5LP/2LP/2LK
- Fully cancellable during Feng Shui Engine
2MK
| Startup | Active | Recovery | Cancel | Damage | Guard | On Hit | On Block |
|---|---|---|---|---|---|---|---|
| 8 | 3 | 19 | Sp SA | 500 | L | +1 | -6 |
| Startup | Active | Recovery | Cancel | Damage | Guard | On Hit | On Block |
|---|---|---|---|---|---|---|---|
| 8 | 3 | 19 | Chn Sp SA | 300 | L | +1 | -6 |
- Applies a 20% damage scaling penalty to the next hit when used as a combo starter (100/80/70/60...)
- Cancel reaction window: f
- xx Lv.2 Super: +15/+8
2HK
| Startup | Active | Recovery | Cancel | Damage | Guard | On Hit | On Block |
|---|---|---|---|---|---|---|---|
| 10 | 3 | 23 | - | 900 | L | HKD +32 | -11 |
- Counterhit/Punish Counter: +47 HKD
- Becomes fully cancellable during FSE, even when not chained into
| Startup | Active | Recovery | Cancel | Damage | Guard | On Hit | On Block |
|---|---|---|---|---|---|---|---|
| 10 | 3 | 23 | Sp SA | 700 | L | HKD +32 | -11 |
- Chained version during Lv.2 Super (FSE)
- Counterhit/Punish Counter: +47 HKD
- Cancel reaction window: f
Jumping Normals
j.LP
| Startup | Active | Recovery | Cancel | Damage | Guard | On Hit | On Block |
|---|---|---|---|---|---|---|---|
| 5 | 6 | 3 land | - | 300 | H | +6(+9) | +2(+5) |
| Startup | Active | Recovery | Cancel | Damage | Guard | On Hit | On Block |
|---|---|---|---|---|---|---|---|
| 5 | 6 | 3 land | Chn Sp | 100 | H | +9 | +5 |
j.MP
| Startup | Active | Recovery | Cancel | Damage | Guard | On Hit | On Block |
|---|---|---|---|---|---|---|---|
| 7 | 5 | 3 land | Sp | 500 | H | +4(+13) | -2(+7) |
| Startup | Active | Recovery | Cancel | Damage | Guard | On Hit | On Block |
|---|---|---|---|---|---|---|---|
| 7 | 5 | 3 land | Chn Sp | 300 | H | - | - |
j.HP
| Startup | Active | Recovery | Cancel | Damage | Guard | On Hit | On Block |
|---|---|---|---|---|---|---|---|
| 12 | 6 | 3 land | - | 900 | H | HKD +23(+34) | +4(+11) |
| Startup | Active | Recovery | Cancel | Damage | Guard | On Hit | On Block |
|---|---|---|---|---|---|---|---|
| 12 | 6 | 3 land | Chn Sp | 700 | H | KD | - |
j.LK
| Startup | Active | Recovery | Cancel | Damage | Guard | On Hit | On Block |
|---|---|---|---|---|---|---|---|
| 4 | 6 | 3 land | - | 300 | H | +5(+10) | +1(+6) |
| Startup | Active | Recovery | Cancel | Damage | Guard | On Hit | On Block |
|---|---|---|---|---|---|---|---|
| 4 | 6 | 3 land | Chn Sp | 100 | H | - | - |
j.MK
| Startup | Active | Recovery | Cancel | Damage | Guard | On Hit | On Block |
|---|---|---|---|---|---|---|---|
| 6 | 6 | 3 land | - | 500 | H | +8(+13) | +4(+9) |
| Startup | Active | Recovery | Cancel | Damage | Guard | On Hit | On Block |
|---|---|---|---|---|---|---|---|
| 6 | 6 | 3 land | Chn Sp | 300 | H | +10(+13) | +6(+9) |
j.HK
| Startup | Active | Recovery | Cancel | Damage | Guard | On Hit | On Block |
|---|---|---|---|---|---|---|---|
| 10 | 6 | 3 land | - | 800 | H | +6(+15) | +2(+11) |
| Startup | Active | Recovery | Cancel | Damage | Guard | On Hit | On Block |
|---|---|---|---|---|---|---|---|
| 10 | 6 | 3 land | Chn Sp | 600 | H | - | - |
8j.HK
Command Normals
6MP
| Startup | Active | Recovery | Cancel | Damage | Guard | On Hit | On Block |
|---|---|---|---|---|---|---|---|
| 8 | 3 | 17 | Sp SA | 600 | LH | +4 | -3 |
| Startup | Active | Recovery | Cancel | Damage | Guard | On Hit | On Block |
|---|---|---|---|---|---|---|---|
| 8 | 3 | 17 | Chn Sp SA | 400 | LH | +4 | -3 |
- Cancel reaction window: f
- xx Lv.2 Super: +16/+9
6MK
| Startup | Active | Recovery | Cancel | Damage | Guard | On Hit | On Block |
|---|---|---|---|---|---|---|---|
| 21 | 2 | 21(23) | - | 600 | H | +2 | -3 |
- Not airborne, despite the animation
| Startup | Active | Recovery | Cancel | Damage | Guard | On Hit | On Block |
|---|---|---|---|---|---|---|---|
| 21 | 2 | 21(23) | Sp SA | 400 | H | KD +25 | -3 |
- Not airborne, despite the animation
- Cancel reaction window: f
- xx Lv.2 Super: KD+39/+14
6HP
| Startup | Active | Recovery | Cancel | Damage | Guard | On Hit | On Block |
|---|---|---|---|---|---|---|---|
| 15(23) | 3(5)3 | 20 | Sp SA | 500x2 | LH | +2 | -4 |
| Startup | Active | Recovery | Cancel | Damage | Guard | On Hit | On Block |
|---|---|---|---|---|---|---|---|
| 15(23) | 3(5)3 | 20 | Chn Sp SA | 400x2 | LH | KD +40 | -4 |
- Cancel reaction window: 27f (14f 2nd hit only)
- xx Lv.2 Super: +18/+8 (+17/+11)
4HK
| Startup | Active | Recovery | Cancel | Damage | Guard | On Hit | On Block |
|---|---|---|---|---|---|---|---|
| 10(19) | 3(6)3 | 19 | Sp SA | 400x2 | LH | -2 | -6 |
| Startup | Active | Recovery | Cancel | Damage | Guard | On Hit | On Block |
|---|---|---|---|---|---|---|---|
| 10(19) | 3(6)3 | 19 | Chn Sp SA | 300x2 | LH | KD +20 | -6 |
- Cancel reaction window: f
- xx Lv.2 Super: +12/+6 (+12/+8)
Target Combos
5MP~4HP~HP
Universal Mechanics
Throws
Forward Throw (LPLK)
| Startup | Active | Recovery | Cancel | Damage | Guard | On Hit | On Block |
|---|---|---|---|---|---|---|---|
| 5 | 3 | 23 | - | 1200 (2040) | T | KD +25 | - |
- Has access to corner throw loops by dashing (+14) or walking; throw must be manually timed
- Punish Counter: +36 HKD
Back Throw (4LPLK)
| Startup | Active | Recovery | Cancel | Damage | Guard | On Hit | On Block |
|---|---|---|---|---|---|---|---|
| 5 | 3 | 23 | - | 1200 (2040) | T | KD +18 | - |
- Side switches
- Unique in that it doesn't change the position of the opponent when thrown
- Punish Counter: +22 HKD
Air Throw (LPLK Air)
| Startup | Active | Recovery | Cancel | Damage | Guard | On Hit | On Block |
|---|---|---|---|---|---|---|---|
| 5 | 3 | 3 land | - | 1200 (2040) | T | KD +2(+4) | - |
- KD Adv. varies based on height
- Side switches
Drive Moves
Drive Impact (HPHK)
| Startup | Active | Recovery | Cancel | Damage | Guard | On Hit | On Block |
|---|---|---|---|---|---|---|---|
| 26 | 2 | 35 | - | 800 | LH | KD +35 / Wall Splat KD +65 | -3 / Wall Splat HKD +72 |
See Drive Impact
- Notable blockstring gaps (8f or less cannot be escaped by jumping):
- 5HP, FSE 6MK: 5f (1f Burnout)
- 6HP (2nd): 8f (4f Burnout)
- 5MP, 6MP: 10f (6f Burnout)
- 2MP, 2MK, 2HP, 6HP (1st), 4HK (2nd), FSE 5MK (2nd): 11f (7f Burnout)
- 5MK (1st), FSE 2HK: 12f (8f Burnout)
- 4HK (1st): 13f (9f Burnout)
- FSE 5HK: 15f (11f Burnout)
Drive Reversal (6HPHK)
| Startup | Active | Recovery | Cancel | Damage | Guard | On Hit | On Block |
|---|---|---|---|---|---|---|---|
| 20 | 3 | 26(31) | - | 500 recoverable | LH | KD +23 | -6 |
See Drive Reversal
- Full Invuln: 1-22f; Armor Break
Drive Parry (MPMK)
| Startup | Active | Recovery | Cancel | Damage | Guard | On Hit | On Block |
|---|---|---|---|---|---|---|---|
| 1 | 12 or until released | 33(1)(11) | - | - | - | - | - |
See Drive Parry
- Perfect Parry has only 1f recovery, and disables the opponent from canceling their attack
- Perfect Parry vs. projectiles puts you into a fixed 11f recovery
Drive Rush (66)
Taunts
Neutral Taunt (5PPPKKK)
| Startup | Active | Recovery | Cancel | Damage | Guard | On Hit | On Block |
|---|---|---|---|---|---|---|---|
| 294 (total) | - | - | - | - | - | - | - |
Forward Taunt (6PPPKKK)
| Startup | Active | Recovery | Cancel | Damage | Guard | On Hit | On Block |
|---|---|---|---|---|---|---|---|
| 199 (total) | - | - | - | - | - | - | - |
Back Taunt (4PPPKKK)
Special Moves
Fuhajin (214LK)
| Startup | Active | Recovery | Cancel | Damage | Guard | On Hit | On Block |
|---|---|---|---|---|---|---|---|
| 10 | 4 | 19(21) | SA3 | 600 | LH | KD +37 | -4 |
- Clashes with 1 projectile hit; gains one Fuha stock on hit/block/whiff
- Cancel reaction window: f (Super)
| Startup | Active | Recovery | Cancel | Damage | Guard | On Hit | On Block |
|---|---|---|---|---|---|---|---|
| 13 | 4 | 21 | SA3 | 600 | LH | KD +37 | -6 |
- Clashes with 1 projectile hit; gains one Fuha stock on hit/block/whiff
- Cancel reaction window: f (Super)
| Startup | Active | Recovery | Cancel | Damage | Guard | On Hit | On Block |
|---|---|---|---|---|---|---|---|
| 25 | 5 | 19(21) | SA3 | 500 | LH | KD +46 | -8 |
- Clashes with 1 projectile hit; gains one Fuha stock on hit/block/whiff
- Launches opponent higher for consistent juggle followup (combos from 5MK 1st hit)
- Cancel reaction window: f (Super)
| Startup | Active | Recovery | Cancel | Damage | Guard | On Hit | On Block |
|---|---|---|---|---|---|---|---|
| 12 | 6 | 21 | SA2 SA3 | 600 | LH | KD +45 | -12 |
- Clashes with 2 projectile hits; gains one Fuha stock on hit/block/whiff
- Launches opponent higher for consistent juggle followup
- Cancel reaction window: f (Super)
- xx Lv.2 Super: KD+51/-6
Saihasho (236LK)
| Startup | Active | Recovery | Cancel | Damage | Guard | On Hit | On Block |
|---|---|---|---|---|---|---|---|
| 16 | 10 | 20 | SA3 | 400 | LH | -2 | -8 |
- Has a projectile hitbox (can lose to projectile-invuln moves)
- Cancel reaction window: f (Super)
| Startup | Active | Recovery | Cancel | Damage | Guard | On Hit | On Block |
|---|---|---|---|---|---|---|---|
| 16 | [80] | 29 | SA3 | 600 | LH | +1 | -3 |
- True 1-hit projectile
- For 1 Fuha stock, can press MK or HK to chain into Ankensatsu or Go Ohsatsu (within the first 3 active frames)
- Counts as 2 hits for damage scaling (for followup links or chained 236LK~6K followups)
- Cancel reaction window: f (Super)
| Startup | Active | Recovery | Cancel | Damage | Guard | On Hit | On Block |
|---|---|---|---|---|---|---|---|
| 11 | [120] | 27 | SA2 SA3 | 400x2 | LH | KD +39 | -2 |
- True 2-hit projectile
- For 1 Fuha stock and 2 additional Drive bars, can press MK or HK to chain into Ankensatsu or Go Ohsatsu (within the first 3 active frames)
- Cancel reaction window: f (Super)
- xx Lv.2 Super: KD+57/+17
Ankensatsu (236MK)
| Startup | Active | Recovery | Cancel | Damage | Guard | On Hit | On Block |
|---|---|---|---|---|---|---|---|
| 24 | 4 | 19 land | SA3 | 600 | LH | +5 (KD +21~23) | -10 |
- 8f~ Low Crush; knocks down vs. airborne opponents; not an overhead
- Cancel reaction window: f (Super)
| Startup | Active | Recovery | Cancel | Damage | Guard | On Hit | On Block |
|---|---|---|---|---|---|---|---|
| 24 | 4 | 19 land | SA3 | 600 | LH | +8 (KD +21~23) | -10 |
- 8f~ Low Crush; knocks down vs. airborne opponents; not an overhead
- For 1 Fuha stock, can press LK or HK to chain into Saihasho or Go Ohsatsu
- Counts as 2 hits for damage scaling (for followup links or chained 236MK~6K followups)
- Cancel reaction window: f (Super)
| Startup | Active | Recovery | Cancel | Damage | Guard | On Hit | On Block |
|---|---|---|---|---|---|---|---|
| 24 | 4 | 19 land | SA2 SA3 | 800 | LH | +9 (KD +56~57) | -10 |
- 8f~ Low Crush; not an overhead
- Knocks down vs. airborne opponents for a ground bounce, puts opponent into limited juggle state
- For 1 Fuha stock and 2 additional Drive bars, can press LK or HK to chain into Saihasho or Go Ohsatsu
- Counts as 2 hits for damage scaling (for followup links or chained 236MK~6K followups)
- Cancel reaction window: f (Super)
- xx Lv.2 Super: +16/-3
Go Ohsatsu (236HK)
| Startup | Active | Recovery | Cancel | Damage | Guard | On Hit | On Block |
|---|---|---|---|---|---|---|---|
| 18 | 4 | 27 | SA3 | 1000 | LH | KD +27 | -11 |
- Puts airborne opponents into limited juggle state
- Cancel reaction window: f (Super)
| Startup | Active | Recovery | Cancel | Damage | Guard | On Hit | On Block |
|---|---|---|---|---|---|---|---|
| 18 | 4(12)3 | 27 | SA3 | 700,500 (1200) | LH | KD +37 | -12 |
- Puts airborne opponents into limited juggle state
- Cancel reaction window: f (Super)
- For 1 Fuha stock, can press LK or MK to chain into Saihasho or Ankensatsu
| Startup | Active | Recovery | Cancel | Damage | Guard | On Hit | On Block |
|---|---|---|---|---|---|---|---|
| 18 | 4(12)3(28)5 | 28 | SA2 SA3 | 400x3 (1200) | LH | KD +32 | -16 |
- First 2 hits are Super cancellable (followup Adv. depends on which his is cancelled)
- For 1 Fuha stock and 2 additional Drive bars, can press LK or MK to chain into Saihasho or Ankensatsu
- Cancel reaction window: f (Super)
- xx Lv.2 Super: +17/+17 (KD+54/+15)
Tensenrin (623P)
| Startup | Active | Recovery | Cancel | Damage | Guard | On Hit | On Block |
|---|---|---|---|---|---|---|---|
| 11 | 3(2)2 | 22 | SA3 | 400x2 | LH | KD +37 | -8 |
- First 2 hits are Super cancellable
- Cancel reaction window: f (Super)
| Startup | Active | Recovery | Cancel | Damage | Guard | On Hit | On Block |
|---|---|---|---|---|---|---|---|
| 5 | 8(5)2(3)2 | 24+14 land | - | 300x4 (1200) | LH | KD +31 | -37 |
- Anti-Air Invuln: 1-?f (strong anti-air)
| Startup | Active | Recovery | Cancel | Damage | Guard | On Hit | On Block |
|---|---|---|---|---|---|---|---|
| 5 | 8(5)2(3)2 | 24+14 land | - | 300x4 (1200) | LH | KD +28 | -37(-41) |
- Anti-Air Invuln: 1-?f (strong anti-air)
- Only 1 hit connects vs. crouch block)
| Startup | Active | Recovery | Cancel | Damage | Guard | On Hit | On Block |
|---|---|---|---|---|---|---|---|
| 6 | 4(1)2(6)2(2)2 | 32+19 land | - | 600,200x3,400 (1600) | LH | KD +5 | -48 |
- Full Invuln: 1-8f
- Juri's primary reversal option
Shiku-sen (j.214K)
| Startup | Active | Recovery | Cancel | Damage | Guard | On Hit | On Block |
|---|---|---|---|---|---|---|---|
| 18 | until landing | 18 land | - | 400 | LH | KD +34(+41) | -10(-3) |
- Puts opponent into limited juggle state
- Can input followup Shiren-sen on hit only
- Button strength does not affect trajectory
| Startup | Active | Recovery | Cancel | Damage | Guard | On Hit | On Block |
|---|---|---|---|---|---|---|---|
| 16 | until landing | 18 land | - | 300 | LH | KD +37(+44) | -10(-3) |
- Puts opponent into limited juggle state
- Can input followup Shiren-sen on hit only
- Button combination does not affect divekick trajectory
Shiren-sen (j.214K~K)
| Startup | Active | Recovery | Cancel | Damage | Guard | On Hit | On Block |
|---|---|---|---|---|---|---|---|
| 6 | 4(4)4(17)4 | 23(29)+12 land | - | 300x2,600 (1200) | - | KD +28(+33) | - |
- Comes out on hit only
| Startup | Active | Recovery | Cancel | Damage | Guard | On Hit | On Block |
|---|---|---|---|---|---|---|---|
| 6 | 4(4)4(17)4 | 27(34)+7 land | - | 300x3 (900) | - | KD +50(+57) | - |
- Comes out on hit only
- Puts opponent into limited juggle state
Super Arts
Level 1 Super (236236K)
| Startup | Active | Recovery | Cancel | Damage | Guard | On Hit | On Block |
|---|---|---|---|---|---|---|---|
| 7 | - | 201 total | - | 1800 | LH | KD +26(+49) | -32 |
- Strike/Throw Invuln: 1-8f; Armor Break
- Depletes 1/2 Drive bar from opponent on hit
| Startup | Active | Recovery | Cancel | Damage | Guard | On Hit | On Block |
|---|---|---|---|---|---|---|---|
| 7 | - | 201 Total | - | 2100 | LH | KD +26(+49) | -32 |
- Strike/Throw Invuln: 1-8f; Armor Break
- Depletes 1/2 Drive bar from opponent on hit
A projectile Super that sends the opponent to the opposite edge of the screen. The Knockdown advantage is highly variable depending on Juri's screen position. Holding the K button will spend 1 Fuha stock to deal an additional 500 damage on the final hit. The full damage distribution is: 200x4*300*700 (200x4*300*1200).
Level 2 Super (214214P)
| Startup | Active | Recovery | Cancel | Damage | Guard | On Hit | On Block |
|---|---|---|---|---|---|---|---|
| 1 | [600] | 6 | - | - | - | - | - |
- Install Super; allows Juri to chain normals together and changes the properties of many attacks
| Startup | Active | Recovery | Cancel | Damage | Guard | On Hit | On Block |
|---|---|---|---|---|---|---|---|
| 9 | 11 | 26 | - | 300 | LH | -4(+6) | -17(-7) |
- Holding P begins the FSE install with a dash attack; Armor Break
Juri's FSE install Super allows her to chain normals into equal or higher strengths for 10 seconds, though she cannot repeat the same button twice in a chain. For example, 2MP~5MK would work, but 2MP~5MP would not since they share the same button command. Many non-cancellable normals gain cancel properties during FSE, like 2LK, 2HK, and 5HK. The chained hits also have many unique properties themselves, such as 6MK causing a knockdown. The install timer stops counting down while the opponent is in hitstop or blockstop, which makes it easier to pressure the opponent without wasting too much of your install time.
If Juri holds the P button during the Super freeze, she will perform a dash attack that can be cancelled into any normal. This gives her more reliable point blank combos when cancelling normals into FSE. The dash attack itself is unsafe if not cancelled, though it becomes much less unsafe near max range.
Level 3 Super (214214K)
| Startup | Active | Recovery | Cancel | Damage | Guard | On Hit | On Block |
|---|---|---|---|---|---|---|---|
| 10 | 4 | 52 | - | 4000 | LH | HKD +22 | -36 |
- Full Invuln: 1-13f; Armor Break
- Depletes 1.5 Drive bars from opponent on hit
No results
- Full Invuln: 1-13f; Armor Break
- Depletes 2 Drive bars from opponent on hit
A cinematic Super that cancels from most of Juri's special moves and works well in juggles. If your opponent is a true Juri fan, they may intentionally let you land the Critical Art version. The full Dmg distribution is: 440x2*830x2*1460*(500).
