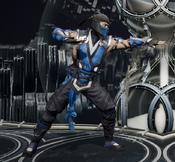
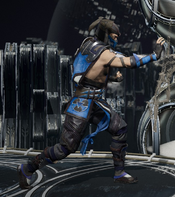
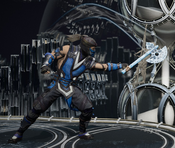
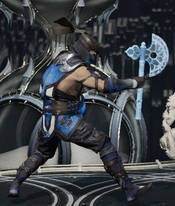
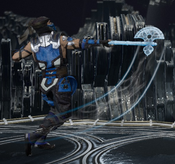
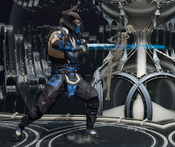
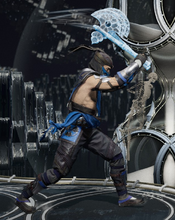
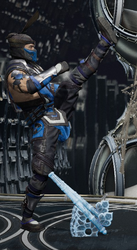
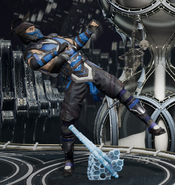
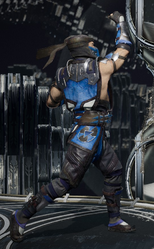
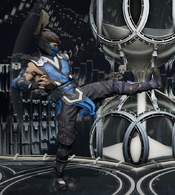
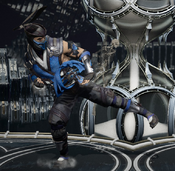
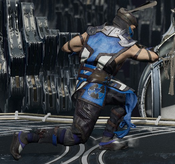
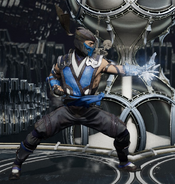
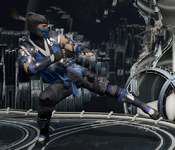
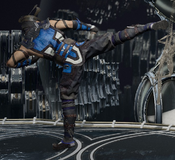
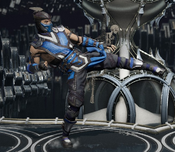
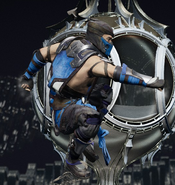
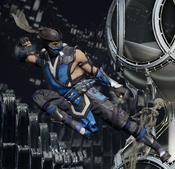
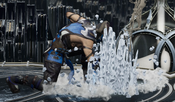
| Sub-Zero #MK11_SUB | |
|---|---|
| REDEMPTION
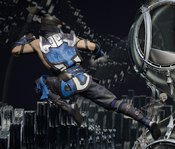
Grandmaster of the Lin Kuei clan. Kuai Liang beat death to redeem his clan for the evil committed by Sektor and the Cyber Lin Kuei. He rebuilt the Lin Kuei and brokered peace with their Shirai Ryu rivals. Now, he hopes to finally close the book on sins of Lin Kuei past. | |
| Data | |
| Health | 1000.00 |
| Hitbox | Male |
Introduction
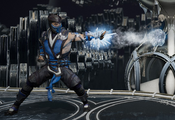
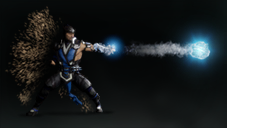
The Chinese Ninja Warrior with a heart so cold, Sub-Zero is an aggressive, mix-up oriented character who can also compete at range thanks to his signature Ice Ball and Slide. B32 and F2 define his gameplan of mixing his opponents to death, capitalizing on mistakes with decent combo damage or resets to keep the mix coming. His kustom abilities complement him well by improving his 50/50s (either giving him better rewards or reducing his risks) or improving his options for approaching opponents. Air Polar Axe in particular is a fantastic projectile to use in neutral. Movement options are also strong with dash cancels and judicious use of F4 for plus frames. If you're a gambling man, one good guess on your mix into Fatal Blow can outright steal rounds. Careless mix can spell your doom, however, as F2 is unsafe without Creeping Ice. Sub-Zero is also rather lacking in the range department and can be confounded by air options like Jacqui's Shrapnel or Kabal's Slight Gas. He is a strong character at all skill levels, being easy to pick up for beginners and a viable character at the higher levels of competition.
| Pros | Cons |
|
|
Movement
- The distance of Sub-Zero's back and forward dashes are very good with the speed of his forward dash being some of the best in the game. The speed of his back dash is much slower, however.
- Sub-Zero's wave dashes are very lenient to input and are a great starter for any player interested in learning how to wave dash.
- The back and forward walk speeds are very good as well. Overall Sub-Zero is a highly mobile character.
Movelist
Normals and Strings
1
| Damage | Guard | Startup | Active | Recovery | |||||||
|---|---|---|---|---|---|---|---|---|---|---|---|
| 20.00 / 3.00 / 0.30 | High | 8 | 2 | 15 | |||||||
| Cancel | Hit Adv | Blk Adv | F/Blk Adv | Cost | |||||||
| 11 | 6 | 0 | 0 | - | |||||||
Use for jailing, very good for staggering. | |||||||||||
| Damage | Guard | Startup | Active | Recovery | |||||||
|---|---|---|---|---|---|---|---|---|---|---|---|
| 30.00 / 04.50 / 0.45 | Mid | 9 | 2 | 20 | |||||||
| Cancel | Hit Adv | Blk Adv | F/Blk Adv | Cost | |||||||
| 13 | 18 | 0 | 0 | - | |||||||
Good auto shimmy, the mid will catch ducking opponents who were expecting a throw from the similar animation. The window to input the 2 here can be pretty tight. This is also your go-to combo starter for punishes and checking gaps. | |||||||||||
| Damage | Guard | Startup | Active | Recovery | |||||||
|---|---|---|---|---|---|---|---|---|---|---|---|
| 70.00 / 10.50 / 1.05 | Mid | 15 | 2 | 39 | |||||||
| Cancel | Hit Adv | Blk Adv | F/Blk Adv | Cost | |||||||
| N/A | 30 | -4 | -4 | - | |||||||
Causes knockdown, cannot be special cancelled. Extra safe on block with the added pushback if you need some space. Also houses another threatening Krushing Blow in Sub-Zero's arsenal. Use this to force breakaways, as otherwise it can rack up insane damage especially in the corner.
| |||||||||||
| Damage | Guard | Startup | Active | Recovery | |||||||
|---|---|---|---|---|---|---|---|---|---|---|---|
| 30.00 / 4.50 / 0.45 | High | 14 | 3 | 26 | |||||||
| Cancel | Hit Adv | Blk Adv | F/Blk Adv | Cost | |||||||
| 17 | 6 | -2 | -2 | - | |||||||
Far reaching poke with good forward momentum. Good tool for whiff punishing or safely getting in. It is a high though so irresponsible use against ducking opponents can make you eat a D2 KB when you're not expecting it. | |||||||||||
| Damage | Guard | Startup | Active | Recovery | |||||||
|---|---|---|---|---|---|---|---|---|---|---|---|
| 30.00 / 04.50 / 0.45 | Mid | 22 | 4 | 22 | |||||||
| Cancel | Hit Adv | Blk Adv | F/Blk Adv | Cost | |||||||
| 27 | 10 | -4 | -4 | - | |||||||
A solid mid to follow up the high, you only normally stop here for staggering on block. This is the only part of this string that can cancel into Ice Ball while grounded. | |||||||||||
| Damage | Guard | Startup | Active | Recovery | |||||||
|---|---|---|---|---|---|---|---|---|---|---|---|
| 50.00 / 7.50 / 0.75 | Mid | 14 | 3 | 31 | |||||||
| Cancel | Hit Adv | Blk Adv | F/Blk Adv | Cost | |||||||
| 18 | 18 | -7 | -7 | - | |||||||
Causes knockdown, can be special cancelled. On hit during a combo this can be followed up with Slide ender. Can only be punished if the opponent has a 6-frame reversal, which many don't. | |||||||||||
| Damage | Guard | Startup | Active | Recovery | |||||||
|---|---|---|---|---|---|---|---|---|---|---|---|
| 20.00 / 3.00 / 0.30 | Mid | 6 | 2 | 18 | |||||||
| Cancel | Hit Adv | Blk Adv | F/Blk Adv | Cost | |||||||
| 17 | 13 | -6 | -6 | - | |||||||
It's a 6-frame jab that allows you to punish and challenge pressure in ways most of the kast aren't able to. Jail into your high starters if you get a hit with this attack. Characters with female hitboxes can disrespect this especially during your frametraps so adjust your pressure accordingly.
| |||||||||||
2
| Damage | Guard | Startup | Active | Recovery |
|---|---|---|---|---|
| 30.00 / 4.50 / 0.45 | High | 8 | 2 | 14 |
| Cancel | Hit Adv | Blk Adv | F/Blk Adv | Cost |
| 12 | 22 | 1 | 1 | - |
| Damage | Guard | Startup | Active | Recovery |
|---|---|---|---|---|
| 30.00 / 4.50 / 0.45 | Mid | 16 | 2 | 33 |
| Cancel | Hit Adv | Blk Adv | F/Blk Adv | Cost |
| 22 | 1 | -8 | -8 | - |
| Damage | Guard | Startup | Active | Recovery |
|---|---|---|---|---|
| 70.00 / 10.50 / 1.05 | Mid | 23 | 2 | 29 |
| Cancel | Hit Adv | Blk Adv | F/Blk Adv | Cost |
| N/A | 18 | -4 | -4 | - |
| Damage | Guard | Startup | Active | Recovery | |||||||
|---|---|---|---|---|---|---|---|---|---|---|---|
| 50.00 / 7.50 / 0.75 | Mid | 14 | 3 | 26 | |||||||
| Cancel | Hit Adv | Blk Adv | F/Blk Adv | Cost | |||||||
| 17 | 35 | -2 | -2 | - | |||||||
The preferred method of getting in for Sub-Zero. Because Back1 is a high and often gets low profiled, Sub-Zeros prefer to use Back2 alone for the great frame data and forward movement. | |||||||||||
| Damage | Guard | Startup | Active | Recovery | |||||||
|---|---|---|---|---|---|---|---|---|---|---|---|
| 70.00 / 10.50 / 1.05 | Mid | 28 | 2 | 32 | |||||||
| Cancel | Hit Adv | Blk Adv | F/Blk Adv | Cost | |||||||
| N/A | 16 | -7 | -7 | - | |||||||
For getting SUPER in for Sub-Zero if you needed to get any closer, be careful of any 6-frame reversals as you often end up in jab range and can get punished with them. | |||||||||||
| Damage | Guard | Startup | Active | Recovery | |||||||
|---|---|---|---|---|---|---|---|---|---|---|---|
| 30.00 / 4.50 / 0.45 | Overhead | 19 | 3 | 30 | |||||||
| Cancel | Hit Adv | Blk Adv | F/Blk Adv | Cost | |||||||
| 22 | -3 | -6 | -6 | - | |||||||
Unreactable online, this overhead has decent range and forward movement as well. It's the Overhead in Sub-Zero's 50/50 game. F2 being as good as it is is a boon for Sub-Zero's viability as it makes micro-ducking and throw OS weaker against him. Unless you're really good 1-Hit confirms then getting a combo off this button (with either Amplified Rising Ice or Amplified Ice Ball) is going to be a risky commitment for you. Staggering with Forward2 alone or special cancelling into Creeping Ice will leave you safe, but if that's all you wanted to do you probably wouldn't want to be playing Sub-Zero. | |||||||||||
| Damage | Guard | Startup | Active | Recovery | |||||||
|---|---|---|---|---|---|---|---|---|---|---|---|
| 116.50 (50.00 + 70.00) / 18.00 (7.50 + 10.50) / 1.80 | Mid, Mid | 20 | 18 | 31 | |||||||
| Cancel | Hit Adv | Blk Adv | F/Blk Adv | Cost | |||||||
| N/A | 30 | -19 | -19 | - | |||||||
Only reason you would use this attack is for the Krushing Blow. It's very punishable on block otherwise.
| |||||||||||
| Damage | Guard | Startup | Active | Recovery | |||||||
|---|---|---|---|---|---|---|---|---|---|---|---|
| 140.00 / 21.00 / 2.10 | High | 10 | 4 | 42 | |||||||
| Cancel | Hit Adv | Blk Adv | F/Blk Adv | Cost | |||||||
| N/A | 24 | -9 | -19 | - | |||||||
A decent uppercut with a surprisingly vertical hitbox, swatting people out of the air directly above Sub-Zero. A very handy anti-air as far as Down2's are concerned.
| |||||||||||
3
| Damage | Guard | Startup | Active | Recovery | |||||||
|---|---|---|---|---|---|---|---|---|---|---|---|
| 50.00 / 7.50 / 0.75 | High | 13 | 2 | 23 | |||||||
| Cancel | Hit Adv | Blk Adv | F/Blk Adv | Cost | |||||||
| 19 | 14 | 2 | 2 | - | |||||||
Safe midrange poke that can be hit confirmed into ice ball. | |||||||||||
| Damage | Guard | Startup | Active | Recovery | |||||||
|---|---|---|---|---|---|---|---|---|---|---|---|
| 70.00 / 10.50 / 1.05 | Mid | 29 | 3 | 33 | |||||||
| Cancel | Hit Adv | Blk Adv | F/Blk Adv | Cost | |||||||
| N/A | 18 | 1 | 1 | - | |||||||
Not a common sight in high level play owing to its long startup. Still safe on block and can occasionally mess with opponents' timing. | |||||||||||
| Damage | Guard | Startup | Active | Recovery | |||||||
|---|---|---|---|---|---|---|---|---|---|---|---|
| 30.00 / 4.50 / 0.45 | Low | 13 | 2 | 19 | |||||||
| Cancel | Hit Adv | Blk Adv | F/Blk Adv | Cost | |||||||
| 16 | 17 | -4 | -4 | - | |||||||
A fast low string starter when used interchangeably with the Forward2 overhead is what makes up Sub-Zero's 50/50 mixup game, his most basic gameplan. Has great forward movement and makes for a great shimmy option as a result. Sub-Zero does not have a particularly fast mid to challenge blocked D1s or to set up whiff punishes out of backdash but this is a great substitute. For the latter, it's arguably better than B1 as you avoid the risk of eating a D2 Krushing Blow for only a slightly shorter range. | |||||||||||
| Damage | Guard | Startup | Active | Recovery | |||||||
|---|---|---|---|---|---|---|---|---|---|---|---|
| 30.00 / 4.50 / 0.45 | Mid | 13 | 1 | 22 | |||||||
| Cancel | Hit Adv | Blk Adv | F/Blk Adv | Cost | |||||||
| 15 | 16 | -6 | -6 | - | |||||||
Able to react on hit into Ice Ball or Rising Ice Amp for a full kombo conversion. Since hit confirming with Forward2 has to be a commitment, the relative safety of B32 helps mitigate the overall risk Sub-Zero has to make while on the offense. As a result, only use F2 to condition the opponent to stop blocking low since B3 is the safer option. In the corner, it also turns Slide into a meterless launcher which opens up his combo damage there significantly. | |||||||||||
| Damage | Guard | Startup | Active | Recovery | |||||||
|---|---|---|---|---|---|---|---|---|---|---|---|
| 70.00 / 10.50 / 1.05 | Mid | 10 | 2 | 20 | |||||||
| Cancel | Hit Adv | Blk Adv | F/Blk Adv | Cost | |||||||
| N/A | 45 | -5 | -5 | - | |||||||
Causes knockdown on hit, has a decently sized hitbox for when things get scrambly, which can be often. It's also technically safe for being in your opponent's face. | |||||||||||
| Damage | Guard | Startup | Active | Recovery |
|---|---|---|---|---|
| 10.00 / 1.50 / 0.15 | Low | 9 | 2 | 17 |
| Cancel | Hit Adv | Blk Adv | F/Blk Adv | Cost |
| 14 | 14 | -7 | -7 | - |
4
| Damage | Guard | Startup | Active | Recovery | |||||||
|---|---|---|---|---|---|---|---|---|---|---|---|
| 70.00 / 10.50 / 1.05 | High | 19 | 2 | 18 | |||||||
| Cancel | Hit Adv | Blk Adv | F/Blk Adv | Cost | |||||||
| 25 | 16 | 2 | 2 | - | |||||||
Usually offers decent damage mid combo whether after a freeze into a jump-in or after a launch in the corner. The angle limits its range in neutral so stick with S3. | |||||||||||
| Damage | Guard | Startup | Active | Recovery | |||||||
|---|---|---|---|---|---|---|---|---|---|---|---|
| 70.00 / 10.50 / 1.05 | Low | 12 | 3 | 23 | |||||||
| Cancel | Hit Adv | Blk Adv | F/Blk Adv | Cost | |||||||
| N/A | 21 | -4 | -9 | - | |||||||
Mediocre ranged sweep to gain a knockdown. | |||||||||||
| Damage | Guard | Startup | Active | Recovery | |||||||
|---|---|---|---|---|---|---|---|---|---|---|---|
| 90.00 / 13.50 / 1.35 | Mid | 25 | 4 | 93 | |||||||
| Cancel | Hit Adv | Blk Adv | F/Blk Adv | Cost | |||||||
| N/A | 38 | 4 | -6 | - | |||||||
Good tool for approaching opponents as it leaves you plus on block. It's the first part of your frame trap, one of Sub's scrub killers. D1 is your fastest follow-up but weak against characters with great low profile tools like Kung Lao and Cetrion. Those moves are slow enough however to get beat out by your own D3 or D4. On Flawless Block, it's a different story as it's got a reasonably long startup to react to. Your turn is over if this happens so pay attention to how your opponent deals with the Timbs.
The Krushing Blow is a one time damage dump against impatient enemies or as a reaction to Breakaway. The gravity adjustment from Breakaway is what allows it to land at all so blindly trying to end combos with it will not work. There's no real reward to bag for using the Armor Break after using the KB so just D2 instead. | |||||||||||
| Damage | Guard | Startup | Active | Recovery | |||||||
|---|---|---|---|---|---|---|---|---|---|---|---|
| 30.00 / 4.50 / 0.45 | Low | 11 | 3 | 23 | |||||||
| Cancel | Hit Adv | Blk Adv | F/Blk Adv | Cost | |||||||
| 20 | 15 | -9 | -9 | - | |||||||
It's one of the better pokes in the game because it reaches so far forward. Also puts Sub-Zero even lower than when he crouches, allowing him to low-profile.
| |||||||||||
Jump and Hop Attacks
| Damage | Guard | Startup | Active | Recovery | |||||||
|---|---|---|---|---|---|---|---|---|---|---|---|
| 50.00 / 7.50 / 0.75 | Mid/Overhead | 12 | 5 | 31 | |||||||
| Cancel | Hit Adv | Blk Adv | F/Blk Adv | Cost | |||||||
| 46 | -1 | -13 | -13 | - | |||||||
Can hit the opponent earlier into the jump due to lower angle of the attack's hitbox. Not really used for kombos but can be very handy for jump-in pressure when it hits the opponent sooner than they expect. | |||||||||||
| Damage | Guard | Startup | Active | Recovery | |||||||
|---|---|---|---|---|---|---|---|---|---|---|---|
| 50.00 / 7.50 / 0.75 | Mid/Overhead | 6 | 6 | 31 | |||||||
| Cancel | Hit Adv | Blk Adv | F/Blk Adv | Cost | |||||||
| 41 | 9 | -8 | -13 | - | |||||||
More horizontal hitbox and faster startup makes for a good air-to-air attack. Does more damage which makes this the more popular attack for Ice Ball combos. | |||||||||||
| Damage | Guard | Startup | Active | Recovery | |||||||
|---|---|---|---|---|---|---|---|---|---|---|---|
| 90.00 / 10.35 / 1.35 | Mid/Overhead | 10 | 6 | 31 | |||||||
| Cancel | Hit Adv | Blk Adv | F/Blk Adv | Cost | |||||||
| 45 | 23 | -8 | -13 | - | |||||||
It being both a 10-frame startup with a fairly horizontal hurtbox, it's an overall good jump kick with everything you'd expect a good jump kick to have. | |||||||||||
| Damage | Guard | Startup | Active | Recovery | |||||||
|---|---|---|---|---|---|---|---|---|---|---|---|
| 90.00 / 10.35 / 1.35 | Overhead | 10 | 3 | 31 | |||||||
| Cancel | Hit Adv | Blk Adv | F/Blk Adv | Cost | |||||||
| N/A | 29 | -12 | -17 | - | |||||||
Reaches farther than U3/U4 and is the more popular of the two Hop Attacks. | |||||||||||
| Damage | Guard | Startup | Active | Recovery | |||||||
|---|---|---|---|---|---|---|---|---|---|---|---|
| 90.00 / 10.35 / 1.35 | Overhead | 10 | 3 | 31 | |||||||
| Cancel | Hit Adv | Blk Adv | F/Blk Adv | Cost | |||||||
| N/A | 29 | -12 | -17 | - | |||||||
Much shorter in reach than U1/U2 and is less commonly used as a result. | |||||||||||
Getup and Flawless Block Attacks
| Damage | Guard | Startup | Active | Recovery | |||||||
|---|---|---|---|---|---|---|---|---|---|---|---|
| 50.00 / 7.50 / 0.75 | Mid | 11 | 5 | 21 | |||||||
| Cancel | Hit Adv | Blk Adv | F/Blk Adv | Cost | |||||||
| N/A | 49 | -9 | -9 | 1 OFF and 1 DEF | |||||||
Launches opponent into the air for a juggle kombo. It is unsafe on block and has no invincibility unlike U+3 but otherwise a very good hitbox that cannot be ducked or low profiled.
| |||||||||||
| Damage | Guard | Startup | Active | Recovery | |||||||
|---|---|---|---|---|---|---|---|---|---|---|---|
| 90.00 / 13.50 / 1.35 | Mid | 10 | 3 | 21 | |||||||
| Cancel | Hit Adv | Blk Adv | F/Blk Adv | Cost | |||||||
| N/A | 15 | -7 | -12 | 1 OFF and 1 DEF | |||||||
Invincible during the animation of this attack. Can only be punished if the opponent has a 6-frame reversal attack. The opponent needs to be a little closer to get hit unlike other U+3's but otherwise a serviceable getup/block attack.
| |||||||||||
Throws
| Damage | Guard | Startup | Active | Recovery | |||||||
|---|---|---|---|---|---|---|---|---|---|---|---|
| 130.00 / 0.00 / 0.00 | High | 10 | 2 | 34 | |||||||
| Cancel | Hit Adv | Blk Adv | F/Blk Adv | Cost | |||||||
| N/A | 21 | N/A | N/A | - | |||||||
This throw ends within Sub-Zero's B3 range for a potential Low/Overhead mixup if the opponent stands back up from knockdown. The closer of the two throws and the preferred one for continued offense.
| |||||||||||
| Damage | Guard | Startup | Active | Recovery | |||||||
|---|---|---|---|---|---|---|---|---|---|---|---|
| 130.00 / 0.00 / 0.00 | High | 10 | 2 | 34 | |||||||
| Cancel | Hit Adv | Blk Adv | F/Blk Adv | Cost | |||||||
| N/A | 19 | N/A | N/A | - | |||||||
This throw launches the opponent away at near full-screen distance. Because Sub-Zero prefers Toward Throw, you can mixup the opponent with a KB-loaded Back Throw instead. Or if the opponent knows if the next throw would be a KB Back Throw, you can mix the opponent up by going for a Toward Throw instead.
| |||||||||||
Special Moves
| Damage | Guard | Startup | Active | Recovery | |||||||
|---|---|---|---|---|---|---|---|---|---|---|---|
| N/A / 16.20 / 0.30 | High (Projectile) | 28 | N/A | N/A | |||||||
| Cancel | Hit Adv | Blk Adv | F/Blk Adv | Cost | |||||||
| N/A | 104 | -16 | -16 | - | |||||||
Does 45.00 damage if opponent was frozen already during the kombo, first hit does no damage but stuns the opponent for a combo extension.
| |||||||||||
| Damage | Guard | Startup | Active | Recovery | |||||||
|---|---|---|---|---|---|---|---|---|---|---|---|
| 70.00 / 18.75 / 1.87 | Low | 11 | 14 | 30 | |||||||
| Cancel | Hit Adv | Blk Adv | F/Blk Adv | Cost | |||||||
| 22 | 29 | -20 | -20 | - | |||||||
A very fast, low-profiling forward moving attack that lets you whiff punish from far away. Great for checking movement and going under projectiles and high attacks. It is unsafe on block so don't be too reckless. A nice gimmick to check the opponent's reactions is to cancel this out of F2 to create a challenging overhead to low mix.
| |||||||||||
| Damage | Guard | Startup | Active | Recovery | |||||||
|---|---|---|---|---|---|---|---|---|---|---|---|
| 146.00 / N/A / N/A | Mid | 13 | 5 | 36 | |||||||
| Cancel | Hit Adv | Blk Adv | F/Blk Adv | Cost | |||||||
| N/A | 9 | -4 | -4 | 1 OFF | |||||||
Amped Slide's Krushing Blow is a vital part of Sub's gameplan and something that the opponent must respect and break away from. Cannot amplify if Slide is blocked. Opponent can Breakaway from Slide before the Amplify catches them. Use if you need the side switch or need the extra damage or stacks for Krushing Blow, otherwise save your meter for your other specials.
| |||||||||||
Fatal Blow
| Damage | Guard | Startup | Active | Recovery | |||||||
|---|---|---|---|---|---|---|---|---|---|---|---|
| 340.00 / 15.00 / 1.50 | Mid | 25 | 3 | 42 | |||||||
| Cancel | Hit Adv | Blk Adv | F/Blk Adv | Cost | |||||||
| N/A | 16 | -23 | -28 | FB Charge On Hit, 10 Sec CD On Miss | |||||||
Absolute robbery after a confirmed F2 or B32, massive unbreakable damage after Freeze, J2, S4, on top of the regular shenanigans that Fatal Blows enable. | |||||||||||
Kustom Abilities
| Damage | Guard | Startup | Active | Recovery | |||||||
|---|---|---|---|---|---|---|---|---|---|---|---|
| 50.00 / 16.25 / 1.62 | Mid (Projectile) | 6 | N/A | N/A | |||||||
| Cancel | Hit Adv | Blk Adv | F/Blk Adv | Cost | |||||||
| N/A | 110 | -15 | -15 | 1 OFF | |||||||
Does damage while stunning, turns into a mid projectile that destroys the opponent's projectile. Great counter-zoning tool and adds new combo opportunities, most importantly off F2.
| |||||||||||
| Damage | Guard | Startup | Active | Recovery | |||||||
|---|---|---|---|---|---|---|---|---|---|---|---|
| 60.00 / 17.50 / 1.75 | Mid | 21 | 10 | 21 | |||||||
| Cancel | Hit Adv | Blk Adv | F/Blk Adv | Cost | |||||||
| 31 | 38 | -24 | -24 | - | |||||||
Causes knockdown and launches opponent away. Typically used amplified to extend kombos. The meterless version is only really used to add an additional launch in the corner after landing an amped Rising Ice. | |||||||||||
| Damage | Guard | Startup | Active | Recovery | |||||||
|---|---|---|---|---|---|---|---|---|---|---|---|
| 80 / 17.50 / 1.75 | Mid | 6 | 10 | 21 | |||||||
| Cancel | Hit Adv | Blk Adv | F/Blk Adv | Cost | |||||||
| N/A | 53 | -24 | -24 | 1 OFF | |||||||
Causes knockdown and pops opponent straight into the air. Allows you to continue your kombo, vastly increasing Sub-Zero's overall damage potential. | |||||||||||
| Damage | Guard | Startup | Active | Recovery | |||||||
|---|---|---|---|---|---|---|---|---|---|---|---|
| 60.00 / 17.50 / 01.75 | Low | 23 | 7 | 28 | |||||||
| Cancel | Hit Adv | Blk Adv | F/Blk Adv | Cost | |||||||
| 35 | 3 | -13 | -18 | - | |||||||
While punishable on block, this is still a viable stagger between ending the string without Creeping Ice and amplifying Creeping Ice, making it harder to punish when the opponent anticipates the other two possibilities. | |||||||||||
| Damage | Guard | Startup | Active | Recovery | |||||||
|---|---|---|---|---|---|---|---|---|---|---|---|
| 58.50 / 14.50 / 1.45 | Low | 18 | 21 | 23 | |||||||
| Cancel | Hit Adv | Blk Adv | F/Blk Adv | Cost | |||||||
| N/A | 23 | -8 | -8 | 1 OFF | |||||||
Causes knockdown on hit. Despite being -8 on block, the pushback makes this very difficult to punish. If Sub-Zero has meter he can be safe on any string or threaten to be safe on any string. Also useful tool for chip-killing for adding three in total extra hits to your blockstring.
| |||||||||||
| Damage | Guard | Startup | Active | Recovery | |||||||
|---|---|---|---|---|---|---|---|---|---|---|---|
| 90.00 / 21.30 / 2.13 | Mid | 16 | 7 | 30 | |||||||
| Cancel | Hit Adv | Blk Adv | F/Blk Adv | Cost | |||||||
| 36 | 16 | -20 | -20 | - | |||||||
Causes knockdown on hit. Differs from Slide in being shorter in range and doing more damage. A kounter or punish with this attack and then amplified triggers the Krushing Blow. Rarely used due to the attack being a Mid instead of a Low and the harder to utilize Krushing Blow. | |||||||||||
| Damage | Guard | Startup | Active | Recovery | |||||||
|---|---|---|---|---|---|---|---|---|---|---|---|
| 90.00 / 12.50 / 01.25 | Mid | 17 | 3 | 40 | |||||||
| Cancel | Hit Adv | Blk Adv | F/Blk Adv | Cost | |||||||
| N/A | 18 | -22 | -22 | 1 OFF | |||||||
Usual ender for 1 bar combos, it keeps the same side and does more damage compared to Slide. Frame advantage can change depending on what string you choose to cancel into the Shoulder. If only the Amplified hits, it will not trigger the Krushing Blow during a Kounter or Punish. The Cold Shoulder itself must hit.
| |||||||||||
| Damage | Guard | Startup | Active | Recovery | |||||||
|---|---|---|---|---|---|---|---|---|---|---|---|
| 80.00 / 20.00 / 2.00 | Mid (Projectile) | 36 | 30 | 5 | |||||||
| Cancel | Hit Adv | Blk Adv | F/Blk Adv | Cost | |||||||
| N/A | 19 | -8 | -8 | - | |||||||
Has a fairly high vertical hitbox, but its long startup animation makes it fairly useless for pressure or kombos and reactable in a zoning context. | |||||||||||
| Damage | Guard | Startup | Active | Recovery | |||||||
|---|---|---|---|---|---|---|---|---|---|---|---|
| 108.80 (20*5 + 4.00*5) / 40.00 (12.50 + 7.25*2 + 6.50 *2) / 04.00 | Mid (Projectile) | 36 | 25 | 34 | |||||||
| Cancel | Hit Adv | Blk Adv | F/Blk Adv | Cost | |||||||
| N/A | 0 | -22 | -22 | - | |||||||
Does 88.81 (20.00*5 before combo scaling) damage initially, then each shard that landed deals 4.00 damage after as damage over time for a maximum of 108.80. While Sub-Zero does do a stepback during the startup animation it can still be fairly easy to punish due to the -22 frames on block. A great tool for closing out matches due to the DoT on hit and shredding the opponent's health on block down to Last Breath. Its large number of active frames also makes it a good option against wakeup options like Getup Attacks or Rolls. This move does a larger amount of Block Damage than most other attacks Sub-Zero has. | |||||||||||
| Damage | Guard | Startup | Active | Recovery | |||||||
|---|---|---|---|---|---|---|---|---|---|---|---|
| 80.00 / 20.00 / 2.00 | Mid | 20 | 18 | 16 | |||||||
| Cancel | Hit Adv | Blk Adv | F/Blk Adv | Cost | |||||||
| N/A | 4 | -17 | -17 | - | |||||||
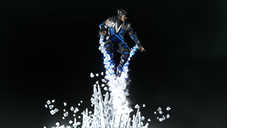
Flutters Sub-Zero in the air, suspending him at his position in the air for a short period of time during the attack animation. Great for checking your opponent's attempts at anti-airing you. The projectile itself has great horizontal reach, allowing you to hit the opponent from a great distance away. Lets Sub-Zero compete with zoners without burning Offensive meter with Deep Freeze. The animation can sometimes extend Sub-Zero's hurtbox vertically causing him to get hit by projectiles unless you've completely cleared them when you jumped. You can especially notice this in mirror matches as the freeze can lead to eating a combo if you mess this up. | |||||||||||
| Damage | Guard | Startup | Active | Recovery | |||||||
|---|---|---|---|---|---|---|---|---|---|---|---|
| N/A / N/A / 00.00 | Mid | 41 | N/A | N/A | |||||||
| Cancel | Hit Adv | Blk Adv | F/Blk Adv | Cost | |||||||
| N/A | 109 | -11 | -11 | - | |||||||
Hard to set up do to its long startup, but often either at a safe distance away from the opponent or while the opponent is knocked down. When used successfully it can extend kombos and/or keep the opponent trapped in the corner.
| |||||||||||
Banned Abilities
| Damage | Guard | Startup | Active | Recovery | |||||||
|---|---|---|---|---|---|---|---|---|---|---|---|
| 70.00 / 0.00 / 0.00 | Unblockable | 49 | 0 | 0 | |||||||
| Cancel | Hit Adv | Blk Adv | F/Blk Adv | Cost | |||||||
| 44 | 88 | 0 | 0 | - | |||||||
Freezes the opponent's legs, giving you a free mix-up. Best used as a set up after winning a knockdown. The opponent can use their Wakeup U3 to stop you if they're close enough. | |||||||||||
| Damage | Guard | Startup | Active | Recovery | |||||||
|---|---|---|---|---|---|---|---|---|---|---|---|
| 0.00 / 0.00 / 0.00 | Low | 2 | 85 | 0 | |||||||
| Cancel | Hit Adv | Blk Adv | F/Blk Adv | Cost | |||||||
| N/A | 60 | -54 | -54 | 1 OFF | |||||||
Increases the range of the ground ice but now becomes crouch blockable. | |||||||||||
Strategy and Kombos
General Tactics
- Sub-Zero has one of the best shimmy and whiff-punish capabilities in the game due to his high mobility and plethora of forward-moving buttons such as Back3, Back1, Forward2 and Back2. This combination allows him to walk or dash in and out of the opponent's effective range and force a whiff for a whiff punish or a block check on them since both his Low starter and Overhead starter move Sub-Zero forward.
- Even at farther distances Sub-Zero can block check your opponent with Slide, which is pretty much unreactable at most distances. Coupled with the space control of Ice Ball that also wins any projectile trade with a full-screen combo confirmation, Sub-Zero can condition the opponent into ducking and crouch blocking at farther distances which can help shape the pace of the game to your advantage.
- If the opponent is frozen while standing, a popular strategy is to use the [B14] string for a standing reset with 10 frames of hit advantage for continued pressure instead of knocking down the opponent. [B32] is also a useful string for standing resets after freeze with 16 frames of hit advantage.
- If you want to better enforce the Overhead/Low mixup game, you may want to consider slotting either Deep Freeze or Rising Ice for your variation. Either of these two Equipped Abilities allow you to convert your Forward2 overhead into a full combo, and Rising Ice lets you do more damaging combos in general. Mixups that do more damage will weigh more heavily on an opponent's mind.
Popular Variations
- An overall well-rounded variation. The combination of Creeping Ice for added safety, Rising Ice for added reward from 50/50's and the (Air) Polar Axe for space control and counter zoning should give any player the tools to seize an advantage at any distance or opportunity with their opponent.
- A variation that focuses especially on getting Sub-Zero within mixup distance of their opponent. Deep-Freeze gives the player multiple projectile speeds to anti-air with as well as counterzone. Rising Ice is used to maximize a player's overall damage potential from any hit once they are at their ideal distance.
Universal Kombos
[Midscreen] B14-DF1, Jump 2, B143-BF3 (223.98 dmg)
- Amplify Ender: BF3 Amp (264.23 dmg) [KB: 361.34 dmg] [Side Switch]
- Replace Starter: B32 (223.98 dmg)
- Replace Starter: 12 (213.98 dmg)
[Midscreen] B14-DF1, Jump 3/4 (Crossup) [Side Switch], 2, B143-BF3 (248.21 dmg)
- Amplify Ender: BF3 Amp (284.20 dmg) [KB: 371.03 dmg] [Keeps Side]
[Midscreen] B2-DF1, Jump 2, B143-BF3 (196.68 dmg)
- Amplify Ender: BF3 Amp (232.36 dmg) [KB: 318.44 dmg] [Side Switch]
- Replace Ender: D2 (186.08 dmg)
[Midscreen] D2(KB), B2-DF1, Jump 2, B143-BF3 (347.35 dmg)
- Amplify Ender: BF3 Amp (375.89 dmg) [KB: 444.75 dmg] [Side Switch]
[Corner] B14-DF1, Jump 2, B2, D1, B32-BF3 (224.77 dmg)
- Amplify Ender: BF3 Amp (260.76 dmg) [KB: 347.59 dmg] [Side Switch]
- Replace Ender: 124 [KB: 308.08 dmg]
- Replace Starter: B12 (224.77 dmg)
[Corner] B2-DF1, J2, 2, D1, 124 [KB: 285.28 dmg]
[Corner] B32-BF3, D1, D1 124 [KB: 372.11 dmg]
[Corner] B32-DF1, Backdash, J3, 2, 2, 2, 2, 124 [KB: 352.35 dmg]
- Replace Starter: raw Ice Ball (325.60 dmg)
- Replace Starter: 12 (342.35 dmg)
- Replace Starter: B14, 21 (352.35 dmg)
- Replace Starter: 3 (359.32 dmg)
- Replace Starter: 4 (379.32 dmg)
Variation Kombos
[Midscreen] F2, DF1 Amp, J2, B143, BF3 (251.69 dmg)
- REQUIRES: Deep Freeze
- COSTS: 1 OFF
- Amplify Ender: BF3 Amp (294.06 dmg) [KB: 396.27 dmg]
[Midscreen] F2, DB+3 Amp, B2, DF1, J2, B143, BF3 (283.51 dmg)
- REQUIRES: Rising Ice
- COSTS: 1 OFF
- Amplify Ender: BF3 Amp (315.71 dmg) [KB: 393.39 dmg]
- Replace Starter: B32 (299.33 dmg)
- Replace B+143 with 124: [KB: 351.51]

