Introduction
About Ryu
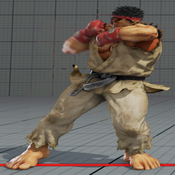
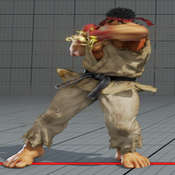
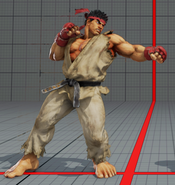
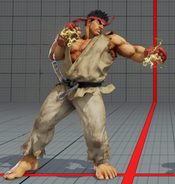
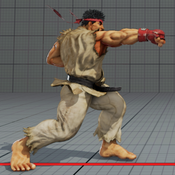
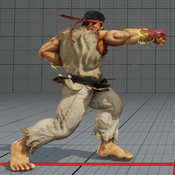
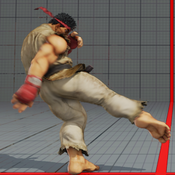
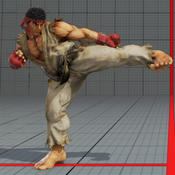
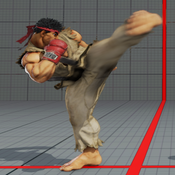
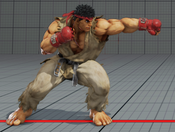
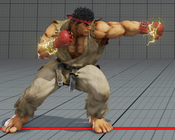
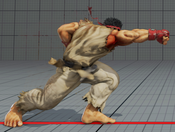
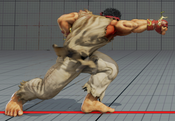
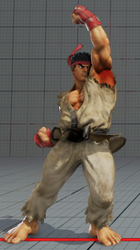
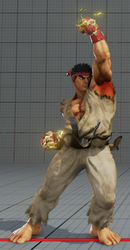
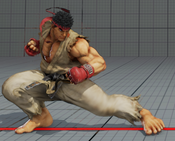
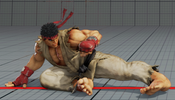
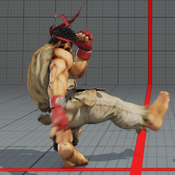
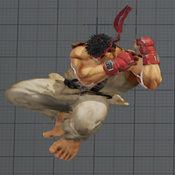
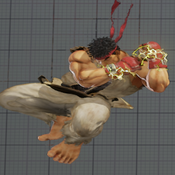
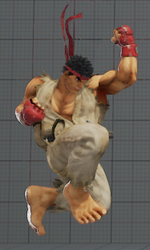
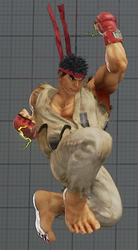
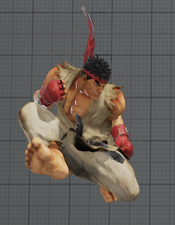
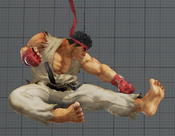
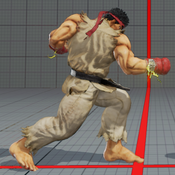
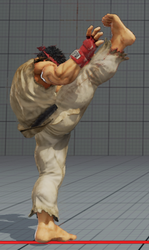
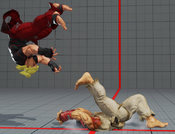
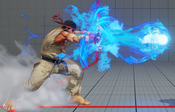
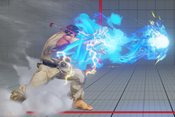
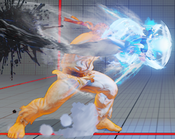
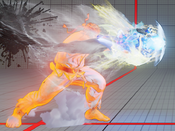
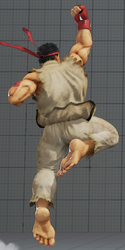
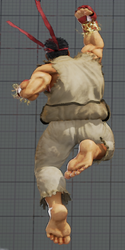
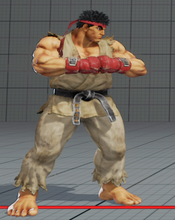
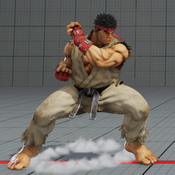
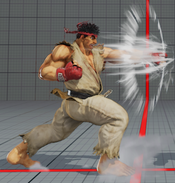
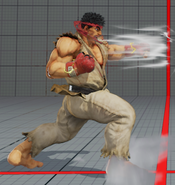
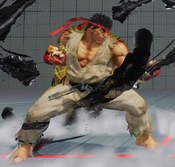
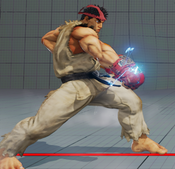
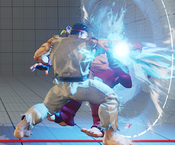
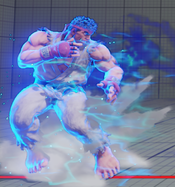
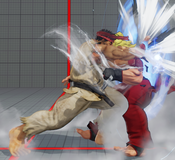
The main protagonist of Street Fighter and one of the most recognizable characters in fighting games, Ryu is an all arounder, beginner friendly character. He used to be in fact one of the worse characters in the game, but now after season 5 he's one of the most buffed characters in SFV history, and is now respectively strong. Ryu has more than solid tools for nearly everything - zoning capabilities, pressure and mixup options, poking, anti airing and frame trapping, corner carry and damage, as well as defensive options. Ryu no longer lacks any notable edge either - he has 2 powerful v-triggers, solid way to build v-meter, and high adaptability in terms of playstyle. Not only is Ryu now both a great character to start with, he is very powerful and effective at high level!
Final Patch
Players to Watch
|
|
|
| Ryu | |
|---|---|
| Vitals | |
| Life Points | 1025 |
| Stun Points | 1050 |
| V-Gauge Points | |
| V-Trigger 1 | 600 |
| V-Trigger 2 | 600 |
| Ground Movement | |
| Forward Walk Speed | 4.7 |
| Backward Walk Speed | 3.2 |
| Forward Dash Speed | 16 |
| Backward Dash Speed | 21 |
| Forward Dash Distance | 145.2 |
| Backward Dash Distance | 97.3 |
| Backdash CH Frames | 3-10 |
| Jumping | |
| Back Jump Speed | 46 (4+38+4) |
| Neutral Jump Speed | 46 (4+38+4) |
| Forward Jump Speed | 45 (3+38+4) |
| Forward Jump Distance | 212.8 |
| Backward Jump Distance | 182.4 |
| Throws | |
| Throw Hurtbox | 0.25 |
| Throw Range | 0.8 |
Frame Data & Descriptions are provided by FATOnline.
|
| SFV Frame Data Glossary | |
|---|---|
| Active |
How many frames a move remains active (can hurt opponents) for. |
| Attack |
Attack level is L for low attacks (must be blocked crouching), H is for High attacks (which can be blocked high or low) and M for overhead (must be blocked standing). T is for throw attacks (which cannot be blocked). |
| Cancel options |
Available cancel options.
|
| Confirm windows |
Hit confirm windows written as Specials & CAs/Target Combos/V-Trigger. Notation may denote V-Skill only cancel windows in Specials.
|
| Crush Counter |
Crush Counter hit advantage written as opponent state, frame advantage, and v-gauge gain on hit. |
| Damage |
Attack damage on hit. Notation may denote multi-hit or "sweet spot" damage values on certain frames. |
| Hit/Block |
These are frame advantage values when the attack hits or is blocked. If the number is positive, then the move will end before the defender can act again. If the number is negative, the defender will be able to act before the attacker and maybe even punish. KD refers to knockdown on hit.
|
| Knockdown |
Knockdown advantage against Normal, Quick Rise and Back Rise wake up options. |
| Recovery |
How many frames it takes for a move to finish after it's been active. |
| Startup |
How many frames it takes before the move becomes 'active' or have a hit box. The last startup frame and the first active frame are the same frame, meaning all values are written as Startup + 1. |
| Stun |
Amount of stun added to the opponent's stun bar on hit. |
Normals
Stand LP
| Normal | Startup | Active | Recovery | Hit | ||
|---|---|---|---|---|---|---|
| 3 | 2 | 7 | 4 | |||
| Damage | Stun | Attack | Block | |||
| 30 | 70 | H | 2 | |||
| ||||||
| V-Trigger 1 | Startup | Active | Recovery | Hit | ||
| 3 | 2 | 7 | 6 | |||
| Damage | Stun | Attack | Block | |||
| 30 | 100 | H | 2 | |||
| ||||||
Stand MP
| Normal | Startup | Active | Recovery | Hit | ||
|---|---|---|---|---|---|---|
| 5 | 3 | 10 | 6 | |||
| Damage | Stun | Attack | Block | |||
| 60 | 100 | H | 2 | |||
| ||||||
| V-Trigger 1 | Startup | Active | Recovery | Hit | ||
| 5 | 3 | 10 | 8 | |||
| Damage | Stun | Attack | Block | |||
| 60 | 130 | H | 2 | |||
| ||||||
Stand HP
| Normal | Startup | Active | Recovery | Hit | ||
|---|---|---|---|---|---|---|
| 8 | 3 | 20 | 3 | |||
| Damage | Stun | Attack | Block | |||
| 90 | 150 | H | -1 | |||
| ||||||
| V-Trigger 1 | Startup | Active | Recovery | Hit | ||
| 8 | 3 | 20 | 5 | |||
| Damage | Stun | Attack | Block | |||
| 90 | 180 | H | -1 | |||
| ||||||
Stand LK
| Startup | Active | Recovery | Hit | ||
|---|---|---|---|---|---|
| 4 | 3 | 11 | -1 | ||
| Damage | Stun | Attack | Block | ||
| 30 | 70 | H | -2 | ||
| |||||
Stand MK
| Startup | Active | Recovery | Hit | ||
|---|---|---|---|---|---|
| 8 | 3 | 16 | 2 | ||
| Damage | Stun | Attack | Block | ||
| 70 | 100 | H | -2 | ||
| |||||
Stand HK
| Startup | Active | Recovery | Hit | ||
|---|---|---|---|---|---|
| 10 | 2 | 20 | 4 | ||
| Damage | Stun | Attack | Block | ||
| 90 | 150 | H | -1 | ||
| |||||
Crouch LP
| Normal | Startup | Active | Recovery | Hit | ||
|---|---|---|---|---|---|---|
| 4 | 3 | 5 | 3 | |||
| Damage | Stun | Attack | Block | |||
| 30 | 70 | H | 2 | |||
| ||||||
| V-Trigger 1 | Startup | Active | Recovery | Hit | ||
| 4 | 3 | 5 | 5 | |||
| Damage | Stun | Attack | Block | |||
| 30 | 100 | H | 2 | |||
| ||||||
Crouch MP
| Normal | Startup | Active | Recovery | Hit | ||
|---|---|---|---|---|---|---|
| 6 | 3 | 12 | 4 | |||
| Damage | Stun | Attack | Block | |||
| 60 | 100 | H | 2 | |||
| V-Trigger 1 | Startup | Active | Recovery | Hit | ||
| 6 | 3 | 12 | 6 | |||
| Damage | Stun | Attack | Block | |||
| 60 | 130 | H | 2 | |||
| ||||||
Crouch HP
| Normal | Startup | Active | Recovery | Hit | ||
|---|---|---|---|---|---|---|
| 6 | 4 | 24 | -7 | |||
| Damage | Stun | Attack | Block | |||
| 90 | 150 | H | -10 | |||
| ||||||
| V-Trigger 1 | Startup | Active | Recovery | Hit | ||
| 6 | 4 | 24 | -5 | |||
| Damage | Stun | Attack | Block | |||
| 90 | 180 | H | -10 | |||
| ||||||
Crouch LK
| Startup | Active | Recovery | Hit | ||
|---|---|---|---|---|---|
| 4 | 2 | 7 | 2 | ||
| Damage | Stun | Attack | Block | ||
| 20 | 70 | L | 1 | ||
| |||||
Crouch MK
| Startup | Active | Recovery | Hit | ||
|---|---|---|---|---|---|
| 6 | 3 | 13 | 2 | ||
| Damage | Stun | Attack | Block | ||
| 50 | 100 | L | -1 | ||
| |||||
Crouch HK
| Startup | Active | Recovery | Hit |
|---|---|---|---|
| 7 | 2 | 22 | KD |
| Damage | Stun | Attack | Block |
| 90 | 150 | L | -11 |
Jump LP
| Normal | Startup | Active | Recovery | Hit |
|---|---|---|---|---|
| 3 | 6 | - | - | |
| Damage | Stun | Attack | Block | |
| 40 | 70 | M | - | |
| V-Trigger 1 | Startup | Active | Recovery | Hit |
| 3 | 6 | - | - | |
| Damage | Stun | Attack | Block | |
| 40 | 100 | M | - |
Jump MP
| Normal | Startup | Active | Recovery | Hit | ||
|---|---|---|---|---|---|---|
| 7 | 3(2)3 | - | - | |||
| Damage | Stun | Attack | Block | |||
| 30*30 | 50*50 | M | - | |||
| ||||||
| V-Trigger 1 | Startup | Active | Recovery | Hit | ||
| 7 | 3(2)3 | - | - | |||
| Damage | Stun | Attack | Block | |||
| 30*30 (60) | 65*65 (130) | M | - | |||
| ||||||
Jump HP
| Normal | Startup | Active | Recovery | Hit | ||
|---|---|---|---|---|---|---|
| 7 | 5 | - | - | |||
| Damage | Stun | Attack | Block | |||
| 90 | 150 | M | - | |||
| ||||||
| V-Trigger 1 | Startup | Active | Recovery | Hit | ||
| 7 | 5 | - | - | |||
| Damage | Stun | Attack | Block | |||
| 90 | 180 | M | - | |||
Jump LK
| Startup | Active | Recovery | Hit | ||
|---|---|---|---|---|---|
| 4 | 6 | - | - | ||
| Damage | Stun | Attack | Block | ||
| 40 | 70 | M | - | ||
| |||||
Jump MK
| Startup | Active | Recovery | Hit | ||
|---|---|---|---|---|---|
| 6 | 4 | - | - | ||
| Damage | Stun | Attack | Block | ||
| 60 | 100 | M | - | ||
| |||||
Jump HK
| Startup | Active | Recovery | Hit | ||
|---|---|---|---|---|---|
| 9 | 5 | - | - | ||
| Damage | Stun | Attack | Block | ||
| 90 | 150 | M | - | ||
| |||||
Command Normals
Collarbone Breaker
| Normal | Startup | Active | Recovery | Hit | ||
|---|---|---|---|---|---|---|
| 22 | 1*3 | 17 | 1 | |||
| Damage | Stun | Attack | Block | |||
| 30*30 | 60*40 | M*M | -7 | |||
| ||||||
| V-Trigger 1 | Startup | Active | Recovery | Hit | ||
| 22 | 1*3 | 17 | 1 | |||
| Damage | Stun | Attack | Block | |||
| 30*30 (60) | 60*70 (130) | M*M | -7 | |||
| ||||||
Solar Plexus Strike
| Normal | Startup | Active | Recovery | Hit | ||
|---|---|---|---|---|---|---|
| 17 | 2(1)2 | 18 | 8 | |||
| Damage | Stun | Attack | Block | |||
| 40*40 | 75*75 | H*H | -2 | |||
| ||||||
| V-Trigger 1 | Startup | Active | Recovery | Hit | ||
| 17 | 2(1)2 | 18 | 8 | |||
| Damage | Stun | Attack | Block | |||
| 45*45 (90) | 90*90 (180) | H*H | -2 | |||
| ||||||
Axe Kick
| Startup | Active | Recovery | Hit | ||
|---|---|---|---|---|---|
| 9 | 3(3)4 | 16 | 4 | ||
| Damage | Stun | Attack | Block | ||
| 40*40 | 60*90 | H*H | -2 | ||
| |||||
Target Combos
Jodan Sanrengeki 1st
| Startup | Active | Recovery | Hit | ||
|---|---|---|---|---|---|
| 5+9 | 2 | 21(28) | -2 | ||
| Damage | Stun | Attack | Block | ||
| 60*63 (123) | 100*90 (190) | H*H | -9 | ||
| |||||
Jodan Sanrengeki 2nd
| Startup | Active | Recovery | Hit | ||
|---|---|---|---|---|---|
| 5+9+9 | 2 | 26 | KD | ||
| Damage | Stun | Attack | Block | ||
| 60*63*56 (179) | 100*90*80 (270) | H*H*H | -7 | ||
| |||||
Jodan Nirengeki
| Startup | Active | Recovery | Hit | ||
|---|---|---|---|---|---|
| 8+9 | 2 | 26 | KD | ||
| Damage | Stun | Attack | Block | ||
| 90*63 (153) | 150*90 (240) | H*H | -7 | ||
| |||||
Throws
Shoulder Throw
| Startup | Active | Recovery | Hit |
|---|---|---|---|
| 5 | 3 | 17 | KD |
| Damage | Stun | Attack | Block |
| 130 | 150 | T | KD |
Somersault Throw
| Startup | Active | Recovery | Hit |
|---|---|---|---|
| 5 | 3 | 17 | KD |
| Damage | Stun | Attack | Block |
| 150 | 200 | T | KD |
Special Moves
LP Hadoken
| Normal | Startup | Active | Recovery | Hit | ||
|---|---|---|---|---|---|---|
| 14 | - | 31 | -1 | |||
| Damage | Stun | Attack | Block | |||
| 60 | 100 | H | -6 | |||
| ||||||
| V-Trigger 1 | Startup | Active | Recovery | Hit | ||
| 14 | - | 28 | KD | |||
| Damage | Stun | Attack | Block | |||
| 80 | 150 | H | -2 | |||
| ||||||
MP Hadoken
| Normal | Startup | Active | Recovery | Hit | ||
|---|---|---|---|---|---|---|
| 14 | - | 31 | -1 | |||
| Damage | Stun | Attack | Block | |||
| 60 | 100 | H | -6 | |||
| ||||||
| V-Trigger 1 | Startup | Active | Recovery | Hit | ||
| 14 | - | 28 | KD | |||
| Damage | Stun | Attack | Block | |||
| 80 | 150 | H | -2 | |||
| ||||||
HP Hadoken
| Normal | Startup | Active | Recovery | Hit | ||
|---|---|---|---|---|---|---|
| 14 | - | 31 | -1 | |||
| Damage | Stun | Attack | Block | |||
| 60 | 100 | H | -6 | |||
| ||||||
| V-Trigger 1 | Startup | Active | Recovery | Hit | ||
| 14 | - | 28 | KD | |||
| Damage | Stun | Attack | Block | |||
| 80 | 150 | H | -2 | |||
| ||||||
EX Hadoken
| Normal | Startup | Active | Recovery | Hit | ||
|---|---|---|---|---|---|---|
| 11(10) | - | 31 | KD | |||
| Damage | Stun | Attack | Block | |||
| 40*60 | 0*150 | H*H | 2 | |||
| ||||||
| V-Trigger 1 | Startup | Active | Recovery | Hit | ||
| 11 | - | 29 | KD | |||
| Damage | Stun | Attack | Block | |||
| 40x3 (120) | 200 | H*H | 2 | |||
| ||||||
LP Shoryuken
| Normal | Startup | Active | Recovery | Hit | ||
|---|---|---|---|---|---|---|
| 3 | 12 | 19+11 | KD | |||
| Damage | Stun | Attack | Block | |||
| 110(60) | 150(100) | H | -24 | |||
| ||||||
| V-Trigger 1 | Startup | Active | Recovery | Hit | ||
| 3 | 12 | 19+11 | KD | |||
| Damage | Stun | Attack | Block | |||
| 120(80) | 200(150) | H | -24 | |||
| ||||||
MP Shoryuken
| Normal | Startup | Active | Recovery | Hit | ||
|---|---|---|---|---|---|---|
| 4 | 11 | 26+13 | KD | |||
| Damage | Stun | Attack | Block | |||
| 120(60) | 150(100) | H | -32 | |||
| ||||||
| V-Trigger 1 | Startup | Active | Recovery | Hit | ||
| 4 | 11 | 26+13 | KD | |||
| Damage | Stun | Attack | Block | |||
| 130(80) | 200(150) | H | -32 | |||
| ||||||
HP Shoryuken
| Normal | Startup | Active | Recovery | Hit | ||
|---|---|---|---|---|---|---|
| 5 | 10 | 29+15 | KD | |||
| Damage | Stun | Attack | Block | |||
| 130(60) | 150 | H | -36 | |||
| ||||||
| V-Trigger 1 | Startup | Active | Recovery | Hit | ||
| 5 | 10 | 29+15 | KD | |||
| Damage | Stun | Attack | Block | |||
| 140(80) | 200 | H | -36 | |||
| ||||||
EX Shoryuken
| Normal | Startup | Active | Recovery | Hit | ||
|---|---|---|---|---|---|---|
| 3 | 12 | 29+15 | KD | |||
| Damage | Stun | Attack | Block | |||
| 80*80 (160) | 200 | H*H | -37 | |||
| ||||||
| V-Trigger 1 | Startup | Active | Recovery | Hit | ||
| 3 | 12 | 29+15 | KD | |||
| Damage | Stun | Attack | Block | |||
| 100*80 (180) | 200 | H*H | -37 | |||
| ||||||
LK Tatsumaki Senpukyaku
| Startup | Active | Recovery | Hit | ||
|---|---|---|---|---|---|
| 10 | 2 | 18+12 | KD | ||
| Damage | Stun | Attack | Block | ||
| 80 | 150 | H | -10 | ||
| |||||
MK Tatsumaki Senpukyaku
| Startup | Active | Recovery | Hit | ||
|---|---|---|---|---|---|
| 12 | 2(16)2 | 14+16 | KD | ||
| Damage | Stun | Attack | Block | ||
| 90 | 150 | H | -12 | ||
| |||||
HK Tatsumaki Senpukyaku
| Startup | Active | Recovery | Hit | ||
|---|---|---|---|---|---|
| 14 | 2(16)2(14)2 | 14+17 | KD | ||
| Damage | Stun | Attack | Block | ||
| 100 | 150 | H | -13 | ||
| |||||
EX Tatsumaki Senpukyaku
| Startup | Active | Recovery | Hit | ||
|---|---|---|---|---|---|
| 10 | 2(4)2(5)2(3)3(3)2 | 11+15 | KD | ||
| Damage | Stun | Attack | Block | ||
| 28x5 (140) | 150 | H | -19 | ||
| |||||
LK Air Tatsumaki Senpukyaku
| Startup | Active | Recovery | Hit | ||
|---|---|---|---|---|---|
| 9 | 2(6)2(6)2 | 14 | KD | ||
| Damage | Stun | Attack | Block | ||
| 100 | 200 | H | -3(2) | ||
| |||||
MK Air Tatsumaki Senpukyaku
| Startup | Active | Recovery | Hit | ||
|---|---|---|---|---|---|
| 9 | 2(6)2(6)2 | 14 | KD | ||
| Damage | Stun | Attack | Block | ||
| 100 | 200 | H | -3(2) | ||
| |||||
HK Air Tatsumaki Senpukyaku
| Startup | Active | Recovery | Hit | ||
|---|---|---|---|---|---|
| 9 | 2(6)2(6)2 | 14 | KD | ||
| Damage | Stun | Attack | Block | ||
| 100 | 200 | H | -3(2) | ||
| |||||
EX Air Tatsumaki Senpukyaku
| Startup | Active | Recovery | Hit | ||
|---|---|---|---|---|---|
| 8 | 2(4)2(2)2(3)2(2)2 | 14 | KD | ||
| Damage | Stun | Attack | Block | ||
| 170 | 250 | H | - | ||
| |||||
LK Jodan Sokutou Geri
| Startup | Active | Recovery | Hit | ||
|---|---|---|---|---|---|
| 10 | 2 | 28 | KD | ||
| Damage | Stun | Attack | Block | ||
| 90 | 150 | H | -15 | ||
| |||||
MK Jodan Sokutou Geri
| Startup | Active | Recovery | Hit | ||
|---|---|---|---|---|---|
| 16 | 2 | 28 | KD | ||
| Damage | Stun | Attack | Block | ||
| 100 | 150 | H | -15 | ||
| |||||
HK Jodan Sokutou Geri
| Startup | Active | Recovery | Hit | ||
|---|---|---|---|---|---|
| 18(17) | 2 | 28 | KD | ||
| Damage | Stun | Attack | Block | ||
| 110 | 150 | H | -15 | ||
| |||||
EX Jodan Sokutou Geri
| Startup | Active | Recovery | Hit | ||
|---|---|---|---|---|---|
| 17 | 2 | 33 | KD | ||
| Damage | Stun | Attack | Block | ||
| 80 | 150 | H | -13 | ||
| |||||
Critical Arts
Shinkuu Hadoken
| Normal | Startup | Active | Recovery | Hit | ||
|---|---|---|---|---|---|---|
| 4 | - | 61 | KD | |||
| Damage | Stun | Attack | Block | |||
| 320 | 0 | H | -25 | |||
| ||||||
| V-Trigger 1 | Startup | Active | Recovery | Hit | ||
| 4 | - | 61 | KD | |||
| Damage | Stun | Attack | Block | |||
| 350 | 300 | H | 9 | |||
| ||||||
Taunts
Taunt
| Startup | Active | Recovery | Hit |
|---|---|---|---|
| - | - | 61 | - |
| Damage | Stun | Attack | Block |
| - | - | - | - |
V-System
V-Skill 1
Mind's Eye
| Startup | Active | Recovery | Hit | ||
|---|---|---|---|---|---|
| 3(1) | 7 | 32(5) | - | ||
| Damage | Stun | Attack | Block | ||
| - | - | - | - | ||
| |||||
V-Skill 2
Thrust Strike
| Normal | Startup | Active | Recovery | Hit | ||
|---|---|---|---|---|---|---|
| 25(10) | 4 | 19(26) | KD | |||
| Damage | Stun | Attack | Block | |||
| 70(120) | 100(200) | H | -4 | |||
| ||||||
| V-Trigger 1 | Startup | Active | Recovery | Hit | ||
| 25(10) | 2 | 21(26) | KD | |||
| Damage | Stun | Attack | Block | |||
| 60(120) | 130(250) | H | -4 | |||
| ||||||
V-Trigger 1
Denjin Renki
| Startup | Active | Recovery | Hit | ||
|---|---|---|---|---|---|
| 1 | - | 4 | - | ||
| Damage | Stun | Attack | Block | ||
| - | - | - | - | ||
| |||||
Hadoken Lvl 2
| Startup | Active | Recovery | Hit | ||
|---|---|---|---|---|---|
| 19+5 | - | 31 | KD | ||
| Damage | Stun | Attack | Block | ||
| 50*50 (100) | 200 | H | 0 | ||
| |||||
Hadoken Lvl 3
| Startup | Active | Recovery | Hit | ||
|---|---|---|---|---|---|
| 59+6 | - | 31 | KD | ||
| Damage | Stun | Attack | Block | ||
| 40x2*50 (130) | 300 | H | 32 | ||
| |||||
EX Hadoken Lvl 2
| Startup | Active | Recovery | Hit | ||
|---|---|---|---|---|---|
| 59+5 | - | 32 | KD | ||
| Damage | Stun | Attack | Block | ||
| 50x3 (150) | 300 | H*H | - | ||
| |||||
V-Trigger 2
Kakko Fubatsu
| Activation | Startup | Active | Recovery | Hit | ||
|---|---|---|---|---|---|---|
| 1 | - | 4 | - | |||
| Damage | Stun | Attack | Block | |||
| - | - | - | - | |||
| ||||||
| During VT2 | Startup | Active | Recovery | Hit | ||
| 2(1) | 10 | 36 | KD | |||
| Damage | Stun | Attack | Block | |||
| 150 | 200 | H | 5 | |||
| ||||||
V-Shift
V-Shift
| Startup | Active | Recovery | Hit | ||
|---|---|---|---|---|---|
| 1 | 9 | 22 | - | ||
| Damage | Stun | Attack | Block | ||
| - | - | - | - | ||
| |||||
V-Shift Break
Fumikomi Joden Kagizuki
| Startup | Active | Recovery | Hit | ||
|---|---|---|---|---|---|
| ? | 3 | ? | KD | ||
| Damage | Stun | Attack | Block | ||
| 60 | 0 | H | -2 | ||
| |||||
V-Reversal
Hashogeki
| Startup | Active | Recovery | Hit | ||
|---|---|---|---|---|---|
| 17 | 2 | 24 | KD | ||
| Damage | Stun | Attack | Block | ||
| 60 | 0 | H | -2 | ||
| |||||

