| ||||
| Damage | Guard | Startup | Active | Recovery |
|---|---|---|---|---|
| 2.00 / 0.30 / 0.0003 | High | 8 | 2 | 19 |
| Cancel | Hit Adv. | Block Adv. | F/Block Adv. | Cost |
| 13 | 3 | -1 | -1 | - |
A subpar jab. Like all jabs, it's used for anti-airs, conventional tick throws, and punishes for when mid strings would be too slow, though its mediocre frame data and very short horizontal range make it harder than other jabs to use in these roles. Characters that do not lean forward in their default pose (such as Sub-Zero) can avoid this jab at the practice mode "Close" distance. Starts the 121 string, which can be used by itself as a weak auto shimmy or with Commando and Leopard Krawl for low-damage mixups.
| ||||
| John Rambo #MK11_RAM | |
|---|---|
 | |
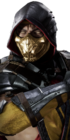
| John J. Rambo is a former United States Special Forces soldier deeply haunted by his time in Vietnam. He is rough, aggressive and is well known for entering exceptionally dangerous situations alone. Rambo has reactivated his ruthless fighting skills to infiltrate the MK universe. | |
| Data | |
| Health | 1000.00 |
| Hitbox | Male |
Introduction
Rambo uses space control and continuous low damage mixups to outlast his enemies in a battle of attrition, then makes hard reads to finish them with deadly Krushing Blows.
| Strengths | Weaknesses |
|---|---|
|
|
Movelist
Normals
1

| ||||
| Damage | Guard | Startup | Active | Recovery |
|---|---|---|---|---|
| 3.00 / 0.45 / 0.0005 | Mid | 11 | 3 | 23 |
| Cancel | Hit Adv. | Block Adv. | F/Block Adv. | Cost |
| 16 | 9 | -9 | -9 | - |
| A small knife slash. Limited range, almost no forward advancement, and surprisingly bad frame data (including being punishable on block at -9) make it very weak in comparison to other mid jab followups. Can be used to stagger with the threat of 121, but Rambo has better strings for staggers, though the animation of 121 does give it a niche use as an auto shimmy. | ||||

| ||||
| Damage | Guard | Startup | Active | Recovery |
|---|---|---|---|---|
| 7.00 / 1.05 / 0.0011 | Mid | 19 | 3 | 31 |
| Cancel | Hit Adv. | Block Adv. | F/Block Adv. | Cost |
| - | 14 | -2 | -7 | - |
Decently ranged knife thrust that ends the 121 string. -2 on block with large pushback and a Flawless Block gap. Slightly longer recovery makes it less plus on hit than expected, though it is one of Rambo's few knockdowns that leaves the enemy close. Has a similar animation to a regular throw, though its efficacy as an auto shimmy is somewhat dubious with the poor block advantage of 12. The gap is also troublesome, as he lacks a special that would immediately catch a Flawless Block attempt.
| ||||

| ||||
| Damage | Guard | Startup | Active | Recovery |
|---|---|---|---|---|
| 8.00 / - / - | Grab, High | 18 | 2 | 31 |
| Cancel | Hit Adv. | Block Adv. | F/Block Adv. | Cost |
| - | 14 | - | - | Commando kustom move |
Alternate string-grab followup to 12 that requires Commando to use, giving Rambo a canned low-damage mixup off his jab. Like all string-grabs, it can snag enemies in standing hitstun. Compared to an auto shimmy it deals less damage and cannot Krushing Blow, but it is much harder to avoid, having only one frame of difference from 121.
| ||||
B1

| ||||
| Damage | Guard | Startup | Active | Recovery |
|---|---|---|---|---|
| 3.00 / 0.45 / 0.0005 | Mid | 18 | 2 | 26 |
| Cancel | Hit Adv. | Block Adv. | F/Block Adv. | Cost |
| 21 | 13 | -6 | -6 | - |
| Slower, advancing mid. Starts B121, a crucial string with two overheads, and the only one of Rambo's overhead strings that cannot be full combo punished. Generally too slow to use in neutral or turn-taking, but the startup is well-timed to allow for oki off most of Rambo's knockdowns. With Leopard Krawl equipped this string becomes far deadlier, giving two special cancel points that each turn into a three-way mixup. | ||||

| ||||
| Damage | Guard | Startup | Active | Recovery |
|---|---|---|---|---|
| 3.00 / 0.45 / 0.0005 | Mid | 17 | 2 | 29 |
| Cancel | Hit Adv. | Block Adv. | F/Block Adv. | Cost |
| 22 | 10 | -9 | -9 | - |
| Overhead stab, the first of two overheads in B121. Surprisingly small hitbox makes it prone to whiff against aerial enemies even if the first part landed. | ||||

| ||||
| Damage | Guard | Startup | Active | Recovery |
|---|---|---|---|---|
| 7.00 / 1.05 / 0.0011 | Overhead | 16 | 2 | 27 |
| Cancel | Hit Adv. | Block Adv. | F/Block Adv. | Cost |
| - | 31 | -7 | -7 | - |
| Big overhead punch, the second of two overheads in B121. Gives a lengthy knockdown, enough to allow Rambo to dash up and oki with B1 midscreen. In the corner, Rambo can either short hop or stance switch to framekill into another B1, though the timing is very tight. -7, so be careful about characters with a 6 frame D1. Against characters without one, a blocked B121 can be used to set up a Flawless Block. | ||||
F1

| ||||
| Damage | Guard | Startup | Active | Recovery |
|---|---|---|---|---|
| 2.00 / 0.30 / 0.0003 | Mid | 11 | 3 | 24 |
| Cancel | Hit Adv. | Block Adv. | F/Block Adv. | Cost |
| 16 | 8 | -7 | -7 | - |
| Mid that starts the F122 string for meterless combos. Tied as his fastest standing mid with B2, though its horizontal range (for the first attack) is much greater. Rarely used outside of punishes, though it can be used for higher reward on shimmy attempts. With Commando or Leopard Krawl equipped, F122 becomes more useful, allowing Rambo to confirm into a combo on hit and do some low-damage mixups on block, though aware enemies can negate this entirely by flawless blocking F12. | ||||

| ||||
| Damage | Guard | Startup | Active | Recovery |
|---|---|---|---|---|
| 3.00 / 0.45 / 0.0005 | Mid | 18 | 3 | 31 |
| Cancel | Hit Adv. | Block Adv. | F/Block Adv. | Cost |
| 23 | 10 | -7 | 7 | - |
Mid followup to F1 with good range, though a large gap. Has the unique property where any followups are disallowed if Flawless Blocked, greatly hampering its use as a mixup string. If the enemy has demonstrated this awareness, avoid this string entirely outside of punishes.
| ||||

| ||||
| Damage | Guard | Startup | Active | Recovery |
|---|---|---|---|---|
| 7.00 / 1.05 / 0.0011 | Overhead | 20 | 3 | 34 |
| Cancel | Hit Adv. | Block Adv. | F/Block Adv. | Cost |
| - | 47 | -30 | -30 | - |
| Last part of the F122 meterless combo string. Great pushback, but absurdly unsafe on block. Only usable for starting juggles, as landing this mid-juggle will make them drop much faster than expected. With Commando or Leopard Krawl, F122 on block becomes a potentially high reward option, even an unbreakable robbery option if Fatal Blow is available. Commando also allows Rambo to follow this up with a highly plus B31+3 restand to restart his gameplan. | ||||

| ||||
| Damage | Guard | Startup | Active | Recovery |
|---|---|---|---|---|
| 8.00 / - / - | Grab, High | 18 | 2 | 32 |
| Cancel | Hit Adv. | Block Adv. | F/Block Adv. | Cost |
| - | 14 | - | - | Requires Commando kustom move |
| Alternate string-grab ender to F12 that side switches. Used to encourage the enemy to let go of block, thus opening them up to F122; an exceedingly risky mix, but a mix nonetheless. Gives the same frame advantage and distance as a back throw. | ||||
D1

| ||||
| Damage | Guard | Startup | Active | Recovery |
|---|---|---|---|---|
| 2.00 / 0.30 / 0.0003 | Mid | 7 | 2 | 19 |
| Cancel | Hit Adv. | Block Adv. | F/Block Adv. | Cost |
| 11 | 13 | -6 | -6 | - |
| An average crouching jab. Rambo's only real abare option due to the slower startup of D3. Cancel directly into FUBAR to stop enemy mashing, though its usage as a tick throw is hampered by Rambo's lack of a special move that would catch an immediate jump. Many of Rambo's optimal FUBAR combos require a D1 or two to add more gravity and prevent B221~FUBAR from whiffing. | ||||
2
| Nose Buster (2) | ||||
| Damage | Guard | Startup | Active | Recovery |
|---|---|---|---|---|
| 3.00 / 0.45 / 0.0005 | High | 9 | 2 | 22 |
| Cancel | Hit Adv. | Block Adv. | F/Block Adv. | Cost |
| 15 | 12 | -2 | -2 | - |
| Heavier jab, with better vertical and horizontal range than 1 while only being one frame slower. Better at anti-airing than 1, but causes a faster drop, making it harder to continue the combo. Starts 222, a string that is safer and more forward advancing than 121 but offers less mixup opportunities. | ||||
| Mission Accomplished (22) | ||||
| Damage | Guard | Startup | Active | Recovery |
|---|---|---|---|---|
| 3.00 / 0.45 / 0.0005 | Mid | 16 | 3 | 22 |
| Cancel | Hit Adv. | Block Adv. | F/Block Adv. | Cost |
| 25 | 11 | -3 | -3 | - |
| Mid punch followup to 2, with decent forward advancement and an oddly limited choice of comboing special cancels. Mid with a high hitbox, meaning that while it will catch neutral ducks and crouching normals, dedicated low profiles will still work against it. Has a tiny gap that is too small to mash, jump, or Flawless Block. Decent recovery and only -3, but its lack of combo options and the relatively quick startup of 222 makes it a middling choice for a stagger. | ||||
| I'd Die For It! (222) | ||||
| Damage | Guard | Startup | Active | Recovery |
|---|---|---|---|---|
| 7.00 / 1.05 / 0.0011 | Mid | 16 | 3 | 31 |
| Cancel | Hit Adv. | Block Adv. | F/Block Adv. | Cost |
| - | 28 | -7 | -7 | - |
| Big mid punch that ends 222. Very forward advancing and highly plus on hit, though the knockback can make it hard to oki midscreen. Yet another move that is -7, so watch out for 6-frame D1 characters. | ||||
B2
| KA-BAR Slash (B2) | ||||
| Damage | Guard | Startup | Active | Recovery |
|---|---|---|---|---|
| 3.00 / 0.45 / 0.0005 | Mid | 11 | 3 | 25 |
| Cancel | Hit Adv. | Block Adv. | F/Block Adv. | Cost |
| 18 | 13 | -1 | -1 | - |
| Short range knife slash - just beyond throw range. Only -1 on block and up to +1 with a meaty, making it a useful stagger. Starts B221, an extremely important string that does just about everything but anti-air and whiff punish, and Rambo's primary string for turn-taking and close-range aggression without a knockdown. | ||||
| Day By Day (B22) | ||||
| Damage | Guard | Startup | Active | Recovery |
|---|---|---|---|---|
| 3.00 / 0.45 / 0.0005 | Mid | 15 | 3 | 25 |
| Cancel | Hit Adv. | Block Adv. | F/Block Adv. | Cost |
| 22 | 12 | -6 | -6 | - |
| Followup to B2. Where B2 was short ranged, B22 is hugely forward advancing. B22 forms Rambo's primary stagger and hit confirm when on the offensive; go into B221 on hit, and stagger with the threat of B224 on block. | ||||
| No More POWs(B221) | ||||
| Damage | Guard | Startup | Active | Recovery |
|---|---|---|---|---|
| 7.00 / 1.05 / 0.0005 | Mid | 13 | 3 | 30 |
| Cancel | Hit Adv. | Block Adv. | F/Block Adv. | Cost |
| 16 | 20 | -11 | -11 | - |
| High damage punch that ends B221. Can be special move cancelled, making it a crucial part of combo extensions for maximum damage and corner carry. -11 on block, though the special move cancel can somewhat remedy that. Puts the enemy airborne on hit, allowing Rambo to combo into FUBAR (DBF1) if they started grounded; for enemies mid-juggle, additional hits must be added to cause more gravity, otherwise the B221 will knock them too high and the FUBAR will whiff. If these combos are too difficult B33 can be used instead, sacrificing damage and corner carry. Unfortunately too fast to cover against B224 Flawless Block attempts. | ||||
| Diddy-Bopping(B224) | ||||
| Damage | Guard | Startup | Active | Recovery |
|---|---|---|---|---|
| 9.00 / 1.35 / 0.0014 | Overhead | 21 | 5 | 43 |
| Cancel | Hit Adv. | Block Adv. | F/Block Adv. | Cost |
| - | 24 | -1 | -6 | - |
Massive overhead drop kick, and the primary threat behind the B22 stagger. Reaches magnificently far and is only -1 on block, though it has a Flawless Block gap and is absolute death on whiff. Will catch any enemy who tries to jump after B22, making it much more useful with Leopard Krawl equipped.
| ||||
F2
| Knockout Punch (F2) | ||||
| Damage | Guard | Startup | Active | Recovery |
|---|---|---|---|---|
| 5.00 / 0.75 / 0.0008 | Mid | 13 | 3 | 29 |
| Cancel | Hit Adv. | Block Adv. | F/Block Adv. | Cost |
| 17 | 9 | -5 | -5 | - |
| Rambo's best singular normal. F2 has superb range, good damage, and strong cancel advantage, allowing it to combo or frametrap into nearly any special move midscreen. Unfortunately its string followups aren't as solid. Starts F211, used for whiff punishes, mixups, and confirms. | ||||
| Civilian Life(F21) | ||||
| Damage | Guard | Startup | Active | Recovery |
|---|---|---|---|---|
| 5.00 / 0.75 / 0.0008 | Mid | 30 | 2 | 31 |
| Cancel | Hit Adv. | Block Adv. | F/Block Adv. | Cost |
| 34 | 10 | -6 | -16 | - |
| Rambo grabs a rock. Very long ranged, though its extremely long startup makes easy to Flawless Block, and a poor choice for oki. With Leopard Krawl, F21 becomes far more useful. The stance attacks allow Rambo to play around the Flawless Block gap, and F2~Leopard Krawl is a visual mixup with F21.
| ||||
| Blood Trail(F211) | ||||
| Damage | Guard | Startup | Active | Recovery |
|---|---|---|---|---|
| 7.00 / 1.05 / 0.0011 | Overhead | 17 | 2 | 32 |
| Cancel | Hit Adv. | Block Adv. | F/Block Adv. | Cost |
| - | 7 | -10 | -10 | - |
| Overhead rock bop with surprising damage that ends F211. Unsafe at -10, but short-ranged characters will be pushed out of full combo range. Rambo's best damage midscreen for confirming F21 (without Fatal Blow or Savage Slide KB) and leaves the enemy very close, though the frame advantage is very short. Confirm into Whip Trap instead for better advantage and greater distance. | ||||
| Most Ricky-Tick (F214) | ||||
| Damage | Guard | Startup | Active | Recovery |
|---|---|---|---|---|
| 5.00 / 0.75 / 0.0008 | Mid | 14 | 3 | 28 |
| Cancel | Hit Adv. | Block Adv. | F/Block Adv. | Cost |
| - | 18 | -4 | -4 | - |
| Alternate, mid ender to F21. Less damage and not an overhead, but completely safe (given the enemy didn't flawless block F21 already) and with much greater pushback. Allows Rambo to attempt a spacing trap by backdashing into B33, though longer range attacks will catch this (while themselves being vulnerable to mashing). | ||||
D2
| Rising KA-BAR (D2) | ||||
| Damage | Guard | Startup | Active | Recovery |
|---|---|---|---|---|
| 14.00 (19.00) / 2.10 / 0.0021 | High | 9 | 5 | 42 |
| Cancel | Hit Adv. | Block Adv. | F/Block Adv. | Cost |
| - | 23 | -10 | -20 | - |
| Krushing Blow: Activates when the attack KOUNTERS or PUNISHES a HIGH attack. A usable but flawed uppercut. Disjointed and decently active, but with a significantly smaller hitbox than other uppercuts. Concerningly short horizontal range also makes it harder to use for reckless disrespecting. Hitbox does not go backwards at all, making it harder to anti-air with once the enemy is close, though the disjoint makes it above average at anti-airing when properly spaced. | ||||
3
| Boot Bash (3) | ||||
| Damage | Guard | Startup | Active | Recovery |
|---|---|---|---|---|
| 5.00 / 0.75 / 0.0008 | High | 12 | 3 | 23 |
| Cancel | Hit Adv. | Block Adv. | F/Block Adv. | Cost |
| 17 | 3 | 1 | 1 | - |
| Rambo's only plus standing normal without a meaty. Creates a bit of pushback, causing most D1 and D3 attacks to whiff. Due to it being a high and lacking string followups, it is very vulnerable to getting mashed on. | ||||
B3
| Low Blow (B3) | ||||
| Damage | Guard | Startup | Active | Recovery |
|---|---|---|---|---|
| 5.00 / 0.75 / 0.0008 | Mid | 12 | 3 | 31 |
| Cancel | Hit Adv. | Block Adv. | F/Block Adv. | Cost |
| 15 | -1 | -6 | -6 | - |
| Important normal with good range, used to start B33 for whiff punishes, backdash traps, and combo construction. Has a surprisingly large hitbox, but don't count on it to anti-air; however, it is Rambo's best normal for hitting enemy landing frames. With Snare Trap equipped, B33 becomes a more damaging and easily confirmable alternative to B22 for shimmies, though it gives less mixup and stagger options on block. -1 on hit, 31 recovery frames, and quick natural followup makes it a poor choice for a single hit stagger. | ||||
| Deadly Boondocks (B33) | ||||
| Damage | Guard | Startup | Active | Recovery |
|---|---|---|---|---|
| 5.00 / 0.75 / 0.0008 | Mid | 16 | 2 | 27 |
| Cancel | Hit Adv. | Block Adv. | F/Block Adv. | Cost |
| 19 | 9 | -7 | -7 | - |
| Followup kick to B3. Interestingly has less recovery than B3 while being slightly more unsafe at -7; beware of 6-frame attacks. Slightly more range than B3, with a bit of forward advancement. Unusually high hitbox means can whiff on both block and grounded hit if used at the absolute tip of B3. Juggle reaction is highly favorable for landing combo enders, especially for FUBAR and Savage Slide, though using B33 instead of B221 will sacrifice damage and corner carry. | ||||
| Nothing Is Over (B31+3) | ||||
| Damage | Guard | Startup | Active | Recovery |
|---|---|---|---|---|
| 11.00 / 3.00 / 0.003 | Mid | 22 | 4 | 35 |
| Cancel | Hit Adv. | Block Adv. | F/Block Adv. | Cost |
| - | 10 | -8 | -8 | Requires Commando kustom move |
| Alternate followup to B3, and one of Rambo's best normals. Restands the enemy on hit, putting Rambo at +10. Midscreen, this restand generally puts the enemy too far to guarantee anything, but in the corner they are kept close - just outside of throw range, just within B2 range. The hit reaction happens regardless of the hitbox contact point, which can cause some weird vacuuming, especially on characters with long non-disjoint attacks like D'vorah. On block it inflicts a surprising 3% chip damage, more than a blocked D2 and rivaling some multi-hit special moves. -8, but the pushback will cause most 7-frame attacks to whiff entirely, especially standing jabs; from testing, only Noob, Skarlet, and Geras can combo punish B31+3 on block. Despite the long startup, the gap between B3 and B31+3 cannot be flawless blocked. Decently active, with a disjoint hitbox. | ||||
F3
| Recon Kick (F3) | ||||
| Damage | Guard | Startup | Active | Recovery |
|---|---|---|---|---|
| 7.00 / 1.050 / 0.011 | High | 16 | 3 | 27 |
| Cancel | Hit Adv. | Block Adv. | F/Block Adv. | Cost |
| 20 | 17 | -3 | -3 | - |
| A spinning kick with excellent range and forward advancement, enough to reach from round start. Used to close the distance, continue U2 combos, and minimize the potential breakaway points of a juggled enemy. Can be used as a big anti-air, but only on very predictable jumping from a distance - close jumps will sail right over it. Generally too fast to duck and punish on reaction, though it is punishable on a read and can be stuffed by preemptive ground pokes. | ||||
D3
| Steel Toe (D3) | ||||
| Damage | Guard | Startup | Active | Recovery |
|---|---|---|---|---|
| 1.00 / 0.15 / 0.0002 | Low | 9 | 3 | 21 |
| Cancel | Hit Adv. | Block Adv. | F/Block Adv. | Cost |
| 16 | 12 | -7 | -7 | - |
| A crouching kick, slightly too slow to use in abare, though its range, low profiling, and pushback make up for that weakness. Like D1, cancelling into FUBAR will catch enemy counterpokes, though there is less incentive to do it with D3 due to the pushback. | ||||
4
| Service Strike (4) | ||||
| Damage | Guard | Startup | Active | Recovery |
|---|---|---|---|---|
| 7.00 / 1.050 / 0.011 | High | 14 | 2 | 26 |
| Cancel | Hit Adv. | Block Adv. | F/Block Adv. | Cost |
| 19 | 23 | -1 | -1 | - |
| A spinning high kick that sends the enemy flying. Briefly puts Rambo airborne after a few frames of startup, avoiding throws and resetting the Forward Throw KB. Short range, unfavorable hit reaction, and lack of string followups makes this a generally poor normal to use. | ||||
B4
| Survival Sweep (B4) | ||||
| Damage | Guard | Startup | Active | Recovery |
|---|---|---|---|---|
| 7.00 / 1.05 / 0.0011 | Low | 13 | 2 | 26 |
| Cancel | Hit Adv. | Block Adv. | F/Block Adv. | Cost |
| - | 19 | -6 | -11 | - |
| A mediocre sweep. Lacks the range and disjoint of a weapon sweep, as well as the low profile of a ninja sweep, while having below average frame data - to the point of being punishable on Flawless Block without spending meter. Despite this, the sweep is still an important part of Rambo's gameplan, being a (mostly) safe low option that lets him oki with B121. | ||||
F4
| Lieutenant Drop (F4) | ||||
| Damage | Guard | Startup | Active | Recovery |
|---|---|---|---|---|
| 9.00 (26.00) / 1.35 / 0.0014 | Overhead | 19 | 2 | 41 |
| Cancel | Hit Adv. | Block Adv. | F/Block Adv. | Cost |
| - | 23 | -11 | -11 | - |
| Krushing Blow: Activates if the attack hits TWICE in a row, or if it BREAKS ARMOR. One of the best overheads in the game. A 19 frame overhead that is safe on regular block, gives a plus knockdown, armor breaks, and immediately threatens an overhead-twice Krushing Blow. Use in staggers, mixups, and even in turn-taking to try and force the enemy to neutrally block high, opening them up to the rest of Rambo's arsenal. Being a leap attack, it becomes throw immune after a few frames of startup and resets the timer on the Forward Throw KB. Beware of its extremely long recovery on whiff, though.
| ||||
D4
| Double Down (D4) | ||||
| Damage | Guard | Startup | Active | Recovery |
|---|---|---|---|---|
| 3.00 / 0.45 / 0.0005 | Low | 11 | 4 | 27 |
| Cancel | Hit Adv. | Block Adv. | F/Block Adv. | Cost |
| 20 | 20 | -9 | -9 | - |
| Rambo's crouching poke of choice for when the fastest speed is not a necessity, and he is absolutely certain that it won't whiff. D4 is Rambo's best low profile, compounded by excellent range, decent active frames, high cancel advantage, enough pushback to immediately start a B33 spacing game, and enough frame advantage on hit to guarantee an F4. Despite these strengths D4 is not without some notable issues; long recovery makes it dangerous to whiff, and the cancel advantage is so great that FUBAR tick throws will fail entirely. This can make it trickier than expected to deal with slower, longer range weapon pokes like Kabal's D4. Leopard Krawl can catch these attacks by cancelling D4 into parry, but this can be interrupted by attacks that are 8 frames or faster. Against opponents who vary between their fast and slow pokes, D3~FUBAR is generally a more consistent option. | ||||
Jump and Hop Attacks
J1
| Air Raid (J1) | ||||
| Damage | Guard | Startup | Active | Recovery |
|---|---|---|---|---|
| 5.00 / 0.75 / 0.0008 | Overhead | 8 | 2 | 30 |
| Cancel | Hit Adv. | Block Adv. | F/Block Adv. | Cost |
| 0 | 0 | -12 | -12 | - |
| Easier, less rewarding alternative to J2 for air-to-airs and jump-ins. Faster startup and bigger downward area make it much easier to land against grounded enemies. -4 at the worst, and up to +10. | ||||
J2
| Deep Cuts (2) | ||||
| Damage | Guard | Startup | Active | Recovery |
|---|---|---|---|---|
| 7.00 / 1.05 / 0.0011 | Overhead | 9 | 3 | 30 |
| Cancel | Hit Adv. | Block Adv. | F/Block Adv. | Cost |
| 0 | 10 | -7 | -12 | - |
| Rambo's jump-in and air-to-air of choice. Use an instant J2 to make a hard read on enemies jumping to avoid Leopard Krawl, and then continue the combo with B221 or B31+3. Due to its small hitbox and longer than average startup it can be hard to land it late for the optimal plus frames, but that should only be attempted against enemies who have been conditioned by repeated fast JK attacks to not immediately anti-air. +5 at the worst, and up to +15. | ||||
JK
| Brutal Boots (JK) | ||||
| Damage | Guard | Startup | Active | Recovery |
|---|---|---|---|---|
| 9.00 / 1.35 / 0.0014 | Overhead | 11 | 5 | 30 |
| Cancel | Hit Adv. | Block Adv. | F/Block Adv. | Cost |
| - | 24 | -7 | -12 | - |
| Incredible jump kick with huge horizontal distance. Excellent for (nearly) all jump kick purposes of approaching, discouraging anti-airs, and avoiding fireballs, though its use as an OS is limited due to Rambo's lack of a solid special to OS into on hit. Like all jump kicks, get used to the increased landing frames compared to J1 and J2 when using it offensively. | ||||
SHP
| Bow Slam (SHP) | ||||
| Damage | Guard | Startup | Active | Recovery |
|---|---|---|---|---|
| 9.00 / 1.35 / 0.0014 | Overhead | 15 | 2 | 38 |
| Cancel | Hit Adv. | Block Adv. | F/Block Adv. | Cost |
| 0 | 28 | -18 | -23 | - |
| Extremely delayable SHP, perfect for catching enemy fuzzy block attempts. Long range and disjoint also make it usable on certain knockdowns to catch both wakeup reversal attacks and forward getup roll at the same time, though this is highly matchup dependent. | ||||
SHK
| Drop Kick (SHK) | ||||
| Damage | Guard | Startup | Active | Recovery |
|---|---|---|---|---|
| 9.00 / 1.35 / 0.0014 | Overhead | 10 | 7 | 30 |
| Cancel | Hit Adv. | Block Adv. | F/Block Adv. | Cost |
| 0 | 31 | -15 | -20 | - |
| The less useful of Rambo's short hop attacks, despite its faster startup. Not nearly as delayable as SHP, and F4 already fills its role much better as a fast overhead. | ||||
Reversal Attacks
U2
| Swinging Bow (U2) | ||||
| Damage | Guard | Startup | Active | Recovery |
|---|---|---|---|---|
| 5.00 / 0.75 / 0.0011 | Mid | 12 | 3 | 25 |
| Cancel | Hit Adv. | Block Adv. | F/Block Adv. | Cost |
| 0 | 42 | -11 | -11 | 1 Offensive + 1 Defensive Meter |
| Excellent in getups, weak in Flawless Blocks. Slow speed means it is unable to guarantee a punish on the fastest pokes and makes interruptions a problem, while its massive hitbox makes it perfect for covering the sky against jumping oki attempts. | ||||
U3
| Quick Detonation (U3) | ||||
| Damage | Guard | Startup | Active | Recovery |
|---|---|---|---|---|
| 9.00 / 1.35 / 0.0014 | Mid | 11 | 3 | 34 |
| Cancel | Hit Adv. | Block Adv. | F/Block Adv. | Cost |
| 0 | 12 | -15 | -20 | 1 Offensive + 1 Defensive Meter |
| Armored getup with a unique retreating property, making it harder to punish midscreen (and easier to punish in the corner). Encourages the enemy to jump to punish, which opens them up to U2. Generally a better reversal attack to use in poke wars due to its safety, armor, and slightly faster speed, though U2 remains a more rewarding option for punishing dedicated gaps. | ||||
Throws
| Forward Throw (F1+3 or FLB) | ||||
| Damage | Guard | Startup | Active | Recovery |
|---|---|---|---|---|
| 13.00 (10.00 + 7.5 DOT) / - / - | Grab, High | 10 | 2 | 34 |
| Cancel | Hit Adv. | Block Adv. | F/Block Adv. | Cost |
| - | 14 | - | - | - |
| Krushing Blow: Activates if Rambo has not JUMPED, been KNOCKED DOWN, or LAUNCHED for 10 seconds. Rambo's forward throw keeps the enemy close and has a long animation. While he doesn't have any ground DOT abilities to directly synergize with the long animation, it helps with building his throw KB timer. B12 is the best oki option after a forward throw but it requires very precise timing; B22 and B33 are easier but less aggressive options. Unlike other throw KBs, Rambo's forward throw KB inflicts DOT and keeps the enemy in place for a combo. Mostly used to pounce on a defensive, cornered enemy, but it can also be deployed as a surprise counterattack on an aggressive enemy after taking pokes. Keep in mind that 4, F4, and B224 will also reset the timer, and that planning for this attack will mean foregoing jumps for a little bit - use at your own risk. However, once it is used, Rambo is entirely free to use his strong jump attacks. | ||||
| Back Throw (B1+3 or BLB) | ||||
| Damage | Guard | Startup | Active | Recovery |
|---|---|---|---|---|
| 13.00 / - / - | Grab, High | 10 | 2 | 34 |
| Cancel | Hit Adv. | Block Adv. | F/Block Adv. | Cost |
| - | 14 | - | - | - |
| Like his forward throw, Rambo's back throw has a long animation for building the forward throw KB. Puts a fair amount of distance between the two fighters, preventing guaranteed oki but allowing him to start a spacing game. | ||||
Special Moves
Hunting Bow (DB2)
| Hunting Bow (DB2) | ||||
| Damage | Guard | Startup | Active | Recovery |
|---|---|---|---|---|
| 8.00 / 2.00 / 0.002 | High | 30 | - | 27 |
| Cancel | Hit Adv. | Block Adv. | F/Block Adv. | Cost |
| - | 4 | -9 | -19 | - |
| Rambo draws a bow and prepares to fire arrows. Entering the input by itself will fire only one arrow and put the bow away immediately, while holding 2 will keep the bow drawn after firing, up to three arrows. The proper way to use the arrow stance is to hold 2 when entering the input, and briefly release for each arrow. The window for combos is very tight, so this will require practice. Each arrow that combos will deal half the damage of the previous, down to 20 damage for the third. One of Rambo's most important and versatile tools. The arrows can be easily ducked on reaction, but their large hitbox and slow movement will delay the enemy and deny jumping while they are onscreen. Do not simply fire all three arrows at once all the time; fire two, and then try to catch them with a Whip Trap. In the corner, Hunting Bow is used to damage the enemy and keep them standing off confirmable strings - it can also be cancelled early to reset the enemy. Some midscreen normals can combo into Hunting Bow, but only do this on guaranteed whiff punishes.
| ||||
Whip Trap (DB4)
| Whip Trap (DB4) | ||||
| Damage | Guard | Startup | Active | Recovery |
|---|---|---|---|---|
| 7.00 / 1.88 / 0.0019 | Mid | 20 | 11 | 32 |
| Cancel | Hit Adv. | Block Adv. | F/Block Adv. | Cost |
| - | 21 | -21 | -21 | - |
Rambo ducks and remotely activates a hidden whip trap, knocking down the enemy. Superb for anti-zoning and space control. The duck will avoid most projectiles, but even unavoidable ones will generally trade in Rambo's favor for the most part (though there are several exceptions to this, such as Sub-Zero Deep Freeze). Large hitbox and easy to aim, with only two distances that together cover the entire screen. The hitbox moves from the Rambo-facing side to the other during its active frames, making it much safer if properly spaced. Prioritize the close version over the far version if the enemy is in the middle zone.
| ||||
Savage Slide (BF4)
| Savage Slide (BF4) | ||||
| Damage | Guard | Startup | Active | Recovery |
|---|---|---|---|---|
| 7.00 / 1.88 / 0.0019 | Mid | 28 | 4 | 40 |
| Cancel | Hit Adv. | Block Adv. | F/Block Adv. | Cost |
| - | 24 | -12 | -12 | - |
| Krushing Blow: Activates on the THIRD AMPLIFIED SLIDE to land. Rambo slides on the ground, low profiling high attacks along the way. Hold Forward during startup to do a near-fullscreen version, though the low profile does not take effect until the default distance. Hold Back during recovery to roll away from the enemy, sacrificing frame advantage for distance on hit, necessitating a different punish on block (still very punishable on block, though), and making it harder to punish on whiff. The Amplified version deals more damage and builds towards a KB, but forces the back roll reaction. Meter will only be spent on hit, so mashing Amplify has no risk of waste. Much too slow to use as an actual mixup tool, but has a niche use as a confirmable string ender to build towards the KB. Rambo has limited ways to spend his offensive meter, so get the damage and the KB progress where you can. Even without meter, the slide gives a better knockdown than most string enders. Be careful not to accidentally input the far version on hit - it will not combo.
| ||||
| Savage Slide (BF4) | ||||
| Damage | Guard | Startup | Active | Recovery |
|---|---|---|---|---|
| 7.00 / 1.88 / 0.0019 | Mid | 28 | 4 | 56 |
| Cancel | Hit Adv. | Block Adv. | F/Block Adv. | Cost |
| - | 8 | -28 | -28 | - |
| Krushing Blow: Activates on the THIRD AMPLIFIED SLIDE to land. Rambo slides on the ground, low profiling high attacks along the way. Hold Forward during startup to do a near-fullscreen version, though the low profile does not take effect until the default distance. Hold Back during recovery to roll away from the enemy, sacrificing frame advantage for distance on hit, necessitating a different punish on block (still very punishable on block, though), and making it harder to punish on whiff. The Amplified version deals more damage and builds towards a KB, but forces the back roll reaction. Meter will only be spent on hit, so mashing Amplify has no risk of waste. Much too slow to use as an actual mixup tool, but has a niche use as a confirmable string ender to build towards the KB. Rambo has limited ways to spend his offensive meter, so get the damage and the KB progress where you can. Even without meter, the slide gives a better knockdown than most string enders. Be careful not to accidentally input the far version on hit - it will not combo.
| ||||
| Savage Slide (BF4) | ||||
| Damage | Guard | Startup | Active | Recovery |
|---|---|---|---|---|
| 7.00 / 1.88 / 0.0019 | Mid | 38 | 4 | 46 |
| Cancel | Hit Adv. | Block Adv. | F/Block Adv. | Cost |
| - | 18 | -16 | -16 | - |
| Krushing Blow: Activates on the THIRD AMPLIFIED SLIDE to land. Rambo slides on the ground, low profiling high attacks along the way. Hold Forward during startup to do a near-fullscreen version, though the low profile does not take effect until the default distance. Hold Back during recovery to roll away from the enemy, sacrificing frame advantage for distance on hit, necessitating a different punish on block (still very punishable on block, though), and making it harder to punish on whiff. The Amplified version deals more damage and builds towards a KB, but forces the back roll reaction. Meter will only be spent on hit, so mashing Amplify has no risk of waste. Much too slow to use as an actual mixup tool, but has a niche use as a confirmable string ender to build towards the KB. Rambo has limited ways to spend his offensive meter, so get the damage and the KB progress where you can. Even without meter, the slide gives a better knockdown than most string enders. Be careful not to accidentally input the far version on hit - it will not combo.
| ||||
| Savage Slide (BF4) | ||||
| Damage | Guard | Startup | Active | Recovery |
|---|---|---|---|---|
| 7.00 / 1.88 / 0.0019 | Mid | 38 | 4 | 64 |
| Cancel | Hit Adv. | Block Adv. | F/Block Adv. | Cost |
| - | 4 | -32 | -32 | - |
| Krushing Blow: Activates on the THIRD AMPLIFIED SLIDE to land. Rambo slides on the ground, low profiling high attacks along the way. Hold Forward during startup to do a near-fullscreen version, though the low profile does not take effect until the default distance. Hold Back during recovery to roll away from the enemy, sacrificing frame advantage for distance on hit, necessitating a different punish on block (still very punishable on block, though), and making it harder to punish on whiff. The Amplified version deals more damage and builds towards a KB, but forces the back roll reaction. Meter will only be spent on hit, so mashing Amplify has no risk of waste. Much too slow to use as an actual mixup tool, but has a niche use as a confirmable string ender to build towards the KB. Rambo has limited ways to spend his offensive meter, so get the damage and the KB progress where you can. Even without meter, the slide gives a better knockdown than most string enders. Be careful not to accidentally input the far version on hit - it will not combo.
| ||||
| Savage Slide (BF4) | ||||
| Damage | Guard | Startup | Active | Recovery |
|---|---|---|---|---|
| 12.63 (27.75) | - | - | - | - |
| Cancel | Hit Adv. | Block Adv. | F/Block Adv. | Cost |
| - | 4 | - | - | 1 Offensive Meter |
| Krushing Blow: Activates on the THIRD AMPLIFIED SLIDE to land. Rambo slides on the ground, low profiling high attacks along the way. Hold Forward during startup to do a near-fullscreen version, though the low profile does not take effect until the default distance. Hold Back during recovery to roll away from the enemy, sacrificing frame advantage for distance on hit, necessitating a different punish on block (still very punishable on block, though), and making it harder to punish on whiff. The Amplified version deals more damage and builds towards a KB, but necessitates the back roll reaction. Meter will only be spent on hit, so mashing Amplify has no risk of waste. Much too slow to use as an actual mixup tool, but has a niche use as a confirmable string ender to build towards the KB. Rambo has limited ways to spend his offensive meter, so get the damage and the KB progress where you can. Even without meter, the slide gives a better knockdown than most string enders. Be careful not to accidentally input the far version on hit - it will not combo.
| ||||
Fatal Blow
| LONE WOLF (Block+Stance Switch) | ||||
| Damage | Guard | Startup | Active | Recovery |
|---|---|---|---|---|
| 33.00 / 1.50 / 0.0015 | Mid | 22 | 3 | 40 |
| Cancel | Hit Adv. | Block Adv. | F/Block Adv. | Cost |
| - | 12 | -24 | -29 | 30% HP or lower |
Not the fastest fatal blow, but has a huge disjoint hitbox. Use with Leopard Krawl command grabs to rob the enemy if they jump.
| ||||
Kustom Abilities
Artillery Strike (BF2)
| Artillery Strike (BF2) | ||||
| Damage | Guard | Startup | Active | Recovery |
|---|---|---|---|---|
| 6.00 / 1.75 / 0.0018 | Mid | 105 | 10 | - |
| Cancel | Hit Adv. | Block Adv. | F/Block Adv. | Cost |
| - | 92 | 54 | 54 | - |
| Rambo tosses a targeting flare, followed by an artillery shell about one second later. The shell has no hitbox until it impacts the ground. A very weak setup move. The hitbox is far smaller than what the blast suggests - combine that with its extremely slow startup and its obvious telegraphing, and it's a miracle if the enemy gets hit by this at all. The only positive is that the shell is guaranteed to arrive as long as the flare has left Rambo's hand, but don't think that you can use it for cheeky turn-stealing; most combos have enough forward advancement to both punish Rambo and avoid the shell if he tries to use it without a knockdown. | ||||
| Artillery Strike (BF2) | ||||
| Damage | Guard | Startup | Active | Recovery |
|---|---|---|---|---|
| 6.00 / 1.75 / 0.0018 | Mid | 109 | 10 | - |
| Cancel | Hit Adv. | Block Adv. | F/Block Adv. | Cost |
| - | 96 | 58 | 58 | - |
| Rambo tosses a targeting flare, followed by an artillery shell about one second later. The shell has no hitbox until it impacts the ground. A very weak setup move. The hitbox is far smaller than what the blast suggests - combine that with its extremely slow startup and its obvious telegraphing, and it's a miracle if the enemy gets hit by this at all. The only positive is that the shell is guaranteed to arrive as long as the flare has left Rambo's hand, but don't think that you can use it for cheeky turn-stealing; most combos have enough forward advancement to both punish Rambo and avoid the shell if he tries to use it without a knockdown. | ||||
| Artillery Strike (BF2) | ||||
| Damage | Guard | Startup | Active | Recovery |
|---|---|---|---|---|
| 6.00 / 1.75 / 0.0018 | Mid | 113 | 10 | - |
| Cancel | Hit Adv. | Block Adv. | F/Block Adv. | Cost |
| - | 100 | 62 | 62 | - |
| Rambo tosses a targeting flare, followed by an artillery shell about one second later. The shell has no hitbox until it impacts the ground. A very weak setup move. The hitbox is far smaller than what the blast suggests - combine that with its extremely slow startup and its obvious telegraphing, and it's a miracle if the enemy gets hit by this at all. The only positive is that the shell is guaranteed to arrive as long as the flare has left Rambo's hand, but don't think that you can use it for cheeky turn-stealing; most combos have enough forward advancement to both punish Rambo and avoid the shell if he tries to use it without a knockdown. | ||||
Claymore (DB3)
| Claymore (DB3) | ||||
| Damage | Guard | Startup | Active | Recovery |
|---|---|---|---|---|
| 6.00 / - / - | Unblockable | 86 | 304 | - |
| Cancel | Hit Adv. | Block Adv. | F/Block Adv. | Cost |
| - | 89 | - | - | - |
| Rambo plants a mine that becomes active after about one second. If either player steps on the mine, it detonates in an unblockable explosion that launches them for combo followups. The explosion can catch the other player if they are very close. After about 5 seconds, the mine will detonate on its own. Rambo can spend 1 offensive meter to turn the mine invisible, though it behaves exactly the same. Odd setup tool that tows the line between self-sabotaging trap and dangerous, matchup defining move. Absurdly powerful against enemies without a teleport or an air dash, as once the mine is active it requires an extremely accurate jump to clear. However, if the enemy can get to the other side the tables are completely turned, and the mine immediately becomes Rambo's greatest enemy. Shoulder Roll mitigates this scenario and allows Rambo to use the mine more creatively. Once placed, Rambo has a brief window to roll over to the other side, turning the mine into an offensive tool. Shoulder Roll can also negate the enemy side advantage if they are able to side-switch with the mine out. | ||||
Hidden M60 (DB2)
| Hidden M60 (DB2) | ||||
| Damage | Guard | Startup | Active | Recovery |
|---|---|---|---|---|
| 9.00 / 1.13 / 0.0002 | High | 43 | 86 | - |
| Cancel | Hit Adv. | Block Adv. | F/Block Adv. | Cost |
| - | - | -23 | -23 | Replaces Hunting Bow |
| Rambo draws an M60 from the ground and unloads. Shockingly low chip damage for a special move (a single arrow from Hunting Bow deals more chip than even the amplified M60!), and easy to duck on reaction. Oddly enough it has different active frames on block, hit, and whiff. Pushes out to a minimum distance on block, though the distance is still very punishable. The amplified version draws two machine guns and lasts longer (only dealing about 50% more damage, though), and the faster startup makes it harder to duck on reaction. Not a very useful special at all. Hunting Bow can already do everything it can and better, on top of its additional uses in strike-throw confirms. Has a good brutality, though.
| ||||
| Hidden M60 (DB2) | ||||
| Damage | Guard | Startup | Active | Recovery |
|---|---|---|---|---|
| 9.00 / 1.13 / 0.0002 | High | 43 | 68 | 40 |
| Cancel | Hit Adv. | Block Adv. | F/Block Adv. | Cost |
| - | - | - | - | Replaces Hunting Bow |
| Rambo draws an M60 from the ground and unloads. Shockingly low chip damage for a special move (a single arrow from Hunting Bow deals more chip than even the amplified M60!), and easy to duck on reaction. Oddly enough it has different active frames on block, hit, and whiff. Pushes out to a minimum distance on block, though the distance is still very punishable. The amplified version draws two machine guns and lasts longer (only dealing about 50% more damage, though), and the faster startup makes it harder to duck on reaction. Not a very useful special at all. Hunting Bow can already do everything it can and better, on top of its additional uses in strike-throw confirms. Has a good brutality, though.
| ||||
| Hidden M60 (DB2) | ||||
| Damage | Guard | Startup | Active | Recovery |
|---|---|---|---|---|
| 9.00 / 1.13 / 0.0002 | High | 43 | 58 | - |
| Cancel | Hit Adv. | Block Adv. | F/Block Adv. | Cost |
| - | 16 | - | - | Replaces Hunting Bow |
| Rambo draws an M60 from the ground and unloads. Shockingly low chip damage for a special move (a single arrow from Hunting Bow deals more chip than even the amplified M60!), and easy to duck on reaction. Oddly enough it has different active frames on block, hit, and whiff. Pushes out to a minimum distance on block, though the distance is still very punishable. The amplified version draws two machine guns and lasts longer (only dealing about 50% more damage, though), and the faster startup makes it harder to duck on reaction. Not a very useful special at all. Hunting Bow can already do everything it can and better, on top of its additional uses in strike-throw confirms. Has a good brutality, though.
| ||||
| Hidden M60 (DB2) | ||||
| Damage | Guard | Startup | Active | Recovery |
|---|---|---|---|---|
| 14.40 / 1.80 / 0.0002 | High | 26 | 140 | - |
| Cancel | Hit Adv. | Block Adv. | F/Block Adv. | Cost |
| - | - | -21 | -21 | Replaces Hunting Bow, 1 Offensive Meter |
| Rambo draws an M60 from the ground and unloads. Shockingly low chip damage for a special move (a single arrow from Hunting Bow deals more chip than even the amplified M60!), and easy to duck on reaction. Oddly enough it has different active frames on block, hit, and whiff. Pushes out to a minimum distance on block, though the distance is still very punishable. The amplified version draws two machine guns and lasts longer (only dealing about 50% more damage, though), and the faster startup makes it harder to duck on reaction. Not a very useful special at all. Hunting Bow can already do everything it can and better, on top of its additional uses in strike-throw confirms. Has a good brutality, though.
| ||||
| Hidden M60 (DB2) | ||||
| Damage | Guard | Startup | Active | Recovery |
|---|---|---|---|---|
| 14.40 / 1.80 / 0.0002 | High | 26 | 85 | 35 |
| Cancel | Hit Adv. | Block Adv. | F/Block Adv. | Cost |
| - | - | - | - | Replaces Hunting Bow, 1 Offensive Meter |
| Rambo draws an M60 from the ground and unloads. Shockingly low chip damage for a special move (a single arrow from Hunting Bow deals more chip than even the amplified M60!), and easy to duck on reaction. Oddly enough it has different active frames on block, hit, and whiff. Pushes out to a minimum distance on block, though the distance is still very punishable. The amplified version draws two machine guns and lasts longer (only dealing about 50% more damage, though), and the faster startup makes it harder to duck on reaction. Not a very useful special at all. Hunting Bow can already do everything it can and better, on top of its additional uses in strike-throw confirms. Has a good brutality, though.
| ||||
| Hidden M60 (DB2) | ||||
| Damage | Guard | Startup | Active | Recovery |
|---|---|---|---|---|
| 14.40 / 1.80 / 0.0002 | High | 26 | 74 | - |
| Cancel | Hit Adv. | Block Adv. | F/Block Adv. | Cost |
| - | 20 | - | - | Replaces Hunting Bow, 1 Offensive Meter |
| Rambo draws an M60 from the ground and unloads. Shockingly low chip damage for a special move (a single arrow from Hunting Bow deals more chip than even the amplified M60!), and easy to duck on reaction. Oddly enough it has different active frames on block, hit, and whiff. Pushes out to a minimum distance on block, though the distance is still very punishable. The amplified version draws two machine guns and lasts longer (only dealing about 50% more damage, though), and the faster startup makes it harder to duck on reaction. Not a very useful special at all. Hunting Bow can already do everything it can and better, on top of its additional uses in strike-throw confirms. Has a good brutality, though.
| ||||
Snare Trap (DB3)
| Snare Trap (DB3) | ||||
| Damage | Guard | Startup | Active | Recovery |
|---|---|---|---|---|
| 8.95 / 1.37 / 0.0014 | Low | 32 | 3 | 47 |
| Cancel | Hit Adv. | Block Adv. | F/Block Adv. | Cost |
| 49 | 21 | -23 | -23 | - |
| Rambo snags the enemy with a low rope that travels fullscreen. The Amplified version keeps the enemy suspended for combo followups. Meter cannot be spent on block, so Rambo should always go for the amplify. Trades will halt the natural animation and allow Rambo to meterlessly combo. Rambo's only conventional combo starting special. One of his scant lows, but even slower than Savage Slide, rendering it entirely unusable as a mixup tool. More reward than Whip Trap for counter-zoning, especially on trades, but harder to land. Long suspension and high enemy height allows Rambo to choose between high damage J2 combos, or delayed grounded combos that build his Forward Throw KB timer. | ||||
| Snare Trap (DB3) | ||||
| Damage | Guard | Startup | Active | Recovery |
|---|---|---|---|---|
| 3.00 / 1.37 / 0.0014 | Low | 32 | - | - |
| Cancel | Hit Adv. | Block Adv. | F/Block Adv. | Cost |
| - | 152 | -23 | -23 | 1 Offensive Meter |
| Rambo snags the enemy with a low rope that travels fullscreen. The Amplified version keeps the enemy suspended for combo followups. Meter cannot be spent on block, so Rambo should always go for the amplify. Trades will halt the natural animation and allow Rambo to meterlessly combo. Rambo's only conventional combo starting special. One of his scant lows, but even slower than Savage Slide, rendering it entirely unusable as a mixup tool. More reward than Whip Trap for counter-zoning, especially on trades, but harder to land. Long suspension and high enemy height allows Rambo to choose between high damage J2 combos, or delayed grounded combos that build his Forward Throw KB timer. | ||||
FUBAR (DBF1)
| FUBAR (DBF1) | ||||
| Damage | Guard | Startup | Active | Recovery |
|---|---|---|---|---|
| 9.00 / - / - | Grab, High | 10 | 2 | 39 |
| Cancel | Hit Adv. | Block Adv. | F/Block Adv. | Cost |
| - | 6 | - | - | - |
| Krushing Blow: Activates when Rambo grabs a GETUP ROLL and then AMPLIFIES. Rambo grabs the enemy. Only special cancel tick throws from D1 and D3, though this is not entirely recommended due to Rambo's lack of an alternate special that would stop immediate jumps. Fast enough to catch enemy crouching attacks when cancelled out of D1 and D3, despite it being a high attack. The Amplified version allows Rambo to choose side, with the reverse FUBAR having more damage but less frame advantage. Rambo's conventional command grab, and the quickest non-throw grab he can neutrally deploy. The regular version is horrendously bad, forcing a side switch and dealing pitiful damage for a command grab, but this is generally only an issue when ending Snare Trap combos due to the limited opportunities that Rambo has to spend offensive meter. FUBAR also provides Rambo with the most directly damaging KB in the game when he snags a getup roll - 30% immediately and an additional 10% over time. The best way to fish for this is to get a moderately distanced knockdown (such as 121) and then react to a forward getup roll, though this is made harder by the long DBF input. FUBAR on an adjacent knockdown will catch both forward and backward getup roll but this is very risky, as any other getup option will open up Rambo to immediate and usually extreme punishment. | ||||
| FUBAR (DBF1) | ||||
| Damage | Guard | Startup | Active | Recovery |
|---|---|---|---|---|
| 13.00 (30.00 + 10.00 DOT) / - / - | Grab, High | - | - | - |
| Cancel | Hit Adv. | Block Adv. | F/Block Adv. | Cost |
| - | 20 | 0 | 0 | 1 Offensive Meter |
| Krushing Blow: Activates when Rambo grabs a GETUP ROLL and then AMPLIFIES. Rambo grabs the enemy. Only special cancel tick throws from D1 and D3, though this is not entirely recommended due to Rambo's lack of an alternate special that would stop immediate jumps. Fast enough to catch enemy crouching attacks when cancelled out of D1 and D3, despite it being a high attack. The Amplified version allows Rambo to choose side, with the reverse FUBAR having more damage but less frame advantage. Rambo's conventional command grab, and the quickest non-throw grab he can neutrally deploy. The regular version is horrendously bad, forcing a side switch and dealing pitiful damage for a command grab, but this is generally only an issue when ending Snare Trap combos due to the limited opportunities that Rambo has to spend offensive meter. FUBAR also provides Rambo with the most directly damaging KB in the game when he snags a getup roll - 30% immediately and an additional 10% over time. The best way to fish for this is to get a moderately distanced knockdown (such as 121) and then react to a forward getup roll, though this is made harder by the long DBF input. FUBAR on an adjacent knockdown will catch both forward and backward getup roll but this is very risky, as any other getup option will open up Rambo to immediate and usually extreme punishment. | ||||
| FUBAR (DBF1) | ||||
| Damage | Guard | Startup | Active | Recovery |
|---|---|---|---|---|
| 15.00 (32.00 + 10.00 DOT) / - / - | Grab, High | - | - | - |
| Cancel | Hit Adv. | Block Adv. | F/Block Adv. | Cost |
| - | 6 | 0 | 0 | 1 Offensive Meter |
| Krushing Blow: Activates when Rambo grabs a GETUP ROLL and then AMPLIFIES. Rambo grabs the enemy. Only special cancel tick throws from D1 and D3, though this is not entirely recommended due to Rambo's lack of an alternate special that would stop immediate jumps. Fast enough to catch enemy crouching attacks when cancelled out of D1 and D3, despite it being a high attack. The Amplified version allows Rambo to choose side, with the reverse FUBAR having more damage but less frame advantage. Rambo's conventional command grab, and the quickest non-throw grab he can neutrally deploy. The regular version is horrendously bad, forcing a side switch and dealing pitiful damage for a command grab, but this is generally only an issue when ending Snare Trap combos due to the limited opportunities that Rambo has to spend offensive meter. FUBAR also provides Rambo with the most directly damaging KB in the game when he snags a getup roll - 30% immediately and an additional 10% over time. The best way to fish for this is to get a moderately distanced knockdown (such as 121) and then react to a forward getup roll, though this is made harder by the long DBF input. FUBAR on an adjacent knockdown will catch both forward and backward getup roll but this is very risky, as any other getup option will open up Rambo to immediate and usually extreme punishment. | ||||
Leopard Krawl (BF4)
| Leopard Krawl (BF4) | ||||
| Damage | Guard | Startup | Active | Recovery |
|---|---|---|---|---|
| - / - / - | - | 16 | - | 29 |
| Cancel | Hit Adv. | Block Adv. | F/Block Adv. | Cost |
| - | - | - | - | - |
| Rambo hits the deck, entering a crawling stance where he low profiles most attacks and gains three followup moves: a low slash, a mid command grab, and a parry. An exceptionally versatile move, and the most popular special to use in the BF4 slot. Potentially turns every special cancel point into a low damage strike-throw mix, especially overhead cancel points. Followup moves can stop enemy mashing and cover Flawless Block attempts. Very vulnerable to jumping from a distance, though Quick Slash will stop most jumps when done as a Special Cancel. Despite it low profiling most projectiles, it is not the best anti-zoning tool due to its slow movement speed and vulnerability to jumping.
The following is a comprehensive list of Leopard Krawl situations, on both block and hit, for every special cancellable normal.
The following is a list of every single move that Leopard Krawl can low profile. All high attacks will be low profiled, so those are not included.
| ||||
| Quick Slash (1) | ||||
| Damage | Guard | Startup | Active | Recovery |
|---|---|---|---|---|
| 3.00 / 1.37 / 0.0014 | Low | 12 | 3 | 24 (approximate) |
| Cancel | Hit Adv. | Block Adv. | F/Block Adv. | Cost |
| - | 15 (approximate) | -2 | -2 | - |
From the Leopard Krawl stance, Rambo slashes with his knife. Used to mix up the enemy, plug in Flawless Block gaps, and catch enemies trying to jump the command grab. Though it is very plus on hit, it causes the enemy to step backwards a significant amount, making midscreen followups difficult - immediate stance cancels will leave Rambo at -16, and crawling up to land another Quick Slash will let the enemy jump. Much deadlier in the corner, where a landed Quick Slash will guarantee another Quick Slash without a gap and force the enemy to accept a strike-throw mix. Will stop jumping off all special cancellable normals on block with the fastest possible timing, though in oki Leopard Krawl requires very specific reads between all three options - Knife Slash being the anti-jumping option. It may be safer to simply exit stance instead.
| ||||
| Quick Slash (1) | ||||
| Damage | Guard | Startup | Active | Recovery |
|---|---|---|---|---|
| 10.00 (26.00) / - / - | Grab, Mid | 14 | 4 | 31 |
| Cancel | Hit Adv. | Block Adv. | F/Block Adv. | Cost |
| - | 24 | - | - | - |
| Krushing Blow: Activates after crawling forward a significant distance. From the Leopard Krawl stance, Rambo performs a mid command grab. Hold Down to return to the Leopard Krawl stance if it whiffs, otherwise Rambo will return to standing. Rambo's most easily deployable grab, allowing him to tick throw off any special cancellable normal. Overhead cancel points can be turned into a three-way mixup between this and Quick Slash. Reactible if the enemy is specifically looking out for it, requiring Quick Slash to complete the mix and stop the enemy from jumping. Technically Rambo's highest damage combo ender without using meter, but its long startup makes it hard to land outside of immediate cancel anti-airs. Gives a long knockdown and creates a great distance on hit, technically guaranteeing an F2 midscreen though this is highly punishable with a delayed getup; a safer option is start zoning. In the corner, Sneak Attack will guarantee B12 oki without defensive meter, and is plus enough for Rambo to drop into Leopard Krawl again and Parry to catch any wakeup attack. When using Leopard Krawl for oki, Sneak Attack will beat mashing, getup rolls, getup U2, and inaction.
| ||||
| Quick Slash (1) | ||||
| Damage | Guard | Startup | Active | Recovery |
|---|---|---|---|---|
| 9.00 (25.00) / - / - | Parry | 6 | 25 | 18 |
| Cancel | Hit Adv. | Block Adv. | F/Block Adv. | Cost |
| - | 24 | - | - | - |
| Krushing Blow: Activates after crawling forward a significant distance. From the Leopard Krawl stance, Rambo readies a parry. Like Sneak Attack, hold Down to return to the Leopard Krawl stance if it whiffs, and otherwise Rambo will return to standing. The reaction on hit is exactly the same as Sneak Attack, though it deals 1% less damage. A superb parry, used to stop the enemy from mashing on the Leopard Krawl mixup and catch U3. Catches basically anything that's not a projectile or a jumping attack, including unblockables. Some special cancellable normals like F2 and F21 have enough cancel advantage to catch mashing with Quick Slash, but for everything else Rambo must use the parry. On oki, the parry is used to catch getup U3.
| ||||
Shoulder Roll (BF4)
| Shoulder Roll (BF4) | ||||
| Damage | Guard | Startup | Active | Recovery |
|---|---|---|---|---|
| 7.00 / 1.88 / 0.0019 | Mid | 41 | 2 | 26 |
| Cancel | Hit Adv. | Block Adv. | F/Block Adv. | Cost |
| - | 6 | -11 | -11 | - |
| Krushing Blow: Activates when it hits as a KOUNTER or PUNISH. Rambo rolls forward and slashes the enemy. Hold Forward or Back to choose the roll distance (all three distances have the same frame data), and hold Down to cancel the roll. Amplified Shoulder Roll does a lightning fast overhead bow slam that makes Rambo plus on block and gives a lengthy knockdown on hit. The third option to place in the BF4 slot. Like the other two it low profiles, though its low profile is not quite as low and should only be relied upon to avoid high attacks and fireballs. The regular version is used exclusively to counterzone and make hard reads on the enemy with the KB - the reward on non-KB hit is too small to be worth it most situations. While the KB reaction looks similar to the forward throw KB its hitstun is actually much longer, allowing Rambo to jump in when continuing the combo for more damage and corner carry. With meter, Shoulder Roll becomes Rambo's one-stop shop for mobility - perfect for skirmishing, evading, and approaching the enemy. Can be used like a traditional teleport when zoning, with the added bite of its overhead followup. When used offensively the threat of the overhead will force enemies to block high as it approaches, and then the cancel can be used to turn any approach into a strike-throw situation - deadly when the forward throw KB is ready. Don't be afraid to just swing with the amplified attack; it's plus on block, and the knockdown on hit is lengthy. Best used with Claymore to roll away and set up a mine, or to side switch with a placed mine and go on the offensive.
| ||||
| Shoulder Roll (BF4) | ||||
| Damage | Guard | Startup | Active | Recovery |
|---|---|---|---|---|
| - / - / - | - | 30 | - | 11 |
| Cancel | Hit Adv. | Block Adv. | F/Block Adv. | Cost |
| - | - | - | - | 1 Defensive Meter |
| Krushing Blow: Activates when it hits as a KOUNTER or PUNISH. Rambo rolls forward and slashes the enemy. Hold Forward or Back to choose the roll distance (all three distances have the same frame data), and hold Down to cancel the roll. Amplified Shoulder Roll does a lightning fast overhead bow slam that makes Rambo plus on block and gives a lengthy knockdown on hit. The third option to place in the BF4 slot. Like the other two it low profiles, though its low profile is not quite as low and should only be relied upon to avoid high attacks and fireballs. The regular version is used exclusively to counterzone and make hard reads on the enemy with the KB - the reward on non-KB hit is too small to be worth it most situations. While the KB reaction looks similar to the forward throw KB its hitstun is actually much longer, allowing Rambo to jump in when continuing the combo for more damage and corner carry. With meter, Shoulder Roll becomes Rambo's one-stop shop for mobility - perfect for skirmishing, evading, and approaching the enemy. Can be used like a traditional teleport when zoning, with the added bite of its overhead followup. When used offensively the threat of the overhead will force enemies to block high as it approaches, and then the cancel can be used to turn any approach into a strike-throw situation - deadly when the forward throw KB is ready. Don't be afraid to just swing with the amplified attack; it's plus on block, and the knockdown on hit is lengthy. Best used with Claymore to roll away and set up a mine, or to side switch with a placed mine and go on the offensive.
| ||||
| Shoulder Roll (BF4) | ||||
| Damage | Guard | Startup | Active | Recovery |
|---|---|---|---|---|
| 9.00 / 2.13 / 0.0021 | Overhead | 12 | 3 | 33 |
| Cancel | Hit Adv. | Block Adv. | F/Block Adv. | Cost |
| - | 32 | 1 | 1 | 1 Offensive Meter |
| Krushing Blow: Activates when it hits as a KOUNTER or PUNISH. Rambo rolls forward and slashes the enemy. Hold Forward or Back to choose the roll distance (all three distances have the same frame data), and hold Down to cancel the roll. Amplified Shoulder Roll does a lightning fast overhead bow slam that makes Rambo plus on block and gives a lengthy knockdown on hit. The third option to place in the BF4 slot. Like the other two it low profiles, though its low profile is not quite as low and should only be relied upon to avoid high attacks and fireballs. The regular version is used exclusively to counterzone and make hard reads on the enemy with the KB - the reward on non-KB hit is too small to be worth it most situations. While the KB reaction looks similar to the forward throw KB its hitstun is actually much longer, allowing Rambo to jump in when continuing the combo for more damage and corner carry. With meter, Shoulder Roll becomes Rambo's one-stop shop for mobility - perfect for skirmishing, evading, and approaching the enemy. Can be used like a traditional teleport when zoning, with the added bite of its overhead followup. When used offensively the threat of the overhead will force enemies to block high as it approaches, and then the cancel can be used to turn any approach into a strike-throw situation - deadly when the forward throw KB is ready. Don't be afraid to just swing with the amplified attack; it's plus on block, and the knockdown on hit is lengthy. Best used with Claymore to roll away and set up a mine, or to side switch with a placed mine and go on the offensive.
| ||||
M.R.E. (DB1)
| M.R.E. (DB1) | ||||
| Damage | Guard | Startup | Active | Recovery |
|---|---|---|---|---|
| - / - / - | - | 1 | 0 | 102 |
| Cancel | Hit Adv. | Block Adv. | F/Block Adv. | Cost |
| - | - | - | - | - |
| Krushing Blow: Activates if FATAL BLOW is on cooldown or if Rambo has THROWN UP. An innocent bug, curious about the violent row that's happening above it, crawls onto the fightline. If it had walked in from the other direction it might have been safe but today is not that day - Rambo stabs it and takes a bite, restoring some health. After a few victims, Rambo begins to feel bad about his choice of snacks and throws up out of guilt. An extremely slow move that restores very little health. In nearly any situation, this is a friendly invitation for the enemy to first laugh at Rambo's choice of kustoms before grievously punishing him. The only remotely "safe" way to set this up is behind a Claymore, against an enemy with no projectile and no way to get over it. (Jacqui without leap, maybe...?) While the KB restores a ton of health its frame data is no better, and you will usually just immediately lose the health the KB gave you. Don't try to get this off the upchuck condition - it requires too many bugs. Try to surprise the enemy with the Fatal Blow condition. | ||||
Mace Trap (DB4)
| Mace Trap (DB4) | ||||
| Damage | Guard | Startup | Active | Recovery |
|---|---|---|---|---|
| 6.00 / 1.75 / 0.0018 | Mid | 23 | 24 | 27 |
| Cancel | Hit Adv. | Block Adv. | F/Block Adv. | Cost |
| 16 | -4 | -30 | -30 | Replaces Whip Trap |
| Krushing Blow: Activates if the AMPLIFIED version hits THREE TIMES in a row. Rambo ducks, and a spiked log swings down in a semicircle arc. A patchy alternate to Whip Trap, intended for air denial instead of ground control, though it is much too slow to use as a reactive antiair. The semicircle arc also makes it liable to whiff against mid-range jumpins (aka the most common distance where jumps are performed), and aiming the far version is even riskier than the near version. As far as ground coverage goes it is vastly inferior to Whip Trap, being far more minus on block, less plus on hit, having 12 more frames in total, and being very difficult to combo into. These issues are partially alleviated by the Amplified version, which deals more damage, comes out quicker, and and is more plus on hit. However, the amplified version also has one of the most impractical Krushing Blows in the game for landing three in a row. Do not go for it, ever. | ||||
| Mace Trap (DB4) | ||||
| Damage | Guard | Startup | Active | Recovery |
|---|---|---|---|---|
| 11.00 / 2.37 / 0.0024 | Mid | 7 | 40 | 12 |
| Cancel | Hit Adv. | Block Adv. | F/Block Adv. | Cost |
| - | 19 | -30 | -30 | Replaces Whip Trap, 1 Offensive Meter |
| Krushing Blow: Activates if the AMPLIFIED version hits THREE TIMES in a row. Rambo ducks, and a spiked log swings down in a semicircle arc. A patchy alternate to Whip Trap, intended for air denial instead of ground control, though it is much too slow to use as a reactive antiair. The semicircle arc also makes it liable to whiff against mid-range jumpins (aka the most common distance where jumps are performed), and aiming the far version is even riskier than the near version. As far as ground coverage goes it is vastly inferior to Whip Trap, being far more minus on block, less plus on hit, having 12 more frames in total, and being very difficult to combo into. These issues are partially alleviated by the Amplified version, which deals more damage, comes out quicker, and and is more plus on hit. However, the amplified version also has one of the most impractical Krushing Blows in the game for landing three in a row. Do not go for it, ever. | ||||
Commando
| Don't Push It (121+3) | ||||
| Damage | Guard | Startup | Active | Recovery |
|---|---|---|---|---|
| 8.00 / - / - | Grab, High | 18 | 2 | 31 |
| Cancel | Hit Adv. | Block Adv. | F/Block Adv. | Cost |
| - | 14 | - | - | Requires Commando kustom move |
Alternate string-grab followup to 12 that requires Commando to use, giving Rambo a canned low-damage mixup off his jab. Like all string-grabs, it can snag enemies in standing hitstun. Compared to an auto shimmy it deals less damage and cannot Krushing Blow, but it is much harder to avoid, having only one frame of difference from 121.
| ||||
| Expendable (F121+3) | ||||
| Damage | Guard | Startup | Active | Recovery |
|---|---|---|---|---|
| 8.00 / - / - | Grab, High | 18 | 2 | 32 |
| Cancel | Hit Adv. | Block Adv. | F/Block Adv. | Cost |
| - | 14 | - | - | Requires Commando kustom move |
| Alternate string-grab ender to F12 that side switches. Used to encourage the enemy to let go of block, thus opening them up to F122; an exceedingly risky mix, but a mix nonetheless. Gives the same frame advantage and distance as a back throw. | ||||
| Nothing Is Over (B31+3) | ||||
| Damage | Guard | Startup | Active | Recovery |
|---|---|---|---|---|
| 11.00 / 3.00 / 0.003 | Mid | 22 | 4 | 35 |
| Cancel | Hit Adv. | Block Adv. | F/Block Adv. | Cost |
| - | 10 | -8 | -8 | Requires Commando kustom move |
| Alternate followup to B3, and one of Rambo's best normals. Restands the enemy on hit, putting Rambo at +10. Midscreen, this restand generally puts the enemy too far to guarantee anything, but in the corner they are kept close - just outside of throw range, just within B2 range. The hit reaction happens regardless of the hitbox contact point, which can cause some weird vacuuming, especially on characters with long non-disjoint attacks like D'vorah. On block it inflicts a surprising 3% chip damage, more than a blocked D2 and rivaling some multi-hit special moves. -8, but the pushback will cause most 7-frame attacks to whiff entirely, especially standing jabs; from testing, only Noob, Skarlet, and Geras can combo punish B31+3 on block. Despite the long startup, the gap between B3 and B31+3 cannot be flawless blocked. Decently active, with a disjoint hitbox. | ||||
Strategy and Kombos
General Tactics
Offense
Rambo's offense is defined by five things: quick low damage mixups, quick movement, limited staggers, almost no plus frames, and KBs that deal devastating damage but are difficult to land. Rambo cannot play relentless, point blank offense - he does not have the endless staggers or the relentless stream of mix that it relies upon. As such, his ideal distance for offense is around default distance, where he can dash up to perform a quick, small mix and then retreat, steadily gaining corner ground. 12 and B22 give him a degree of point blank stagger options and while they are usable, they should not be used multiple times in a row. When aggressing, have a mixup in mind, apply it as quickly as possible, and then immediately prepare for the successful defense situation. Some mix options like F4 and B224 will give you the opportunity to skedaddle in the successful defense situation, while others like B121 will force Rambo to take the enemy turn.
Leopard Krawl and Shoulder Roll will let Rambo play more aggressively, with Leopard Krawl turning blocked normals into a strike-throw situation and Shoulder Roll letting him approach and disrupt the enemy. Leopard Krawl especially turns B121 into an excellent oki string, with favorable startup to apply on most close knockdowns and two special cancel points to each turn into a three-way mixup.
Many of Rambo's knockdowns will create significant distance. Do not attempt to oki off every knockdown, especially these distanced ones, as that can easily be punished through wakeup actions and Rambo has a great zoning and spacing game anyways.
Defense
Whip Trap gives Rambo superb defense at every range but point blank. It cannot be ducked and will force the enemy to dash-block more carefully, and combining it with Hunting Bow will catch enemies that are already midair and cover the air if they are grounded. Close range Whip Trap can also catch enemies trying to do a backdash spacing trap, or catch enemy landing frames if you backdashed their jump-in. As Rambo's offense largely consists of brief, sudden mixups rather than extended pressure, always be ready to switch to a defensive posture if the opportunity presents itself - in nearly any matchup, Whip Trap forces the enemy to approach Rambo instead of the other way around. This can be further enhanced with Claymore.
Rambo's point blank defensive options are rather limited. He lacks a truly safe special to tack onto normals, and he must rely on FUBAR to cancel out of crouching pokes - which can be punished by a D2. At point blank range, Rambo's best option is flawless block U3, which will give him space even if it gets blocked.
Neutral Theory
Machabo's triangle theory of neutral divides actions in neutral into three categories: oki-waza (henceforth referred to as "covering ground"), ate-waza ("seizing ground"), and sashi-kaeshi ("reactively defending ground"). (Note: these are not linguistic translations, they are simply alternate wordings). The general idea is that these three categories form an RPS of a covering action stuffing a seizing/approaching action, a seizing action taking advantage of a reactive posture, and a reactive posture punishing a whiffed covering action. Obviously every move won't fit into these categories perfectly, but they provide a useful foundation for categorizing the purpose of moves and the intention behind actions in neutral.
- Rambo uses his advancing normals, like F3 and F2, and Shoulder Roll, to seize ground. With this ground, he applies a quick mixup and then looks for opportunities to retreat.
- Rambo uses Whip Trap, Hunting Bow, D4, and B33 to cover ground. When successfully covering ground, he is given the opportunity to either dash up and apply a mixup, or retreat further to continue to place obstacles between himself and the enemy.
- Rambo uses B33, F2, and 1 antiair to reactively defend ground, potentially confirming into solid damage. Whip Trap can also be used to safely defend ground, though it is on the slow side for reactive punishes and gives less reward.
Popular Variations
[[File:]] [[File:]] [[File:]]
FUBAR, Commando, Leopard Krawl
The "All Grabs Everything" build, maximizing his possible mix. The most popular loadout. Despite every single slot providing a grab, each command grab in this variation does serve a distinct purpose:
- FUBAR is used to catch counterpokes off D1 and D3, fish for the getup roll KB, and end combos.
- Commando is used to end combos in the corner, side switch, deal chip damage, and mix the enemy when they are between 3% and 7% remaining HP.
- Leopard Krawl is used to mix the enemy and apply corner pressure.
While this variation is well suited to Rambo's traditional hit-and-run style, it also gives him more ability to stay point blank through continual Leopard Krawl stance mix and corner positioning.
Players: BiohazardCMNDR, roethor
[[File:]] [[File:]] [[File:]]
Snare Trap, Shoulder Roll
For those who are unconvinced that Rambo's command grabs are worth it. This variation gives Rambo his best non-command grab utility for the close range - use Shoulder Roll to approach and start strike-throw mixups, and then use Snare Trap to maximize damage off of confirms. Probably Rambo's safest and most conventional kustom variation overall, though it is not as popular as the triple-grab.
Players: Grr
[[File:]] [[File:]] [[File:]]
Claymore, Shoulder Roll, Commando
If you're gonna use the Claymore, might as well pick the special that works the best with it. This variation uses the Shoulder Roll to apply the Claymore both offensively and defensively, and keeps Commando for the additional mix and utility.
Players: Dylan Lloyd
[[File:]] [[File:]] [[File:]]
Snare Trap, (command grab kustom of choice)
Well rounded custom loadout, for players confident in their approaches and hit confirms. Gives the high damage of Snare Trap confirms while maintaining a command grab option. Each of the three options is viable - FUBAR will give the absolute best damage, Commando allows the high damage combos to end with a restand, and Leopard Krawl gives the most mixup options on block.
Universal Kombos
F122, D2
F122/D2 > B221 ~ Whip Trap (DB4)
- Basic, easy combo that gives a lengthy, long distanced knockdown. Add a dashup before the B221 to give slightly more corner carry and make the timing easier.
- Very lenient timing due to the long active frames of Whip Trap.
- Most combos that can be done with F122 can be done with D2 as well, though D2 causes a faster fall and is harder to continue.
- For all F122 or D2 combos, follow up with F4 to catch breakaway or D2 to maximize guaranteed damage.
F122/D2 > dash ~ D1 > B221 ~ Whip Trap (DB4)
- Add a D1 before the B221 to deal slightly more damage and increase the corner carry. Difficult, and requires a very specific dash cancel timing.
F122/D2 > B221 ~ Savage Slide (BF4)
- Landing Savage Slide on juggled enemies is much harder than Whip Trap, having a smaller hitbox, far fewer active frames, and non-projectile behavior. Perform the B221 as soon as possible after the F122 or D2.
- Doing the B221 at the absolute earliest time will still land, but it may cause a bizarre side switch. The amplify will still work.
F122/D2 > B33 ~ Savage Slide (BF4)
- Using B33 instead of B221 is easier to land, but sacrifices damage and corner carry.
F122/D2 > 1 > D1 > B221 ~ Whip Trap (DB4)
- In the corner, B221 hits the enemy too high for the immediate Whip Trap to work. Add a 1 and then a D1 to squeeze more damage and add gravity.
- If the 1 > D1 > B221 is too hard to land, omit the D1 and just do 1 > B221.
F122/D2 > B221 ~ Savage Slide (DF4)
F122/D2 > B33 ~ Savage Slide (BF4)
- The midscreen Savage Slide combos can be done without changes in the corner.
U2
U2 > B221 ~ Whip Trap (DB4)
U2 > F3 ~ Whip Trap (DB4)
(corner) U2 > 1 > D1 > B221 ~ Whip Trap (DB4)
- For the most part, combo construction is nearly identical to D2 or F122.
- Midscreen D1 > B221 combos cannot be done from U2 due to the greater horizontal knockback.
- Rambo generally has enough dash speed to combo into B221 from U2. If the enemy is too far away use F3 instead.
Antiairs
1 > F12/F2 ~ Whip Trap (DB4)/FUBAR (DBF1)
- Most basic antiair combo.
- Whip Trap will deal less damage than D2, while FUBAR will exceed the D2 damage and give a better knockdown.
- F2 is harder to use as an extension, but deals slightly more damage and gives less breakaway points.
1 > B33/B221 ~ Whip Trap (DB4)/FUBAR (DBF1)
- Perfectly clean 1 antiairs will allow for extensions with B221 or B33.
- Deals more damage than D2 even without FUBAR, but requires very disciplined antiairing.
3 ~ Savage Slide (BF4)
- The only way to get Savage Slide off an antiair.
- Only use when absolutely ready to antiair - while 3 has a large hitbox, its 12 frame startup doesn't do it any favors.
Jump Kick
JK > F3 ~ Whip Trap (DB4)
- The easiest way to follow up a landed JK without a special move buffered. Requires no dash, deals decent damage, and gives some corner carry.
JK > dash ~ B221/B33 ~ Whip Trap (DB4)
- Following up with a string will require a dash with difficult timing, but will further increase the damage and corner carry.
JK > D1 > D1 > B221/B33 ~ Whip Trap (DB4)
- Jump kicks in the corner bounce the enemy far lower than F122 or D2. If these conversions are too difficult, omit or reduce the D1 attacks and use B33 instead.
Forward Throw KB
Forward Throw KB > F122 > B221/B33 ~ Whip Trap (DB4)/Savage Slide (BF4)
Forward Throw KB > F122 > dash ~ D1 > B221 ~ Whip Trap (DB4)
Forward Throw KB > F122 > D2/F4
- All combos that start from F122 can be performed after the Forward Throw KB. The same properties apply - Whip Trap creates more distance and is easier to combo into, Savage Slide keeps the enemy close and potentially gives more damage while being harder to land.
- Follow up with D2 or F4 if the enemy has defensive meter.
Forward Throw KB > B33 ~ Hunting Bow (DB2)
- In the corner, the forward throw KB creates a unique opportunity to guarantee a B33 ~ Hunting Bow. By far the best corner option if breakaway is available, but even without breakaway it lets Rambo seamlessly continue offense.
Forward Throw KB > F122 > 1 > D1 > B221/B33 ~ Whip Trap (DB4)
Forward Throw KB > F122 > B221/B33 ~ Savage Slide (BF4)
- Like the midscreen F122 combos, the corner F122 combos can also be used after the forward throw KB.
- Without enemy defensive meter meter these deal more damage and give longer advantage than B33 ~ Hunting Bow, but they require a disciplined Rambo to take advantage of.
Variation Kombos
FUBAR (DBF1)
(forward throw KB) > F122/D2/U2 > dash ~ D1 (not from U2) > B221 ~ FUBAR (DBF1)
(forward throw KB) > F122/D2/U2 > B33 ~ FUBAR (DBF1)
- FUBAR can be used in place of Whip Trap for more damage, a closer knockdown, and side choosing (with meter). For B211 this requires more specific combo structuring, making B33 a more attractive option to avoid drops.
- Where adding a D1 gave marginal benefit to Whip Trap combos, it gives much more to FUBAR combos. Without the D1 there is often not enough gravity for the FUBAR to connect.
JK > F3 ~ FUBAR (DBF1)
JK > dash ~ B221 ~ FUBAR (DBF1)
- B33 ~ FUBAR will not work for jump kick combos, as B33 lacks the forward advancement.
- B221 ~ FUBAR on a midscreen jump kick is especially difficult to land, as the jump kick lacks the vertical bounce to add a D1, but B221 still has enough upward knockback to make the FUBAR whiff. Only attempt if you are 100% certain it will land.
(forward throw KB) > F122/D2/U2 > F3 ~ FUBAR (DBF1)
- New, breakaway spoofing combo that FUBAR allows. Gives the least possible points for the enemy to break, while dealing more damage than a D2.
- Used against enemies who breakaway late to avoid oki and get punishes.
F122/D2/U2 > 1 > D1 > B221/B33 ~ FUBAR (DBF1)Forward Throw KB > F122 > 1 > D1 > B221/B33 ~ FUBAR (DBF1)JK > D1 > D1 > B221 ~ FUBAR (DBF1)
- In the corner, FUBAR becomes an even more attractive option versus Whip Trap - where Whip Trap becomes less plus, FUBAR keeps all its midscreen plus frames when in the corner.
- Landing FUBAR in the corner is not substantially different from landing Whip Trap - additional attacks also must be added to increase gravity.
Snare Trap (DB3)
(forward throw KB) > B33 ~ Snare Trap (DB3) > J2 (late) > microwalk > F3 > B221 ~ Whip Trap (DB4)/FUBAR (DBF1)
- All Snare Trap combos can be set up with the forward throw KB.
- Best possible damage from Snare Trap. The microwalk is difficult to time to get the required vertical bounce - too late and the bounce will be too horizontal, and the enemy will be knocked out of B221 distance.
- Many normals and strings will combo into Snare Trap. B33 is listed because it is the easiest to hit confirm and deals the most damage.
- Without spending meter, FUBAR will always side switch. Consider ending with Whip Trap even when FUBAR is equipped to maintain the corner progress.
- Exactly the same construction in the corner.
(forward throw KB) > B33 ~ Snare Trap (DB3) > J2 (late) > J2 (immediate) > B221 ~ Whip Trap (DB4)/FUBAR (DBF1)
- Much easier followup to Snare Trap that deals less damage.
- When doing the double J2 attacks, continually hold the forward jump input until the B221.
- In the corner, add a D1 before the B221 to squeeze out slightly more damage. This requires the FUBAR ender.
(forward throw KB) > B33 ~ Snare Trap (DB3) > 12 (whiffed, framekill) > F3 > B221 ~ Whip Trap (DB4)/FUBAR (DBF1)
- Sacrifices even more damage to build towards the forward throw KB.
- Delays an entire seven seconds, meaning that Rambo only has to wait three seconds after finishing to get the KB.
- In the corner, add a D1 before the B221 to squeeze out slightly more damage. This requires the FUBAR ender.
(forward throw KB) > B33 ~ Snare Trap (DB3) > J2 (middle) > F4
- Breakaway callout combo.
- With the right J2 timing it can catch both breaking and non-breaking enemies.
(forward throw KB) > B33 ~ Snare Trap (DB3) > J2 (middle) > dash (when midscreen) ~ D2
- Guaranteed damage combo.
- Requires a dash to catch both regular and breakaway timing.
(forward throw KB) > B33 ~ Snare Trap (DB3) > dash > 1 > dash (when midscreen) ~ D2
- Guaranteed damage with KB build combo.
Shoulder Roll (BF4)
Shoulder Roll KB (BF4) > J2 > F122 > dash ~ D1 > B221 ~ Whip Trap (DB4)/FUBAR (DBF1)
Shoulder Roll KB (BF4) > J2 > B33 ~ Hunting Bow (DB2)
Shoulder Roll KB (BF4) > J2 > B33 ~ Snare Trap (DB3) > J2 (late) > microwalk > F3 > B221 ~ Whip Trap (DB4)/FUBAR (DBF1)
(etc)
- The Shoulder Roll KB can be used in place of the forward throw KB for all combos.
- It functions nearly identically to the forward throw KB but gives much more hit advantage - enough to add a J2, even in the corner.
- The J2 must be well timed to intersect with the top of the enemy hurtbox. If this proves to be too difficult use J1 instead.
Claymore (DB3)
Claymore (DB3) > Whip Trap (DB4)
Claymore (DB3) > F3 > Whip Trap (DB4)/FUBAR (DBF1)
- Most of the time, Rambo won't be in a position to substantially follow up Claymore.
- Use F3 if within distance. Raw Whip Trap works anywhere, but doesn't give much.
Claymore (DB3) > forward jump > (claymore detonation) > J2 (late) > B221 ~ Whip Trap (DB4)
Claymore (DB3) > forward jump > (claymore detonation) > J2 (late) > dash ~ D1 > B221 ~ Whip Trap (DB4)/FUBAR (DBF1)
Claymore (DB3) > forward jump > (claymore detonation) > J2 (late) > B33 ~ FUBAR (DBF1)
- Against woefully unprepared enemies, Claymore can be used as a dedicated combo starter.
- Easier to follow up than F122, but the general combo structure is the same.
Claymore (DB3) > D1 > D1 > B221 ~ Claymore (DB3)/Whip Trap (DB4)/FUBAR (DBF1)
- In the corner, it becomes substantially easier to pick up off of stray Claymore hits.
- End the Claymore combo with another Claymore for risky shenanigans.
Claymore (DB3) > JK > D1 > B221 ~ Claymore (DB3)/Whip Trap (DB4)/FUBAR (DBF1)
- Claymore incentivizes use of the jump kick - slightly harder to follow up for combos than J2, but with a much bigger hitbox.
- If the jump kick is done with the earliest possible timing it will not allow for combos. Delay the jump kick to find the proper timing that still stuffs out enemy actions, while allowing for combo extension.
Artillery Strike (BF2)
Artillery Strike (BF2) > forward jump > (shell lands) > J2 (late) > B221 ~ Whip Trap (DB4)/FUBAR (DBF1)
- Where Claymore was difficult to follow up on a stray midscreen hit, Artillery Strike is near impossible.
- The only way to continue it midscreen is to jump over the enemy first before the shell lands and hit them with a J2 when they're launched.
- That is, if the shell lands.
- If.
Artillery Strike (BF2) > D1 > D1 > B221 ~ Whip Trap (DB4)/FUBAR (DBF1)
Artillery Strike (BF2) > JK > D1 > B221 ~ Whip Trap (DB4)/FUBAR (DBF1)
- Identical combo construction to Claymore in the corner.
- However, while Claymore loops can sometimes work, Artillery Strike loops are entirely out of the question.