| Pre-release information
This page is under construction based on pre-release data. Join the SF6 Resource Hub for info on editing. |
Introduction
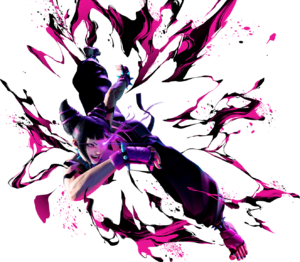
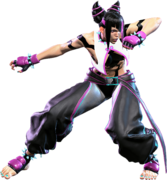
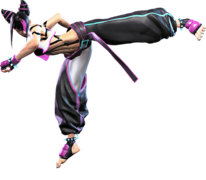
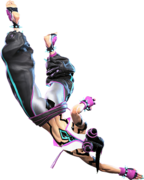
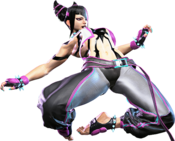
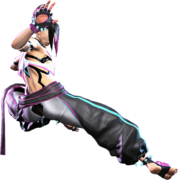
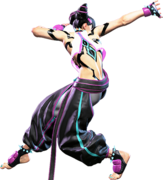
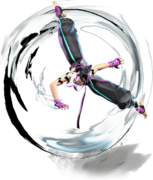
This sadistic thrillseeker enjoys the strife and suffering of others, taking immense joy in obliterating her foes. Without revenge against M. Bison as a motivator, she whiles away her time in a gloomy haze.
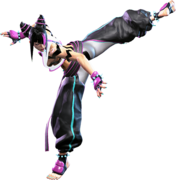
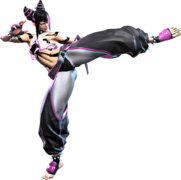
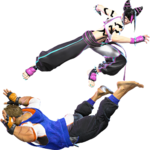
Juri is well suited to explosive, aggressive rushdown and strike/throw mix that's empowered by space control with her ground normals and storing up stocks to improve her special moves, making her a menace at close and mid range. She can also get some very massive and flashy combos off of her hits, making her a great pick for someone who loves pulling off long combo strings.
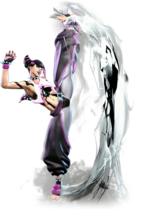
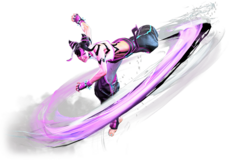
The core of Juri's playstyle is centered around Fuhajin, which grants Juri a special stock (up to a maximum of 3). These stocks will separately enhance three of her other special moves; Saihasho is a ground-based projectile that travels much farther when enhanced, Ankensatsu is an advancing kick that has more hitstun for combo extensions when enhanced, and Go Ohsatsu is a lunging roundhouse that gains another kick when enhanced, increasing its corner carry potential. Juri can also cancel between these three moves if she has a stock available, using their enhanced versions when she does so, and her Level 1 Super Art, Sakkai Fuhazan, can be enhanced for extra damage on the last hit by holding down the button with a stock available.
Aside from those moves, Juri's ground and anti-air game are quite powerful. Her dash covers a lot of space at a time, making her strike/throw game especially dangerous, and many of her buttons either cover a lot of space in front of her (5MK, 5HK), convert into a Fuhajin knockdown either directly or through combos (6MP, 2MK), or do both (5HP). She can also shut down a ton of air approaches with 2HP as well as her dedicated anti-air special Tensenrin, particularly its HP version. Juri's powerful ground presence is also enhanced by the speed and length of Juri's Drive Rush; getting caught by Drive Rush normals from her usually results in her cashing out for a fair bit of damage and at minimum getting a Fuhajin stock.
Juri's most powerful and unique tool, however, is her Level 2 Super Art, the Feng Shui Engine. While it's active, Juri can chain her normals together in ascending order so long as she doesn't use the same button twice, similar to the magic series of the Darkstalkers games, and many of her normals gain new properties and cancel points that they lack otherwise, opening up FSE-exclusive combo routes and letting her crank out even stronger pressure. She can also choose to start it off with a dash that does damage and breaks through armor, allowing her to bully through enemies that try to Drive Impact or otherwise push through when she initially engages it.
While Juri has a lot going for her, there are a few things to keep in mind when playing her. Managing her Fuhajin stocks is critical to maximizing her effectiveness -- she's not so dependent on them that lacking them will completely ruin her offense, but not having any does shut out some options for her and can make her a little less threatening. Similarly, while she doesn't strictly need Feng Shui Engine to be effective, it offers a wide range of benefits for both combos and pressure, so mastering its use means learning and labbing out its chains in order to seize any opportunity the opponent gives her. If you enjoy the rush of kicking your opponents when they're down and crushing their defenses, Juri is the riotous rider for you.
| Pick if you like: | Avoid if you dislike: |
|---|---|
|
|
Classic & Modern Versions Comparison
| Missing Normals |
|
|---|---|
| Missing Command Normals |
|
| Shortcut-Only Specials |
|
| Assist Combos |
|
| Miscellaneous Changes |
|
| Juri | |
|---|---|
| Vitals | |
| Life Points | 10000 |
| Ground Movement | |
| Forward Walk Speed | 0.047 |
| Backward Walk Speed | 0.032 |
| Forward Dash Speed | 22 |
| Backward Dash Speed | 23 |
| Forward Dash Distance | 1.903 |
| Backward Dash Distance | 1.114 |
| Drive Rush Min. Distance (Throw) | 0.641 |
| Drive Rush Min. Distance (Block) | 2.479 |
| Drive Rush Max Distance | 3.999 |
| Jumping | |
| Jump Speed | 4+38+3 |
| Jump Apex | 2.115 |
| Forward Jump Distance | 1.90 |
| Backward Jump Distance | 1.52 |
| Throws | |
| Throw Range | 0.8 |
| Throw Hurtbox | 0.33 |
Normals
Standing Normals
5LP
| Startup | Active | Recovery | Cancel | Damage | Guard | On Hit | On Block |
|---|---|---|---|---|---|---|---|
| 4 | 4 | 7 | Chn Sp SA | 300 | LH | +5 | -2 |
5MP
| Startup | Active | Recovery | Cancel | Damage | Guard | On Hit | On Block |
|---|---|---|---|---|---|---|---|
| 6 | 4 | 12 | Sp SA TC | 600 | LH | +7 | +2 |
5HP
| Startup | Active | Recovery | Cancel | Damage | Guard | On Hit | On Block |
|---|---|---|---|---|---|---|---|
| 10 | 3 | 24 | Sp SA | 800 | LH | -1 | -5 |
| Startup | Active | Recovery | Cancel | Damage | Guard | On Hit | On Block |
|---|---|---|---|---|---|---|---|
| 10 | 3 | 24 | Chn Sp SA | 600 | LH | KD +29 | -5 |
- Chained version during Lv.2 Super (FSE)
5LK
| Startup | Active | Recovery | Cancel | Damage | Guard | On Hit | On Block |
|---|---|---|---|---|---|---|---|
| 5 | 3 | 9 | Sp SA | 300 | LH | +2 | -3 |
5MK
| Startup | Active | Recovery | Cancel | Damage | Guard | On Hit | On Block |
|---|---|---|---|---|---|---|---|
| 5(8) | 2(1)3 | 17 | Sp SA (1st) | 400,300 (700) | LH | +3 | -4 |
- The first hit can link from 5LP; it has enormous hitstun and can even combo into HK Fuha Store
- If the first hit whiffs, the second hit connects on frame 8.
5HK
| Startup | Active | Recovery | Cancel | Damage | Guard | On Hit | On Block |
|---|---|---|---|---|---|---|---|
| 17 | 4 | 19 | - | 900 | LH | +2(+5) | -3(0) |
| Startup | Active | Recovery | Cancel | Damage | Guard | On Hit | On Block |
|---|---|---|---|---|---|---|---|
| 17 | 4 | 19 | Chn Sp SA | 700 | LH | KD +34 | -3 |
- Becomes fully cancellable during FSE, even when not chained into
Crouching Normals
2LP
| Startup | Active | Recovery | Cancel | Damage | Guard | On Hit | On Block |
|---|---|---|---|---|---|---|---|
| 4 | 3 | 8 | Chn Sp SA | 300 | LH | +4 | -1 |
2MP
| Startup | Active | Recovery | Cancel | Damage | Guard | On Hit | On Block |
|---|---|---|---|---|---|---|---|
| 6 | 4 | 14 | Sp SA | 600 | LH | +5 | -2 |
2HP
| Startup | Active | Recovery | Cancel | Damage | Guard | On Hit | On Block |
|---|---|---|---|---|---|---|---|
| 8 | 4 | 23 | Sp SA | 900 | LH | +3 | -11 |
2LK
| Startup | Active | Recovery | Cancel | Damage | Guard | On Hit | On Block |
|---|---|---|---|---|---|---|---|
| 5 | 3 | 8 | Chn | 200 | L | +3 | -1 |
2MK
| Startup | Active | Recovery | Cancel | Damage | Guard | On Hit | On Block |
|---|---|---|---|---|---|---|---|
| 8 | 3 | 19 | Sp SA | 500 | L | +1 | -6 |
2HK
| Startup | Active | Recovery | Cancel | Damage | Guard | On Hit | On Block |
|---|---|---|---|---|---|---|---|
| 10 | 3 | 23 | - | 900 | L | HKD +32 | -11 |
Jumping Normals
j.LP
| Startup | Active | Recovery | Cancel | Damage | Guard | On Hit | On Block |
|---|---|---|---|---|---|---|---|
| 5 | 6 | 3 land | - | 300 | H | +6(+9) | +2(+5) |
j.MP
| Startup | Active | Recovery | Cancel | Damage | Guard | On Hit | On Block |
|---|---|---|---|---|---|---|---|
| 7 | 5 | 3 land | Sp | 500 | H | +4(+13) | -2(+7) |
j.HP
| Startup | Active | Recovery | Cancel | Damage | Guard | On Hit | On Block |
|---|---|---|---|---|---|---|---|
| 12 | 6 | 3 land | - | 900 | H | HKD +23(+34) | +4(+11) |
j.LK
| Startup | Active | Recovery | Cancel | Damage | Guard | On Hit | On Block |
|---|---|---|---|---|---|---|---|
| 4 | 6 | 3 land | - | 300 | H | +5(+10) | +1(+6) |
j.MK
| Startup | Active | Recovery | Cancel | Damage | Guard | On Hit | On Block |
|---|---|---|---|---|---|---|---|
| 6 | 6 | 3 land | - | 500 | H | +8(+13) | +4(+9) |
j.HK
| Startup | Active | Recovery | Cancel | Damage | Guard | On Hit | On Block |
|---|---|---|---|---|---|---|---|
| 10 | 6 | 3 land | - | 800 | H | +6(+15) | +2(+11) |
8j.HK
Command Normals
6MP
| Startup | Active | Recovery | Cancel | Damage | Guard | On Hit | On Block |
|---|---|---|---|---|---|---|---|
| 8 | 3 | 17 | Sp SA | 600 | LH | +4 | -3 |
6MK
| Startup | Active | Recovery | Cancel | Damage | Guard | On Hit | On Block |
|---|---|---|---|---|---|---|---|
| 21 | 2 | 21(23) | - | 600 | H | +2 | -3 |
6HP
| Startup | Active | Recovery | Cancel | Damage | Guard | On Hit | On Block |
|---|---|---|---|---|---|---|---|
| 15(23) | 3(5)3 | 20 | Sp SA | 500x2 | LH | +2 | -4 |
4HK
Target Combos
5MP~4HP~HP
Universal Mechanics
Throws
Forward Throw (LPLK)
| Startup | Active | Recovery | Cancel | Damage | Guard | On Hit | On Block |
|---|---|---|---|---|---|---|---|
| 5 | 3 | 23 | - | 1200 (2040) | T | KD +25 | - |
Back Throw (4LPLK)
| Startup | Active | Recovery | Cancel | Damage | Guard | On Hit | On Block |
|---|---|---|---|---|---|---|---|
| 5 | 3 | 23 | - | 1200 (2040) | T | KD +18 | - |
- Unique in that it doesn't change the position of the opponent when thrown.
Air Throw (LPLK Air)
| Startup | Active | Recovery | Cancel | Damage | Guard | On Hit | On Block |
|---|---|---|---|---|---|---|---|
| 5 | 3 | 3 land | - | 1200 (2040) | T | KD +2(+4) | - |
Drive Moves
Drive Impact (HPHK)
| Startup | Active | Recovery | Cancel | Damage | Guard | On Hit | On Block |
|---|---|---|---|---|---|---|---|
| 26 | 2 | 35 | - | 800 | LH | KD +35 / Wall Splat KD +65 | -3 / Wall Splat HKD +72 |
See Drive Impact
Drive Reversal (6HPHK)
| Startup | Active | Recovery | Cancel | Damage | Guard | On Hit | On Block |
|---|---|---|---|---|---|---|---|
| 20 | 3 | 26(31) | - | 500 recoverable | LH | KD +23 | -6 |
See Drive Reversal
- Full Invuln: 1-22f; Armor Break
Drive Parry (MPMK)
| Startup | Active | Recovery | Cancel | Damage | Guard | On Hit | On Block |
|---|---|---|---|---|---|---|---|
| 1 | 12 or until released | 33(1)(11) | - | - | - | - | - |
See Drive Parry
- Perfect Parry has only 1f recovery, and disables the opponent from canceling their attack
- Perfect Parry vs. projectiles puts you into a fixed 11f recovery
Drive Rush (66)
Taunts
Neutral Taunt (5PPPKKK)
| Startup | Active | Recovery | Cancel | Damage | Guard | On Hit | On Block |
|---|---|---|---|---|---|---|---|
| 294 (total) | - | - | - | - | - | - | - |
Forward Taunt (6PPPKKK)
| Startup | Active | Recovery | Cancel | Damage | Guard | On Hit | On Block |
|---|---|---|---|---|---|---|---|
| 199 (total) | - | - | - | - | - | - | - |
Back Taunt (4PPPKKK)
Special Moves
Fuhajin (214LK)
| Startup | Active | Recovery | Cancel | Damage | Guard | On Hit | On Block |
|---|---|---|---|---|---|---|---|
| 10 | 4 | 19(21) | SA3 | 600 | LH | KD +37 | -4 |
| Startup | Active | Recovery | Cancel | Damage | Guard | On Hit | On Block |
|---|---|---|---|---|---|---|---|
| 13 | 4 | 21 | SA3 | 600 | LH | KD +37 | -6 |
| Startup | Active | Recovery | Cancel | Damage | Guard | On Hit | On Block |
|---|---|---|---|---|---|---|---|
| 25 | 5 | 19(21) | SA3 | 500 | LH | KD +46 | -8 |
| Startup | Active | Recovery | Cancel | Damage | Guard | On Hit | On Block |
|---|---|---|---|---|---|---|---|
| 12 | 6 | 21 | SA2 SA3 | 600 | LH | KD +45 | -12 |
- Juri gains one store on hit, block, or whiff.
- Clashes with 1 hit of projectiles, 2 hits on the OD version.
Saihasho (236LK)
| Startup | Active | Recovery | Cancel | Damage | Guard | On Hit | On Block |
|---|---|---|---|---|---|---|---|
| 16 | 10 | 20 | SA3 | 400 | LH | -2 | -8 |
| Startup | Active | Recovery | Cancel | Damage | Guard | On Hit | On Block |
|---|---|---|---|---|---|---|---|
| 16 | [80] | 29 | SA3 | 600 | LH | +1 | -3 |
| Startup | Active | Recovery | Cancel | Damage | Guard | On Hit | On Block |
|---|---|---|---|---|---|---|---|
| 11 | [120] | 27 | SA2 SA3 | 400x2 | LH | KD +39 | -2 |
- Not a low.
- The 1-Stock and OD versions are true fireballs. The 0-Stock version still registers as a projectile however and will lose to projectile invul moves.
- Can use 1 Fuhajin Stock to follow-up with Ankensatsu or Go Ohsatsu using the MK or HK buttons respectively, but only when connecting with the first 3 active frames.
Ankensatsu (236MK)
| Startup | Active | Recovery | Cancel | Damage | Guard | On Hit | On Block |
|---|---|---|---|---|---|---|---|
| 24 | 4 | 19 land | SA3 | 600 | LH | +5 (KD +21~23) | -10 |
| Startup | Active | Recovery | Cancel | Damage | Guard | On Hit | On Block |
|---|---|---|---|---|---|---|---|
| 24 | 4 | 19 land | SA3 | 600 | LH | +8 (KD +21~23) | -10 |
| Startup | Active | Recovery | Cancel | Damage | Guard | On Hit | On Block |
|---|---|---|---|---|---|---|---|
| 24 | 4 | 19 land | SA2 SA3 | 800 | LH | +9 (KD +56~57) | -10 |
- Not an overhead.
- Can use 1 Fuhajin Stock to follow-up with Saihasho or Go Ohsatsu using the LK or HK buttons respectively.
Go Ohsatsu (236HK)
| Startup | Active | Recovery | Cancel | Damage | Guard | On Hit | On Block |
|---|---|---|---|---|---|---|---|
| 18 | 4 | 27 | SA3 | 1000 | LH | KD +27 | -11 |
| Startup | Active | Recovery | Cancel | Damage | Guard | On Hit | On Block |
|---|---|---|---|---|---|---|---|
| 18 | 4(12)3 | 27 | SA3 | 700,500 (1200) | LH | KD +37 | -12 |
| Startup | Active | Recovery | Cancel | Damage | Guard | On Hit | On Block |
|---|---|---|---|---|---|---|---|
| 18 | 4(12)3(28)5 | 28 | SA2 SA3 | 400x3 (1200) | LH | KD +32 | -16 |
- Can use 1 Fuhajin Stock to follow-up with Saihasho or Ankensatsu using the LK or MK buttons respectively.
Tensenrin (623P)
| Startup | Active | Recovery | Cancel | Damage | Guard | On Hit | On Block |
|---|---|---|---|---|---|---|---|
| 11 | 3(2)2 | 22 | SA3 | 400x2 | LH | KD +37 | -8 |
| Startup | Active | Recovery | Cancel | Damage | Guard | On Hit | On Block |
|---|---|---|---|---|---|---|---|
| 5 | 8(5)2(3)2 | 24+14 land | - | 300x4 (1200) | LH | KD +31 | -37 |
- Anti-Air Invuln: 1-?f
| Startup | Active | Recovery | Cancel | Damage | Guard | On Hit | On Block |
|---|---|---|---|---|---|---|---|
| 5 | 8(5)2(3)2 | 24+14 land | - | 300x4 (1200) | LH | KD +28 | -37(-41) |
- Anti-Air Invuln: 1-?f
| Startup | Active | Recovery | Cancel | Damage | Guard | On Hit | On Block |
|---|---|---|---|---|---|---|---|
| 6 | 4(1)2(6)2(2)2 | 32+19 land | - | 600,200x3,400 (1600) | LH | KD +5 | -48 |
- Full Invuln: 1-8f
Shiku-sen (j.214K)
| Startup | Active | Recovery | Cancel | Damage | Guard | On Hit | On Block |
|---|---|---|---|---|---|---|---|
| 18 | until landing | 18 land | - | 400 | LH | KD +34(+41) | -10(-3) |
| Startup | Active | Recovery | Cancel | Damage | Guard | On Hit | On Block |
|---|---|---|---|---|---|---|---|
| 16 | until landing | 18 land | - | 300 | LH | KD +37(+44) | -10(-3) |
Shiren-sen (j.214K~K)
| Startup | Active | Recovery | Cancel | Damage | Guard | On Hit | On Block |
|---|---|---|---|---|---|---|---|
| 6 | 4(4)4(17)4 | 23(29)+12 land | - | 300x2,600 (1200) | - | KD +28(+33) | - |
| Startup | Active | Recovery | Cancel | Damage | Guard | On Hit | On Block |
|---|---|---|---|---|---|---|---|
| 6 | 4(4)4(17)4 | 27(34)+7 land | - | 300x3 (900) | - | KD +50(+57) | - |
Super Arts
Level 1 Super (236236K)
| Startup | Active | Recovery | Cancel | Damage | Guard | On Hit | On Block |
|---|---|---|---|---|---|---|---|
| 7 | - | 201 total | - | 1800 | LH | KD +26(+49) | -32 |
| Startup | Active | Recovery | Cancel | Damage | Guard | On Hit | On Block |
|---|---|---|---|---|---|---|---|
| 7 | - | 201 Total | - | 2100 | LH | KD +26(+49) | -32 |
- Strike/Throw Invuln: 1-8f; Armor Break
- Depletes 1/2 Drive bar from opponent on hit
- Hold the K input to spend 1 Fuhajin Stock (adds 500 damage to final hit)
Level 2 Super (214214P)
| Startup | Active | Recovery | Cancel | Damage | Guard | On Hit | On Block |
|---|---|---|---|---|---|---|---|
| 1 | [600] | 6 | - | - | - | - | - |
- Install Super; allows Juri to chain normals into equal or greater strengths
- Cannot repeat the same button twice in a single chain
- Changes some move properties, such as cancellability
| Startup | Active | Recovery | Cancel | Damage | Guard | On Hit | On Block |
|---|---|---|---|---|---|---|---|
| 9 | 11 | 26 | - | 300 | LH | -4(+6) | -17(-7) |
- Holding the button enters the same install state, but begins with a dash attack
- Dash attack is cancellable into any normal
- Dash attack itself has much better frame advantage the later it connects
Level 3 Super (214214K)
| Startup | Active | Recovery | Cancel | Damage | Guard | On Hit | On Block |
|---|---|---|---|---|---|---|---|
| 10 | 4 | 52 | - | 4000 | LH | HKD +22 | -36 |
- Full Invuln: 1-13f; Armor Break
- Depletes 1.5 Drive bars from opponent on hit
No results
- Full Invuln: 1-13f; Armor Break
- Depletes 2 Drive bars from opponent on hit
