|
|
| Line 21: |
Line 21: |
| * Applies 20% damage scaling to next hit when beginning a combo (100/80/70...) | | * Applies 20% damage scaling to next hit when beginning a combo (100/80/70...) |
| <br> | | <br> |
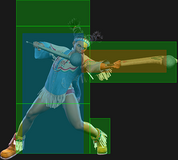
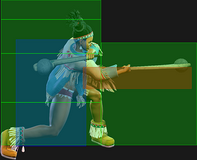
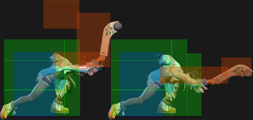
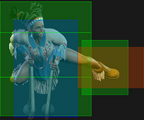
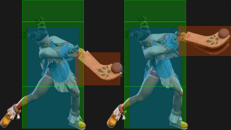
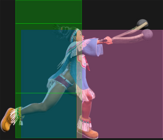
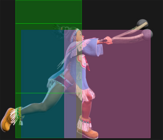
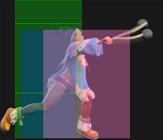
| A jab with good horizontal reach and above average damage for a light. On Counter-hit it links into [[#5MK|{{clr|M|5MK}}]] or [[#2MP|{{clr|M|2MP}}]], and when done from {{clr|DR|Drive Rush}} it links into both of those plus [[#2HP|{{clr|H|2HP}}]] if close enough for more damage. | | A jab with good horizontal reach and above average damage for a light. On {{clr|PC|Counter-hit}} it links into [[#5MK|{{clr|M|5MK}}]] or [[#2MP|{{clr|M|2MP}}]], and when done from {{clr|DR|Drive Rush}} it links into both of those plus [[#2HP|{{clr|H|2HP}}]] if close enough for more damage. |
| }} | | }} |
|
| |
|
| Line 58: |
Line 58: |
| * Extends a hurtbox 1f before active that is vulnerable to projectiles | | * Extends a hurtbox 1f before active that is vulnerable to projectiles |
| <br> | | <br> |
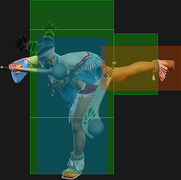
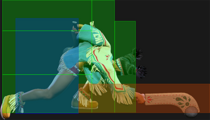
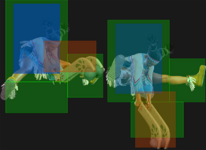
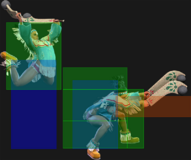
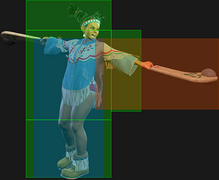
| A counterpoke that leads to a crumple on Punish Counter. This allows for a conversion into a full combo via [[#6HP|{{clr|H|6HP}}]], Dash [[#5MK|{{clr|M|5MK}}]], or {{clr|DR|Drive Rush}}, depending on range. | | A counterpoke that leads to a crumple on {{clr|PC|Punish Counter}}. This allows for a conversion into a full combo via [[#6HP|{{clr|H|6HP}}]], Dash [[#5MK|{{clr|M|5MK}}]], or {{clr|DR|Drive Rush}}, depending on range. |
| }} | | }} |
|
| |
|
| Line 79: |
Line 79: |
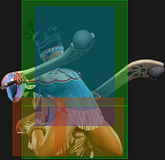
| This is Lily's only 4 frame normal move. Very important for frame trapping the opponent in low frame advantage situations such as after [[#Condor_Spire_(236K)|{{clr|OD|Condor Spire}}]]. It doesn't leave a gap when chained into from [[#2LK|{{clr|L|2LK}}]], which prevents it from being interrupted with a parry or reversal like other light chains. | | This is Lily's only 4 frame normal move. Very important for frame trapping the opponent in low frame advantage situations such as after [[#Condor_Spire_(236K)|{{clr|OD|Condor Spire}}]]. It doesn't leave a gap when chained into from [[#2LK|{{clr|L|2LK}}]], which prevents it from being interrupted with a parry or reversal like other light chains. |
|
| |
|
| Defensively, while this move can be used for mashing out of pressure, it is very liable to whiff due to its short range, making it vulnerable to a mid-string shimmy. If it lands as a counter-hit or Punish Counter, Lily can reliably link into a cancelable [[#5MK|{{clr|M|5MK}}]] for extra damage. | | Defensively, while this move can be used for mashing out of pressure, it is very liable to whiff due to its short range, making it vulnerable to a mid-string shimmy. If it lands as a {{clr|PC|Counter-hit}} or {{clr|PC|Punish Counter}}, Lily can reliably link into a cancelable [[#5MK|{{clr|M|5MK}}]] for extra damage. |
| }} | | }} |
|
| |
|
| Line 96: |
Line 96: |
| * '''{{clr|DR|Drive Rush}} cancel advantage:''' {{sf6-adv|VP|+10}} oH / {{sf6-adv|VP|+7}} oB | | * '''{{clr|DR|Drive Rush}} cancel advantage:''' {{sf6-adv|VP|+10}} oH / {{sf6-adv|VP|+7}} oB |
| <br> | | <br> |
| Cancelable, combo-friendly normal that's useful in both Counter-hit confirms and juggles. Links into a combo after {{clr|DR|Drive Rush}}/Counter-hit [[#2LP|{{clr|L|2LP}}]]/[[#5LP|{{clr|L|5LP}}]]/[[#4HP|{{clr|H|4HP}}]], or Punish Counter [[#5HP|{{clr|H|5HP}}]] with a dash.<br> | | Cancelable, combo-friendly normal that's useful in both {{clr|PC|Counter-hit}} confirms and juggles. Links into a combo after {{clr|DR|Drive Rush}}/{{clr|PC|Counter-hit}} [[#2LP|{{clr|L|2LP}}]]/[[#5LP|{{clr|L|5LP}}]]/[[#4HP|{{clr|H|4HP}}]], or {{clr|PC|Punish Counter}} [[#5HP|{{clr|H|5HP}}]] with a dash.<br> |
| While its range isn't as impressive as Lily's other medium and heavy normals, the relatively fast startup makes it useful to use on reaction as a whiff punish into {{clr|DR|Drive Rush}} [[#4HP|{{clr|H|4HP}}]]. It can be effective against some low pokes since Lily doesn't extend a lower body hurtbox on startup.<br> | | While its range isn't as impressive as Lily's other medium and heavy normals, the relatively fast startup makes it useful to use on reaction as a whiff punish into {{clr|DR|Drive Rush}} [[#4HP|{{clr|H|4HP}}]]. It can be effective against some low pokes since Lily doesn't extend a lower body hurtbox on startup.<br> |
| Finally, unlike Lily's other medium and heavy normal moves, this one recovers quickly enough to block a Drive Reversal. | | Finally, unlike Lily's other medium and heavy normal moves, this one recovers quickly enough to block a Drive Reversal. |
| Line 117: |
Line 117: |
| * It triggers proximity block from a longer range, making it harder for the opponent to create space to whiff punish. | | * It triggers proximity block from a longer range, making it harder for the opponent to create space to whiff punish. |
| * It covers long range punishes on moves that are {{sf6-adv|VM|-14}} to {{sf6-adv|VM|-17}} on block such as [[Street_Fighter_6/JP#3HP|JP's 3HP]] which would otherwise be safe. | | * It covers long range punishes on moves that are {{sf6-adv|VM|-14}} to {{sf6-adv|VM|-17}} on block such as [[Street_Fighter_6/JP#3HP|JP's 3HP]] which would otherwise be safe. |
| * On Punish Counter it causes a long range hard knockdown, providing an opportunity to take a free Windclad stock or {{clr|DR|Drive Rush}} back in for pressure. | | * On {{clr|PC|Punish Counter}} it causes a long range hard knockdown, providing an opportunity to take a free Windclad stock or {{clr|DR|Drive Rush}} back in for pressure. |
| * Maintains a lot of momentum from {{clr|DR|Drive Rush}}, which allows it to interrupt the opponent from a surprising distance. | | * Maintains a lot of momentum from {{clr|DR|Drive Rush}}, which allows it to interrupt the opponent from a surprising distance. |
| * It has a lot of pushback on block, which can be helpful when trying to push out of the corner. | | * It has a lot of pushback on block, which can be helpful when trying to push out of the corner. |
| Line 143: |
Line 143: |
| <br> | | <br> |
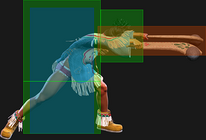
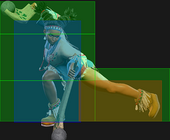
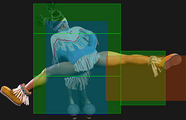
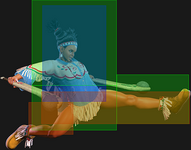
| Lily's longest ranged light normal. When compared to [[#5LP|{{clr|L|5LP}}]], it deals slightly less damage and has the same frame advantage. <br> | | Lily's longest ranged light normal. When compared to [[#5LP|{{clr|L|5LP}}]], it deals slightly less damage and has the same frame advantage. <br> |
| On Counter-hit it still links into [[#5MK|{{clr|M|5MK}}]], and when done from {{clr|DR|Drive Rush}} it combos into [[#5MK|{{clr|M|5MK}}]] or [[#2MP|{{clr|M|2MP}}]].<br> | | On {{clr|PC|Counter-hit}} it still links into [[#5MK|{{clr|M|5MK}}]], and when done from {{clr|DR|Drive Rush}} it combos into [[#5MK|{{clr|M|5MK}}]] or [[#2MP|{{clr|M|2MP}}]].<br> |
| It also has the least pushback of Lily's normals, making it ideal for hitconfirms into [[#Tomahawk_Buster_(623P)|{{clr|OD|623P}}]], [[#Condor_Spire_(236K)|{{clr|OD|236KK}}]], [[#Level_1_Super_(236236P)|{{clr|SA|SA1}}]], [[#Level_3_Super_(214214P)|{{clr|SA|SA3}}]], or {{clr|DR|Drive Rush}}. | | It also has the least pushback of Lily's normals, making it ideal for hitconfirms into [[#Tomahawk_Buster_(623P)|{{clr|OD|623P}}]], [[#Condor_Spire_(236K)|{{clr|OD|236KK}}]], [[#Level_1_Super_(236236P)|{{clr|SA|SA1}}]], [[#Level_3_Super_(214214P)|{{clr|SA|SA3}}]], or {{clr|DR|Drive Rush}}. |
| }} | | }} |
| Line 177: |
Line 177: |
| | info = | | | info = |
| {{AttackDataCargo-SF6/Query|lily_2hp}} | | {{AttackDataCargo-SF6/Query|lily_2hp}} |
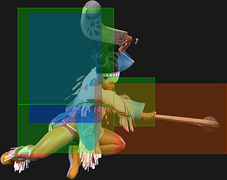
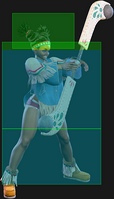
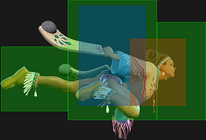
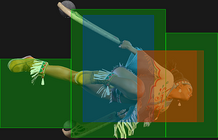
| * Counter-hit/Punish Counter puts airborne opponents into {{sf6-jug|limited juggle}} state | | * {{clr|PC|Counter-hit}}/{{clr|PC|Punish Counter}} puts airborne opponents into {{sf6-jug|limited juggle}} state |
| * Can anti-air cross-ups on the first 2 active frames | | * Can anti-air cross-ups on the first 2 active frames |
| * '''Cancel Hitconfirm Window:''' 30f / 18f (2nd hit only) | | * '''Cancel Hitconfirm Window:''' 30f / 18f (2nd hit only) |
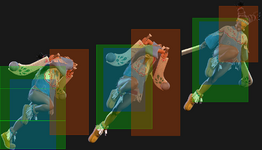
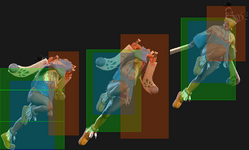
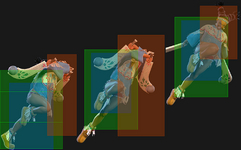
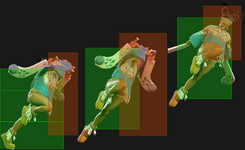
| Line 186: |
Line 186: |
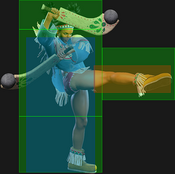
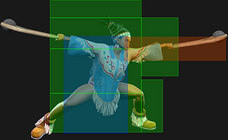
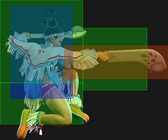
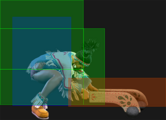
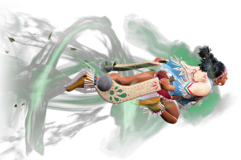
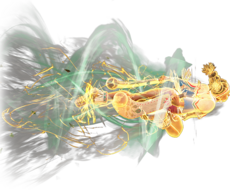
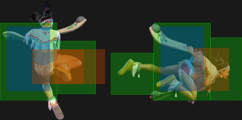
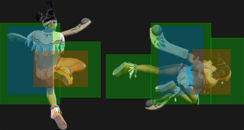
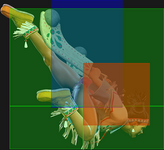
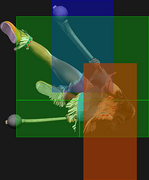
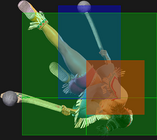
| One of Lily's best buttons in its range, cancelability, confirmability, hitstun, and anti-air potential. It does basically everything. It is also the normal to use for generating Windclad stocks through [[Street_Fighter_6/Lily/Strategy#Condor_Wind|Condor Wind Pressure]]. | | One of Lily's best buttons in its range, cancelability, confirmability, hitstun, and anti-air potential. It does basically everything. It is also the normal to use for generating Windclad stocks through [[Street_Fighter_6/Lily/Strategy#Condor_Wind|Condor Wind Pressure]]. |
|
| |
|
| Against a grounded opponent, being close enough to connect both hits makes it very easy to hit-confirm into {{clr|DR|Drive Rush}}, {{clr|OD|Special}} or {{clr|SA|Super Art}}. It's also easy to visually confirm and counter {{clr|DR|Drive Impact}}. Even if the first hit is spaced to whiff it can still Counter-hit the opponent for both hits if they press a button.<br> | | Against a grounded opponent, being close enough to connect both hits makes it very easy to hit-confirm into {{clr|DR|Drive Rush}}, {{clr|OD|Special}} or {{clr|SA|Super Art}}. It's also easy to visually confirm and counter {{clr|DR|Drive Impact}}. Even if the first hit is spaced to whiff it can still {{clr|PC|Counter-hit}} the opponent for both hits if they press a button.<br> |
|
| |
|
| At longer ranges it spaces out various reversals, and can be used to start [[#Street_Fighter_6/Lily/Strategy#Condor_Spire|Condor Spire Pressure]] from an obscene distance. | | At longer ranges it spaces out various reversals, and can be used to start [[#Street_Fighter_6/Lily/Strategy#Condor_Spire|Condor Spire Pressure]] from an obscene distance. |
|
| |
|
| As an anti-air it will catch jumps a significant distance in front of Lily as well as above and even slightly behind her. On Counter-hit it juggles into [[#Condor_Wind_Attack_(214P)|{{clr|OD|Condor Wind}}]] or [[#Condor_Spire_(236K)|{{clr|OD|Condor Spire}}]], but this is risky to attempt as the opponent can punish with a reversal after an empty jump. | | As an anti-air it will catch jumps a significant distance in front of Lily as well as above and even slightly behind her. On {{clr|PC|Counter-hit}} it juggles into [[#Condor_Wind_Attack_(214P)|{{clr|OD|Condor Wind}}]] or [[#Condor_Spire_(236K)|{{clr|OD|Condor Spire}}]], but this is risky to attempt as the opponent can punish with a reversal after an empty jump. |
| }} | | }} |
|
| |
|
| Line 369: |
Line 369: |
| <br> | | <br> |
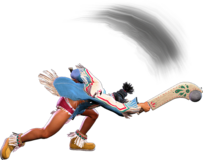
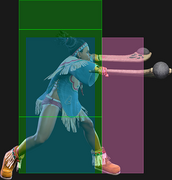
| An advancing heavy normal that can be canceled into either a special move or the more easily confirmable [[#6HP~HP~HP|Target Combo]].<br> | | An advancing heavy normal that can be canceled into either a special move or the more easily confirmable [[#6HP~HP~HP|Target Combo]].<br> |
| Typically used as a followup after crumpling the opponent with Punish Counter [[#5HP|{{clr|H|5HP}}]] or {{clr|DR|Drive Impact}}, or after a {{clr|DR|Drive Impact}} wall splat.<br> | | Typically used as a followup after crumpling the opponent with {{clr|PC|Punish Counter}} [[#5HP|{{clr|H|5HP}}]] or {{clr|DR|Drive Impact}}, or after a {{clr|DR|Drive Impact}} wall splat.<br> |
| It can juggle after some high launching single hits such as [[#j.HK|{{clr|H|j.HK}}]] out of a crumple, or the tip of [[#Condor_Spire_(236K)|Windclad OD Condor Spire]] in the corner.<br> | | It can juggle after some high launching single hits such as [[#j.HK|{{clr|H|j.HK}}]] out of a crumple, or the tip of [[#Condor_Spire_(236K)|Windclad OD Condor Spire]] in the corner.<br> |
| {{clr|DR|Drive Rush}} {{clr|H|6HP}} can be used after whiff punishing a crouching attack with [[#2HP|{{clr|H|2HP}}]] or [[#4HP|{{clr|H|4HP}}]] to stand the opponent up into a late-hit [[#Tomahawk_Buster_(623P)|Windclad Tomahawk Buster]] combo. | | {{clr|DR|Drive Rush}} {{clr|H|6HP}} can be used after whiff punishing a crouching attack with [[#2HP|{{clr|H|2HP}}]] or [[#4HP|{{clr|H|4HP}}]] to stand the opponent up into a late-hit [[#Tomahawk_Buster_(623P)|Windclad Tomahawk Buster]] combo. |
| Line 393: |
Line 393: |
| * Crouching state on frames 25-42 (only 3f standing recovery at the end) | | * Crouching state on frames 25-42 (only 3f standing recovery at the end) |
| <br> | | <br> |
| An overhead with surprising range and hitbox disjoint. Can be used to hop over low attacks for a Punish Counter, which combos into light attacks.<br> | | An overhead with surprising range and hitbox disjoint. Can be used to hop over low attacks for a {{clr|PC|Punish Counter}}, which combos into light attacks.<br> |
| When done after {{clr|DR|Drive Rush}} it also combos into light attacks, and is {{sf6-adv|P|+1}} on block. | | When done after {{clr|DR|Drive Rush}} it also combos into light attacks, and is {{sf6-adv|P|+1}} on block. |
| }} | | }} |
| Line 411: |
Line 411: |
| * '''{{clr|DR|Drive Rush}} cancel advantage:''' {{sf6-adv|VP|+17}} oH / {{sf6-adv|VP|+10}} oB | | * '''{{clr|DR|Drive Rush}} cancel advantage:''' {{sf6-adv|VP|+17}} oH / {{sf6-adv|VP|+10}} oB |
| <br> | | <br> |
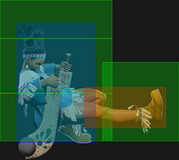
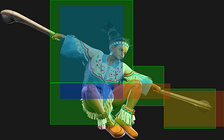
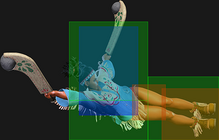
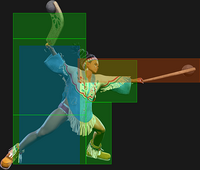
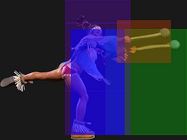
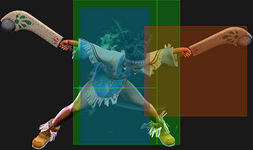
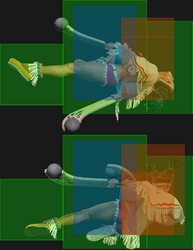
| This move is unique in that Lily's hurtbox does not move forwards at all until the attack hits. This makes it effective at fishing for Counter-hits with little risk of being counterpoked herself.<br> | | This move is unique in that Lily's hurtbox does not move forwards at all until the attack hits. This makes it effective at fishing for {{clr|PC|Counter-hits}} with little risk of being counterpoked herself.<br> |
| It will usually reach beyond and cleanly beat the low pokes that [[#2HP|{{clr|H|2HP}}]] typically loses to, complimenting it perfectly.<br> | | It will usually reach beyond and cleanly beat the low pokes that [[#2HP|{{clr|H|2HP}}]] typically loses to, complimenting it perfectly.<br> |
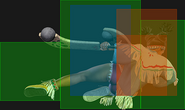
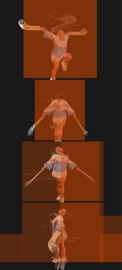
| It is also indispensable as a combo tool due to its high damage and high frame advantage on hit, linking into standing medium kick after a drive rush. {{clr|DR|Drive Rush}}~[[#4HP|{{clr|H|4HP}}]] is Lily's optimal punish starter. | | It is also indispensable as a combo tool due to its high damage and high frame advantage on hit, linking into standing medium kick after a drive rush. {{clr|DR|Drive Rush}}~[[#4HP|{{clr|H|4HP}}]] is Lily's optimal punish starter. |
| Line 691: |
Line 691: |
| * Use {{clr|H|2HP}} > {{clr|OD|214PP}}; a true blockstring that leaves no gap for the opponent to reversal through. | | * Use {{clr|H|2HP}} > {{clr|OD|214PP}}; a true blockstring that leaves no gap for the opponent to reversal through. |
| * Use {{clr|DR|Drive Rush}} {{clr|H|2HP}}, {{clr|H|4HP}} or {{clr|H|5HP}} canceled into {{clr|M|214MP}}. The extra blockstun from {{clr|L|Drive Rush}} makes it a true blockstring. | | * Use {{clr|DR|Drive Rush}} {{clr|H|2HP}}, {{clr|H|4HP}} or {{clr|H|5HP}} canceled into {{clr|M|214MP}}. The extra blockstun from {{clr|L|Drive Rush}} makes it a true blockstring. |
| * When midscreen, keep the button held. This takes the hit as a regular Counter-hit instead of a Punish Counter, which is pretty inconsequential outside the corner. | | * When midscreen, keep the button held. This takes the hit as a regular {{clr|PC|Counter-hit}} instead of a {{clr|PC|Punish Counter}}, which is pretty inconsequential outside the corner. |
| * With 3 bars and good reflexes, hold it until the opponent presses a button, then release and cancel into [[#Level_3_Super_(214214P)|{{clr|SA|SA3}}]]. | | * With 3 bars and good reflexes, hold it until the opponent presses a button, then release and cancel into [[#Level_3_Super_(214214P)|{{clr|SA|SA3}}]]. |
| ** Modern mode's Heavy Assisted Combo does this automatically, performing {{clr|H|2HP}} > {{clr|M|214MP}} > ({{clr|SA|214214P}}) but only canceling into the Super on hit. | | ** Modern mode's Heavy Assisted Combo does this automatically, performing {{clr|H|2HP}} > {{clr|M|214MP}} > ({{clr|SA|214214P}}) but only canceling into the Super on hit. |
| Line 924: |
Line 924: |
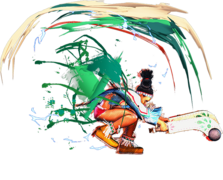
| A command grab, the backbone of Lily's mixups. The {{clr|H|HP}} version does the most damage, hitting harder than a typical meterless combos, but has the shortest range. The {{clr|L|LP}} version has the longest range, but the lowest damage. The {{clr|OD|OD}} version combines the range of the {{clr|L|LP}} version with even more damage than the {{clr|H|HP}} version. | | A command grab, the backbone of Lily's mixups. The {{clr|H|HP}} version does the most damage, hitting harder than a typical meterless combos, but has the shortest range. The {{clr|L|LP}} version has the longest range, but the lowest damage. The {{clr|OD|OD}} version combines the range of the {{clr|L|LP}} version with even more damage than the {{clr|H|HP}} version. |
|
| |
|
| Every version of the command grab leaves the opponent the same long distance away, but it's possible to {{clr|DR|Drive Rush}} back in with a delayed [[#2HP|{{clr|H|2HP}}]]. The ideal timing will connect with the 2nd hit somewhere close to their 5th recovery frame. This leaves a small enough gap that the opponent can't jump out, and gets close enough such that they can't walk backwards out of the way, and can't interrupt it with a 4-5 frame normal because the first hit whiffs just close enough to connect as a Counter-hit if they try. | | Every version of the command grab leaves the opponent the same long distance away, but it's possible to {{clr|DR|Drive Rush}} back in with a delayed [[#2HP|{{clr|H|2HP}}]]. The ideal timing will connect with the 2nd hit somewhere close to their 5th recovery frame. This leaves a small enough gap that the opponent can't jump out, and gets close enough such that they can't walk backwards out of the way, and can't interrupt it with a 4-5 frame normal because the first hit whiffs just close enough to connect as a {{clr|PC|Counter-hit}} if they try. |
| }} | | }} |
| <br> | | <br> |


