(stage info) |
(movelist + frame data + hitboxes + numpad + hey hey hey) |
||
| Line 1: | Line 1: | ||
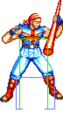
[[File:FFS_Billy_Portrait.png|right]] | [[File:FFS_Billy_Portrait.png|right|The Vengeful Pole Pounder]] | ||
[[File:FFS_Billy_Colors.png|right]] | [[File:FFS_Billy_Colors.png|right]] | ||
[[File:FFS_Billy_Stage.png|thumb|Billy has a single lane stage. Lane changing is not possible and Lane Blasts will send characters into the machinery for an additional 8 damage and 5 stun.]] | [[File:FFS_Billy_Stage.png|thumb|Billy has a single lane stage. Lane changing is not possible and Lane Blasts will send characters into the machinery for an additional 8 damage and 5 stun.]] | ||
| Line 21: | Line 21: | ||
==Move List== | ==Move List== | ||
< | {| border="1em" cellspacing="0" style="border: 1px solid #999;" | ||
< | | align="center" | Standing/Walking || align="center" | Crouching || align="center" | Jumping || align="center" | Taunting | ||
|- | |||
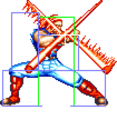
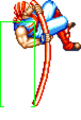
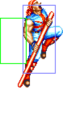
| align="center"; valign="bottom" | [[File:FFS Billy Stand.gif|bottom]] || align="center"; valign="bottom" | [[File:FFS Billy Crouch.png|bottom]] || align="center"; valign="bottom" | [[File:FFS Billy Jump.gif|bottom]] || [[File:FFS Billy Taunt.gif|bottom]] | |||
|- | |||
| align="center" | Hurtbox does not shift when walking. || align="center" | || align="center" | 52F duration. || Billy has slight invincibility when lifting and lowering his Kane. | |||
|} | |||
===Close Standing Normals=== | |||
===== <span class="invisible-header">c5A</span> ===== | |||
<font style="visibility:hidden" size="0"></font> | |||
{{MoveData | |||
|image=FFS_Billy_c5A.png | |||
|subtitle= | |||
|caption= | |||
|name=c5A | |||
|data= | |||
{{AttackData-FFS | |||
|Damage=6 | |||
|Stun=2 | |||
|Guard=Mid | |||
|Startup=4 | |||
|Active=6 | |||
|Recovery=5 | |||
|Total=14 | |||
|Hit Adv=+5 | |||
|Block Adv=+6 | |||
|Property=Kara Cancel, Self Cancel | |||
|description= * Similar to f5A but will whiff on some crouching characters. | |||
}} | |||
}} | |||
===== <span class="invisible-header">c5B</span> ===== | |||
<font style="visibility:hidden" size="0"></font> | |||
{{MoveData | |||
|image=FFS_Billy_c5B.png | |||
|subtitle= | |||
|caption= | |||
|name=c5B | |||
|data= | |||
{{AttackData-FFS | |||
|Damage=5 | |||
|Stun=2 | |||
|Guard=Mid | |||
|Startup=10 | |||
|Active=7 | |||
|Recovery=10 | |||
|Total=26 | |||
|Hit Adv=-1 | |||
|Block Adv=0 | |||
|Property=Kara Cancel | |||
|description= | |||
}} | |||
}} | |||
===== <span class="invisible-header">c5C</span> ===== | |||
<font style="visibility:hidden" size="0"></font> | |||
{{MoveData | |||
|image=FFS_Billy_c5C.png | |||
|subtitle= | |||
|caption= | |||
|name=c5C | |||
|data= | |||
{{AttackData-FFS | |||
|Damage=16 | |||
|Stun=4 | |||
|Guard=Mid | |||
|Startup=5 | |||
|Active=10 | |||
|Recovery=12 | |||
|Total=26 | |||
|Hit Adv=+2 | |||
|Block Adv=+1 | |||
|Property=Kara Cancel | |||
|description= | |||
}} | |||
}} | |||
===== <span class="invisible-header">c5D</span> ===== | |||
<font style="visibility:hidden" size="0"></font> | |||
{{MoveData | |||
|image=FFS_Billy_c5B.png | |||
|subtitle= | |||
|caption= | |||
|name=c5D | |||
|data= | |||
{{AttackData-FFS | |||
|Damage=12 | |||
|Stun=4 | |||
|Guard=Mid | |||
|Startup=11 | |||
|Active=11 | |||
|Recovery=16 | |||
|Total=37 | |||
|Hit Adv=-3 | |||
|Block Adv=-4 | |||
|Property=Kara Cancel | |||
|description= | |||
}} | |||
}} | |||
===Far Standing Normals=== | |||
===== <span class="invisible-header">f5A</span> ===== | |||
<font style="visibility:hidden" size="0"></font> | |||
{{MoveData | |||
|image=FFS_Billy_f5A.png | |||
|subtitle= | |||
|caption= | |||
|name=f5A | |||
|data= | |||
{{AttackData-FFS | |||
|Damage=6 | |||
|Stun=2 | |||
|Guard=Mid | |||
|Startup=4 | |||
|Active=6 | |||
|Recovery=5 | |||
|Total=14 | |||
|Hit Adv=+5 | |||
|Block Adv=+6 | |||
|Property=Kara Cancel, Self Cancel | |||
|description= * Insanely powerful poke. Cannot be crouched under by any character. | |||
}} | |||
}} | |||
== | ===== <span class="invisible-header">f5B</span> ===== | ||
<font style="visibility:hidden" size="0"></font> | |||
{{MoveData | |||
|image=FFS_Billy_f5B.png | |||
|subtitle= | |||
|caption= | |||
|name=f4/5/6B | |||
|data= | |||
{{AttackData-FFS | |||
|Damage=5 | |||
|Stun=2 | |||
|Guard=Mid | |||
|Startup=23 | |||
|Active=7 | |||
|Recovery=10 | |||
|Total=39 | |||
|Hit Adv=-1 | |||
|Block Adv=0 | |||
|Property=Kara Cancel | |||
|description= * Moves Billy very far forward, can go over projectiles, is safe and can be cancelled. | |||
* Can adjust the distance Billy travels by inputting while holding back, neutral or forward. | |||
}} | |||
}} | |||
=== | ===== <span class="invisible-header">f5C</span> ===== | ||
<font style="visibility:hidden" size="0"></font> | |||
{{MoveData | |||
|image=FFS_Billy_f5C.png | |||
|subtitle= | |||
|caption= | |||
|name=f5C | |||
|data= | |||
{{AttackData-FFS | |||
|Damage=16x4 | |||
|Stun=4x4 | |||
|Guard=Mid | |||
|Startup=10 | |||
|Active=4x4 | |||
|Recovery=4 | |||
|Total=29 | |||
|Hit Adv=+16 | |||
|Block Adv=+15 | |||
|Property=Cancel | |||
|description= * Moves Billy forward. | |||
* Can be linked out of. | |||
<gallery class="mw-collapsible"> | |||
FFS Billy f5C.png| | |||
FFS Billy f5C 1.png| | |||
FFS Billy f5C 2.png| | |||
FFS Billy f5C 3.png| | |||
</gallery> | |||
}} | |||
}} | |||
=== | ===== <span class="invisible-header">f5D</span> ===== | ||
<font style="visibility:hidden" size="0"></font> | |||
{{MoveData | |||
|image=FFS_Billy_c5D.png | |||
|subtitle= | |||
|caption= | |||
|name=f5D | |||
|data= | |||
{{AttackData-FFS | |||
|Damage=12x2 | |||
|Stun=4x2 | |||
|Guard=Mid | |||
|Startup=10 | |||
|Active=6 (7) 8 | |||
|Recovery=22 | |||
|Total=52 | |||
|Hit Adv=-7 | |||
|Block Adv=-8 | |||
|Property=/ | |||
|description= | |||
<gallery class="mw-collapsible"> | |||
FFS Billy c5D.png| | |||
FFS Billy f5D 1.png| | |||
</gallery> | |||
}} | |||
}} | |||
{| | ===Crouching Normals=== | ||
|- | |||
| | ===== <span class="invisible-header">2A</span> ===== | ||
|- | <font style="visibility:hidden" size="0"></font> | ||
| Ippon Zuri Nage || | {{MoveData | ||
|- | |image=FFS_Billy_2A.png | ||
| Jigoku Otoshi || | |subtitle= | ||
|- | |caption= | ||
|} | |name=2A | ||
|data= | |||
{{AttackData-FFS | |||
|Damage=5 | |||
|Stun=2 | |||
|Guard=Mid | |||
|Startup=7 | |||
|Active=7 | |||
|Recovery=10 | |||
|Total=23 | |||
|Hit Adv=-1 | |||
|Block Adv=0 | |||
|Property=Kara Cancel | |||
|description= * Generally outclassed by f5A and 2C. | |||
}} | |||
}} | |||
===== <span class="invisible-header">2B</span> ===== | |||
<font style="visibility:hidden" size="0"></font> | |||
{{MoveData | |||
|image=FFS_Billy_2B.png | |||
|subtitle= | |||
|caption= | |||
|name=2B | |||
|data= | |||
{{AttackData-FFS | |||
|Damage=8 | |||
|Stun=2 | |||
|Guard=Low | |||
|Startup=6 | |||
|Active=7 | |||
|Recovery=8 | |||
|Total=20 | |||
|Hit Adv=+1 | |||
|Block Adv=+2 | |||
|Property=Kara Cancel | |||
|description= | |||
}} | |||
}} | |||
===== <span class="invisible-header">2C</span> ===== | |||
<font style="visibility:hidden" size="0"></font> | |||
{{MoveData | |||
|image=FFS Billy 2C.png | |||
|subtitle= | |||
|caption= | |||
|name=2C | |||
|data= | |||
{{AttackData-FFS | |||
|Damage=12 | |||
|Stun=4 | |||
|Guard=Mid | |||
|Startup=7 | |||
|Active=8 | |||
|Recovery=22 | |||
|Total=36 | |||
|Hit Adv=-6 | |||
|Block Adv=-7 | |||
|Property=Kara Cancel | |||
|description= * Insanely powerful poke. | |||
}} | |||
}} | |||
===== <span class="invisible-header">2D</span> ===== | |||
<font style="visibility:hidden" size="0"></font> | |||
{{MoveData | |||
|image=FFS_Billy_2B.png | |||
|subtitle= | |||
|caption= | |||
|name=2D | |||
|data= | |||
{{AttackData-FFS | |||
|Damage=14 | |||
|Stun=4 | |||
|Guard=Low | |||
|Startup=7 | |||
|Active=10 | |||
|Recovery=22 | |||
|Total=38 | |||
|Hit Adv=KD | |||
|Block Adv=-9 | |||
|Property=/ | |||
|description= | |||
}} | |||
}} | |||
===Jumping Normals=== | |||
===== <span class="invisible-header">jA</span> ===== | |||
<font style="visibility:hidden" size="0"></font> | |||
{{MoveData | |||
|image=FFS_Billy_jA.png | |||
|image2=FFS Billy j8A.png | |||
|subtitle= | |||
|caption=Diagonal Jump | |||
|caption2=Neutral Jump | |||
|name=jA | |||
|data= | |||
{{AttackData-FFS | |||
|version=Diagonal Jump | |||
|Damage=8 | |||
|Stun=2 | |||
|Guard=Overhead | |||
|Startup=3 | |||
|Active=2+2+5+∞ | |||
|Recovery=/ | |||
|Total=/ | |||
|Hit Adv= | |||
|Block Adv= | |||
|Property= | |||
|description= | |||
<gallery class="mw-collapsible"> | |||
FFS Billy jA.png| | |||
FFS Billy jA 1.png| | |||
FFS Billy jA 2.png| | |||
FFS Billy jA 3.png| | |||
</gallery> | |||
}} | |||
{{AttackData-FFS | |||
|header=no | |||
|version=Neutral Jump | |||
|Damage=8 | |||
|Stun=2 | |||
|Guard=Overhead | |||
|Startup=12 | |||
|Active=7+∞ | |||
|Recovery=/ | |||
|Total=/ | |||
|Hit Adv= | |||
|Block Adv= | |||
|Property= | |||
|description= | |||
<gallery class="mw-collapsible"> | |||
FFS Billy j8A.png| | |||
FFS Billy j8A 1.png| | |||
</gallery> | |||
}} | |||
}} | |||
===== <span class="invisible-header">jB</span> ===== | |||
<font style="visibility:hidden" size="0"></font> | |||
{{MoveData | |||
|image=FFS_Billy_j8A.png | |||
|subtitle= | |||
|caption=Diagonal & Neutral Jump | |||
|name=jB | |||
|data= | |||
{{AttackData-FFS | |||
|version=Diagonal & Neutral Jump | |||
|Damage=8 | |||
|Stun=2 | |||
|Guard=Overhead | |||
|Startup=12 | |||
|Active=7+∞ | |||
|Recovery=/ | |||
|Total=/ | |||
|Hit Adv= | |||
|Block Adv= | |||
|Property= | |||
|description= * Both diagonal and neutral jump versions have the same characteristics as neutral jump jA. | |||
* Can hit low profile moves, but is less damaging than jD. | |||
<gallery class="mw-collapsible"> | |||
FFS Billy j8A.png| | |||
FFS Billy j8A 1.png| | |||
</gallery> | |||
}} | |||
}} | |||
===== <span class="invisible-header">jC</span> ===== | |||
<font style="visibility:hidden" size="0"></font> | |||
{{MoveData | |||
|image=FFS_Billy_jA.png | |||
|image2=FFS Billy j8A.png | |||
|subtitle= | |||
|caption=Diagonal Jump | |||
|caption2=Neutral Jump | |||
|name=jC | |||
|data= | |||
{{AttackData-FFS | |||
|version=Diagonal Jump | |||
|Damage=16 | |||
|Stun=4 | |||
|Guard=Overhead | |||
|Startup=3 | |||
|Active=2+4+5+12 | |||
|Recovery=/ | |||
|Total=/ | |||
|Hit Adv= | |||
|Block Adv= | |||
|Property= | |||
|description= | |||
<gallery class="mw-collapsible"> | |||
FFS Billy jA.png| | |||
FFS Billy jA 1.png| | |||
FFS Billy jA 2.png| | |||
FFS Billy jA 3.png| | |||
</gallery> | |||
}} | |||
{{AttackData-FFS | |||
|header=no | |||
|version=Neutral Jump | |||
|Damage=16 | |||
|Stun=4 | |||
|Guard=Overhead | |||
|Startup=10 | |||
|Active=5+12 | |||
|Recovery=/ | |||
|Total=/ | |||
|Hit Adv= | |||
|Block Adv= | |||
|Property= | |||
|description= | |||
<gallery class="mw-collapsible"> | |||
FFS Billy j8A.png| | |||
FFS Billy j8A 1.png| | |||
</gallery> | |||
}} | |||
}} | |||
===== <span class="invisible-header">jD</span> ===== | |||
<font style="visibility:hidden" size="0"></font> | |||
{{MoveData | |||
|image=FFS_Billy_j8A.png | |||
|subtitle= | |||
|caption=Diagonal & Neutral Jump | |||
|name=jD | |||
|data= | |||
{{AttackData-FFS | |||
|version=Diagonal Jump | |||
|Damage=16 | |||
|Stun=4 | |||
|Guard=Overhead | |||
|Startup=11 | |||
|Active=5+12 | |||
|Recovery=/ | |||
|Total=/ | |||
|Hit Adv= | |||
|Block Adv= | |||
|Property= | |||
|description= * Almost identical to neutral jump C. | |||
* Can hit low profile moves. | |||
<gallery class="mw-collapsible"> | |||
FFS Billy j8A.png| | |||
FFS Billy j8A 1.png| | |||
</gallery> | |||
}} | |||
{{AttackData-FFS | |||
|header=no | |||
|version=Neutral Jump | |||
|Damage=16 | |||
|Stun=4 | |||
|Guard=Overhead | |||
|Startup=10 | |||
|Active=5+12 | |||
|Recovery=/ | |||
|Total=/ | |||
|Hit Adv= | |||
|Block Adv= | |||
|Property= | |||
|description=Identical to neutral jump C. | |||
<gallery class="mw-collapsible"> | |||
FFS Billy j8A.png| | |||
FFS Billy j8A 1.png| | |||
</gallery> | |||
}} | |||
}} | |||
===System Normals=== | |||
===== <span class="invisible-header">Lane Blast</span> ===== | |||
<font style="visibility:hidden" size="0"></font> | |||
{{MoveData | |||
|image=FFS_Billy_CD_Front.png | |||
|image2=FFS_Billy_CD_Back.png | |||
|subtitle= | |||
|caption=Front Lane | |||
|caption2=Back Lane | |||
|name=Lane Blast | |||
|input=C+D | |||
|data= | |||
{{AttackData-FFS | |||
|version=Front Lane | |||
|Damage=22 | |||
|Stun=5 | |||
|Guard=Mid | |||
|Startup=5 | |||
|Active=6 (16) 19 | |||
|Recovery=7 | |||
|Total=42 | |||
|Hit Adv=KD | |||
|Block Adv=-20 | |||
|Property=Cancel, Lane Shift | |||
|description= | |||
<gallery class="mw-collapsible"> | |||
FFS Billy CD Front.png| | |||
FFS Billy CD Front 1.png| | |||
</gallery> | |||
}} | |||
{{AttackData-FFS | |||
|header=no | |||
|version=Back Lane | |||
|Damage=22 | |||
|Stun=5 | |||
|Guard=Mid | |||
|Startup=16 | |||
|Active=6 | |||
|Recovery=14 | |||
|Total=35 | |||
|Hit Adv=KD | |||
|Block Adv=-2 | |||
|Property=Cancel, Lane Shift | |||
|description= | |||
}} | |||
}} | |||
===== <span class="invisible-header">Lane Attack</span> ===== | |||
<font style="visibility:hidden" size="0"></font> | |||
{{MoveData | |||
|image=FFS_Billy_Lane_Punch_Front.png | |||
|image2=FFS Billy Lane Kick Front.png | |||
|image3=FFS Billy Lane Punch Back.png | |||
|image4=FFS Billy Lane Kick Back.png | |||
|subtitle= | |||
|caption=Front Lane Punch | |||
|caption2=Front Lane Kick | |||
|caption3=Back Lane Punch | |||
|caption4=Back Lane Kick | |||
|name=Lane Attack | |||
|input=A/B/C/D from opposite lane | |||
|data= | |||
{{AttackData-FFS | |||
|version=A | |||
|Damage=20 | |||
|Stun=2 | |||
|Guard=Overhead | |||
|Startup=13 | |||
|Active=17 | |||
|Recovery=4 | |||
|Total=33 | |||
|Hit Adv= | |||
|Block Adv= | |||
|Property=/ | |||
|description= * Straight lane attack. | |||
}} | |||
{{AttackData-FFS | |||
|header=no | |||
|version=B | |||
|Damage=20 | |||
|Stun=2 | |||
|Guard=Overhead | |||
|Startup=9 | |||
|Active=21 | |||
|Recovery=4 | |||
|Total=33 | |||
|Hit Adv= | |||
|Block Adv= | |||
|Property=/ | |||
|description= * Straight lane attack. Faster startup but whiffs on crouchers. | |||
}} | |||
{{AttackData-FFS | |||
|header=no | |||
|version=C | |||
|Damage=20 | |||
|Stun=4 | |||
|Guard=Overhead | |||
|Startup=13 | |||
|Active=36 | |||
|Recovery=4 | |||
|Total=52 | |||
|Hit Adv= | |||
|Block Adv= | |||
|Property=/ | |||
|description= * Slower high angle lane attack. | |||
}} | |||
{{AttackData-FFS | |||
|header=no | |||
|version=D | |||
|Damage=20 | |||
|Stun=4 | |||
|Guard=Overhead | |||
|Startup=9 | |||
|Active=40 | |||
|Recovery=4 | |||
|Total=52 | |||
|Hit Adv= | |||
|Block Adv= | |||
|Property=/ | |||
|description= * Slower high angle lane attack. Faster startup but whiffs on crouchers. | |||
}} | |||
}} | |||
===== <span class="invisible-header">Dodge Attack</span> ===== | |||
<font style="visibility:hidden" size="0"></font> | |||
{{MoveData | |||
|image=FFS_Billy_Dodge_Attack 1.png | |||
|subtitle= | |||
|caption= | |||
|name=Dodge Attack | |||
|input=6A during proximity guard | |||
|data= | |||
{{AttackData-FFS | |||
|Damage=11 | |||
|Stun=5 | |||
|Guard=Mid | |||
|Startup=18 | |||
|Active=13 | |||
|Recovery=12 | |||
|Total=42 | |||
|Hit Adv=Air Reset | |||
|Block Adv=-5 | |||
|Property=Kara Cancel, Upper-Body Invuln 1-29F | |||
|description= | |||
<gallery class="mw-collapsible"> | |||
FFS Billy Dodge Attack.png|Startup | |||
FFS Billy Dodge Attack 1.png| | |||
FFS Billy Dodge Attack 2.png| | |||
FFS Billy Dodge Attack 3.png|Recovery | |||
</gallery> | |||
}} | |||
}} | |||
===Throws=== | |||
===== <span class="invisible-header">C Throw</span> ===== | |||
<font style="visibility:hidden" size="0"></font> | |||
{{MoveData | |||
|image=FFS_Billy_C_Throw.png | |||
|caption= | |||
|name=Ippon Zuri Nage | |||
|input=close 4/6C | |||
|data= | |||
{{AttackData-FFS | |||
|Damage=26 | |||
|Stun=3 | |||
|Guard=Throw | |||
|Startup=1 | |||
|Active=1 | |||
|Recovery=/ | |||
|Hit Adv= | |||
|Block Adv=/ | |||
|Property=/ | |||
|description= | |||
<gallery class="mw-collapsible"> | |||
FFS Billy C Throw 1.png| | |||
</gallery> | |||
}} | |||
}} | |||
===== <span class="invisible-header">D Throw</span> ===== | |||
<font style="visibility:hidden" size="0"></font> | |||
{{MoveData | |||
|image=FFS_Billy_D_Throw.png | |||
|caption= | |||
|name=Jigoku Otoshi | |||
|input=close 4/6D | |||
|data= | |||
{{AttackData-FFS | |||
|Damage=4x8 | |||
|Stun=0 | |||
|Guard=Throw | |||
|Startup=1 | |||
|Active=1 | |||
|Recovery=/ | |||
|Hit Adv= | |||
|Block Adv=/ | |||
|Property=/ | |||
|description= | |||
<gallery class="mw-collapsible"> | |||
FFS Billy D Throw 1.png| | |||
</gallery> | |||
}} | |||
}} | |||
===Special Moves=== | ===Special Moves=== | ||
{| | ===== <span class="invisible-header">Sansetsu Kon ([4]6P)</span> ===== | ||
|- | {{MoveData | ||
| | | name = Sansetsu Kon | ||
|- | | input = [4]6A/C | ||
| | | subtitle = | ||
|- | | image = FFS Billy 46A 6.png | ||
| Suzume Otoshi || Charge | | image2 = FFS Billy 46C 8.png | ||
| | | caption = A, max distance | ||
| | | caption2 = C, max distance | ||
|- | | data = Considered a projectile. | ||
| Kyoushuu Hishou Kon || | {{AttackData-FFS | ||
|} | | version = A | ||
| subtitle = | |||
| Damage = 16 (4) | |||
| Stun = 3 | |||
| Guard = Mid | |||
| Startup = 19 | |||
| Active = 7 | |||
| Recovery = 21 | |||
| Total = 46 | |||
| Hit Adv = -7 | |||
| Block Adv = -10 | |||
| Property = Throw Invuln 2-46F | |||
| description = * Charge time: 40F. | |||
<gallery class="mw-collapsible"> | |||
FFS Billy 46A.png|Startup | |||
FFS Billy 46A 1.png| | |||
FFS Billy 46A 2.png| | |||
FFS Billy 46A 3.png| | |||
FFS Billy 46A 4.png| | |||
FFS Billy 46A 5.png| | |||
FFS Billy 46A 6.png| | |||
</gallery> | |||
}} | |||
{{AttackData-FFS | |||
| header = no | |||
| version = C | |||
| subtitle = | |||
| Damage = 22 (6) | |||
| Stun = 6 | |||
| Guard = Mid | |||
| Startup = 23 | |||
| Active = 9 | |||
| Recovery = 22 | |||
| Total = 53 | |||
| Hit Adv = -3 | |||
| Block Adv = -10 | |||
| Property = Throw Invuln 2-54F. | |||
| description = * Charge time: 60F. | |||
* Has farther range than the A version. | |||
<gallery class="mw-collapsible"> | |||
FFS Billy 46A.png|Startup | |||
FFS Billy 46A 1.png| | |||
FFS Billy 46A 2.png| | |||
FFS Billy 46A 3.png| | |||
FFS Billy 46A 4.png| | |||
FFS Billy 46A 5.png| | |||
FFS Billy 46A 6.png| | |||
FFS Billy 46C 7.png| | |||
FFS Billy 46C 8.png| | |||
</gallery> | |||
}} | |||
}} | |||
===== <span class="invisible-header">Senpuu Kon (Mash P)</span> ===== | |||
{{MoveData | |||
| name = Senpuu Kon | |||
| input = Mash P | |||
| subtitle = | |||
| image = FFS Billy Mash P 1.png | |||
| caption = | |||
| data = Considered a projectile. | |||
<gallery class="mw-collapsible"> | |||
FFS Billy Mash P.png|Startup & Recovery | |||
FFS Billy Mash P 2.png|Between hits | |||
</gallery> | |||
{{AttackData-FFS | |||
| version = A | |||
| subtitle = | |||
| Damage = 13 (4xN) | |||
| Stun = 3 | |||
| Guard = Mid | |||
| Startup = 4 | |||
| Active = 5 (5) 5 (5) 5 (5) 1 ... | |||
| Recovery = 6 | |||
| Total = 40 | |||
| Hit Adv = KD | |||
| Block Adv = +14 | |||
| Property = Upper-Body Invuln 1-3F, 35-40F | |||
| description = | |||
}} | |||
{{AttackData-FFS | |||
| header = no | |||
| version = C | |||
| subtitle = | |||
| Damage = 19 (5xN) | |||
| Stun = 6 | |||
| Guard = Mid | |||
| Startup = 4 | |||
| Active = 3 (3) 3 (3) 3 (3) 3 (3) 3 (3) 1 | |||
| Recovery = 10 | |||
| Total = 44 | |||
| Hit Adv = KD | |||
| Block Adv = -4 | |||
| Property = Upper-Body Invuln 1-3F, 35-44F | |||
| description = | |||
}} | |||
}} | |||
===== <span class="invisible-header">Suzume Otoshi ([1]9P)</span> ===== | |||
{{MoveData | |||
| name = Suzume Otoshi | |||
| input = [1]9A/C | |||
| subtitle = | |||
| image = FFS Billy 19P.png | |||
| caption = | |||
| data = | |||
{{AttackData-FFS | |||
| version = A | |||
| subtitle = | |||
| Damage = 16 (4) | |||
| Stun = 3 | |||
| Guard = Mid | |||
| Startup = 14 | |||
| Active = 11 | |||
| Recovery = 35 | |||
| Total = 59 | |||
| Hit Adv = KD | |||
| Block Adv = | |||
| Property = Throw Invuln 2-59F | |||
| description = * Charge time: 30F. | |||
* Difficult to use. | |||
}} | |||
{{AttackData-FFS | |||
| header = no | |||
| version = C | |||
| subtitle = | |||
| Damage = 22 (6) | |||
| Stun = 6 | |||
| Guard = Mid | |||
| Startup = 19 | |||
| Active = 16 | |||
| Recovery = 40 | |||
| Total = 74 | |||
| Hit Adv = KD | |||
| Block Adv = | |||
| Property = Throw Invuln 2-74F | |||
| description = * Charge time: 45F. | |||
* More difficult to use. | |||
}} | |||
}} | |||
===== <span class="invisible-header">Kyoushuu Hishou Kon (1236K)</span> ===== | |||
{{MoveData | |||
| name = Kyoushuu Hishou Kon | |||
| input = 1236B/D | |||
| subtitle = | |||
| image = FFS Billy 1236K 2.png | |||
| caption = | |||
| data = Billy jumps above the screen and attacks on the way back down. By default Billy will track the opponent's position when coming down, but inputting left and right and slightly influence where he lands. Has a projectile hitbox at certain heights in the fall. | |||
<gallery class="mw-collapsible"> | |||
FFS Billy 1236K.png|Startup Invuln | |||
FFS Billy 1236K 1.png|Vulnerable Startup | |||
FFS Billy 1236K 2.png| | |||
FFS Billy 1236K 3.png| | |||
</gallery> | |||
{{AttackData-FFS | |||
| version = B | |||
| Damage = 18 (5) | |||
| Stun = 3 | |||
| Guard = Mid | |||
| Startup = 72 | |||
| Active = 13 | |||
| Recovery = 8 | |||
| Total = 92 | |||
| Hit Adv = KD | |||
| Block Adv = | |||
| Property = Invuln 1-27F, Throw Invuln 28-92F | |||
| description = | |||
}} | |||
{{AttackData-FFS | |||
| header = no | |||
| version = D | |||
| Damage = 18 (5) | |||
| Stun = 6 | |||
| Guard = Mid | |||
| Startup = 96 | |||
| Active = 13 | |||
| Recovery = 8 | |||
| Total = 116 | |||
| Hit Adv = KD | |||
| Block Adv = | |||
| Property = Invuln 1-31F, Throw Invuln 32-116F | |||
| description = | |||
}} | |||
}} | |||
===Desperation Move=== | |||
=== | ===== <span class="invisible-header">Chou Kaen Senpuu Kon (23632147AC)</span> ===== | ||
{{MoveData | |||
| name = Chou Kaen Senpuu Kon | |||
| input = 23632147A+C | |||
| subtitle = When health is flashing | |||
| image = FFS Billy 23632147AC_1.png | |||
| caption = | |||
| data = | |||
{{AttackData-FFS | |||
| Damage = 38 (9x2) | |||
| Stun = 4 | |||
| Guard = Mid | |||
| Startup = 5 | |||
| Active = 56 | |||
| Recovery = 19 | |||
| Total = 79 | |||
| Hit Adv = KD | |||
| Block Adv = -2 | |||
| Property = Upper-Body Invuln 1-4F, 72-79F | |||
| description = Billy spins his stick around creating a ring of fire, then throws the ring forward as a projectile. The ring gets sent out on the 41st frame and is considered a separate projectile, so Billy can nulify an incoming fireball while sending one of his own. Can be comboed into, can anti-air, and is difficult to punish. | |||
<gallery class="mw-collapsible"> | |||
FFS Billy Mash P.png|Startup & Recovery | |||
FFS Billy 23632147AC 1.png|Stationary projectile | |||
FFS Billy 23632147AC 2.png| | |||
FFS Billy 23632147AC 3.png| | |||
FFS Billy 23632147AC 4.png|No hitbox | |||
FFS Billy 23632147AC 5.png|Moving projectile | |||
FFS Billy 23632147AC 6.png| | |||
</gallery> | |||
}} | |||
}} | |||
==Combos== | ==Combos== | ||
Revision as of 08:17, 20 November 2024


Introduction
| Pros | Cons |
|---|---|
|
|
Move List
| Standing/Walking | Crouching | Jumping | Taunting |
 |
 |
 |

|
| Hurtbox does not shift when walking. | 52F duration. | Billy has slight invincibility when lifting and lowering his Kane. |
Close Standing Normals
c5A
c5A

| Damage | Stun | Guard | Startup | Active | Recovery | Total | Hit Adv | Block Adv | Property | |
|---|---|---|---|---|---|---|---|---|---|---|
| 6 | 2 | Mid | 4 | 6 | 5 | 14 | +5 | +6 | Kara Cancel, Self Cancel | |
| ||||||||||
c5B
c5B

| Damage | Stun | Guard | Startup | Active | Recovery | Total | Hit Adv | Block Adv | Property |
|---|---|---|---|---|---|---|---|---|---|
| 5 | 2 | Mid | 10 | 7 | 10 | 26 | -1 | 0 | Kara Cancel |
c5C
c5C

| Damage | Stun | Guard | Startup | Active | Recovery | Total | Hit Adv | Block Adv | Property |
|---|---|---|---|---|---|---|---|---|---|
| 16 | 4 | Mid | 5 | 10 | 12 | 26 | +2 | +1 | Kara Cancel |
c5D
c5D
| Damage | Stun | Guard | Startup | Active | Recovery | Total | Hit Adv | Block Adv | Property |
|---|---|---|---|---|---|---|---|---|---|
| 12 | 4 | Mid | 11 | 11 | 16 | 37 | -3 | -4 | Kara Cancel |
Far Standing Normals
f5A
f5A

| Damage | Stun | Guard | Startup | Active | Recovery | Total | Hit Adv | Block Adv | Property | |
|---|---|---|---|---|---|---|---|---|---|---|
| 6 | 2 | Mid | 4 | 6 | 5 | 14 | +5 | +6 | Kara Cancel, Self Cancel | |
| ||||||||||
f5B
f4/5/6B

| Damage | Stun | Guard | Startup | Active | Recovery | Total | Hit Adv | Block Adv | Property | |
|---|---|---|---|---|---|---|---|---|---|---|
| 5 | 2 | Mid | 23 | 7 | 10 | 39 | -1 | 0 | Kara Cancel | |
| ||||||||||
f5C
f5C

| Damage | Stun | Guard | Startup | Active | Recovery | Total | Hit Adv | Block Adv | Property | |
|---|---|---|---|---|---|---|---|---|---|---|
| 16x4 | 4x4 | Mid | 10 | 4x4 | 4 | 29 | +16 | +15 | Cancel | |
| ||||||||||


f5D
f5D

| Damage | Stun | Guard | Startup | Active | Recovery | Total | Hit Adv | Block Adv | Property | |
|---|---|---|---|---|---|---|---|---|---|---|
| 12x2 | 4x2 | Mid | 10 | 6 (7) 8 | 22 | 52 | -7 | -8 | / | |
|
| ||||||||||

Crouching Normals
2A
2A

| Damage | Stun | Guard | Startup | Active | Recovery | Total | Hit Adv | Block Adv | Property | |
|---|---|---|---|---|---|---|---|---|---|---|
| 5 | 2 | Mid | 7 | 7 | 10 | 23 | -1 | 0 | Kara Cancel | |
| ||||||||||
2B
2B

| Damage | Stun | Guard | Startup | Active | Recovery | Total | Hit Adv | Block Adv | Property |
|---|---|---|---|---|---|---|---|---|---|
| 8 | 2 | Low | 6 | 7 | 8 | 20 | +1 | +2 | Kara Cancel |
2C
2C

| Damage | Stun | Guard | Startup | Active | Recovery | Total | Hit Adv | Block Adv | Property | |
|---|---|---|---|---|---|---|---|---|---|---|
| 12 | 4 | Mid | 7 | 8 | 22 | 36 | -6 | -7 | Kara Cancel | |
| ||||||||||
2D
2D
| Damage | Stun | Guard | Startup | Active | Recovery | Total | Hit Adv | Block Adv | Property |
|---|---|---|---|---|---|---|---|---|---|
| 14 | 4 | Low | 7 | 10 | 22 | 38 | KD | -9 | / |
Jumping Normals
jA
jA


| Version | Damage | Stun | Guard | Startup | Active | Recovery | Total | Hit Adv | Block Adv | Property | |
|---|---|---|---|---|---|---|---|---|---|---|---|
| Diagonal Jump | 8 | 2 | Overhead | 3 | 2+2+5+∞ | / | / | - | - | - | |
|
| |||||||||||
| Neutral Jump | 8 | 2 | Overhead | 12 | 7+∞ | / | / | - | - | - | |
|
| |||||||||||


jB
jB
| Version | Damage | Stun | Guard | Startup | Active | Recovery | Total | Hit Adv | Block Adv | Property | |
|---|---|---|---|---|---|---|---|---|---|---|---|
| Diagonal & Neutral Jump | 8 | 2 | Overhead | 12 | 7+∞ | / | / | - | - | - | |
| |||||||||||
jC
jC
| Version | Damage | Stun | Guard | Startup | Active | Recovery | Total | Hit Adv | Block Adv | Property | |
|---|---|---|---|---|---|---|---|---|---|---|---|
| Diagonal Jump | 16 | 4 | Overhead | 3 | 2+4+5+12 | / | / | - | - | - | |
|
| |||||||||||
| Neutral Jump | 16 | 4 | Overhead | 10 | 5+12 | / | / | - | - | - | |
|
| |||||||||||
jD
jD
| Version | Damage | Stun | Guard | Startup | Active | Recovery | Total | Hit Adv | Block Adv | Property | |
|---|---|---|---|---|---|---|---|---|---|---|---|
| Diagonal Jump | 16 | 4 | Overhead | 11 | 5+12 | / | / | - | - | - | |
| |||||||||||
| Neutral Jump | 16 | 4 | Overhead | 10 | 5+12 | / | / | - | - | - | |
|
Identical to neutral jump C. | |||||||||||
System Normals
Lane Blast
Lane Blast
C+D
C+D


| Version | Damage | Stun | Guard | Startup | Active | Recovery | Total | Hit Adv | Block Adv | Property | |
|---|---|---|---|---|---|---|---|---|---|---|---|
| Front Lane | 22 | 5 | Mid | 5 | 6 (16) 19 | 7 | 42 | KD | -20 | Cancel, Lane Shift | |
|
| |||||||||||
| Back Lane | 22 | 5 | Mid | 16 | 6 | 14 | 35 | KD | -2 | Cancel, Lane Shift | |

Lane Attack
Lane Attack
A/B/C/D from opposite lane
A/B/C/D from opposite lane


| Version | Damage | Stun | Guard | Startup | Active | Recovery | Total | Hit Adv | Block Adv | Property | |
|---|---|---|---|---|---|---|---|---|---|---|---|
| A | 20 | 2 | Overhead | 13 | 17 | 4 | 33 | - | - | / | |
| |||||||||||
| B | 20 | 2 | Overhead | 9 | 21 | 4 | 33 | - | - | / | |
| |||||||||||
| C | 20 | 4 | Overhead | 13 | 36 | 4 | 52 | - | - | / | |
| |||||||||||
| D | 20 | 4 | Overhead | 9 | 40 | 4 | 52 | - | - | / | |
| |||||||||||
Dodge Attack
Dodge Attack
6A during proximity guard
6A during proximity guard

| Damage | Stun | Guard | Startup | Active | Recovery | Total | Hit Adv | Block Adv | Property | |
|---|---|---|---|---|---|---|---|---|---|---|
| 11 | 5 | Mid | 18 | 13 | 12 | 42 | Air Reset | -5 | Kara Cancel, Upper-Body Invuln 1-29F | |
| ||||||||||


Throws
C Throw
Ippon Zuri Nage
close 4/6C
close 4/6C

| Damage | Stun | Guard | Startup | Active | Recovery | Total | Hit Adv | Block Adv | Property | |
|---|---|---|---|---|---|---|---|---|---|---|
| 26 | 3 | Throw | 1 | 1 | / | - | - | / | / | |
|
| ||||||||||

D Throw
Jigoku Otoshi
close 4/6D
close 4/6D

| Damage | Stun | Guard | Startup | Active | Recovery | Total | Hit Adv | Block Adv | Property | |
|---|---|---|---|---|---|---|---|---|---|---|
| 4x8 | 0 | Throw | 1 | 1 | / | - | - | / | / | |
|
| ||||||||||

Special Moves
Sansetsu Kon ([4]6P)
Sansetsu Kon
[4]6A/C
[4]6A/C


Considered a projectile.
| Version | Damage | Stun | Guard | Startup | Active | Recovery | Total | Hit Adv | Block Adv | Property | |
|---|---|---|---|---|---|---|---|---|---|---|---|
| A | 16 (4) | 3 | Mid | 19 | 7 | 21 | 46 | -7 | -10 | Throw Invuln 2-46F | |
| |||||||||||
| C | 22 (6) | 6 | Mid | 23 | 9 | 22 | 53 | -3 | -10 | Throw Invuln 2-54F. | |
| |||||||||||


Senpuu Kon (Mash P)
Senpuu Kon
Mash P
Mash P

Considered a projectile.
Startup & Recovery
Between hits


| Version | Damage | Stun | Guard | Startup | Active | Recovery | Total | Hit Adv | Block Adv | Property |
|---|---|---|---|---|---|---|---|---|---|---|
| A | 13 (4xN) | 3 | Mid | 4 | 5 (5) 5 (5) 5 (5) 1 ... | 6 | 40 | KD | +14 | Upper-Body Invuln 1-3F, 35-40F |
| C | 19 (5xN) | 6 | Mid | 4 | 3 (3) 3 (3) 3 (3) 3 (3) 3 (3) 1 | 10 | 44 | KD | -4 | Upper-Body Invuln 1-3F, 35-44F |
Suzume Otoshi ([1]9P)
Suzume Otoshi
[1]9A/C
[1]9A/C

| Version | Damage | Stun | Guard | Startup | Active | Recovery | Total | Hit Adv | Block Adv | Property | |
|---|---|---|---|---|---|---|---|---|---|---|---|
| A | 16 (4) | 3 | Mid | 14 | 11 | 35 | 59 | KD | - | Throw Invuln 2-59F | |
| |||||||||||
| C | 22 (6) | 6 | Mid | 19 | 16 | 40 | 74 | KD | - | Throw Invuln 2-74F | |
| |||||||||||
Kyoushuu Hishou Kon (1236K)
Kyoushuu Hishou Kon
1236B/D
1236B/D

Billy jumps above the screen and attacks on the way back down. By default Billy will track the opponent's position when coming down, but inputting left and right and slightly influence where he lands. Has a projectile hitbox at certain heights in the fall.
Startup Invuln
Vulnerable Startup


| Version | Damage | Stun | Guard | Startup | Active | Recovery | Total | Hit Adv | Block Adv | Property |
|---|---|---|---|---|---|---|---|---|---|---|
| B | 18 (5) | 3 | Mid | 72 | 13 | 8 | 92 | KD | - | Invuln 1-27F, Throw Invuln 28-92F |
| D | 18 (5) | 6 | Mid | 96 | 13 | 8 | 116 | KD | - | Invuln 1-31F, Throw Invuln 32-116F |
Desperation Move
Chou Kaen Senpuu Kon (23632147AC)
Chou Kaen Senpuu Kon
When health is flashing
23632147A+C
When health is flashing
23632147A+C

| Damage | Stun | Guard | Startup | Active | Recovery | Total | Hit Adv | Block Adv | Property | |
|---|---|---|---|---|---|---|---|---|---|---|
| 38 (9x2) | 4 | Mid | 5 | 56 | 19 | 79 | KD | -2 | Upper-Body Invuln 1-4F, 72-79F | |
|
Billy spins his stick around creating a ring of fire, then throws the ring forward as a projectile. The ring gets sent out on the 41st frame and is considered a separate projectile, so Billy can nulify an incoming fireball while sending one of his own. Can be comboed into, can anti-air, and is difficult to punish.
| ||||||||||


Combos
- Close A x 1-4 > Far A x 1-3
- cr.C > Sansetsukon Chuudan Uchi (A)
- Close C > Sansetsukon Chuudan Uchi (A) or Choukaen Senpuukon
- cr.B > Choukaen Senpuukon
- (In the corner) Far C > close C > Sansetsukon Chuudan Uchi (A)


