Lichmassacre (talk | contribs) m (Navbox added.) |
(Skeleton for moves) |
||
| Line 2: | Line 2: | ||
This faq was done by Wolverine-Master of shoryuken.com | This faq was done by Wolverine-Master of shoryuken.com | ||
==Moves | ==Normal Moves== | ||
'''Magic Series'''<br> | |||
Ground: standard zig-zag <br> | |||
Jumping: standard zig-zag <br> | |||
Super Jumping: standard zig-zag <br> | |||
'''Throws'''<br> | |||
===Standing=== | |||
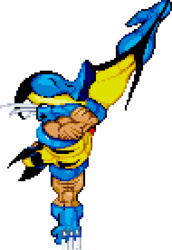
{{MoveData | |||
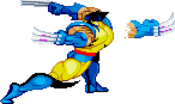
|image=MSH_Wolverine_5LP.png | |||
|caption= | |||
|name=5LP | |||
|input=5LP | |||
|data= | |||
{{AttackData-MSH | |||
|damage=6 | |||
|guard=All | |||
|startup=3 | |||
|active=6 | |||
|recovery=8 | |||
|onhit=+1 | |||
|onblock=+3 | |||
|invuln= N/A | |||
|description= | |||
Fast disjointed light. | |||
}} | |||
}} | |||
{{MoveData | |||
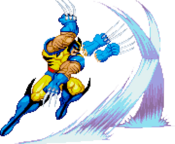
|image=MSH_Wolverine_5MP.png | |||
|caption= | |||
|name=5MP | |||
|input=5MP | |||
|data= | |||
{{AttackData-MSH | |||
|damage= | |||
|guard= | |||
|startup= | |||
|active= | |||
|recovery= | |||
|onhit= | |||
|onblock= | |||
|invuln= | |||
|description= | |||
Placeholder text | |||
}} | |||
}} | |||
{{MoveData | |||
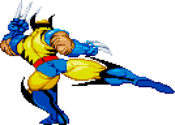
|image=MSH_Wolverine_5HP.png | |||
|caption= | |||
|name=5HP | |||
|input=5HP | |||
|data= | |||
{{AttackData-MSH | |||
|damage= | |||
|guard= | |||
|startup= | |||
|active= | |||
|recovery= | |||
|onhit= | |||
|onblock= | |||
|invuln= | |||
|description= | |||
Placeholder text | |||
}} | |||
}} | |||
{{MoveData | |||
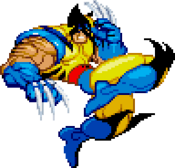
|image=MSH_Wolverine_5LK.png | |||
|caption= | |||
|name=5LK | |||
|input=5LK | |||
|data= | |||
{{AttackData-MSH | |||
|damage= | |||
|guard= | |||
|startup= | |||
|active= | |||
|recovery= | |||
|onhit= | |||
|onblock= | |||
|invuln= | |||
|description= | |||
Placeholder text | |||
}} | |||
}} | |||
{{MoveData | |||
|image=MSH_Wolverine_5MK.png | |||
|caption= | |||
|name=5MK | |||
|input=5MK | |||
|data= | |||
{{AttackData-MSH | |||
|damage= | |||
|guard= | |||
|startup= | |||
|active= | |||
|recovery= | |||
|onhit= | |||
|onblock= | |||
|invuln= | |||
|description= | |||
Placeholder text | |||
}} | |||
}} | |||
{{MoveData | |||
|image=MSH_Wolverine_5HK.png | |||
|caption= | |||
|name=5HK | |||
|input=5HK | |||
|data= | |||
{{AttackData-MSH | |||
|damage= | |||
|guard= | |||
|startup= | |||
|active= | |||
|recovery= | |||
|onhit= | |||
|onblock= | |||
|invuln= | |||
|description= | |||
Placeholder text | |||
}} | |||
}} | |||
===Crouching Normals=== | |||
{{MoveData | |||
|image=MSH_Wolverine_2LP.png | |||
|caption= | |||
|name=2LP | |||
|input=2LP | |||
|data= | |||
{{AttackData-MSH | |||
|damage= | |||
|guard= | |||
|startup= | |||
|active= | |||
|recovery= | |||
|onhit= | |||
|onblock= | |||
|invuln= | |||
|description= | |||
Placeholder text | |||
}} | |||
}} | |||
{{MoveData | |||
|image=MSH_Wolverine_2MP.png | |||
|caption= | |||
|name=2MP | |||
|input=2MP | |||
|data= | |||
{{AttackData-MSH | |||
|damage= | |||
|guard= | |||
|startup= | |||
|active= | |||
|recovery= | |||
|onhit= | |||
|onblock= | |||
|invuln= | |||
|description= | |||
Placeholder text | |||
}} | |||
}} | |||
{{MoveData | |||
|image=MSH_Wolverine_2HP.png | |||
|caption= | |||
|name=2HP | |||
|input=2HP | |||
|data= | |||
{{AttackData-MSH | |||
|damage= | |||
|guard= | |||
|startup= | |||
|active= | |||
|recovery= | |||
|onhit= | |||
|onblock= | |||
|invuln= | |||
|description= | |||
Placeholder text | |||
}} | |||
}} | |||
{{MoveData | |||
|image=MSH_Wolverine_2LK.png | |||
|caption= | |||
|name=2LK | |||
|input=2LK | |||
|data= | |||
{{AttackData-MSH | |||
|damage= | |||
|guard= | |||
|startup= | |||
|active= | |||
|recovery= | |||
|onhit= | |||
|onblock= | |||
|invuln= | |||
|description= | |||
Placeholder text | |||
}} | |||
}} | |||
{{MoveData | |||
|image=MSH_Wolverine_2MK.png | |||
|caption= | |||
|name=2MK | |||
|input=2MK | |||
|data= | |||
{{AttackData-MSH | |||
|damage= | |||
|guard= | |||
|startup= | |||
|active= | |||
|recovery= | |||
|onhit= | |||
|onblock= | |||
|invuln= | |||
|description= | |||
Placeholder text | |||
}} | |||
}} | |||
{{MoveData | |||
|image=MSH_Wolverine_2HK.png | |||
|caption= | |||
|name=2HK | |||
|input=2HK | |||
|data= | |||
{{AttackData-MSH | |||
|damage= | |||
|guard= | |||
|startup= | |||
|active= | |||
|recovery= | |||
|onhit= | |||
|onblock= | |||
|invuln= | |||
|description= | |||
Placeholder text | |||
}} | |||
}} | |||
===Jumping Normals=== | |||
{{MoveData | |||
|image=MSH_Wolverine_jLP.png | |||
|caption= | |||
|name=jLP | |||
|input=jLP | |||
|data= | |||
{{AttackData-MSH | |||
|damage= | |||
|guard= | |||
|startup= | |||
|active= | |||
|recovery= | |||
|onhit= | |||
|onblock= | |||
|invuln= | |||
|description= | |||
Placeholder text | |||
}} | |||
}} | |||
{{MoveData | |||
|image=MSH_Wolverine_jMP.png | |||
|caption= | |||
|name=jMP | |||
|input=jMP | |||
|data= | |||
{{AttackData-MSH | |||
|damage= | |||
|guard= | |||
|startup= | |||
|active= | |||
|recovery= | |||
|onhit= | |||
|onblock= | |||
|invuln= | |||
|description= | |||
Placeholder text | |||
}} | |||
}} | |||
{{MoveData | |||
|image=MSH_Wolverine_jHP.png | |||
|caption= | |||
|name=jHP | |||
|input=jHP | |||
|data= | |||
{{AttackData-MSH | |||
|damage= | |||
|guard= | |||
|startup= | |||
|active= | |||
|recovery= | |||
|onhit= | |||
|onblock= | |||
|invuln= | |||
|description= | |||
Placeholder text | |||
}} | |||
}} | |||
{{MoveData | |||
|image=MSH_Wolverine_jLK.png | |||
|caption= | |||
|name=jLK | |||
|input=jLK | |||
|data= | |||
{{AttackData-MSH | |||
|damage= | |||
|guard= | |||
|startup= | |||
|active= | |||
|recovery= | |||
|onhit= | |||
|onblock= | |||
|invuln= | |||
|description= | |||
Placeholder text | |||
}} | |||
}} | |||
== | {{MoveData | ||
|image=MSH_Wolverine_jMK.png | |||
|caption= | |||
|name=jMK | |||
|input=jMK | |||
|data= | |||
{{AttackData-MSH | |||
|damage= | |||
|guard= | |||
|startup= | |||
|active= | |||
|recovery= | |||
|onhit= | |||
|onblock= | |||
|invuln= | |||
|description= | |||
Placeholder text | |||
}} | |||
}} | |||
{{MoveData | |||
|image=MSH_Wolverine_jHK.png | |||
|caption= | |||
|name=jHK | |||
|input=jHK | |||
|data= | |||
{{AttackData-MSH | |||
|damage= | |||
|guard= | |||
|startup= | |||
|active= | |||
|recovery= | |||
|onhit= | |||
|onblock= | |||
|invuln= | |||
|description= | |||
Placeholder text | |||
}} | |||
}} | |||
==Throws== | |||
{{MoveData | |||
|image=MSH_Wolverine_MP_Throw.png | |||
|caption= | |||
|name=MP Throw | |||
|input=6/4 MP | |||
|data= | |||
{{AttackData-MSH | |||
|damage= | |||
|guard= | |||
|startup= | |||
|active= | |||
|recovery= | |||
|onhit= | |||
|onblock= | |||
|invuln= | |||
|description= | |||
Placeholder text | |||
}} | |||
}} | |||
=== | {{MoveData | ||
|image=MSH_Wolverine_HP_Throw.png | |||
|caption= | |||
|name=HP Throw | |||
|input=6/4 HP | |||
|data= | |||
{{AttackData-MSH | |||
|damage= | |||
|guard= | |||
|startup= | |||
|active= | |||
|recovery= | |||
|onhit= | |||
|onblock= | |||
|invuln= | |||
|description= | |||
Placeholder text | |||
}} | |||
}} | |||
=== | {{MoveData | ||
|image=MSH_Wolverine_Air_Throw.png | |||
|caption= | |||
|name=Air Throw | |||
|input=6/4 MP/HP | |||
|data= | |||
{{AttackData-MSH | |||
|damage= | |||
|guard= | |||
|startup= | |||
|active= | |||
|recovery= | |||
|onhit= | |||
|onblock= | |||
|invuln= | |||
|description= | |||
Placeholder text | |||
}} | |||
}} | |||
=== | ==Command Normals== | ||
== | {{MoveData | ||
|image=MSH_Wolverine_3HP.png | |||
|caption= | |||
|name=Slide | |||
|input=3HP | |||
|data= | |||
{{AttackData-MSH | |||
|damage= | |||
|guard= | |||
|startup= | |||
|active= | |||
|recovery= | |||
|onhit= | |||
|onblock= | |||
|invuln= | |||
|description= | |||
Placeholder text | |||
}} | |||
}} | |||
{{MoveData | |||
|image=MSH_Wolverine_j2MK.png | |||
|caption= | |||
|name=Divekick | |||
|input=j2MK | |||
|data= | |||
{{AttackData-MSH | |||
|damage= | |||
|guard= | |||
|startup= | |||
|active= | |||
|recovery= | |||
|onhit= | |||
|onblock= | |||
|invuln= | |||
|description= | |||
Placeholder text | |||
}} | |||
}} | |||
==Special Moves== | ==Special Moves== | ||
Berserker Barrage | {{MoveData | ||
|image=MSH_Wolverine_236P.png | |||
|caption= | |||
|name=Berserker Barrage | |||
|input=236P | |||
|data= | |||
{{AttackData-MSH | |||
|damage= | |||
|guard= | |||
|startup= | |||
|active= | |||
|recovery= | |||
|onhit= | |||
|onblock= | |||
|invuln= | |||
|description= | |||
This has been a very effective move throughout the Marvel series and it still | This has been a very effective move throughout the Marvel series and it still | ||
is. This move will do alot of damage and depending on which strength of | is. This move will do alot of damage and depending on which strength of | ||
| Line 89: | Line 503: | ||
Infinity Guage pretty quickly. This can be used in combos or OTG. Only the | Infinity Guage pretty quickly. This can be used in combos or OTG. Only the | ||
fierce version can be OTGed afterwards. | fierce version can be OTGed afterwards. | ||
}} | |||
}} | |||
{{MoveData | |||
|image=MSH_Wolverine_623P.png | |||
|caption= | |||
|name=Tornado Claw | |||
|input=623P | |||
|data= | |||
{{AttackData-MSH | |||
|damage= | |||
|guard= | |||
|startup= | |||
|active= | |||
|recovery= | |||
|onhit= | |||
|onblock= | |||
|invuln= | |||
|description= | |||
An excellent anti-air attack that does alot of damage and is just as easily | An excellent anti-air attack that does alot of damage and is just as easily | ||
comboed as his Berserker Barrage. The recovery time is pretty decent for an | comboed as his Berserker Barrage. The recovery time is pretty decent for an | ||
| Line 97: | Line 527: | ||
the jab version should be used the most since it has the least amount of | the jab version should be used the most since it has the least amount of | ||
recovery time and its pretty hard to counter. | recovery time and its pretty hard to counter. | ||
}} | |||
}} | |||
Drill Claw | {{MoveData | ||
|image=MSH_Wolverine_PK.png | |||
An excellent move to use overall, mainly because it does | |caption= | ||
|name=Drill Claw | |||
|input=Any direction + PK | |||
|data= | |||
{{AttackData-MSH | |||
|damage= | |||
|guard= | |||
|startup= | |||
|active= | |||
|recovery= | |||
|onhit= | |||
|onblock= | |||
|invuln= | |||
|description= | |||
An excellent move to use overall, mainly because it does a lot of damage and | |||
can be used as an AC Finisher. Watch if Wolverine misses with his move though | can be used as an AC Finisher. Watch if Wolverine misses with his move though | ||
because he will sorta coil back and be left open to attack. This move comes | because he will sorta coil back and be left open to attack. This move comes | ||
out very quickly and can easily be put in combos like his other moves. It can | out very quickly and can easily be put in combos like his other moves. It can | ||
also be used as a surprise attack and Wolverine can use this in the air in | also be used as a surprise attack and Wolverine can use this in the air in | ||
any 8 directions. | any of the 8 directions. | ||
Also serves as Wolverine's Infinity Counter, which can be executed with 412P. | |||
}} | |||
}} | |||
==Super Moves== | ==Super Moves== | ||
Berserker Barrage X | {{MoveData | ||
|image=MSH_Wolverine_236PPP.png | |||
|caption= | |||
|name=Berserker Barrage X | |||
|input=236PP | |||
|data= | |||
{{AttackData-MSH | |||
|damage= | |||
|guard= | |||
|startup= | |||
|active= | |||
|recovery= | |||
|onhit= | |||
|onblock= | |||
|invuln= | |||
|description= | |||
A very lethal super mainly because it comes out so fast and does alot of | A very lethal super mainly because it comes out so fast and does alot of | ||
damage. It comboes just as easily as his other special attacks and has good | damage. It comboes just as easily as his other special attacks and has good | ||
| Line 126: | Line 583: | ||
move at start up is pretty high, but during the latter part he can be knocked | move at start up is pretty high, but during the latter part he can be knocked | ||
out of it and he is still vulnerable to projectiles. | out of it and he is still vulnerable to projectiles. | ||
}} | |||
}} | |||
Weapon X | {{MoveData | ||
|image=MSH_Wolverine_623PPP.png | |||
|caption= | |||
|name=Weapon X | |||
|input=623PP | |||
|data= | |||
{{AttackData-MSH | |||
|damage= | |||
|guard= | |||
|startup= | |||
|active= | |||
|recovery= | |||
|onhit= | |||
|onblock= | |||
|invuln= | |||
|description= | |||
An immensely painful super that does a TON of damage, even more so than the | An immensely painful super that does a TON of damage, even more so than the | ||
Final Justice. It ranks up there with being one of the most powerful supers | Final Justice. It ranks up there with being one of the most powerful supers | ||
| Line 141: | Line 614: | ||
this move, but for one measely hit though. This is the prime counter against | this move, but for one measely hit though. This is the prime counter against | ||
missed attacks and supers. | missed attacks and supers. | ||
}} | |||
}} | |||
=== Combos === | === Combos === | ||
Revision as of 17:10, 15 August 2024
Introduction
This faq was done by Wolverine-Master of shoryuken.com
Normal Moves
Magic Series
Ground: standard zig-zag
Jumping: standard zig-zag
Super Jumping: standard zig-zag
Throws
Standing
| Damage | Startup | Active | Recovery |
|---|---|---|---|
| 6 | 3 | 6 | 8 |
| On Hit | On Block | Guard | Invuln |
| +1 | +3 | All | N/A |
|
Fast disjointed light. | |||
| Damage | Startup | Active | Recovery |
|---|---|---|---|
| - | - | - | - |
| On Hit | On Block | Guard | Invuln |
| - | - | - | - |
|
Placeholder text | |||
| Damage | Startup | Active | Recovery |
|---|---|---|---|
| - | - | - | - |
| On Hit | On Block | Guard | Invuln |
| - | - | - | - |
|
Placeholder text | |||
| Damage | Startup | Active | Recovery |
|---|---|---|---|
| - | - | - | - |
| On Hit | On Block | Guard | Invuln |
| - | - | - | - |
|
Placeholder text | |||
| Damage | Startup | Active | Recovery |
|---|---|---|---|
| - | - | - | - |
| On Hit | On Block | Guard | Invuln |
| - | - | - | - |
|
Placeholder text | |||
| Damage | Startup | Active | Recovery |
|---|---|---|---|
| - | - | - | - |
| On Hit | On Block | Guard | Invuln |
| - | - | - | - |
|
Placeholder text | |||
Crouching Normals
| Damage | Startup | Active | Recovery |
|---|---|---|---|
| - | - | - | - |
| On Hit | On Block | Guard | Invuln |
| - | - | - | - |
|
Placeholder text | |||
| Damage | Startup | Active | Recovery |
|---|---|---|---|
| - | - | - | - |
| On Hit | On Block | Guard | Invuln |
| - | - | - | - |
|
Placeholder text | |||
| Damage | Startup | Active | Recovery |
|---|---|---|---|
| - | - | - | - |
| On Hit | On Block | Guard | Invuln |
| - | - | - | - |
|
Placeholder text | |||
| Damage | Startup | Active | Recovery |
|---|---|---|---|
| - | - | - | - |
| On Hit | On Block | Guard | Invuln |
| - | - | - | - |
|
Placeholder text | |||
| Damage | Startup | Active | Recovery |
|---|---|---|---|
| - | - | - | - |
| On Hit | On Block | Guard | Invuln |
| - | - | - | - |
|
Placeholder text | |||
| Damage | Startup | Active | Recovery |
|---|---|---|---|
| - | - | - | - |
| On Hit | On Block | Guard | Invuln |
| - | - | - | - |
|
Placeholder text | |||
Jumping Normals
| Damage | Startup | Active | Recovery |
|---|---|---|---|
| - | - | - | - |
| On Hit | On Block | Guard | Invuln |
| - | - | - | - |
|
Placeholder text | |||
| Damage | Startup | Active | Recovery |
|---|---|---|---|
| - | - | - | - |
| On Hit | On Block | Guard | Invuln |
| - | - | - | - |
|
Placeholder text | |||
| Damage | Startup | Active | Recovery |
|---|---|---|---|
| - | - | - | - |
| On Hit | On Block | Guard | Invuln |
| - | - | - | - |
|
Placeholder text | |||
| Damage | Startup | Active | Recovery |
|---|---|---|---|
| - | - | - | - |
| On Hit | On Block | Guard | Invuln |
| - | - | - | - |
|
Placeholder text | |||
| Damage | Startup | Active | Recovery |
|---|---|---|---|
| - | - | - | - |
| On Hit | On Block | Guard | Invuln |
| - | - | - | - |
|
Placeholder text | |||
| Damage | Startup | Active | Recovery |
|---|---|---|---|
| - | - | - | - |
| On Hit | On Block | Guard | Invuln |
| - | - | - | - |
|
Placeholder text | |||
Throws
| Damage | Startup | Active | Recovery |
|---|---|---|---|
| - | - | - | - |
| On Hit | On Block | Guard | Invuln |
| - | - | - | - |
|
Placeholder text | |||
| Damage | Startup | Active | Recovery |
|---|---|---|---|
| - | - | - | - |
| On Hit | On Block | Guard | Invuln |
| - | - | - | - |
|
Placeholder text | |||
| Damage | Startup | Active | Recovery |
|---|---|---|---|
| - | - | - | - |
| On Hit | On Block | Guard | Invuln |
| - | - | - | - |
|
Placeholder text | |||
Command Normals
| Damage | Startup | Active | Recovery |
|---|---|---|---|
| - | - | - | - |
| On Hit | On Block | Guard | Invuln |
| - | - | - | - |
|
Placeholder text | |||
| Damage | Startup | Active | Recovery |
|---|---|---|---|
| - | - | - | - |
| On Hit | On Block | Guard | Invuln |
| - | - | - | - |
|
Placeholder text | |||
Special Moves
| Damage | Startup | Active | Recovery |
|---|---|---|---|
| - | - | - | - |
| On Hit | On Block | Guard | Invuln |
| - | - | - | - |
|
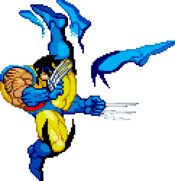
This has been a very effective move throughout the Marvel series and it still is. This move will do alot of damage and depending on which strength of button you use will determine how many hits you get afterwards. It has good recovery time and extremely hard to counter, that is if you don't use the Fierce version after rapidly hitting that punch button. This move will do alot of block damage and even if the opponent does block it will gain his Infinity Guage pretty quickly. This can be used in combos or OTG. Only the fierce version can be OTGed afterwards. | |||
| Damage | Startup | Active | Recovery |
|---|---|---|---|
| - | - | - | - |
| On Hit | On Block | Guard | Invuln |
| - | - | - | - |
|
An excellent anti-air attack that does alot of damage and is just as easily comboed as his Berserker Barrage. The recovery time is pretty decent for an anti-air attack. This move has good horizontal range and chips good damage, the jab version should be used the most since it has the least amount of recovery time and its pretty hard to counter. | |||
| Damage | Startup | Active | Recovery |
|---|---|---|---|
| - | - | - | - |
| On Hit | On Block | Guard | Invuln |
| - | - | - | - |
|
An excellent move to use overall, mainly because it does a lot of damage and can be used as an AC Finisher. Watch if Wolverine misses with his move though because he will sorta coil back and be left open to attack. This move comes out very quickly and can easily be put in combos like his other moves. It can also be used as a surprise attack and Wolverine can use this in the air in any of the 8 directions. Also serves as Wolverine's Infinity Counter, which can be executed with 412P. | |||
Super Moves
| Damage | Startup | Active | Recovery |
|---|---|---|---|
| - | - | - | - |
| On Hit | On Block | Guard | Invuln |
| - | - | - | - |
|
A very lethal super mainly because it comes out so fast and does alot of damage. It comboes just as easily as his other special attacks and has good range and should be used to counter missed supers or even missed Jabs. It does decent block damage and hits 12 times and can be OTGed after if in the corner. You should mainly use this in combos rather than to wait and counter. The recovery time is pretty bad and he can be countered. The priority of this move at start up is pretty high, but during the latter part he can be knocked out of it and he is still vulnerable to projectiles. | |||
| Damage | Startup | Active | Recovery |
|---|---|---|---|
| - | - | - | - |
| On Hit | On Block | Guard | Invuln |
| - | - | - | - |
|
An immensely painful super that does a TON of damage, even more so than the Final Justice. It ranks up there with being one of the most powerful supers in the game as Wolverine engages in an auto 12 hit combo that ends with a Weapon X slash. This is visually impressive and like the Final Justice you just want to mimick the motions to insult your opponent even more. But being an auto super it will only work if if connects and Wolverine will stop if the opponent blocks leaving him open to attack. It moves extremely quick and will go full screen's distance, not only that it has high priority and will go through any projectile, it even catches Blackheart out of his Armageddon. It has a bit of a start up delay and cannot be comboed, unless if you OTG with this move, but for one measely hit though. This is the prime counter against missed attacks and supers. | |||
Combos
Basic
4 hits- lp, lk, mp, hp.
6 hits- dash, lp, lk, mp, d.mk, d.hp, d.hk .
11 hits- dash, lp, lk, d.mp, berserker barrage. (mash berserker barrage for more hits)
14 hits- mk, mk, berserker barrage x
Intermediate
9 hits- lp, lk, d.mp, hk, sj.lp, sj.lk, sj.mp, sj.mk, sj.hk
15 hits- j.lp, j.lk, j.mp, j.hk, dash, lp, lk, d.mp, hk, sj.lp, sj.lk, sj.mp, sj.mp, sj.mk, sj.hp, sj.hk.
Advanced
various hits- j.hp, j.hk, dash, lp, lk, d.mp, d.hk, sj.lp, sj.lk, sj.mp, dive kick, sj.hk, land, hk, sj.lp, sj.lk, sj.mp, drill claw diagonal down, sj.lp, dive kick, sj.hp, sj.hk, land, lp, hk, sj.lp, sj.lk, sj.mp, dive kick, sj.hp, sj.hk, berserker barrage x.......i've gotten this entire combo to work a couple times, and other times they get dizzy before its finished.......must be done in corner.
Infinites
Dash lp, lk, mp, (d+dash, lk, mp)......repeat bracket.....you have to cancel mp, by pressing down afterward....expect this from every major wolverine player
Dash, lp, lk, d.mp, (hk, sj.lp, sj.lk, sj.mp, dive kick, sj.hp, sj.hk).....dash and repeat bracket....opponent will get dizzy after 4 reps.
Dash, lp, lk, d.mp, hk, sj.lp, sj.lk, sj.mp, dive kick, sj.hp, sj.hk, (j.lp, j.lk, j.mp, j.mp, j.hp, j.hk)....repeat brackets.....must be done in corner. (or shuma gorath stage anywhere)
Wolverine's FSD Infinite- j.hp, j.hk, dash, lp, lk, d.mp, hk, sj.lp, sj.lk, sj.mp, sj.mp, drill claw diagonal up, sj.lp, sj.hk, (hold foward which allows you to switch sides before falling) sj.lk, (you should be on opposite side), (j.lk, j.mp, j.mp, j.mk)....repeat last bracket......wolverine's hardest infinite by far.....if you dont have timing, you need to get yourself some practice. http://www.youtube.com/watch?v=owfTrKmIy1A........ check out 7:24 on the video for how it should be done.
Semi-Infinite
with time gem- (f, f, lp, lk, mp)...repeat bracket.....opponent should get dizzy by the end of time gem.

