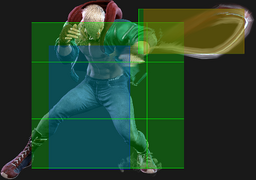
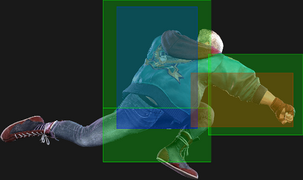
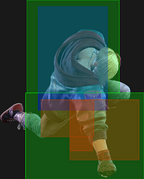
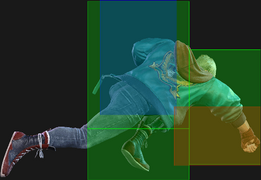
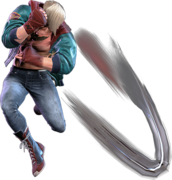
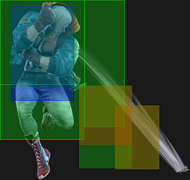
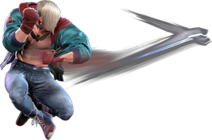
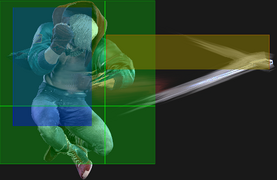
| Line 681: | Line 681: | ||
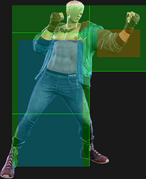
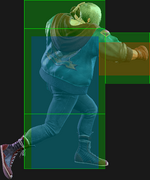
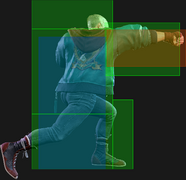
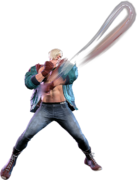
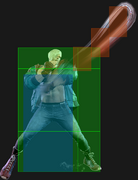
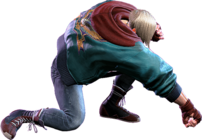
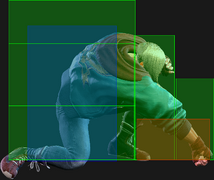
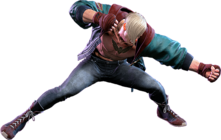
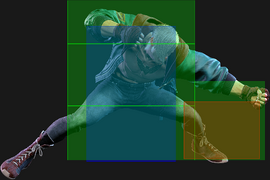
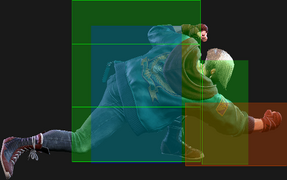
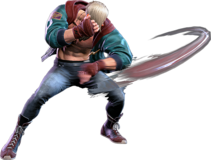
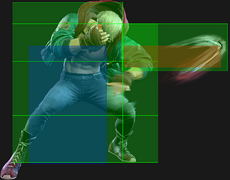
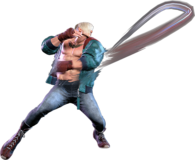
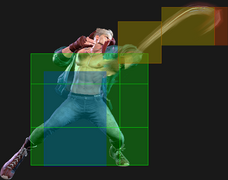
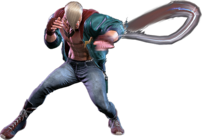
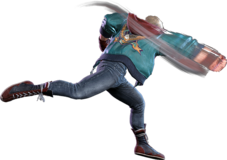
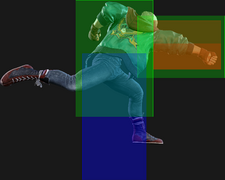
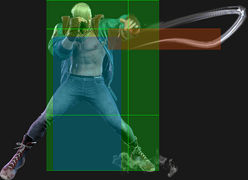
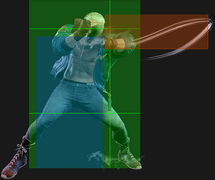
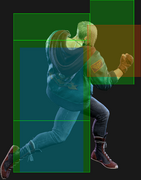
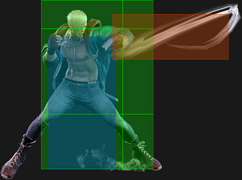
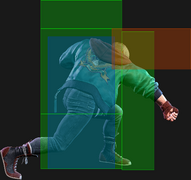
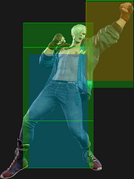
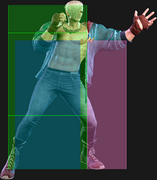
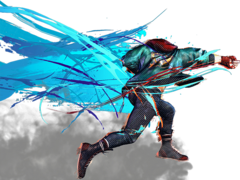
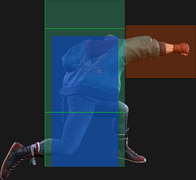
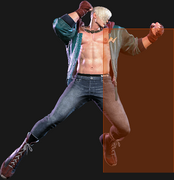
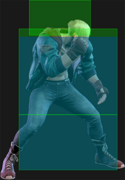
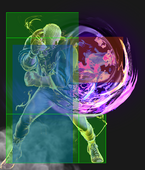
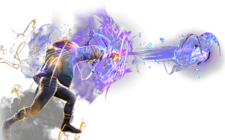
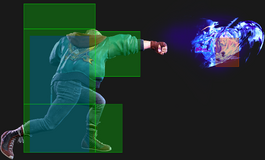
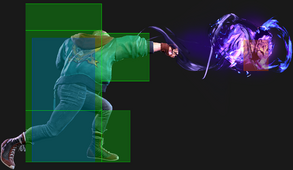
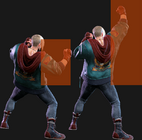
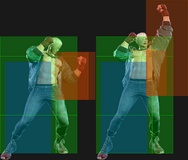
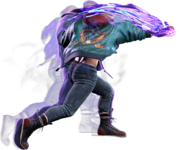
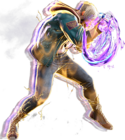
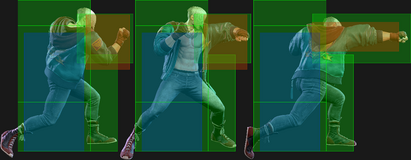
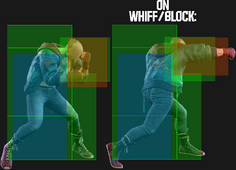
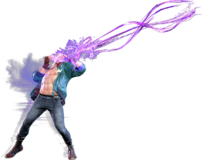
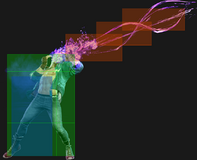
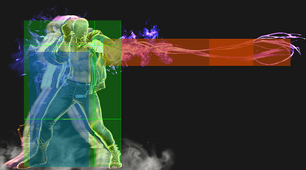
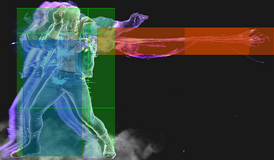
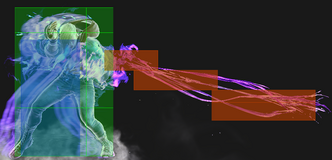
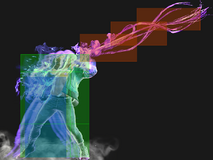
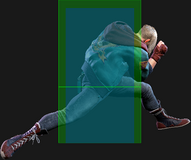
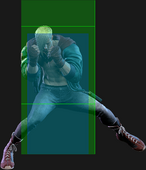
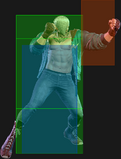
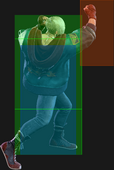
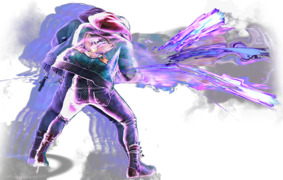
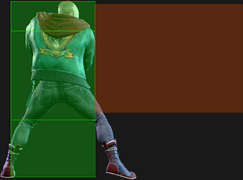
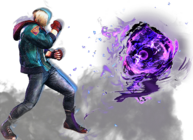
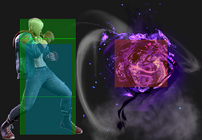
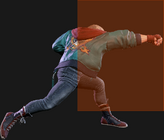
{{MoveDataCargoImage|hitbox=yes|imageHeight=160px|ed_236hk_hold|caption=}} | {{MoveDataCargoImage|hitbox=yes|imageHeight=160px|ed_236hk_hold|caption=}} | ||
| info = | | info = | ||
{{AttackDataCargo-SF6/Query| | {{AttackDataCargo-SF6/Query|ed_236lk_hold}} | ||
* | * | ||
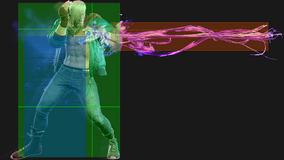
{{AttackDataCargo-SF6/Query| | {{AttackDataCargo-SF6/Query|ed_236mk_hold}} | ||
* | * | ||
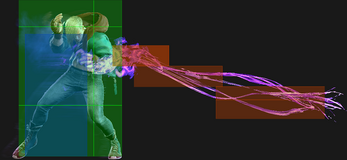
{{AttackDataCargo-SF6/Query| | {{AttackDataCargo-SF6/Query|ed_236hk_hold}} | ||
* | * | ||
<br> | <br> | ||
Revision as of 13:42, 27 February 2024
| Early game information
This game is relatively new, and its pages are still being written. Some information may be mildly inaccurate or missing altogether. You can join the SF6 Resource Hub for more info on editing and other ways you can potentially help with this resource. |
Introduction
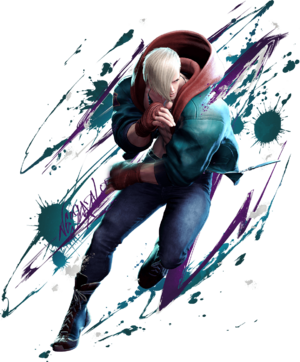
A Psycho Power-wielding youth aged up rapidly by Shadaloo's experimentation, on a journey and a mission to free other subjects. He gets his short temper and foul mouth from Balrog, his former mentor.
Ed is a midrange zoner/ranged character with strong emphasis on hard callouts and looping okizeme. In contrast to the usual "boxer" archetype, Ed prefers to play things out in the midrange. Where Balrog was a rushdown pressure fighter, and Dudley is a counter-punching orthodox, Ed is an outfighter with flicker-style jabs modelled after Thomas Hearns. Ed is most comfortable giving his opponents a bit of breathing room, where his excellent pokes can go to work.
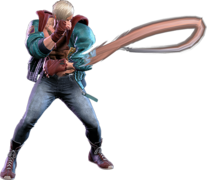
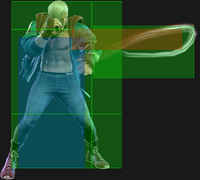
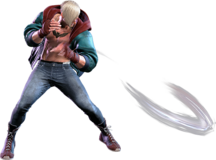
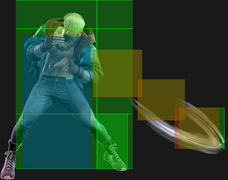
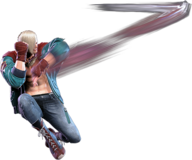
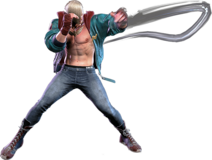
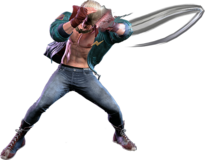
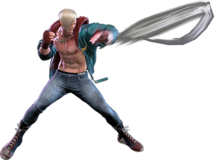
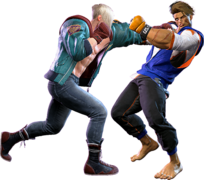
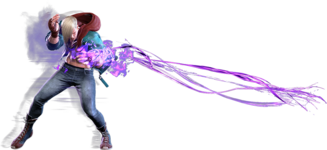
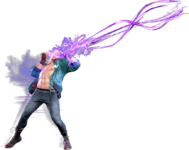
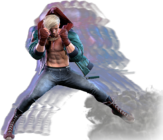
Ed's signature move is Psycho Flicker, which comes in an uncharged and charged variant. While uncharged, Psycho Flicker acts medium-range lash special, keeping opponents back. While good for holdingspace in front of Ed, it really shines when charged up, where it gains the properties of pulling Ed's opponents towards him on hit or block. If the charged hit lands, the opponent is put in a juggle state, while on block they are pulled next to Ed while leaving him at +4. Ed's entire gameplan centers around use (and abuse) of this move. It can be used as anything from a neutral detterent, to a pressure reset, to even a full on okizeme tool for maintaining advantage. While flicker is unsafe, Ed can cancel out of a flicker charge with Kill Rush, a command dash which lets him either pull back to dodge DI attempts or close in for a throw.
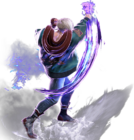
Ed's other specials are a standard suite of tools. Psycho Spark is a swipe that can nullify projectiles or be used as okizeme tool. It also has a followup that allows Ed to shoot his own fireballs, each of which has great speed for their button strength. Psycho Upper is a standard grounded uppercut with good combo utility, and Psycho Blitz is a very good combo ender. What is particularly notable about Blitz and Upper is that they both set up excellent safejumps no matter the screen location, allowing Ed to continue offense easily after a combo. Both enders also leave opponents at great screen distance if he chooses not to follow up. Ed's most notable move outside of this collection is Psycho Cannon, a fireball super that can be tacked onto combos, used as a pressure extender/mixup tool, or thrown out in neutral to follow behind it, using this maneuver right after EX Psycho Blitz can lead to some of the most free form, corner carry, and devastating combos in the game if you’re willing to spend the meter/bar.
Ed's gameplan is focused around holding distance with his incredible pokes before calling out the opponent's hesitation. All of Ed's kick normals are "flicker" jabs that have absurd range for their button strength. Many of these buttons are special cancellable, giving Ed the ability to be an excellent whiff-punisher if he chooses. If opponents respects Ed too much, he can charge a Psycho Flicker and yoink them close for a huge callout, or back off more and make them come to him. While Ed does have to consistently play around Drive Parry, calling out parry attempts by cancelling Flicker into Kill Switch gives Ed excellent reward. Ed's consistent safejumps, great damage and solid throw game only magnify his offensive prowess.
This midrange power comes at a huge cost, however. Ed's close range offensive options, particularly his jabs, are downright terrible. He has no ways to generate plus frames without committing to a big read with Psycho Flicker, and he notably lacks any kind of overhead option for mixups. This bad close-range offense even extends to his reversal options. While Light Upper is a good anti-air, OD Upper is able to be safejabbed, and his Level 1 Psycho Storm super has similar issues. This means that Ed really struggles to escape pressure situations even if he takes a huge risk, and it can be difficult for him to jab check whatsoever. All in all, Ed excels when he's in control of the match. When the opponent is sitting right where he wants them, Ed excels with dominating neutral control and a snowballing gameplan. If you like unconventional zoning, Hitman-style boxing, and can stay cool when put in the corner, Ed will put your opponents on the ropes.
| Pick if you like: | Avoid if you dislike: |
|---|---|
|
|
Classic & Modern Versions Comparison
| Missing Normals |
|
|---|---|
| Missing Command Normals |
|
| Shortcut-Only Specials |
|
| Assist Combos |
|
| Miscellaneous Changes |
|
| Ed | |
|---|---|
| Vitals | |
| Life Points | 10000 |
| Ground Movement | |
| Forward Walk Speed | 0.0475 |
| Backward Walk Speed | 0.032 |
| Forward Dash Speed | 19 |
| Backward Dash Speed | 23 |
| Forward Dash Distance | 1.348 |
| Backward Dash Distance | 0.803 |
| Drive Rush Min. Distance (Throw) | 0.910 |
| Drive Rush Min. Distance (Block) | 2.190 |
| Drive Rush Max Distance | 3.374 |
| Jumping | |
| Jump Speed | 4+38+3 |
| Jump Apex | 2.115 |
| Forward Jump Distance | 1.90 |
| Backward Jump Distance | 1.52 |
| Throws | |
| Throw Range | 0.8 |
| Throw Hurtbox | 0.33 |
| Frame Data Glossary - SF6 | |
|---|---|
| Hitbox Images |
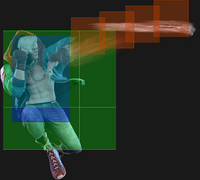
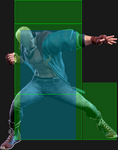
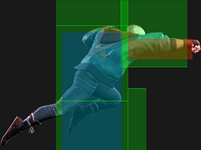
🟥 (Red): Attack hitbox
🟩 (Green): Vulnerable hurtbox that can be hit by strikes/projectiles
🟦 (Blue): Vulnerable throw hurtbox
|
| Active |
How many frames a move remains active (can hurt opponents) for. For projectiles with a maximum active period, a value may be listed in [brackets], but this number is not factored into the move's total frame count.
|
| Cancel |
Available options for canceling one move into another move.
|
| Cancel Hitconfirm Windows |
Hitconfirm reaction windows into Special Moves, Target Combos, and Super Arts.
|
| Damage |
Attack damage on hit. Multi-hit moves may have the damage listed for individual hits as X,Y (or sometimes X*Y). Sometimes a move's damage changes depending on which active frame connects, or on cinematic vs. non-cinematic hits; in this case, multiple values may be listed, and it will be clarified in the move description.
|
| Damage Scaling |
Some moves cause additional damage scaling in combos. Refer to Game Data page for a more detailed breakdown. Scaling Types:
|
| Drive Rush Cancel Advantage |
Refers to the frame advantage when canceling a normal, command normal, or Target Combo into Drive Rush on hit or block (abbreviated as DRC for Drive Rush Cancel). This is calculated at the moment a follow-up attack can be input, not at the moment the character can block or perform movement options. An attack that with DRC +8 on Hit can link into an 8-frame attack, and DRC +4 on Block can create a true blockstring into a 4-frame attack. Note that any DRC on Block worse than +4 cannot form a true blockstring, allowing the opponent to interrupt with an invincible reversal. Most light normals are slightly negative after a DRC on block, meaning the opponent can mash their fastest normal to guarantee a counter-hit (though this requires fast reactions). The attacking character could punish this with Light > DRC into an immediate invincible attack, but this would be an incredibly expensive and high-risk gambit.
|
| Forced Knockdown |
Most airborne command normals, special moves, and Super Arts put the user in a "Forced Knockdown" state. While in this state, an air knockdown will occur when being hit by any attack, even if it would otherwise cause an air reset. As an example, Ryu's 2HP causes an air reset when used as an anti-air. Against a move like Cammy's Hooligan Combination, however, the 2HP puts her into an air knockdown state. This allows Ryu to successfully cancel 2HP into Shoryuken for a juggle, similar to how a Drive Impact wall splat works. Taking advantage of Forced Knockdown juggles is important for dealing with moves like Ken's Dragonlash, Dhalsim's Air Teleport, or Kimberly's 6HK~Hop sequence. Moves that already cause an air knockdown, like most j.MP air-to-airs, will not display the "Forced Knockdown" message.
|
| Guard |
Refers to the direction an attack must be blocked. L is for Low attacks (must be blocked crouching), H is for High attacks/overheads (must be blocked standing), LH is for attacks that can be blocked crouching or standing. T is for Throw attacks which cannot be blocked.
|
| Juggles |
When a character is put into an Air Knockdown state, it is often possible to follow up with a Juggle attack before they hit the ground. In the simplest terms, there are 2 main juggle states:
The following is a more detailed overview of the SF6 juggle system:
Juggle Start (JS): When starting a juggle, the opponent's JC will be set to this value. May be different vs. standing and airborne opponents.
Juggle Increase (JI): When opponent is already in a juggle state, attacks will increase the opponent's JC by this amount.
Juggle Limit (JL): Property of an attack hitbox that determines whether it connects on a juggled opponent. The JL must be ≥ the opponent's JC to hit successfully.
An example to tie everything together:
Drive Rush notes:
More recently, the official definitions used by Capcom are slightly different than these community-designated terms. When reading official patch notes, the following terms are used instead:
|
| On Hit/Block |
These are frame advantage values when the attack hits or is blocked. If the number is positive, then the move will recover before the defender can act again. If the number is negative, the defender will be able to act before the attacker and maybe even punish. KD refers to knockdown on hit, and the listed KD Advantage refers to how many frames the attacker can act before the defender finishes their wakeup animation.
|
| Recovery |
How many frames it takes for a move to finish after the active frames have finished. For projectiles, recovery is considered to begin after the first active frame.
|
| Startup |
How many frames it takes before the move becomes 'active' or have a hit box. The last startup frame and the first active frame are the same frame, meaning all values are written as Startup + 1.
|
| IASA / Actionable Recovery |
Some moves play out an extended recovery animation when no other button/direction is input (for crouching moves, it applies when holding any down direction). These are often referred to as "actionable recovery" frames; in some games, the term IASA (Interruptible As Soon As) refers to the frame that Actionable Recovery begins. Letting the Actionable Recovery frames play out can change the character's position, potentially setting up spacing traps by recovering farther away. For example, Manon 5HP will recover much farther away from the opponent if no input is performed immediately after her recovery; holding back or down-back to block will keep her much closer to the opponent.
|
Normals
Standing Normals
5LP
| Startup | Active | Recovery | Cancel | Damage | Guard | On Hit | On Block |
|---|---|---|---|---|---|---|---|
| 4 | 3 | 7 | Chn Sp SA | 300 | LH | +4 | -1 |
5MP
| Startup | Active | Recovery | Cancel | Damage | Guard | On Hit | On Block |
|---|---|---|---|---|---|---|---|
| 7 | 3 | 15 | Sp SA TC | 600 | LH | +6 | -1 |
5HP
| Startup | Active | Recovery | Cancel | Damage | Guard | On Hit | On Block |
|---|---|---|---|---|---|---|---|
| 10 | 4 | 18 | Sp SA | 800 | LH | +5 | -2 |
5LK
| Startup | Active | Recovery | Cancel | Damage | Guard | On Hit | On Block |
|---|---|---|---|---|---|---|---|
| 6 | 2 | 13 | TC | 300 | LH | +3 | -3 |
5MK
| Startup | Active | Recovery | Cancel | Damage | Guard | On Hit | On Block |
|---|---|---|---|---|---|---|---|
| 10 | 2 | 16(20) | Sp SA TC | 600 | LH | 0 | -5 |
5HK
| Startup | Active | Recovery | Cancel | Damage | Guard | On Hit | On Block |
|---|---|---|---|---|---|---|---|
| 10 | 3 | 12 | Sp SA | 800 | LH | +8 | +4 |
Crouching Normals
2LP
| Startup | Active | Recovery | Cancel | Damage | Guard | On Hit | On Block |
|---|---|---|---|---|---|---|---|
| 4 | 3 | 10 | Chn | 200 | L | +3 | -3 |
2MP
| Startup | Active | Recovery | Cancel | Damage | Guard | On Hit | On Block |
|---|---|---|---|---|---|---|---|
| 8 | 3 | 19 | Sp SA | 500 | L | +2 | -6 |
2HP
| Startup | Active | Recovery | Cancel | Damage | Guard | On Hit | On Block |
|---|---|---|---|---|---|---|---|
| 10 | 4 | 24 | - | 900 | L | KD +30 | -12 |
2LK
| Startup | Active | Recovery | Cancel | Damage | Guard | On Hit | On Block |
|---|---|---|---|---|---|---|---|
| 5 | 2 | 12 | Sp SA | 300 | LH | +2 | -4 |
2MK
| Startup | Active | Recovery | Cancel | Damage | Guard | On Hit | On Block |
|---|---|---|---|---|---|---|---|
| 9 | 2 | 16(17) | Sp SA | 600 | LH | +8 | -1 |
2HK
| Startup | Active | Recovery | Cancel | Damage | Guard | On Hit | On Block |
|---|---|---|---|---|---|---|---|
| 12 | 2 | 17 | Sp SA TC | 800 | LH | +1 | -4 |
Jumping Normals
j.LP
| Startup | Active | Recovery | Cancel | Damage | Guard | On Hit | On Block |
|---|---|---|---|---|---|---|---|
| 5 | 5 | 3 land | - | 300 | H | +5(+9) | +1(+5) |
j.MP
| Startup | Active | Recovery | Cancel | Damage | Guard | On Hit | On Block |
|---|---|---|---|---|---|---|---|
| 8 | 6 | 3 land | - | 500 | H | +6(+13) | +2(+9) |
- Can hit cross-up
j.HP
| Startup | Active | Recovery | Cancel | Damage | Guard | On Hit | On Block |
|---|---|---|---|---|---|---|---|
| 9 | 5 | 3 land | - | 800 | H | +8(+15) | +4(+11) |
j.LK
| Startup | Active | Recovery | Cancel | Damage | Guard | On Hit | On Block |
|---|---|---|---|---|---|---|---|
| 8 | 3 | 3 land | - | 300 | H | +1(+9) | -3(+5) |
j.MK
| Startup | Active | Recovery | Cancel | Damage | Guard | On Hit | On Block |
|---|---|---|---|---|---|---|---|
| 10 | 2 | 3 land | - | 700 | H | +9(+11) | +5(+7) |
j.HK
| Startup | Active | Recovery | Cancel | Damage | Guard | On Hit | On Block |
|---|---|---|---|---|---|---|---|
| 8 | 2 | 3 land | - | 800 | H | +15 | +11 |
Command Normals
5[HP]
| Startup | Active | Recovery | Cancel | Damage | Guard | On Hit | On Block |
|---|---|---|---|---|---|---|---|
| 30+9 | 1~15 | 25~35 | 6KK* | 800 | LH | Crumple +76 (+12 ground) | -2(+2) |
- Side switch on hit/block; crumple on hit
- Cancelable into 5/6KK on frames ?-?
| Startup | Active | Recovery | Cancel | Damage | Guard | On Hit | On Block |
|---|---|---|---|---|---|---|---|
| 60+9 | 1~15 | 29~35 | 6KK* | 1200 | LH | Crumple +76 (+12 ground) | +4 |
- Side switch on hit/block; crumple on hit
- Cancelable into 5/6KK on frames ?-?
6HP
| Startup | Active | Recovery | Cancel | Damage | Guard | On Hit | On Block |
|---|---|---|---|---|---|---|---|
| 17 | 3 | 21 | - | 900 | LH | +1 | -3 |
- Low Crush ?-?f
A forward-moving leaping punch useful for hopping over the opponent's low pokes.
Target Combos
5LK~LK~LK
| Startup | Active | Recovery | Cancel | Damage | Guard | On Hit | On Block |
|---|---|---|---|---|---|---|---|
| 7 | 3 | 15 | TC | 400(320) | LH | +3 | -3 |
| Startup | Active | Recovery | Cancel | Damage | Guard | On Hit | On Block |
|---|---|---|---|---|---|---|---|
| 7 | 3 | 16 | - | 600(420) | LH | +1 | -8 |
5MP~HP
| Startup | Active | Recovery | Cancel | Damage | Guard | On Hit | On Block |
|---|---|---|---|---|---|---|---|
| 13 | 2 | 23 | Sp* SA | 400 | LH | KD +38 | -8(-23) |
- Cancelable into and special/super except 4KK
5MK~MK~HP
| Startup | Active | Recovery | Cancel | Damage | Guard | On Hit | On Block |
|---|---|---|---|---|---|---|---|
| 7 | 2 | 20 | TC | 300 | LH | 0(-15) | -6(-20) |
| Startup | Active | Recovery | Cancel | Damage | Guard | On Hit | On Block |
|---|---|---|---|---|---|---|---|
| 11 | 5 | 23 | - | 600(480) | LH | KD +35 | -11 |
2HK~HP
| Startup | Active | Recovery | Cancel | Damage | Guard | On Hit | On Block |
|---|---|---|---|---|---|---|---|
| 12 | 5 | 19 | SA | 700 | LH | KD +34 | -8 |
Throws
Forward Throw (LPLK)
| Startup | Active | Recovery | Cancel | Damage | Guard | On Hit | On Block |
|---|---|---|---|---|---|---|---|
| 5 | 3 | 23 | - | 1200 (2040) | T | KD +24 | - |
- Punish Counter: +? HKD
Back Throw (4LPLK)
| Startup | Active | Recovery | Cancel | Damage | Guard | On Hit | On Block |
|---|---|---|---|---|---|---|---|
| 5 | 3 | 23 | - | 1200 (2040) | T | KD +24 | - |
- Side switches
- Punish Counter: +? HKD
Drive System
Drive Impact (HPHK)
| Startup | Active | Recovery | Cancel | Damage | Guard | On Hit | On Block |
|---|---|---|---|---|---|---|---|
| 26 | 2 | 35 | - | 800 | LH | KD +35 / Wall Splat KD +65 | -3 / Wall Splat HKD +72 |
- Armor (2-hit): 1-27f
- Applies 20% damage scaling to next hit when beginning a combo (including Wall Splat on block)
See Drive Impact on the Gauges page for more details.
When canceled from a normal, these are the important blockstring gaps; a gap of N will trade with an N-frame startup attack; [] = Burnout
- -
- Note: A gap ≥ 6f can be thrown, and a gap ≥ 9f can be jumped out of by most characters
Drive Reversal (6HPHK)
| Startup | Active | Recovery | Cancel | Damage | Guard | On Hit | On Block |
|---|---|---|---|---|---|---|---|
| 20 | 3 | 26(31) | - | 500 recoverable | LH | KD +23 | -6 |
- Full Invuln: 1-22f; Armor Break
See Drive Reversal on the Gauges page for more details.
Drive Parry (MPMK)
| Startup | Active | Recovery | Cancel | Damage | Guard | On Hit | On Block |
|---|---|---|---|---|---|---|---|
| 1 | 12 or until released | 33(1)(11) | - | - | - | - | - |
See Drive Parry on the Gauges page for more details.
- Perfect Parry:
- Applies a 50% damage scaling multiplier to any punish afterwards
- vs. strikes, has only 1f recovery and prevents the opponent from canceling their attack
- vs. projectiles, puts you into a fixed 11f recovery
Drive Rush (66)
No results
- Applies 15% damage scaling multiplier to any follow-up hits when used mid-combo
- Only applies scaling once per combo; does not apply when an enhanced Drive Rush attack starts the combo
See Drive Rush on the Gauges page for more details. Frame data shown in (parentheses) refers to Parry Drive Rush.
- Distance:
- ? (min, cancel into immediate Throw)
- ? (min, earliest blocking/movement frame)
- ? (max, final DR frame)
- See Strategy page for Blockstring Gaps and Combo Routes
Special Moves
Psycho Spark (236P)
| Startup | Active | Recovery | Cancel | Damage | Guard | On Hit | On Block |
|---|---|---|---|---|---|---|---|
| 14 | 12 | 8 | 6P* SA3 | 400 | LH | +3 | -5 |
- Cancelable into regular 6P follow-up
| Startup | Active | Recovery | Cancel | Damage | Guard | On Hit | On Block |
|---|---|---|---|---|---|---|---|
| 14 | 12 | 7 | 6P* SA2 SA3 | 200x2 | LH | KD +43 | -2 |
- Cancelable into OD 6P follow-up for no extra Drive cost
Psycho Shoot (236P~6P)
| Startup | Active | Recovery | Cancel | Damage | Guard | On Hit | On Block |
|---|---|---|---|---|---|---|---|
| 12 | - | 30 | SA3 | 600 | LH | +3 | -8 |
- Button strength determines projectile speed (LP slow, MP mid, HP fast)
- Projectile Speed: ? / ? / ?
| Startup | Active | Recovery | Cancel | Damage | Guard | On Hit | On Block |
|---|---|---|---|---|---|---|---|
| 12 | - | 28 | SA2 SA3 | 400x2 | LH | KD +46~ | -2 |
- Only possible after 236PP starter (does not cost additional Drive meter)
- Button strength determines projectile speed (LP slow, MP mid, HP fast)
- Projectile Speed: ? / ? / ?
Psycho Uppercut (623P)
| Startup | Active | Recovery | Cancel | Damage | Guard | On Hit | On Block |
|---|---|---|---|---|---|---|---|
| 10 | 8 | 23(28) | SA3 | 900 | LH | KD +38 | -13 |
- Anti-Air Invuln: 1-?f; stands in place
- Allows follow-up juggle on high connect
| Startup | Active | Recovery | Cancel | Damage | Guard | On Hit | On Block |
|---|---|---|---|---|---|---|---|
| 14 | 6 | 32 | SA3 | 1000 | LH | KD +39 | -20 |
- Anti-Air Invuln: 1-?f; takes slight step forward
| Startup | Active | Recovery | Cancel | Damage | Guard | On Hit | On Block |
|---|---|---|---|---|---|---|---|
| 16 | 6 | 33 | SA3 | 1200 | LH | KD +38 | -21 |
- Anti-Air Invuln: 1-?f; takes large step forward
| Startup | Active | Recovery | Cancel | Damage | Guard | On Hit | On Block |
|---|---|---|---|---|---|---|---|
| 13 | 6 | 36(41) | - | 800x2 | LH | KD +18 | -28 |
- Full Invuln: 1-?f; takes large step forward
Psycho Blitz (214P)
| Startup | Active | Recovery | Cancel | Damage | Guard | On Hit | On Block |
|---|---|---|---|---|---|---|---|
| 11 | 3(3)3(6)4 | 14 | SA3 | 200x2,400 (800) | LH | +3 | -5 |
| Startup | Active | Recovery | Cancel | Damage | Guard | On Hit | On Block |
|---|---|---|---|---|---|---|---|
| 13 | 2(7)3(9)3 | 16(24) | SA3 | 250x2,400 (900) | LH | KD +39 | -12 |
| Startup | Active | Recovery | Cancel | Damage | Guard | On Hit | On Block |
|---|---|---|---|---|---|---|---|
| 15 | 2(11)2(6)2 | 23(26) | SA3 | 250x2,600 (1100) | LH | KD +40 | -12 |
| Startup | Active | Recovery | Cancel | Damage | Guard | On Hit | On Block |
|---|---|---|---|---|---|---|---|
| 13 | 1(4)1(3)1(3) 1(3)1(3)1(8)2 |
20 | SA2 SA3 | 150x8,200 (1400) | LH | KD +42 | -4 |
Psycho Flicker (236K)
| Startup | Active | Recovery | Cancel | Damage | Guard | On Hit | On Block |
|---|---|---|---|---|---|---|---|
| 11+5 | 4 | 26(24) | SA3 Sp* | 800 | LH | +1 | -6 |
| Startup | Active | Recovery | Cancel | Damage | Guard | On Hit | On Block |
|---|---|---|---|---|---|---|---|
| 15+5 | 4 | 26(25) | SA3 Sp* | 900 | LH | +3 | -6 |
| Startup | Active | Recovery | Cancel | Damage | Guard | On Hit | On Block |
|---|---|---|---|---|---|---|---|
| 12+5 | 8 | 18 | SA3 Sp* | 800 | - | KD +51(+63) | - |
| Startup | Active | Recovery | Cancel | Damage | Guard | On Hit | On Block |
|---|---|---|---|---|---|---|---|
| 25 | 4 | 32 | SA2 SA3 (1st) | 400x2 (600x2) |
LH | KD +61 | +4 |
- Cannot be charged for an improved version
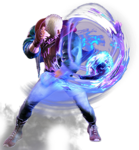
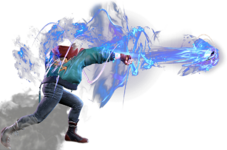
Psycho Flicker (Hold) (236[K])
| Startup | Active | Recovery | Cancel | Damage | Guard | On Hit | On Block |
|---|---|---|---|---|---|---|---|
| 26+5 | 5 | 24 | SA3 (1st) | 800,200 | LH | KD +61 | +4 |
| Startup | Active | Recovery | Cancel | Damage | Guard | On Hit | On Block |
|---|---|---|---|---|---|---|---|
| 30+5 | 5 | 24 | SA3 (1st) | 800,200 | LH | KD +61 | +4 |
| Startup | Active | Recovery | Cancel | Damage | Guard | On Hit | On Block |
|---|---|---|---|---|---|---|---|
| 30+5 | 10 | 19 | SA3 (1st) | 800,200 | - | KD +56(68) | - |
Kill Rush (5/6KK or 4KK)
| Startup | Active | Recovery | Cancel | Damage | Guard | On Hit | On Block |
|---|---|---|---|---|---|---|---|
| - | - | 31 | 6P* | - | - | - | - |
- Can be input with 66 when charging 5[HP] or 236[K]
| Startup | Active | Recovery | Cancel | Damage | Guard | On Hit | On Block |
|---|---|---|---|---|---|---|---|
| - | - | 31 | - | - | - | - | - |
- Can be input with 44 when charging 236[K]
- Cannot be performed from 5MP~HP Target Combo
Kill Switch Break/Chaser (5/6KK~6P)
| Startup | Active | Recovery | Cancel | Damage | Guard | On Hit | On Block |
|---|---|---|---|---|---|---|---|
| 11+11 | 3 | 20 | SA3 | 600 | LH | KD +38 | -4 |
- 6P must be input early out of Kill Rush (Forward)
| Startup | Active | Recovery | Cancel | Damage | Guard | On Hit | On Block |
|---|---|---|---|---|---|---|---|
| 13+11 | 3 | 20 | SA3 | 600 | LH | KD +50 | -6 |
- 6P must be input late out of Kill Rush (Forward)
Super Arts
Level 1 Super (236236K)
| Startup | Active | Recovery | Cancel | Damage | Guard | On Hit | On Block |
|---|---|---|---|---|---|---|---|
| 13 | 2(7)2(16)2(3) 2(16)1(1)1(1)1 |
56 | - | 10x7,1300 (2000) | LH | KD +33 | -32 |
- Full Invuln: 1f; Strike/Throw Invuln: ?-?f; Armor Break
- Drive Gauge Depletion: ? bars (hit) / ? bars (block)
- 30% minimum damage scaling
Level 2 Super (214214P)
| Startup | Active | Recovery | Cancel | Damage | Guard | On Hit | On Block |
|---|---|---|---|---|---|---|---|
| 8 | - | 27 | - | 150x6,200 (1100) | LH | KD +115~ | +65~ |
- Armor Break; button strength determines projectile speed (LP slow, MP mid, HP fast)
- Drive Gauge Depletion: ? bar (hit) / ? bars (block)
- 40% minimum damage scaling
- Projectile Speed: ? / ? / ?
Level 3 Super (236236P)
| Startup | Active | Recovery | Cancel | Damage | Guard | On Hit | On Block |
|---|---|---|---|---|---|---|---|
| 10 | 10 | 64 | - | 4000 | LH | HKD +24 | -49 |
- Full Invuln: 1-?f; Armor Break
- Drive Gauge Depletion: 1.5 bars (hit) / 0.75 bars (block)
- Cinematic time regenerates ~? Drive bars for Ed
- 50% minimum damage scaling; applies 10% immediate damage scaling when canceled from special moves
| Startup | Active | Recovery | Cancel | Damage | Guard | On Hit | On Block |
|---|---|---|---|---|---|---|---|
| 10 | 10 | 64 | - | 4500 | LH | HKD +24 | -49 |
- Full Invuln: 1-?f; Armor Break
- Available at 25% HP or below
- Drive Gauge Depletion: 2 bars (hit) / 1 bar (block)
- Cinematic time regenerates ~? Drive bars for Ed
- 50% minimum damage scaling; applies 10% immediate damage scaling when canceled from special moves
Taunts
Neutral Taunt (5PPPKKK)
| Startup | Active | Recovery | Cancel | Damage | Guard | On Hit | On Block |
|---|---|---|---|---|---|---|---|
| 192 (total) | - | - | - | - | - | - | - |
Forward Taunt (6PPPKKK)
| Startup | Active | Recovery | Cancel | Damage | Guard | On Hit | On Block |
|---|---|---|---|---|---|---|---|
| 304 (total) | - | - | - | - | - | - | - |
Back Taunt (4PPPKKK)
| Startup | Active | Recovery | Cancel | Damage | Guard | On Hit | On Block |
|---|---|---|---|---|---|---|---|
| 370 (total) | - | - | - | - | - | - | - |
