No edit summary |
|||
| Line 14: | Line 14: | ||
| info = | | info = | ||
{{AttackDataCargo-SF6/Query|e.honda_5lp}} | {{AttackDataCargo-SF6/Query|e.honda_5lp}} | ||
*Chains into Double Slap target combo | |||
1 frame slower startup than Honda's other light normals, meaning it will not combo in situations where 2LP will (for example, Honda is +4 on hit after Enhanced Hands). Also makes it slightly worse for mashing out of pressure. | |||
In exchange, target combo out of 5LP lets Honda combo into stronger specials than he would have access too from his other light normals. | |||
Can work as an emergency anti-air against shallow jump-ins in a pinch. | |||
}} | }} | ||
| Line 26: | Line 30: | ||
| info = | | info = | ||
{{AttackDataCargo-SF6/Query|e.honda_5mp}} | {{AttackDataCargo-SF6/Query|e.honda_5mp}} | ||
*Chains into Toko Shizume target combo. | |||
*Moves Honda forward slightly | |||
Honda's only normal that is generically plus on block. Good poke and solid pressure tool. 5MP meaty on opponent's wakeup will let you react to Drive Impact, punishes attempts to mash wakeup jump or wakeup backdash out of Honda's throws, and keeps you at advantage if they block. | |||
Target combo into overhead can open up defensive players, either by letting the 3HK overhead complete or by kara-canceling into Oicho Throw | |||
Canceling 5MP into Drive Rush can start Honda's offense on block, and can be confirmed into 5HK or any normal on hit for good damage. | |||
}} | }} | ||
| Line 38: | Line 48: | ||
| info = | | info = | ||
{{AttackDataCargo-SF6/Query|e.honda_5hp}} | {{AttackDataCargo-SF6/Query|e.honda_5hp}} | ||
Honda chops in a downward arc. Earlier active frames hit close to Honda and above him, later active frames hit lower and farther out. Early active frames (1-?) are special-cancelable. However, the later few active frames can not be canceled, except into Enhanced Hands. | |||
Good anti-air for when Honda does not have Headbutt charged. Can also be used as a counterpoke against characters trying to zone Honda with long-range normals. 20f recovery means it will sometimes be fast enough to punish attempts to Drive Impact through it. | |||
Causes a crumple on Punish Counter. In most cases, Honda can Parry -> Drive Rush 5HK to start a combo off this. | |||
}} | }} | ||
| Line 50: | Line 64: | ||
| info = | | info = | ||
{{AttackDataCargo-SF6/Query|e.honda_5lk}} | {{AttackDataCargo-SF6/Query|e.honda_5lk}} | ||
+5 on hit means it links into 5LP to go into target combo | |||
}} | }} | ||
| Line 74: | Line 88: | ||
| info = | | info = | ||
{{AttackDataCargo-SF6/Query|e.honda_5hk}} | {{AttackDataCargo-SF6/Query|e.honda_5hk}} | ||
Hits twice. First part will force standing on hit (but not on block), second hit whiffs against crouching (in which case Honda is -11 instead of -5). Both hits are special-cancelable, although the first hit causes more hitstun and can combo into things the second hit can not. | |||
First hit of 5HK is Honda's primary way to combo into Taiho Cannon Lift and therefore one of his most important combo tools. Second hit still combos into many useful specials including HP Hands and can be Drive Rush canceled to start an offense similarly to 5MP. | |||
}} | }} | ||
| Line 88: | Line 104: | ||
| info = | | info = | ||
{{AttackDataCargo-SF6/Query|e.honda_2lp}} | {{AttackDataCargo-SF6/Query|e.honda_2lp}} | ||
Very fast and low-commitment jab, can be used to mash out of pressure. 2LP 2LP > LP Hands or 2LP 2LP > LP Headbutt are basic confirms and can even be unpunishable on block due to pushback. | |||
}} | }} | ||
| Line 112: | Line 128: | ||
| info = | | info = | ||
{{AttackDataCargo-SF6/Query|e.honda_2hp}} | {{AttackDataCargo-SF6/Query|e.honda_2hp}} | ||
Relatively low-risk advancing low poke. Because it moves Honda forward, it can be used to advance without letting go of a down-back charge. | |||
Drive Rush into 2HP is a low attack to pair with 3HK overhead, will be plus on block, and links into 5LP target combo on hit. | |||
}} | }} | ||
| Line 147: | Line 165: | ||
| info = | | info = | ||
{{AttackDataCargo-SF6/Query|e.honda_2hk}} | {{AttackDataCargo-SF6/Query|e.honda_2hk}} | ||
Hits twice, but the second hit is behind Honda, where it will almost never connect. | |||
Outclassed by 6HK in terms of range and is more likely to be punished on block, but is slightly faster and will score a Hard Knockdown even on a normal hit. | |||
}} | }} | ||
| Line 228: | Line 249: | ||
| info = | | info = | ||
{{AttackDataCargo-SF6/Query|e.honda_6hk}} | {{AttackDataCargo-SF6/Query|e.honda_6hk}} | ||
Honda advances forward while attacking with a standing Low kick. Forward movement gives 6HK surprising range which can clip opponents who are playing footsies from outside of his usual poke range. | |||
Drive Rush into 6HK is +7 and can connect unexpectedly from nearly full-screen. Letting Honda confirm into 5LP target combo. | |||
}} | }} | ||
Revision as of 17:45, 3 June 2023
| Pre-release information
This page is under construction based on pre-release data. Join the SF6 Resource Hub for info on editing. |
Introduction
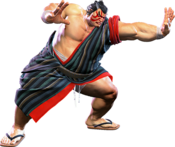
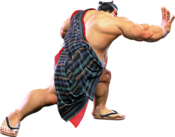
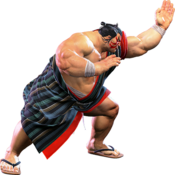
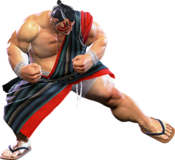
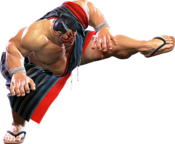
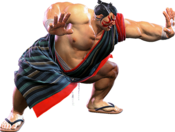
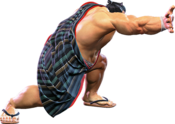
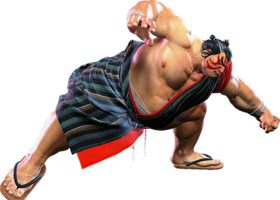
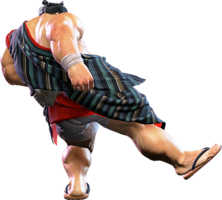
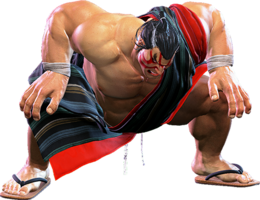
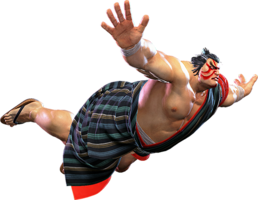
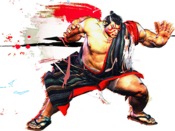
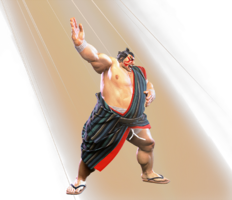
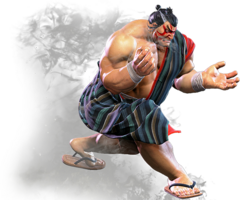
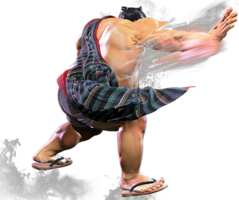
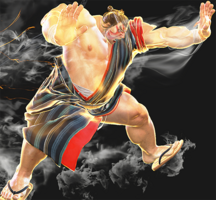
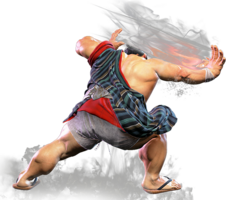
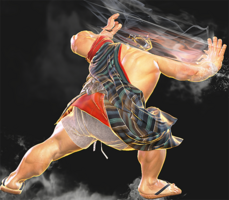
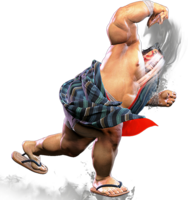
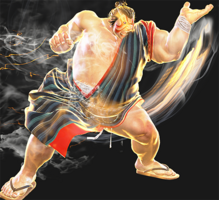
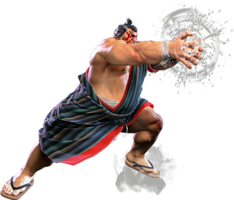
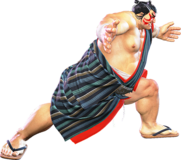
A sumo wrestler looking to bring the sport worldwide, E. Honda has the skills of a yokozuna, but his constant globetrotting has prevented his promotion. Also an expert chef renowned for mouthwatering chanko stew.
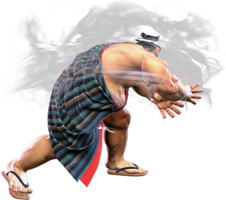
Edmond Honda is a powerful and aggressive rushdown character with a speciality in long-range advancing offense. Honda's entire gameplan revolves around his signature sumo moves, burying opponents under a barrage of slaps, headbutts and ground slams until he's the only one left standing.
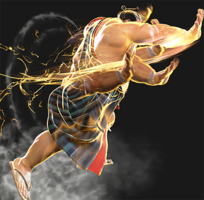
Honda's core move is Sumo Headbutt, a forward-moving special that just about does it all. If blocked normally, headbutt is safe and deals significant damage to the opponent's drive gauge. On hit, headbutt deals 1000+ damage and knocks down, leading to strong setplay. At close ranges, the headbutt is fast to start up and is difficult to react to or punish. Headbutt is also an anti-air, and OD headbutt has armor frames and works as a reversal. Opponents therefore can't carelessly approach Honda, as successful headbutts will get them slammed backwards. If opponents choose to block, they will burn out due to drive gauge damage, allowing Honda to begin nearly endless pressure against them. This forces opponents to take action and make risky guesses, and Honda capitalizes by forcing these interactions.
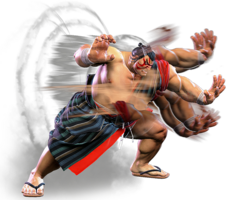
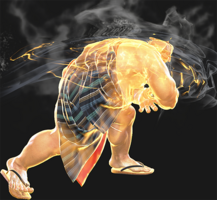
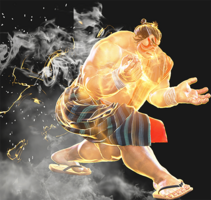
Outside of headbutt, Honda also has a great set of brawling tools. In close range, Honda has strong normals and target combos. Standing medium punch (5MP) is +1 on block and leads to tricky offensive sequences. At far range, Honda can poke with crouching medium punch (2MP) and Harai Kick (6HK). Oicho Throw (a damage-dealing command grab) and Sumo Smash (a combo finisher and anti-air that is plus on block) round out Honda's offense. Once he's gotten the hit, Honda is capable of dealing exceptional damage thanks to the mighty Hundred-Hand Slap, an incredible combo starter/filler/ender that is safe on block. Allowing Honda to stay still at fullscreen will let him apply Sumo Spirit, a buff that makes successful conversions with Hundred-Hand Slap hurt even more. All of this can make Honda very difficult to deal with once he's gotten close.
While Honda's offense is nothing short of devastating, it does have one major weakness: commitment. Unlike a lot of characters, Honda is all-in or all-out. He has poor movement speed, meaning his footsies can be somewhat lacking. He lacks a throw loop, and Oicho Throw resets him back to neutral on landing it. While Honda has great pokes, his Medium normals are notably either stubbier or slower than the majority of the cast, and he lacks a low to cancel into Drive Rush for demonstrating neutral control. Thus, Honda relies quite a bit on headbutt to get the job done in many matchups. That said, headbutt is a fantastic move that compliments Honda's gameplan well, so smart Honda players have to learn when to go ham and when to back off and be patient. Honda rewards both styles well, as any sumo should. If you love getting up close and personal and live for the feeling of landing a good headbutt or hand slap, there's no better Rikishi to show you the ropes than E. Honda.
| Pick if you like: | Avoid if you dislike: |
|---|---|
|
|
Classic & Modern Versions Comparison
| Missing Normals |
|
|---|---|
| Missing Command Normals |
|
| Shortcut-Only Specials |
|
| Assist Combos |
|
| Miscellaneous Changes |
|
| E. Honda | |
|---|---|
| Vitals | |
| Life Points | 10500 |
| Ground Movement | |
| Forward Walk Speed | 0.045 |
| Backward Walk Speed | 0.025 |
| Forward Dash Speed | 19 |
| Backward Dash Speed | 23 |
| Forward Dash Distance | 1.058 |
| Backward Dash Distance | 0.601 |
| Drive Rush Min. Distance (Throw) | 0.213 |
| Drive Rush Min. Distance (Block) | 1.769 |
| Drive Rush Max Distance | 3.375 |
| Jumping | |
| Jump Speed | 4+38+3 |
| Jump Apex | 2.115 |
| Forward Jump Distance | 1.90 |
| Backward Jump Distance | 1.52 |
| Throws | |
| Throw Range | 0.9 |
| Throw Hurtbox | 0.43 |
| Frame Data Glossary - SF6 | |
|---|---|
| Hitbox Images |
🟥 (Red): Attack hitbox
🟩 (Green): Vulnerable hurtbox that can be hit by strikes/projectiles
🟦 (Blue): Vulnerable throw hurtbox
|
| Active |
How many frames a move remains active (can hurt opponents) for. For projectiles with a maximum active period, a value may be listed in [brackets], but this number is not factored into the move's total frame count.
|
| Cancel |
Available options for canceling one move into another move.
|
| Cancel Hitconfirm Windows |
Hitconfirm reaction windows into Special Moves, Target Combos, and Super Arts.
|
| Damage |
Attack damage on hit. Multi-hit moves may have the damage listed for individual hits as X,Y (or sometimes X*Y). Sometimes a move's damage changes depending on which active frame connects, or on cinematic vs. non-cinematic hits; in this case, multiple values may be listed, and it will be clarified in the move description.
|
| Damage Scaling |
Some moves cause additional damage scaling in combos. Refer to Game Data page for a more detailed breakdown. Scaling Types:
|
| Drive Rush Cancel Advantage |
Refers to the frame advantage when canceling a normal, command normal, or Target Combo into Drive Rush on hit or block (abbreviated as DRC for Drive Rush Cancel). This is calculated at the moment a follow-up attack can be input, not at the moment the character can block or perform movement options. An attack that with DRC +8 on Hit can link into an 8-frame attack, and DRC +4 on Block can create a true blockstring into a 4-frame attack. Note that any DRC on Block worse than +4 cannot form a true blockstring, allowing the opponent to interrupt with an invincible reversal. Most light normals are slightly negative after a DRC on block, meaning the opponent can mash their fastest normal to guarantee a counter-hit (though this requires fast reactions). The attacking character could punish this with Light > DRC into an immediate invincible attack, but this would be an incredibly expensive and high-risk gambit.
|
| Forced Knockdown |
Most airborne command normals, special moves, and Super Arts put the user in a "Forced Knockdown" state. While in this state, an air knockdown will occur when being hit by any attack, even if it would otherwise cause an air reset. As an example, Ryu's 2HP causes an air reset when used as an anti-air. Against a move like Cammy's Hooligan Combination, however, the 2HP puts her into an air knockdown state. This allows Ryu to successfully cancel 2HP into Shoryuken for a juggle, similar to how a Drive Impact wall splat works. Taking advantage of Forced Knockdown juggles is important for dealing with moves like Ken's Dragonlash, Dhalsim's Air Teleport, or Kimberly's 6HK~Hop sequence. Moves that already cause an air knockdown, like most j.MP air-to-airs, will not display the "Forced Knockdown" message.
|
| Guard |
Refers to the direction an attack must be blocked. L is for Low attacks (must be blocked crouching), H is for High attacks/overheads (must be blocked standing), LH is for attacks that can be blocked crouching or standing. T is for Throw attacks which cannot be blocked.
|
| Juggles |
When a character is put into an Air Knockdown state, it is often possible to follow up with a Juggle attack before they hit the ground. In the simplest terms, there are 2 main juggle states:
The following is a more detailed overview of the SF6 juggle system:
Juggle Start (JS): When starting a juggle, the opponent's JC will be set to this value. May be different vs. standing and airborne opponents.
Juggle Increase (JI): When opponent is already in a juggle state, attacks will increase the opponent's JC by this amount.
Juggle Limit (JL): Property of an attack hitbox that determines whether it connects on a juggled opponent. The JL must be ≥ the opponent's JC to hit successfully.
An example to tie everything together:
Drive Rush notes:
More recently, the official definitions used by Capcom are slightly different than these community-designated terms. When reading official patch notes, the following terms are used instead:
|
| On Hit/Block |
These are frame advantage values when the attack hits or is blocked. If the number is positive, then the move will recover before the defender can act again. If the number is negative, the defender will be able to act before the attacker and maybe even punish. KD refers to knockdown on hit, and the listed KD Advantage refers to how many frames the attacker can act before the defender finishes their wakeup animation.
|
| Recovery |
How many frames it takes for a move to finish after the active frames have finished. For projectiles, recovery is considered to begin after the first active frame.
|
| Startup |
How many frames it takes before the move becomes 'active' or have a hit box. The last startup frame and the first active frame are the same frame, meaning all values are written as Startup + 1.
|
| IASA / Actionable Recovery |
Some moves play out an extended recovery animation when no other button/direction is input (for crouching moves, it applies when holding any down direction). These are often referred to as "actionable recovery" frames; in some games, the term IASA (Interruptible As Soon As) refers to the frame that Actionable Recovery begins. Letting the Actionable Recovery frames play out can change the character's position, potentially setting up spacing traps by recovering farther away. For example, Manon 5HP will recover much farther away from the opponent if no input is performed immediately after her recovery; holding back or down-back to block will keep her much closer to the opponent.
|
Normals
Standing Normals
5LP
| Startup | Active | Recovery | Cancel | Damage | Guard | On Hit | On Block |
|---|---|---|---|---|---|---|---|
| 5 | 3 | 10 | Sp SA TC | 300 | LH | +4 | -1 |
- Chains into Double Slap target combo
1 frame slower startup than Honda's other light normals, meaning it will not combo in situations where 2LP will (for example, Honda is +4 on hit after Enhanced Hands). Also makes it slightly worse for mashing out of pressure. In exchange, target combo out of 5LP lets Honda combo into stronger specials than he would have access too from his other light normals.
Can work as an emergency anti-air against shallow jump-ins in a pinch.
5MP
| Startup | Active | Recovery | Cancel | Damage | Guard | On Hit | On Block |
|---|---|---|---|---|---|---|---|
| 10 | 4 | 13 | Sp SA TC | 700 | LH | +6 | +1 |
- Chains into Toko Shizume target combo.
- Moves Honda forward slightly
Honda's only normal that is generically plus on block. Good poke and solid pressure tool. 5MP meaty on opponent's wakeup will let you react to Drive Impact, punishes attempts to mash wakeup jump or wakeup backdash out of Honda's throws, and keeps you at advantage if they block.
Target combo into overhead can open up defensive players, either by letting the 3HK overhead complete or by kara-canceling into Oicho Throw
Canceling 5MP into Drive Rush can start Honda's offense on block, and can be confirmed into 5HK or any normal on hit for good damage.
5HP
| Startup | Active | Recovery | Cancel | Damage | Guard | On Hit | On Block |
|---|---|---|---|---|---|---|---|
| 8(9) | 7 | 20 | Sp SA | 900 | LH | +1(+4) | -6(-3) |
Honda chops in a downward arc. Earlier active frames hit close to Honda and above him, later active frames hit lower and farther out. Early active frames (1-?) are special-cancelable. However, the later few active frames can not be canceled, except into Enhanced Hands.
Good anti-air for when Honda does not have Headbutt charged. Can also be used as a counterpoke against characters trying to zone Honda with long-range normals. 20f recovery means it will sometimes be fast enough to punish attempts to Drive Impact through it.
Causes a crumple on Punish Counter. In most cases, Honda can Parry -> Drive Rush 5HK to start a combo off this.
5LK
| Startup | Active | Recovery | Cancel | Damage | Guard | On Hit | On Block |
|---|---|---|---|---|---|---|---|
| 4 | 2 | 9 | Sp SA | 300 | LH | +5 | -1 |
+5 on hit means it links into 5LP to go into target combo
5MK
| Startup | Active | Recovery | Cancel | Damage | Guard | On Hit | On Block |
|---|---|---|---|---|---|---|---|
| 10 | 4 | 16 | - | 700 | LH | +4 | -3 |
5HK
| Startup | Active | Recovery | Cancel | Damage | Guard | On Hit | On Block |
|---|---|---|---|---|---|---|---|
| 8 | 2(1)4 | 22 | Sp SA | 400x2 | LH | -1 | -5(-11) |
Hits twice. First part will force standing on hit (but not on block), second hit whiffs against crouching (in which case Honda is -11 instead of -5). Both hits are special-cancelable, although the first hit causes more hitstun and can combo into things the second hit can not.
First hit of 5HK is Honda's primary way to combo into Taiho Cannon Lift and therefore one of his most important combo tools. Second hit still combos into many useful specials including HP Hands and can be Drive Rush canceled to start an offense similarly to 5MP.
Crouching Normals
2LP
| Startup | Active | Recovery | Cancel | Damage | Guard | On Hit | On Block |
|---|---|---|---|---|---|---|---|
| 4 | 3 | 10 | Chn Sp SA | 300 | LH | +4 | -1 |
Very fast and low-commitment jab, can be used to mash out of pressure. 2LP 2LP > LP Hands or 2LP 2LP > LP Headbutt are basic confirms and can even be unpunishable on block due to pushback.
2MP
| Startup | Active | Recovery | Cancel | Damage | Guard | On Hit | On Block |
|---|---|---|---|---|---|---|---|
| 8 | 4 | 16 | Sp SA | 600 | LH | +3 | -3 |
2HP
| Startup | Active | Recovery | Cancel | Damage | Guard | On Hit | On Block |
|---|---|---|---|---|---|---|---|
| 11 | 4 | 17(19) | - | 800 | LH | +3(+5) | -3(-1) |
Relatively low-risk advancing low poke. Because it moves Honda forward, it can be used to advance without letting go of a down-back charge.
Drive Rush into 2HP is a low attack to pair with 3HK overhead, will be plus on block, and links into 5LP target combo on hit.
2LK
| Startup | Active | Recovery | Cancel | Damage | Guard | On Hit | On Block |
|---|---|---|---|---|---|---|---|
| 5 | 2 | 9 | Chn | 200 | L | +3 | -3 |
2MK
| Startup | Active | Recovery | Cancel | Damage | Guard | On Hit | On Block |
|---|---|---|---|---|---|---|---|
| 9 | 3 | 17 | - | 500 | L | +6 | -2 |
2HK
| Startup | Active | Recovery | Cancel | Damage | Guard | On Hit | On Block |
|---|---|---|---|---|---|---|---|
| 11 | 3(6)5 | 14 | - | 900 | L | HKD +30(+39) | -10(-1) |
Hits twice, but the second hit is behind Honda, where it will almost never connect.
Outclassed by 6HK in terms of range and is more likely to be punished on block, but is slightly faster and will score a Hard Knockdown even on a normal hit.
Jumping Normals
j.LP
| Startup | Active | Recovery | Cancel | Damage | Guard | On Hit | On Block |
|---|---|---|---|---|---|---|---|
| 5 | 6 | 3 land | - | 300 | H | +3(+9) | -1(+5) |
j.MP
| Startup | Active | Recovery | Cancel | Damage | Guard | On Hit | On Block |
|---|---|---|---|---|---|---|---|
| 6 | 8 | 3 land | - | 700 | H | +5(+11) | +1(+7) |
j.HP
| Startup | Active | Recovery | Cancel | Damage | Guard | On Hit | On Block |
|---|---|---|---|---|---|---|---|
| 9 | 4 | 3 land | - | 800 | H | +9(+15) | +5(+11) |
j.LK
| Startup | Active | Recovery | Cancel | Damage | Guard | On Hit | On Block |
|---|---|---|---|---|---|---|---|
| 6 | 6 | 3 land | - | 300 | H | +5(+10) | +1(+6) |
j.MK
| Startup | Active | Recovery | Cancel | Damage | Guard | On Hit | On Block |
|---|---|---|---|---|---|---|---|
| 9 | 6 | 3 land | - | 700 | H | +8(+13) | +4(+9) |
j.HK
| Startup | Active | Recovery | Cancel | Damage | Guard | On Hit | On Block |
|---|---|---|---|---|---|---|---|
| 10 | 8 | 3 land | - | 800 | H | +8(+15) | +4(+11) |
Command Normals
6HK
| Startup | Active | Recovery | Cancel | Damage | Guard | On Hit | On Block |
|---|---|---|---|---|---|---|---|
| 14 | 3 | 21 | - | 900 | L | +1 | -5 |
Honda advances forward while attacking with a standing Low kick. Forward movement gives 6HK surprising range which can clip opponents who are playing footsies from outside of his usual poke range.
Drive Rush into 6HK is +7 and can connect unexpectedly from nearly full-screen. Letting Honda confirm into 5LP target combo.
3HK
| Startup | Active | Recovery | Cancel | Damage | Guard | On Hit | On Block |
|---|---|---|---|---|---|---|---|
| 22 | 6 | 18 | kara | 800 | H | +3 | -3 |
j.2MK
| Startup | Active | Recovery | Cancel | Damage | Guard | On Hit | On Block |
|---|---|---|---|---|---|---|---|
| 11 | 9 | 3 land | - | 500 | H | +10(+13) | +6(+9) |
- Can hit Crossup
Target Combos
5LP~MP
| Startup | Active | Recovery | Cancel | Damage | Guard | On Hit | On Block |
|---|---|---|---|---|---|---|---|
| 4 | 4 | 20 | Sp SA | 600(480) | LH | KD +34 | -10 |
5MP~3HK
| Startup | Active | Recovery | Cancel | Damage | Guard | On Hit | On Block |
|---|---|---|---|---|---|---|---|
| 22 | 6 | 18 | kara | 800 | H | +3 | -3 |
Throws
Forward Throw (LPLK)
| Startup | Active | Recovery | Cancel | Damage | Guard | On Hit | On Block |
|---|---|---|---|---|---|---|---|
| 5 | 3 | 23 | - | 1200 (2040) | T | KD +17 | - |
Back Throw (4LPLK)
Drive System
Drive Impact (HPHK)
| Startup | Active | Recovery | Cancel | Damage | Guard | On Hit | On Block |
|---|---|---|---|---|---|---|---|
| 26 | 2 | 35 | - | 800 | LH | KD +35 / Wall Splat KD +65 | -3 / Wall Splat HKD +72 |
See Drive Impact
- Notable blockstring gaps; [] = Burnout
- -
- Note: gaps of 8f or less cannot be escaped by jumping
Drive Reversal (6HPHK)
| Startup | Active | Recovery | Cancel | Damage | Guard | On Hit | On Block |
|---|---|---|---|---|---|---|---|
| 20 | 3 | 26(31) | - | 500 recoverable | LH | KD +23 | -6 |
See Drive Reversal
- Full Invuln: 1-22f; Armor Break
Drive Parry (MPMK)
| Startup | Active | Recovery | Cancel | Damage | Guard | On Hit | On Block |
|---|---|---|---|---|---|---|---|
| 1 | 12 or until released | 33(1)(11) | - | - | - | - | - |
See Drive Parry
- Perfect Parry has only 1f recovery, and disables the opponent from canceling their attack
- Perfect Parry vs. projectiles puts you into a fixed 11f recovery
Drive Rush (66)
No results
See Drive Rush. Frame data shown in (parentheses) refers to the version used after Parry.
- Notable Drive Rush cancel combo routes:
- Notable Drive Rush cancel blockstring gaps:
Special Moves
Sumo Spirit (22K)
| Startup | Active | Recovery | Cancel | Damage | Guard | On Hit | On Block |
|---|---|---|---|---|---|---|---|
| 51 | - | 1 | - | - | - | - | - |
- Enhances the next use of Hundred Hand Slap
Hundred Hand Slap (214P)
| Startup | Active | Recovery | Cancel | Damage | Guard | On Hit | On Block |
|---|---|---|---|---|---|---|---|
| 12 | 2(4)2(2)1(2)2(1)1(1)2 [2(4)2(2)1(1)2(1)1(10)2] |
14 | SA3 | 80x5,400 (800) [80x5,450 (850)] |
LH | +2[+4] | -4 |
| Startup | Active | Recovery | Cancel | Damage | Guard | On Hit | On Block |
|---|---|---|---|---|---|---|---|
| 18 | 2(4)2(1)1(3)1(2)1(3)1(3)1(2)1(2)2 [2(4)2(2)1(3)1(2)1(4)1(1)1(14)2] |
17[14] | SA3 | 80x8,360 (1000) [80x7,490 (1050)] |
LH | +2[+4] | -8 |
| Startup | Active | Recovery | Cancel | Damage | Guard | On Hit | On Block |
|---|---|---|---|---|---|---|---|
| 21 | 2(4)2(3)1(3)1(3)1(3)1(3)1(3)1(2)1(2)1(2)1(1)2 [2(4)2(3)1(3)1(3)1(3)1(3)1(3)1(1)1(1)1(14)2] |
17[14] | SA3 | 80x11,320 (1200) [80x10,450 (1250)] |
LH | +2[+4] | -8 |
| Startup | Active | Recovery | Cancel | Damage | Guard | On Hit | On Block |
|---|---|---|---|---|---|---|---|
| 19 | 4(6)2(3)2(3)2(4)2(2)2(2)2(2)2(1)2 [4(6)2(3)2(3)2(4)2(1)2(1)1(1)1(10)2] |
12 | SA2 SA3 | 80x8,160 (800) [80x9,130 (850)] |
LH | +4[+6] | -3 |
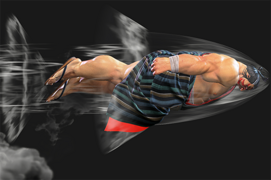
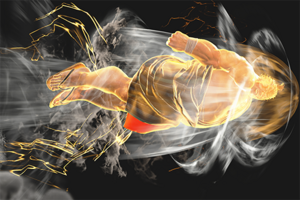
Sumo Headbutt ([4]6P)
| Startup | Active | Recovery | Cancel | Damage | Guard | On Hit | On Block |
|---|---|---|---|---|---|---|---|
| 10 | 1~22 | 2+18(17) land | SA3 | 1400(1000) | LH | KD +40 | -3 |
| Startup | Active | Recovery | Cancel | Damage | Guard | On Hit | On Block |
|---|---|---|---|---|---|---|---|
| 10 | 1~24 | 2+18(20) land | SA3 | 1400(1100) | LH | KD +40 | -3 |
| Startup | Active | Recovery | Cancel | Damage | Guard | On Hit | On Block |
|---|---|---|---|---|---|---|---|
| 14 | 1~34 | 2+18(20) land | SA3 | 1500(1300) | LH | KD +40 | -3 |
| Startup | Active | Recovery | Cancel | Damage | Guard | On Hit | On Block |
|---|---|---|---|---|---|---|---|
| 9 | 5,1~30 | 30(37) land | - | 600,1000 | LH | KD +36(+37) | -20 |
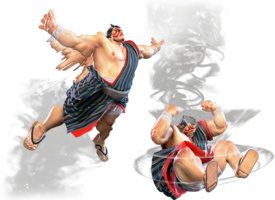
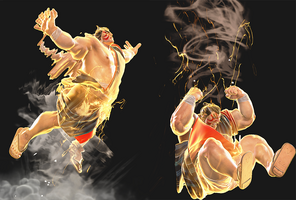
Sumo Smash ([2]8K)
| Startup | Active | Recovery | Cancel | Damage | Guard | On Hit | On Block |
|---|---|---|---|---|---|---|---|
| 11(45) | 4(26)8 | 17 land | - | 400,1000 [800] | LH,H | HKD +23[+27] | +1 |
| Startup | Active | Recovery | Cancel | Damage | Guard | On Hit | On Block |
|---|---|---|---|---|---|---|---|
| 11(42) | 4(24)7 | 17 land | - | 400,1000 [800] | LH,H | HKD +23[+27] | +1 |
| Startup | Active | Recovery | Cancel | Damage | Guard | On Hit | On Block |
|---|---|---|---|---|---|---|---|
| 11(39) | 4(22)6 | 17 land | - | 400,1000 [800] | LH,H | HKD +23[+27] | +1 |
| Startup | Active | Recovery | Cancel | Damage | Guard | On Hit | On Block |
|---|---|---|---|---|---|---|---|
| 6(31~36) | 12(13~17)9 | 17 land | - | 400,1000 [800] | LH,H | HKD +23[+27] | +2 |
Oicho Throw (63214K)
| Startup | Active | Recovery | Cancel | Damage | Guard | On Hit | On Block |
|---|---|---|---|---|---|---|---|
| 6 | 4 | 52 | - | 2000 (2300) | T | HKD +7 | - |
| Startup | Active | Recovery | Cancel | Damage | Guard | On Hit | On Block |
|---|---|---|---|---|---|---|---|
| 6 | 4 | 52 | - | 2200 (2645) | T | HKD +7 | - |
| Startup | Active | Recovery | Cancel | Damage | Guard | On Hit | On Block |
|---|---|---|---|---|---|---|---|
| 6 | 4 | 52 | - | 2400 (2760) | T | HKD +7 | - |
| Startup | Active | Recovery | Cancel | Damage | Guard | On Hit | On Block |
|---|---|---|---|---|---|---|---|
| 6 | 4 | 52 | - | 2800 (3220) | T | HKD +7 | - |
Sumo Dash (236K)
| Startup | Active | Recovery | Cancel | Damage | Guard | On Hit | On Block |
|---|---|---|---|---|---|---|---|
| 14 | - | 51 total | - | - | - | - | - |
| Startup | Active | Recovery | Cancel | Damage | Guard | On Hit | On Block |
|---|---|---|---|---|---|---|---|
| 13(11) | - | 34 total | - | - | - | - | - |
Teppo Triple Slap 1 (236K~P)
| Startup | Active | Recovery | Cancel | Damage | Guard | On Hit | On Block |
|---|---|---|---|---|---|---|---|
| 14+9 | 3(13)3 | 22 | SA3 | 400x2 | LH | KD +42 | -3 |
| Startup | Active | Recovery | Cancel | Damage | Guard | On Hit | On Block |
|---|---|---|---|---|---|---|---|
| 13+9 | 3(13)3 | 17 | SA2 SA3 | 400x2 | LH | +3 | +3 |
Teppo Triple Slap 2 (236K~P~P)
| Startup | Active | Recovery | Cancel | Damage | Guard | On Hit | On Block |
|---|---|---|---|---|---|---|---|
| 14 | 3 | 38 | - | 600 | LH | KD +22 | -24 |
| Startup | Active | Recovery | Cancel | Damage | Guard | On Hit | On Block |
|---|---|---|---|---|---|---|---|
| 14 | 3 | 38 | - | 800 | LH | KD +54 | -24 |
Taiho Cannon Lift (236K~2P)
| Startup | Active | Recovery | Cancel | Damage | Guard | On Hit | On Block |
|---|---|---|---|---|---|---|---|
| 12 | 2(17)3 | 32(15) | SA3 | 400x2 | LH | KD +64 | -22 |
| Startup | Active | Recovery | Cancel | Damage | Guard | On Hit | On Block |
|---|---|---|---|---|---|---|---|
| 12 | 2(17)3 | 32(15) | SA2 SA3 | 500x2 | LH | KD +64 | -22 |
Neko Damashi (22P)
Super Arts
Level 1 Super (236236P)
| Startup | Active | Recovery | Cancel | Damage | Guard | On Hit | On Block |
|---|---|---|---|---|---|---|---|
| 7 | 5 | 48 | - | 2000 | LH | KD +13(+38) | -33 |
Level 2 Super ([4]646K)
| Startup | Active | Recovery | Cancel | Damage | Guard | On Hit | On Block |
|---|---|---|---|---|---|---|---|
| 12 | 2(2),1~21 | 2+43 land | - | 2850(2800) | LH | HKD +13 | -27 |
Level 3 Super ()
| Startup | Active | Recovery | Cancel | Damage | Guard | On Hit | On Block |
|---|---|---|---|---|---|---|---|
| 9 | 3(8)3 | 51 | - | 4000 (2500) | LH | HKD +11 (KD +19) | -34 |
| Startup | Active | Recovery | Cancel | Damage | Guard | On Hit | On Block |
|---|---|---|---|---|---|---|---|
| 9 | 3(8)3 | 51 | - | 4500 (2750) | LH | HKD +34 (KD +19) | -34 |
Taunts
Neutral Taunt (5PPPKKK)
| Startup | Active | Recovery | Cancel | Damage | Guard | On Hit | On Block |
|---|---|---|---|---|---|---|---|
| 88 | [178] | 45 | - | - | - | - | - |
Forward Taunt (6PPPKKK)
| Startup | Active | Recovery | Cancel | Damage | Guard | On Hit | On Block |
|---|---|---|---|---|---|---|---|
| 100 (total) | - | - | - | - | - | - | - |
Back Taunt (4PPPKKK)
| Startup | Active | Recovery | Cancel | Damage | Guard | On Hit | On Block |
|---|---|---|---|---|---|---|---|
| 205 (total) | - | - | - | - | - | - | - |

