No edit summary |
No edit summary |
||
| Line 1: | Line 1: | ||
==Move List== | |||
Frame Data Source: https://w.atwiki.jp/garoumow/pages/26.html and https://w.atwiki.jp/garoumow/pages/64.html | |||
{{MOTW Legend}} | |||
===Close Standing Normals=== | |||
===== <span class="invisible-header"></span> ===== | |||
<font style="visibility:hidden" size="0"></font> | |||
{{MoveData | |||
|image=Garou_Butt_cl.A.jpg | |||
|name=Cl. {{Icon-SNK|A}} | |||
|subtitle= | |||
|caption= | |||
|data= | |||
{{AttackData-Garou | |||
|Damage=5 | |||
|Guard=Mid | |||
|Startup=4 | |||
|Active=4 | |||
|Recovery=5 | |||
|Total=13 | |||
|Hit Adv=+6 | |||
|Block Adv=+6 | |||
|Feint Cancel=No | |||
|Cancel on Hit=No/chainable | |||
|Cancel on Block=No/chainable | |||
|Guard Crush Value=4 | |||
|description=Standing jab. | |||
}} | |||
}} | |||
===== <span class="invisible-header"></span> ===== | |||
<font style="visibility:hidden" size="0"></font> | |||
{{MoveData | |||
|image=Garou_Butt_cl.B.jpg | |||
|name=Cl. {{Icon-SNK|B}} | |||
|subtitle= | |||
|caption= | |||
|data= | |||
{{AttackData-Garou | |||
|Damage=6 | |||
|Guard=Mid | |||
|Startup=4 | |||
|Active=4 | |||
|Recovery=7 | |||
|Total=15 | |||
|Hit Adv=+4 | |||
|Block Adv=+4 | |||
|Feint Cancel=No | |||
|Cancel on Hit=No | |||
|Cancel on Block=No | |||
|Guard Crush Value=4 | |||
|description=The last 3F of recovery has full-body invincibility. | |||
}} | |||
}} | |||
===== <span class="invisible-header"></span> ===== | |||
<font style="visibility:hidden" size="0"></font> | |||
{{MoveData | |||
|image=Garou_Butt_cl.C-1.jpg | |||
|image2=Garou_Butt_cl.C-2.jpg | |||
|name=Cl. {{Icon-SNK|C}} | |||
|subtitle= | |||
|caption= | |||
|data= | |||
{{AttackData-Garou | |||
|Damage=5,5 | |||
|Guard=Mid | |||
|Startup=7 | |||
|Active=1,《2》,4 | |||
|Recovery=21 | |||
|Total=35 | |||
|Hit Adv=-4 | |||
|Block Adv=-4 | |||
|Feint Cancel=Yes (1st hit) | |||
|Cancel on Hit=Yes (1st hit) | |||
|Cancel on Block=Yes (1st hit) | |||
|Guard Crush Value=3,3 | |||
|description= Not very good, cancel first hit into something else if you don't end up grabbing. | |||
}} | |||
}} | |||
===== <span class="invisible-header"></span> ===== | |||
<font style="visibility:hidden" size="0"></font> | |||
{{MoveData | |||
|image=Garou_Butt_cl.D.jpg | |||
|name=Cl. {{Icon-SNK|D}} | |||
|subtitle= | |||
|caption= | |||
|data= | |||
{{AttackData-Garou | |||
|Damage=10 | |||
|Guard=Mid | |||
|Startup=5 | |||
|Active=4 | |||
|Recovery=26 | |||
|Total=35 | |||
|Hit Adv=-9 | |||
|Block Adv=-9 | |||
|Feint Cancel=Yes | |||
|Cancel on Hit=Yes | |||
|Cancel on Block=Yes | |||
|Guard Crush Value=5 | |||
|description= Leads to big damage combos | |||
}} | |||
}} | |||
===Far Standing Normals=== | |||
===== <span class="invisible-header"></span> ===== | |||
<font style="visibility:hidden" size="0"></font> | |||
{{MoveData | |||
|image=Garou_Butt_s.A.jpg | |||
|name=Far {{Icon-SNK|A}} | |||
|subtitle= | |||
|caption= | |||
|data= | |||
{{AttackData-Garou | |||
|Damage=5 | |||
|Guard=Mid | |||
|Startup=3 | |||
|Active=4 | |||
|Recovery=7 | |||
|Total=14 | |||
|Hit Adv=+4 | |||
|Block Adv=+4 | |||
|Feint Cancel=No | |||
|Cancel on Hit=No/chainable | |||
|Cancel on Block=No/chainable | |||
|Guard Crush Value=4 | |||
|description= Good range and a fast normal, used to cover some states like people dashing at you, trying to jump or stopping other jabs. | |||
}} | |||
}} | |||
===== <span class="invisible-header"></span> ===== | |||
<font style="visibility:hidden" size="0"></font> | |||
{{MoveData | |||
|image=Garou_Butt_s.B.jpg | |||
|name=Far {{Icon-SNK|B}} | |||
|subtitle= | |||
|caption= | |||
|data= | |||
{{AttackData-Garou | |||
|Damage=7 | |||
|Guard=Mid | |||
|Startup=5 | |||
|Active=3 | |||
|Recovery=16 | |||
|Total=24 | |||
|Hit Adv=-4 | |||
|Block Adv=-4 | |||
|Feint Cancel=No | |||
|Cancel on Hit=No | |||
|Cancel on Block=No | |||
|Guard Crush Value=4 | |||
|description= | |||
}} | |||
}} | |||
===== <span class="invisible-header"></span> ===== | |||
<font style="visibility:hidden" size="0"></font> | |||
{{MoveData | |||
|image=Garou_Butt_s.C.jpg | |||
|name=Far {{Icon-SNK|C}} | |||
|subtitle= | |||
|caption= | |||
|data= | |||
{{AttackData-Garou | |||
|Damage=12 | |||
|Guard=Mid | |||
|Startup=11 | |||
|Active=5 | |||
|Recovery=21 | |||
|Total=37 | |||
|Hit Adv=-5 | |||
|Block Adv=-5 | |||
|Feint Cancel=No | |||
|Cancel on Hit=No | |||
|Cancel on Block=No | |||
|Guard Crush Value=5 | |||
|description= Bad normal, avoid using it. Big range but punishable by some supers on hit. You also get very little off of it. | |||
}} | |||
}} | |||
===== <span class="invisible-header"></span> ===== | |||
<font style="visibility:hidden" size="0"></font> | |||
{{MoveData | |||
|image=Garou_Butt_s.D.jpg | |||
|name=Far {{Icon-SNK|D}} | |||
|subtitle= | |||
|caption= | |||
|data= | |||
{{AttackData-Garou | |||
|Damage=14 | |||
|Guard=Mid | |||
|Startup=11 | |||
|Active=4 | |||
|Recovery=24 | |||
|Total=39 | |||
|Hit Adv=-7 | |||
|Block Adv=-7 | |||
|Feint Cancel=Yes (on block) | |||
|Cancel on Hit=No | |||
|Cancel on Block=Yes | |||
|Guard Crush Value=5 | |||
|description= Another lacking normal, cancel it at far range with C 1/4+ screen from the opponent for deception and to help gain a bit of momentum. | |||
}} | |||
}} | |||
===Crouching Normals=== | |||
===== <span class="invisible-header"></span> ===== | |||
<font style="visibility:hidden" size="0"></font> | |||
{{MoveData | |||
|image=Garou_Butt_cr.A.jpg | |||
|name=Cr. {{Icon-SNK|A}} | |||
|subtitle= | |||
|caption= | |||
|data= | |||
{{AttackData-Garou | |||
|Damage=4 | |||
|Guard=Mid | |||
|Startup=4 | |||
|Active=4 | |||
|Recovery=5 | |||
|Total=13 | |||
|Hit Adv=+6 | |||
|Block Adv=+6 | |||
|Feint Cancel=No | |||
|Cancel on Hit=No/chainable | |||
|Cancel on Block=No/chainable | |||
|Guard Crush Value=4 | |||
|description= | |||
}} | |||
}} | |||
===== <span class="invisible-header"></span> ===== | |||
<font style="visibility:hidden" size="0"></font> | |||
{{MoveData | |||
|image=Garou_Butt_cr.B.jpg | |||
|name=Cr. {{Icon-SNK|B}} | |||
|subtitle= | |||
|caption= | |||
|data= | |||
{{AttackData-Garou | |||
|Damage=6 | |||
|Guard=Low | |||
|Startup=4 | |||
|Active=4 | |||
|Recovery=6 | |||
|Total=14 | |||
|Hit Adv=+5 | |||
|Block Adv=+5 | |||
|Feint Cancel=No | |||
|Cancel on Hit=No/chainable | |||
|Cancel on Block=No/chainable | |||
|Guard Crush Value=4 | |||
|description= | |||
}} | |||
}} | |||
===== <span class="invisible-header"></span> ===== | |||
<font style="visibility:hidden" size="0"></font> | |||
{{MoveData | |||
|image=Garou_Butt_cr.C-1.jpg | |||
|image2=Garou_Butt_cr.C-2.jpg | |||
|name=Cr. {{Icon-SNK|C}} | |||
|subtitle= | |||
|caption= | |||
|data= | |||
{{AttackData-Garou | |||
|Damage=9 | |||
|Guard=Mid | |||
|Startup=5 | |||
|Active=1,《1》,2 | |||
|Recovery=22 | |||
|Total=31 | |||
|Hit Adv=-5 | |||
|Block Adv=-5 | |||
|Feint Cancel=Yes | |||
|Cancel on Hit=Yes | |||
|Cancel on Block=Yes | |||
|Guard Crush Value=5 | |||
|description= | |||
}} | |||
}} | |||
===== <span class="invisible-header"></span> ===== | |||
<font style="visibility:hidden" size="0"></font> | |||
{{MoveData | |||
|image=Garou_Butt_cr.D.jpg | |||
|name=Cr. {{Icon-SNK|D}} | |||
|subtitle= | |||
|caption= | |||
|data= | |||
{{AttackData-Garou | |||
|Damage=10 | |||
|Guard=Low | |||
|Startup=8 | |||
|Active=4 | |||
|Recovery=22 | |||
|Total=34 | |||
|Hit Adv=KD | |||
|Block Adv=-5 | |||
|Feint Cancel=No | |||
|Cancel on Hit=No | |||
|Cancel on Block=No | |||
|Guard Crush Value=5 | |||
|description= | |||
}} | |||
}} | |||
===Jumping Normals=== | |||
===== <span class="invisible-header"></span> ===== | |||
<font style="visibility:hidden" size="0"></font> | |||
{{MoveData | |||
|image=Garou_Butt_j.A.jpg | |||
|name=Jump {{Icon-SNK|A}} | |||
|subtitle= | |||
|caption= | |||
|data= | |||
{{AttackData-Garou | |||
|Damage=6 | |||
|Guard=High | |||
|Startup=5 | |||
|Active=10 | |||
|Recovery= | |||
|Total= | |||
|Hit Adv= | |||
|Block Adv= | |||
|Feint Cancel= | |||
|Cancel on Hit=No | |||
|Cancel on Block=No | |||
|Guard Crush Value=4 | |||
|description= Your go to air to air. | |||
}} | |||
}} | |||
===== <span class="invisible-header"></span> ===== | |||
<font style="visibility:hidden" size="0"></font> | |||
{{MoveData | |||
|image=Garou_Butt_j.B.jpg | |||
|name=Jump {{Icon-SNK|B}} | |||
|subtitle= | |||
|caption= | |||
|data= | |||
{{AttackData-Garou | |||
|Damage=6 | |||
|Guard=High | |||
|Startup=9 | |||
|Active=10 | |||
|Recovery= | |||
|Total= | |||
|Hit Adv= | |||
|Block Adv= | |||
|Feint Cancel= | |||
|Cancel on Hit=No | |||
|Cancel on Block=No | |||
|Guard Crush Value=4 | |||
|description= A ton of active frames, can cross up and beat some anti airs | |||
Neutral or back hop B can beat out an upper-body evasion attack. | |||
}} | |||
}} | |||
===== <span class="invisible-header"></span> ===== | |||
<font style="visibility:hidden" size="0"></font> | |||
{{MoveData | |||
|image=Garou_Butt_j.C.jpg | |||
|name=Jump {{Icon-SNK|C}} | |||
|subtitle= | |||
|caption= | |||
|data= | |||
{{AttackData-Garou | |||
|Damage=9 | |||
|Guard=High | |||
|Startup=12 | |||
|Active=6 | |||
|Recovery= | |||
|Total= | |||
|Hit Adv= | |||
|Block Adv= | |||
|Feint Cancel= | |||
|Cancel on Hit=No | |||
|Cancel on Block=No | |||
|Guard Crush Value=5 | |||
|description= Use it as an air mixup thanks to it's slower timing compared to your other air normals, and possibly a crossup with it's big hitbox | |||
}} | |||
}} | |||
===== <span class="invisible-header"></span> ===== | |||
<font style="visibility:hidden" size="0"></font> | |||
{{MoveData | |||
|image=Garou_Butt_j.D.jpg | |||
|name=Jump {{Icon-SNK|D}} | |||
|subtitle= | |||
|caption= | |||
|data= | |||
{{AttackData-Garou | |||
|Damage=9 | |||
|Guard=High | |||
|Startup=9 | |||
|Active=7 | |||
|Recovery= | |||
|Total= | |||
|Hit Adv= | |||
|Block Adv= | |||
|Feint Cancel= | |||
|Cancel on Hit=No | |||
|Cancel on Block=No | |||
|Guard Crush Value=5 | |||
|description= Arguably the best jump D in the game. Can be comboed out of and can be used to pressure pretty well. | |||
}} | |||
}} | |||
===Command Normals=== | |||
===== <span class="invisible-header"></span> ===== | |||
<font style="visibility:hidden" size="0"></font> | |||
{{MoveData | |||
|image=Garou_Butt_f.A.jpg | |||
|name=Kyokugen Hiji | |||
|subtitle={{Motion|6}} + {{Icon-SNK|A}} | |||
|caption= | |||
|data= | |||
{{AttackData-Garou | |||
|Damage=12 | |||
|Guard=Overhead | |||
|Startup=15 | |||
|Active=1 | |||
|Recovery=14 | |||
|Total=30 | |||
|Hit Adv=+6 | |||
|Block Adv=+6 | |||
|Feint Cancel=No | |||
|Cancel on Hit=No | |||
|Cancel on Block=No | |||
|Guard Crush Value=9 | |||
|description= Great overhead, fast with good damage that confirms into many things, even at far range. | |||
}} | |||
}} | |||
===Universal Moves=== | |||
===== <span class="invisible-header"></span> ===== | |||
<font style="visibility:hidden" size="0"></font> | |||
{{MoveData | |||
|image=Garou_Butt_AB.jpg | |||
|name=St. {{Icon-SNK|A}}{{Icon-SNK|B}} | |||
|subtitle=Lower-body evasion attack | |||
|caption= | |||
|data= | |||
{{AttackData-Garou | |||
|Damage=10 | |||
|Guard=Overhead | |||
|Startup=24 | |||
|Active=5 | |||
|Recovery=14 | |||
|Total=43 | |||
|Hit Adv=0 | |||
|Block Adv=+6 | |||
|Feint Cancel= | |||
|Cancel on Hit=No | |||
|Cancel on Block=No | |||
|Guard Crush Value=6 | |||
|description= | |||
}} | |||
}} | |||
===== <span class="invisible-header"></span> ===== | |||
<font style="visibility:hidden" size="0"></font> | |||
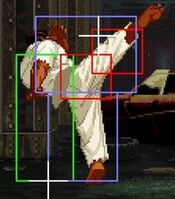
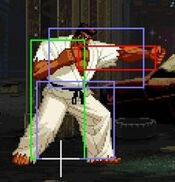
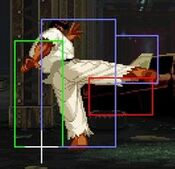
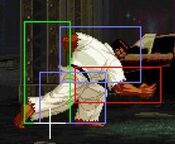
{{MoveData | |||
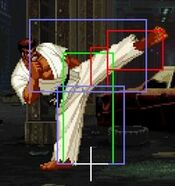
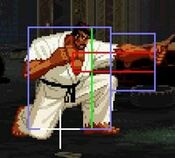
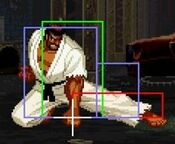
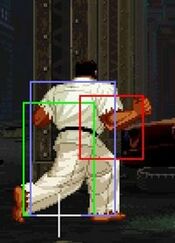
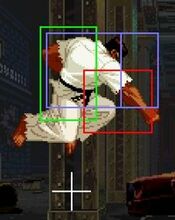
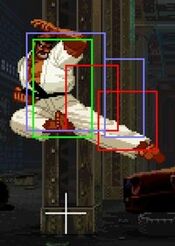
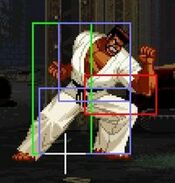
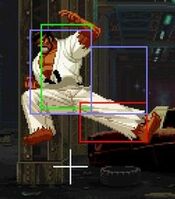
|image=Garou_Butt_2AB-1-re.jpg | |||
|image2=Garou_Butt_2AB-2-re.jpg | |||
|image3=Garou_Butt_2AB-3-re.jpg | |||
|image4=Garou_Butt_2AB-4-re.jpg | |||
|name=Cr. {{Icon-SNK|A}}{{Icon-SNK|B}} | |||
|subtitle=Upper-body evasion attack | |||
|caption= | |||
|data= | |||
{{AttackData-Garou | |||
|Damage=10 | |||
|Guard=Mid | |||
|Startup=9 | |||
|Active=3 | |||
|Recovery=22 | |||
|Total=34 | |||
|Hit Adv=-6 | |||
|Block Adv=0 | |||
|Feint Cancel=Yes (on hit) | |||
|Cancel on Hit=Yes | |||
|Cancel on Block=No | |||
|Guard Crush Value=6 | |||
|description=1~6F upper-body invincibility. | |||
}} | |||
}} | |||
===== <span class="invisible-header"></span> ===== | |||
<font style="visibility:hidden" size="0"></font> | |||
{{MoveData | |||
|image= | |||
|name=Zan Retsu Ken (T.O.P. Attack) | |||
|subtitle={{Icon-SNK|C}}{{Icon-SNK|D}} | |||
|caption= | |||
|data= | |||
{{AttackData-Garou | |||
|Damage= | |||
|Guard=Mid | |||
|Startup=10 | |||
|Active= | |||
|Recovery= | |||
|Total= | |||
|Hit Adv=KD | |||
|Block Adv=-24 | |||
|Feint Cancel= | |||
|Cancel on Hit= | |||
|Cancel on Block= | |||
|Guard Crush Value=2×8,9 | |||
|description= | |||
}} | |||
}} | |||
===Throws=== | |||
===== <span class="invisible-header"></span> ===== | |||
<font style="visibility:hidden" size="0"></font> | |||
{{MoveData | |||
|image=Garou_Butt_Grab.jpg | |||
|name=Close {{Motion|4}}/{{Motion|6}}+{{Icon-SNK|C}} | |||
|subtitle=Kyokugen Zutsuki (Headbutt) | |||
|caption= | |||
|data= | |||
{{AttackData-Garou | |||
|Damage=14 | |||
|Guard= | |||
|Startup=1 | |||
|Active= | |||
|Recovery= | |||
|Total= | |||
|Hit Adv=+64 | |||
|Block Adv= | |||
|Feint Cancel= | |||
|Cancel on Hit= | |||
|Cancel on Block= | |||
|Guard Crush Value= | |||
|description=Normal throw. | |||
}} | |||
}} | |||
===Feints=== | |||
===== <span class="invisible-header"></span> ===== | |||
<font style="visibility:hidden" size="0"></font> | |||
{{MoveData | |||
|image=Garou_Butt_F.Taunt.jpg | |||
|name={{Motion|6}}+{{Icon-SNK|A}}+{{Icon-SNK|C}} | |||
|subtitle= | |||
|caption= | |||
|data= | |||
{{AttackData-Garou | |||
|Damage= | |||
|Guard= | |||
|Startup= | |||
|Active= | |||
|Recovery= | |||
|Total=10 | |||
|Hit Adv= | |||
|Block Adv= | |||
|Feint Cancel= | |||
|Cancel on Hit= | |||
|Cancel on Block= | |||
|Guard Crush Value= | |||
|description=Mimics the start of 236(x2)C, and to a lesser extent the start of 236(x2)A. | |||
}} | |||
}} | |||
===== <span class="invisible-header"></span> ===== | |||
{{MoveData | |||
|image=Garou_Butt_D.Taunt.jpg | |||
|name={{Motion|2}}+{{Icon-SNK|A}}+{{Icon-SNK|C}} | |||
|subtitle= | |||
|caption= | |||
|data= | |||
{{AttackData-Garou | |||
|Damage= | |||
|Guard= | |||
|Startup= | |||
|Active= | |||
|Recovery= | |||
|Total=11 | |||
|Hit Adv= | |||
|Block Adv= | |||
|Feint Cancel= | |||
|Cancel on Hit= | |||
|Cancel on Block= | |||
|Guard Crush Value= | |||
|description=Mimics the start of 623A/C, 623A/C (BR), or 236(x2)B/D. | |||
}} | |||
}} | |||
===Special Moves=== | |||
===== <span class="invisible-header"></span> ===== | |||
<font style="visibility:hidden" size="0"></font> | |||
{{MoveData | |||
|image= | |||
|name=Ko'ou-Ken | |||
|input= {{Motion|236}}+{{Icon-SNK|A}}/{{Icon-SNK|C}} | |||
|subtitle= | |||
|caption= | |||
|data= | |||
Fastest projectile in the game, all-round reliable, just mind them being JD'd at fullscreen. Also knocks down up close. <br> | |||
Impossible to just defend at 0-pixel health bar. <br> | |||
The guard crush value in parentheses is at short-range. <br><br> | |||
{{AttackData-Garou | |||
|version={{Motion|236}}+{{Icon-SNK|A}} | |||
|Damage=13 (18) | |||
|Guard=Mid | |||
|Startup=9 | |||
|Active= | |||
|Recovery= | |||
|Total= | |||
|Hit Adv=KD | |||
|Block Adv=-5 | |||
|Feint Cancel= | |||
|Cancel on Hit= | |||
|Cancel on Block= | |||
|Guard Crush Value=7(8) | |||
|description= | |||
}} | |||
{{AttackData-Garou | |||
|version={{Motion|236}}+{{Icon-SNK|C}} | |||
|Damage=14 (22) | |||
|Guard=Mid | |||
|Startup=9 | |||
|Active= | |||
|Recovery= | |||
|Total= | |||
|Hit Adv=KD | |||
|Block Adv=-5 | |||
|Feint Cancel= | |||
|Cancel on Hit= | |||
|Cancel on Block= | |||
|Guard Crush Value=8(9) | |||
|description= | |||
}} | |||
}} | |||
===== <span class="invisible-header"></span> ===== | |||
<font style="visibility:hidden" size="0"></font> | |||
{{MoveData | |||
|image= | |||
|name=Hien Shippu-Kyaku | |||
|input= {{Motion|236}}+{{Icon-SNK|B}}/{{Icon-SNK|D}} | |||
|subtitle= | |||
|caption= | |||
|data= | |||
Impossible to just defend at 0-pixel health bar. <br><br> | |||
{{AttackData-Garou | |||
|version={{Motion|236}}+{{Icon-SNK|B}} | |||
|Damage=16 | |||
|Guard=Mid | |||
|Startup=10 | |||
|Active= | |||
|Recovery= | |||
|Total= | |||
|Hit Adv=KD | |||
|Block Adv=-8 | |||
|Feint Cancel= | |||
|Cancel on Hit= | |||
|Cancel on Block= | |||
|Guard Crush Value=4,3 | |||
|description= | |||
}} | |||
{{AttackData-Garou | |||
|version={{Motion|236}}+{{Icon-SNK|D}} | |||
|Damage=17 | |||
|Guard=Mid | |||
|Startup=7 | |||
|Active= | |||
|Recovery= | |||
|Total= | |||
|Hit Adv=KD | |||
|Block Adv=-7 | |||
|Feint Cancel= | |||
|Cancel on Hit= | |||
|Cancel on Block= | |||
|Guard Crush Value=4,4 | |||
|description= | |||
}} | |||
}} | |||
===== <span class="invisible-header"></span> ===== | |||
<font style="visibility:hidden" size="0"></font> | |||
{{MoveData | |||
| name=Kohou | |||
| input= {{Motion|623}} + {{Icon-SNK|A}} | |||
| subtitle= | |||
| image= | |||
| caption= | |||
| linkname= | |||
| data = | |||
{{AttackData-Garou | |||
| subtitle = | |||
| version ={{Motion|623}} + {{Icon-SNK|A}} | |||
| Damage =10 | |||
| Guard = | |||
| Startup =4 | |||
| Active = | |||
| Recovery = | |||
| Total = | |||
| Hit Adv =KD | |||
| Block Adv =-19 | |||
| Feint Cancel = | |||
| Cancel on Hit = | |||
| Cancel on Block = | |||
| Guard Crush Value =7 | |||
| description = | |||
}} | |||
{{AttackData-Garou | |||
| header = | |||
| subtitle = | |||
| version ={{Motion|623}} + {{Icon-SNK|A}} Break | |||
| Damage =10 | |||
| Guard = | |||
| Startup =4 | |||
| Active = | |||
| Recovery = | |||
| Total = | |||
| Hit Adv =KD | |||
| Block Adv =+2 | |||
| Feint Cancel = | |||
| Cancel on Hit = | |||
| Cancel on Block = | |||
| Guard Crush Value =7 | |||
| description =Learn to use this often, it's part of your gameplan. Can be done after many normals and is a part of many combos. | |||
}} | |||
}} | |||
===== <span class="invisible-header"></span> ===== | |||
<font style="visibility:hidden" size="0"></font> | |||
{{MoveData | |||
| name =Kohou | |||
| input ={{Motion|623}} + {{Icon-SNK|C}} | |||
| subtitle = | |||
| image = | |||
| caption = | |||
| linkname = | |||
| data = | |||
{{AttackData-Garou | |||
| subtitle = | |||
| version = {{Motion|623}} + {{Icon-SNK|C}} | |||
| Damage =10 | |||
| Guard = | |||
| Startup =4 | |||
| Active = | |||
| Recovery = | |||
| Total = | |||
| Hit Adv =KD | |||
| Block Adv =-29 | |||
| Feint Cancel = | |||
| Cancel on Hit = | |||
| Cancel on Block = | |||
| Guard Crush Value =7 | |||
| description = | |||
}} | |||
{{AttackData-Garou | |||
| header = | |||
| subtitle = | |||
| version = {{Motion|623}} + {{Icon-SNK|C}} Break | |||
| Damage =10 | |||
| Guard = | |||
| Startup =4 | |||
| Active = | |||
| Recovery = | |||
| Total = | |||
| Hit Adv =KD | |||
| Block Adv =0 | |||
| Feint Cancel = | |||
| Cancel on Hit = | |||
| Cancel on Block = | |||
| Guard Crush Value =7 | |||
| description = | |||
}} | |||
}} | |||
===== <span class="invisible-header"></span> ===== | |||
<font style="visibility:hidden" size="0"></font> | |||
{{MoveData | |||
|image= | |||
|name=Harai | |||
|input= {{Motion|214}}+{{Icon-SNK|A}}/{{Icon-SNK|B}} | |||
|subtitle= | |||
|caption= | |||
|data= | |||
{{AttackData-Garou | |||
|subtitle=Upper-Body Harai | |||
|version={{Motion|214}}+{{Icon-SNK|A}} | |||
|Damage=15 | |||
|Guard= | |||
|Startup=3 | |||
|Active= | |||
|Recovery= | |||
|Total= | |||
|Hit Adv=KD | |||
|Block Adv= | |||
|Feint Cancel= | |||
|Cancel on Hit= | |||
|Cancel on Block= | |||
|Guard Crush Value=7 | |||
|description=4~11F of upper-body counter state, after counter is initiated the counter-attack startup is 2F. | |||
{{Icon-SNK|A}} version counters mid & high attacks. | |||
}} | |||
{{AttackData-Garou | |||
|subtitle=Lower-Body Harai | |||
|version={{Motion|214}}+{{Icon-SNK|B}} | |||
|Damage=N/A | |||
|Guard= | |||
|Startup=3 | |||
|Active= | |||
|Recovery= | |||
|Total= | |||
|Hit Adv=KD | |||
|Block Adv= | |||
|Feint Cancel= | |||
|Cancel on Hit= | |||
|Cancel on Block= | |||
|Guard Crush Value=7 | |||
|description=1~3F lower-body invincibility, 4~13F of lower-body counter state, after counter is initiated the counter-attack startup is 2F. | |||
{{Icon-SNK|B}} version counters low attacks. | |||
}} | |||
}} | |||
===== <span class="invisible-header"></span> ===== | |||
<font style="visibility:hidden" size="0"></font> | |||
{{MoveData | |||
|image= | |||
|name=Ryuu-Sen-Ken | |||
|input= Ch. {{Icon-SNK|C}} | |||
|subtitle= | |||
|caption= | |||
|data= | |||
Impossible to just defend at 0-pixel health bar. <br><br> | |||
{{AttackData-Garou | |||
|version=Lv1 | |||
|Damage=15 | |||
|Guard=Mid | |||
|Startup=12 | |||
|Active= | |||
|Recovery= | |||
|Total= | |||
|Hit Adv=KD | |||
|Block Adv=-9 | |||
|Feint Cancel= | |||
|Cancel on Hit= | |||
|Cancel on Block= | |||
|Guard Crush Value=7 | |||
|description=Charge time is 120F (~2 seconds). | |||
}} | |||
{{AttackData-Garou | |||
|version=Lv2 | |||
|Damage=18 | |||
|Guard=Mid | |||
|Startup=14 | |||
|Active= | |||
|Recovery= | |||
|Total= | |||
|Hit Adv=KD | |||
|Block Adv=-9 | |||
|Feint Cancel= | |||
|Cancel on Hit= | |||
|Cancel on Block= | |||
|Guard Crush Value=8 | |||
|description=Charge time is 240F (~4 seconds). | |||
}} | |||
{{AttackData-Garou | |||
|version=Lv3 | |||
|Damage=22 | |||
|Guard=Mid | |||
|Startup=14 | |||
|Active= | |||
|Recovery= | |||
|Total= | |||
|Hit Adv=KD | |||
|Block Adv=-9 | |||
|Feint Cancel= | |||
|Cancel on Hit= | |||
|Cancel on Block= | |||
|Guard Crush Value=9 | |||
|description=Charge time is 480F (~8 seconds). | |||
}} | |||
{{AttackData-Garou | |||
|version=Lv4 | |||
|Damage=27 | |||
|Guard=Mid | |||
|Startup=11 | |||
|Active= | |||
|Recovery= | |||
|Total= | |||
|Hit Adv=KD | |||
|Block Adv=-11 | |||
|Feint Cancel= | |||
|Cancel on Hit= | |||
|Cancel on Block= | |||
|Guard Crush Value=4×3 | |||
|description=Charge time is 960F (~16 seconds). | |||
}} | |||
}} | |||
===== <span class="invisible-header"></span> ===== | |||
<font style="visibility:hidden" size="0"></font> | |||
{{MoveData | |||
|image= | |||
|name=Tora-Sen-Kyaku | |||
|input= Ch. {{Icon-SNK|D}} | |||
|subtitle= | |||
|caption= | |||
|data= | |||
Impossible to just defend at 0-pixel health bar. <br><br> | |||
{{AttackData-Garou | |||
|version=Lv1 | |||
|Damage=15 | |||
|Guard=Mid | |||
|Startup=14 | |||
|Active= | |||
|Recovery= | |||
|Total= | |||
|Hit Adv=KD | |||
|Block Adv=-8 | |||
|Feint Cancel= | |||
|Cancel on Hit= | |||
|Cancel on Block= | |||
|Guard Crush Value=8 | |||
|description=Charge time is 120F (~2 seconds). | |||
}} | |||
{{AttackData-Garou | |||
|version=Lv2 | |||
|Damage=18 | |||
|Guard=Mid | |||
|Startup=14 | |||
|Active= | |||
|Recovery= | |||
|Total= | |||
|Hit Adv=KD | |||
|Block Adv=-8 | |||
|Feint Cancel= | |||
|Cancel on Hit= | |||
|Cancel on Block= | |||
|Guard Crush Value=8 | |||
|description=Charge time is 240F (~4 seconds). | |||
}} | |||
{{AttackData-Garou | |||
|version=Lv3 | |||
|Damage=22 | |||
|Guard=Mid | |||
|Startup=14 | |||
|Active= | |||
|Recovery= | |||
|Total= | |||
|Hit Adv=KD | |||
|Block Adv=-8 | |||
|Feint Cancel= | |||
|Cancel on Hit= | |||
|Cancel on Block= | |||
|Guard Crush Value=9 | |||
|description=Charge time is 480F (~8 seconds). | |||
}} | |||
{{AttackData-Garou | |||
|version=Lv4 | |||
|Damage=27 | |||
|Guard=Mid | |||
|Startup=14 | |||
|Active= | |||
|Recovery= | |||
|Total= | |||
|Hit Adv=KD | |||
|Block Adv=-6 | |||
|Feint Cancel= | |||
|Cancel on Hit= | |||
|Cancel on Block= | |||
|Guard Crush Value=4×3 | |||
|description=Charge time is 960F (~16 seconds). | |||
}} | |||
}} | |||
===Super Moves=== | |||
<font style="visibility:hidden" size="0"></font> | |||
{{MoveData | |||
|image = | |||
|name =Haou Shoukou Ken | |||
|input ={{Motion|236}},{{Motion|236}} + {{Icon-SNK|A}}/{{Icon-SNK|C}} | |||
|caption= | |||
|data= | |||
Impossible to just defend at 0-pixel health bar. <br><br> | |||
{{AttackData-Garou | |||
|version = {{Motion|236}},{{Motion|236}} + {{Icon-SNK|A}} | |||
|Damage=33 | |||
|Guard=Mid | |||
|Startup=17 | |||
|Active= | |||
|Recovery= | |||
|Total= | |||
|Hit Adv=KD | |||
|Block Adv=-16 | |||
|Feint Cancel= | |||
|Cancel on Hit= | |||
|Cancel on Block= | |||
|Guard Crush Value=15 | |||
|description=1~7F full-body invincibility. | |||
}} | |||
{{AttackData-Garou | |||
|header = | |||
|version ={{Motion|236}},{{Motion|236}} + {{Icon-SNK|C}} | |||
|Damage=48 | |||
|Guard=Mid | |||
|Startup=7 | |||
|Active= | |||
|Recovery= | |||
|Total= | |||
|Hit Adv=KD | |||
|Block Adv=-24 | |||
|Feint Cancel= | |||
|Cancel on Hit= | |||
|Cancel on Block= | |||
|Guard Crush Value=6×4 | |||
|description=1~9F full-body invincibility. | |||
}} | |||
}} | |||
<font style="visibility:hidden" size="0"></font> | |||
{{MoveData | |||
|image = | |||
|name =Kyokugen Kohou | |||
|input ={{Motion|236}},{{Motion|236}} + {{Icon-SNK|B}}/{{Icon-SNK|D}} | |||
|caption= | |||
|data= | |||
{{AttackData-Garou | |||
|version = {{Motion|236}},{{Motion|236}} + {{Icon-SNK|B}} | |||
|Damage=35 | |||
|Guard=Mid | |||
|Startup=0 | |||
|Active= | |||
|Recovery= | |||
|Total= | |||
|Hit Adv=KD | |||
|Block Adv=-44 | |||
|Feint Cancel= | |||
|Cancel on Hit= | |||
|Cancel on Block= | |||
|Guard Crush Value=5×2,3×5 | |||
|description= The 1 meter version in particular is a part of several combo enders | |||
1~4F full-body invincibility. | |||
}} | |||
{{AttackData-Garou | |||
| header = | |||
|version ={{Motion|236}},{{Motion|236}} + {{Icon-SNK|D}} | |||
|Damage=51 | |||
|Guard=Mid | |||
|Startup=0 | |||
|Active= | |||
|Recovery= | |||
|Total= | |||
|Hit Adv=KD | |||
|Block Adv=-56 | |||
|Feint Cancel= | |||
|Cancel on Hit= | |||
|Cancel on Block= | |||
|Guard Crush Value=10×2,3×8 | |||
|description=1~5F full-body invincibility. | |||
}} | |||
}} | |||
<font style="visibility:hidden" size="0"></font> | |||
{{MoveData | |||
|image = | |||
|name =Ryuuko Ranbu | |||
|input ={{Motion|236}},{{Motion|236}},{{Motion|236}} + {{Icon-SNK|C}} <br>(Press {{Icon-SNK|C}} rapidly) | |||
|caption= | |||
|data= | |||
{{AttackData-Garou | |||
|version = Lv1 | |||
|Damage=31 | |||
|Guard= | |||
|Startup=0 | |||
|Active= | |||
|Recovery= | |||
|Total= | |||
|Hit Adv=KD | |||
|Block Adv=-42 | |||
|Feint Cancel= | |||
|Cancel on Hit= | |||
|Cancel on Block= | |||
|Guard Crush Value=3×13 | |||
|description=1~3F full-body invincibility. | |||
No extra presses ({{Icon-SNK|C}} x1). 13 hits. | |||
}} | |||
{{AttackData-Garou | |||
|version =Lv2 | |||
|Damage=43 | |||
|Guard= | |||
|Startup=0 | |||
|Active= | |||
|Recovery= | |||
|Total= | |||
|Hit Adv=KD | |||
|Block Adv=-48 | |||
|Feint Cancel= | |||
|Cancel on Hit= | |||
|Cancel on Block= | |||
|Guard Crush Value=3×19~22 | |||
|description=1~3F full-body invincibility. | |||
{{Icon-SNK|C}} x3-9. 19 hits (a low on the 7th hit). | |||
}} | |||
{{AttackData-Garou | |||
|version =Lv3 | |||
|Damage=55 | |||
|Guard= | |||
|Startup=0 | |||
|Active= | |||
|Recovery= | |||
|Total= | |||
|Hit Adv=KD | |||
|Block Adv=-48 | |||
|Feint Cancel= | |||
|Cancel on Hit= | |||
|Cancel on Block= | |||
|Guard Crush Value=3×19~22 | |||
|description=1~3F full-body invincibility. | |||
{{Icon-SNK|C}} x10. 22 hits (a low on the 7th hit). | |||
}} | |||
{{AttackData-Garou | |||
|header = | |||
|version =Lv4 | |||
|Damage=61 | |||
|Guard= | |||
|Startup=4 | |||
|Active= | |||
|Recovery= | |||
|Total= | |||
|Hit Adv=KD | |||
|Block Adv=-40 | |||
|Feint Cancel= | |||
|Cancel on Hit= | |||
|Cancel on Block= | |||
|Guard Crush Value=8×6,5×6 | |||
|description=1~9F full-body invincibility. | |||
Impossible to just defend at 0-pixel health bar. | |||
}} | |||
}} | |||
{{Navbox-MOTW}} | |||
[[Category:Garou: Mark of the Wolves]] | |||
Revision as of 02:32, 18 February 2023
Move List
Frame Data Source: https://w.atwiki.jp/garoumow/pages/26.html and https://w.atwiki.jp/garoumow/pages/64.html
| Data Help | |
|---|---|
| Disclaimer: This is meant to teach basic terminology used when describing moves. | |
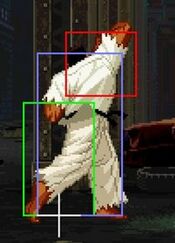
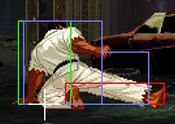
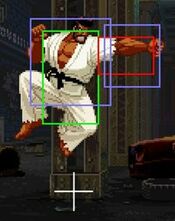
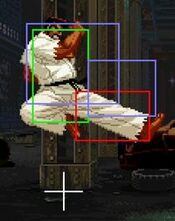
| Hitbox: | A predefined area (usually a rectangle or rectangles) that tells the game how any given attack can come in contact with a character. Hitboxes are invisible to the player when normally playing. |
| Hurtbox: | A predefined area (usually a group of rectangles) that tell the game how your character is allowed to get hit by any incoming attack. Specifically, you'll get hit by (or block) an attack if that attack's hitbox ever overlaps your hurtbox. |
| Throw Box/Range: | Active throw frames and range. Your opponent will be thrown in this field if not in block or hit stun. |
| Projectile Box: | Hitbox on a projectile attack. |
| Guard/Counter Box: | The Guard Box or Counter Box. This appears when blocking or using a counter move. |
| Push Box: | Has no bearing on hit/hurt boxes. Just prevents characters to not pass through each other. (Also known as "Collision Box".) |
| Startup | The number of frames before an attack can hit the opponent. Does not include the first active frame. |
| Guard | The way this move must be blocked.
High or H or Overhead (especially when from the ground) -- must be blocked standing. |
| Damage | "Basic" damage -- Unmodified damage values
"Correct" damage -- Damage values accounting for damage scaling, TOP multiplier, and defense rate |
| Guard Crush Value | Decreases the defender's guard durability gauge by this value. |
| +X | Attacker has X number of advantage frames. |
| -X | Attacker has X number of disadvantage frames. |
| KD | Short for "knockdown", knocks down opponent on hit. |
| ◯ | Cancelable on both hit and block. |
| ∞ | Chain cancelable with the same button (renda cancel). |
| ※ | Cancelable on the first hit/part only. |
| 《X》OR «X» OR <<X>> OR (X) | X number of inactive frames between hits of multihit moves. |
| △ | Only cancelable on block. |
| ▽ | Only cancelable on hit. |
| × OR X | Not cancelable. |
Close Standing Normals
| Damage | Guard | Startup | Active | Recovery | Total |
|---|---|---|---|---|---|
| 5 | Mid | 4 | 4 | 5 | 13 |
| Hit Adv | Block Adv | Cancel on Hit | Cancel on Block | Guard Crush Value | |
| +6 | +6 | No/chainable | No/chainable | 4 | |
|
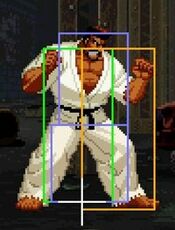
Standing jab. | |||||
| Damage | Guard | Startup | Active | Recovery | Total |
|---|---|---|---|---|---|
| 6 | Mid | 4 | 4 | 7 | 15 |
| Hit Adv | Block Adv | Cancel on Hit | Cancel on Block | Guard Crush Value | |
| +4 | +4 | No | No | 4 | |
|
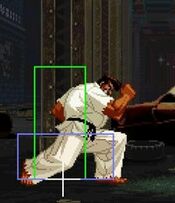
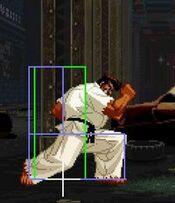
The last 3F of recovery has full-body invincibility. | |||||
| Damage | Guard | Startup | Active | Recovery | Total |
|---|---|---|---|---|---|
| 5,5 | Mid | 7 | 1,《2》,4 | 21 | 35 |
| Hit Adv | Block Adv | Cancel on Hit | Cancel on Block | Guard Crush Value | |
| -4 | -4 | Yes (1st hit) | Yes (1st hit) | 3,3 | |
|
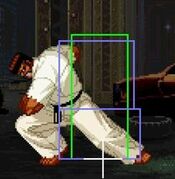
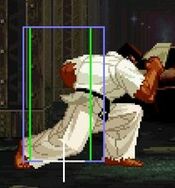
Not very good, cancel first hit into something else if you don't end up grabbing. | |||||
| Damage | Guard | Startup | Active | Recovery | Total |
|---|---|---|---|---|---|
| 10 | Mid | 5 | 4 | 26 | 35 |
| Hit Adv | Block Adv | Cancel on Hit | Cancel on Block | Guard Crush Value | |
| -9 | -9 | Yes | Yes | 5 | |
|
Leads to big damage combos | |||||
Far Standing Normals
| Damage | Guard | Startup | Active | Recovery | Total |
|---|---|---|---|---|---|
| 5 | Mid | 3 | 4 | 7 | 14 |
| Hit Adv | Block Adv | Cancel on Hit | Cancel on Block | Guard Crush Value | |
| +4 | +4 | No/chainable | No/chainable | 4 | |
|
Good range and a fast normal, used to cover some states like people dashing at you, trying to jump or stopping other jabs. | |||||
| Damage | Guard | Startup | Active | Recovery | Total |
|---|---|---|---|---|---|
| 7 | Mid | 5 | 3 | 16 | 24 |
| Hit Adv | Block Adv | Cancel on Hit | Cancel on Block | Guard Crush Value | |
| -4 | -4 | No | No | 4 |
| Damage | Guard | Startup | Active | Recovery | Total |
|---|---|---|---|---|---|
| 12 | Mid | 11 | 5 | 21 | 37 |
| Hit Adv | Block Adv | Cancel on Hit | Cancel on Block | Guard Crush Value | |
| -5 | -5 | No | No | 5 | |
|
Bad normal, avoid using it. Big range but punishable by some supers on hit. You also get very little off of it. | |||||
| Damage | Guard | Startup | Active | Recovery | Total |
|---|---|---|---|---|---|
| 14 | Mid | 11 | 4 | 24 | 39 |
| Hit Adv | Block Adv | Cancel on Hit | Cancel on Block | Guard Crush Value | |
| -7 | -7 | No | Yes | 5 | |
|
Another lacking normal, cancel it at far range with C 1/4+ screen from the opponent for deception and to help gain a bit of momentum. | |||||
Crouching Normals
| Damage | Guard | Startup | Active | Recovery | Total |
|---|---|---|---|---|---|
| 4 | Mid | 4 | 4 | 5 | 13 |
| Hit Adv | Block Adv | Cancel on Hit | Cancel on Block | Guard Crush Value | |
| +6 | +6 | No/chainable | No/chainable | 4 |
| Damage | Guard | Startup | Active | Recovery | Total |
|---|---|---|---|---|---|
| 6 | Low | 4 | 4 | 6 | 14 |
| Hit Adv | Block Adv | Cancel on Hit | Cancel on Block | Guard Crush Value | |
| +5 | +5 | No/chainable | No/chainable | 4 |
| Damage | Guard | Startup | Active | Recovery | Total |
|---|---|---|---|---|---|
| 9 | Mid | 5 | 1,《1》,2 | 22 | 31 |
| Hit Adv | Block Adv | Cancel on Hit | Cancel on Block | Guard Crush Value | |
| -5 | -5 | Yes | Yes | 5 |
| Damage | Guard | Startup | Active | Recovery | Total |
|---|---|---|---|---|---|
| 10 | Low | 8 | 4 | 22 | 34 |
| Hit Adv | Block Adv | Cancel on Hit | Cancel on Block | Guard Crush Value | |
| KD | -5 | No | No | 5 |
Jumping Normals
| Damage | Guard | Startup | Active | Recovery | Total |
|---|---|---|---|---|---|
| 6 | High | 5 | 10 | - | - |
| Hit Adv | Block Adv | Cancel on Hit | Cancel on Block | Guard Crush Value | |
| - | - | No | No | 4 | |
|
Your go to air to air. | |||||
| Damage | Guard | Startup | Active | Recovery | Total |
|---|---|---|---|---|---|
| 6 | High | 9 | 10 | - | - |
| Hit Adv | Block Adv | Cancel on Hit | Cancel on Block | Guard Crush Value | |
| - | - | No | No | 4 | |
|
A ton of active frames, can cross up and beat some anti airs Neutral or back hop B can beat out an upper-body evasion attack. | |||||
| Damage | Guard | Startup | Active | Recovery | Total |
|---|---|---|---|---|---|
| 9 | High | 12 | 6 | - | - |
| Hit Adv | Block Adv | Cancel on Hit | Cancel on Block | Guard Crush Value | |
| - | - | No | No | 5 | |
|
Use it as an air mixup thanks to it's slower timing compared to your other air normals, and possibly a crossup with it's big hitbox | |||||
| Damage | Guard | Startup | Active | Recovery | Total |
|---|---|---|---|---|---|
| 9 | High | 9 | 7 | - | - |
| Hit Adv | Block Adv | Cancel on Hit | Cancel on Block | Guard Crush Value | |
| - | - | No | No | 5 | |
|
Arguably the best jump D in the game. Can be comboed out of and can be used to pressure pretty well. | |||||
Command Normals
| Damage | Guard | Startup | Active | Recovery | Total |
|---|---|---|---|---|---|
| 12 | Overhead | 15 | 1 | 14 | 30 |
| Hit Adv | Block Adv | Cancel on Hit | Cancel on Block | Guard Crush Value | |
| +6 | +6 | No | No | 9 | |
|
Great overhead, fast with good damage that confirms into many things, even at far range. | |||||
Universal Moves
| Damage | Guard | Startup | Active | Recovery | Total |
|---|---|---|---|---|---|
| 10 | Overhead | 24 | 5 | 14 | 43 |
| Hit Adv | Block Adv | Cancel on Hit | Cancel on Block | Guard Crush Value | |
| 0 | +6 | No | No | 6 |
| Damage | Guard | Startup | Active | Recovery | Total |
|---|---|---|---|---|---|
| 10 | Mid | 9 | 3 | 22 | 34 |
| Hit Adv | Block Adv | Cancel on Hit | Cancel on Block | Guard Crush Value | |
| -6 | 0 | Yes | No | 6 | |
|
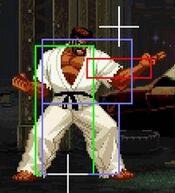
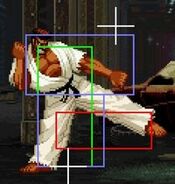
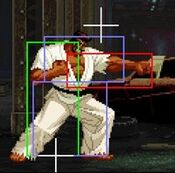
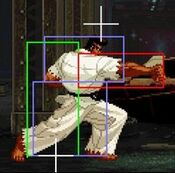
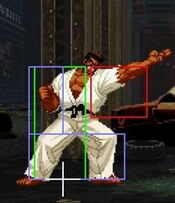
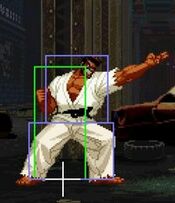
1~6F upper-body invincibility. | |||||
| Damage | Guard | Startup | Active | Recovery | Total |
|---|---|---|---|---|---|
| - | Mid | 10 | - | - | - |
| Hit Adv | Block Adv | Cancel on Hit | Cancel on Block | Guard Crush Value | |
| KD | -24 | - | - | 2×8,9 |
Throws
| Damage | Guard | Startup | Active | Recovery | Total |
|---|---|---|---|---|---|
| 14 | - | 1 | - | - | - |
| Hit Adv | Block Adv | Cancel on Hit | Cancel on Block | Guard Crush Value | |
| +64 | - | - | - | - | |
|
Normal throw. | |||||
Feints
| Damage | Guard | Startup | Active | Recovery | Total |
|---|---|---|---|---|---|
| - | - | - | - | - | 10 |
| Hit Adv | Block Adv | Cancel on Hit | Cancel on Block | Guard Crush Value | |
| - | - | - | - | - | |
|
Mimics the start of 236(x2)C, and to a lesser extent the start of 236(x2)A. | |||||
| Damage | Guard | Startup | Active | Recovery | Total |
|---|---|---|---|---|---|
| - | - | - | - | - | 11 |
| Hit Adv | Block Adv | Cancel on Hit | Cancel on Block | Guard Crush Value | |
| - | - | - | - | - | |
|
Mimics the start of 623A/C, 623A/C (BR), or 236(x2)B/D. | |||||
Special Moves
Impossible to just defend at 0-pixel health bar.
The guard crush value in parentheses is at short-range.
| Lv1 | Damage | Guard | Startup | Active | Recovery | Total |
|---|---|---|---|---|---|---|
| 15 | Mid | 12 | - | - | - | |
| Hit Adv | Block Adv | Cancel on Hit | Cancel on Block | Guard Crush Value | ||
| KD | -9 | - | - | 7 | ||
|
Charge time is 120F (~2 seconds). | ||||||
| Lv2 | Damage | Guard | Startup | Active | Recovery | Total |
| 18 | Mid | 14 | - | - | - | |
| Hit Adv | Block Adv | Cancel on Hit | Cancel on Block | Guard Crush Value | ||
| KD | -9 | - | - | 8 | ||
|
Charge time is 240F (~4 seconds). | ||||||
| Lv3 | Damage | Guard | Startup | Active | Recovery | Total |
| 22 | Mid | 14 | - | - | - | |
| Hit Adv | Block Adv | Cancel on Hit | Cancel on Block | Guard Crush Value | ||
| KD | -9 | - | - | 9 | ||
|
Charge time is 480F (~8 seconds). | ||||||
| Lv4 | Damage | Guard | Startup | Active | Recovery | Total |
| 27 | Mid | 11 | - | - | - | |
| Hit Adv | Block Adv | Cancel on Hit | Cancel on Block | Guard Crush Value | ||
| KD | -11 | - | - | 4×3 | ||
|
Charge time is 960F (~16 seconds). | ||||||
| Lv1 | Damage | Guard | Startup | Active | Recovery | Total |
|---|---|---|---|---|---|---|
| 15 | Mid | 14 | - | - | - | |
| Hit Adv | Block Adv | Cancel on Hit | Cancel on Block | Guard Crush Value | ||
| KD | -8 | - | - | 8 | ||
|
Charge time is 120F (~2 seconds). | ||||||
| Lv2 | Damage | Guard | Startup | Active | Recovery | Total |
| 18 | Mid | 14 | - | - | - | |
| Hit Adv | Block Adv | Cancel on Hit | Cancel on Block | Guard Crush Value | ||
| KD | -8 | - | - | 8 | ||
|
Charge time is 240F (~4 seconds). | ||||||
| Lv3 | Damage | Guard | Startup | Active | Recovery | Total |
| 22 | Mid | 14 | - | - | - | |
| Hit Adv | Block Adv | Cancel on Hit | Cancel on Block | Guard Crush Value | ||
| KD | -8 | - | - | 9 | ||
|
Charge time is 480F (~8 seconds). | ||||||
| Lv4 | Damage | Guard | Startup | Active | Recovery | Total |
| 27 | Mid | 14 | - | - | - | |
| Hit Adv | Block Adv | Cancel on Hit | Cancel on Block | Guard Crush Value | ||
| KD | -6 | - | - | 4×3 | ||
|
Charge time is 960F (~16 seconds). | ||||||
Super Moves
| Lv1 | Damage | Guard | Startup | Active | Recovery | Total |
|---|---|---|---|---|---|---|
| 31 | - | 0 | - | - | - | |
| Hit Adv | Block Adv | Cancel on Hit | Cancel on Block | Guard Crush Value | ||
| KD | -42 | - | - | 3×13 | ||
|
1~3F full-body invincibility. | ||||||
| Lv2 | Damage | Guard | Startup | Active | Recovery | Total |
| 43 | - | 0 | - | - | - | |
| Hit Adv | Block Adv | Cancel on Hit | Cancel on Block | Guard Crush Value | ||
| KD | -48 | - | - | 3×19~22 | ||
|
1~3F full-body invincibility. | ||||||
| Lv3 | Damage | Guard | Startup | Active | Recovery | Total |
| 55 | - | 0 | - | - | - | |
| Hit Adv | Block Adv | Cancel on Hit | Cancel on Block | Guard Crush Value | ||
| KD | -48 | - | - | 3×19~22 | ||
|
1~3F full-body invincibility. | ||||||
| Lv4 | Damage | Guard | Startup | Active | Recovery | Total |
| 61 | - | 4 | - | - | - | |
| Hit Adv | Block Adv | Cancel on Hit | Cancel on Block | Guard Crush Value | ||
| KD | -40 | - | - | 8×6,5×6 | ||
|
1~9F full-body invincibility. Impossible to just defend at 0-pixel health bar. | ||||||
