mNo edit summary |
(Modified header and top of page) |
||
| Line 1: | Line 1: | ||
{{MOTW Character Intro|char=Kain |content= | |||
[[File:Kain.PNG|right]] | [[File:Kain.PNG|right]] | ||
== Introduction == | ==Introduction== | ||
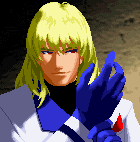
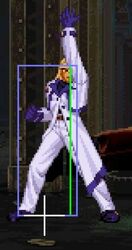
Kain is the final boss in Garou. He is uncle to Rock Howard, and runs the family business after Geese's death. | '''Kain R. Heinlein''' is the final boss in Garou. He is uncle to Rock Howard, and runs the family business after Geese's death. | ||
== Gameplay == | |||
{{Content Box|content= | |||
TBD | |||
{{ProConTable | |||
|pros= | |||
* '''Can Combo 2 S-Power Moves''' | |||
* '''Good Zoning Moves''' | |||
* '''Excellent Poking Normals''' | |||
|cons= | |||
* '''Low Stamina''' | |||
* '''Slow Special Recovery''' | |||
}} | |||
}} | |||
}} | |||
'''Character Colors''' | '''Character Colors''' | ||
| Line 24: | Line 29: | ||
==Move List== | ==Move List== | ||
Frame Data Source : https://w.atwiki.jp/garoumow/pages/32.html and https://w.atwiki.jp/garoumow/pages/70.html | |||
Frame Data Source : | |||
Legend | {{MOTW Legend}} | ||
===Close Standing Normals=== | ===Close Standing Normals=== | ||
Revision as of 02:33, 20 January 2023
Character Colors
Move List
Frame Data Source : https://w.atwiki.jp/garoumow/pages/32.html and https://w.atwiki.jp/garoumow/pages/70.html
| Data Help | |
|---|---|
| Disclaimer: This is meant to teach basic terminology used when describing moves. | |
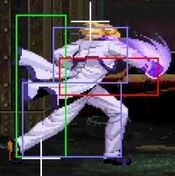
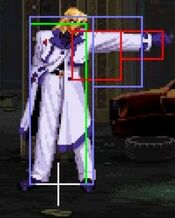
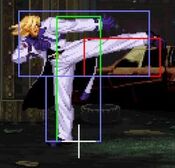
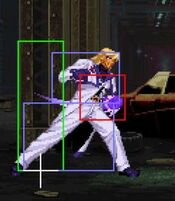
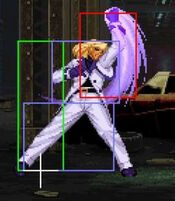
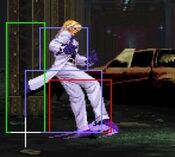
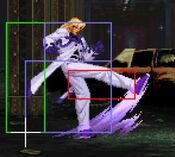
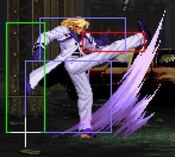
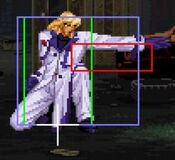
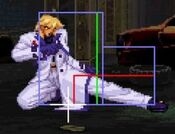
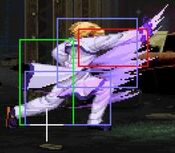
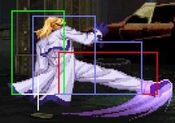
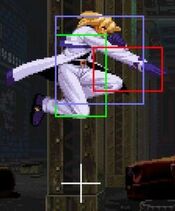
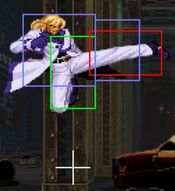
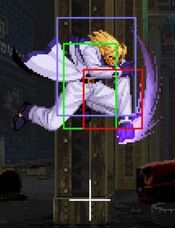
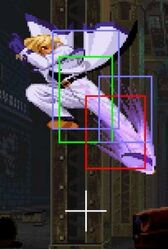
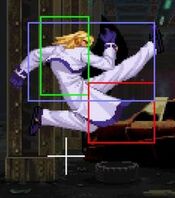
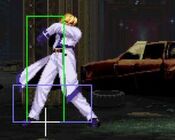
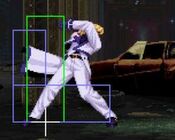
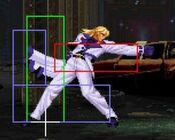
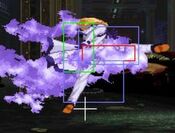
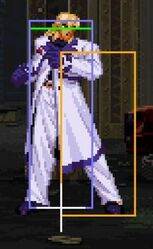
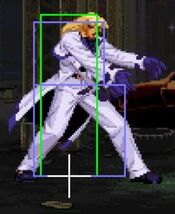
| Hitbox: | A predefined area (usually a rectangle or rectangles) that tells the game how any given attack can come in contact with a character. Hitboxes are invisible to the player when normally playing. |
| Hurtbox: | A predefined area (usually a group of rectangles) that tell the game how your character is allowed to get hit by any incoming attack. Specifically, you'll get hit by (or block) an attack if that attack's hitbox ever overlaps your hurtbox. |
| Throw Box/Range: | Active throw frames and range. Your opponent will be thrown in this field if not in block or hit stun. |
| Projectile Box: | Hitbox on a projectile attack. |
| Guard/Counter Box: | The Guard Box or Counter Box. This appears when blocking or using a counter move. |
| Push Box: | Has no bearing on hit/hurt boxes. Just prevents characters to not pass through each other. (Also known as "Collision Box".) |
| Startup | The number of frames before an attack can hit the opponent. Does not include the first active frame. |
| Guard | The way this move must be blocked.
High or H or Overhead (especially when from the ground) -- must be blocked standing. |
| Damage | "Basic" damage -- Unmodified damage values
"Correct" damage -- Damage values accounting for damage scaling, TOP multiplier, and defense rate |
| Guard Crush Value | Decreases the defender's guard durability gauge by this value. |
| +X | Attacker has X number of advantage frames. |
| -X | Attacker has X number of disadvantage frames. |
| KD | Short for "knockdown", knocks down opponent on hit. |
| ◯ | Cancelable on both hit and block. |
| ∞ | Chain cancelable with the same button (renda cancel). |
| ※ | Cancelable on the first hit/part only. |
| 《X》OR «X» OR <<X>> OR (X) | X number of inactive frames between hits of multihit moves. |
| △ | Only cancelable on block. |
| ▽ | Only cancelable on hit. |
| × OR X | Not cancelable. |
Close Standing Normals
| Damage | Guard | Startup | Active | Recovery | Total |
|---|---|---|---|---|---|
| 4 | Mid | 4 | 4 | 5 | 13 |
| Hit Adv | Block Adv | Cancel on Hit | Cancel on Block | Guard Crush Value | |
| +6 | +6 | Chain / ◯ | Chain / ◯ | 4 | |
|
Standing jab. | |||||
| Damage | Guard | Startup | Active | Recovery | Total |
|---|---|---|---|---|---|
| 7 | Mid | 5 | 4 | 11 | 20 |
| Hit Adv | Block Adv | Cancel on Hit | Cancel on Block | Guard Crush Value | |
| +0 | +0 | ◯ | ◯ | 4 |
| Damage | Guard | Startup | Active | Recovery | Total |
|---|---|---|---|---|---|
| 10 | Mid | 8 | 3 | 24 | 35 |
| Hit Adv | Block Adv | Cancel on Hit | Cancel on Block | Guard Crush Value | |
| -6 | -6 | ◯ | ◯ | 5 |
| Damage | Guard | Startup | Active | Recovery | Total |
|---|---|---|---|---|---|
| 5 x 3 | Mid | 9 | 1, 1, 3 | 30 | 44 |
| Hit Adv | Block Adv | Cancel on Hit | Cancel on Block | Guard Crush Value | |
| -12 | -12 | X | X | 3 x 3 |
Far Standing Normals
| Damage | Guard | Startup | Active | Recovery | Total |
|---|---|---|---|---|---|
| 5 | Mid | 4 | 4 | 5 | 13 |
| Hit Adv | Block Adv | Cancel on Hit | Cancel on Block | Guard Crush Value | |
| +6 | +6 | ◯ | ◯ | 4 |
| Damage | Guard | Startup | Active | Recovery | Total |
|---|---|---|---|---|---|
| 7 | Mid | 5 | 4 | 11 | 20 |
| Hit Adv | Block Adv | Cancel on Hit | Cancel on Block | Guard Crush Value | |
| +0 | +0 | ◯ | ◯ | 4 |
| Damage | Guard | Startup | Active | Recovery | Total |
|---|---|---|---|---|---|
| 8, 8 | Mid | 12 | 2, 1 | 23 | 38 |
| Hit Adv | Block Adv | Cancel on Hit | Cancel on Block | Guard Crush Value | |
| -3 | -3 | ◯ (First hit only) | ◯ (First hit only) | 3, 3 |
| Damage | Guard | Startup | Active | Recovery | Total |
|---|---|---|---|---|---|
| 6 x 3 | Mid | 9 | 1, 1, 3 | 30 | 44 |
| Hit Adv | Block Adv | Cancel on Hit | Cancel on Block | Guard Crush Value | |
| -12 | -12 | X | X | 3 x 3 |
Crouching Normals
| Damage | Guard | Startup | Active | Recovery | Total |
|---|---|---|---|---|---|
| 4 | Low | 3 | 5 | 6 | 14 |
| Hit Adv | Block Adv | Cancel on Hit | Cancel on Block | Guard Crush Value | |
| +4 | +4 | X | X | 4 |
| Damage | Guard | Startup | Active | Recovery | Total |
|---|---|---|---|---|---|
| 4, 5 | Low | 4 | 4 | 7 | 15 |
| Hit Adv | Block Adv | Cancel on Hit | Cancel on Block | Guard Crush Value | |
| +4 | +4 | X | X | 4, 4 |
| Damage | Guard | Startup | Active | Recovery | Total |
|---|---|---|---|---|---|
| 6 | Low | 4 | 4 | 7 | 15 |
| Hit Adv | Block Adv | Cancel on Hit | Cancel on Block | Guard Crush Value | |
| +4 | +4 | X | X | 4 |
| Damage | Guard | Startup | Active | Recovery | Total |
|---|---|---|---|---|---|
| 4/6, 8 | Mid | 7 | 3 | 19 | 29 |
| Hit Adv | Block Adv | Cancel on Hit | Cancel on Block | Guard Crush Value | |
| -1 | -1 | X | X | 4, 5 |
| Damage | Guard | Startup | Active | Recovery | Total |
|---|---|---|---|---|---|
| 10 | Mid | 7 | 3 | 19 | 29 |
| Hit Adv | Block Adv | Cancel on Hit | Cancel on Block | Guard Crush Value | |
| -1 | -1 | X | X | 5 |
| Damage | Guard | Startup | Active | Recovery | Total |
|---|---|---|---|---|---|
| 10 | Low | 11 | 5 | 21 | 37 |
| Hit Adv | Block Adv | Cancel on Hit | Cancel on Block | Guard Crush Value | |
| KD | -5 | X | X | 5 |
Jumping Normals
| Damage | Guard | Startup | Active | Recovery | Total |
|---|---|---|---|---|---|
| 6 | High | 5 | 6 | - | - |
| Hit Adv | Block Adv | Cancel on Hit | Cancel on Block | Guard Crush Value | |
| - | - | - | - | 4 |
| Damage | Guard | Startup | Active | Recovery | Total |
|---|---|---|---|---|---|
| 6 | High | 6 | 8 | - | - |
| Hit Adv | Block Adv | Cancel on Hit | Cancel on Block | Guard Crush Value | |
| - | - | - | - | 4 |
| Damage | Guard | Startup | Active | Recovery | Total |
|---|---|---|---|---|---|
| 10 | High | 9 | 6 | - | - |
| Hit Adv | Block Adv | Cancel on Hit | Cancel on Block | Guard Crush Value | |
| - | - | - | - | 5 |
| Damage | Guard | Startup | Active | Recovery | Total |
|---|---|---|---|---|---|
| 10 | High | 8 | 6 | - | - |
| Hit Adv | Block Adv | Cancel on Hit | Cancel on Block | Guard Crush Value | |
| - | - | - | - | 5 |
Command Normals
| Damage | Guard | Startup | Active | Recovery | Total |
|---|---|---|---|---|---|
| 6, 6 | Overhead | 23 | 3, 8 | 12 | 46 |
| Hit Adv | Block Adv | Cancel on Hit | Cancel on Block | Guard Crush Value | |
| -1 | +5 | X | X | 3, 3 |
| Damage | Guard | Startup | Active | Recovery | Total |
|---|---|---|---|---|---|
| 10, 10 | Mid | 8, 6 | 4, 1 | 27, 36 | 39, 37 |
| Hit Adv | Block Adv | Cancel on Hit | Cancel on Block | Guard Crush Value | |
| -12, KD | -6, -16 | ◯ | ◯ (2nd hit only) | 6, 3 | |
| |||||
| Damage | Guard | Startup | Active | Recovery | Total |
|---|---|---|---|---|---|
| - | Mid | 18 | - | - | - |
| Hit Adv | Block Adv | Cancel on Hit | Cancel on Block | Guard Crush Value | |
| KD | -13 | X | X | 25 | |
|
Kain's top move travels forward, covering a fair amount of distance and is good for one hit that knocks down your opponent. Besides doing a super, this is one of the most damaging moves you can finish a combo with. | |||||
Throws
| Damage | Guard | Startup | Active | Recovery | Total |
|---|---|---|---|---|---|
| 7 x 3 | - | 1 | - | - | - |
| Hit Adv | Block Adv | Cancel on Hit | Cancel on Block | Guard Crush Value | |
| +78 | - | - | - | - | |
|
Kain's normal throw. | |||||
Feint Cancels
| Damage | Guard | Startup | Active | Recovery | Total |
|---|---|---|---|---|---|
| - | - | - | - | - | - |
| Hit Adv | Block Adv | Cancel on Hit | Cancel on Block | Guard Crush Value | |
| - | - | - | - | - |
| Damage | Guard | Startup | Active | Recovery | Total |
|---|---|---|---|---|---|
| - | - | - | - | - | - |
| Hit Adv | Block Adv | Cancel on Hit | Cancel on Block | Guard Crush Value | |
| - | - | - | - | - |
Special Moves
Super Moves
| S Power | Damage | Guard | Startup | Active | Recovery | Total |
|---|---|---|---|---|---|---|
| 26 | - | 13 | - | - | - | |
| Hit Adv | Block Adv | Cancel on Hit | Cancel on Block | Guard Crush Value | ||
| KD | +34 | - | - | 2 x 7 | ||
| ||||||
| P Power | Damage | Guard | Startup | Active | Recovery | Total |
| 35 | - | 9 | - | - | - | |
| Hit Adv | Block Adv | Cancel on Hit | Cancel on Block | Guard Crush Value | ||
| KD | +46 | - | - | 2 x 10 | ||
| ||||||
| S Power | Damage | Guard | Startup | Active | Recovery | Total |
|---|---|---|---|---|---|---|
| 28 | - | 1 | - | - | - | |
| Hit Adv | Block Adv | Cancel on Hit | Cancel on Block | Guard Crush Value | ||
| KD | +8 | - | - | 15 | ||
| ||||||
| P Power | Damage | Guard | Startup | Active | Recovery | Total |
| 54 | - | 2 | - | - | - | |
| Hit Adv | Block Adv | Cancel on Hit | Cancel on Block | Guard Crush Value | ||
| KD | +34 | - | - | 15, 8 x 2 | ||
| ||||||
Combos
Anywhere
j.![]() ,cr.
,cr.![]() +
+![]() , charge
, charge ![]()
![]() +
+![]()
j.![]() , Standing
, Standing ![]() /
/![]() ,charge
,charge ![]()
![]() +
+![]()
j.![]() /
/![]() , cr.
, cr.![]()
![]() ,
, ![]() ,QCFx2+P
,QCFx2+P
Corner only
Throw, charge ![]()
![]() +
+![]()
Throw,QCFx2+![]() ,charge
,charge ![]()
![]() +
+![]() OR charge
OR charge ![]()
![]() +LK OR TOP Attack
+LK OR TOP Attack
- Probably his most damaging combo, but getting the QCFx2+K super to connect can be a bit tricky, and the opponent can always escape your throw... Note: You MUST use the P-power super, the S-power version DOES NOT hit!
j.![]() /
/![]() ,cr.
,cr.![]()
![]() , HP xxQCFx2+LP,QCFx2+LK,charge
, HP xxQCFx2+LP,QCFx2+LK,charge ![]()
![]() +
+![]() OR charge
OR charge ![]()
![]() +LK OR TOP Attack
+LK OR TOP Attack
j.![]() /
/![]() ,cr.
,cr.![]()
![]() , HP xxQCFx2+HP,charge
, HP xxQCFx2+HP,charge ![]()
![]() +
+![]() OR charge
OR charge ![]()
![]() +LK OR TOP Attack(1)
+LK OR TOP Attack(1)
Jumping K,Standing HP-Feint->cr.![]()
![]() ,QCFx2+LK,QCFx2+LK,charge
,QCFx2+LK,QCFx2+LK,charge ![]()
![]() +
+![]() OR charge
OR charge ![]()
![]() +LK OR TOP Attack(2)
+LK OR TOP Attack(2)
j.![]() or
or ![]() ,cr.
,cr.![]()
![]() , HP,TOP Attack
, HP,TOP Attack
(1)When in TOP, this combo does more damage than the one above if the TOP Attack is used to finish the combo.
(2)Jumping LK has a better chance for the full combo to connect than ![]() .
.
Furthermore, for any of the corner combos, you can substitute j.![]() or
or ![]() with a Jumping LP or LK if you prefer.
with a Jumping LP or LK if you prefer.
Basic Strategy
Kain can be both a keep away or rushdown character, but most people prefer his keep away style the most. Since Kain has the right tools to keep opponents guessing with both of his angled and horizontal projectiles.
Also his qcfX2 + A/C is a great anti-air, even while you're getting hit it usually ends up trading with the whatever move the opponent tries to do. If you want to rush with him you'll have to learn how to use the charge tricks, which make Kain seems like he never needs to charge.
Another thing with Kain is to learn what pokes beat what as well like all other characters. Kain has some great pokes from his stand A/B, even his stand D is a somewhat decent distant poke but has some recovery behind it. Just don't use it a lot or up close or you'll end up eating a super. Also use his d + AB into stand C on wake-up situations since it beats most wake-up specials and even sometimes supers if timed correctly. Kain's low dodge attack is a great wake-up move as well since sometimes its hard to see when he'll do it and it hits twice. If you do it just right on wake-up it leaves Kain pretty much safe from anything after it. Learn to break with his charge down, up + B/D consistantly as this is one of his main combo starters. It also helps you gain super meter when you might need more meter in certain situation. It's also a great poke as it beats most other specials and supers as well at times.
Use whiff Breaked Schwarze Lanze to build meter, it has a ridiculously low charge time and can be thus done in quick succesion.
Advanced Tactics
Comboing Crouching LK(B) into a LK(B) S. Lanze
The trick is to first land a ![]() +
+![]() on them. Usually you can land about 2 at most to be able to combo afterwards in the corner. Mid screen you can only land 1
on them. Usually you can land about 2 at most to be able to combo afterwards in the corner. Mid screen you can only land 1 ![]() +
+![]() on the opponent as 2
on the opponent as 2 ![]() +
+![]() s will cause the S. Lanze to whiff. Now for the method of doing it, same method for doing the Guard Cancel shortcuts. What you do is while the
s will cause the S. Lanze to whiff. Now for the method of doing it, same method for doing the Guard Cancel shortcuts. What you do is while the ![]() +
+![]() hits them when they are in hit stun do a quick up then go back to
hits them when they are in hit stun do a quick up then go back to ![]() , after the
, after the ![]() +
+![]() is done from its animation then hit
is done from its animation then hit ![]() again. What happens is since you already started with a
again. What happens is since you already started with a ![]()
![]() you gained the charge needed for the S. Lanze from it. So when you do the
you gained the charge needed for the S. Lanze from it. So when you do the ![]() then
then ![]() again then hit
again then hit ![]() it makes it so the move is able to combo afterwards. It does sound tricky but in reality its pretty simple, it gives you enough time to pull it off.
it makes it so the move is able to combo afterwards. It does sound tricky but in reality its pretty simple, it gives you enough time to pull it off.
- So just remember hit
 +
+ , then
  , back to
  , then hit
  again to combo into the move, you can also Break it afterwards but has to be done pretty quick.
 - Another way this can be understood is hit
 +
+ , then
  , then
  +
+ . As long as you do this fast enough it should work unless you are out of range
So with this tool added to Kain's other options this really helps him in his corner game for mixups. Since most of Kain's moves are charges so most people don't except him to be able to combo into those moves from crouch attacks. With this trick also comes new combos that Kain can use in an actual match as well.
Guard Cancel Shortcuts
The whole Guard Cancel section explains how the shortcuts for GCs work so Kains is the same. Just have the charge of the move you want to do lets says any of his Charge Back then Forward+P or K (S. Flamme or Panzer). Charge it for a second then hit Foward then hit Back, or even Down-Back, again to JD the move you want to JD. After that just hit which move you want to pull off with P or K. It should Guard Cancel right when you hit the button you want with no problems. Also you can Guard Cancel his S. Lanze as well. Though there are 2 ways of doing it, I find the first method easier in certain situations. Charge Down then , either press Back or Down-Back to JD then hit Up+K right when you JD. The other method is jumping in but charging as you jump then before you land input Down, Up, then hit Back or Down-Back as you land then the button to Guard Cancel into it. Try both methods out and see which one works best for you.
Backdash Cancel
It's possible to cancel Kain's backdash into any of his specials/supers, that includes his TOP attack. The timing is pretty instant about a 2 frame window to input the special/super/TOP attack. So for instance if you want to cancel his charge kick hold d, u + B/D during the backdash, you would need to do it as:
hold d, do a quick backdash then hit up + B/D the instant you backdash. It's a real quick cancel and the timing is very hard but possible to do. Requires a lot of practice to get it down.
Video Lecture
In-depth video lecture on Kain. Please use the timestamps to navigate the topics.
Matchup Notes
To come.
