No edit summary |
(skeleton) |
||
| Line 3: | Line 3: | ||
== Normals == | == Normals == | ||
=== Standing Normals === | ===Standing Normals=== | ||
=== Crouching Normals === | =====<font style="visibility:hidden; float:right">5LP</font>===== | ||
=== Jumping Normals === | {{MoveDataCargo | ||
| title = 5LP | |||
| subtitle = | |||
| input = Standing Light Punch | |||
| images = | |||
{{MoveDataCargoImage|e.honda_5lp|caption=}} | |||
| info = | |||
{{AttackDataCargo-SF6/Query|e.honda_5lp}} | |||
}} | |||
=====<font style="visibility:hidden; float:right">5MP</font>===== | |||
{{MoveDataCargo | |||
| title = 5MP | |||
| subtitle = | |||
| input = Standing Medium Punch | |||
| images = | |||
{{MoveDataCargoImage|e.honda_5mp|caption=}} | |||
| info = | |||
{{AttackDataCargo-SF6/Query|e.honda_5mp}} | |||
}} | |||
=====<font style="visibility:hidden; float:right">5HP</font>===== | |||
{{MoveDataCargo | |||
| title = 5HP | |||
| subtitle = | |||
| input = Standing Heavy Punch | |||
| images = | |||
{{MoveDataCargoImage|e.honda_5hp|caption=}} | |||
| info = | |||
{{AttackDataCargo-SF6/Query|e.honda_5hp}} | |||
}} | |||
=====<font style="visibility:hidden; float:right">5LK</font>===== | |||
{{MoveDataCargo | |||
| title = 5LK | |||
| subtitle = | |||
| input = Standing Light Kick | |||
| images = | |||
{{MoveDataCargoImage|e.honda_5lk|caption=}} | |||
| info = | |||
{{AttackDataCargo-SF6/Query|e.honda_5lk}} | |||
}} | |||
=====<font style="visibility:hidden; float:right">5MK</font>===== | |||
{{MoveDataCargo | |||
| title = 5MK | |||
| subtitle = | |||
| input = Standing Medium Kick | |||
| images = | |||
{{MoveDataCargoImage|e.honda_5Mk|caption=}} | |||
| info = | |||
{{AttackDataCargo-SF6/Query|e.honda_5mk}} | |||
}} | |||
=====<font style="visibility:hidden; float:right">5HK</font>===== | |||
{{MoveDataCargo | |||
| title = 5HK | |||
| subtitle = | |||
| input = Standing Heavy Kick | |||
| images = | |||
{{MoveDataCargoImage|imageHeight=200px|e.honda_5Hk|caption=}} | |||
| info = | |||
{{AttackDataCargo-SF6/Query|e.honda_5hk}} | |||
}} | |||
===Crouching Normals=== | |||
=====<font style="visibility:hidden; float:right">2LP</font>===== | |||
{{MoveDataCargo | |||
| title = 2LP | |||
| subtitle = | |||
| input = Crouching Light Punch | |||
| images = | |||
{{MoveDataCargoImage|e.honda_2lp|caption=}} | |||
| info = | |||
{{AttackDataCargo-SF6/Query|e.honda_2lp}} | |||
}} | |||
=====<font style="visibility:hidden; float:right">2MP</font>===== | |||
{{MoveDataCargo | |||
| title = 2MP | |||
| subtitle = | |||
| input = Crouching Medium Punch | |||
| images = | |||
{{MoveDataCargoImage|e.honda_2mp|caption=}} | |||
| info = | |||
{{AttackDataCargo-SF6/Query|e.honda_2mp}} | |||
}} | |||
=====<font style="visibility:hidden; float:right">2HP</font>===== | |||
{{MoveDataCargo | |||
| title = 2HP | |||
| subtitle = | |||
| input = Crouching Heavy Punch | |||
| images = | |||
{{MoveDataCargoImage|imageHeight=200px|e.honda_2hp|caption=}} | |||
| info = | |||
{{AttackDataCargo-SF6/Query|e.honda_2hp}} | |||
}} | |||
=====<font style="visibility:hidden; float:right">2LK</font>===== | |||
{{MoveDataCargo | |||
| title = 2LK | |||
| subtitle = | |||
| input = Crouching Light Kick | |||
| images = | |||
{{MoveDataCargoImage|e.honda_2lk|caption=}} | |||
| info = | |||
{{AttackDataCargo-SF6/Query|e.honda_2lk}} | |||
}} | |||
=====<font style="visibility:hidden; float:right">2MK</font>===== | |||
{{MoveDataCargo | |||
| title = 2MK | |||
| subtitle = | |||
| input = Crouching Medium Kick | |||
| images = | |||
{{MoveDataCargoImage|e.honda_2mk|caption=}} | |||
| info = | |||
{{AttackDataCargo-SF6/Query|e.honda_2mk}} | |||
}} | |||
=====<font style="visibility:hidden; float:right">2HK</font>===== | |||
{{MoveDataCargo | |||
| title = 2HK | |||
| subtitle = | |||
| input = Crouching Heavy Kick | |||
| images = | |||
{{MoveDataCargoImage|e.honda_2hk|caption=}} | |||
| info = | |||
{{AttackDataCargo-SF6/Query|e.honda_2hk}} | |||
}} | |||
===Jumping Normals=== | |||
=====<font style="visibility:hidden; float:right">j.LP</font>===== | |||
{{MoveDataCargo | |||
| title = j.LP | |||
| subtitle = | |||
| input = Jumping Light Punch | |||
| images = | |||
{{MoveDataCargoImage|imageHeight=200px|e.honda_jlp|caption=}} | |||
| info = | |||
{{AttackDataCargo-SF6/Query|e.honda_jlp}} | |||
}} | |||
=====<font style="visibility:hidden; float:right">j.MP</font>===== | |||
{{MoveDataCargo | |||
| title = j.MP | |||
| subtitle = | |||
| input = Jumping Medium Punch | |||
| images = | |||
{{MoveDataCargoImage|imageHeight=200px|e.honda_jmp|caption=}} | |||
| info = | |||
{{AttackDataCargo-SF6/Query|e.honda_jmp}} | |||
}} | |||
=====<font style="visibility:hidden; float:right">j.HP</font>===== | |||
{{MoveDataCargo | |||
| title = j.HP | |||
| subtitle = | |||
| input = Jumping Heavy Punch | |||
| images = | |||
{{MoveDataCargoImage|e.honda_jhp|caption=}} | |||
| info = | |||
{{AttackDataCargo-SF6/Query|e.honda_jhp}} | |||
}} | |||
=====<font style="visibility:hidden; float:right">j.LK</font>===== | |||
{{MoveDataCargo | |||
| title = j.LK | |||
| subtitle = | |||
| input = Jumping Light Kick | |||
| images = | |||
{{MoveDataCargoImage|imageHeight=200px|e.honda_jlk|caption=}} | |||
| info = | |||
{{AttackDataCargo-SF6/Query|e.honda_jlk}} | |||
}} | |||
=====<font style="visibility:hidden; float:right">j.MK</font>===== | |||
{{MoveDataCargo | |||
| title = j.MK | |||
| subtitle = | |||
| input = Jumping Medium Kick | |||
| images = | |||
{{MoveDataCargoImage|e.honda_jmk|caption=}} | |||
| info = | |||
{{AttackDataCargo-SF6/Query|e.honda_jmk}} | |||
}} | |||
=====<font style="visibility:hidden; float:right">j.HK</font>===== | |||
{{MoveDataCargo | |||
| title = j.HK | |||
| subtitle = | |||
| input = Jumping Heavy Kick | |||
| images = | |||
{{MoveDataCargoImage|e.honda_jhk|caption=}} | |||
| info = | |||
{{AttackDataCargo-SF6/Query|e.honda_jhk}} | |||
}} | |||
== Command Normals == | == Command Normals == | ||
== Target Combos == | == Target Combos == | ||
== Universal Mechanics == | == Universal Mechanics == | ||
=== Throws === | === Throws === | ||
=====<font style="visibility:hidden; float:right">Throw</font>===== | |||
{{MoveDataCargo | |||
| title = Throw | |||
| subtitle = | |||
| input = | |||
| images = | |||
{{MoveDataCargoImage|e.honda_lplk|caption=}} | |||
| info = | |||
{{AttackDataCargo-SF6/Query|e.honda_lplk}} | |||
}} | |||
=====<font style="visibility:hidden; float:right">Back Throw</font>===== | |||
{{MoveDataCargo | |||
| title = Back Throw | |||
| subtitle = | |||
| input = | |||
| images = | |||
{{MoveDataCargoImage|e.honda_4lplk|caption=}} | |||
| info = | |||
{{AttackDataCargo-SF6/Query|e.honda_4lplk}} | |||
}} | |||
=== Drive Moves === | === Drive Moves === | ||
=====<font style="visibility:hidden; float:right">Drive Impact</font>===== | |||
{{MoveDataCargo | |||
| title = Drive Impact | |||
| subtitle = | |||
| input = | |||
| images = | |||
{{MoveDataCargoImage|e.honda_hphk|caption=}} | |||
| info = | |||
{{AttackDataCargo-SF6/Query|e.honda_hphk}} | |||
See [[Street_Fighter_6/Gauges#Drive_Impact|Drive Impact]]. | |||
}} | |||
=====<font style="visibility:hidden; float:right">Drive Reversal</font>===== | |||
{{MoveDataCargo | |||
| title = Drive Reversal | |||
| subtitle = | |||
| input = | |||
| images = | |||
{{MoveDataCargoImage|e.honda_6hphk|caption=}} | |||
| info = | |||
{{AttackDataCargo-SF6/Query|e.honda_6hphk}} | |||
Armor Break; See [[Street_Fighter_6/Gauges#Drive_Reversal|Drive Reversal]]. | |||
}} | |||
=====<font style="visibility:hidden; float:right">Drive Rush</font>===== | |||
{{MoveDataCargo | |||
| title = Drive Rush | |||
| subtitle = | |||
| input = | |||
| images = | |||
{{MoveDataCargoImage|imageHeight=200px|e.honda_66|caption=}} | |||
| info = | |||
{{AttackDataCargo-SF6/Query|e.honda_66}} | |||
See [[Street_Fighter_6/Gauges#Drive_Rush|Drive Rush]]. Framedata shown in parentheses refers to the Drive Rush version used from a Parry. | |||
}} | |||
=====<font style="visibility:hidden; float:right">Drive Parry</font>===== | |||
{{MoveDataCargo | |||
| title = Drive Parry | |||
| subtitle = | |||
| input = | |||
| images = | |||
{{MoveDataCargoImage|imageHeight=200px|e.honda_mpmk|caption=}} | |||
| info = | |||
{{AttackDataCargo-SF6/Query|e.honda_mpmk}} | |||
See [[Street_Fighter_6/Gauges#Drive_Parry|Drive Parry]]. Perfect Parrying has only 1F of recovery and disables the opponent from canceling their attack. Perfect Parrying projectiles puts you into fixed 11 frames of recovery. | |||
}} | |||
=== Taunts === | |||
=====<font style="visibility:hidden; float:right">Taunt</font>===== | |||
{{MoveDataCargo | |||
| title = Neutral Taunt | |||
| subtitle = | |||
| input = 5PPPKKK | |||
| images = | |||
{{MoveDataCargoImage|imageHeight=160px|e.honda_5pppkkk|caption='' "" ''}} | |||
| info = | |||
{{AttackDataCargo-SF6/Query|e.honda_5pppkkk}} | |||
}} | |||
=====<font style="visibility:hidden; float:right">Forward Taunt</font>===== | |||
{{MoveDataCargo | |||
| title = Forward Taunt | |||
| subtitle = | |||
| input = 6PPPKKK | |||
| images = | |||
{{MoveDataCargoImage|imageHeight=160px|e.honda_6pppkkk|caption='' "" ''}} | |||
| info = | |||
{{AttackDataCargo-SF6/Query|e.honda_6pppkkk}} | |||
}} | |||
=====<font style="visibility:hidden; float:right">Back Taunt</font>===== | |||
{{MoveDataCargo | |||
| title = Back Taunt | |||
| subtitle = | |||
| input = 4PPPKKK | |||
| images = | |||
{{MoveDataCargoImage|imageHeight=160px|e.honda_4pppkkk|caption='' "" ''}} | |||
| info = | |||
{{AttackDataCargo-SF6/Query|e.honda_4pppkkk}} | |||
}} | |||
== Special Moves == | == Special Moves == | ||
=====<font style="visibility:hidden; float:right">236P</font>===== | |||
{{MoveDataCargo | |||
| title = Placeholder | |||
| subtitle = | |||
| input = Placeholder | |||
| images = | |||
{{MoveDataCargoImage|imageHeight=200px|e.honda_|caption=}} | |||
---- | |||
{{MoveDataCargoImage|imageHeight=200px|e.honda_|caption=}} | |||
| info = | |||
{{AttackDataCargo-SF6/Query|e.honda_}} | |||
{{AttackDataCargo-SF6/Query|e.honda_}} | |||
{{AttackDataCargo-SF6/Query|e.honda_}} | |||
{{AttackDataCargo-SF6/Query|e.honda_}} | |||
}} | |||
== Super Arts == | == Super Arts == | ||
=====<font style="visibility:hidden; float:right">236236P</font>===== | |||
{{MoveDataCargo | |||
| title = | |||
| subtitle = Level 1 Super Art | |||
| input = | |||
| images = | |||
{{MoveDataCargoImage|imageHeight=200px|e.honda_|caption=}} | |||
| info = | |||
{{AttackDataCargo-SF6/Query|e.honda_}} | |||
}} | |||
=====<font style="visibility:hidden; float:right">214214P</font>===== | |||
{{MoveDataCargo | |||
| title = | |||
| subtitle = Level 2 Super Art | |||
| input = | |||
| images = | |||
{{MoveDataCargoImage|imageHeight=180px|e.honda_|caption=}} | |||
| info = | |||
{{AttackDataCargo-SF6/Query|e.honda_}} | |||
}} | |||
=====<font style="visibility:hidden; float:right">Placeholder</font>===== | |||
{{MoveDataCargo | |||
| title = | |||
| subtitle = Level 3 Super Art | |||
| input = | |||
| images = | |||
{{MoveDataCargoImage|e.honda_|caption=}} | |||
---- | |||
{{MoveDataCargoImage|e.honda_|caption=CA version grants 500 extra damage}} | |||
| info = | |||
{{AttackDataCargo-SF6/Query|e.honda_}} | |||
{{AttackDataCargo-SF6/Query|e.honda_(ca)}} | |||
}} | |||
{{Character Subnav SF6|chara={{SUBPAGENAME}}|discord={{{discord|}}} }} | |||
{{Navbox-SF6}} | |||
[[Category:Street Fighter 6]] | [[Category:Street Fighter 6]] | ||
[[Category:E. Honda]] | [[Category:E. Honda]] | ||
Revision as of 17:49, 29 December 2022
| Pre-release information
This page is under construction based on pre-release data. Join the SF6 Resource Hub for info on editing. |
Introduction
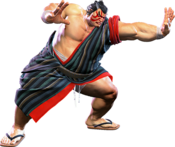
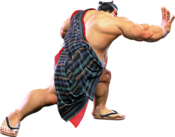
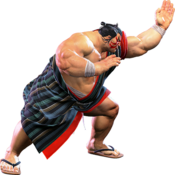
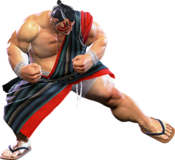
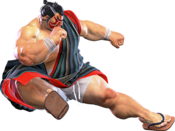
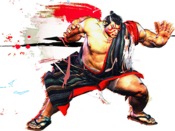
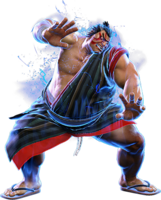
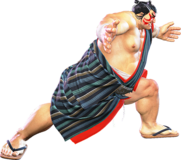
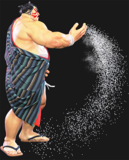
A sumo wrestler looking to bring the sport worldwide, E. Honda has the skills of a yokozuna, but his constant globetrotting has prevented his promotion. Also an expert chef renowned for mouthwatering chanko stew.
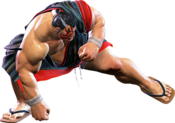
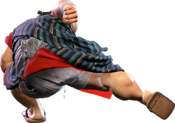
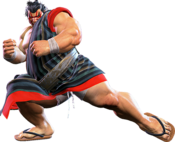
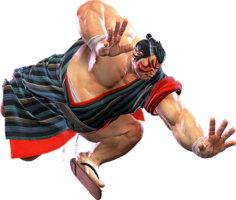
Edmond Honda is a powerful and aggressive rushdown character with a speciality in long-range advancing offense. Honda's entire gameplan revolves around his signature sumo moves, burying opponents under a barrage of slaps, headbutts and ground slams until he's the only one left standing.
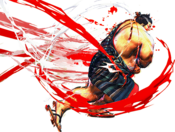
Honda's core move is Sumo Headbutt, a forward-moving special that just about does it all. If blocked normally, headbutt is safe and deals significant damage to the opponent's drive gauge. On hit, headbutt deals 1000+ damage and knocks down, leading to strong setplay. At close ranges, the headbutt is fast to start up and is difficult to react to or punish. Headbutt is also an anti-air, and OD headbutt has armor frames and works as a reversal. Opponents therefore can't carelessly approach Honda, as successful headbutts will get them slammed backwards. If opponents choose to block, they will burn out due to drive gauge damage, allowing Honda to begin nearly endless pressure against them. This forces opponents to take action and make risky guesses, and Honda capitalizes by forcing these interactions.
Outside of headbutt, Honda also has a great set of brawling tools. In close range, Honda has strong normals and target combos. Standing medium punch (5MP) is +1 on block and leads to tricky offensive sequences. At far range, Honda can poke with crouching medium punch (2MP) and Harai Kick (6HK). Oicho Throw (a damage-dealing command grab) and Sumo Smash (a combo finisher and anti-air that is plus on block) round out Honda's offense. Once he's gotten the hit, Honda is capable of dealing exceptional damage thanks to the mighty Hundred-Hand Slap, an incredible combo starter/filler/ender that is safe on block. Allowing Honda to stay still at fullscreen will let him apply Sumo Spirit, a buff that makes successful conversions with Hundred-Hand Slap hurt even more. All of this can make Honda very difficult to deal with once he's gotten close.
While Honda's offense is nothing short of devastating, it does have one major weakness: commitment. Unlike a lot of characters, Honda is all-in or all-out. He has poor movement speed, meaning his footsies can be somewhat lacking. He lacks a throw loop, and Oicho Throw resets him back to neutral on landing it. While Honda has great pokes, his Medium normals are notably either stubbier or slower than the majority of the cast, and he lacks a low to cancel into Drive Rush for demonstrating neutral control. Thus, Honda relies quite a bit on headbutt to get the job done in many matchups. That said, headbutt is a fantastic move that compliments Honda's gameplan well, so smart Honda players have to learn when to go ham and when to back off and be patient. Honda rewards both styles well, as any sumo should. If you love getting up close and personal and live for the feeling of landing a good headbutt or hand slap, there's no better Rikishi to show you the ropes than E. Honda.
| Pick if you like: | Avoid if you dislike: |
|---|---|
|
|
Classic & Modern Versions Comparison
| Missing Normals |
|
|---|---|
| Missing Command Normals |
|
| Shortcut-Only Specials |
|
| Assist Combos |
|
| Miscellaneous Changes |
|
| E. Honda | |
|---|---|
| Vitals | |
| Life Points | 10500 |
| Ground Movement | |
| Forward Walk Speed | 0.045 |
| Backward Walk Speed | 0.025 |
| Forward Dash Speed | 19 |
| Backward Dash Speed | 23 |
| Forward Dash Distance | 1.058 |
| Backward Dash Distance | 0.601 |
| Drive Rush Min. Distance (Throw) | 0.213 |
| Drive Rush Min. Distance (Block) | 1.769 |
| Drive Rush Max Distance | 3.375 |
| Jumping | |
| Jump Speed | 4+38+3 |
| Jump Apex | 2.115 |
| Forward Jump Distance | 1.90 |
| Backward Jump Distance | 1.52 |
| Throws | |
| Throw Range | 0.9 |
| Throw Hurtbox | 0.43 |
Normals
Standing Normals
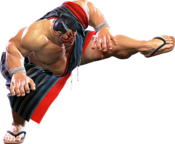
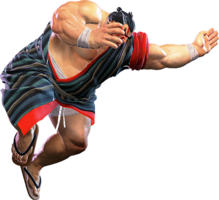
5LP
| Startup | Active | Recovery | Cancel | Damage | Guard | On Hit | On Block |
|---|---|---|---|---|---|---|---|
| 5 | 3 | 10 | Sp SA TC | 300 | LH | +4 | -1 |
5MP
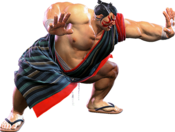
| Startup | Active | Recovery | Cancel | Damage | Guard | On Hit | On Block |
|---|---|---|---|---|---|---|---|
| 10 | 4 | 13 | Sp SA TC | 700 | LH | +6 | +1 |
5HP
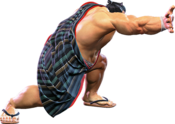
| Startup | Active | Recovery | Cancel | Damage | Guard | On Hit | On Block |
|---|---|---|---|---|---|---|---|
| 8(9) | 7 | 20 | Sp SA | 900 | LH | +1(+4) | -6(-3) |
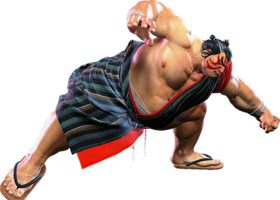
5LK
| Startup | Active | Recovery | Cancel | Damage | Guard | On Hit | On Block |
|---|---|---|---|---|---|---|---|
| 4 | 2 | 9 | Sp SA | 300 | LH | +5 | -1 |
5MK
| Startup | Active | Recovery | Cancel | Damage | Guard | On Hit | On Block |
|---|---|---|---|---|---|---|---|
| 10 | 4 | 16 | - | 700 | LH | +4 | -3 |
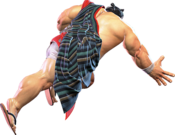
5HK
| Startup | Active | Recovery | Cancel | Damage | Guard | On Hit | On Block |
|---|---|---|---|---|---|---|---|
| 8 | 2(1)4 | 22 | Sp SA | 400x2 | LH | -1 | -5(-11) |
Crouching Normals
2LP
| Startup | Active | Recovery | Cancel | Damage | Guard | On Hit | On Block |
|---|---|---|---|---|---|---|---|
| 4 | 3 | 10 | Chn Sp SA | 300 | LH | +4 | -1 |
2MP
| Startup | Active | Recovery | Cancel | Damage | Guard | On Hit | On Block |
|---|---|---|---|---|---|---|---|
| 8 | 4 | 16 | Sp SA | 600 | LH | +3 | -3 |
2HP
| Startup | Active | Recovery | Cancel | Damage | Guard | On Hit | On Block |
|---|---|---|---|---|---|---|---|
| 11 | 4 | 17(19) | - | 800 | LH | +3(+5) | -3(-1) |
2LK
| Startup | Active | Recovery | Cancel | Damage | Guard | On Hit | On Block |
|---|---|---|---|---|---|---|---|
| 5 | 2 | 9 | Chn | 200 | L | +3 | -3 |
2MK
| Startup | Active | Recovery | Cancel | Damage | Guard | On Hit | On Block |
|---|---|---|---|---|---|---|---|
| 9 | 3 | 17 | - | 500 | L | +6 | -2 |
2HK
| Startup | Active | Recovery | Cancel | Damage | Guard | On Hit | On Block |
|---|---|---|---|---|---|---|---|
| 11 | 3(6)5 | 14 | - | 900 | L | HKD +30(+39) | -10(-1) |
Jumping Normals
j.LP
| Startup | Active | Recovery | Cancel | Damage | Guard | On Hit | On Block |
|---|---|---|---|---|---|---|---|
| 5 | 6 | 3 land | - | 300 | H | +3(+9) | -1(+5) |
j.MP
| Startup | Active | Recovery | Cancel | Damage | Guard | On Hit | On Block |
|---|---|---|---|---|---|---|---|
| 6 | 8 | 3 land | - | 700 | H | +5(+11) | +1(+7) |
j.HP
| Startup | Active | Recovery | Cancel | Damage | Guard | On Hit | On Block |
|---|---|---|---|---|---|---|---|
| 9 | 4 | 3 land | - | 800 | H | +9(+15) | +5(+11) |
j.LK
| Startup | Active | Recovery | Cancel | Damage | Guard | On Hit | On Block |
|---|---|---|---|---|---|---|---|
| 6 | 6 | 3 land | - | 300 | H | +5(+10) | +1(+6) |
j.MK
| Startup | Active | Recovery | Cancel | Damage | Guard | On Hit | On Block |
|---|---|---|---|---|---|---|---|
| 9 | 6 | 3 land | - | 700 | H | +8(+13) | +4(+9) |
j.HK
Command Normals
Target Combos
Universal Mechanics
Throws
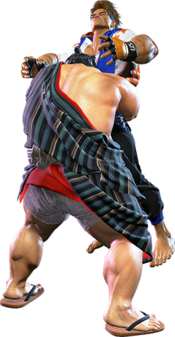
Throw
| Startup | Active | Recovery | Cancel | Damage | Guard | On Hit | On Block |
|---|---|---|---|---|---|---|---|
| 5 | 3 | 23 | - | 1200 (2040) | T | KD +17 | - |
Back Throw
| Startup | Active | Recovery | Cancel | Damage | Guard | On Hit | On Block |
|---|---|---|---|---|---|---|---|
| 5 | 3 | 23 | - | 1200 (2040) | T | KD +24 | - |
Drive Moves
Drive Impact
| Startup | Active | Recovery | Cancel | Damage | Guard | On Hit | On Block |
|---|---|---|---|---|---|---|---|
| 26 | 2 | 35 | - | 800 | LH | KD +35 / Wall Splat KD +65 | -3 / Wall Splat HKD +72 |
See Drive Impact.
Drive Reversal
| Startup | Active | Recovery | Cancel | Damage | Guard | On Hit | On Block |
|---|---|---|---|---|---|---|---|
| 20 | 3 | 26(31) | - | 500 recoverable | LH | KD +23 | -6 |
Armor Break; See Drive Reversal.
Drive Rush
No results
See Drive Rush. Framedata shown in parentheses refers to the Drive Rush version used from a Parry.
Drive Parry
| Startup | Active | Recovery | Cancel | Damage | Guard | On Hit | On Block |
|---|---|---|---|---|---|---|---|
| 1 | 12 or until released | 33(1)(11) | - | - | - | - | - |
See Drive Parry. Perfect Parrying has only 1F of recovery and disables the opponent from canceling their attack. Perfect Parrying projectiles puts you into fixed 11 frames of recovery.
Taunts
Taunt
| Startup | Active | Recovery | Cancel | Damage | Guard | On Hit | On Block |
|---|---|---|---|---|---|---|---|
| 88 | [178] | 45 | - | - | - | - | - |
Forward Taunt
| Startup | Active | Recovery | Cancel | Damage | Guard | On Hit | On Block |
|---|---|---|---|---|---|---|---|
| 100 (total) | - | - | - | - | - | - | - |
Back Taunt
Special Moves
236P
No results
No results No results No results
Super Arts
236236P
No results
214214P
No results
Placeholder
CA version grants 500 extra damage
No results
No results

