Lichmassacre (talk | contribs) m (→Move List: Attack Data boxes for all basic normals.) |
mNo edit summary |
||
| Line 1,037: | Line 1,037: | ||
To get out of it, after pressing C (rotor comes out), you can press backdash+D to backdash out of it, or AD to stA out of it, or 2ABD to anti-air with 2AB (or anything else allowing you to cancel the rotor, but these are usually the safest options). | To get out of it, after pressing C (rotor comes out), you can press backdash+D to backdash out of it, or AD to stA out of it, or 2ABD to anti-air with 2AB (or anything else allowing you to cancel the rotor, but these are usually the safest options). | ||
===Video lecture=== | |||
In-depth video lecture on Kevin. Please use the timestamps to navigate the topics. | |||
<youtube>CDk0nLBs0Sc</youtube> | |||
===Matchup Notes=== | ===Matchup Notes=== | ||
Revision as of 07:44, 14 November 2021
Introduction
Originally, his designer gave him knife attacks to improve his reach but this was taken out due to balancing issues.
| Pros | Cons |
|---|---|
|
|
Character Colors
Move List
Esoterics
Frame Data Source: https://w.atwiki.jp/garoumow/pages/30.html
Legend:
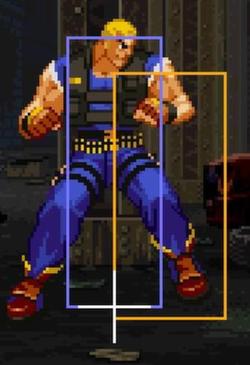
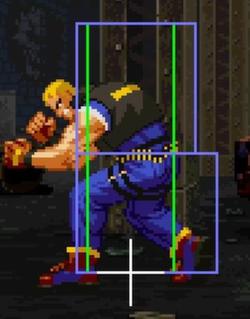
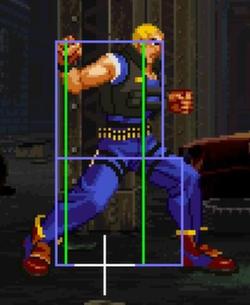
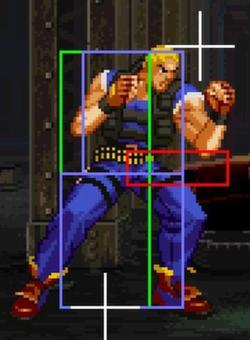
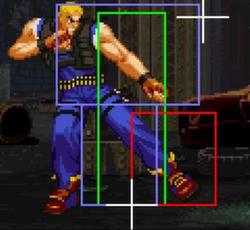
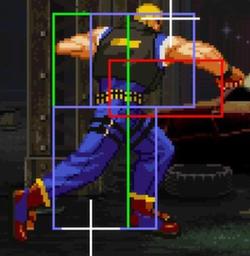
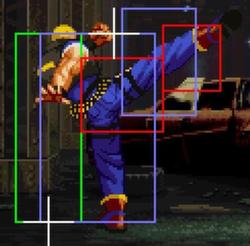
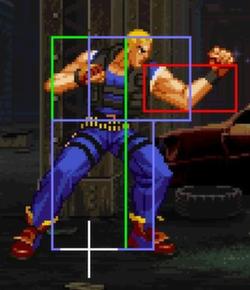
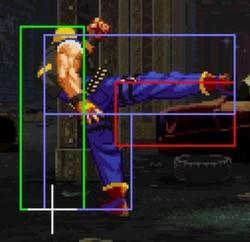
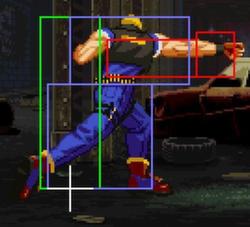
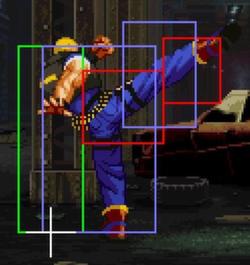
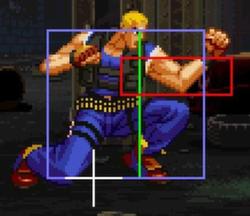
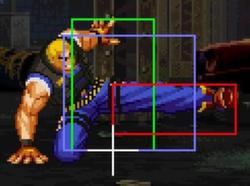
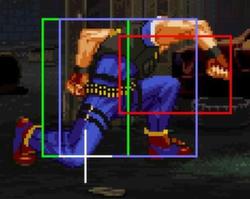
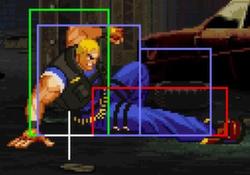
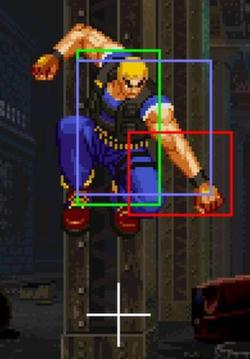
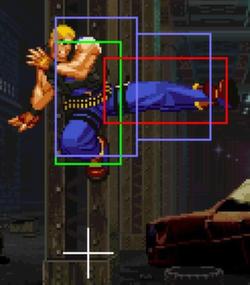
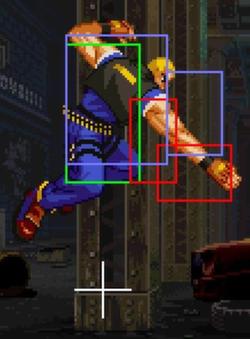
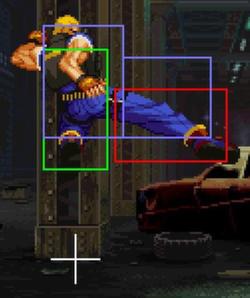
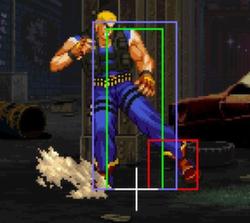
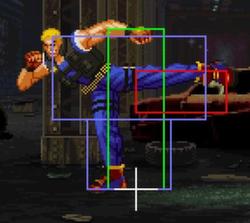
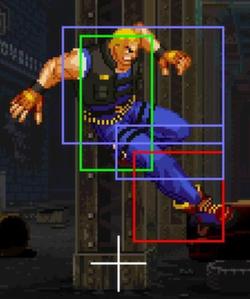
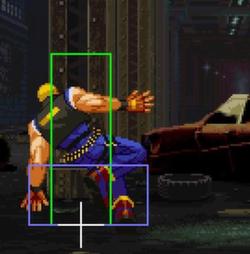
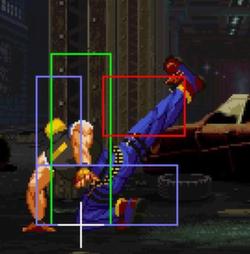
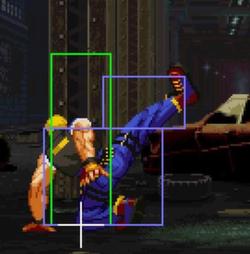
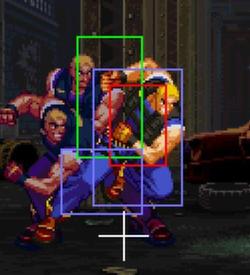
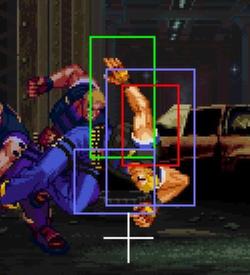
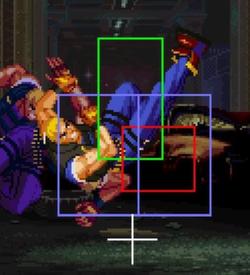
- Hit Box: Area that will hit the opponent
- Hurt Box: Area where you can get hit. A move is invincible if the Hurt Box is absent.
- Throw Box/Range: Active throw frames and range. Your opponent will be thrown in this field if not in block or hit stun.
- Projectile Box: Hit box on a projectile attack.
- Guard/Counter Box: The Guard Box or Counter Box. This appears when blocking or using a counter move.
- Push Box: Has no bearing on hurt/hit boxes. Just allows characters to not pass through each other.
- Command = the input for the attack.
- Start Up = How many start up frames a move/attack has.
- Hit = When the attack hits.
- Block = When the attack is blocked.
- + signifies how many advantage frames the attacker has.
- - signifies how many disadvantage frames the attacker has.
- KD means the attack will knock the opponent down.
Close Standing Normals
| Damage | Guard | Startup | Active | Recovery | Total |
|---|---|---|---|---|---|
| - | - | - | - | - | - |
| Hit Adv | Block Adv | Cancel on Hit | Cancel on Block | Guard Crush Value | |
| - | - | - | - | - | |
|
Standing jab. | |||||
| Damage | Guard | Startup | Active | Recovery | Total |
|---|---|---|---|---|---|
| - | - | - | - | - | - |
| Hit Adv | Block Adv | Cancel on Hit | Cancel on Block | Guard Crush Value | |
| - | - | - | - | - |
| Damage | Guard | Startup | Active | Recovery | Total |
|---|---|---|---|---|---|
| - | - | - | - | - | - |
| Hit Adv | Block Adv | Cancel on Hit | Cancel on Block | Guard Crush Value | |
| - | - | - | - | - |
| Damage | Guard | Startup | Active | Recovery | Total |
|---|---|---|---|---|---|
| - | - | - | - | - | - |
| Hit Adv | Block Adv | Cancel on Hit | Cancel on Block | Guard Crush Value | |
| - | - | - | - | - |
Far Standing Normals
| Damage | Guard | Startup | Active | Recovery | Total |
|---|---|---|---|---|---|
| - | - | - | - | - | - |
| Hit Adv | Block Adv | Cancel on Hit | Cancel on Block | Guard Crush Value | |
| - | - | - | - | - |
| Damage | Guard | Startup | Active | Recovery | Total |
|---|---|---|---|---|---|
| - | - | - | - | - | - |
| Hit Adv | Block Adv | Cancel on Hit | Cancel on Block | Guard Crush Value | |
| - | - | - | - | - |
| Damage | Guard | Startup | Active | Recovery | Total |
|---|---|---|---|---|---|
| - | - | - | - | - | - |
| Hit Adv | Block Adv | Cancel on Hit | Cancel on Block | Guard Crush Value | |
| - | - | - | - | - |
| Damage | Guard | Startup | Active | Recovery | Total |
|---|---|---|---|---|---|
| - | - | - | - | - | - |
| Hit Adv | Block Adv | Cancel on Hit | Cancel on Block | Guard Crush Value | |
| - | - | - | - | - |
Crouching Normals
| Damage | Guard | Startup | Active | Recovery | Total |
|---|---|---|---|---|---|
| - | - | - | - | - | - |
| Hit Adv | Block Adv | Cancel on Hit | Cancel on Block | Guard Crush Value | |
| - | - | - | - | - |
| Damage | Guard | Startup | Active | Recovery | Total |
|---|---|---|---|---|---|
| - | - | - | - | - | - |
| Hit Adv | Block Adv | Cancel on Hit | Cancel on Block | Guard Crush Value | |
| - | - | - | - | - |
| Damage | Guard | Startup | Active | Recovery | Total |
|---|---|---|---|---|---|
| - | - | - | - | - | - |
| Hit Adv | Block Adv | Cancel on Hit | Cancel on Block | Guard Crush Value | |
| - | - | - | - | - |
| Damage | Guard | Startup | Active | Recovery | Total |
|---|---|---|---|---|---|
| - | - | - | - | - | - |
| Hit Adv | Block Adv | Cancel on Hit | Cancel on Block | Guard Crush Value | |
| - | - | - | - | - |
Jumping Normals
| Damage | Guard | Startup | Active | Recovery | Total |
|---|---|---|---|---|---|
| - | - | - | - | - | - |
| Hit Adv | Block Adv | Cancel on Hit | Cancel on Block | Guard Crush Value | |
| - | - | - | - | - |
| Damage | Guard | Startup | Active | Recovery | Total |
|---|---|---|---|---|---|
| - | - | - | - | - | - |
| Hit Adv | Block Adv | Cancel on Hit | Cancel on Block | Guard Crush Value | |
| - | - | - | - | - |
| Damage | Guard | Startup | Active | Recovery | Total |
|---|---|---|---|---|---|
| - | - | - | - | - | - |
| Hit Adv | Block Adv | Cancel on Hit | Cancel on Block | Guard Crush Value | |
| - | - | - | - | - |
| Damage | Guard | Startup | Active | Recovery | Total |
|---|---|---|---|---|---|
| - | - | - | - | - | - |
| Hit Adv | Block Adv | Cancel on Hit | Cancel on Block | Guard Crush Value | |
| - | - | - | - | - |
Command Normals
Throws
Feint Cancels
Special Moves
Super Moves
Attributes
When a move can be canceled, it can either be canceled into a special/super/feint. Some moves that can't be canceled when they hit can be canceled when the opponent blocks while some moves that can be Special/Super canceled cannot be Feint Canceled.
Frame Data
Legend :
Command = the input for the attack.
Start Up = How many start up frames a move/attack has.
Hit = When the attack hits.
Block = When the attack is blocked.
+ signifies how many advantage frames the attacker has.
- signifies how many disadvantage frames the attacker has.
KD means the attack will knock the opponent down.
Data from Howard's Arena
Hitboxes
| Command | Total Frames |
| Close |
x |
| Command | Total Frames |
| x |
| Command | Total Frames |
| x |
| Command | Start Up | Hit | Guard |
| Close |
4 | +2 | +2 |
| Command | Start Up | Hit | Guard |
| Close |
4 | '+2 | +2 |
| Command | Start Up | Hit | Guard |
| Close |
6 | -9 | -9 |
| Command | Start Up | Hit | Guard |
| Close |
11 | -9 | -9 |
| Command | Start Up | Hit | Guard |
| Far |
3 | +2 | +2 |
| Command | Start Up | Hit | Guard |
| Far |
9 | -6 | -6 |
| Command | Start Up | Hit | Guard |
| Far |
11 | -11 | -11 |
| Command | Start Up | Hit | Guard |
| Far |
11 | -9 | -9 |
| Command | Start Up | Hit | Guard |
| 4 | +2 | +2 |
| Command | Start Up | Hit | Guard |
| 5 | +2 | +2 |
| Command | Start Up | Hit | Guard |
| 6 | -7 | -7 |
| Command | Start Up | Hit | Guard |
| 7 | KD | -12 |
| Command | Start Up | Hit | Guard |
| Jumping |
4 | ? | ? |
| Command | Start Up | Hit | Guard |
| Jumping |
6 | ? | ? |
| Command | Start Up | Hit | Guard |
| Jumping |
9 | ? | ? |
| Command | Start Up | Hit | Guard |
| Jumping |
12 | ? | ? |
| Command | Start Up | Hit | Guard |
| 7 | -2 | -2 |
| Command | Start Up | Hit | Guard |
| 22 | 0 | 6 |
| Command | Start Up | Hit | Guard |
| 8 | -6 | 0 |
| Command | Start Up | Hit | Guard |
| 10 | KD | -5 |
Hitboxes and Attack Notes
Hell Trap
Kevin will move forward with a low attack, followed by a grab. This move is going to be important for corner lock downs as its his break, and he recovers very fast from it. The first hit goes low, and if blocked can be canceled with the break input. If it does hit, the grab will automatically grab them. The second hit of this move is a grab, but it registers as a normal attack. Since its an attack, it can be JD and punished.
This move has 3 levels. The ![]() version hits mid, while the
version hits mid, while the ![]() is an overhead. The
is an overhead. The ![]() version comes out a bit slower, but can be worth it for mix ups as many would expect Kevin to do his
version comes out a bit slower, but can be worth it for mix ups as many would expect Kevin to do his ![]() +
+ ![]() attack. The
attack. The ![]() version is the best follow up to his break, but it must be timed correctly, other wise it will whiff. This move has three levels, a level 2 must be done in order to hit after break. Doing this move by itself isn't the best thing to do, but it can be done every now and then to throw off your opponent. This move also leads into all of his advanced tricks with cancels. For more about his cancels read Kevin Cancel's
version is the best follow up to his break, but it must be timed correctly, other wise it will whiff. This move has three levels, a level 2 must be done in order to hit after break. Doing this move by itself isn't the best thing to do, but it can be done every now and then to throw off your opponent. This move also leads into all of his advanced tricks with cancels. For more about his cancels read Kevin Cancel's
Close range command grab that will throw them away from Kevin. This is a great move, especially since many people never see it coming. Throw it in with your mix ups, empty cancel into it, tick into it.
Kevin crawls on the ground like a commando and can follow up with an overhead, or a low attack. Since's hes on the ground, attacks that don't hit low-mid or low will not touch him. He also has some invincibility frames which allow him to get out of bad situations. His ![]() follow-up will got low on the opponent. it doesn't come out very fast, but it can be affective at times. The
follow-up will got low on the opponent. it doesn't come out very fast, but it can be affective at times. The ![]() follow-up is an over head, which comes out slower that his
follow-up is an over head, which comes out slower that his ![]() follow-up. If blocked Kevin is in trouble, but if it hits, he scores a knockdown. Use both of these moves sparingly, and remember to mix it up with them, don't stick to one follow-up. You can also do a
follow-up. If blocked Kevin is in trouble, but if it hits, he scores a knockdown. Use both of these moves sparingly, and remember to mix it up with them, don't stick to one follow-up. You can also do a ![]() follow-up which will get Kevin off the ground, and is another trick to build meter with him, but not anywhere near as fast as doing it with his cancels.
follow-up which will get Kevin off the ground, and is another trick to build meter with him, but not anywhere near as fast as doing it with his cancels.
Kevin will do a roll that takes him about two character lengths ahead of where he was. This move sounds great since its a semi invincible roll, but its recovery isn't the best, and once used a few times, it becomes quite obvious to a seasoned player when it will be used again. Many people tend to use this move to escape from the corner, but if the opponent predicts it, Kevin can get punished. Try not to abuse this move or rely on this move too much. This move can lead to a decent wake up game, but you will be thrown more often than anything else. Use this move wisely.
An arching air attack. This move can be a decent anti-air if the opponent is at the right height, but its best not to rely on this. Its a great follow up after his ![]() +
+ ![]() break. it doesn't require any special timing, and as long as you are close enough the
break. it doesn't require any special timing, and as long as you are close enough the ![]() version will hit them 100% of the time. The
version will hit them 100% of the time. The ![]() version is also -1 on block, so it is very hard to punish. The
version is also -1 on block, so it is very hard to punish. The ![]() version travels higher and further, and it will not hit grounded opponents, which makes it a pretty useless version.
version travels higher and further, and it will not hit grounded opponents, which makes it a pretty useless version.
This will go through some moves, has a fair amount of invulnerability frames. Mostly used after a ![]() +
+![]() +
+![]() or in combo and has to be timed right, otherwise the super will whiff the last few hits. Can be used as a high risk high reward reversal.
or in combo and has to be timed right, otherwise the super will whiff the last few hits. Can be used as a high risk high reward reversal.
Damage on this super is very low, but this is easily one of the best supers in the game. When hit, the opponent will be frozen for a couple of seconds, which allows Kevin to continue with his onslaught. The ![]() version comes out slow, and should never be thrown out randomly as it doesn't have a good hit box and can be stuffed out easily. Two can be connected in the same combo, or one followed by an
version comes out slow, and should never be thrown out randomly as it doesn't have a good hit box and can be stuffed out easily. Two can be connected in the same combo, or one followed by an ![]() super. The
super. The ![]() version comes out instantly and is easily the best move for juggling. The overall best option is for Kevin to sit on his meter until he can throw out a
version comes out instantly and is easily the best move for juggling. The overall best option is for Kevin to sit on his meter until he can throw out a ![]() version in a combo.
version in a combo.
Combos
Kevin has perhaps the most damaging combos in the game; he is 2nd to non in this field. While not all of his combos may be posted as of this writing, the ones given may suffice for even the most amateur of players. All combos can be preformed anywhere unless noted.
Note: damage is based on the majority of the cast. All combos will do slightly less on Grant and Tizoc and slightly more on Jenet, Hotaru and Hokutomaru
Basic
These combos require no feinting, and can be preformed by all skill levels.
St.![]() xx
xx ![]() +
+ ![]() (break),
(break), ![]() +
+ ![]() 24 damage
24 damage
St.![]() xx
xx ![]() +
+ ![]() (break),
(break), ![]() +
+ ![]() 30 damage
30 damage
St.![]() xx
xx ![]() +
+ ![]() (break),
(break), ![]() +
+ ![]() 28 damage
28 damage
St.![]() xx
xx ![]() +
+ ![]() (break),
(break), ![]() +
+ ![]() 34 damage
34 damage
St.![]() xx
xx ![]() +
+ ![]() (break),
(break), ![]() ,
, ![]() +
+ ![]() ,
, ![]()
![]() 50 damage
50 damage
St.![]() xx
xx ![]() +
+ ![]() (break),
(break), ![]() ,
, ![]() +
+ ![]() ,
, ![]()
![]() 67 damage
67 damage
Intermediate
These combos implement feinting
St.![]() (FC), St.
(FC), St.![]() xx
xx ![]()
![]() (break),
(break), ![]()
![]() (hold)
(hold)
St.![]() (FC), cr.
(FC), cr.![]() xx
xx ![]()
![]() (break),
(break), ![]()
![]() (hold)
(hold)
J.![]() , St.
, St.![]() (FC), St.
(FC), St.![]() xx
xx ![]()
![]() (break),
(break), ![]()
![]() (hold)
(hold)
Advanced
These combos implement feinting and break with P or S Power
St.![]() xx
xx ![]()
![]() ,
, ![]()
![]() xx
xx ![]()
![]() (break),
(break), ![]()
![]() (hold)
(hold)
St.![]() xx
xx ![]()
![]() ,
, ![]()
![]() (FC), dash, St.
(FC), dash, St.![]() xx
xx ![]()
![]() (break),
(break), ![]()
![]() (hold)
(hold)
St.![]() , St.
, St.![]() xx
xx ![]()
![]() (break), dash,
(break), dash, ![]()
![]()
![]()
St.![]() xx
xx ![]()
![]() ,
, ![]()
![]() (FC), dash, St.
(FC), dash, St.![]() xx
xx ![]()
![]() (break), dash,
(break), dash, ![]()
![]()
![]()
Corner only
St.![]() xx
xx ![]() +
+ ![]() (break),
(break), ![]() +
+ ![]() xx
xx ![]() ,
, ![]() +
+ ![]() ,
, ![]()
![]() 74 damage (Corner)
74 damage (Corner)
St.![]() xx
xx ![]() +
+ ![]() (break),
(break), ![]() +
+ ![]() xx
xx ![]() ,
, ![]() +
+ ![]() ,
, ![]()
![]() 82 damage (Corner)
82 damage (Corner)
J. ![]() , St.
, St.![]() (FC), Cr.
(FC), Cr.![]() +
+![]() xx
xx ![]() +
+![]() (Break),
(Break), ![]() +
+![]() (Hold),
(Hold),![]()
![]() +
+![]() ,
,![]() +
+ ![]() (Hold),
(Hold), ![]()
![]() +
+![]() ,
, ![]() +
+ ![]() (Hold)
(Hold)
J. ![]() , St.
, St. ![]() (FC), Cr.
(FC), Cr.![]() +
+![]() xx
xx ![]() +
+![]() (Break),
(Break),![]() +
+![]() (Hold),
(Hold), ![]()
![]() +
+![]() ,
, ![]() +
+ ![]() (Hold),
(Hold), ![]()
![]() +
+![]() ,
,![]() +
+![]() (Break),
(Break),![]() +
+ ![]() (Hold)
(Hold)
J. ![]() , St.
, St. ![]() (FC), Cr.
(FC), Cr.![]() +
+![]() xx
xx ![]() +
+![]() (Break),
(Break),![]()
![]() +
+![]()
J. ![]() , St.
, St. ![]() (FC), Cr.
(FC), Cr.![]() +
+![]() xx
xx ![]() +
+![]() (Break),
(Break), ![]()
![]() +
+![]() ,
, ![]() +
+![]() (Break),
(Break),![]() +
+ ![]() (Hold)
(Hold)
J. ![]() , St.
, St. ![]() xx
xx ![]()
![]() +
+![]() , J.
, J. ![]() , St.
, St.![]() xx
xx ![]()
![]() +
+![]() , J.
, J. ![]() , St.
, St.![]() (FC), Cr.
(FC), Cr.![]() +
+![]() xx
xx ![]() +
+![]() (Break),
(Break), ![]() +
+ ![]() (Hold)
(Hold)
J. ![]() , St.
, St. ![]() (FC), St.
(FC), St. ![]() (FC), St.
(FC), St. ![]() xx
xx ![]()
![]() (break),
(break), ![]()
![]() (hold),
(hold), ![]()
![]()
![]() ,
, ![]()
![]() (hold),
(hold),![]()
![]()
![]()
J. ![]() , dash,
, dash, ![]()
![]() ,
, ![]()
![]() xx
xx ![]() +
+![]() ,
, ![]()
![]() (FC), dash, St.
(FC), dash, St.![]() xx
xx ![]()
![]() (break),
(break), ![]()
![]() (hold),
(hold), ![]()
![]()
![]() ,
, ![]()
![]() (hold),
(hold), ![]()
![]()
![]()
St.![]() (FC), St.
(FC), St.![]() (FC), cr.
(FC), cr. ![]() , dash, St.
, dash, St.![]() xx
xx ![]()
![]() (break),
(break), ![]()
![]() (hold),
(hold), ![]()
![]()
![]() ,
, ![]()
![]() (hold),
(hold), ![]()
![]()
![]()
Notes:
You will notice that in a number of combos here and in Anywhere, you will have to Hold A for his special move to hit. Your best bet is to hold it for a split second to get it's Lvl. 2 ver. In addition, you can 'buffer' the QCB during Kevin's recovery from attacks then when holding LP, you most likely will get the Lvl. 2 ver. immediately.
Finally, only his Lvl. 2 & 3 ver. of his QCB+P will hit a juggled opponent.
2- For the QCFx2+LK to connect easily, you must hit your opponent with the 2nd QCB+A somewhat 'early' this will knock them high enough for the super to hit them.
3- The difference between adding in the QCF+K and not, is approximately 7 points of damage.
4- You can get some energy for your power gauge by doing QCB+(A+D) then QCF+B, Break-->QCB+ A (Hold) then release. This method makes it so that the QCF+K will connect easily, however you might need to practice this method as it requires performing the QCB+(A+D) as soon as Kevin recovers (attempt the buffering trick mentioned previously).
T.O.P. Notes
Kevin's T.O.P attack is a charging roll which has 10 frames of start up and is -5 on block (unsafe).
On guard it has huge Guard Crush potential (taking out about 40% of an average guard meter).
When used to Guard Crush, Kevin has the ability to combo after the Guard Crush.
Being unsafe, the TOP shouldn't be used on guard when it won't crush.
Basic Strategy
Kevin is the most versatile character in the game. Builds meter really fast with his special cancels. He can play offensively or defensively and still control the match. He has some of the longest combos in game. Once Kevin has P super, the match becomes his to control. The opponent must fear and respect Kevin with full super, even if its an inexperienced Kevin. Even without meter Kevin can still be scary with his command grab, guard crush corner loop and high/low options. This is why most players consider him the best in the game.
- Guard Crushing :
When Kevin has his opponent cornered he can go for a Guard Crush loop (full blockstring on guard) :
![]()
![]() >
> ![]() xx
xx ![]()
![]() (break) >
(break) > ![]()
![]() >
> ![]() xx
xx ![]()
![]() (break) > repeat ...
(break) > repeat ...
This is probably one of the easiest guardcrush loop in the game, however it has a weakness : your opponent can stand up, making the Hell Trap hit (it hits low).
The Kevin player should look at the animation of his opponent to see if he is standing up and be ready to confirm.
Advanced Tactics
Kevin Cancel's
SNK added a cancel to Kevin's ![]() +
+ ![]() . If you press
. If you press ![]() anytime during the move, it will canceled. If you press it right as you preform the move, you will get
anytime during the move, it will canceled. If you press it right as you preform the move, you will get ![]() +
+ ![]() , later in the move will produce a s.
, later in the move will produce a s. ![]() .
.
This leads to a few things, the main being meter building. Canceling the move into a s. ![]() builds meter very fast, and is the easiest way to build meter with the cancels. You can also cancel the move into itself (
builds meter very fast, and is the easiest way to build meter with the cancels. You can also cancel the move into itself (![]() +
+ ![]() into
into ![]() +
+ ![]() or vice-vera), but its a bit tricker to do it consistently, but we'll get to that later, for now we'll show how to do the simple and safer cancel.
or vice-vera), but its a bit tricker to do it consistently, but we'll get to that later, for now we'll show how to do the simple and safer cancel.
When doing the ![]() +
+ ![]() you can hit any button with
you can hit any button with ![]() and it will cancel into the button that was pressed with
and it will cancel into the button that was pressed with ![]() , for instance, if you were to do the move then press
, for instance, if you were to do the move then press ![]() +
+![]() you will get a s.
you will get a s. ![]() . So the easiest option for building meter in this situation is to cancel the special with
. So the easiest option for building meter in this situation is to cancel the special with ![]() +
+![]() or
or ![]() +
+![]() +
+![]() . These will result in a s/c
. These will result in a s/c ![]() which comes out and recovers the fastest.
which comes out and recovers the fastest.
The more complex way of building meter isn't too hard. You do ![]() +
+ ![]() then piano
then piano ![]() ,
, ![]() , this will lead one special into another special, and Kevin will never leave his charge animation but build twice the meter in the same amount of time . The meter build can continue from there, for example:
, this will lead one special into another special, and Kevin will never leave his charge animation but build twice the meter in the same amount of time . The meter build can continue from there, for example: ![]() +
+ ![]() ,
, ![]() ,
, ![]() ,
, ![]() ,
, ![]() ,
, ![]() ...and so on. If done right, Kevin will never leave his hunched anymation. This has to be done right, otherwise it will lead to Kevin being open for an attack. Once you have this down, the safest thing to do would be to cancel into one special, then a s/c.
...and so on. If done right, Kevin will never leave his hunched anymation. This has to be done right, otherwise it will lead to Kevin being open for an attack. Once you have this down, the safest thing to do would be to cancel into one special, then a s/c. ![]() . It may seem tempting to keep going and build your meter, but it isn't the safest thing to do since the opponent can rush in during the middle of the cancels.
. It may seem tempting to keep going and build your meter, but it isn't the safest thing to do since the opponent can rush in during the middle of the cancels.
His cancels can be used for more than just meter building. Combos, mind games, and more can be done with the cancels.
Many people seem to have trouble doing his cancels in T.O.P mode, especially anything involving ![]() +
+![]() . People usually get his T.O.P attack to come out instead of a
. People usually get his T.O.P attack to come out instead of a ![]() attack. The way to fix this is to throw in an extra button when you do the cancel. So if you wanted to do two s.
attack. The way to fix this is to throw in an extra button when you do the cancel. So if you wanted to do two s. ![]() 's using the cancels in top, you would have to do it like: s.
's using the cancels in top, you would have to do it like: s. ![]() ,
, ![]() +,
+, ![]() ,
, ![]() +
+![]() +
+![]() . Adding the extra button will make it so the T.O.P attack doesn't come out, and instead you get the
. Adding the extra button will make it so the T.O.P attack doesn't come out, and instead you get the ![]() input you wanted.
input you wanted.
- Building meter (the rotor dance):
Kevin has the fastest meter building tool in the game thanks to this cancel, however it requires a bit of execution.
The rotor loop to build meter is : ![]()
![]()
![]() ~
~![]() (karacancel) > repeat
(karacancel) > repeat
To understand how it works, let's break it down :


 => stand
  will come out, because in this game pressing 2 boutons at once prevents specials from comming out.

 ~
~ => pressing
  will karacancel the stand
  (cancel it before it is active), and since a
  was buffered, the C rotor will come out (the usual input being
 ). Kevin is now performing his C rotor.
- C rotor >


 => it will cancel the C rotor with a stand
  . At this point, you can press C again to karacancel the stA into a rotor which you can cancel again, etc.
Execution tip : pressing A+D at the same time with your index finger makes it much easier, do qcb A+D with your index, then C right after with your middle finger.
This takes fast execution and once mastered, you need to figure out "How do I get out of it to avoid being punished?".
To get out of it, after pressing C (rotor comes out), you can press backdash+D to backdash out of it, or AD to stA out of it, or 2ABD to anti-air with 2AB (or anything else allowing you to cancel the rotor, but these are usually the safest options).
Video lecture
In-depth video lecture on Kevin. Please use the timestamps to navigate the topics.
Matchup Notes
Jenet
2AB xx B Super can anti-air divekicks, allowing for Jenet specific combo. The super will combo even if it hits her in the air, allowing for a Jenet specific juggle, such as C rotor C xx B Super.
Crawl makes divekicks whiff, allowing to lowprofile the divekick and punish it by getting up when she lands.
Jenet specific combos allow to juggle her with C or D air resets, for example hop D > Bingo will combo even if the hop D hit her aiborne.
