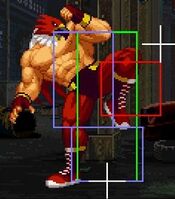
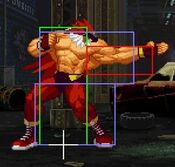
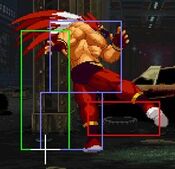
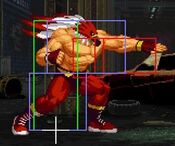
GigaTempest (talk | contribs) No edit summary |
GigaTempest (talk | contribs) No edit summary |
||
| Line 851: | Line 851: | ||
| Cancel on Block = | | Cancel on Block = | ||
| Guard Crush Value = | | Guard Crush Value = | ||
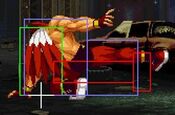
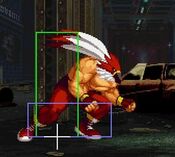
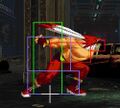
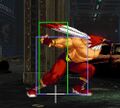
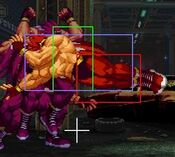
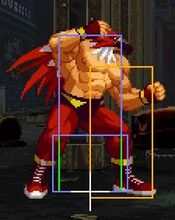
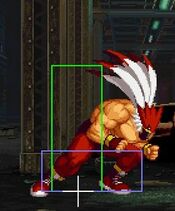
| description = This is a command grab that only works on standing opponents (whiffs on crouch). The A version has faster startup but shorter range and the | | description = This is a command grab that only works on standing opponents (whiffs on crouch). The A version has faster startup but shorter range and the C version has slower startup but farther range. You're generally better off going for a Justice Hurricane instead of using the A version. The C version is too slow to be used on reaction to fireballs (only as a read) and is more of a hail mary. Can be sparingly used to catch the opponent off guard and trick them into stand blocking against a potential jump-in, most practically in the corner to finish a round. The move results in side switch if it lands, making it more practical for round finishers only to avoid cornering yourself. | ||
}} | }} | ||
}} | }} | ||
Revision as of 22:26, 9 November 2021
Introduction
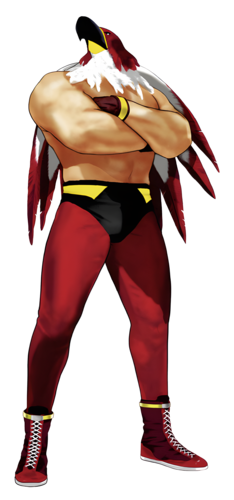
Tizoc, also known as The Griffon or Griffon Mask in Japan, is a professional wrestler who hails from Mexico. He has many fans and is idolized by children as a "hero of justice". After a demoralizing loss to a mysterious man, he enters the Maximum Mayhem tournament to regain his fighting spirit.
Gameplay
Tizoc is the grappler of the game. His main gameplan is to poke and pressure the opponent with his long-range normals and to go in for a command grab once he has conditioned the opponent to block. He generally wants to maintain a mid-range distance from the opponent in neutral where he can play a footsies game by being in range to reach the opponent with his pokes, while remaining outside the range of the opponent's normals. At this range, he is able to keep the opponent out with his great air-to-air capabilities and also threaten an approach with a potential command grab.
| Strengths | Weaknesses |
|---|---|
|
|
Character Colors
Move List
Frame Data Source: https://w.atwiki.jp/garoumow/pages/29.html
| Data Help | |
|---|---|
| Disclaimer: This is meant to teach basic terminology used when describing moves. | |
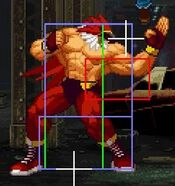
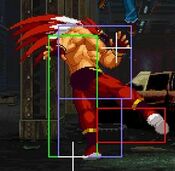
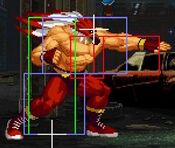
| Hitbox: | A predefined area (usually a rectangle or rectangles) that tells the game how any given attack can come in contact with a character. Hitboxes are invisible to the player when normally playing. |
| Hurtbox: | A predefined area (usually a group of rectangles) that tell the game how your character is allowed to get hit by any incoming attack. Specifically, you'll get hit by (or block) an attack if that attack's hitbox ever overlaps your hurtbox. |
| Throw Box/Range: | Active throw frames and range. Your opponent will be thrown in this field if not in block or hit stun. |
| Projectile Box: | Hitbox on a projectile attack. |
| Guard/Counter Box: | The Guard Box or Counter Box. This appears when blocking or using a counter move. |
| Push Box: | Has no bearing on hit/hurt boxes. Just prevents characters to not pass through each other. (Also known as "Collision Box".) |
| Startup | The number of frames before an attack can hit the opponent. Does not include the first active frame. |
| Guard | The way this move must be blocked.
High or H or Overhead (especially when from the ground) -- must be blocked standing. |
| Damage | "Basic" damage -- Unmodified damage values
"Correct" damage -- Damage values accounting for damage scaling, TOP multiplier, and defense rate |
| Guard Crush Value | Decreases the defender's guard durability gauge by this value. |
| +X | Attacker has X number of advantage frames. |
| -X | Attacker has X number of disadvantage frames. |
| KD | Short for "knockdown", knocks down opponent on hit. |
| ◯ | Cancelable on both hit and block. |
| ∞ | Chain cancelable with the same button (renda cancel). |
| ※ | Cancelable on the first hit/part only. |
| 《X》OR «X» OR <<X>> OR (X) | X number of inactive frames between hits of multihit moves. |
| △ | Only cancelable on block. |
| ▽ | Only cancelable on hit. |
| × OR X | Not cancelable. |
Close Standing Normals
| Damage | Guard | Startup | Active | Recovery | Total |
|---|---|---|---|---|---|
| 6 | Mid | 4 | 3 | - | - |
| Hit Adv | Block Adv | Cancel on Hit | Cancel on Block | Guard Crush Value | |
| +3 | +3 | ◯ | ◯ | 4 | |
|
Tizoc's fastest close standing normal with decent frame advantage on hit and block. | |||||
| Damage | Guard | Startup | Active | Recovery | Total |
|---|---|---|---|---|---|
| 6 | Mid | 7 | 5 | - | - |
| Hit Adv | Block Adv | Cancel on Hit | Cancel on Block | Guard Crush Value | |
| 0 | 0 | ◯ | ◯ | 4 | |
|
Slower than cl.A, no real reason to use it in close range. | |||||
| Damage | Guard | Startup | Active | Recovery | Total |
|---|---|---|---|---|---|
| 14 | Mid | 14 | 4 | - | - |
| Hit Adv | Block Adv | Cancel on Hit | Cancel on Block | Guard Crush Value | |
| +1 | +1 | X | ◯ | 8 | |
|
Same as his far st.C. The slow startup makes it relatively impractical to be used in close range. | |||||
| Damage | Guard | Startup | Active | Recovery | Total |
|---|---|---|---|---|---|
| 14 | Mid | 6 | 4 | - | - |
| Hit Adv | Block Adv | Cancel on Hit | Cancel on Block | Guard Crush Value | |
| +4 | +4 | X | X | 8 | |
|
A highly damaging normal that has decently fast startup and good frame advantage compared to his other normals. Good as a meaty. | |||||
Far Standing Normals
| Damage | Guard | Startup | Active | Recovery | Total |
|---|---|---|---|---|---|
| 7 | Mid | 4 | 3 | - | - |
| Hit Adv | Block Adv | Cancel on Hit | Cancel on Block | Guard Crush Value | |
| +1 | +1 | ◯ | ◯ | 4 | |
|
One of Tizoc's main pokes and his fastest one alongside cr.A. Has good range and the hitbox hits fairly high due to Tizoc's tall body. | |||||
| Damage | Guard | Startup | Active | Recovery | Total |
|---|---|---|---|---|---|
| 7 | Mid | 7 | 5 | - | - |
| Hit Adv | Block Adv | Cancel on Hit | Cancel on Block | Guard Crush Value | |
| 0 | 0 | ◯ | ◯ | 4 | |
|
Tizoc's farthest reaching poke with great range. This move has slower startup than his st.A so it is ideally used when you are outside of his st.A range. | |||||
| Damage | Guard | Startup | Active | Recovery | Total |
|---|---|---|---|---|---|
| 14 | Mid | 14 | 4 | - | - |
| Hit Adv | Block Adv | Cancel on Hit | Cancel on Block | Guard Crush Value | |
| +1 | +1 | X | ◯ | 8 | |
|
Slow startup but is safe on hit and block (and can be feint cancelled on block). Has slightly more range than his st.A but slightly less than his st.B. Can be used as a slow poke/counter-poke of sorts and works well as a far-ranged meaty. | |||||
| Damage | Guard | Startup | Active | Recovery | Total |
|---|---|---|---|---|---|
| 14 | Mid | 12 | 6 | - | - |
| Hit Adv | Block Adv | Cancel on Hit | Cancel on Block | Guard Crush Value | |
| -9 | -9 | X | X | 8 | |
|
A slow normal that typically isn't used. The startup is too slow to be used as a reliable anti-air. Usually you get this move unintentionally when you "whiff" his D throw. | |||||
Crouching Normals
| Damage | Guard | Startup | Active | Recovery | Total |
|---|---|---|---|---|---|
| 6 | Mid | 4 | 3 | - | - |
| Hit Adv | Block Adv | Cancel on Hit | Cancel on Block | Guard Crush Value | |
| 0 | 0 | ◯ | ◯ | 4 | |
|
Similar in function to his st.A but has a tiny bit more range and has him hit at a slightly lower profile. | |||||
| Damage | Guard | Startup | Active | Recovery | Total |
|---|---|---|---|---|---|
| 6 | Low | 7 | 4 | - | - |
| Hit Adv | Block Adv | Cancel on Hit | Cancel on Block | Guard Crush Value | |
| +2 | +2 | X | X | 4 | |
|
Similar range to his cr.A but has slower startup. His main poke that hits low. | |||||
| Damage | Guard | Startup | Active | Recovery | Total |
|---|---|---|---|---|---|
| 10 | Mid | 11 | 4 | - | - |
| Hit Adv | Block Adv | Cancel on Hit | Cancel on Block | Guard Crush Value | |
| -5 | -5 | X | X | 5 | |
|
Serviceable as an anti-air if well spaced. The move hits at an approximate 45 degree angle, so it works best as an anti-air when the opponent is jumping in from farther away, otherwise it may be possible for them to jump right above Tizoc from up close. Should not be heavily relied on as an anti-air as it is slow and can be air just defended. | |||||
| Damage | Guard | Startup | Active | Recovery | Total |
|---|---|---|---|---|---|
| 10 | Low | 12 | 4 | - | - |
| Hit Adv | Block Adv | Cancel on Hit | Cancel on Block | Guard Crush Value | |
| knockdown | -10 | X | X | 5 | |
|
Slow and unsafe sweep. Like a lot of sweeps in the game, it's not something you want to use much. Use cr.B instead if you want a normal that hits low and is actually safe on block. | |||||
Jumping Normals
| Damage | Guard | Startup | Active | Recovery | Total |
|---|---|---|---|---|---|
| 6 | High | 7 | 6 | - | - |
| Hit Adv | Block Adv | Cancel on Hit | Cancel on Block | Guard Crush Value | |
| - | - | ◯ | - | 4 | |
|
Tizoc's fastest jump normal with a high hitbox relative to his body. Useful as a fast air-to-air in closer range when the opponent may already be jumping in from above Tizoc. Can be comboed into Icarus Crash. | |||||
| Damage | Guard | Startup | Active | Recovery | Total |
|---|---|---|---|---|---|
| 6 | High | 9 | 6 | - | - |
| Hit Adv | Block Adv | Cancel on Hit | Cancel on Block | Guard Crush Value | |
| - | - | ◯ | - | 4 | |
|
Has a similar range to his j.D with 1f longer startup and is active for 1f less, while doing less damage. Generally not used too much aside from instances where you would want less pushback or would want to combo into Icarus Crash. | |||||
| Damage | Guard | Startup | Active | Recovery | Total |
|---|---|---|---|---|---|
| 10 | High | 11 | 9 | - | - |
| Hit Adv | Block Adv | Cancel on Hit | Cancel on Block | Guard Crush Value | |
| - | - | ◯ | - | 5 | |
|
A good forward jump and hop normal with a hitbox extending below Tizoc's torso, more suited as a closer jump-in than his j.D. Useful as an air-to-air if the opponent tries to jump after your pokes to escape your command grabs. | |||||
| Damage | Guard | Startup | Active | Recovery | Total |
|---|---|---|---|---|---|
| 10 | High | 8 | 7 | - | - |
| Hit Adv | Block Adv | Cancel on Hit | Cancel on Block | Guard Crush Value | |
| - | - | ◯ | - | 5 | |
|
One of Tizoc's best and most versatile normals. Has great range and works well as a forward jump or hop normal. Works great as an air-to-air off of a neutral or backwards jump and can be used to keep the opponent from jumping in and approaching from the air. A staple in his air-to-air game. | |||||
Command Normals
| Damage | Guard | Startup | Active | Recovery | Total |
|---|---|---|---|---|---|
| 10 | Overhead | 22 | 6 | - | - |
| Hit Adv | Block Adv | Cancel on Hit | Cancel on Block | Guard Crush Value | |
| +1 | +7 | X | X | 6 | |
|
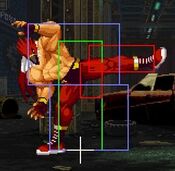
13f of lower body invincibility after landing. Can be used as a meaty to potentially score a counter hit. Otherwise not too useful as an overhead due to its slow startup. | |||||
| Damage | Guard | Startup | Active | Recovery | Total |
|---|---|---|---|---|---|
| 13 | Mid | 13 | 1,2 | - | - |
| Hit Adv | Block Adv | Cancel on Hit | Cancel on Block | Guard Crush Value | |
| +1 | +1 | X | X | 3,3 | |
|
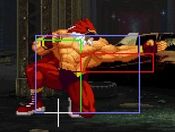
1~5f of upper body invincibility. Good as a poke/counter-poke against other characters' st.A and higher hitting normals. The move hits twice, which makes it useful for potentially beating guard cancels against opponents who try to do so against the first hit. | |||||
| Damage | Guard | Startup | Active | Recovery | Total |
|---|---|---|---|---|---|
| 21 (in T.O.P. mode) | Mid | 20 | - | - | - |
| Hit Adv | Block Adv | Cancel on Hit | Cancel on Block | Guard Crush Value | |
| knockdown | -18 | X | X | 30 | |
|
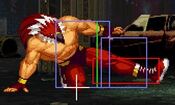
Mainly used as a guard cancel against fireballs or to go over grounded fireballs like Rock's Reppuken or Terry's Power Wave. Depending on the spacing, the move can be hard to punish for some characters due to its pushback on block, but it shouldn't be thrown out in neutral too much as it has slow startup and is easy to jump over. | |||||
Throws
| Damage | Guard | Startup | Active | Recovery | Total |
|---|---|---|---|---|---|
| 16(+8) | - | 1 | - | - | - |
| Hit Adv | Block Adv | Cancel on Hit | Cancel on Block | Guard Crush Value | |
| - | - | - | - | - | |
|
Grif-Fall (follow-up move): 33C or 11C while lifting the opponent up into the air. His D throw is generally used over this throw, unless you need the 2 extra points of damage with the follow-up to kill. | |||||
| Damage | Guard | Startup | Active | Recovery | Total |
|---|---|---|---|---|---|
| 22 | - | 1 | - | - | - |
| Hit Adv | Block Adv | Cancel on Hit | Cancel on Block | Guard Crush Value | |
| - | - | - | - | - | |
|
Tizoc's main normal throw to use. Does decent damage. It can give better positional advantage with corner carry and gives better okizeme than his C throw. If the throw "whiffs" a cl.D or far st.D will come out and can potentially anti-air an opponent who tries to jump. | |||||
Feints
| Damage | Guard | Startup | Active | Recovery | Total |
|---|---|---|---|---|---|
| - | - | - | - | - | 13 |
| Hit Adv | Block Adv | Cancel on Hit | Cancel on Block | Guard Crush Value | |
| - | - | - | - | - | |
|
Moves Tizoc forward slightly and gives him upper body invincibility. Can be used to go through various higher hitting normals and specials, and as an anti-air against various jump or hop normals. Typically used in conjunction with Justice Hurricane, Big Fall Griffon, or his D throw as a follow-up to "punish" whiffed moves that are avoided with its upper body invincibility. This is the feint you want to feint cancel with. Due to it moving Tizoc slightly forward, it can be used after one of his pokes (that can be feint cancelled) in order to move him closer in range of a command grab. | |||||
| Damage | Guard | Startup | Active | Recovery | Total |
|---|---|---|---|---|---|
| - | - | - | - | - | - |
| Hit Adv | Block Adv | Cancel on Hit | Cancel on Block | Guard Crush Value | |
| - | - | - | - | - | |
|
DAAH! Only used as a taunt. | |||||
Special Moves
| Damage | Guard | Startup | Active | Recovery | Total |
|---|---|---|---|---|---|
| 8 | Unblockable | 13 | - | - | - |
| Hit Adv | Block Adv | Cancel on Hit | Cancel on Block | Guard Crush Value | |
| KD | - | - | - | - | |
|
Tizoc's other command grab. Has much slower startup than Justice Hurricane and its meterless follow-ups result in less damage than a Justice Hurricane C. Generally only used as an anti-air guard cancel, which is possible thanks to its slow startup. | |||||
| Damage | Guard | Startup | Active | Recovery | Total |
|---|---|---|---|---|---|
| 22 | - | 5 | - | - | - |
| Hit Adv | Block Adv | Cancel on Hit | Cancel on Block | Guard Crush Value | |
| KD | - | - | - | - | |
|
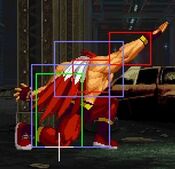
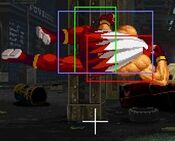
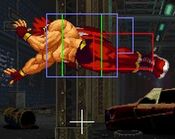
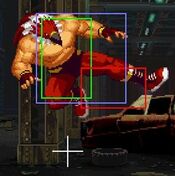
Tizoc's air grab which isn't actually an air throw but a strike/hit that can be just defended. It does decent damage otherwise. You can combo into this move from a j.A or j.B as an air-to-air. You can also kara cancel into this move from his st.AB or perform a faster instant air version with a TK motion and kara cancelling from a jump normal (e.g. 2369B~A), which results in doing an Icarus Crash lower to the ground. | |||||
Super Moves
Combos
Combo tutorial here.
Anywhere
- 41236B-->421A
- Do the 421A immediatley after the throw
- 41236B- jump 236A in the air
- This combo is a bit harder, but during the HCF+B, hold UF and Tizoc will jump, then time the QCF+A while in the air. This combo is more damading than the one above.
- HCF+B-->QCFx2+B
- You need to time the super after the throw to get at least 2 hits in OR all 3 hits.
- Jumping D-->Crouching B
- Jumping D-->QCF+Ainto QCF+D for his super
Corner only
- B, D, DB+P-->Crouching D
- This combo sort of feels like a bug or something. This combo won't work if the P. Wave counter hits a jumping opponent.
- Corner: Jumping D-->Standing D
T.O.P. Notes
Tizoc's TOP move is a drop kick with a fair amount of priority. It is not easily punishable by most moves and has decent recovery.
Basic Strategy
Advanced Tactics
Here are some VERY important notes to help you get in some grabs.
- Tizoc's Forward+AC feint has upper invincibility frames and moves him forward. This is ESPECIALLY useful when attempting to get in close for a grab.
- Tizoc's taunt has lower invincibility frames which might help in getting close as well for grab.
- You can input a 412369 motion instead of a full 360 and get the J. Hurricane. Furthermore if you jump and do 2 270s in a row (270, then another 270) you can get his Super THrow move to come out as well.
- If he techs a throw whe he has his back to the corner, he can do his 720 as soon as the tech animation ends => unblockable, cannot jump out or backdash
Matchup Notes
To come.
