(→HUD) |
|||
| Line 3: | Line 3: | ||
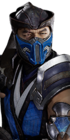
The elements of the Heads-Up Display (HUD) explained from the screenshot above: | The elements of the Heads-Up Display (HUD) explained from the screenshot above: | ||
# Life meter: The character's health bar--when a character loses all of their health bar, they lose the round. If both characters get to 0 at the same time, there is a special draw condition. When the final round experiences a draw, both players will have some health restored. | |||
# PLACEHOLDER | # PLACEHOLDER | ||
# PLACEHOLDER | # PLACEHOLDER | ||
| Line 8: | Line 9: | ||
# PLACEHOLDER | # PLACEHOLDER | ||
# PLACEHOLDER | # PLACEHOLDER | ||
= Notation = | = Notation = | ||
Revision as of 14:27, 25 March 2021
HUD

The elements of the Heads-Up Display (HUD) explained from the screenshot above:
- Life meter: The character's health bar--when a character loses all of their health bar, they lose the round. If both characters get to 0 at the same time, there is a special draw condition. When the final round experiences a draw, both players will have some health restored.
- PLACEHOLDER
- PLACEHOLDER
- PLACEHOLDER
- PLACEHOLDER
- PLACEHOLDER
Notation
For the sake of consistency, the notation used here is based upon what is used by the community.
| Kommand | |
|---|---|
| F | Forward |
| B | Backward |
| U | Up |
| D | Down |
| 1 | Front Punch |
| 2 | Back Punch |
| 3 | Front Kick |
| 4 | Back Kick |
| BL | Block |
| 1+3 | Throw |
| SS | Flip Stance |
| TG | Interact |
| Spatial |
|---|
| (air) |
| (close) |
| (mid) |
| (far) |
| Other |
|---|
| Hold |
| Press |
| Amplify |
| Delay |
| Cancel |
| + |
| or |
| , |