|
|
| Line 22: |
Line 22: |
| * Applies 20% damage scaling to next hit when beginning a combo (100/80/70...) | | * Applies 20% damage scaling to next hit when beginning a combo (100/80/70...) |
| <br> | | <br> |
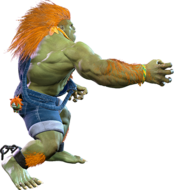
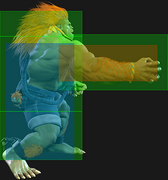
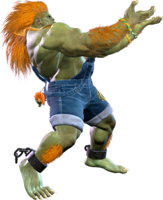
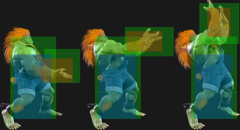
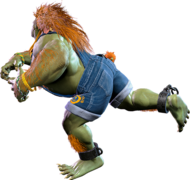
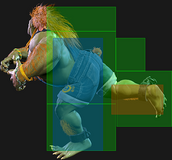
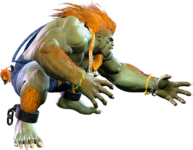
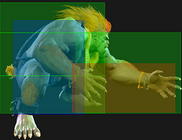
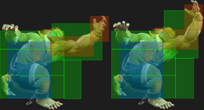
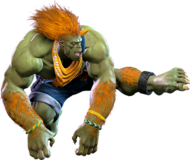
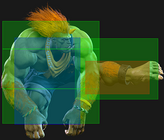
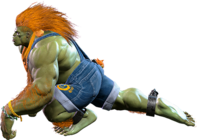
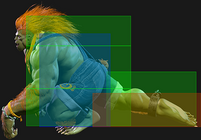
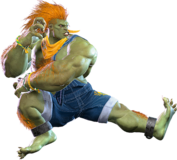
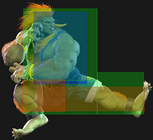
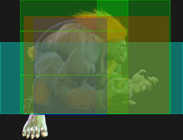
| Excellent reach for a 5-frame light attack. Cannot be chained into, and has no follow-up links without counter-hit or Punish Counter. Canceling into {{clr|M|MP Rolling Attack}} is a consistent buffer option, and Electricity also combos at closer ranges. Can be used to frame trap after a blocked {{clr|M|4MK}} if Blanka is too far for {{clr|L|5LK}} to reach. | | Excellent reach for a 5-frame light attack. Cannot be chained into, and has no follow-up links without {{clr|PC|Counter-hit}} or {{clr|PC|Punish Counter}}. Canceling into {{clr|M|MP Rolling Attack}} is a consistent buffer option, and Electricity also combos at closer ranges. Can be used to frame trap after a blocked {{clr|M|4MK}} if Blanka is too far for {{clr|L|5LK}} to reach. |
| }} | | }} |
|
| |
|
| Line 121: |
Line 121: |
| * Forces stand | | * Forces stand |
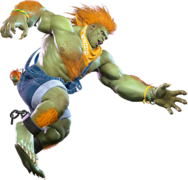
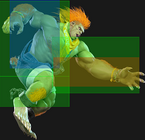
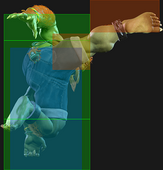
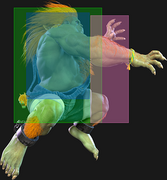
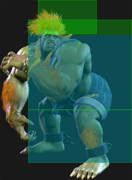
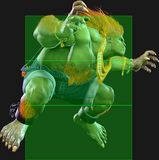
| * Frames 13-15 (active frames 7-9) can anti-air cross-ups unlike most AAs | | * Frames 13-15 (active frames 7-9) can anti-air cross-ups unlike most AAs |
| * Counter-hit/Punish Counter puts airborne opponents into {{sf6-jug|limited juggle}} state (high float) | | * {{clr|PC|Counter-hit/Punish Counter}} puts airborne opponents into {{sf6-jug|limited juggle}} state (high float) |
| <br> | | <br> |
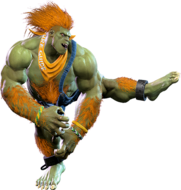
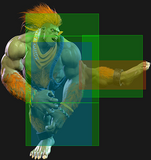
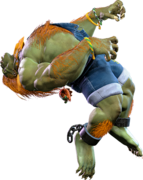
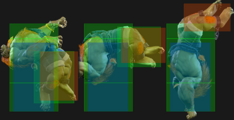
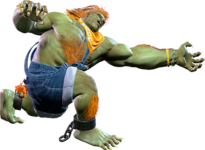
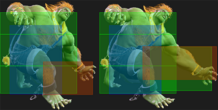
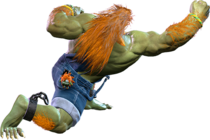
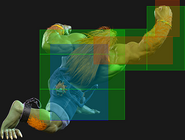
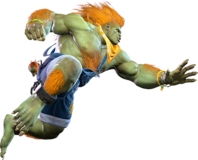
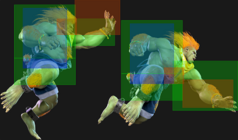
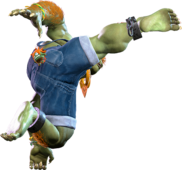
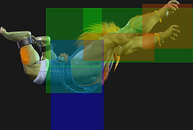
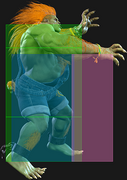
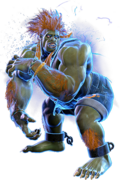
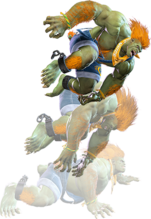
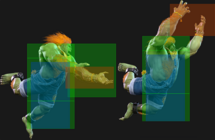
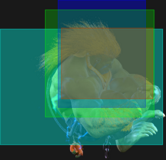
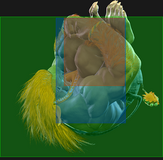
| Highly rewarding anti-air tool, especially if it lands as a counter-hit or punish counter (even after an anti-air trade). The high juggle state gives Blanka numerous options for follow-up damage. While the vertical hitbox is excellent, it can be slightly tricky to time against opponents that can alter their air trajectory, leaving Blanka open for a punish as the move recovers. | | Highly rewarding anti-air tool, especially if it lands as a {{clr|PC|Counter-hit}} or {{clr|PC|Punish Counter}} (even after an anti-air trade). The high juggle state gives Blanka numerous options for follow-up damage. While the vertical hitbox is excellent, it can be slightly tricky to time against opponents that can alter their air trajectory, leaving Blanka open for a punish as the move recovers. |
|
| |
|
| The high active frame count makes {{clr|H|5HK}} an excellent meaty option if well-timed. In Punish or {{clr|DR|Drive Rush}} routes, it can link directly to {{clr|H|5HP}} for optimal damage and oki. | | The high active frame count makes {{clr|H|5HK}} an excellent meaty option if well-timed. In Punish or {{clr|DR|Drive Rush}} routes, it can link directly to {{clr|H|5HP}} for optimal damage and oki. |
| Line 196: |
Line 196: |
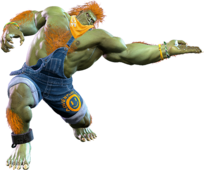
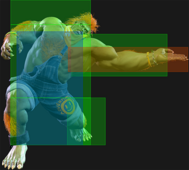
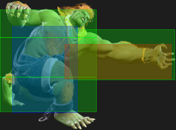
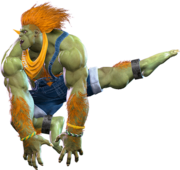
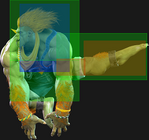
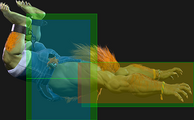
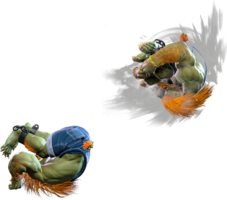
| Enormous reach for a normal attack, and one of Blanka's farthest-reaching neutral options. Great for harassing the opponent's Drive gauge, especially when they are on the lookout to Perfect Parry a Blanka Ball. Can be fairly easily counterpoked and whiff punished due to the slow startup and long recovery time, so it should be used sparingly. | | Enormous reach for a normal attack, and one of Blanka's farthest-reaching neutral options. Great for harassing the opponent's Drive gauge, especially when they are on the lookout to Perfect Parry a Blanka Ball. Can be fairly easily counterpoked and whiff punished due to the slow startup and long recovery time, so it should be used sparingly. |
|
| |
|
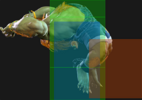
| On Punish Counter, it knocks the opponent to the other end of the screen; this doesn't allow a follow-up juggle, but gives Blanka great screen position. After a whiff punish, closet the gap with {{clr|M|MP Rolling Attack}} for follow-up oki, or set up a Blanka-chan doll. | | On {{clr|PC|Punish Counter}}, it knocks the opponent to the other end of the screen; this doesn't allow a follow-up juggle, but gives Blanka great screen position. After a whiff punish, closet the gap with {{clr|M|MP Rolling Attack}} for follow-up oki, or set up a Blanka-chan doll. |
|
| |
|
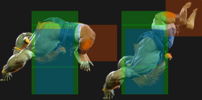
| {{clr|H|2HP}} can anti-air near its max range, but is liable to lose or trade with stronger jump-ins. | | {{clr|H|2HP}} can anti-air near its max range, but is liable to lose or trade with stronger jump-ins. |
| Line 385: |
Line 385: |
| {{AttackDataCargo-SF6/Query|blanka_6mp}} | | {{AttackDataCargo-SF6/Query|blanka_6mp}} |
| * If 1st hit is blocked, 2nd hit no longer hits overhead | | * If 1st hit is blocked, 2nd hit no longer hits overhead |
| * Counter-hit/Punish Counter bonus advantage carries through both hits | | * {{clr|PC|Counter-hit/Punish Counter}} bonus advantage carries through both hits |
| <br> | | <br> |
| A short range 2-hit overhead that is safe on block and can lead to combos on Counter-hit/Punish Counter or when used out of {{clr|DR|Drive Rush}}. Because the 2nd hit has only 1 active frame, there are no meaty setups that allow a natural follow-up link. Pairs well with Blanka-chan bomb to crack the opponent's defenses. | | A short range 2-hit overhead that is safe on block and can lead to combos on {{clr|PC|Counter-hit/Punish Counter}} or when used out of {{clr|DR|Drive Rush}}. Because the 2nd hit has only 1 active frame, there are no meaty setups that allow a natural follow-up link. Pairs well with Blanka-chan bomb to crack the opponent's defenses. |
| }} | | }} |
|
| |
|
| Line 403: |
Line 403: |
| * '''Low Crush:''' 9-23f (not airborne) | | * '''Low Crush:''' 9-23f (not airborne) |
| * 1st hit puts airborne opponents into {{sf6-jug|free juggle}} state (allows both hits to connect) | | * 1st hit puts airborne opponents into {{sf6-jug|free juggle}} state (allows both hits to connect) |
| * Counter-hit/Punish Counter bonus advantage carries through both hits | | * {{clr|PC|Counter-hit/Punish Counter}} bonus advantage carries through both hits |
| <br> | | <br> |
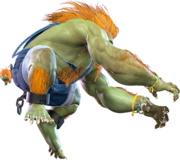
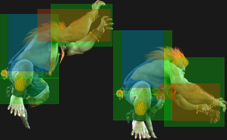
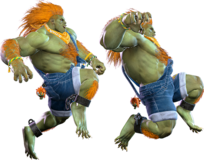
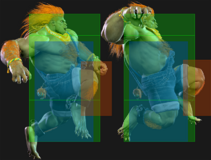
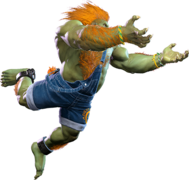
| A hopping 2-hit knee strike that advances forward. Can combo naturally into {{clr|L|5LP}} or {{clr|L|2LP}} with plenty of time to hitconfirm. Works well out of {{clr|DR|Drive Rush}}, giving it extra momentum, plus frames on block, and a combo route into {{clr|H|5HP}} for great damage. | | A hopping 2-hit knee strike that advances forward. Can combo naturally into {{clr|L|5LP}} or {{clr|L|2LP}} with plenty of time to hitconfirm. Works well out of {{clr|DR|Drive Rush}}, giving it extra momentum, plus frames on block, and a combo route into {{clr|H|5HP}} for great damage. |
| Line 430: |
Line 430: |
| One of Blanka's best normals with multiple uses. | | One of Blanka's best normals with multiple uses. |
|
| |
|
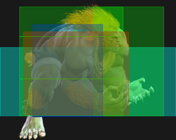
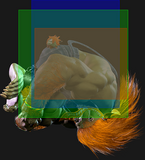
| {{clr|M|4MK}} gives Blanka frame advantage on block, and can even frame trap into itself when used out of {{clr|DR|Drive Rush}}. The high active frame count makes it easy to time as a meaty, giving even better frame advantage. It combos naturally into {{clr|L|lights}} or {{clr|M|2MK}}, and can get much stronger combo routes on Counter-hit or with {{clr|DR|Drive Rush}}. The hitconfirm window is extremely lenient, allowing for special/super follow-ups even at a range where links won't work. Its hitbox is completely disjointed, making it a useful anti-air at mid range. The only downside is that Blanka must be relatively close to enact his pressure, since it can whiff against crouchers at when farther away. | | {{clr|M|4MK}} gives Blanka frame advantage on block, and can even frame trap into itself when used out of {{clr|DR|Drive Rush}}. The high active frame count makes it easy to time as a meaty, giving even better frame advantage. It combos naturally into {{clr|L|lights}} or {{clr|M|2MK}}, and can get much stronger combo routes on {{clr|PC|Counter-hit}} or with {{clr|DR|Drive Rush}}. The hitconfirm window is extremely lenient, allowing for special/super follow-ups even at a range where links won't work. Its hitbox is completely disjointed, making it a useful anti-air at mid range. The only downside is that Blanka must be relatively close to enact his pressure, since it can whiff against crouchers at when farther away. |
| }} | | }} |
|
| |
|
| Line 455: |
Line 455: |
| * Blanka is in a crouching state during recovery on frames 21-43 | | * Blanka is in a crouching state during recovery on frames 21-43 |
| <br> | | <br> |
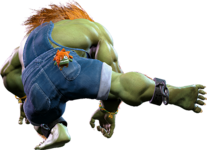
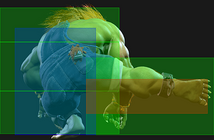
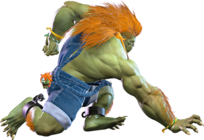
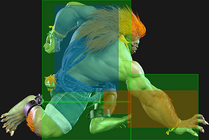
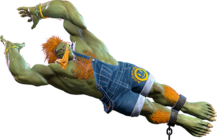
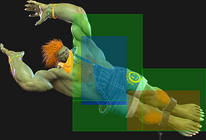
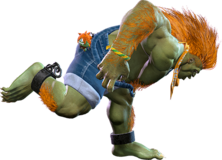
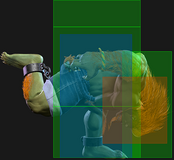
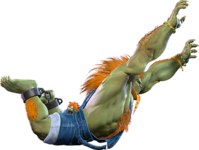
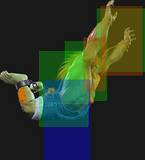
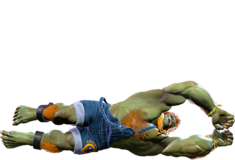
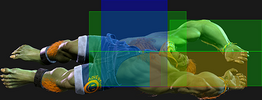
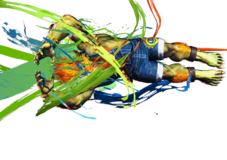
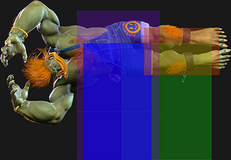
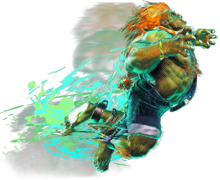
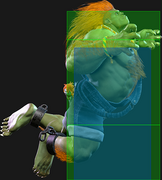
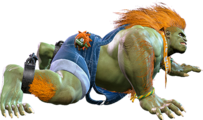
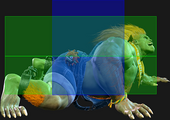
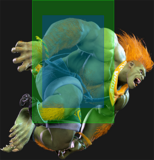
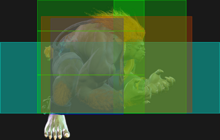
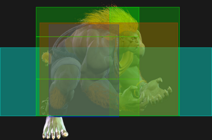
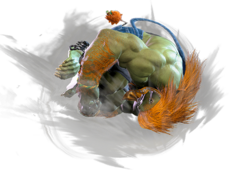
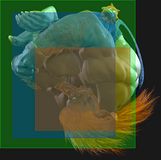
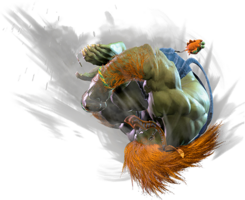
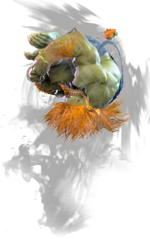
| A body splash with good horizontal and vertical reach. Quite unsafe on block, but if well-spaced it can be difficult for most characters to punish. A regular hit gives a fairly unremarkable knockdown, but the Punish Counter crumple state makes it useful as a DP punish and as a predictive tool against low pokes. | | A body splash with good horizontal and vertical reach. Quite unsafe on block, but if well-spaced it can be difficult for most characters to punish. A regular hit gives a fairly unremarkable knockdown, but the {{clr|PC|Punish Counter}} crumple state makes it useful as a DP punish and as a predictive tool against low pokes. |
|
| |
|
| Canceling into Coward Crouch will not keep Blanka safe on block, but it does allow a juggle into Wild Lift on Punish Counter. By holding up to cancel the Coward Crouch immediately, it's also possible to score a free juggle into any attack 6f or faster. | | Canceling into Coward Crouch will not keep Blanka safe on block, but it does allow a juggle into Wild Lift on {{clr|PC|Punish Counter}}. By holding up to cancel the Coward Crouch immediately, it's also possible to score a free juggle into any attack 6f or faster. |
| }} | | }} |
|
| |
|
| Line 564: |
Line 564: |
| * On Hit/PC: Applies 20% damage scaling to next hit when beginning a combo | | * On Hit/PC: Applies 20% damage scaling to next hit when beginning a combo |
| * On Block: Applies 20% scaling multiplier to all follow-up hits after Wall Splat; the next attack can incur additional Starter Scaling | | * On Block: Applies 20% scaling multiplier to all follow-up hits after Wall Splat; the next attack can incur additional Starter Scaling |
| * Combos when canceled from {{clr|H|5HP}} or Punish Counter {{clr|M|4MK}}/{{clr|M|5MK}}/{{clr|M|2MK}} (no corner wallsplat; useful for depleting Drive gauge, especially after Perfect Parry) | | * Combos when canceled from {{clr|H|5HP}} or {{clr|PC|Punish Counter}} {{clr|M|4MK}}/{{clr|M|5MK}}/{{clr|M|2MK}} (no corner wallsplat; useful for depleting Drive gauge, especially after Perfect Parry) |
| * A blocked {{clr|DR|DI}} can combo into another {{clr|DR|DI}} if opponent is not fully cornered (Stuns if opponent has less than 1.5 Drive bars) | | * A blocked {{clr|DR|DI}} can combo into another {{clr|DR|DI}} if opponent is not fully cornered (Stuns if opponent has less than 1.5 Drive bars) |
| ** This happens because a blocked {{clr|DR|DI}} is not considered a "hit" for combo purposes | | ** This happens because a blocked {{clr|DR|DI}} is not considered a "hit" for combo purposes |
| Line 582: |
Line 582: |
| * '''Zangief ({{clr|H|5[HP]}})''', frame 4 armor | | * '''Zangief ({{clr|H|5[HP]}})''', frame 4 armor |
|
| |
|
| It's important to use a blockstring that cannot be absorbed by their armor/counter moves. Ideally, the string should also not be a true combo, or it will cause a Lock and prevent Stun.<br>{{clr|OD|*}} Denotes a move that causes Lock on Counter-hit, allowing the opponent to escape a Stun by mashing on wakeup. | | It's important to use a blockstring that cannot be absorbed by their armor/counter moves. Ideally, the string should also not be a true combo, or it will cause a Lock and prevent Stun.<br>{{clr|OD|*}} Denotes a move that causes Lock on {{clr|PC|Counter-hit}}, allowing the opponent to escape a Stun by mashing on wakeup. |
| * {{clr|H|5HP}}{{clr|OD|*}} > {{clr|DR|DI}}: 2f blockstring gap prevents opponent from absorbing the hit | | * {{clr|H|5HP}}{{clr|OD|*}} > {{clr|DR|DI}}: 2f blockstring gap prevents opponent from absorbing the hit |
| * {{clr|M|4MK}}{{clr|OD|*}} > {{clr|DR|DI}}: 3f blockstring gap will work vs. Zangief {{clr|H|5[HP]}} | | * {{clr|M|4MK}}{{clr|OD|*}} > {{clr|DR|DI}}: 3f blockstring gap will work vs. Zangief {{clr|H|5[HP]}} |
| Line 686: |
Line 686: |
| ** Surprise Hop has 3f extra recovery when performed out of Coward Crouch | | ** Surprise Hop has 3f extra recovery when performed out of Coward Crouch |
| * Can tap Up to exit stance from frame 20~ | | * Can tap Up to exit stance from frame 20~ |
| * Counter-hit state for entire move duration | | * {{clr|PC|Counter-hit}} state for entire move duration |
|
| |
|
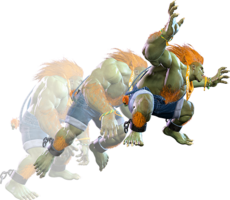
| A crouching stance that can be canceled into from normals, most notably 5HP. Blanka can follow this up with a launching attack, a shallow jump, a forward or back hop, or by simply exiting the stance. The low profile frames are good at ducking under projectiles and {{clr|DR|Drive Impact}}, and the variable follow-up timing allows Blanka to act unpredictably, making it a bit harder for the opponent to punish the stance recovery. | | A crouching stance that can be canceled into from normals, most notably {{clr|H|5HP}}. Blanka can follow this up with a launching attack, a shallow jump, a forward or back hop, or by simply exiting the stance. The low profile frames are good at ducking under projectiles and {{clr|DR|Drive Impact}}, and the variable follow-up timing allows Blanka to act unpredictably, making it a bit harder for the opponent to punish the stance recovery. |
| {{AttackDataCargo-SF6/Query|blanka_2pp_p}} | | {{AttackDataCargo-SF6/Query|blanka_2pp_p}} |
| * Puts opponents into {{sf6-jug|limited juggle}} state | | * Puts opponents into {{sf6-jug|limited juggle}} state |
|
| |
|
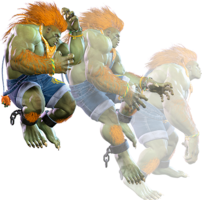
| An upward swipe that launches the opponent on hit, but is very unsafe on block. The final 3 active frames have a very disjointed vertical hitbox, allowing it to anti-air at some ranges if the opponent jumps in response to the crouch animation. Combos naturally from 5HP, but can also work after Counter-hit 4MK or Punish Counter/{{clr|DR|Drive Rush}} 5MK and 2MK. Blanka can maintain charge while inputting Wild Lift, allowing for easy juggles like Vertical Roll. | | An upward swipe that launches the opponent on hit, but is very unsafe on block. The final 3 active frames have a very disjointed vertical hitbox, allowing it to anti-air at some ranges if the opponent jumps in response to the crouch animation. Combos naturally from {{clr|H|5HP}}, but can also work after {{clr|PC|Counter-hit}} {{clr|M|4MK}} or {{clr|PC|Punish Counter}}/{{clr|DR|Drive Rush}} {{clr|M|5MK}} and {{clr|M|2MK}}. Blanka can maintain charge while inputting Wild Lift, allowing for easy juggles like Vertical Roll. |
| {{AttackDataCargo-SF6/Query|blanka_2pp_k}} | | {{AttackDataCargo-SF6/Query|blanka_2pp_k}} |
| * '''Upper Body Projectile Invuln:''' 1-9f | | * '''Upper Body Projectile Invuln:''' 1-9f |
| * '''Airborne''' 9-43f; Counter-hit state for entire duration (but no Forced Knockdown) | | * '''Airborne''' 9-43f; {{clr|PC|Counter-hit}} state for entire duration (but no Forced Knockdown) |
| * 12f landing recovery if no air attack is used | | * 12f landing recovery if no air attack is used |
|
| |
|
| Line 798: |
Line 798: |
| {{clr|L|LP Blanka Ball}} is primarily used to intentionally stop short of the opponent, whiffing with quick landing recovery. Many opponents will try to parry frequently in neutral against Blanka to avoid losing Drive gauge on block or to punish the safer versions of Blanka Ball with a Perfect Parry; mixing in the occasional LP Ball lets him land and immediately throw to punish this. It's important not to accidentally use this version at a range where it can be blocked, as it's horribly unsafe. If the opponent expects a whiffed LP Ball, they can stuff it with a quick jab punish on reaction. | | {{clr|L|LP Blanka Ball}} is primarily used to intentionally stop short of the opponent, whiffing with quick landing recovery. Many opponents will try to parry frequently in neutral against Blanka to avoid losing Drive gauge on block or to punish the safer versions of Blanka Ball with a Perfect Parry; mixing in the occasional LP Ball lets him land and immediately throw to punish this. It's important not to accidentally use this version at a range where it can be blocked, as it's horribly unsafe. If the opponent expects a whiffed LP Ball, they can stuff it with a quick jab punish on reaction. |
|
| |
|
| {{clr|M|MP Blanka Ball}} is the most common version in combos with its good combination of speed and distance, hitting much more consistently than [[#Electric_Thunder_(214P)|Electric Thunder]] from ranged pokes. In some matchups it can also be used as a decent whiff punish tool if Blanka already has charge, though it's quite risky to throw out if the opponent might block it. A successful Punish Counter can lead to a juggled {{clr|SA|SA1}} in the corner, but in most cases the reward is just better oki and corner carry. | | {{clr|M|MP Blanka Ball}} is the most common version in combos with its good combination of speed and distance, hitting much more consistently than [[#Electric_Thunder_(214P)|Electric Thunder]] from ranged pokes. In some matchups it can also be used as a decent whiff punish tool if Blanka already has charge, though it's quite risky to throw out if the opponent might block it. A successful {{clr|PC|Punish Counter}} can lead to a juggled {{clr|SA|SA1}} in the corner, but in most cases the reward is just better oki and corner carry. |
|
| |
|
| {{clr|H|HP Blanka Ball}} has much slower startup than the other versions, but travels full screen and is much safer on block due to the high pushback. In almost all cases, a Perfect Parry is required to punish it effectively. This version is great for harassing the opponent's Drive gauge, chipping away a full bar every time they block. The threat of HP Blanka Ball is what makes whiffed LP Ball so strong. The slow startup does make it a little easier to Perfect Parry or to interrupt with an anti-air invincible move, and makes it more likely for Blanka to run into a projectile before it can connect with the opponent. If it manages to land as a Punish Counter, the tumble state allows Blanka to combo into {{clr|DR|DR~}}{{clr|H|3HP}} from anywhere on the screen. | | {{clr|H|HP Blanka Ball}} has much slower startup than the other versions, but travels full screen and is much safer on block due to the high pushback. In almost all cases, a Perfect Parry is required to punish it effectively. This version is great for harassing the opponent's Drive gauge, chipping away a full bar every time they block. The threat of HP Blanka Ball is what makes whiffed LP Ball so strong. The slow startup does make it a little easier to Perfect Parry or to interrupt with an anti-air invincible move, and makes it more likely for Blanka to run into a projectile before it can connect with the opponent. If it manages to land as a {{clr|PC|Punish Counter}}, the tumble state allows Blanka to combo into {{clr|DR|DR~}}{{clr|H|3HP}} from anywhere on the screen. |
|
| |
|
| Notable punishes for HP Blanka Ball without Perfect Parry include: | | Notable punishes for HP Blanka Ball without Perfect Parry include: |
| Line 853: |
Line 853: |
| All versions on block have only 5 frames of landing recovery, much like the standard OD version. This makes the proper punish timing a bit more precise, as an early punish will put Blanka into a juggle state. The LP and MP versions are slightly safer on block and bounce much farther away, limiting the punish options of most characters. The HP version, meanwhile, recovers closer and is 6f worse on block; this makes it much more punishable if not canceled into Rolling Cannon. OD Blanka Ball also recovers closer, but at -7 it is still generally safe. | | All versions on block have only 5 frames of landing recovery, much like the standard OD version. This makes the proper punish timing a bit more precise, as an early punish will put Blanka into a juggle state. The LP and MP versions are slightly safer on block and bounce much farther away, limiting the punish options of most characters. The HP version, meanwhile, recovers closer and is 6f worse on block; this makes it much more punishable if not canceled into Rolling Cannon. OD Blanka Ball also recovers closer, but at -7 it is still generally safe. |
|
| |
|
| After a Punish Counter MP or HP version, the opponent's tumbling OTG state can be followed up anywhere on the screen with a 3P Rolling Cannon or an enhanced {{clr|SA|SA1}}. This dramatically increases the damage output on a successful punish starter compared to the non-{{clr|SA|SA2}} versions. | | After a {{clr|PC|Punish Counter}} MP or HP version, the opponent's tumbling OTG state can be followed up anywhere on the screen with a 3P Rolling Cannon or an enhanced {{clr|SA|SA1}}. This dramatically increases the damage output on a successful punish starter compared to the non-{{clr|SA|SA2}} versions. |
| }} | | }} |
| </tabber> | | </tabber> |
| Line 1,126: |
Line 1,126: |
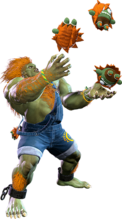
| * Button strength determines doll placement (LP close, MP mid, HP far) | | * Button strength determines doll placement (LP close, MP mid, HP far) |
| * Blanka can only place 1 doll on-screen at a time | | * Blanka can only place 1 doll on-screen at a time |
| * Blanka is in a counter-hit state for entire throwing animation | | * Blanka is in a {{clr|PC|Counter-hit}} state for entire throwing animation |
| * The doll stock is consumed on frame 25, and spawns on frame 39 | | * The doll stock is consumed on frame 25, and spawns on frame 39 |
| ** If counter-hit between these frames, loses the doll completely | | ** If {{clr|PC|Counter-hit}} between these frames, loses the doll completely |
| * After spawning, the doll takes 35 more frames to reach the ground and become interactable | | * After spawning, the doll takes 35 more frames to reach the ground and become interactable |
| * Doll disappears if completely off-screen or after 1000 frames | | * Doll disappears if completely off-screen or after 1000 frames |

