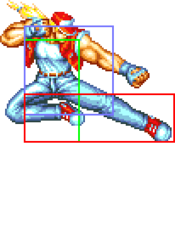
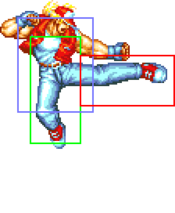
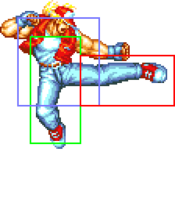
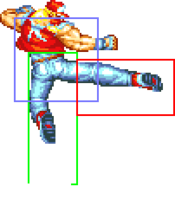
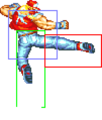
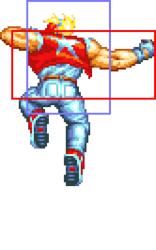
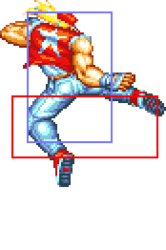
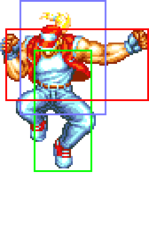
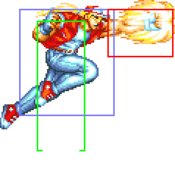
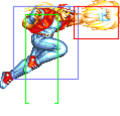
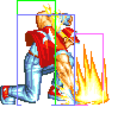
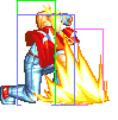
mNo edit summary |
(→Moves List: numpad + frame data + hitboxes + fighting master..!?) |
||
| Line 19: | Line 19: | ||
|} | |} | ||
== | ==Move List== | ||
< | {| border="1em" cellspacing="0" style="border: 1px solid #999;" | ||
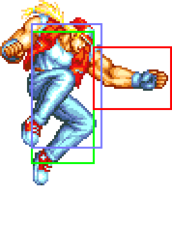
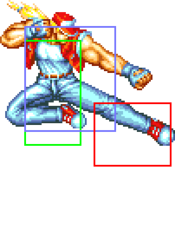
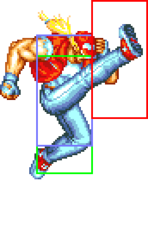
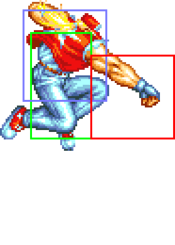
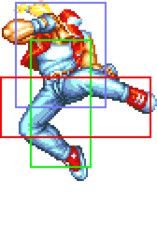
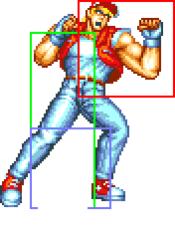
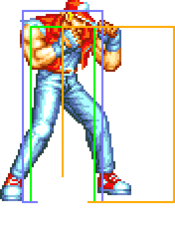
< | | align="center" | Standing/Taunting || align="center" | Crouching || align="center" | Crouchwalking || align="center" | Jumping | ||
|- | |||
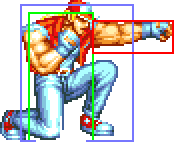
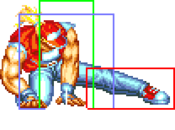
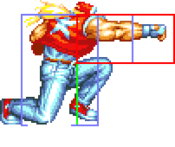
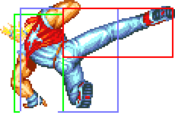
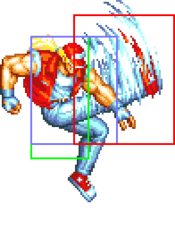
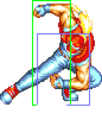
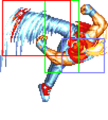
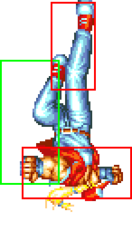
| align="center"; valign="bottom" | [[File:FFS Terry Stand.png|bottom]] || align="center"; valign="bottom" | [[File:FFS Terry Crouch.png|bottom]] || align="center"; valign="bottom" | [[File:FFS Terry Crouchwalk.png|bottom]] || align="center"; valign="bottom" | [[File:FFS Terry Jump.png|bottom]] | |||
|- | |||
| align="center" | || align="center" | || align="center" | || align="center" | 54F (4+47+3) duration. | |||
|} | |||
===Close Standing Normals=== | |||
===== <span class="invisible-header">c5A</span> ===== | |||
<font style="visibility:hidden" size="0"></font> | |||
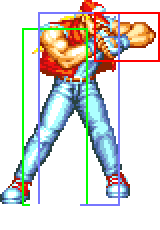
{{MoveData | |||
|image=FFS_Terry_c5A.png | |||
|subtitle=Elbow/エルボー | |||
|caption= | |||
|name=c5A | |||
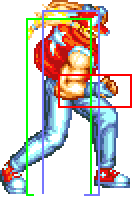
|data= | |||
{{AttackData-FFS | |||
|Damage=8 | |||
|Stun=2 | |||
|Guard=Mid | |||
|Startup=3 | |||
|Active=3 | |||
|Recovery=4 | |||
|Total=9 | |||
|Hit Adv=+9 | |||
|Block Adv=+10 | |||
|Property=Kara Cancel | |||
|description= | |||
}} | |||
}} | |||
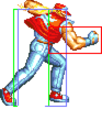
===== <span class="invisible-header">c5B</span> ===== | |||
<font style="visibility:hidden" size="0"></font> | |||
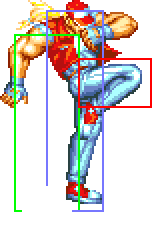
{{MoveData | |||
|image=FFS_Terry_c5B.png | |||
|subtitle=ひざ蹴り | |||
|caption= | |||
|name=c5B | |||
|data= | |||
{{AttackData-FFS | |||
|Damage=10 | |||
|Stun=2 | |||
|Guard=Mid | |||
|Startup=8 | |||
|Active=6 | |||
|Recovery=8 | |||
|Total=21 | |||
|Hit Adv=+2 | |||
|Block Adv=+3 | |||
|Property=Kara Cancel | |||
|description= | |||
}} | |||
}} | |||
===== <span class="invisible-header">c5C</span> ===== | |||
<font style="visibility:hidden" size="0"></font> | |||
{{MoveData | |||
|image=FFS_Terry_c5C.png | |||
|subtitle=Body/ボディ | |||
|caption= | |||
|name=c5C | |||
|data= | |||
{{AttackData-FFS | |||
|Damage=11x2 | |||
|Stun=4x2 | |||
|Guard=Mid | |||
|Startup=7 | |||
|Active=3+8 | |||
|Recovery=13 | |||
|Total=30 | |||
|Hit Adv=+4 | |||
|Block Adv=+5 | |||
|Property=Kara Cancel | |||
|description= | |||
<gallery class="mw-collapsible"> | |||
FFS Terry c5C 1.png| | |||
</gallery> | |||
}} | |||
}} | |||
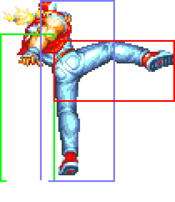
===== <span class="invisible-header">c5D</span> ===== | |||
<font style="visibility:hidden" size="0"></font> | |||
{{MoveData | |||
|image=FFS_Terry_c5D.png | |||
|subtitle=High Kick/ハイキック | |||
|caption= | |||
|name=c5D | |||
|data= | |||
{{AttackData-FFS | |||
|Damage=20 | |||
|Stun=4 | |||
|Guard=Mid | |||
|Startup=8 | |||
|Active=9 | |||
|Recovery=25 | |||
|Total=41 | |||
|Hit Adv=-10 | |||
|Block Adv=-11 | |||
|Property=Kara Cancel | |||
|description= | |||
}} | |||
}} | |||
===Far Standing Normals=== | |||
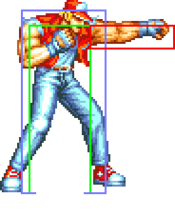
===== <span class="invisible-header">f5A</span> ===== | |||
<font style="visibility:hidden" size="0"></font> | |||
{{MoveData | |||
|image=FFS_Terry_f5A.png | |||
|subtitle=Jab/ジャブ | |||
|caption= | |||
|name=f5A | |||
|data= | |||
{{AttackData-FFS | |||
|Damage=6 | |||
|Stun=2 | |||
|Guard=Mid | |||
|Startup=3 | |||
|Active=3 | |||
|Recovery=4 | |||
|Total=9 | |||
|Hit Adv=+9 | |||
|Block Adv=+10 | |||
|Property=Kara Cancel | |||
|description= | |||
}} | |||
}} | |||
===== <span class="invisible-header">f5B</span> ===== | |||
<font style="visibility:hidden" size="0"></font> | |||
{{MoveData | |||
|image=FFS_Terry_f5B.png | |||
|subtitle=Middle Kick/ミドルキック | |||
|caption= | |||
|name=f5B | |||
|data= | |||
{{AttackData-FFS | |||
|Damage=8 | |||
|Stun=2 | |||
|Guard=Mid | |||
|Startup=5 | |||
|Active=7 | |||
|Recovery=8 | |||
|Total=20 | |||
|Hit Adv=+1 | |||
|Block Adv=+2 | |||
|Property=Kara Cancel | |||
|description= | |||
}} | |||
}} | |||
===== <span class="invisible-header">f5C</span> ===== | |||
<font style="visibility:hidden" size="0"></font> | |||
{{MoveData | |||
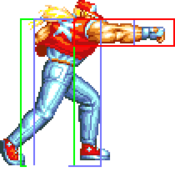
|image=FFS_Terry_f5C.png | |||
|subtitle=Straight/ストレート | |||
|caption= | |||
|name=f5C | |||
|data= | |||
{{AttackData-FFS | |||
|Damage=16 | |||
|Stun=4 | |||
|Guard=Mid | |||
|Startup=10 | |||
|Active=8 | |||
|Recovery=14 | |||
|Total=31 | |||
|Hit Adv=+1 | |||
|Block Adv=0 | |||
|Property= | |||
|description= | |||
}} | |||
}} | |||
===== <span class="invisible-header">f5D</span> ===== | |||
<font style="visibility:hidden" size="0"></font> | |||
{{MoveData | |||
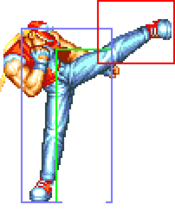
|image=FFS_Terry_f5D 1.png | |||
|subtitle=回し蹴り | |||
|caption= | |||
|name=f5D | |||
|data= | |||
{{AttackData-FFS | |||
|Damage=18 | |||
|Stun=4 | |||
|Guard=Mid | |||
|Startup=10 | |||
|Active=10 | |||
|Recovery=20 | |||
|Total=39 | |||
|Hit Adv=-7 | |||
|Block Adv=-8 | |||
|Property= | |||
|description= | |||
<gallery class="mw-collapsible"> | |||
FFS Terry f5D.png| | |||
FFS Terry f5D 1.png| | |||
</gallery> | |||
}} | |||
}} | |||
===Crouching Normals=== | |||
===== <span class="invisible-header">2A</span> ===== | |||
<font style="visibility:hidden" size="0"></font> | |||
{{MoveData | |||
|image=FFS_Terry_2A.png | |||
|subtitle=Crouching Jab/しゃがみジャブ | |||
|caption= | |||
|name=2A | |||
|data= | |||
{{AttackData-FFS | |||
|Damage=6 | |||
|Stun=2 | |||
|Guard=Mid | |||
|Startup=4 | |||
|Active=3 | |||
|Recovery=5 | |||
|Total=11 | |||
|Hit Adv=+8 | |||
|Block Adv=+9 | |||
|Property=Kara Cancel | |||
|description= | |||
}} | |||
}} | |||
===== <span class="invisible-header">2B</span> ===== | |||
<font style="visibility:hidden" size="0"></font> | |||
{{MoveData | |||
|image=FFS_Terry_2B.png | |||
|subtitle=足払い蹴り | |||
|caption= | |||
|name=2B | |||
|data= | |||
{{AttackData-FFS | |||
|Damage=8 | |||
|Stun=2 | |||
|Guard=Low | |||
|Startup=7 | |||
|Active=6 | |||
|Recovery=9 | |||
|Total=21 | |||
|Hit Adv=+1 | |||
|Block Adv=+2 | |||
|Property= | |||
|description= | |||
}} | |||
}} | |||
===== <span class="invisible-header">2C</span> ===== | |||
<font style="visibility:hidden" size="0"></font> | |||
{{MoveData | |||
|image=FFS Terry 2C.png | |||
|subtitle=Crouching Straight/しゃがみストレート | |||
|caption= | |||
|name=2C | |||
|data= | |||
{{AttackData-FFS | |||
|Damage=16 | |||
|Stun=4 | |||
|Guard=Mid | |||
|Startup=7 | |||
|Active=9 | |||
|Recovery=10 | |||
|Total=25 | |||
|Hit Adv=+5 | |||
|Block Adv=+4 | |||
|Property=Kara Cancel | |||
|description= | |||
}} | |||
}} | |||
===== <span class="invisible-header">2D</span> ===== | |||
<font style="visibility:hidden" size="0"></font> | |||
{{MoveData | |||
|image=FFS_Terry_2D.png | |||
|subtitle=Slide Kick/スライドキック | |||
|caption= | |||
|name=2D | |||
|data= | |||
{{AttackData-FFS | |||
|Damage=14 | |||
|Stun=4 | |||
|Guard=Low | |||
|Startup=8 | |||
|Active=8 | |||
|Recovery=19 | |||
|Total=35 | |||
|Hit Adv=KD | |||
|Block Adv=-3 | |||
|Property= | |||
|description= | |||
}} | |||
}} | |||
===Jumping Normals=== | |||
===== <span class="invisible-header">jA</span> ===== | |||
<font style="visibility:hidden" size="0"></font> | |||
{{MoveData | |||
|image=FFS_Terry_jA.png | |||
|subtitle=ジャンプ手刀 | |||
|caption= | |||
|name=jA | |||
|data= | |||
{{AttackData-FFS | |||
|Damage=8 | |||
|Stun=2 | |||
|Guard=Overhead | |||
|Startup=6 | |||
|Active=∞ | |||
|Recovery=/ | |||
|Total=/ | |||
|Hit Adv= | |||
|Block Adv= | |||
|Property= | |||
|description= | |||
}} | |||
}} | |||
===== <span class="invisible-header">jB</span> ===== | |||
<font style="visibility:hidden" size="0"></font> | |||
{{MoveData | |||
|image=FFS_Terry_jB.png | |||
|image2=FFS_Terry_j8B.png | |||
|subtitle=Jump Terry Kick/ジャンプテリーキック | |||
|subtitle2=ジャンプ前蹴り | |||
|caption=Diagonal Jump | |||
|caption2=Neutral Jump | |||
|name=jB | |||
|data= | |||
{{AttackData-FFS | |||
|Damage=10 | |||
|Stun=2 | |||
|Guard=Overhead | |||
|Startup=6 | |||
|Active=∞ | |||
|Recovery=/ | |||
|Total=/ | |||
|Hit Adv= | |||
|Block Adv= | |||
|Property= | |||
|description= * Same frame data for diagonal and neutral jumps. | |||
}} | |||
}} | |||
===== <span class="invisible-header">jC</span> ===== | |||
<font style="visibility:hidden" size="0"></font> | |||
{{MoveData | |||
|image=FFS_Terry_jC.png | |||
|subtitle=ジャンプ正拳突き | |||
|caption= | |||
|name=jC | |||
|data= | |||
{{AttackData-FFS | |||
|version=Diagonal Jump | |||
|Damage=18 | |||
|Stun=4 | |||
|Guard=Overhead | |||
|Startup=6 | |||
|Active=17 | |||
|Recovery=/ | |||
|Total=/ | |||
|Hit Adv= | |||
|Block Adv= | |||
|Property= | |||
|description= | |||
}} | |||
}} | |||
===== <span class="invisible-header">jD</span> ===== | |||
<font style="visibility:hidden" size="0"></font> | |||
{{MoveData | |||
|image=FFS_Terry_jD.png | |||
|image2=FFS_Terry_j8D.png | |||
|subtitle= | |||
|caption=Diagonal Jump | |||
|caption2=Neutral Jump | |||
|name=jD | |||
|data= | |||
{{AttackData-FFS | |||
|version=Diagonal Jump | |||
|subtitle=Jump Terry Kick/ジャンプテリーキック | |||
|Damage=20 | |||
|Stun=4 | |||
|Guard=Overhead | |||
|Startup=8 | |||
|Active=17 | |||
|Recovery=/ | |||
|Total=/ | |||
|Hit Adv= | |||
|Block Adv= | |||
|Property= | |||
|description= | |||
}} | |||
{{AttackData-FFS | |||
|header=no | |||
|version=Neutral Jump | |||
|subtitle=ジャンプ後ろ回し蹴り | |||
|Damage=16 | |||
|Stun=4 | |||
|Guard=Overhead | |||
|Startup=11 | |||
|Active=10 | |||
|Recovery=/ | |||
|Total=/ | |||
|Hit Adv= | |||
|Block Adv= | |||
|Property= | |||
|description= | |||
}} | |||
}} | |||
===Universal Mechanics=== | |||
===== <span class="invisible-header">Lane Blast (CD)</span> ===== | |||
<font style="visibility:hidden" size="0"></font> | |||
{{MoveData | |||
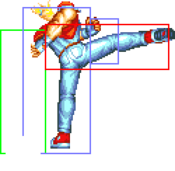
|image=FFS_Terry_CD_Front 3.png | |||
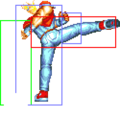
|image2=FFS_Terry_CD_Back 3.png | |||
|subtitle=Jump Back Spin Kick/ジャンプバックスピンキック | |||
|caption=Front Lane | |||
|caption2=Back Lane | |||
|name=Lane Blast | |||
|input=C+D | |||
|data= | |||
{{AttackData-FFS | |||
|version=Front Lane | |||
|Damage=22 | |||
|Stun=5 | |||
|Guard=Mid | |||
|Startup=19 | |||
|Active=9 | |||
|Recovery=13 | |||
|Total=40 | |||
|Hit Adv=KD | |||
|Block Adv=-3 | |||
|Property=Cancel, Lane Shift, Foot Invuln 4-32F | |||
|description= | |||
<gallery class="mw-collapsible"> | |||
FFS Terry CD Front.png| | |||
FFS Terry CD Front 1.png| | |||
FFS Terry CD Front 2.png| | |||
FFS Terry CD Front 3.png| | |||
FFS Terry CD Front 4.png| | |||
FFS Terry CD Front 5.png| | |||
</gallery> | |||
}} | |||
{{AttackData-FFS | |||
|header=no | |||
|version=Back Lane | |||
|Damage=22 | |||
|Stun=5 | |||
|Guard=Mid | |||
|Startup=16 | |||
|Active=9 | |||
|Recovery=13 | |||
|Total=37 | |||
|Hit Adv=KD | |||
|Block Adv=-3 | |||
|Property=Cancel, Lane Shift, Foot Invuln 4-30F | |||
|description= | |||
<gallery class="mw-collapsible"> | |||
FFS Terry CD Back.png| | |||
FFS Terry CD Back 1.png| | |||
FFS Terry CD Back 2.png| | |||
FFS Terry CD Back 3.png| | |||
FFS Terry CD Back 4.png| | |||
</gallery> | |||
}} | |||
}} | |||
===== <span class="invisible-header">Lane Attack</span> ===== | |||
<font style="visibility:hidden" size="0"></font> | |||
{{MoveData | |||
|image=FFS_Terry_Lane_Punch_Front.png | |||
|image2=FFS Terry Lane Kick Front.png | |||
|image3=FFS Terry Lane Punch Back.png | |||
|image4=FFS Terry Lane Kick Back.png | |||
|subtitle= | |||
|caption=Front Lane Punch | |||
|caption2=Front Lane Kick | |||
|caption3=Back Lane Punch | |||
|caption4=Back Lane Kick | |||
|name=Lane Attack | |||
|input=A/B/C/D from opposite lane | |||
|data= | |||
{{AttackData-FFS | |||
|version=A | |||
|subtitle=Jump Lariat Punch/ジャンプラリアットパンチ | |||
|Damage=20 | |||
|Stun=2 | |||
|Guard=Overhead | |||
|Startup=13 | |||
|Active= | |||
|Recovery=4 | |||
|Total= | |||
|Hit Adv= | |||
|Block Adv= | |||
|Property=/ | |||
|description= * Straight and fast cross-lane punch. | |||
}} | |||
{{AttackData-FFS | |||
|header=no | |||
|version=B | |||
|subtitle=Jump Knee Attack/ジャンプニーアタック | |||
|Damage=20 | |||
|Stun=2 | |||
|Guard=Overhead | |||
|Startup=13 | |||
|Active= | |||
|Recovery=4 | |||
|Total= | |||
|Hit Adv= | |||
|Block Adv= | |||
|Property=/ | |||
|description= * Straight cross-lane kick. | |||
}} | |||
{{AttackData-FFS | |||
|header=no | |||
|version=C | |||
|subtitle=Jump Lariat Punch/ジャンプラリアットパンチ | |||
|Damage=20 | |||
|Stun=4 | |||
|Guard=Overhead | |||
|Startup=13 | |||
|Active= | |||
|Recovery=4 | |||
|Total= | |||
|Hit Adv= | |||
|Block Adv= | |||
|Property=/ | |||
|description= * Slower high angle punch. | |||
}} | |||
{{AttackData-FFS | |||
|header=no | |||
|version=D | |||
|subtitle=Jump Knee Attack/ジャンプニーアタック | |||
|Damage=20 | |||
|Stun=4 | |||
|Guard=Overhead | |||
|Startup=13 | |||
|Active= | |||
|Recovery=4 | |||
|Total= | |||
|Hit Adv= | |||
|Block Adv= | |||
|Property=/ | |||
|description= * Slower high-angle kick. | |||
}} | |||
}} | |||
===== <span class="invisible-header">Dodge Attack</span> ===== | |||
<font style="visibility:hidden" size="0"></font> | |||
{{MoveData | |||
|image=FFS_Terry_Dodge_Attack 2.png | |||
|subtitle= | |||
|caption= | |||
|name=Dodge Attack | |||
|input=6A during proximity guard | |||
|data= | |||
{{AttackData-FFS | |||
|Damage=11 | |||
|Stun=5 | |||
|Guard=Mid | |||
|Startup=9 | |||
|Active=7+9 | |||
|Recovery=12 | |||
|Total=36 | |||
|Hit Adv=Air Reset | |||
|Block Adv= | |||
|Property=Cancel, Upper-Body Invuln 1-24F※ | |||
|description= | |||
※Hurtbox is slightly taller during 9-15F. | |||
<gallery class="mw-collapsible"> | |||
FFS_Terry_Dodge_Attack.png|Upper-Body Invuln | |||
FFS Terry Dodge Attack 1.png| | |||
FFS Terry Dodge Attack 2.png|Hitbox 1 (tall) | |||
FFS Terry Dodge Attack 3.png|Hitbox 2 (normal) | |||
FFS Terry Dodge Attack 4.png|Recovery | |||
</gallery> | |||
}} | |||
}} | |||
===Throws=== | |||
===== <span class="invisible-header">Buster Throw (4/6C)</span> ===== | |||
<font style="visibility:hidden" size="0"></font> | |||
{{MoveData | |||
|image=FFS_Terry_Throw.png | |||
|caption= | |||
|name=Buster Throw | |||
|input=close 4/6C | |||
|data= | |||
{{AttackData-FFS | |||
|Damage=26 | |||
|Stun=3 | |||
|Guard=Throw | |||
|Startup=1 | |||
|Active=1 | |||
|Recovery=/ | |||
|Hit Adv=KD (+79) | |||
|Block Adv=/ | |||
|Property=/ | |||
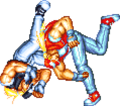
|description= * Switches sides. | |||
<gallery class="mw-collapsible"> | |||
FFS Terry Throw 1.png| | |||
</gallery> | |||
}} | |||
}} | |||
===Special Moves=== | |||
===== <span class="invisible-header">Burn Knuckle (214P)</span> ===== | |||
{{MoveData | |||
| name = Burn Knuckle | |||
| input = 214A/C | |||
| subtitle = | |||
| image = FFS Terry 214P 1.png | |||
| caption = | |||
| data = | |||
<gallery class="mw-collapsible"> | |||
FFS Terry 214P.png| | |||
FFS Terry 214P 1.png| | |||
</gallery> | |||
{{AttackData-FFS | |||
| version = A | |||
| subtitle = | |||
| Damage = 16 (4) | |||
| Stun = 3 | |||
| Guard = Mid | |||
| Startup = 14 | |||
| Active = 16 | |||
| Recovery = 11 | |||
| Total = 40 | |||
| Hit Adv = Air Reset (+12) | |||
| Block Adv = -9 | |||
| Property = Throw Invincible | |||
| description = | |||
}} | |||
{{AttackData-FFS | |||
| header = no | |||
| version = C | |||
| subtitle = | |||
| Damage = 22 (5) | |||
| Stun = 6 | |||
| Guard = Mid | |||
| Startup = 29 | |||
| Active = 16 | |||
| Recovery = 13 | |||
| Total = 57 | |||
| Hit Adv = KD (+71) | |||
| Block Adv = -7 | |||
| Property = Throw Invincible | |||
| description = | |||
}} | |||
}} | |||
===== <span class="invisible-header">Power Wave (236P)</span> ===== | |||
{{MoveData | |||
| name = Power Wave | |||
| input = 236A/C | |||
| subtitle = | |||
| image = FFS Terry 236P 2.png | |||
| caption = | |||
| data = | |||
<gallery class="mw-collapsible"> | |||
FFS Terry 236P.png| | |||
FFS Terry 236P 1.png| | |||
FFS Terry 236P 2.png| | |||
</gallery> | |||
{{AttackData-FFS | |||
| version = A | |||
| subtitle = | |||
| Damage = 16 (4) | |||
| Stun = 3 | |||
| Guard = Mid | |||
| Startup = 19 | |||
| Active = | |||
| Recovery = 36 | |||
| Total = 54 | |||
| Hit Adv = -3 | |||
| Block Adv = -2 | |||
| Property = | |||
| description = | |||
}} | |||
{{AttackData-FFS | |||
| header = no | |||
| version = C | |||
| subtitle = | |||
| Damage = 22 (5) | |||
| Stun = 6 | |||
| Guard = Mid | |||
| Startup = 23 | |||
| Active = | |||
| Recovery = 38 | |||
| Total = 60 | |||
| Hit Adv = +3 | |||
| Block Adv = -8 | |||
| Property = | |||
| description = | |||
}} | |||
}} | |||
===== <span class="invisible-header">Crack Shoot (2147K)</span> ===== | |||
{{MoveData | |||
| name = Crack Shoot | |||
| input = 2147B/D | |||
| subtitle = | |||
| image = FFS Terry 2147K 5.png | |||
| caption = | |||
| data = | |||
<gallery class="mw-collapsible mw-collapsed" data-expandtext="show detailed hitboxes" data-collapsetext="hide detailed hitboxes"> | |||
FFS Terry 2147K.png| | |||
FFS Terry 2147K 1.png| | |||
FFS Terry 2147K 2.png| | |||
FFS Terry 2147K 3.png| | |||
FFS Terry 2147K 4.png| | |||
FFS Terry 2147K 5.png| | |||
FFS Terry 2147K 6.png| | |||
FFS Terry CD Front 5.png| | |||
</gallery> | |||
{{AttackData-FFS | |||
| version = B | |||
| subtitle = | |||
| Damage = 13x2 (3x2) | |||
| Stun = 3x2 | |||
| Guard = Mid | |||
| Startup = 10 | |||
| Active = 6x3 | |||
| Recovery = 16 | |||
| Total = 43 | |||
| Hit Adv = -1 | |||
| Block Adv = -10 | |||
| Property = Throw Invincible | |||
| description = * -4 on block against crouching Terry. | |||
}} | |||
{{AttackData-FFS | |||
| header = no | |||
| version = D | |||
| subtitle = | |||
| Damage = 18x2 (4x2) | |||
| Stun = 6x2 | |||
| Guard = Mid | |||
| Startup = 15 | |||
| Active = 8+8+4 | |||
| Recovery = 19 | |||
| Total = 53 | |||
| Hit Adv = -2 | |||
| Block Adv = -9 | |||
| Property = Throw Invincible | |||
| description = * -1 on block against crouching Terry. | |||
}} | |||
}} | |||
===== <span class="invisible-header">Rising Tackle ([2]8P)</span> ===== | |||
{{MoveData | |||
| name = Rising Tackle | |||
| input = [2]8A/C | |||
| subtitle = | |||
| image = FFS Terry 28A.png | |||
| caption = | |||
| data = | |||
<gallery class="mw-collapsible"> | |||
FFS Terry 28A.png| | |||
FFS Terry 28A 1.png| | |||
FFS Terry 28A 2.png| | |||
</gallery> | |||
{{AttackData-FFS | |||
| version = A | |||
| Damage = 14 (3x3) | |||
| Stun = 3 | |||
| Guard = Mid | |||
| Startup = 13 | |||
| Active = 6+6+3 | |||
| Recovery = 29 | |||
| Total = 56 | |||
| Hit Adv = KD (+13) | |||
| Block Adv = -16 | |||
| Property = Invincible 1-24F, Throw Invincible | |||
| description = * -10 if the 3rd hit is blocked. | |||
}} | |||
{{AttackData-FFS | |||
| header = no | |||
| version = C | |||
| Damage = 20 (5) | |||
| Stun = 6 | |||
| Guard = Mid | |||
| Startup = 18 | |||
| Active = 5+5+5+3 | |||
| Recovery = 40 | |||
| Total = 75 | |||
| Hit Adv = KD (+42) | |||
| Block Adv = -40 | |||
| Property = Invincible 1-25F, Throw Invincible | |||
| description = * -34 if the 3rd hit is blocked. | |||
}} | |||
}} | |||
===Desperation Move=== | |||
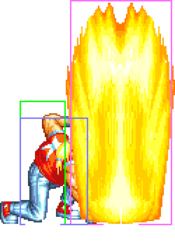
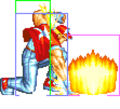
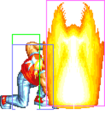
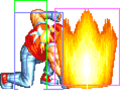
===== <span class="invisible-header">Power Geyser (21416BC)</span> ===== | |||
{{MoveData | |||
| name = Power Geyser | |||
| input = 21416B+C | |||
| subtitle = When health is flashing | |||
| image = FFS Terry 21416BC 2.png | |||
| caption = | |||
| data = | |||
{{AttackData-FFS | |||
| Damage = 48 (12) | |||
| Stun = 4 | |||
| Guard = Mid | |||
| Startup = 27 | |||
| Active = 22 | |||
| Recovery = 24 | |||
| Total = 72 | |||
| Hit Adv = +74 | |||
| Block Adv = -4 | |||
| Property = | |||
| description = | |||
<gallery class="mw-collapsible"> | |||
FFS Terry 21416BC.png| | |||
FFS Terry 21416BC 1.png| | |||
FFS Terry 21416BC 2.png| | |||
FFS Terry 21416BC 3.png| | |||
FFS Terry 21416BC 4.png| | |||
</gallery> | |||
}} | |||
}} | |||
==Normals== | ==Normals== | ||
{| border="1em" cellpadding="5" cellspacing="0" width="60%" style="border: 1px solid #999;" | {| border="1em" cellpadding="5" cellspacing="0" width="60%" style="border: 1px solid #999;" | ||
Revision as of 04:33, 19 January 2025
Introduction
| Strengths | Weaknesses |
|---|---|
|
|
Move List
| Standing/Taunting | Crouching | Crouchwalking | Jumping |
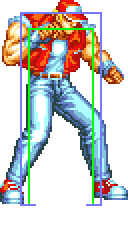 |
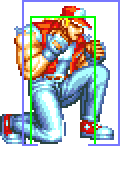 |
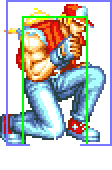 |
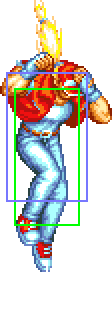
|
| 54F (4+47+3) duration. |
Close Standing Normals
c5A
| Damage | Stun | Guard | Startup | Active | Recovery | Total | Hit Adv | Block Adv | Property |
|---|---|---|---|---|---|---|---|---|---|
| 8 | 2 | Mid | 3 | 3 | 4 | 9 | +9 | +10 | Kara Cancel |
c5B
| Damage | Stun | Guard | Startup | Active | Recovery | Total | Hit Adv | Block Adv | Property |
|---|---|---|---|---|---|---|---|---|---|
| 10 | 2 | Mid | 8 | 6 | 8 | 21 | +2 | +3 | Kara Cancel |
c5C
c5D
| Damage | Stun | Guard | Startup | Active | Recovery | Total | Hit Adv | Block Adv | Property |
|---|---|---|---|---|---|---|---|---|---|
| 20 | 4 | Mid | 8 | 9 | 25 | 41 | -10 | -11 | Kara Cancel |
Far Standing Normals
f5A
| Damage | Stun | Guard | Startup | Active | Recovery | Total | Hit Adv | Block Adv | Property |
|---|---|---|---|---|---|---|---|---|---|
| 6 | 2 | Mid | 3 | 3 | 4 | 9 | +9 | +10 | Kara Cancel |
f5B
| Damage | Stun | Guard | Startup | Active | Recovery | Total | Hit Adv | Block Adv | Property |
|---|---|---|---|---|---|---|---|---|---|
| 8 | 2 | Mid | 5 | 7 | 8 | 20 | +1 | +2 | Kara Cancel |
f5C
| Damage | Stun | Guard | Startup | Active | Recovery | Total | Hit Adv | Block Adv | Property |
|---|---|---|---|---|---|---|---|---|---|
| 16 | 4 | Mid | 10 | 8 | 14 | 31 | +1 | 0 | - |
f5D
Crouching Normals
2A
| Damage | Stun | Guard | Startup | Active | Recovery | Total | Hit Adv | Block Adv | Property |
|---|---|---|---|---|---|---|---|---|---|
| 6 | 2 | Mid | 4 | 3 | 5 | 11 | +8 | +9 | Kara Cancel |
2B
| Damage | Stun | Guard | Startup | Active | Recovery | Total | Hit Adv | Block Adv | Property |
|---|---|---|---|---|---|---|---|---|---|
| 8 | 2 | Low | 7 | 6 | 9 | 21 | +1 | +2 | - |
2C
| Damage | Stun | Guard | Startup | Active | Recovery | Total | Hit Adv | Block Adv | Property |
|---|---|---|---|---|---|---|---|---|---|
| 16 | 4 | Mid | 7 | 9 | 10 | 25 | +5 | +4 | Kara Cancel |
2D
| Damage | Stun | Guard | Startup | Active | Recovery | Total | Hit Adv | Block Adv | Property |
|---|---|---|---|---|---|---|---|---|---|
| 14 | 4 | Low | 8 | 8 | 19 | 35 | KD | -3 | - |
Jumping Normals
jA
| Damage | Stun | Guard | Startup | Active | Recovery | Total | Hit Adv | Block Adv | Property |
|---|---|---|---|---|---|---|---|---|---|
| 8 | 2 | Overhead | 6 | ∞ | / | / | - | - | - |
jB
| Damage | Stun | Guard | Startup | Active | Recovery | Total | Hit Adv | Block Adv | Property | |
|---|---|---|---|---|---|---|---|---|---|---|
| 10 | 2 | Overhead | 6 | ∞ | / | / | - | - | - | |
| ||||||||||
jC
| Version | Damage | Stun | Guard | Startup | Active | Recovery | Total | Hit Adv | Block Adv | Property |
|---|---|---|---|---|---|---|---|---|---|---|
| Diagonal Jump | 18 | 4 | Overhead | 6 | 17 | / | / | - | - | - |
jD
| Version | Damage | Stun | Guard | Startup | Active | Recovery | Total | Hit Adv | Block Adv | Property |
|---|---|---|---|---|---|---|---|---|---|---|
| Diagonal Jump Jump Terry Kick/ジャンプテリーキック |
20 | 4 | Overhead | 8 | 17 | / | / | - | - | - |
| Neutral Jump ジャンプ後ろ回し蹴り |
16 | 4 | Overhead | 11 | 10 | / | / | - | - | - |
Universal Mechanics
Lane Blast (CD)
Lane Attack
| Version | Damage | Stun | Guard | Startup | Active | Recovery | Total | Hit Adv | Block Adv | Property | |
|---|---|---|---|---|---|---|---|---|---|---|---|
| A Jump Lariat Punch/ジャンプラリアットパンチ |
20 | 2 | Overhead | 13 | - | 4 | - | - | - | / | |
| |||||||||||
| B Jump Knee Attack/ジャンプニーアタック |
20 | 2 | Overhead | 13 | - | 4 | - | - | - | / | |
| |||||||||||
| C Jump Lariat Punch/ジャンプラリアットパンチ |
20 | 4 | Overhead | 13 | - | 4 | - | - | - | / | |
| |||||||||||
| D Jump Knee Attack/ジャンプニーアタック |
20 | 4 | Overhead | 13 | - | 4 | - | - | - | / | |
| |||||||||||
Dodge Attack
Throws
Buster Throw (4/6C)
Special Moves
Burn Knuckle (214P)
Power Wave (236P)
Crack Shoot (2147K)
Rising Tackle ([2]8P)
| Version | Damage | Stun | Guard | Startup | Active | Recovery | Total | Hit Adv | Block Adv | Property | |
|---|---|---|---|---|---|---|---|---|---|---|---|
| A | 14 (3x3) | 3 | Mid | 13 | 6+6+3 | 29 | 56 | KD (+13) | -16 | Invincible 1-24F, Throw Invincible | |
| |||||||||||
| C | 20 (5) | 6 | Mid | 18 | 5+5+5+3 | 40 | 75 | KD (+42) | -40 | Invincible 1-25F, Throw Invincible | |
| |||||||||||
Desperation Move
Power Geyser (21416BC)
Normals
| Move Name | Notes |
| Standing/Crouching A | With its rapid-fire ability it's used for close poking where you can attempt a throw once they're relaxed enough; if you sense they'll try to counter your throw, link in a crouching A x 1~2- crouching C-> B Crack Shoot combo. This only whiffs against a handful of characters when crouching: Mai and the old geezers. The crouching A has similar uses. |
| Far Standing B | Outside of a GA, this is Terry's only anti-air normal. It's decent, but you have to position yourself in such a way that a: it doesn't whiff and b: you don't get the close version. |
| Crouching C | A great combo move because it links easily from any version of his A (jumping, crouching, standing) and combos easily into his A Burn Knuckle and B Crack Shoot. This also has its own specific uses - like being able to beat Billy's Sansestu Kon (c,b,f+punch) both on reaction, depending on distance; and by throwing the punch before Billy's attack appears. |
| Crouching D | Terry's main mid-distance poking weapon. Very good reach and because it can be canceled, allows him to get right in the opponent's face and start his rush patterns. Your most frequent cancels should be into his B or D Crack Shoot. And for special purposes, an A Power Wave when your opponent expects the Crack Shoot or an A Burn Knuckle. The A Burn Knuckle whiffs against the smaller characters such as Mai and the old geezers, where you can throw them the instant you land. A mix-up tactic similar to SF Boxer's crouching attack-> whiffed Dash Upper-> throw. Mix this up further by not going for the throw and use a crouching A, then a throw instead. |
| Close Standing D | Great for combos and plenty of stun (8 points?); also allows easy hit-confirms from the second hit. |
| Jumping B | Great against anti-air sliding attacks; mix-up by landing into a throw or an A x n-> crouching C combo. |
| Jumping D | Can cross-up, and is useful for the occasional A Power Wave-> opponent jumps-> anti-air jumping D trap. |
| Guard Attack | This uppercut is great for opponents who try rush with body projectile moves: Burn Knuckle, Crack Shoot, Tung's Senshippo(qcb+p), Laurence's Bloody Spin. Also a good anti-air. Like all GAs it has upper body invincibility and can be canceled. |
Throw
| Damage | Stun | Guard | Startup | Active | Recovery | Total | Hit Adv | Block Adv | Property | |
|---|---|---|---|---|---|---|---|---|---|---|
| - | - | - | - | - | - | - | - | - | - | |
|
Terry's Throw. | ||||||||||
Special Moves
| Move Name | Motion | Notes |
| Power Wave | QCF + P | Cannot be GA'ed through. When used at some distance it can be followed up with a Crack Shoot for a 2-hit combo or as a pressure tactic (the Crack Shoots hits while the opponent is in block-stun). The A version comes out quicker but travels slower; C version comes out slower but travels faster. The A version will combo in special circumstances: opponent dizzy, back facing Terry, in the corner. |
| Burning Knuckle | QCB + P | The A version is safe when spaced so it barely hits, but your options are limited from that position. Very quick and can be used to punish blocked moves such as Cheng's Belly Blast (d,u+p), both versions of the Bloody Sabre and the A version of the Rising Tackle. The C version is only safe when blocked at a full-screen's distance. It's okay to use once in a while during full-screen A Power Wave volleys. Can be used to retaliate after a blocked Kim Hisho Kyaku (jump d+kick), even beating the extra kick that Kim can perform as he's landing. |
| Rising Tackle | Charge D,U + P | The A version is a quick DP-like move with great reach thanks to the fist that Terry stretches out. Will go through close energy projectiles and hit cleanly, knocking them down. Wake-up and anti-air functions available as well. Up to 3 hits when blocked. May be safe from punishment against some characters when all 3 hits are blocked; Bear? |
| Crack Shoot | QCB,UB + K | Terry's breadwinner. Great trap and mix-ups. Can travel over projectiles cleanly when performed before the projectile materializes: Hurricane Upper, Mai's fan, Jubei's Cookie Cutter, Geese's A Reppu Ken; Power Wave, Krauser's Low Blitz Ball and perhaps more. Safe when blocked except for a handful of instances. The D version has more start-up than the B version but is safer when blocked and leaves Terry at a further distance. The B version is great to combo from his crouching C. When the B Crack Shoot is blocked, Terry is vulnerable to Cheng's B tumble attack, Duck, Jubei's and Bear's command throw. Even if it hits, say from a crouching C-> B Crack Shoot combo, he is still vulnerable to the throws. Take caution. Both versions hit twice hit depending on character and distance. |
Super Move
| Move Name | Motion | Notes |
| Power Geyser | QCB,DB,F + B+C | Will absorb projectiles. Anti-air. Mix in between your Power Waves when at some distance. And mix-up with a crouching D-> A Power Wave and crouching D-> Power Geyser. Great for a corner, meaty block-damage pressure sequence, where you recover while the opponent is in block-stun from the Geyser so you can lock them down with crouching A-> crouching C-> Crack Shoot etc. |
* Power Geyser will absorb projectiles.
Combos
| Combo | Damage | Stun | Notes |
| (Jumping A or B) > Close B or cr.B > Burn Knuckle (A); will whiff on small/crouching characters | |||
| Jumping D > Close C (2 hits) > Burn Knuckle (A) or Crack Shoot (B) | |||
| (Cross Up D or B Line Attack) > Close A x 1-4 >cr.C > Burn Knuckle (A) or Crack Shoot (B) | |||
| Close Standing A(xN) > Far Standing A(xN) > Crouching C > B Crack Shoot | |||
| Close Standing A(xN) > Far Standing A(xN) > Crouching D | |||
| Near Full Screen Power Wave > C Burn Knuckle or D Crack Shoot | |||
| Cross Up Jumping D > Crouching A > Crouching C(1 Hit) > D Crack Shoot or C Rising Tackle; Crouching Opponents Only | |||
| cr.A x 1-3 > cr.C > Crack Shoot (B) (works against smaller characters) | |||
| Power Wave (from a distance) > Burn Knuckle (C) or Crack Shoot (D) | |||
| Cross Up D > Close Standing B > B Crack Shoot(2 Hits) |
Strategies
Overview
Basics
Standing/Crouching A
- With its rapid-fire ability it's used for close poking where you can attempt a throw once they're relaxed enough; if you sense they'll try to counter your throw, link in a crouching A x 1~2- crouching C-> B Crack Shoot combo. This only whiffs against a handful of characters when crouching: Mai and the old geezers. The crouching A has similar uses.
Far Standing B
- Outside of a GA, this is Terry's only anti-air normal. It's decent, but you have to position yourself in such a way that a: it doesn't whiff and b: you don't get the close version.
Crouching C
- A great combo move because it links easily from any version of his A (jumping, crouching, standing) and combos easily into his A Burn Knuckle and B Crack Shoot. This also has its own specific uses - like being able to beat Billy's Sansestu Kon (c,b,f+punch) both on reaction, depending on distance; and by throwing the punch before Billy's attack appears.
Crouching D
- Terry's main mid-distance poking weapon. Very good reach and because it can be canceled, allows him to get right in the opponent's face and start his rush patterns. Your most frequent cancels should be into his B or D Crack Shoot. And for special purposes, an A Power Wave when your opponent expects the Crack Shoot or an A Burn Knuckle. The A Burn Knuckle whiffs against the smaller characters such as Mai and the old geezers, where you can throw them the instant you land. A mix-up tactic similar to SF Boxer's crouching attack-> whiffed Dash Upper-> throw. Mix this up further by not going for the throw and use a crouching A, then a throw instead.
Close Standing C
- Great for combos and plenty of stun (8 points?); also allows easy hit-confirms from the second hit.
Jumping B
- Great against anti-air sliding attacks; mix-up by landing into a throw or an A x n-> crouching C combo.
Jumping D
- Can cross-up, and is useful for the occasional A Power Wave-> opponent jumps-> anti-air jumping D trap.
Guard Attack
- This uppercut is great for opponents who try rush with body projectile moves: Burn Knuckle, Crack Shoot, Tung's Senshippo(qcb+p), Laurence's Bloody Spin. Also a good anti-air. Like all GAs it has upper body invincibility and can be canceled.
Line Blast
- Terry's Line Blast is like A3 A-Charlie's standing Forward but without the mobility and with a fair bit of wind-up animation; it's great for beating all sliding attacks (Duck, Laurence, Jubei and Joe) and once in full swing, will beat low-to-the-ground crouching kicks from Bear, Geese and Mai. Also has great priority and makes a decent meaty. The move will still execute if performed from a crouching position, and as such allows Terry to keep his charge for a Rising Tackle. The move is quicker on the rear plane but may not have the same hit box properties as the front plane version.
Power Wave
- Cannot be GA'ed through. When used at some distance it can be followed up with a Crack Shoot for a 2-hit combo or as a pressure tactic (the Crack Shoots hits while the opponent is in block-stun). The A version comes out quicker but travels slower; C version comes out slower but travels faster. The A version will combo in special circumstances: opponent dizzy, back facing Terry, in the corner.
Burning Knuckle
- The A version is safe when spaced so it barely hits, but your options are limited from that position. Very quick and can be used to punish blocked moves such as Cheng's Belly Blast (d,u+p), both versions of the Bloody Sabre and the A version of the Rising Tackle. The C version is only safe when blocked at a full-screen's distance. It's okay to use once in a while during full-screen A Power Wave volleys. Can be used to retaliate after a blocked Kim Hisho Kyaku (jump d+kick), even beating the extra kick that Kim can perform as he's landing.
Rising Tackle
- The A version is a quick DP-like move with great reach thanks to the fist that Terry stretches out. Will go through close energy projectiles and hit cleanly, knocking them down. Wake-up and anti-air functions available as well. Up to 3 hits when blocked. May be safe from punishment against some characters when all 3 hits are blocked; Bear?
Crack Shoot Terry's breadwinner. Great trap and mix-ups. Can travel over projectiles cleanly when performed before the projectile materializes: Hurricane Upper, Mai's fan, Jubei's Cookie Cutter, Geese's A Reppu Ken; Power Wave, Krauser's Low Blitz Ball and perhaps more. Safe when blocked except for a handful of instances. The D version has more start-up than the B version but is safer when blocked and leaves Terry at a further distance. The B version is great to combo from his crouching C. When the B Crack Shoot is blocked, Terry is vulnerable to Cheng's B tumble attack, Duck, Jubei's and Bear's command throw. Even if it hits, say from a crouching C-> B Crack Shoot combo, he is still vulnerable to the throws. Take caution. Both versions hit twice hit depending on character and distance.
Power Geyser
- Will absorb projectiles. Anti-air. Mix in between your Power Waves when at some distance. And mix-up with a crouching D-> A Power Wave and crouching D-> Power Geyser. Great for a corner, meaty block-damage pressure sequence, where you recover while the opponent is in block-stun from the Geyser so you can lock them down with crouching A-> crouching C-> Crack Shoot etc.
Credit to MiddleKick
