| Line 4: | Line 4: | ||
== Introduction == | == Introduction == | ||
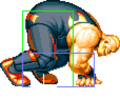
After the events of Fatal Fury 1, the wrestler Raiden drops his heel persona and joins the fight under the new alias Big Bear. Bear is the resident big body grappler and has the usual pros and cons of the archetype - great throw range, damaging moves and long reaching normals, but also big hurtboxes, slow walk speed and hard matchups against good zoners. | |||
{| | {| | ||
|-style="text-align:left;" | |-style="text-align:left;" | ||
| Line 13: | Line 14: | ||
* Moves with tons of invulnerability | * Moves with tons of invulnerability | ||
| style="width: 50%;"| | | style="width: 50%;"| | ||
* | * Slow movement | ||
* Next to no combo potential | * Next to no combo potential | ||
* Has a hard time getting in against certain characters | * Has a hard time getting in against certain characters | ||
Revision as of 16:18, 6 January 2025


Introduction
After the events of Fatal Fury 1, the wrestler Raiden drops his heel persona and joins the fight under the new alias Big Bear. Bear is the resident big body grappler and has the usual pros and cons of the archetype - great throw range, damaging moves and long reaching normals, but also big hurtboxes, slow walk speed and hard matchups against good zoners.
| Pros | Cons |
|---|---|
|
|
Move List
| Standing | Walking | Crouching | Jumping | Taunting |
 |
 |
 |
 |

|
| 46F (4+39+3) duration, the fastest jump in the game. |
Close Standing Normals
c5A
c5A
Elbow/エルボー
Elbow/エルボー

| Damage | Stun | Guard | Startup | Active | Recovery | Total | Hit Adv | Block Adv | Property | |
|---|---|---|---|---|---|---|---|---|---|---|
| 9 | 2 | Mid | 7 | 7 | 6 | 19 | +3 | +4 | Kara Cancel | |
| ||||||||||
c5B
c5B
Knee Attack/ニーアタック
Knee Attack/ニーアタック

| Damage | Stun | Guard | Startup | Active | Recovery | Total | Hit Adv | Block Adv | Property | |
|---|---|---|---|---|---|---|---|---|---|---|
| 12 | 2 | Mid | 8 | 9 | 10 | 26 | -3 | -2 | Kara Cancel | |
| ||||||||||
c5C
c5C
Elbow/エルボー
Elbow/エルボー
| Damage | Stun | Guard | Startup | Active | Recovery | Total | Hit Adv | Block Adv | Property | |
|---|---|---|---|---|---|---|---|---|---|---|
| 22 | 4 | Mid | 12 | 10 | 8 | 29 | +6 | +5 | Kara Cancel | |
| ||||||||||
c5D
c5D
Stomping/ストンピング
Stomping/ストンピング

| Damage | Stun | Guard | Startup | Active | Recovery | Total | Hit Adv | Block Adv | Property | |
|---|---|---|---|---|---|---|---|---|---|---|
| 24 | 4 | Mid | 13 | 10 | 9 | 31 | +5 | +4 | Kara Cancel | |
| ||||||||||

Far Standing Normals
f5A
f5A
Jab/ジャブ
Jab/ジャブ

| Damage | Stun | Guard | Startup | Active | Recovery | Total | Hit Adv | Block Adv | Property | |
|---|---|---|---|---|---|---|---|---|---|---|
| 7 | 2 | Mid | 6 | 8 | 7 | 20 | +1 | +2 | Kara Cancel | |
| ||||||||||
f5B
f5B
Front Kick/前蹴り
Front Kick/前蹴り

| Damage | Stun | Guard | Startup | Active | Recovery | Total | Hit Adv | Block Adv | Property | |
|---|---|---|---|---|---|---|---|---|---|---|
| 10 | 2 | Mid | 10 | 8 | 10 | 27 | -2 | -1 | Kara Cancel | |
| ||||||||||
f5C
f5C
Knuckle Part/ナックルパート
Knuckle Part/ナックルパート

| Damage | Stun | Guard | Startup | Active | Recovery | Total | Hit Adv | Block Adv | Property | |
|---|---|---|---|---|---|---|---|---|---|---|
| 20 | 4 | Mid | 12 | 11 | 12 | 34 | -5 | -6 | / | |
| ||||||||||
f5D
f5D
Dropkick/ドロップキック
Dropkick/ドロップキック

| Damage | Stun | Guard | Startup | Active | Recovery | Total | Hit Adv | Block Adv | Property | |
|---|---|---|---|---|---|---|---|---|---|---|
| 23 | 4 | Mid | 16 | 12 | 11 | 38 | -5 | -6 | Throw Invincible 16-27F | |
| ||||||||||


Crouching Normals
2A
2A
Crouching Straight/しゃがみストレート
Crouching Straight/しゃがみストレート

| Damage | Stun | Guard | Startup | Active | Recovery | Total | Hit Adv | Block Adv | Property | |
|---|---|---|---|---|---|---|---|---|---|---|
| 7 | 2 | Mid | 6 | 8 | 7 | 20 | +1 | +2 | Kara Cancel | |
| ||||||||||
2B
2B
Slide Kick/スライドキック
Slide Kick/スライドキック

| Damage | Stun | Guard | Startup | Active | Recovery | Total | Hit Adv | Block Adv | Property | |
|---|---|---|---|---|---|---|---|---|---|---|
| 10 | 2 | Low | 8 | 9 | 10 | 26 | -3 | -2 | Kara Cancel | |
| ||||||||||
2C
2C
Crouching Straight/しゃがみストレート
Crouching Straight/しゃがみストレート
| Damage | Stun | Guard | Startup | Active | Recovery | Total | Hit Adv | Block Adv | Property | |
|---|---|---|---|---|---|---|---|---|---|---|
| 20 | 4 | Mid | 10 | 13 | 10 | 32 | +1 | 0 | Kara Cancel | |
| ||||||||||
2D
2D
Slide Kick/スライドキック
Slide Kick/スライドキック

| Damage | Stun | Guard | Startup | Active | Recovery | Total | Hit Adv | Block Adv | Property | |
|---|---|---|---|---|---|---|---|---|---|---|
| 23 | 4 | Low | 11 | 13 | 21 | 44 | KD (+28) | -11 | Kara Cancel | |
| ||||||||||
Jumping Normals
jA
jA
Albatross Chop/アルバトロスチョップ
Albatross Chop/アルバトロスチョップ

| Version | Damage | Stun | Guard | Startup | Active | Recovery | Total | Hit Adv | Block Adv | Property | |
|---|---|---|---|---|---|---|---|---|---|---|---|
| Diagonal Jump | 9 | 2 | Overhead | 6 | ∞ | / | / | - | - | - | |
| |||||||||||
| Neutral Jump | 9 | 2 | Overhead | 8 | ∞ | / | / | - | - | - | |
jB
jB
Stamp Kick/スタンプキック
Stamp Kick/スタンプキック

| Version | Damage | Stun | Guard | Startup | Active | Recovery | Total | Hit Adv | Block Adv | Property | |
|---|---|---|---|---|---|---|---|---|---|---|---|
| Diagonal Jump | 12 | 2 | Overhead | 8 | ∞ | / | / | - | - | - | |
| |||||||||||
| Neutral Jump | 12 | 2 | Overhead | 5 | ∞ | / | / | - | - | - | |
| |||||||||||
jC
jC
Albatross Chop/アルバトロスチョップ
Albatross Chop/アルバトロスチョップ
| Version | Damage | Stun | Guard | Startup | Active | Recovery | Total | Hit Adv | Block Adv | Property | |
|---|---|---|---|---|---|---|---|---|---|---|---|
| Diagonal Jump | 22 | 4 | Overhead | 11 | 18 | / | / | - | - | - | |
| |||||||||||
| Neutral Jump | 22 | 4 | Overhead | 11 | 17 | / | / | - | - | - | |
jD
jD

| Version | Damage | Stun | Guard | Startup | Active | Recovery | Total | Hit Adv | Block Adv | Property | |
|---|---|---|---|---|---|---|---|---|---|---|---|
| Diagonal Jump Flying Dropkick/フライングドロップキック |
24 | 4 | Overhead | 13 | 18 | / | / | - | - | - | |
| |||||||||||
| Neutral Jump Stamp Kick/スタンプキック |
24 | 4 | Overhead | 13 | 18 | / | / | - | - | - | |
| |||||||||||
Universal Mechanics
Lane Blast (CD)
Lane Blast
Outstep Kick/アウトステップキック
C+D
Outstep Kick/アウトステップキック
C+D


| Version | Damage | Stun | Guard | Startup | Active | Recovery | Total | Hit Adv | Block Adv | Property | |
|---|---|---|---|---|---|---|---|---|---|---|---|
| Front Lane | 22 | 5 | Mid | 15 | 12 | 8 | 34 | KD | -1 | Cancel, Lane Shift | |
| |||||||||||
| Back Lane | 22 | 5 | Mid | 15 | 12 | 15 | 41 | KD | -8 | Cancel, Lane Shift | |
| |||||||||||
Lane Attack
Lane Attack
Flying Dropkick/フライングドロップキック
A/B/C/D from opposite lane
Flying Dropkick/フライングドロップキック
A/B/C/D from opposite lane


| Version | Damage | Stun | Guard | Startup | Active | Recovery | Total | Hit Adv | Block Adv | Property | |
|---|---|---|---|---|---|---|---|---|---|---|---|
| A/B | 20 | 2 | Overhead | 13 | - | 4 | - | - | - | / | |
| |||||||||||
| C/D | 20 | 4 | Overhead | 13 | - | 4 | - | - | - | / | |
| |||||||||||
Dodge Attack
Dodge Attack
Bear Claw/ベアクロー
6A during proximity guard
Bear Claw/ベアクロー
6A during proximity guard

| Damage | Stun | Guard | Startup | Active | Recovery | Total | Hit Adv | Block Adv | Property | |
|---|---|---|---|---|---|---|---|---|---|---|
| 11 | 5 | Mid | 20 | 11 | 9 | 39 | Air Reset (+20) | -1 | Kara Cancel, Upper-Body Invuln 1-39F | |
| ||||||||||


Throws
Power Bomb (6C)
Power Bomb
close 6C
close 6C

| Damage | Stun | Guard | Startup | Active | Recovery | Total | Hit Adv | Block Adv | Property | |
|---|---|---|---|---|---|---|---|---|---|---|
| 26 | 3 | Throw | 1 | 1 | / | - | KD (+78) | / | / | |
| ||||||||||

Back Drop (4C)
Back Drop
close 4C
close 4C
| Damage | Stun | Guard | Startup | Active | Recovery | Total | Hit Adv | Block Adv | Property | |
|---|---|---|---|---|---|---|---|---|---|---|
| 26 | 3 | Throw | 1 | 1 | / | - | KD (+79) | / | / | |
| ||||||||||

Lariat Drop (3C)
Lariat Drop
close 3C
close 3C

| Damage | Stun | Guard | Startup | Active | Recovery | Total | Hit Adv | Block Adv | Property | |
|---|---|---|---|---|---|---|---|---|---|---|
| 26 | 3 | Throw | 1 | 1 | / | - | KD (+18) | / | / | |
| ||||||||||

Neck Hang (6D)
Neck Hang
close 6D
close 6D

| Damage | Stun | Guard | Startup | Active | Recovery | Total | Hit Adv | Block Adv | Property | |
|---|---|---|---|---|---|---|---|---|---|---|
| 16~32 (4 x 4~8) | 0 | Throw | 1 | 1 | / | - | +29 | / | / | |
| ||||||||||

Headbutt (4D)
Headbutt
close 4D
close 4D
| Damage | Stun | Guard | Startup | Active | Recovery | Total | Hit Adv | Block Adv | Property | |
|---|---|---|---|---|---|---|---|---|---|---|
| 12~32 (4 x 3~8) | 0 | Throw | 1 | 1 | / | - | +28 | / | / | |
| ||||||||||

Lift Up Throw (3D)
Lift Up Throw
close 3D
close 3D

| Damage | Stun | Guard | Startup | Active | Recovery | Total | Hit Adv | Block Adv | Property | |
|---|---|---|---|---|---|---|---|---|---|---|
| 26 | 3 | Throw | 1 | 1 | / | - | KD (+39) | / | / | |
| ||||||||||

Bear Hug (9D)
Bear Hug
close 9D
close 9D

| Damage | Stun | Guard | Startup | Active | Recovery | Total | Hit Adv | Block Adv | Property | |
|---|---|---|---|---|---|---|---|---|---|---|
| 24~48 (4 x 6~12) | 0 | Throw | 1 | 1 | / | - | +30 | / | / | |
| ||||||||||

Special Moves
Giant Bomb ([1]6P)
Giant Bomb
[1]6P
[1]6P

※Recovery on whiff.
Invincible during recovery on contact


| Version | Damage | Stun | Guard | Startup | Active | Recovery | Total | Hit Adv | Block Adv | Property | |
|---|---|---|---|---|---|---|---|---|---|---|---|
| A | 16 (4) | 3 | Mid | 37 | 12 | 2※ | 50 | KD (+41) | +2 | Invincible 1-25F, Upper-Body Invuln 26-48F, Throw Invincible | |
|
Travels 3/4ths of the screen.
| |||||||||||
| C | 22 (5) | 6 | Mid | 57 | 16 | 2※ | 74 | KD (+74) | -4 | Invincible 1-45F, Upper-Body Invuln 46-73F, Throw Invincible | |
|
Travels fullscreen.
| |||||||||||
Super Drop Kick ([D])
Super Drop Kick
Hold D
Hold D

An advancing move that grows more powerful the longer the D button is held. The D button can begin charging during the match's intro, but the charge is reset between rounds.
- Pressing D immediately after releasing the charge will cause Bear to execute a D normal or D throw instead of the dropkick.


| Version | Damage | Stun | Guard | Startup | Active | Recovery | Total | Hit Adv | Block Adv | Property |
|---|---|---|---|---|---|---|---|---|---|---|
| 300F Charge 5 Second Charge |
13 (3) | 3 | Mid | 21 | 11 | 12 | 43 | KD (+77) | -1 | Invincible 1-11F, Foot Invuln after frame 18, Throw Invincible |
| 720F Charge 12 Second Charge |
33 (8) | 3 | Mid | 23 | 11 | 12 | 45 | KD (+77) | -1 | Foot Invuln after frame 20, Throw Invincible |
| 1200F Charge 20 Second Charge |
53 (13) | 3 | Mid | 25 | 11 | 12 | 47 | KD (+77) | -1 | Foot Invuln after frame 22, Throw Invincible |
| 2400F Charge 40 Second Charge |
73 (18) | 3 | Mid | 27 | 11 | 12 | 49 | KD (+77) | -1 | Foot Invuln after frame 24, Throw Invincible |
Bear Bomber (6428C)
Bear Bomber
6428C
6428C

| Damage | Stun | Guard | Startup | Active | Recovery | Total | Hit Adv | Block Adv | Property | |
|---|---|---|---|---|---|---|---|---|---|---|
| 26 | 3 | Throw | 1 | 1 | / | / | KD (+71) | / | - | |
|
A throw with average damage but immensely large range.
| ||||||||||

Desperation Move
Fire Breath (63216BC)
Fire Breath
When health is flashing
63216BC
When health is flashing
63216BC

| Damage | Stun | Guard | Startup | Active | Recovery | Total | Hit Adv | Block Adv | Property | |
|---|---|---|---|---|---|---|---|---|---|---|
| 48 (12) | 4 | Mid | 30 | 96 | 16 | 141 | KD | +12 | - | |
| ||||||||||


Combos
- 2C > Super Drop Kick (5 sec. version only)
- Meaty c5D > 2C


