|
|
| Line 17: |
Line 17: |
| * Chains into [[#5LP|{{clr|L|5LP}}]]/[[#2LP|{{clr|L|2LP}}]]/[[#5LK|{{clr|L|5LK}}]]/[[#2LK|{{clr|L|2LK}}]] | | * Chains into [[#5LP|{{clr|L|5LP}}]]/[[#2LP|{{clr|L|2LP}}]]/[[#5LK|{{clr|L|5LK}}]]/[[#2LK|{{clr|L|2LK}}]] |
| * '''Cancel Hitconfirm Window:''' 13f | | * '''Cancel Hitconfirm Window:''' 13f |
| * {{clr|4|DR}} cancel is delayed until after the 2nd active frame | | * {{clr|DR|DR}} cancel is delayed until after the 2nd active frame |
| * '''{{clr|4|Drive Rush}} cancel advantage:''' {{sf6-adv|VP|+6}} oH / {{sf6-adv|M|-1}} oB | | * '''{{clr|DR|Drive Rush}} cancel advantage:''' {{sf6-adv|VP|+6}} oH / {{sf6-adv|M|-1}} oB |
| * Applies 20% damage scaling to next hit when beginning a combo (100/80/70...) | | * Applies 20% damage scaling to next hit when beginning a combo (100/80/70...) |
| <br> | | <br> |
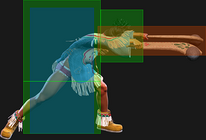
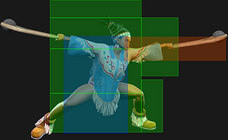
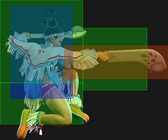
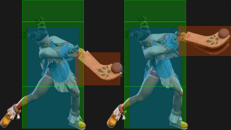
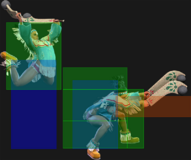
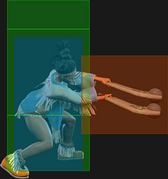
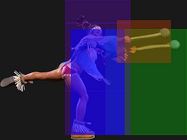
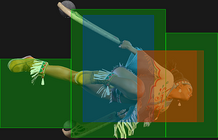
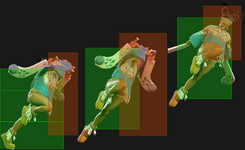
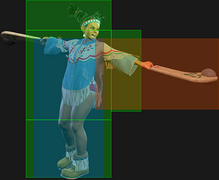
| A jab with good horizontal reach and above average damage for a light. On Counter-hit it links into [[#5MK|{{clr|M|5MK}}]] or [[#2MP|{{clr|M|2MP}}]], and when done from {{clr|4|Drive Rush}} it links into both of those plus [[#2HP|{{clr|H|2HP}}]] if close enough for more damage. | | A jab with good horizontal reach and above average damage for a light. On Counter-hit it links into [[#5MK|{{clr|M|5MK}}]] or [[#2MP|{{clr|M|2MP}}]], and when done from {{clr|DR|Drive Rush}} it links into both of those plus [[#2HP|{{clr|H|2HP}}]] if close enough for more damage. |
| }} | | }} |
|
| |
|
| Line 37: |
Line 37: |
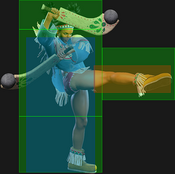
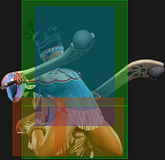
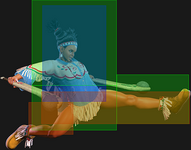
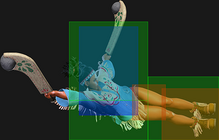
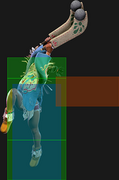
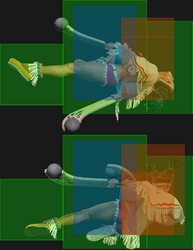
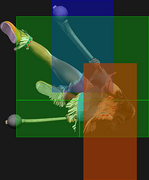
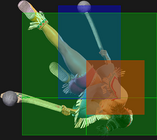
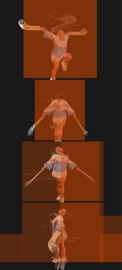
| * Head hurtbox disappears on frames 8-25 | | * Head hurtbox disappears on frames 8-25 |
| <br> | | <br> |
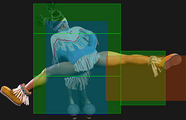
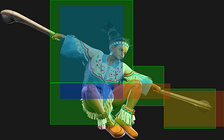
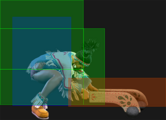
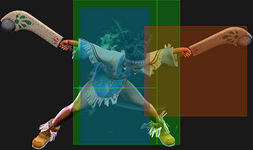
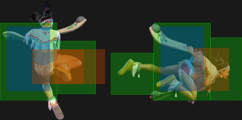
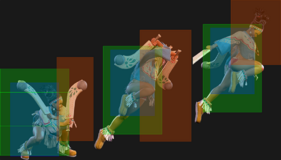
| An amazingly disjointed poke and neutral tool, but cannot be canceled which makes it vulnerable to {{clr|4|Drive Impact}}. | | An amazingly disjointed poke and neutral tool, but cannot be canceled which makes it vulnerable to {{clr|DR|Drive Impact}}. |
| }} | | }} |
|
| |
|
| Line 51: |
Line 51: |
| | info = | | | info = |
| {{AttackDataCargo-SF6/Query|lily_5hp}} | | {{AttackDataCargo-SF6/Query|lily_5hp}} |
| * Punish Counter: Crumple (Standing +5, Juggle +28, KD +84); {{sf6-jug|limited juggle}} state vs. airborne | | * {{clr|PC|Punish Counter}}: Crumple (Standing +5, Juggle +28, KD +84); {{sf6-jug|limited juggle}} state vs. airborne |
| * Head hurtbox disappears on frames 10-35 | | * Head hurtbox disappears on frames 10-35 |
| * '''Cancel Hitconfirm Window:''' 19f | | * '''Cancel Hitconfirm Window:''' 19f |
| * Special/{{clr|4|DR}} cancel is delayed until after the 2nd active frame | | * Special/{{clr|DR|DR}} cancel is delayed until after the 2nd active frame |
| * '''{{clr|4|Drive Rush}} cancel advantage:''' {{sf6-adv|VP|+14}} oH / {{sf6-adv|VP|+9}} oB | | * '''{{clr|DR|Drive Rush}} cancel advantage:''' {{sf6-adv|VP|+14}} oH / {{sf6-adv|VP|+9}} oB |
| * Extends a hurtbox 1f before active that is vulnerable to projectiles | | * Extends a hurtbox 1f before active that is vulnerable to projectiles |
| <br> | | <br> |
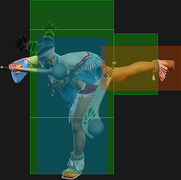
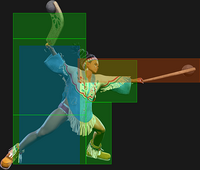
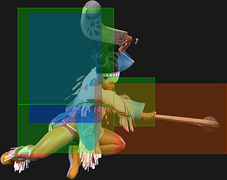
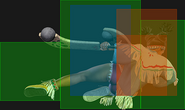
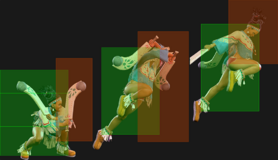
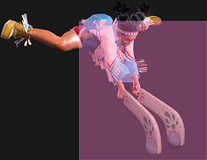
| A counterpoke that leads to a crumple on Punish Counter. This allows for a conversion into a full combo via [[#6HP|{{clr|H|6HP}}]], Dash [[#5MK|{{clr|M|5MK}}]], or {{clr|4|Drive Rush}}, depending on range. | | A counterpoke that leads to a crumple on Punish Counter. This allows for a conversion into a full combo via [[#6HP|{{clr|H|6HP}}]], Dash [[#5MK|{{clr|M|5MK}}]], or {{clr|DR|Drive Rush}}, depending on range. |
| }} | | }} |
|
| |
|
| Line 74: |
Line 74: |
| * Chains into [[#5LP|{{clr|L|5LP}}]]/[[#2LP|{{clr|L|2LP}}]]/[[#5LK|{{clr|L|5LK}}]]/[[#2LK|{{clr|L|2LK}}]] | | * Chains into [[#5LP|{{clr|L|5LP}}]]/[[#2LP|{{clr|L|2LP}}]]/[[#5LK|{{clr|L|5LK}}]]/[[#2LK|{{clr|L|2LK}}]] |
| * '''Cancel Hitconfirm Window:''' 13f | | * '''Cancel Hitconfirm Window:''' 13f |
| * '''{{clr|4|Drive Rush}} cancel advantage:''' {{sf6-adv|VP|+6}} oH / {{sf6-adv|E|0}} oB | | * '''{{clr|DR|Drive Rush}} cancel advantage:''' {{sf6-adv|VP|+6}} oH / {{sf6-adv|E|0}} oB |
| * Applies 20% damage scaling to next hit when beginning a combo (100/80/70...) | | * Applies 20% damage scaling to next hit when beginning a combo (100/80/70...) |
| <br> | | <br> |
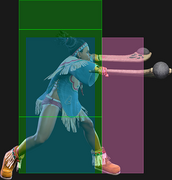
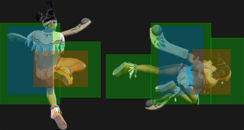
| This is Lily's only 4 frame normal move. Very important for frame trapping the opponent in low frame advantage situations such as after [[#Condor_Spire_(236K)|{{clr|10|Condor Spire}}]]. It doesn't leave a gap when chained into from [[#2LK|{{clr|L|2LK}}]], which prevents it from being interrupted with a parry or reversal like other light chains. | | This is Lily's only 4 frame normal move. Very important for frame trapping the opponent in low frame advantage situations such as after [[#Condor_Spire_(236K)|{{clr|OD|Condor Spire}}]]. It doesn't leave a gap when chained into from [[#2LK|{{clr|L|2LK}}]], which prevents it from being interrupted with a parry or reversal like other light chains. |
|
| |
|
| Defensively, while this move can be used for mashing out of pressure, it is very liable to whiff due to its short range, making it vulnerable to a mid-string shimmy. If it lands as a counter-hit or Punish Counter, Lily can reliably link into a cancelable [[#5MK|{{clr|M|5MK}}]] for extra damage. | | Defensively, while this move can be used for mashing out of pressure, it is very liable to whiff due to its short range, making it vulnerable to a mid-string shimmy. If it lands as a counter-hit or Punish Counter, Lily can reliably link into a cancelable [[#5MK|{{clr|M|5MK}}]] for extra damage. |
| Line 94: |
Line 94: |
| {{AttackDataCargo-SF6/Query|lily_5mk}} | | {{AttackDataCargo-SF6/Query|lily_5mk}} |
| * '''Cancel Hitconfirm Window:''' 15f | | * '''Cancel Hitconfirm Window:''' 15f |
| * '''{{clr|4|Drive Rush}} cancel advantage:''' {{sf6-adv|VP|+10}} oH / {{sf6-adv|VP|+7}} oB | | * '''{{clr|DR|Drive Rush}} cancel advantage:''' {{sf6-adv|VP|+10}} oH / {{sf6-adv|VP|+7}} oB |
| <br> | | <br> |
| Cancelable, combo-friendly normal that's useful in both Counter-hit confirms and juggles. Links into a combo after {{clr|4|Drive Rush}}/Counter-hit [[#2LP|{{clr|L|2LP}}]]/[[#5LP|{{clr|L|5LP}}]]/[[#4HP|{{clr|H|4HP}}]], or Punish Counter [[#5HP|{{clr|H|5HP}}]] with a dash.<br> | | Cancelable, combo-friendly normal that's useful in both Counter-hit confirms and juggles. Links into a combo after {{clr|DR|Drive Rush}}/Counter-hit [[#2LP|{{clr|L|2LP}}]]/[[#5LP|{{clr|L|5LP}}]]/[[#4HP|{{clr|H|4HP}}]], or Punish Counter [[#5HP|{{clr|H|5HP}}]] with a dash.<br> |
| While its range isn't as impressive as Lily's other medium and heavy normals, the relatively fast startup makes it useful to use on reaction as a whiff punish into {{clr|4|Drive Rush}} [[#4HP|{{clr|H|4HP}}]]. It can be effective against some low pokes since Lily doesn't extend a lower body hurtbox on startup.<br> | | While its range isn't as impressive as Lily's other medium and heavy normals, the relatively fast startup makes it useful to use on reaction as a whiff punish into {{clr|DR|Drive Rush}} [[#4HP|{{clr|H|4HP}}]]. It can be effective against some low pokes since Lily doesn't extend a lower body hurtbox on startup.<br> |
| Finally, unlike Lily's other medium and heavy normal moves, this one recovers quickly enough to block a Drive Reversal. It's also the optimal combo starter for punishing a blocked Drive Reversal. | | Finally, unlike Lily's other medium and heavy normal moves, this one recovers quickly enough to block a Drive Reversal. It's also the optimal combo starter for punishing a blocked Drive Reversal. |
| }} | | }} |
| Line 112: |
Line 112: |
| | info = | | | info = |
| {{AttackDataCargo-SF6/Query|lily_5hk}} | | {{AttackDataCargo-SF6/Query|lily_5hk}} |
| * Punish Counter: KD +47 (ground), {{sf6-jug|limited juggle}} state (air) | | * {{clr|PC|Punish Counter}}: KD +47 (ground), {{sf6-jug|limited juggle}} state (air) |
| <br> | | <br> |
| Cannot be canceled and has a lot of startup and recovery. While it has a lot of range, walkup [[#5MP|{{clr|M|5MP}}]] is usually a better choice as it is much less vulnerable to being punished by {{clr|4|Drive Impact}} and jump attacks, but [[#5HK|{{clr|H|5HK}}]] does have some situational usefulness at the tip of its range: | | Cannot be canceled and has a lot of startup and recovery. While it has a lot of range, walkup [[#5MP|{{clr|M|5MP}}]] is usually a better choice as it is much less vulnerable to being punished by {{clr|DR|Drive Impact}} and jump attacks, but [[#5HK|{{clr|H|5HK}}]] does have some situational usefulness at the tip of its range: |
| * It triggers proximity block from a longer range, making it harder for the opponent to create space to whiff punish. | | * It triggers proximity block from a longer range, making it harder for the opponent to create space to whiff punish. |
| * It covers long range punishes on moves that are {{sf6-adv|VM|-14}} to {{sf6-adv|VM|-17}} on block such as [[Street_Fighter_6/JP#3HP|JP's 3HP]] which would otherwise be safe. | | * It covers long range punishes on moves that are {{sf6-adv|VM|-14}} to {{sf6-adv|VM|-17}} on block such as [[Street_Fighter_6/JP#3HP|JP's 3HP]] which would otherwise be safe. |
| * On Punish Counter it causes a long range hard knockdown, providing an opportunity to take a free Windclad stock or {{clr|4|Drive Rush}} back in for pressure. | | * On Punish Counter it causes a long range hard knockdown, providing an opportunity to take a free Windclad stock or {{clr|DR|Drive Rush}} back in for pressure. |
| * Maintains a lot of momentum from {{clr|4|Drive Rush}}, which allows it to interrupt the opponent from a surprising distance. | | * Maintains a lot of momentum from {{clr|DR|Drive Rush}}, which allows it to interrupt the opponent from a surprising distance. |
| * It has a lot of pushback on block, which can be helpful when trying to push out of the corner. | | * It has a lot of pushback on block, which can be helpful when trying to push out of the corner. |
| }} | | }} |
| Line 137: |
Line 137: |
| * Chains into [[#5LP|{{clr|L|5LP}}]]/[[#2LP|{{clr|L|2LP}}]]/[[#5LK|{{clr|L|5LK}}]]/[[#2LK|{{clr|L|2LK}}]] | | * Chains into [[#5LP|{{clr|L|5LP}}]]/[[#2LP|{{clr|L|2LP}}]]/[[#5LK|{{clr|L|5LK}}]]/[[#2LK|{{clr|L|2LK}}]] |
| * '''Cancel Hitconfirm Window:''' 13f | | * '''Cancel Hitconfirm Window:''' 13f |
| * '''{{clr|4|Drive Rush}} cancel advantage:''' {{sf6-adv|VP|+6}} oH / {{sf6-adv|E|0}} oB | | * '''{{clr|DR|Drive Rush}} cancel advantage:''' {{sf6-adv|VP|+6}} oH / {{sf6-adv|E|0}} oB |
| * Applies 20% damage scaling to next hit when beginning a combo (100/80/70...) | | * Applies 20% damage scaling to next hit when beginning a combo (100/80/70...) |
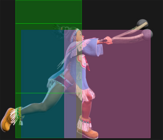
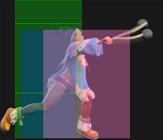
| * Topmost hurtbox on frames 1-8 is vulnerable only to aerial attacks, preventing its use as an anti-air | | * Topmost hurtbox on frames 1-8 is vulnerable only to aerial attacks, preventing its use as an anti-air |
| <br> | | <br> |
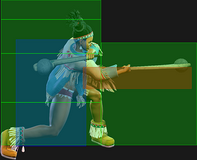
| Lily's longest ranged light normal. It has less frame advantage than [[#5LP|{{clr|L|5LP}}]], but on Counter-hit it still links into [[#5MK|{{clr|M|5MK}}]], and when done from {{clr|4|Drive Rush}} it combos into [[#5MK|{{clr|M|5MK}}]] or [[#2MP|{{clr|M|2MP}}]].<br> | | Lily's longest ranged light normal. It has less frame advantage than [[#5LP|{{clr|L|5LP}}]], but on Counter-hit it still links into [[#5MK|{{clr|M|5MK}}]], and when done from {{clr|DR|Drive Rush}} it combos into [[#5MK|{{clr|M|5MK}}]] or [[#2MP|{{clr|M|2MP}}]].<br> |
| It also has the least pushback of Lily's normals, making it ideal for hitconfirms into [[#Tomahawk_Buster_(623P)|{{clr|10|623P}}]], [[#Condor_Spire_(236K)|{{clr|10|236KK}}]], [[#Level_1_Super_(236236P)|{{clr|10|SA1}}]], [[#Level_3_Super_(214214P)|{{clr|10|SA3}}]], or {{clr|4|Drive Rush}}. | | It also has the least pushback of Lily's normals, making it ideal for hitconfirms into [[#Tomahawk_Buster_(623P)|{{clr|OD|623P}}]], [[#Condor_Spire_(236K)|{{clr|OD|236KK}}]], [[#Level_1_Super_(236236P)|{{clr|SA|SA1}}]], [[#Level_3_Super_(214214P)|{{clr|SA|SA3}}]], or {{clr|DR|Drive Rush}}. |
| }} | | }} |
|
| |
|
| Line 160: |
Line 160: |
| <br> | | <br> |
| A disjointed poke that's marginally faster than [[#5MP|{{clr|M|5MP}}]] but without quite as much range.<br> | | A disjointed poke that's marginally faster than [[#5MP|{{clr|M|5MP}}]] but without quite as much range.<br> |
| Noteworthy for being cancelable into {{clr|10|Super Arts}}, especially [[#Level_1_Super_(236236P)|{{clr|10|SA1}}]] for good damage off a counter-poke or a {{clr|4|Drive Rush}} combo. | | Noteworthy for being cancelable into {{clr|SA|Super Arts}}, especially [[#Level_1_Super_(236236P)|{{clr|SA|SA1}}]] for good damage off a counter-poke or a {{clr|DR|Drive Rush}} combo. |
| }} | | }} |
|
| |
|
| Line 178: |
Line 178: |
| * Can anti-air cross-ups on the first 2 active frames | | * Can anti-air cross-ups on the first 2 active frames |
| * '''Cancel Hitconfirm Window:''' 30f / 18f (2nd hit only) | | * '''Cancel Hitconfirm Window:''' 30f / 18f (2nd hit only) |
| * Special/{{clr|4|DR}} cancel is delayed until after the 4th active frame (2nd active frame of the 2nd hit) | | * Special/{{clr|DR|DR}} cancel is delayed until after the 4th active frame (2nd active frame of the 2nd hit) |
| * '''{{clr|4|Drive Rush}} cancel advantage:''' {{sf6-adv|VP|+15}} oH / {{sf6-adv|VP|+13}} oB | | * '''{{clr|DR|Drive Rush}} cancel advantage:''' {{sf6-adv|VP|+15}} oH / {{sf6-adv|VP|+13}} oB |
| * Extends a hurtbox on whiff until end of recovery | | * Extends a hurtbox on whiff until end of recovery |
| <br> | | <br> |
| One of Lily's best buttons in its range, cancelability, confirmability, hitstun, and anti-air potential. It does basically everything. It is also the normal to use for generating Windclad stocks through [[Street_Fighter_6/Lily/Strategy#Condor_Wind|Condor Wind Pressure]]. | | One of Lily's best buttons in its range, cancelability, confirmability, hitstun, and anti-air potential. It does basically everything. It is also the normal to use for generating Windclad stocks through [[Street_Fighter_6/Lily/Strategy#Condor_Wind|Condor Wind Pressure]]. |
|
| |
|
| Against a grounded opponent, being close enough to connect both hits makes it very easy to hit-confirm into {{clr|4|Drive Rush}}, {{clr|10|Special}} or {{clr|10|Super Art}}. It's also easy to visually confirm and counter {{clr|4|Drive Impact}}. Even if the first hit is spaced to whiff it can still Counter-hit the opponent for both hits if they press a button.<br> | | Against a grounded opponent, being close enough to connect both hits makes it very easy to hit-confirm into {{clr|DR|Drive Rush}}, {{clr|OD|Special}} or {{clr|SA|Super Art}}. It's also easy to visually confirm and counter {{clr|DR|Drive Impact}}. Even if the first hit is spaced to whiff it can still Counter-hit the opponent for both hits if they press a button.<br> |
|
| |
|
| At longer ranges it spaces out various reversals, and can be used to start [[#Street_Fighter_6/Lily/Strategy#Condor_Spire|Condor Spire Pressure]] from an obscene distance. | | At longer ranges it spaces out various reversals, and can be used to start [[#Street_Fighter_6/Lily/Strategy#Condor_Spire|Condor Spire Pressure]] from an obscene distance. |
|
| |
|
| As an anti-air it will catch jumps a significant distance in front of Lily as well as above and even slightly behind her. On Counter-hit it juggles into [[#Condor_Wind_Attack_(214P)|{{clr|10|Condor Wind}}]] or [[#Condor_Spire_(236K)|{{clr|10|Condor Spire}}]], but this is risky to attempt as the opponent can punish with a reversal after an empty jump. | | As an anti-air it will catch jumps a significant distance in front of Lily as well as above and even slightly behind her. On Counter-hit it juggles into [[#Condor_Wind_Attack_(214P)|{{clr|OD|Condor Wind}}]] or [[#Condor_Spire_(236K)|{{clr|OD|Condor Spire}}]], but this is risky to attempt as the opponent can punish with a reversal after an empty jump. |
| }} | | }} |
|
| |
|
| Line 222: |
Line 222: |
| {{AttackDataCargo-SF6/Query|lily_2mk}} | | {{AttackDataCargo-SF6/Query|lily_2mk}} |
| * '''Cancel Hitconfirm Window:''' 13f | | * '''Cancel Hitconfirm Window:''' 13f |
| * Special/{{clr|4|DR}} cancel is delayed until after the active frames | | * Special/{{clr|DR|DR}} cancel is delayed until after the active frames |
| * '''{{clr|4|Drive Rush}} cancel advantage:''' {{sf6-adv|VP|+10}} oH / {{sf6-adv|VP|+4}} oB | | * '''{{clr|DR|Drive Rush}} cancel advantage:''' {{sf6-adv|VP|+10}} oH / {{sf6-adv|VP|+4}} oB |
| * Applies 20% damage scaling to next hit when beginning a combo (100/80/70...) | | * Applies 20% damage scaling to next hit when beginning a combo (100/80/70...) |
| <br> | | <br> |
| A low attack that is mainly used as a hard read against an opponent that likes to walk backwards, comboing into {{clr|4|Drive Rush}} or {{clr|4|Windclad}} [[#Condor_Spire_(236K)|{{clr|10|Condor Spire}}]].<br> | | A low attack that is mainly used as a hard read against an opponent that likes to walk backwards, comboing into {{clr|DR|Drive Rush}} or {{clr|DR|Windclad}} [[#Condor_Spire_(236K)|{{clr|OD|Condor Spire}}]].<br> |
| This move is hugely limited by its slow startup and short range, with the lack of hit-confirmability making it virtually impossible to use with most of Lily's specials due to them being unsafe on block. | | This move is hugely limited by its slow startup and short range, with the lack of hit-confirmability making it virtually impossible to use with most of Lily's specials due to them being unsafe on block. |
| }} | | }} |
| Line 242: |
Line 242: |
| | info = | | | info = |
| {{AttackDataCargo-SF6/Query|lily_2hk}} | | {{AttackDataCargo-SF6/Query|lily_2hk}} |
| * Counter-hit/Punish Counter: HKD +47 | | * {{clr|PC|Counter-hit/Punish Counter}}: HKD +47 |
| * Has juggle potential; not a Hard Knockdown when juggled into | | * Has juggle potential; not a Hard Knockdown when juggled into |
| * 1st hit doesn't knock down ({{sf6-adv|VM|-4}} if 2nd hit whiffs as a long-range whiff punish) | | * 1st hit doesn't knock down ({{sf6-adv|VM|-4}} if 2nd hit whiffs as a long-range whiff punish) |
| * 2nd hit can be blocked high if the 1st hit was blocked. | | * 2nd hit can be blocked high if the 1st hit was blocked. |
| <br> | | <br> |
| Can be used to juggle the opponent if a {{clr|4|Windclad}} [[#Condor_Spire_(236K)|{{clr|10|Condor Spire}}]] hits them less than three times.<br> | | Can be used to juggle the opponent if a {{clr|DR|Windclad}} [[#Condor_Spire_(236K)|{{clr|OD|Condor Spire}}]] hits them less than three times.<br> |
| Otherwise it's pretty standard for a sweep. The two hits don't amount to much in a game where {{clr|4|Drive Impact}} absorbs both of them. | | Otherwise it's pretty standard for a sweep. The two hits don't amount to much in a game where {{clr|DR|Drive Impact}} absorbs both of them. |
| }} | | }} |
| <br> | | <br> |
| Line 363: |
Line 363: |
| * Puts airborne opponents into {{sf6-jug|limited juggle}} state | | * Puts airborne opponents into {{sf6-jug|limited juggle}} state |
| * '''Cancel Hitconfirm Window:''' 16f / 21f (TC) | | * '''Cancel Hitconfirm Window:''' 16f / 21f (TC) |
| * '''{{clr|4|Drive Rush}} cancel advantage:''' {{sf6-adv|VP|+17}} oH / {{sf6-adv|VP|+11}} oB | | * '''{{clr|DR|Drive Rush}} cancel advantage:''' {{sf6-adv|VP|+17}} oH / {{sf6-adv|VP|+11}} oB |
| <br> | | <br> |
| An advancing heavy normal that can be canceled into either a special move, or the much less useful (but more easily confirmable) Target Combo.<br> | | An advancing heavy normal that can be canceled into either a special move, or the much less useful (but more easily confirmable) Target Combo.<br> |
| Typically used as a followup after crumpling the opponent with Punish Counter [[#5HP|{{clr|H|5HP}}]] or a {{clr|4|Drive Impact}} wall splat.<br> | | Typically used as a followup after crumpling the opponent with Punish Counter [[#5HP|{{clr|H|5HP}}]] or a {{clr|DR|Drive Impact}} wall splat.<br> |
| Despite the upward swinging animation, this is not an effective anti-air. | | Despite the upward swinging animation, this is not an effective anti-air. |
| }} | | }} |
| Line 386: |
Line 386: |
| <br> | | <br> |
| An overhead with surprising range and hitbox disjoint. Can be used to hop over low attacks for a Punish Counter, which combos into light attacks.<br> | | An overhead with surprising range and hitbox disjoint. Can be used to hop over low attacks for a Punish Counter, which combos into light attacks.<br> |
| When done after {{clr|4|Drive Rush}} it also combos into light attacks, and is {{sf6-adv|P|+1}} on block. | | When done after {{clr|DR|Drive Rush}} it also combos into light attacks, and is {{sf6-adv|P|+1}} on block. |
| }} | | }} |
|
| |
|
| Line 401: |
Line 401: |
| {{AttackDataCargo-SF6/Query|lily_4hp}} | | {{AttackDataCargo-SF6/Query|lily_4hp}} |
| * '''Cancel Hitconfirm Window:''' 18f | | * '''Cancel Hitconfirm Window:''' 18f |
| * '''{{clr|4|Drive Rush}} cancel advantage:''' {{sf6-adv|VP|+17}} oH / {{sf6-adv|VP|+10}} oB | | * '''{{clr|DR|Drive Rush}} cancel advantage:''' {{sf6-adv|VP|+17}} oH / {{sf6-adv|VP|+10}} oB |
| <br> | | <br> |
| This move is unique in that Lily's hurtbox does not move forwards at all until the attack hits. This makes it effective at fishing for Counter-hits with little risk of being counterpoked herself.<br> | | This move is unique in that Lily's hurtbox does not move forwards at all until the attack hits. This makes it effective at fishing for Counter-hits with little risk of being counterpoked herself.<br> |
| It will usually reach beyond and cleanly beat the low pokes that [[#2HP|{{clr|H|2HP}}]] typically loses to, complimenting it perfectly.<br> | | It will usually reach beyond and cleanly beat the low pokes that [[#2HP|{{clr|H|2HP}}]] typically loses to, complimenting it perfectly.<br> |
| It is also indispensable as a combo tool due to its high damage and high frame advantage on hit. {{clr|4|Drive Rush}}~[[#4HP|{{clr|H|4HP}}]] is Lily's optimal punish starter. | | It is also indispensable as a combo tool due to its high damage and high frame advantage on hit. {{clr|DR|Drive Rush}}~[[#4HP|{{clr|H|4HP}}]] is Lily's optimal punish starter. |
| }} | | }} |
|
| |
|
| Line 447: |
Line 447: |
| * () refers to scaled damage from {{clr|H|6HP}}~{{clr|H|HP}} combo starter | | * () refers to scaled damage from {{clr|H|6HP}}~{{clr|H|HP}} combo starter |
| <br> | | <br> |
| A Target Combo that is rarely used, since canceling [[#6HP|{{clr|H|6HP}}]] into [[#Condor_Wind_Attack_(214P)|{{clr|10|Condor Wind}}]] does more damage while building a wind stock.<br> | | A Target Combo that is rarely used, since canceling [[#6HP|{{clr|H|6HP}}]] into [[#Condor_Wind_Attack_(214P)|{{clr|OD|Condor Wind}}]] does more damage while building a wind stock.<br> |
| The main benefit of this TC chain is that it's much easier to confirm directly from [[#6HP|{{clr|H|6HP}}]] in neutral. Each hit is also a built-in frame trap if the opponent tries to take their turn back on block, though this is quite risky and doesn't work if the opponent is in Burnout. | | The main benefit of this TC chain is that it's much easier to confirm directly from [[#6HP|{{clr|H|6HP}}]] in neutral. Each hit is also a built-in frame trap if the opponent tries to take their turn back on block, though this is quite risky and doesn't work if the opponent is in Burnout. |
| }} | | }} |
| Line 466: |
Line 466: |
| <br> | | <br> |
| A rewarding air-to-air option to complement her strong anti-airs.<br> | | A rewarding air-to-air option to complement her strong anti-airs.<br> |
| Double Arrow allows Lily to heavily punish jumps by linking into [[#Tomahawk_Buster_(623P)|{{clr|10|Tomahawk Buster}}]] upon landing or by canceling into [[#Level_2_Super_(236236K)|{{clr|10|SA2}}]] in the air. | | Double Arrow allows Lily to heavily punish jumps by linking into [[#Tomahawk_Buster_(623P)|{{clr|OD|Tomahawk Buster}}]] upon landing or by canceling into [[#Level_2_Super_(236236K)|{{clr|SA|SA2}}]] in the air. |
| }} | | }} |
| <br> | | <br> |
| Line 482: |
Line 482: |
| | info = | | | info = |
| {{AttackDataCargo-SF6/Query|lily_lplk}} | | {{AttackDataCargo-SF6/Query|lily_lplk}} |
| * Punish Counter: HKD +20 | | * {{clr|PC|Punish Counter}}: HKD +20 |
| * Applies 20% immediate damage scaling when comboed into (e.g. after Crumple) | | * Applies 20% immediate damage scaling when comboed into (e.g. after Crumple) |
| <br> | | <br> |
| While it has less damage and range than Mexican Typhoon, Lily's normal throw leaves the opponent much closer on the ground for significantly better followup options. It also allows Lily to recover in time to anti-air an opponent that jumps in anticipation of a command grab. | | While it has less damage and range than Mexican Typhoon, Lily's normal throw leaves the opponent much closer on the ground for significantly better followup options. It also allows Lily to recover in time to anti-air an opponent that jumps in anticipation of a command grab. |
|
| |
|
| After throwing the opponent into the corner, they remain in range for a walkup [[#Mexican_Typhoon_(360+P)|{{clr|10|Command Grab}}]]. Input 2486 or 8426 during end of the animation, then hold forwards and press punch just as the opponent stands up. It's possible to do this with any strength grab, but it is easier to time when using the longer ranged {{clr|L|LP}} or {{clr|10|OD}} version. | | After throwing the opponent into the corner, they remain in range for a walkup [[#Mexican_Typhoon_(360+P)|{{clr|OD|Command Grab}}]]. Input 2486 or 8426 during end of the animation, then hold forwards and press punch just as the opponent stands up. It's possible to do this with any strength grab, but it is easier to time when using the longer ranged {{clr|L|LP}} or {{clr|OD|OD}} version. |
|
| |
|
| {{clr|4|Drive Rush}} Throw can be used to loop the opponent in the corner. If they have access to a 6 frame invincible reversal they can use it on reaction, and will not be possible recover in time to bait it by blocking. Blanka, Honda, and Zangief can be looped using a frame-perfect walkup throw instead, but this is somewhat risky as missing the timing by a single frame in either direction causes the throw to lose to wakeup mashing. | | {{clr|DR|Drive Rush}} Throw can be used to loop the opponent in the corner. If they have access to a 6 frame invincible reversal they can use it on reaction, and will not be possible recover in time to bait it by blocking. Blanka, Honda, and Zangief can be looped using a frame-perfect walkup throw instead, but this is somewhat risky as missing the timing by a single frame in either direction causes the throw to lose to wakeup mashing. |
|
| |
|
| Midscreen, Lily can {{clr|4|Drive Rush}} into a slightly delayed [[#4HP|{{clr|H|4HP}}]] or [[#2HP|{{clr|H|2HP}}]] and cancel into [[#Condor_Wind_Attack_(214P)|{{clr|M|214MP}}]] to grab a Windclad stock, with the extra blockstun making it safe against {{clr|4|Drive Impact}}. The attack needs to be delayed because otherwise the opponent can avoid it by walking backwards and get a free whiff punish. | | Midscreen, Lily can {{clr|DR|Drive Rush}} into a slightly delayed [[#4HP|{{clr|H|4HP}}]] or [[#2HP|{{clr|H|2HP}}]] and cancel into [[#Condor_Wind_Attack_(214P)|{{clr|M|214MP}}]] to grab a Windclad stock, with the extra blockstun making it safe against {{clr|DR|Drive Impact}}. The attack needs to be delayed because otherwise the opponent can avoid it by walking backwards and get a free whiff punish. |
| }} | | }} |
|
| |
|
| Line 506: |
Line 506: |
| {{AttackDataCargo-SF6/Query|lily_4lplk}} | | {{AttackDataCargo-SF6/Query|lily_4lplk}} |
| * Side switch | | * Side switch |
| * Punish Counter: HKD +32 | | * {{clr|PC|Punish Counter}}: HKD +32 |
| * Applies 20% immediate damage scaling when comboed into (e.g. after Crumple) | | * Applies 20% immediate damage scaling when comboed into (e.g. after Crumple) |
| <br> | | <br> |
| While this has a longer knockdown than forward throw it also leaves the opponent further away, so it's best to avoid sending them midscreen with it. | | While this has a longer knockdown than forward throw it also leaves the opponent further away, so it's best to avoid sending them midscreen with it. |
|
| |
|
| After throwing the opponent back into the corner, {{clr|4|Drive Rush}} sets up another close range strike/throw mixup. Unlike forward throw, there is enough time to recover and block reversals.<br> | | After throwing the opponent back into the corner, {{clr|DR|Drive Rush}} sets up another close range strike/throw mixup. Unlike forward throw, there is enough time to recover and block reversals.<br> |
| Alternatively, performing a regular dash sets up a mixup between [[#4HP|{{clr|H|4HP}}]], microwalk [[#2HP|{{clr|H|2HP}}]], or walk-up [[#Mexican_Typhoon_(360+P)|{{clr|10|Command Grab}}]]. Input 2486 or 8426 during the dash animation, then hold forwards and press punch just as the opponent stands up. | | Alternatively, performing a regular dash sets up a mixup between [[#4HP|{{clr|H|4HP}}]], microwalk [[#2HP|{{clr|H|2HP}}]], or walk-up [[#Mexican_Typhoon_(360+P)|{{clr|OD|Command Grab}}]]. Input 2486 or 8426 during the dash animation, then hold forwards and press punch just as the opponent stands up. |
|
| |
|
| Other alternatives are meaty [[#Condor_Spire_(236K)|{{clr|M|236MK}}]] to become {{sf6-adv|VP|+4}} on block, or {{clr|4|Windclad}} [[#Condor_Spire_(236K)|{{clr|L|236LK}}]] to become {{sf6-adv|P|+3}}. While this is good for immediately getting close it is also very reactable, and will lose outright to a meterless anti-air special. | | Other alternatives are meaty [[#Condor_Spire_(236K)|{{clr|M|236MK}}]] to become {{sf6-adv|VP|+4}} on block, or {{clr|DR|Windclad}} [[#Condor_Spire_(236K)|{{clr|L|236LK}}]] to become {{sf6-adv|P|+3}}. While this is good for immediately getting close it is also very reactable, and will lose outright to a meterless anti-air special. |
| }} | | }} |
| <br> | | <br> |
| Line 534: |
Line 534: |
| * On Block: Applies 20% scaling multiplier to all follow-up hits after Wall Splat; the next attack can incur additional Starter Scaling | | * On Block: Applies 20% scaling multiplier to all follow-up hits after Wall Splat; the next attack can incur additional Starter Scaling |
| * Combos when canceled from {{clr|H|6HP}}/{{clr|H|4HP}} or Punish Counter {{clr|H|2HP}}/{{clr|H|5HP}} (no corner wallsplat; useful for depleting Drive gauge, especially after Perfect Parry) | | * Combos when canceled from {{clr|H|6HP}}/{{clr|H|4HP}} or Punish Counter {{clr|H|2HP}}/{{clr|H|5HP}} (no corner wallsplat; useful for depleting Drive gauge, especially after Perfect Parry) |
| * A blocked {{clr|4|DI}} can combo into another {{clr|4|DI}} if opponent is not fully cornered (Stuns if opponent has less than 1.5 Drive bars) | | * A blocked {{clr|DR|DI}} can combo into another {{clr|DR|DI}} if opponent is not fully cornered (Stuns if opponent has less than 1.5 Drive bars) |
| ** This happens because a blocked {{clr|4|DI}} is not considered a "hit" for combo purposes | | ** This happens because a blocked {{clr|DR|DI}} is not considered a "hit" for combo purposes |
| ** Causes both the 20% Starter and 20% Multiplier scaling to apply to the follow-up combo | | ** Causes both the 20% Starter and 20% Multiplier scaling to apply to the follow-up combo |
| See [[Street_Fighter_6/Gauges#Drive_Impact|Drive Impact]] on the Gauges page for more details. | | See [[Street_Fighter_6/Gauges#Drive_Impact|Drive Impact]] on the Gauges page for more details. |
| Line 552: |
Line 552: |
| * '''Marisa (214K)''', frame 3 armor | | * '''Marisa (214K)''', frame 3 armor |
| * '''Zangief ({{clr|H|5[HP]}})''', frame 4 armor | | * '''Zangief ({{clr|H|5[HP]}})''', frame 4 armor |
| It's important to use a blockstring that cannot be absorbed by their armor/counter moves. Ideally, the string should also not be a true combo, or it will cause a Lock and prevent Stun.<br>{{clr|10|*}} Denotes a move that causes Lock on Counter-hit, allowing the opponent to escape a Stun by mashing on wakeup. | | It's important to use a blockstring that cannot be absorbed by their armor/counter moves. Ideally, the string should also not be a true combo, or it will cause a Lock and prevent Stun.<br>{{clr|OD|*}} Denotes a move that causes Lock on Counter-hit, allowing the opponent to escape a Stun by mashing on wakeup. |
| * {{clr|H|2HP}} > delay {{clr|4|DI}}: delay allows a small blockstring gap to prevent opponent from absorbing the hit | | * {{clr|H|2HP}} > delay {{clr|DR|DI}}: delay allows a small blockstring gap to prevent opponent from absorbing the hit |
| * {{clr|H|6HP}}{{clr|10|*}} > {{clr|4|DI}}: 2f blockstring gap prevents opponent from absorbing the hit | | * {{clr|H|6HP}}{{clr|OD|*}} > {{clr|DR|DI}}: 2f blockstring gap prevents opponent from absorbing the hit |
| * {{clr|H|4HP}}{{clr|10|*}} > {{clr|4|DI}}: 3f blockstring gap will work vs. Zangief {{clr|H|5[HP]}} | | * {{clr|H|4HP}}{{clr|OD|*}} > {{clr|DR|DI}}: 3f blockstring gap will work vs. Zangief {{clr|H|5[HP]}} |
| * {{clr|4|DR~}}{{clr|M|5MK}} > {{clr|4|DI}}: 2f blockstring gap prevents opponent from absorbing the hit | | * {{clr|DR|DR~}}{{clr|M|5MK}} > {{clr|DR|DI}}: 2f blockstring gap prevents opponent from absorbing the hit |
| }} | | }} |
|
| |
|
| Line 613: |
Line 613: |
| ** Can also be performed from whiffed cancelable light normals | | ** Can also be performed from whiffed cancelable light normals |
| See [[Street_Fighter_6/Gauges#Drive_Rush|Drive Rush]] on the Gauges page for more details. See Strategy page for [[Street_Fighter_6/Lily/Strategy#Drive_Rush|Blockstring Gaps and Combo Routes]] | | See [[Street_Fighter_6/Gauges#Drive_Rush|Drive Rush]] on the Gauges page for more details. See Strategy page for [[Street_Fighter_6/Lily/Strategy#Drive_Rush|Blockstring Gaps and Combo Routes]] |
| * Startup refers to minimum time before an attack can cancel the {{clr|4|Drive Rush}} animation | | * Startup refers to minimum time before an attack can cancel the {{clr|DR|Drive Rush}} animation |
| * The first 15 recovery frames are cancelable into any attack | | * The first 15 recovery frames are cancelable into any attack |
| * The final 22 recovery frames are cancelable into any attack or movement option or blocking (except Parry) | | * The final 22 recovery frames are cancelable into any attack or movement option or blocking (except Parry) |
| * Only Normal and Command Normal attacks are enhanced with '''+4''' frame advantage and improved juggle properties | | * Only Normal and Command Normal attacks are enhanced with '''+4''' frame advantage and improved juggle properties |
| * Applies 15% damage scaling multiplier to any follow-up hits when used mid-combo | | * Applies 15% damage scaling multiplier to any follow-up hits when used mid-combo |
| ** Only applies scaling once per combo; does not apply when a {{clr|4|Drive Rush}} enhanced attack starts the combo | | ** Only applies scaling once per combo; does not apply when a {{clr|DR|Drive Rush}} enhanced attack starts the combo |
|
| |
|
| Distance: | | Distance: |
| * 0.434 (min, cancel into immediate Throw) | | * 0.434 (min, cancel into immediate Throw) |
| * 1.900 (min, earliest blocking/movement frame) | | * 1.900 (min, earliest blocking/movement frame) |
| * 3.044 (max, final {{clr|4|DR}} frame) | | * 3.044 (max, final {{clr|DR|DR}} frame) |
| }} | | }} |
| <br> | | <br> |
| Line 646: |
Line 646: |
| <br> | | <br> |
| {{clr|L|214LP}} is an important tool for getting Windclad stocks without using resources. Mix it up with the [[#Condor_Wind_Attack_(214P)|{{clr|M|214MP}}]] and [[#Condor_Wind_Attack_(214P)|{{clr|H|214HP}}]] on block, especially after [[#2HP|{{clr|H|2HP}}]]; the startup animation is identical but the punish is usually different. | | {{clr|L|214LP}} is an important tool for getting Windclad stocks without using resources. Mix it up with the [[#Condor_Wind_Attack_(214P)|{{clr|M|214MP}}]] and [[#Condor_Wind_Attack_(214P)|{{clr|H|214HP}}]] on block, especially after [[#2HP|{{clr|H|2HP}}]]; the startup animation is identical but the punish is usually different. |
| * {{clr|H|2HP}} > {{clr|M|214MP}}/{{clr|H|HP}} needs to be countered with invincibility, Perfect Parry, or an armored move such as {{clr|4|Drive Impact}}. | | * {{clr|H|2HP}} > {{clr|M|214MP}}/{{clr|H|HP}} needs to be countered with invincibility, Perfect Parry, or an armored move such as {{clr|DR|Drive Impact}}. |
| * {{clr|H|2HP}} > {{clr|L|214LP}} is a massive -25 on block but needs to be punished with a long ranged move. Importantly, {{clr|4|Drive Impact}} is too slow and can be punished back. | | * {{clr|H|2HP}} > {{clr|L|214LP}} is a massive -25 on block but needs to be punished with a long ranged move. Importantly, {{clr|DR|Drive Impact}} is too slow and can be punished back. |
| However, try not to rely on this against characters with a move that ticks all the boxes for punishing both, such as a long ranged Super. | | However, try not to rely on this against characters with a move that ticks all the boxes for punishing both, such as a long ranged Super. |
| }} | | }} |
| Line 674: |
Line 674: |
| Windclad stocks are vital to Lily's game plan, so learning how to safely use this move is vital. | | Windclad stocks are vital to Lily's game plan, so learning how to safely use this move is vital. |
|
| |
|
| Despite being {{sf6-adv|VM|-8}} on block, the {{clr|M|MP}} and {{clr|H|HP}} versions have a lot of pushback which makes them mostly safe when properly spaced. Unfortunately, all versions are very vulnerable to {{clr|4|Drive Impact}}, which can be input on reaction to seeing the startup. There are several ways to counter this: | | Despite being {{sf6-adv|VM|-8}} on block, the {{clr|M|MP}} and {{clr|H|HP}} versions have a lot of pushback which makes them mostly safe when properly spaced. Unfortunately, all versions are very vulnerable to {{clr|DR|Drive Impact}}, which can be input on reaction to seeing the startup. There are several ways to counter this: |
| * Mix in {{clr|H|2HP}} > {{clr|L|214LP}}. This is safe against {{clr|4|Drive Impact}} and allows for it to be punished. | | * Mix in {{clr|H|2HP}} > {{clr|L|214LP}}. This is safe against {{clr|DR|Drive Impact}} and allows for it to be punished. |
| * Use {{clr|H|2HP}} > {{clr|10|214PP}}; a true blockstring that leaves no gap for the opponent to reversal through. | | * Use {{clr|H|2HP}} > {{clr|OD|214PP}}; a true blockstring that leaves no gap for the opponent to reversal through. |
| * Use {{clr|4|Drive Rush}} {{clr|H|2HP}}, {{clr|H|4HP}} or {{clr|H|5HP}} canceled into {{clr|M|214MP}}. The extra blockstun from {{clr|L|Drive Rush}} makes it a true blockstring. | | * Use {{clr|DR|Drive Rush}} {{clr|H|2HP}}, {{clr|H|4HP}} or {{clr|H|5HP}} canceled into {{clr|M|214MP}}. The extra blockstun from {{clr|L|Drive Rush}} makes it a true blockstring. |
| * When midscreen, keep the button held. This takes the hit as a regular Counter-hit instead of a Punish Counter, which is pretty inconsequential outside the corner. | | * When midscreen, keep the button held. This takes the hit as a regular Counter-hit instead of a Punish Counter, which is pretty inconsequential outside the corner. |
| * With 3 bars and good reflexes, hold it until the opponent presses a button, then release and cancel into [[#Level_3_Super_(214214P)|{{clr|10|SA3}}]]. | | * With 3 bars and good reflexes, hold it until the opponent presses a button, then release and cancel into [[#Level_3_Super_(214214P)|{{clr|SA|SA3}}]]. |
| ** Modern mode's Heavy Assisted Combo does this automatically, performing {{clr|H|2HP}} > {{clr|M|214MP}} > ({{clr|10|214214P}}) but only canceling into the Super on hit. | | ** Modern mode's Heavy Assisted Combo does this automatically, performing {{clr|H|2HP}} > {{clr|M|214MP}} > ({{clr|SA|214214P}}) but only canceling into the Super on hit. |
| ** Additionally, Assist + {{clr|H|H}} > {{clr|H|H}} > {{clr|M|[M]}}+{{clr|H|H}} causes Condor Wind to be held, but it still cancels into {{clr|10|SA3}} upon hitting the opponent when {{clr|M|M}} is released. | | ** Additionally, Assist + {{clr|H|H}} > {{clr|H|H}} > {{clr|M|[M]}}+{{clr|H|H}} causes Condor Wind to be held, but it still cancels into {{clr|SA|SA3}} upon hitting the opponent when {{clr|M|M}} is released. |
|
| |
|
| The attack gains Windclad stocks much earlier than {{clr|L|214LP}}, with the stock being kept even when punished. Slap a fireball with {{clr|M|214MP}} and take the hit in exchange for the stock. When releasing a partially charged Condor Wind, the startup is only 4 frames. | | The attack gains Windclad stocks much earlier than {{clr|L|214LP}}, with the stock being kept even when punished. Slap a fireball with {{clr|M|214MP}} and take the hit in exchange for the stock. When releasing a partially charged Condor Wind, the startup is only 4 frames. |
|
| |
|
| Ending a combo with {{clr|M|214MP}} up close (e.g. after a {{clr|4|Drive Rush}} combo) leaves Lily in range for [[#Mexican_Typhoon_(360+P)|Mexican Typhoon]]. The opponent can walk backwards out of range of {{clr|H|360HP}}, so only use that specific version in the corner. | | Ending a combo with {{clr|M|214MP}} up close (e.g. after a {{clr|DR|Drive Rush}} combo) leaves Lily in range for [[#Mexican_Typhoon_(360+P)|Mexican Typhoon]]. The opponent can walk backwards out of range of {{clr|H|360HP}}, so only use that specific version in the corner. |
| }} | | }} |
|
| |
|
| Line 715: |
Line 715: |
| All versions can be spaced to be safe or even as good as +4 on block even when not Windclad. | | All versions can be spaced to be safe or even as good as +4 on block even when not Windclad. |
|
| |
|
| Canceling from [[#2HP|{{clr|H|2HP}}]] into {{clr|L|LK Condor Spire}} from a max range results in a frame trap that can be as good as +1 on block and also safe against {{clr|4|Drive Impact}} (unless they do it before {{clr|H|2HP}}). This also works from [[#4HP|{{clr|H|4HP}}]], though not quite to the same extent. | | Canceling from [[#2HP|{{clr|H|2HP}}]] into {{clr|L|LK Condor Spire}} from a max range results in a frame trap that can be as good as +1 on block and also safe against {{clr|DR|Drive Impact}} (unless they do it before {{clr|H|2HP}}). This also works from [[#4HP|{{clr|H|4HP}}]], though not quite to the same extent. |
|
| |
|
| {{clr|10|OD Condor Spire}} has the same range as the {{clr|M|MK}} version but with a much faster startup that makes it less vulnerable to {{clr|4|Drive Impact}} and other reactive options. It's a fun surprise to throw out in neutral or at round start. | | {{clr|OD|OD Condor Spire}} has the same range as the {{clr|M|MK}} version but with a much faster startup that makes it less vulnerable to {{clr|DR|Drive Impact}} and other reactive options. It's a fun surprise to throw out in neutral or at round start. |
|
| |
|
| The {{clr|M|MK}} and {{clr|H|HK}} versions aren't quite as good outside of combos due to the longer distance and slower startup making them easier to space out and react to with big punishes. | | The {{clr|M|MK}} and {{clr|H|HK}} versions aren't quite as good outside of combos due to the longer distance and slower startup making them easier to space out and react to with big punishes. |
| Line 756: |
Line 756: |
| * Frame kills after KD: '''214LP:''' +9 / '''214MP:''' +5 / '''Forward Dash x2:''' +14 | | * Frame kills after KD: '''214LP:''' +9 / '''214MP:''' +5 / '''Forward Dash x2:''' +14 |
| <br> | | <br> |
| One of the big reasons to play Lily. Depending on the available resources it's possible to bulldoze your way into a +1 or +2 on block situation from almost anywhere, which directly gives a mixup between [[#5LK|{{clr|L|5LK}}]] and [[#Forward_Throw_(LPLK)|{{clr|10|Throw}}]] or [[#Mexican_Typhoon_(360+P)|{{clr|10|Command Grab}}]]. It also hits 3 times which allows it to plow through {{clr|4|Drive Impact}} when used from a close enough range for all 3 hits to land. The non-Drive versions being only +1 means that Lily's 5-frame throw options will lose to opponents mashing 4 frame attacks, a weakness that the +2 {{clr|10|OD}} version does not have. This can be worked around with proper conditioning but does change the RPS on block. | | One of the big reasons to play Lily. Depending on the available resources it's possible to bulldoze your way into a +1 or +2 on block situation from almost anywhere, which directly gives a mixup between [[#5LK|{{clr|L|5LK}}]] and [[#Forward_Throw_(LPLK)|{{clr|OD|Throw}}]] or [[#Mexican_Typhoon_(360+P)|{{clr|OD|Command Grab}}]]. It also hits 3 times which allows it to plow through {{clr|DR|Drive Impact}} when used from a close enough range for all 3 hits to land. The non-Drive versions being only +1 means that Lily's 5-frame throw options will lose to opponents mashing 4 frame attacks, a weakness that the +2 {{clr|OD|OD}} version does not have. This can be worked around with proper conditioning but does change the RPS on block. |
|
| |
|
| In the corner, and with an additional Windclad stock, a {{clr|4|Windclad}} Condor Spire combos directly into {{clr|4|Windclad}} [[#Tomahawk_Buster_(623P)|Tomahawk Buster]] using the same strength button or faster (e.g. {{clr|4|W.}}{{clr|M|236MK}} then {{clr|4|W.}}{{clr|M|623MP}}). Alternatively, the used stock can be regained by using [[#Condor_Wind_Stock_(214P)|{{clr|L|214LP}}]] while the opponent is knocked down while staying ±0 after {{clr|L|L Spire}} and maintaining frame advantage from the others.<br> | | In the corner, and with an additional Windclad stock, a {{clr|DR|Windclad}} Condor Spire combos directly into {{clr|DR|Windclad}} [[#Tomahawk_Buster_(623P)|Tomahawk Buster]] using the same strength button or faster (e.g. {{clr|DR|W.}}{{clr|M|236MK}} then {{clr|DR|W.}}{{clr|M|623MP}}). Alternatively, the used stock can be regained by using [[#Condor_Wind_Stock_(214P)|{{clr|L|214LP}}]] while the opponent is knocked down while staying ±0 after {{clr|L|L Spire}} and maintaining frame advantage from the others.<br> |
| The {{clr|10|OD}} version can be canceled into [[#Level_2_Super_(236236K)|{{clr|10|SA2}}]] for high damage anywhere on the screen, or in the corner it can be linked into [[#Level_1_Super_(236236P)|{{clr|10|SA1}}]].<br> | | The {{clr|OD|OD}} version can be canceled into [[#Level_2_Super_(236236K)|{{clr|SA|SA2}}]] for high damage anywhere on the screen, or in the corner it can be linked into [[#Level_1_Super_(236236P)|{{clr|SA|SA1}}]].<br> |
| The {{clr|H|HK}} version in the corner also links into [[#Level_2_Super_(236236K)|{{clr|10|SA2}}]]... or even [[#Level_1_Super_(236236P)|{{clr|10|SA1}}]] if it hits the opponent while they're airborne. | | The {{clr|H|HK}} version in the corner also links into [[#Level_2_Super_(236236K)|{{clr|SA|SA2}}]]... or even [[#Level_1_Super_(236236P)|{{clr|SA|SA1}}]] if it hits the opponent while they're airborne. |
|
| |
|
| The main weakness of Windclad Spire is that it is weak to drive reversal. The opponent can swat the {{clr|10|OD}} version away every time to spend an equal amount of drive gauge while the Windclad stock remains spent. On the other hand when Windclad stocks are plentiful and the opponent has less drive gauge, it isn't unreasonable to just keep doing it and trading drive gauge until the opponent runs out. | | The main weakness of Windclad Spire is that it is weak to drive reversal. The opponent can swat the {{clr|OD|OD}} version away every time to spend an equal amount of drive gauge while the Windclad stock remains spent. On the other hand when Windclad stocks are plentiful and the opponent has less drive gauge, it isn't unreasonable to just keep doing it and trading drive gauge until the opponent runs out. |
| }} | | }} |
| </tabber> | | </tabber> |
| Line 818: |
Line 818: |
| * '''Anti-Air Invuln''' 1-10f; '''Throw Invuln''' 1-10f; '''Airborne''' 7-45f ({{FKD}} state) | | * '''Anti-Air Invuln''' 1-10f; '''Throw Invuln''' 1-10f; '''Airborne''' 7-45f ({{FKD}} state) |
| * 2nd active frame has extra range vs. grounded opponents only (for combo consistency) | | * 2nd active frame has extra range vs. grounded opponents only (for combo consistency) |
| * '''Cancel Hitconfirm Window:''' 69f [[#Condor_Dive_(j.PP)]|({{clr|10|j.PPP}}]], on hit only) | | * '''Cancel Hitconfirm Window:''' 69f [[#Condor_Dive_(j.PP)]|({{clr|OD|j.PPP}}]], on hit only) |
| * Applies 20% damage scaling to next hit when beginning a combo; counts as 2 hits for damage scaling when comboed into (applies to next hit) | | * Applies 20% damage scaling to next hit when beginning a combo; counts as 2 hits for damage scaling when comboed into (applies to next hit) |
| <br> | | <br> |
| With {{clr|4|Windclad}} stocked, it's possible to use this to juggle after [[#Condor_Spire_(236K)|Condor Spire]] in the corner for an expensive but damaging combo.<br> | | With {{clr|DR|Windclad}} stocked, it's possible to use this to juggle after [[#Condor_Spire_(236K)|Condor Spire]] in the corner for an expensive but damaging combo.<br> |
| The {{clr|L|LP}} and {{clr|10|OD}} versions hit on frame 4, which makes them impossible to safe-jump. The opponent has to bait it by doing an empty-jump instead. | | The {{clr|L|LP}} and {{clr|OD|OD}} versions hit on frame 4, which makes them impossible to safe-jump. The opponent has to bait it by doing an empty-jump instead. |
| }} | | }} |
| </tabber> | | </tabber> |
| Line 845: |
Line 845: |
| * Forward/Neutral Jump only | | * Forward/Neutral Jump only |
| * {{FKD}} state until landing | | * {{FKD}} state until landing |
| * Applies 10% immediate damage scaling when comboed into (stacks with [[#Tomahawk_Buster_(623P)|{{clr|10|623PP}}]] damage scaling) | | * Applies 10% immediate damage scaling when comboed into (stacks with [[#Tomahawk_Buster_(623P)|{{clr|OD|623PP}}]] damage scaling) |
| <br> | | <br> |
| Can be used to punish fireballs from medium or close range. This is more effective when using the {{clr|10|OD}} version as it moves significantly faster.<br> | | Can be used to punish fireballs from medium or close range. This is more effective when using the {{clr|OD|OD}} version as it moves significantly faster.<br> |
| The {{clr|4|Windclad}} version hits twice, breaking armored moves. This makes it especially effective against Marisa. | | The {{clr|DR|Windclad}} version hits twice, breaking armored moves. This makes it especially effective against Marisa. |
| }} | | }} |
| |-| | | |-| |
| Line 871: |
Line 871: |
| * Applies 10% immediate damage scaling when comboed into (stacks with 623PP damage scaling) | | * Applies 10% immediate damage scaling when comboed into (stacks with 623PP damage scaling) |
| <br> | | <br> |
| Can be used to punish fireballs from medium or close range. This is more effective when using the {{clr|10|OD}} version as it moves significantly faster.<br> | | Can be used to punish fireballs from medium or close range. This is more effective when using the {{clr|OD|OD}} version as it moves significantly faster.<br> |
| The {{clr|4|Windclad}} version hits twice, breaking armored moves. This makes it especially effective against Marisa. | | The {{clr|DR|Windclad}} version hits twice, breaking armored moves. This makes it especially effective against Marisa. |
| }} | | }} |
| </tabber> | | </tabber> |
| Line 905: |
Line 905: |
| * Applies 10% immediate damage scaling when comboed into (e.g. after Crumple) | | * Applies 10% immediate damage scaling when comboed into (e.g. after Crumple) |
| <br> | | <br> |
| A command grab, the backbone of Lily's mixups. The {{clr|H|HP}} version does the most damage, hitting harder than a typical meterless combos, but has the shortest range. The {{clr|L|LP}} version has the longest range, but the lowest damage. The {{clr|10|OD}} version combines the range of the {{clr|L|LP}} version with even more damage than the {{clr|H|HP}} version. | | A command grab, the backbone of Lily's mixups. The {{clr|H|HP}} version does the most damage, hitting harder than a typical meterless combos, but has the shortest range. The {{clr|L|LP}} version has the longest range, but the lowest damage. The {{clr|OD|OD}} version combines the range of the {{clr|L|LP}} version with even more damage than the {{clr|H|HP}} version. |
|
| |
|
| Every version of the command grab leaves the opponent the same long distance away, but it's possible to {{clr|4|Drive Rush}} back in with a delayed [[#2HP|{{clr|H|2HP}}]]. The ideal timing will connect with the 2nd hit somewhere close to their 5th recovery frame. This leaves a small enough gap that the opponent can't jump out, and gets close enough such that they can't walk backwards out of the way, and can't interrupt it with a 4-5 frame normal because the first hit whiffs just close enough to connect as a Counter-hit if they try. | | Every version of the command grab leaves the opponent the same long distance away, but it's possible to {{clr|DR|Drive Rush}} back in with a delayed [[#2HP|{{clr|H|2HP}}]]. The ideal timing will connect with the 2nd hit somewhere close to their 5th recovery frame. This leaves a small enough gap that the opponent can't jump out, and gets close enough such that they can't walk backwards out of the way, and can't interrupt it with a 4-5 frame normal because the first hit whiffs just close enough to connect as a Counter-hit if they try. |
| }} | | }} |
| <br> | | <br> |
| Line 930: |
Line 930: |
| * Damage distribution: 80x13,1160 (full) / 80x2,1680 (partial) | | * Damage distribution: 80x13,1160 (full) / 80x2,1680 (partial) |
| <br> | | <br> |
| Offers good damage off of lights without burning drive gauge or Windclad stocks. Also useful as a juggle after {{clr|4|Windclad}} [[#Condor_Spire_(236K)|{{clr|10|236KK}}]] near the corner to go for the kill.<br>As a reversal it can lose to some well-timed meaty light normals, but the startup is fast enough to punish slower attacks or to interrupt the opponent's chained light normals on block. | | Offers good damage off of lights without burning drive gauge or Windclad stocks. Also useful as a juggle after {{clr|DR|Windclad}} [[#Condor_Spire_(236K)|{{clr|OD|236KK}}]] near the corner to go for the kill.<br>As a reversal it can lose to some well-timed meaty light normals, but the startup is fast enough to punish slower attacks or to interrupt the opponent's chained light normals on block. |
| }} | | }} |
|
| |
|
| Line 953: |
Line 953: |
| * '''Drive Gauge Depletion:''' 1 bar (hit) / 0.5 bars (block) | | * '''Drive Gauge Depletion:''' 1 bar (hit) / 0.5 bars (block) |
| * 40% minimum damage scaling | | * 40% minimum damage scaling |
| * 2f startup when canceled from [[#Condor_Spire_(236K)|{{clr|10|236KK}}]]; Damage distribution: 100x7,1800 | | * 2f startup when canceled from [[#Condor_Spire_(236K)|{{clr|OD|236KK}}]]; Damage distribution: 100x7,1800 |
| <br> | | <br> |
| Can be canceled into from [[#Condor_Spire_(236K)|{{clr|10|OD Condor Spire}}]] and [[#Condor_Wind_Attack_(214P)|{{clr|10|OD Condor Wind}}]]. The latter is especially potent as it builds {{clr|4|Windclad}} for extra damage on the spot. | | Can be canceled into from [[#Condor_Spire_(236K)|{{clr|OD|OD Condor Spire}}]] and [[#Condor_Wind_Attack_(214P)|{{clr|OD|OD Condor Wind}}]]. The latter is especially potent as it builds {{clr|DR|Windclad}} for extra damage on the spot. |
|
| |
|
| This is a good anti air that hits straight upwards and in both directions, catching crossup attempts. It's also a good reversal that beats most buttons as well as vertical jump. When jumping out of a corner throw loop, inputting the aerial version in the opposite direction allows Lily to punish an opponent who tries to anti-air uppercut your escape; this is a risky call-out, as it can't be done on reaction. | | This is a good anti air that hits straight upwards and in both directions, catching crossup attempts. It's also a good reversal that beats most buttons as well as vertical jump. When jumping out of a corner throw loop, inputting the aerial version in the opposite direction allows Lily to punish an opponent who tries to anti-air uppercut your escape; this is a risky call-out, as it can't be done on reaction. |
|
| |
|
| The huge length of its invincibility makes it good at going for chip kills. The aerial version in particular hits more times against a crouching opponent, so it is usually good to cancel into it from {{clr|10|OD Spire}}. However, it doesn't necessarily need to be confirmed from another blocked move because the long invincibility will outlast the opponent even if they try to counter with their own Super. You do need to be careful of some characters though, who can use their own Super Art to dodge Lily's. These are: | | The huge length of its invincibility makes it good at going for chip kills. The aerial version in particular hits more times against a crouching opponent, so it is usually good to cancel into it from {{clr|OD|OD Spire}}. However, it doesn't necessarily need to be confirmed from another blocked move because the long invincibility will outlast the opponent even if they try to counter with their own Super. You do need to be careful of some characters though, who can use their own Super Art to dodge Lily's. These are: |
| * 1 bar: Cammy | | * 1 bar: Cammy |
| * 2 bars: E.Honda, Lily, Zangief | | * 2 bars: E.Honda, Lily, Zangief |
| * 3 bars: Marisa, JP, Dee Jay, Dhalsim | | * 3 bars: Marisa, JP, Dee Jay, Dhalsim |
|
| |
|
| The {{clr|4|Windclad}} version has significantly more range and deals more damage, making it useful as an anti-projectile tool and as a long range punish. The suction effect will ensure it fully connects even against an extended hurtbox. | | The {{clr|DR|Windclad}} version has significantly more range and deals more damage, making it useful as an anti-projectile tool and as a long range punish. The suction effect will ensure it fully connects even against an extended hurtbox. |
| }} | | }} |
| |-| | | |-| |
| Line 988: |
Line 988: |
| * '''Drive Gauge Depletion:''' 1 bar (hit) / 0.6 bars (block) | | * '''Drive Gauge Depletion:''' 1 bar (hit) / 0.6 bars (block) |
| * 40% minimum damage scaling | | * 40% minimum damage scaling |
| * 2f startup when canceled from [[#Condor_Spire_(236K)|{{clr|10|236KK}}]]; Damage distribution: 100x12,1600 | | * 2f startup when canceled from [[#Condor_Spire_(236K)|{{clr|OD|236KK}}]]; Damage distribution: 100x12,1600 |
| <br> | | <br> |
| Can be canceled into from [[#Condor_Spire_(236K)|{{clr|10|OD Condor Spire}}]] and [[#Condor_Wind_Attack_(214P)|{{clr|10|OD Condor Wind}}]]. The latter is especially potent as it builds {{clr|4|Windclad}} for extra damage on the spot. | | Can be canceled into from [[#Condor_Spire_(236K)|{{clr|OD|OD Condor Spire}}]] and [[#Condor_Wind_Attack_(214P)|{{clr|OD|OD Condor Wind}}]]. The latter is especially potent as it builds {{clr|DR|Windclad}} for extra damage on the spot. |
|
| |
|
| This is a good anti air that hits straight upwards and in both directions, catching crossup attempts. It's also a good reversal that beats most buttons as well as vertical jump. When jumping out of a corner throw loop, inputting the aerial version in the opposite direction allows Lily to punish an opponent who tries to anti-air uppercut your escape; this is a risky call-out, as it can't be done on reaction. | | This is a good anti air that hits straight upwards and in both directions, catching crossup attempts. It's also a good reversal that beats most buttons as well as vertical jump. When jumping out of a corner throw loop, inputting the aerial version in the opposite direction allows Lily to punish an opponent who tries to anti-air uppercut your escape; this is a risky call-out, as it can't be done on reaction. |
|
| |
|
| The huge length of its invincibility makes it good at going for chip kills. The aerial version in particular hits more times against a crouching opponent, so it is usually good to cancel into it from {{clr|10|OD Spire}}. However, it doesn't necessarily need to be confirmed from another blocked move because the long invincibility will outlast the opponent even if they try to counter with their own Super. You do need to be careful of some characters though, who can use their own Super Art to dodge Lily's. These are: | | The huge length of its invincibility makes it good at going for chip kills. The aerial version in particular hits more times against a crouching opponent, so it is usually good to cancel into it from {{clr|OD|OD Spire}}. However, it doesn't necessarily need to be confirmed from another blocked move because the long invincibility will outlast the opponent even if they try to counter with their own Super. You do need to be careful of some characters though, who can use their own Super Art to dodge Lily's. These are: |
| * 1 bar: Cammy | | * 1 bar: Cammy |
| * 2 bars: E.Honda, Lily, Zangief | | * 2 bars: E.Honda, Lily, Zangief |
| * 3 bars: Marisa, JP, Dee Jay, Dhalsim | | * 3 bars: Marisa, JP, Dee Jay, Dhalsim |
|
| |
|
| The {{clr|4|Windclad}} version has significantly more range and deals more damage, making it useful as an anti-projectile tool and as a long range punish. The suction effect will ensure it fully connects even against an extended hurtbox. | | The {{clr|DR|Windclad}} version has significantly more range and deals more damage, making it useful as an anti-projectile tool and as a long range punish. The suction effect will ensure it fully connects even against an extended hurtbox. |
| }} | | }} |
| </tabber> | | </tabber> |
| Line 1,031: |
Line 1,031: |
| Lily's grab super. Unfortunately it can be jumped after the screen freeze, but that doesn't make it bad by any means.<br> | | Lily's grab super. Unfortunately it can be jumped after the screen freeze, but that doesn't make it bad by any means.<br> |
| It does not work in juggle combos, but it combos against a grounded opponent from [[#Condor_Wind_Attack_(214P)|{{clr|M|214MP}}]], or straight from any cancelable normal move.<br> | | It does not work in juggle combos, but it combos against a grounded opponent from [[#Condor_Wind_Attack_(214P)|{{clr|M|214MP}}]], or straight from any cancelable normal move.<br> |
| The range is significantly longer than [[#Mexican_Typhoon_(360+P)|{{clr|10|Mexican Typhoon}}]], making it useful as a punish against some characters.<br> | | The range is significantly longer than [[#Mexican_Typhoon_(360+P)|{{clr|OD|Mexican Typhoon}}]], making it useful as a punish against some characters.<br> |
| Also, because this is a grab, it can be used to whiff punish an opponent's parry for half of their health bar. | | Also, because this is a grab, it can be used to whiff punish an opponent's parry for half of their health bar. |
| }} | | }} |


