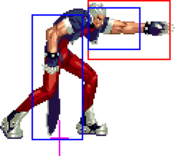
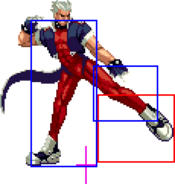
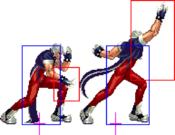
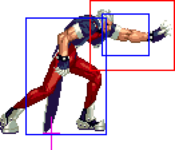
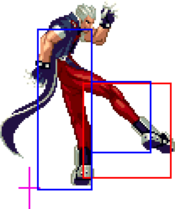
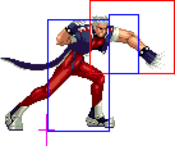
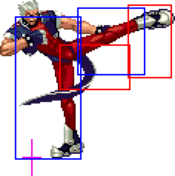
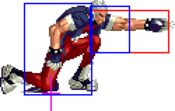
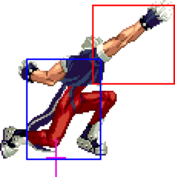
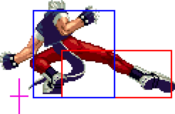
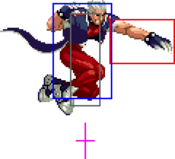
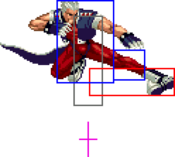
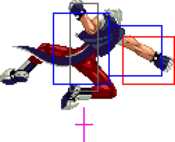
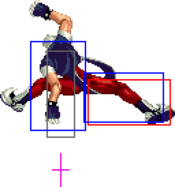
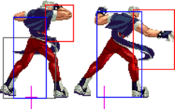
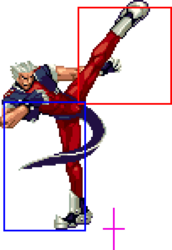
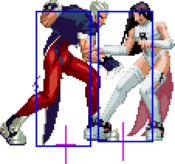
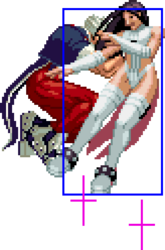
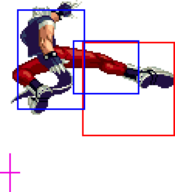
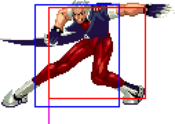
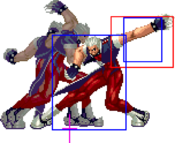
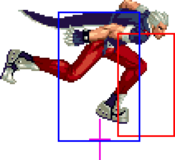
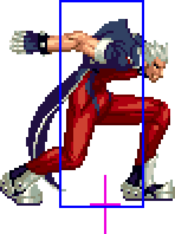
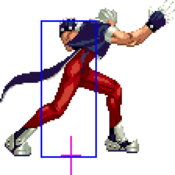
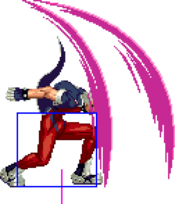
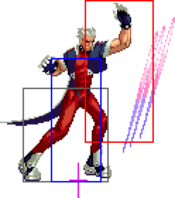
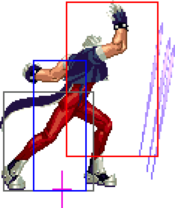
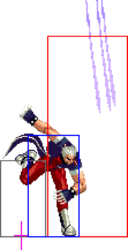
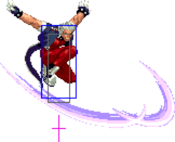
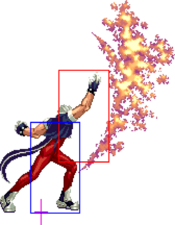
(added video) |
No edit summary |
||
| Line 4: | Line 4: | ||
<youtube>xXbQtFoPH44</youtube></center> | <youtube>xXbQtFoPH44</youtube></center> | ||
== | ==Movelist== | ||
====Impact==== | |||
[[File:Snka.gif]][[File:Snka.gif]][[File:Snkc.gif]][[File:Snkc.gif]][[File:Snkd.gif]] | |||
''(Air)'' [[File:Snka.gif]][[File:Snkb.gif]][[File:Snkc.gif]][[File:Snkd.gif]][[File:Snkd.gif]] | |||
==Special Moves== | ====Command Normals==== | ||
{{f}}[[File:Snka.gif]] | |||
: | |||
{{df}}[[File:Snkb.gif]] | |||
====Special Moves==== | |||
{{hcf}}[[File:Snka.gif]]/[[File:Snkc.gif]] - The Ripper | |||
{{dp}}[[File:Snkb.gif]]/[[File:Snkd.gif]] - Air Cut | |||
{{qcb}}[[File:Snka.gif]]/[[File:Snkc.gif]]~{{qcb}}[[File:Snka.gif]]/[[File:Snkc.gif]]~{{qcb}}[[File:Snka.gif]]/[[File:Snkc.gif]] - Cold Steel | |||
''(Air)'' {{qcb}}[[File:Snka.gif]]/[[File:Snkc.gif]] - Cutting Edge | |||
====Super Moves==== | |||
{{qcf}}{{qcf}}[[File:Snkb.gif]]/[[File:Snkd.gif]] ''(Hold [[File:Snkd.gif]])'' - Bloody Mess | |||
==Close Normals== | |||
{{MoveData | |||
|image=ROTD_Oni_clA.png | |||
|caption= | |||
|name=cl.A | |||
|data= | |||
{{AttackData-ROTD | |||
|Damage=6 | |||
|Guard=Mid | |||
|Stun=2 | |||
|Cancel=Chain, Command, Special | |||
|Startup=4 | |||
|Active=5 | |||
|Recovery=5 | |||
|Adv. Hit=+1 | |||
|Adv. Guard=0 | |||
|description= | |||
}} | |||
}} | |||
{{MoveData | |||
|image=ROTD_Oni_clB.png | |||
|caption= | |||
|name=cl.B | |||
|data= | |||
{{AttackData-ROTD | |||
|Damage=8 | |||
|Guard=Mid | |||
|Stun=4 | |||
|Cancel=Command, Special | |||
|Startup=5 | |||
|Active=3 | |||
|Recovery=8 | |||
|Adv. Hit=0 | |||
|Adv. Guard=-1 | |||
|description= | |||
}} | |||
}} | |||
{{MoveData | |||
|image=ROTD_Oni_clC.png | |||
|caption= | |||
|name=cl.C | |||
|data= | |||
{{AttackData-ROTD | |||
|Damage=16 (6+10) | |||
|Guard=Mid | |||
|Stun=8 | |||
|Cancel=Command, Special | |||
|Startup=6 | |||
|Active=1+(1)+4 | |||
|Recovery=15 | |||
|Adv. Hit=-3/0 | |||
|Adv. Guard=-6 | |||
|description=Oni's fastest heavy. | |||
}} | |||
}} | |||
{{MoveData | |||
|image=ROTD_Oni_clD.png | |||
|caption= | |||
|name=cl.D | |||
|data= | |||
{{AttackData-ROTD | |||
|Damage=18 (8+10) | |||
|Guard=Mid | |||
|Stun=10 | |||
|Cancel=Command, Special | |||
|Startup=7 | |||
|Active=2+(2)+4 | |||
|Recovery=24 | |||
|Adv. Hit=-12/-9 | |||
|Adv. Guard=-15 | |||
|description=Extremely generous proximity window. | |||
}} | |||
}} | |||
==Standing Normals== | |||
{{MoveData | |||
|image=ROTD_Oni_stA.png | |||
|caption= | |||
|name=st.A | |||
|data= | |||
{{AttackData-ROTD | |||
|Damage=8 | |||
|Guard=Mid | |||
|Stun=2 | |||
|Cancel=Chain, Command, Special | |||
|Startup=4 | |||
|Active=2 | |||
|Recovery=11 | |||
|Adv. Hit=-2 | |||
|Adv. Guard=-3 | |||
|description= | |||
}} | |||
}} | |||
{{MoveData | |||
|image=ROTD_Oni_stB.png | |||
|caption= | |||
|name=st.B | |||
|data= | |||
{{AttackData-ROTD | |||
|Damage=10 | |||
|Guard=Mid | |||
|Stun=5 | |||
|Cancel= | |||
|Startup=5 | |||
|Active=3 | |||
|Recovery=13 | |||
|Adv. Hit=-5 | |||
|Adv. Guard=-6 | |||
|description= | |||
}} | |||
}} | |||
{{MoveData | |||
|image=ROTD_Oni_stC.png | |||
|caption= | |||
|name=st.C | |||
|data= | |||
{{AttackData-ROTD | |||
|Damage=18 | |||
|Guard=Mid | |||
|Stun=10 | |||
|Cancel= | |||
|Startup=12 | |||
|Active=4 | |||
|Recovery=13 | |||
|Adv. Hit=-1/+2 | |||
|Adv. Guard=-4 | |||
|description= | |||
}} | |||
}} | |||
{{MoveData | |||
|image=ROTD_Oni_stD.png | |||
|caption= | |||
|name=st.D | |||
|data= | |||
{{AttackData-ROTD | |||
|Damage=20 | |||
|Guard=Mid | |||
|Stun=12 | |||
|Cancel= | |||
|Startup=15 | |||
|Active=4 | |||
|Recovery=21 | |||
|Adv. Hit=-9/-6 | |||
|Adv. Guard=-12 | |||
|description=Moves Oni over halfscreen. The hitbox both reaches high and hits all crouchers, but it can be punished on standing hit by long-ranged sweeps. | |||
}} | |||
}} | |||
==Crouching Normals== | |||
{{MoveData | |||
|image=ROTD_Oni_crA.png | |||
|caption= | |||
|name=cr.A | |||
|data= | |||
{{AttackData-ROTD | |||
|Damage=6 | |||
|Guard=Mid | |||
|Stun=2 | |||
|Cancel=Chain, Command, Special | |||
|Startup=4 | |||
|Active=4 | |||
|Recovery=5 | |||
|Adv. Hit=+2 | |||
|Adv. Guard=+1 | |||
|description= | |||
}} | |||
}} | |||
{{MoveData | |||
|image=ROTD_Oni_crB.png | |||
|caption= | |||
|name=cr.B | |||
|data= | |||
{{AttackData-ROTD | |||
|Damage=8 | |||
|Guard=Low | |||
|Stun=4 | |||
|Cancel=Chain, Command, Special | |||
|Startup=4 | |||
|Active=2 | |||
|Recovery=6 | |||
|Adv. Hit=+3 | |||
|Adv. Guard=+2 | |||
|description= | |||
}} | |||
}} | |||
{{MoveData | |||
|image=ROTD_Oni_crC.png | |||
|caption= | |||
|name=cr.C | |||
|data= | |||
{{AttackData-ROTD | |||
|Damage=16 | |||
|Guard=Mid | |||
|Stun=8 | |||
|Cancel=Command, Special | |||
|Startup=7 | |||
|Active=5 | |||
|Recovery=11 | |||
|Adv. Hit=0/+3 | |||
|Adv. Guard=-3 | |||
|description=Oni's ideal heavy to use for combos; being a single-hitter, it adds a little less to scaling. | |||
}} | |||
}} | |||
{{MoveData | |||
|image=ROTD_Oni_crD.png | |||
|caption= | |||
|name=cr.D | |||
|data= | |||
{{AttackData-ROTD | |||
|Damage=20 | |||
|Guard=Low | |||
|Stun=15 | |||
|Cancel= | |||
|Startup=7 | |||
|Active=4 | |||
|Recovery=17 | |||
|Adv. Hit=SKD | |||
|Adv. Guard=-4 | |||
|description= | |||
}} | |||
}} | |||
==Jumping Normals== | |||
{{MoveData | |||
|image=ROTD_Oni_jA.png | |||
|caption= | |||
|name=j.A | |||
|data= | |||
{{AttackData-ROTD | |||
|Damage=8 | |||
|Guard=High/Air | |||
|Stun=6 | |||
|Cancel=Special | |||
|Startup=3 | |||
|Active=16 | |||
|Recovery= | |||
|Adv. Hit= | |||
|Adv. Guard= | |||
|description= | |||
}} | |||
}} | |||
{{MoveData | |||
|image=ROTD_Oni_jB.png | |||
|caption= | |||
|name=j.B | |||
|data= | |||
{{AttackData-ROTD | |||
|Damage=10 | |||
|Guard=High/Air | |||
|Stun=8 | |||
|Cancel=Special | |||
|Startup=4 | |||
|Active=16 | |||
|Recovery= | |||
|Adv. Hit= | |||
|Adv. Guard= | |||
|description= | |||
}} | |||
}} | |||
{{MoveData | |||
|image=ROTD_Oni_jC.png | |||
|caption= | |||
|name=j.C | |||
|data= | |||
{{AttackData-ROTD | |||
|Damage=14 | |||
|Guard=High/Air | |||
|Stun=12 | |||
|Cancel=Special | |||
|Startup=6 | |||
|Active=12 | |||
|Recovery= | |||
|Adv. Hit= | |||
|Adv. Guard= | |||
|description= | |||
}} | |||
}} | |||
{{MoveData | |||
|image=ROTD_Oni_jD.png | |||
|caption= | |||
|name=j.D | |||
|data= | |||
{{AttackData-ROTD | |||
|Damage=16 | |||
|Guard=High/Air | |||
|Stun=12 | |||
|Cancel=Special | |||
|Startup=7 | |||
|Active=10 | |||
|Recovery= | |||
|Adv. Hit= | |||
|Adv. Guard= | |||
|description= | |||
}} | |||
}} | |||
==Command Normals== | |||
{{MoveData | |||
|image=ROTD_Oni_6A.png | |||
|caption= | |||
|name=6A | |||
|data= | |||
{{AttackData-ROTD | |||
|Damage=12 (6+6) | |||
|Guard=Mid | |||
|Stun=14 (7+7) | |||
|Cancel=Special | |||
|Startup=15 | |||
|Active=2+(2)+4 | |||
|Recovery=25 | |||
|Adv. Hit=-5/-1 | |||
|Adv. Guard=-12 | |||
|description=Spinning back fist. Hits twice and is a great tool for combos. | |||
}} | |||
}} | |||
{{MoveData | |||
|image=ROTD_Oni_3B.png | |||
|caption= | |||
|name=3B | |||
|data= | |||
{{AttackData-ROTD | |||
|Damage=10 | |||
|Guard=Mid | |||
|Stun=5 | |||
|Cancel=Special | |||
|Startup=10 | |||
|Active=10 | |||
|Recovery=45 | |||
|Adv. Hit=SKD | |||
|Adv. Guard=-38 | |||
|description=High extended kick, decent anti-air but is best used to finish Impact moves with. Oni can link into this after he lands from Air Impact. | |||
}} | |||
}} | |||
==Throws== | |||
{{MoveData | |||
|image=ROTD_Oni_throw.png | |||
|caption= | |||
|name=4/6C | |||
|data= | |||
{{AttackData-ROTD | |||
|Damage=20 | |||
|Guard= | |||
|Stun=0 | |||
|Cancel= | |||
|Startup=1 | |||
|Active=1 | |||
|Recovery= | |||
|Adv. Hit=SKD | |||
|Adv. Guard= | |||
|description=Oni throws the opponent fullscreen. | |||
}} | |||
}} | |||
{{MoveData | |||
|image=ROTD_Oni_airthrow.png | |||
|caption= | |||
|name=j.6C | |||
|data= | |||
{{AttackData-ROTD | |||
|Damage=20 | |||
|Guard= | |||
|Stun=0 | |||
|Cancel= | |||
|Startup=1 | |||
|Active=1 | |||
|Recovery= | |||
|Adv. Hit=SKD | |||
|Adv. Guard= | |||
|description=Oni kneedrops the opponent as he falls straight down. Great air-to-air option. | |||
}} | |||
}} | |||
==System== | |||
{{MoveData | |||
|image=ROTD_Oni_BC.png | |||
|caption=BC | |||
|name=Tag-In | |||
|data= | |||
{{AttackData-ROTD | |||
|Damage=16 | |||
|Guard=Mid | |||
|Stun=0 | |||
|Cancel=Command, Special | |||
|Startup=6 | |||
|Active=2 | |||
|Recovery=25 | |||
|Adv. Hit=SKD | |||
|Adv. Guard=-10 | |||
|description= | |||
}} | |||
}} | |||
{{MoveData | |||
|image=ROTD_Oni_236236D.png | |||
|caption=gcCD | |||
|name=Guard Cancel | |||
|data= | |||
{{AttackData-ROTD | |||
|Damage=10 | |||
|Guard=Mid | |||
|Stun=10 | |||
|Cancel= | |||
|Startup=13 | |||
|Active=8 | |||
|Recovery=17 | |||
|Adv. Hit=SKD | |||
|Adv. Guard=-8 | |||
|description= | |||
}} | |||
}} | |||
{{MoveData | |||
|image=ROTD_Oni_CD.png | |||
|caption=CD | |||
|name=First Impact | |||
|data= | |||
{{AttackData-ROTD | |||
|Damage=5+5×5 | |||
|Guard=Mid | |||
|Stun=0 | |||
|Cancel=Hit: Command, Special | |||
|Startup=15 | |||
|Active=4 | |||
|Recovery=29 | |||
|Adv. Hit=SKD | |||
|Adv. Guard=-16 | |||
|description=The range is very good and it hits at an upward angle, which lets it catch approaches from midrange. | |||
}} | |||
}} | |||
{{MoveData | |||
|image=ROTD_Oni_run.png | |||
|image2=ROTD_Oni_236BC.png | |||
|caption=236CD | |||
|caption2=236CD~236CD | |||
|name=Duplex Attack | |||
|data= | |||
{{AttackData-ROTD | |||
|Damage=30 | |||
|Guard=Mid | |||
|Stun=0 | |||
|Cancel= | |||
|Startup=3 | |||
|Active=60 | |||
|Recovery=29 | |||
|Adv. Hit=SKD | |||
|Adv. Guard=-13 | |||
|description=Your partner must be alive and able to tag in. Oni is one of two characters who can cancel into his Duplex, the other being Pepe. | |||
}} | |||
{{AttackData-ROTD | |||
|Damage=27 (27 with Cassandra) | |||
|Guard= | |||
|Stun=0 | |||
|Cancel= | |||
|Startup= | |||
|Active= | |||
|Recovery= | |||
|Adv. Hit=SKD | |||
|Adv. Guard= | |||
|description=Follow up with another 236BC for more damage. Costs an extra bar. | |||
}} | |||
}} | |||
==Special Moves== | |||
{{MoveData | |||
|image=ROTD_Oni_41236P.png | |||
|caption=41236A/C | |||
|name=The Ripper | |||
|data= | |||
{{AttackData-ROTD | |||
|Damage=20 | |||
|Guard= | |||
|Stun=0 | |||
|Cancel= | |||
|Startup=35 | |||
|Active=7 | |||
|Recovery=27 | |||
|Adv. Hit=SKD | |||
|Adv. Guard= | |||
|description=A ranged command grab designed to synergise with rekka staggers, but the startup, though low key, is still quite long. It also only deals as much damage as a normal throw, so it's not the most rewarding move on hit. Still, it goes halfscreen and stays out for a decent amount of time, so it has its perks. Pat yourself on the back if this catches a tag-in. | |||
}} | |||
}} | |||
{{MoveData | |||
|image=ROTD_Oni_623P.png | |||
|caption=623A/C | |||
|name=Air Cut | |||
|data= | |||
{{AttackData-ROTD | |||
|Damage=18 | |||
|Guard=Mid/Air | |||
|Stun=4 | |||
|Cancel= | |||
|Startup=11 (1-20 upper invuln) | |||
|Active=? | |||
|Recovery=42-? | |||
|Adv. Hit=SKD | |||
|Adv. Guard=-2 | |||
|description=Can be airblocked and not a true reversal, but for an anti-air, it's huge and really safe. Keeping with his theme of staggers, Oni can let it rip again to catch a poke, but it can be punished after a dodge. This move doesn't have hitboxes or active frames yet because it's a projectile, which means it both destroys other fireballs and it sticks out and wins in trades against pokes. | |||
}} | |||
{{AttackData-ROTD | |||
|Damage=20 (4+16) | |||
|Guard=Mid/Air | |||
|Stun=6 (4+2) | |||
|Cancel= | |||
|Startup=19 (1-29 upper invuln) | |||
|Active=? | |||
|Recovery=43-? | |||
|Adv. Hit=SKD | |||
|Adv. Guard=0 | |||
|description=Slower as an anti-air, but stronger and more reliable in juggle combos. | |||
}} | |||
}} | |||
{{MoveData | |||
|image=ROTD_Oni_214P_1.png | |||
|image2=ROTD_Oni_214P_2.png | |||
|image3=ROTD_Oni_214P_3.png | |||
|caption=214A/C | |||
|caption2=214A/C~214A/C | |||
|caption3=214A/C~214A/C~214A/C | |||
|name=Cold Steel | |||
|data= | |||
{{AttackData-ROTD | |||
|Damage=10 | |||
|Guard=Mid | |||
|Stun=4 | |||
|Cancel= | |||
|Startup=14 (1-11 upper invuln) | |||
|Active=4 | |||
|Recovery=21 | |||
|Adv. Hit=-9/-6 | |||
|Adv. Guard=-12 | |||
|description=The light version of Oni's first rekka. Typically, its damage and corner carry is used to end combos on the ground, but Oni can delay each rekka for a trap. On their own, they can all be punished. | |||
}} | |||
{{AttackData-ROTD | |||
|Damage=10 | |||
|Guard=Mid | |||
|Stun=4 | |||
|Cancel= | |||
|Startup=21 (1-18 upper invuln) | |||
|Active=5 | |||
|Recovery=23 | |||
|Adv. Hit=-12/-9 | |||
|Adv. Guard=-15 | |||
|description=The heavy version travels further, but is slower and even less safe. Only the first rekka has differences between light and heavy. | |||
}} | |||
{{AttackData-ROTD | |||
|Damage=5 | |||
|Guard=Mid | |||
|Stun=4 | |||
|Cancel= | |||
|Startup=7 | |||
|Active=4 | |||
|Recovery=16 | |||
|Adv. Hit=-4/-1 | |||
|Adv. Guard=-7 | |||
|description=Second rekka. | |||
}} | |||
{{AttackData-ROTD | |||
|Damage=10 | |||
|Guard=Mid | |||
|Stun=4 | |||
|Cancel= | |||
|Startup=8 | |||
|Active=4 | |||
|Recovery=31 | |||
|Adv. Hit=SKD | |||
|Adv. Guard=-18 | |||
|description=Third rekka. | |||
}} | |||
}} | |||
{{MoveData | |||
|image=ROTD_Oni_j214P.png | |||
|caption=j.214A/C | |||
|name=Cutting Edge | |||
|data= | |||
{{AttackData-ROTD | |||
|Damage=18 | |||
|Guard=Mid/Air | |||
|Stun=8 | |||
|Cancel= | |||
|Startup=13 | |||
|Active=? | |||
|Recovery= | |||
|Adv. Hit=SKD | |||
|Adv. Guard= | |||
|description=Unpunishable on the ground. Use this to make your jump-ins safe. If you whiff this move, it's easy to punish. | |||
}} | |||
{{AttackData-ROTD | |||
|Damage= | |||
|Guard=Mid, Mid/Air | |||
|Stun=10 (8+2) | |||
|Cancel= | |||
|Startup=22 | |||
|Active=? | |||
|Recovery= | |||
|Adv. Hit=SKD | |||
|Adv. Guard= | |||
|description=Hits twice, second hit is air unblockable. Great option for an air-to-air if you cannot air throw. | |||
}} | |||
}} | |||
==Super Moves== | ==Super Moves== | ||
{{MoveData | |||
|image=ROTD_Oni_236236K.png | |||
|image2=ROTD_Oni_236236D.png | |||
|caption=236236B/D | |||
|caption2=236236]D[ | |||
|name=Bloody Mess | |||
|data= | |||
{{AttackData-ROTD | |||
|Damage=40 | |||
|Guard=Mid | |||
|Stun=4 | |||
|Cancel= | |||
|Startup=10 (1-7 invuln) | |||
|Active=6 | |||
|Recovery=41 | |||
|Adv. Hit=SKD | |||
|Adv. Guard=-5 | |||
|description=An anti-air and pseudo reversal, but mainly used in combos as with most supers. The flames don't have a hitbox. | |||
}} | |||
{{AttackData-ROTD | |||
|Damage=65 (5+5+20+35) | |||
|Guard=Mid, Guard Crush | |||
|Stun=4×4 | |||
|Cancel= | |||
|Startup=8 (1-7 invuln) | |||
|Active=6+(52+[113]+5)+16 | |||
|Recovery=17 | |||
|Adv. Hit=SKD | |||
|Adv. Guard=-2/-1 (Guard Crush) | |||
|description=This version has an extra part where Oni juggles with a forward stab, which can be delayed by holding D. This extra hit will always cause a guard crush, but you only get a combo at farther ranges. | |||
}} | |||
}} | |||
[[Category:Rage of the Dragons]] | [[Category:Rage of the Dragons]] | ||
{{Rage Of The Dragons}} | {{Rage Of The Dragons}} | ||
Revision as of 06:00, 4 November 2024
Movelist
Impact
Command Normals
Special Moves
Super Moves
Close Normals
| Damage | Guard | Stun | Cancel | |
|---|---|---|---|---|
| 6 | Mid | 2 | Chain, Command, Special | |
| Startup | Active | Recovery | Adv. Hit | Adv. Guard |
| 4 | 5 | 5 | +1 | 0 |
| Damage | Guard | Stun | Cancel | |
|---|---|---|---|---|
| 8 | Mid | 4 | Command, Special | |
| Startup | Active | Recovery | Adv. Hit | Adv. Guard |
| 5 | 3 | 8 | 0 | -1 |
| Damage | Guard | Stun | Cancel | ||
|---|---|---|---|---|---|
| 16 (6+10) | Mid | 8 | Command, Special | ||
| Startup | Active | Recovery | Adv. Hit | Adv. Guard | |
| 6 | 1+(1)+4 | 15 | -3/0 | -6 | |
|
Oni's fastest heavy. | |||||
| Damage | Guard | Stun | Cancel | ||
|---|---|---|---|---|---|
| 18 (8+10) | Mid | 10 | Command, Special | ||
| Startup | Active | Recovery | Adv. Hit | Adv. Guard | |
| 7 | 2+(2)+4 | 24 | -12/-9 | -15 | |
|
Extremely generous proximity window. | |||||
Standing Normals
| Damage | Guard | Stun | Cancel | |
|---|---|---|---|---|
| 8 | Mid | 2 | Chain, Command, Special | |
| Startup | Active | Recovery | Adv. Hit | Adv. Guard |
| 4 | 2 | 11 | -2 | -3 |
| Damage | Guard | Stun | Cancel | |
|---|---|---|---|---|
| 10 | Mid | 5 | - | |
| Startup | Active | Recovery | Adv. Hit | Adv. Guard |
| 5 | 3 | 13 | -5 | -6 |
| Damage | Guard | Stun | Cancel | |
|---|---|---|---|---|
| 18 | Mid | 10 | - | |
| Startup | Active | Recovery | Adv. Hit | Adv. Guard |
| 12 | 4 | 13 | -1/+2 | -4 |
| Damage | Guard | Stun | Cancel | ||
|---|---|---|---|---|---|
| 20 | Mid | 12 | - | ||
| Startup | Active | Recovery | Adv. Hit | Adv. Guard | |
| 15 | 4 | 21 | -9/-6 | -12 | |
|
Moves Oni over halfscreen. The hitbox both reaches high and hits all crouchers, but it can be punished on standing hit by long-ranged sweeps. | |||||
Crouching Normals
| Damage | Guard | Stun | Cancel | |
|---|---|---|---|---|
| 6 | Mid | 2 | Chain, Command, Special | |
| Startup | Active | Recovery | Adv. Hit | Adv. Guard |
| 4 | 4 | 5 | +2 | +1 |
| Damage | Guard | Stun | Cancel | |
|---|---|---|---|---|
| 8 | Low | 4 | Chain, Command, Special | |
| Startup | Active | Recovery | Adv. Hit | Adv. Guard |
| 4 | 2 | 6 | +3 | +2 |
| Damage | Guard | Stun | Cancel | ||
|---|---|---|---|---|---|
| 16 | Mid | 8 | Command, Special | ||
| Startup | Active | Recovery | Adv. Hit | Adv. Guard | |
| 7 | 5 | 11 | 0/+3 | -3 | |
|
Oni's ideal heavy to use for combos; being a single-hitter, it adds a little less to scaling. | |||||
| Damage | Guard | Stun | Cancel | |
|---|---|---|---|---|
| 20 | Low | 15 | - | |
| Startup | Active | Recovery | Adv. Hit | Adv. Guard |
| 7 | 4 | 17 | SKD | -4 |
Jumping Normals
| Damage | Guard | Stun | Cancel | |
|---|---|---|---|---|
| 8 | High/Air | 6 | Special | |
| Startup | Active | Recovery | Adv. Hit | Adv. Guard |
| 3 | 16 | - | - | - |
| Damage | Guard | Stun | Cancel | |
|---|---|---|---|---|
| 10 | High/Air | 8 | Special | |
| Startup | Active | Recovery | Adv. Hit | Adv. Guard |
| 4 | 16 | - | - | - |
| Damage | Guard | Stun | Cancel | |
|---|---|---|---|---|
| 14 | High/Air | 12 | Special | |
| Startup | Active | Recovery | Adv. Hit | Adv. Guard |
| 6 | 12 | - | - | - |
| Damage | Guard | Stun | Cancel | |
|---|---|---|---|---|
| 16 | High/Air | 12 | Special | |
| Startup | Active | Recovery | Adv. Hit | Adv. Guard |
| 7 | 10 | - | - | - |
Command Normals
| Damage | Guard | Stun | Cancel | ||
|---|---|---|---|---|---|
| 12 (6+6) | Mid | 14 (7+7) | Special | ||
| Startup | Active | Recovery | Adv. Hit | Adv. Guard | |
| 15 | 2+(2)+4 | 25 | -5/-1 | -12 | |
|
Spinning back fist. Hits twice and is a great tool for combos. | |||||
| Damage | Guard | Stun | Cancel | ||
|---|---|---|---|---|---|
| 10 | Mid | 5 | Special | ||
| Startup | Active | Recovery | Adv. Hit | Adv. Guard | |
| 10 | 10 | 45 | SKD | -38 | |
|
High extended kick, decent anti-air but is best used to finish Impact moves with. Oni can link into this after he lands from Air Impact. | |||||
Throws
| Damage | Guard | Stun | Cancel | ||
|---|---|---|---|---|---|
| 20 | - | 0 | - | ||
| Startup | Active | Recovery | Adv. Hit | Adv. Guard | |
| 1 | 1 | - | SKD | - | |
|
Oni throws the opponent fullscreen. | |||||
| Damage | Guard | Stun | Cancel | ||
|---|---|---|---|---|---|
| 20 | - | 0 | - | ||
| Startup | Active | Recovery | Adv. Hit | Adv. Guard | |
| 1 | 1 | - | SKD | - | |
|
Oni kneedrops the opponent as he falls straight down. Great air-to-air option. | |||||
System
| Damage | Guard | Stun | Cancel | |
|---|---|---|---|---|
| 16 | Mid | 0 | Command, Special | |
| Startup | Active | Recovery | Adv. Hit | Adv. Guard |
| 6 | 2 | 25 | SKD | -10 |
| Damage | Guard | Stun | Cancel | |
|---|---|---|---|---|
| 10 | Mid | 10 | - | |
| Startup | Active | Recovery | Adv. Hit | Adv. Guard |
| 13 | 8 | 17 | SKD | -8 |
| Damage | Guard | Stun | Cancel | ||
|---|---|---|---|---|---|
| 5+5×5 | Mid | 0 | Hit: Command, Special | ||
| Startup | Active | Recovery | Adv. Hit | Adv. Guard | |
| 15 | 4 | 29 | SKD | -16 | |
|
The range is very good and it hits at an upward angle, which lets it catch approaches from midrange. | |||||
| Damage | Guard | Stun | Cancel | ||
|---|---|---|---|---|---|
| 30 | Mid | 0 | - | ||
| Startup | Active | Recovery | Adv. Hit | Adv. Guard | |
| 3 | 60 | 29 | SKD | -13 | |
|
Your partner must be alive and able to tag in. Oni is one of two characters who can cancel into his Duplex, the other being Pepe. | |||||
| Damage | Guard | Stun | Cancel | ||
| 27 (27 with Cassandra) | - | 0 | - | ||
| Startup | Active | Recovery | Adv. Hit | Adv. Guard | |
| - | - | - | SKD | - | |
|
Follow up with another 236BC for more damage. Costs an extra bar. | |||||
Special Moves
| Damage | Guard | Stun | Cancel | ||
|---|---|---|---|---|---|
| 20 | - | 0 | - | ||
| Startup | Active | Recovery | Adv. Hit | Adv. Guard | |
| 35 | 7 | 27 | SKD | - | |
|
A ranged command grab designed to synergise with rekka staggers, but the startup, though low key, is still quite long. It also only deals as much damage as a normal throw, so it's not the most rewarding move on hit. Still, it goes halfscreen and stays out for a decent amount of time, so it has its perks. Pat yourself on the back if this catches a tag-in. | |||||
| Damage | Guard | Stun | Cancel | ||
|---|---|---|---|---|---|
| 18 | Mid/Air | 4 | - | ||
| Startup | Active | Recovery | Adv. Hit | Adv. Guard | |
| 11 (1-20 upper invuln) | ? | 42-? | SKD | -2 | |
|
Can be airblocked and not a true reversal, but for an anti-air, it's huge and really safe. Keeping with his theme of staggers, Oni can let it rip again to catch a poke, but it can be punished after a dodge. This move doesn't have hitboxes or active frames yet because it's a projectile, which means it both destroys other fireballs and it sticks out and wins in trades against pokes. | |||||
| Damage | Guard | Stun | Cancel | ||
| 20 (4+16) | Mid/Air | 6 (4+2) | - | ||
| Startup | Active | Recovery | Adv. Hit | Adv. Guard | |
| 19 (1-29 upper invuln) | ? | 43-? | SKD | 0 | |
|
Slower as an anti-air, but stronger and more reliable in juggle combos. | |||||
| Damage | Guard | Stun | Cancel | ||
|---|---|---|---|---|---|
| 10 | Mid | 4 | - | ||
| Startup | Active | Recovery | Adv. Hit | Adv. Guard | |
| 14 (1-11 upper invuln) | 4 | 21 | -9/-6 | -12 | |
|
The light version of Oni's first rekka. Typically, its damage and corner carry is used to end combos on the ground, but Oni can delay each rekka for a trap. On their own, they can all be punished. | |||||
| Damage | Guard | Stun | Cancel | ||
| 10 | Mid | 4 | - | ||
| Startup | Active | Recovery | Adv. Hit | Adv. Guard | |
| 21 (1-18 upper invuln) | 5 | 23 | -12/-9 | -15 | |
|
The heavy version travels further, but is slower and even less safe. Only the first rekka has differences between light and heavy. | |||||
| Damage | Guard | Stun | Cancel | ||
| 5 | Mid | 4 | - | ||
| Startup | Active | Recovery | Adv. Hit | Adv. Guard | |
| 7 | 4 | 16 | -4/-1 | -7 | |
|
Second rekka. | |||||
| Damage | Guard | Stun | Cancel | ||
| 10 | Mid | 4 | - | ||
| Startup | Active | Recovery | Adv. Hit | Adv. Guard | |
| 8 | 4 | 31 | SKD | -18 | |
|
Third rekka. | |||||
| Damage | Guard | Stun | Cancel | ||
|---|---|---|---|---|---|
| 18 | Mid/Air | 8 | - | ||
| Startup | Active | Recovery | Adv. Hit | Adv. Guard | |
| 13 | ? | - | SKD | - | |
|
Unpunishable on the ground. Use this to make your jump-ins safe. If you whiff this move, it's easy to punish. | |||||
| Damage | Guard | Stun | Cancel | ||
| - | Mid, Mid/Air | 10 (8+2) | - | ||
| Startup | Active | Recovery | Adv. Hit | Adv. Guard | |
| 22 | ? | - | SKD | - | |
|
Hits twice, second hit is air unblockable. Great option for an air-to-air if you cannot air throw. | |||||
Super Moves
| Damage | Guard | Stun | Cancel | ||
|---|---|---|---|---|---|
| 40 | Mid | 4 | - | ||
| Startup | Active | Recovery | Adv. Hit | Adv. Guard | |
| 10 (1-7 invuln) | 6 | 41 | SKD | -5 | |
|
An anti-air and pseudo reversal, but mainly used in combos as with most supers. The flames don't have a hitbox. | |||||
| Damage | Guard | Stun | Cancel | ||
| 65 (5+5+20+35) | Mid, Guard Crush | 4×4 | - | ||
| Startup | Active | Recovery | Adv. Hit | Adv. Guard | |
| 8 (1-7 invuln) | 6+(52+[113]+5)+16 | 17 | SKD | -2/-1 (Guard Crush) | |
|
This version has an extra part where Oni juggles with a forward stab, which can be delayed by holding D. This extra hit will always cause a guard crush, but you only get a combo at farther ranges. | |||||
