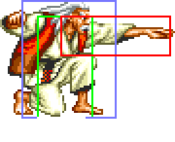
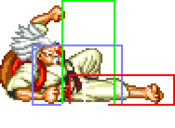
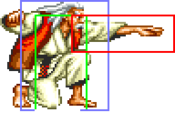
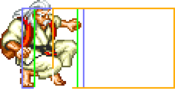
m (added video) |
(modernized movelist and added some stun combos) |
||
| Line 22: | Line 22: | ||
<center>'''Move List Showcase''' <br> | <center>'''Move List Showcase''' <br> | ||
<youtube>cRqBqDGf770</youtube></center> | <youtube>cRqBqDGf770</youtube></center> | ||
=== | ===Close Standing Normals=== | ||
{| | |||
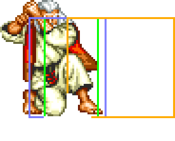
|- | ===== <span class="invisible-header">c5A</span> ===== | ||
| '' | <font style="visibility:hidden" size="0"></font> | ||
|- | {{MoveData | ||
| | |image=FFS_Jubei_c5A.png | ||
|- | |subtitle= | ||
| | |caption= | ||
|- | |name=c5A | ||
| Tawara Nage || | |data= | ||
| | {{AttackData-FFS | ||
| Benkei Nakashi || | |Damage=6 | ||
| | |Stun=2 | ||
| Tomoe Nage | | |Guard=Mid | ||
|- | |Startup=3 | ||
| | |Active=4 | ||
|- | |Recovery=4 | ||
|} | |Total=10 | ||
|Hit Adv=+8 | |||
|Block Adv=+9 | |||
|Property=Cancel | |||
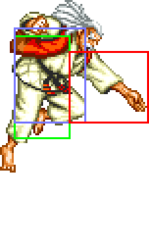
|description= * Extremely fast and advantageous. | |||
}} | |||
}} | |||
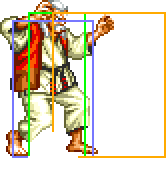
===== <span class="invisible-header">c5B</span> ===== | |||
<font style="visibility:hidden" size="0"></font> | |||
{{MoveData | |||
|image=FFS_Jubei_c5B.png | |||
|subtitle= | |||
|caption= | |||
|name=c5B | |||
|data= | |||
{{AttackData-FFS | |||
|Damage=8 | |||
|Stun=2 | |||
|Guard=Mid | |||
|Startup=4 | |||
|Active=7 | |||
|Recovery=5 | |||
|Total=15 | |||
|Hit Adv=+4 | |||
|Block Adv=+5 | |||
|Property=Cancel | |||
|description= | |||
}} | |||
}} | |||
===== <span class="invisible-header">c5C</span> ===== | |||
<font style="visibility:hidden" size="0"></font> | |||
{{MoveData | |||
|image=FFS_Jubei_c5C.png | |||
|subtitle= | |||
|caption= | |||
|name=c5C | |||
|data= | |||
{{AttackData-FFS | |||
|Damage=14 | |||
|Stun=4 | |||
|Guard=Mid | |||
|Startup=8 | |||
|Active=8 | |||
|Recovery=12 | |||
|Total=27 | |||
|Hit Adv=+4 | |||
|Block Adv=+3 | |||
|Property=Cancel | |||
|description= | |||
}} | |||
}} | |||
===== <span class="invisible-header">c5D</span> ===== | |||
<font style="visibility:hidden" size="0"></font> | |||
{{MoveData | |||
|image=FFS_Jubei_c5D.png | |||
|subtitle= | |||
|caption= | |||
|name=c5D | |||
|data= | |||
{{AttackData-FFS | |||
|Damage=16 | |||
|Stun=4 | |||
|Guard=Mid | |||
|Startup=8 | |||
|Active=11 | |||
|Recovery=8 | |||
|Total=26 | |||
|Hit Adv=+5 | |||
|Block Adv=+4 | |||
|Property=Cancel | |||
|description= | |||
}} | |||
}} | |||
===Far Standing Normals=== | |||
===== <span class="invisible-header">f5A</span> ===== | |||
<font style="visibility:hidden" size="0"></font> | |||
{{MoveData | |||
|image=FFS_Jubei_f5A.png | |||
|subtitle= | |||
|caption= | |||
|name=f5A | |||
|data= | |||
{{AttackData-FFS | |||
|Damage=5 | |||
|Stun=2 | |||
|Guard=Mid | |||
|Startup=3 | |||
|Active=4 | |||
|Recovery=4 | |||
|Total=10 | |||
|Hit Adv=+8 | |||
|Block Adv=+9 | |||
|Property=Cancel | |||
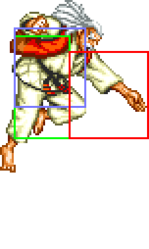
|description= * Extremely fast and advantageous. | |||
}} | |||
}} | |||
===== <span class="invisible-header">f5B</span> ===== | |||
<font style="visibility:hidden" size="0"></font> | |||
{{MoveData | |||
|image=FFS_Jubei_f5B.png | |||
|subtitle= | |||
|caption= | |||
|name=f5B | |||
|data= | |||
{{AttackData-FFS | |||
|Damage=6 | |||
|Stun=2 | |||
|Guard=Mid | |||
|Startup=4 | |||
|Active=7 | |||
|Recovery=5 | |||
|Total=15 | |||
|Hit Adv=+4 | |||
|Block Adv=+5 | |||
|Property=Cancel | |||
|description= | |||
}} | |||
}} | |||
===== <span class="invisible-header">f5C</span> ===== | |||
<font style="visibility:hidden" size="0"></font> | |||
{{MoveData | |||
|image=FFS_Jubei_f5C.png | |||
|subtitle= | |||
|caption= | |||
|name=f5C | |||
|data= | |||
{{AttackData-FFS | |||
|Damage=12 | |||
|Stun=4 | |||
|Guard=Mid | |||
|Startup=8 | |||
|Active=8 | |||
|Recovery=12 | |||
|Total=27 | |||
|Hit Adv=+3 | |||
|Block Adv=+2 | |||
|Property=/ | |||
|description= | |||
}} | |||
}} | |||
===== <span class="invisible-header">f5D</span> ===== | |||
<font style="visibility:hidden" size="0"></font> | |||
{{MoveData | |||
|image=FFS_Jubei_f5D.png | |||
|subtitle= | |||
|caption= | |||
|name=f5D | |||
|data= | |||
{{AttackData-FFS | |||
|Damage=14 | |||
|Stun=4 | |||
|Guard=Mid | |||
|Startup=8 | |||
|Active=11 | |||
|Recovery=9 | |||
|Total=27 | |||
|Hit Adv=+3 | |||
|Block Adv=+2 | |||
|Property=/ | |||
|description= | |||
}} | |||
}} | |||
===Crouching Normals=== | |||
===== <span class="invisible-header">2A</span> ===== | |||
<font style="visibility:hidden" size="0"></font> | |||
{{MoveData | |||
|image=FFS_Jubei_2A.png | |||
|subtitle= | |||
|caption= | |||
|name=2A | |||
|data= | |||
{{AttackData-FFS | |||
|Damage=5 | |||
|Stun=2 | |||
|Guard=Mid | |||
|Startup=4 | |||
|Active=4 | |||
|Recovery=5 | |||
|Total=12 | |||
|Hit Adv=+7 | |||
|Block Adv=+8 | |||
|Property=Cancel | |||
|description= * Extremely fast and advantageous. | |||
}} | |||
}} | |||
===== <span class="invisible-header">2B</span> ===== | |||
<font style="visibility:hidden" size="0"></font> | |||
{{MoveData | |||
|image=FFS_Jubei_2B.png | |||
|subtitle= | |||
|caption= | |||
|name=2B | |||
|data= | |||
{{AttackData-FFS | |||
|Damage=6 | |||
|Stun=2 | |||
|Guard=Low | |||
|Startup=5 | |||
|Active=7 | |||
|Recovery=6 | |||
|Total=17 | |||
|Hit Adv=+3 | |||
|Block Adv=+4 | |||
|Property=Cancel | |||
|description= * Extremely low profile that makes it an effective anti-air. Will often hit meaty as an anti-air, allowing it to be linked out of for deadly combos. | |||
* Can be whiffed repeatedly to dodge some projectiles like Mai's fans or Jubei's crackers while keeping charge. | |||
}} | |||
}} | |||
===== <span class="invisible-header">2C</span> ===== | |||
<font style="visibility:hidden" size="0"></font> | |||
{{MoveData | |||
|image=FFS Jubei 2C.png | |||
|subtitle= | |||
|caption= | |||
|name=2C | |||
|data= | |||
{{AttackData-FFS | |||
|Damage=12 | |||
|Stun=4 | |||
|Guard=Mid | |||
|Startup=6 | |||
|Active=8 | |||
|Recovery=10 | |||
|Total=23 | |||
|Hit Adv=+6 | |||
|Block Adv=+5 | |||
|Property=Cancel | |||
|description= | |||
}} | |||
}} | |||
===== <span class="invisible-header">2D</span> ===== | |||
<font style="visibility:hidden" size="0"></font> | |||
{{MoveData | |||
|image=FFS_Jubei_2D.png | |||
|subtitle= | |||
|caption= | |||
|name=2D | |||
|data= | |||
{{AttackData-FFS | |||
|Damage=14 | |||
|Stun=4 | |||
|Guard=Low | |||
|Startup=7 | |||
|Active=15 | |||
|Recovery=17 | |||
|Total=38 | |||
|Hit Adv=KD | |||
|Block Adv=-10 | |||
|Property=/ | |||
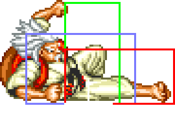
|description= * Moves Jubei forward while letting him maintain charge. | |||
* Extremely low profile that makes it an effective anti-air. | |||
* Can slide under most projectiles but has long recovery. | |||
}} | |||
}} | |||
===Air Normals=== | |||
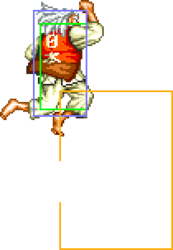
===== <span class="invisible-header">jA</span> ===== | |||
<font style="visibility:hidden" size="0"></font> | |||
{{MoveData | |||
|image=FFS_Jubei_jA.png | |||
|subtitle= | |||
|caption= | |||
|name=jA | |||
|data= | |||
{{AttackData-FFS | |||
|Damage=6 | |||
|Stun=2 | |||
|Guard=Overhead | |||
|Startup=5 | |||
|Active=∞ | |||
|Recovery= | |||
|Total= | |||
|Hit Adv= | |||
|Block Adv= | |||
|Property= | |||
|description= | |||
}} | |||
}} | |||
===== <span class="invisible-header">jB</span> ===== | |||
<font style="visibility:hidden" size="0"></font> | |||
{{MoveData | |||
|image=FFS_Jubei_jB.png | |||
|subtitle= | |||
|caption= | |||
|name=jB | |||
|data= | |||
{{AttackData-FFS | |||
|Damage=8 | |||
|Stun=2 | |||
|Guard=Overhead | |||
|Startup=5 | |||
|Active=∞ | |||
|Recovery= | |||
|Total= | |||
|Hit Adv= | |||
|Block Adv= | |||
|Property= | |||
|description= | |||
}} | |||
}} | |||
===== <span class="invisible-header">jC</span> ===== | |||
<font style="visibility:hidden" size="0"></font> | |||
{{MoveData | |||
|image=FFS_Jubei_jC.png | |||
|subtitle= | |||
|caption= | |||
|name=jC | |||
|data= | |||
{{AttackData-FFS | |||
|Damage=14 | |||
|Stun=4 | |||
|Guard=Overhead | |||
|Startup=6 | |||
|Active=17 | |||
|Recovery= | |||
|Total= | |||
|Hit Adv= | |||
|Block Adv= | |||
|Property= | |||
|description= | |||
}} | |||
}} | |||
===== <span class="invisible-header">jD</span> ===== | |||
<font style="visibility:hidden" size="0"></font> | |||
{{MoveData | |||
|image=FFS_Jubei_jD.png | |||
|subtitle= | |||
|caption= | |||
|name=jD | |||
|data= | |||
{{AttackData-FFS | |||
|version=Neutral Jump | |||
|Damage=16 | |||
|Stun=4 | |||
|Guard=Overhead | |||
|Startup=6 | |||
|Active=17 | |||
|Recovery= | |||
|Total= | |||
|Hit Adv= | |||
|Block Adv= | |||
|Property= | |||
|description= | |||
}} | |||
{{AttackData-FFS | |||
|header=no | |||
|version=Diagonal Jump | |||
|Damage=16 | |||
|Stun=4 | |||
|Guard=Overhead | |||
|Startup=7 | |||
|Active=17 | |||
|Recovery= | |||
|Total= | |||
|Hit Adv= | |||
|Block Adv= | |||
|Property= | |||
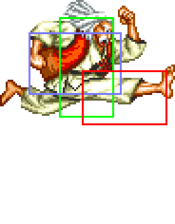
|description= * Crosses up. | |||
}} | |||
}} | |||
===System Normals=== | |||
===== <span class="invisible-header">Blowback Attack</span> ===== | |||
<font style="visibility:hidden" size="0"></font> | |||
{{MoveData | |||
|image=FFS_Jubei_CD_Front.png | |||
|image2=FFS_Jubei_CD_Back.png | |||
|subtitle= | |||
|caption= | |||
|name=Blowback Attack | |||
|input=C+D | |||
|data= | |||
{{AttackData-FFS | |||
|version=Front Lane | |||
|Damage=22 | |||
|Stun=5 | |||
|Guard=Mid | |||
|Startup=9 | |||
|Active=8 | |||
|Recovery=19 | |||
|Total=35 | |||
|Hit Adv=KD | |||
|Block Adv=-8 | |||
|Property=Cancel, Lane Shift | |||
|description= | |||
}} | |||
{{AttackData-FFS | |||
|header=no | |||
|version=Back Lane | |||
|Damage=22 | |||
|Stun=5 | |||
|Guard=Mid | |||
|Startup=16 | |||
|Active=10 | |||
|Recovery=8 | |||
|Total=33 | |||
|Hit Adv=KD | |||
|Block Adv=+1 | |||
|Property=Cancel, Lane Shift | |||
|description= | |||
}} | |||
}} | |||
===== <span class="invisible-header">Lane Attack</span> ===== | |||
<font style="visibility:hidden" size="0"></font> | |||
{{MoveData | |||
|image=FFS_Jubei_Lane_Attack.png | |||
|subtitle= | |||
|caption= | |||
|name=Lane Attack | |||
|input=A/B/C/D from opposite lane | |||
|data= | |||
{{AttackData-FFS | |||
|Damage=18 | |||
|Stun=0 | |||
|Guard=Overhead | |||
|Startup=9 | |||
|Active= | |||
|Recovery=4 | |||
|Total= | |||
|Hit Adv= | |||
|Block Adv= | |||
|Property=/ | |||
|description= * A/B will do a low and fast lane attack while C/D will do a high and slow lane attack. | |||
* Jubei has the same lane attack for punch and kick buttons. | |||
}} | |||
}} | |||
===== <span class="invisible-header">Dodge Attack</span> ===== | |||
<font style="visibility:hidden" size="0"></font> | |||
{{MoveData | |||
|image=FFS_Jubei_Dodge_Attack.png | |||
|subtitle= | |||
|caption= | |||
|name=Dodge Attack | |||
|input=6A during proximity guard | |||
|data= | |||
{{AttackData-FFS | |||
|Damage=11 | |||
|Stun=5 | |||
|Guard=Mid | |||
|Startup=10 | |||
|Active=11 | |||
|Recovery=11 | |||
|Total=31 | |||
|Hit Adv=Air(+18) | |||
|Block Adv=-3 | |||
|Property=Cancel, Upper-Body Invuln 1-20F | |||
|description= * Excellent anti-air. | |||
}} | |||
}} | |||
===Throws=== | |||
<font style="visibility:hidden" size="0">C Throw</font> | |||
{{MoveData | |||
|image=FFS_Jubei_C_Throw.png | |||
|caption= | |||
|name=Ippon Seoi | |||
|input=close 4/6C | |||
|data= | |||
{{AttackData-FFS | |||
|Damage=26 | |||
|Stun=3 | |||
|Guard=Throw | |||
|Startup=1 | |||
|Active=1 | |||
|Recovery=/ | |||
|Hit Adv=KD | |||
|Block Adv=/ | |||
|Property=/ | |||
|description= * Swaps sides. | |||
}} | |||
}} | |||
<font style="visibility:hidden" size="0">3C Throw</font> | |||
{{MoveData | |||
|image=FFS_Jubei_3C_Throw.png | |||
|caption= | |||
|name=Tawara Nage | |||
|input=close 3C | |||
|data= | |||
{{AttackData-FFS | |||
|Damage=28 | |||
|Stun=3 | |||
|Guard=Throw | |||
|Startup=1 | |||
|Active=1 | |||
|Recovery=/ | |||
|Hit Adv=KD | |||
|Block Adv=/ | |||
|Property=/ | |||
|description= * Above average damage. | |||
* Swaps sides. | |||
}} | |||
}} | |||
<font style="visibility:hidden" size="0">9C Throw</font> | |||
{{MoveData | |||
|image=FFS_Jubei_9C_Throw.png | |||
|caption= | |||
|name=Kumo Koroshi | |||
|input=close 9C | |||
|data= | |||
{{AttackData-FFS | |||
|Damage=24~48 (4 x 6~12) | |||
|Stun=3 | |||
|Guard=Throw | |||
|Startup=1 | |||
|Active=1 | |||
|Recovery=/ | |||
|Hit Adv=KD | |||
|Block Adv=/ | |||
|Property=/ | |||
|description= * Hold throw. Opponent can mash to reduce hits. | |||
* Jubei's most damaging normal throw on average as it requires very fast reactions and mashing to reduce to 6 hits. | |||
* Swaps sides. | |||
}} | |||
}} | |||
<font style="visibility:hidden" size="0">6D Throw</font> | |||
{{MoveData | |||
|image=FFS_Jubei_6D_Throw.png | |||
|caption= | |||
|name=Benkei Nakashi | |||
|input=close 6D | |||
|data= | |||
{{AttackData-FFS | |||
|Damage=8~32 (4 x 2~8) | |||
|Stun=0 | |||
|Guard=Throw | |||
|Startup=1 | |||
|Active=1 | |||
|Recovery=/ | |||
|Hit Adv=KD | |||
|Block Adv=/ | |||
|Property=/ | |||
|description= * Hold throw. Opponent can mash to reduce hits. | |||
* On average this is Jubei's least damaging throw as the long delay between hits makes mashing out of it easy. | |||
* Swaps sides. | |||
}} | |||
}} | |||
<font style="visibility:hidden" size="0">4D Throw</font> | |||
{{MoveData | |||
|image=FFS_Jubei_4D_Throw.png | |||
|caption= | |||
|name=Tomoe Nage | |||
|input=close 4D | |||
|data= | |||
{{AttackData-FFS | |||
|Damage=26 | |||
|Stun=3 | |||
|Guard=Throw | |||
|Startup=1 | |||
|Active=1 | |||
|Recovery=/ | |||
|Hit Adv=KD | |||
|Block Adv=/ | |||
|Property=/ | |||
|description= * Swaps sides. | |||
}} | |||
}} | |||
<font style="visibility:hidden" size="0">Air Throw</font> | |||
{{MoveData | |||
|image=FFS_Jubei_Air_Throw.png | |||
|caption= | |||
|name=Izuna Otoshi | |||
|input=close j2D | |||
|data= | |||
{{AttackData-FFS | |||
|Damage=26 | |||
|Stun=3 | |||
|Guard=Throw | |||
|Startup=1 | |||
|Active=1 | |||
|Recovery=/ | |||
|Hit Adv=KD | |||
|Block Adv=/ | |||
|Property=/ | |||
|description= | |||
}} | |||
}} | |||
===Special Moves=== | ===Special Moves=== | ||
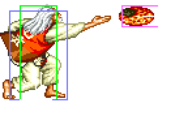
{| | ===== <span class="invisible-header">Senbe Shuriken ([4]6P)</span> ===== | ||
|- | {{MoveData | ||
| | | name = Senbe Shuriken | ||
|- | | input = [4]6A/C | ||
| Nihon Seoi Dash || | | subtitle = | ||
|- | | image = FFS Jubei 46P.png | ||
| Ooizuna Otoshi || | | caption = | ||
|- | | data = Jubei throws a rice cracker. Very good projectile. | ||
| | {{AttackData-FFS | ||
| | | version = A | ||
| Neko Jarashi || | | subtitle = | ||
|- | | Damage = 7 (1) | ||
|} | | Stun = 3 | ||
| Guard = Mid | |||
| Startup = 7 | |||
| Active = | |||
| Recovery = 24 | |||
| Total = | |||
| Hit Adv = +9 | |||
| Block Adv = +6 | |||
| Property = / | |||
| description = * Projectile travels slower. | |||
}} | |||
{{AttackData-FFS | |||
| header = no | |||
| version = C | |||
| subtitle = | |||
| Damage = 14 (3) | |||
| Stun = 6 | |||
| Guard = Mid | |||
| Startup = 10 | |||
| Active = | |||
| Recovery = 29 | |||
| Total = | |||
| Hit Adv = +12 | |||
| Block Adv = +5 | |||
| Property = / | |||
| description = * Projectile travels faster. | |||
}} | |||
}} | |||
===== <span class="invisible-header">Nihon Seoi Dash ([4]6K)</span> ===== | |||
{{MoveData | |||
| name = Nihon Seoi Dash | |||
| input = [4]6B/D | |||
| subtitle = | |||
| image = FFS Jubei 46K.png | |||
| caption = | |||
| data = Running throw that swaps sides on hit. | |||
{{AttackData-FFS | |||
| version = B | |||
| subtitle = | |||
| Damage = 16 | |||
| Stun = 3 | |||
| Guard = Throw | |||
| Startup = 12 | |||
| Active = 9 | |||
| Recovery = 15 | |||
| Total = 35 | |||
| Hit Adv = | |||
| Block Adv = / | |||
| Property = / | |||
| description = * Travels about half of the screen. Can be whiffed after a knockdown for fast repositioning. | |||
}} | |||
{{AttackData-FFS | |||
| header = no | |||
| version = D | |||
| subtitle = | |||
| Damage = 22 | |||
| Stun = 6 | |||
| Guard = Throw | |||
| Startup = 14 | |||
| Active = 21 | |||
| Recovery = 15 | |||
| Total = 39 | |||
| Hit Adv = -1 | |||
| Block Adv = / | |||
| Property = / | |||
| description = * Travels almost the full screen. | |||
}} | |||
}} | |||
===== <span class="invisible-header">Ooizuna Otoshi ([2]8P)</span> ===== | |||
{{MoveData | |||
| name = Ooizuna Otoshi | |||
| input = [2]8A/C | |||
| subtitle = | |||
| image = FFS Jubei 28P.png | |||
| caption = | |||
| data = | |||
{{AttackData-FFS | |||
| version = A/C | |||
| subtitle = | |||
| Damage = 21 | |||
| Stun = 3 | |||
| Guard = Throw | |||
| Startup = 1 | |||
| Active = 1 | |||
| Recovery = / | |||
| Total = / | |||
| Hit Adv = | |||
| Block Adv = / | |||
| Property = / | |||
| description = * More range than Jubei's normal throws and looks very cool but has low damage and an awkward input. | |||
}} | |||
}} | |||
===== <span class="invisible-header">Neko Jarashi (63214P)</span> ===== | |||
{{MoveData | |||
| name = Ooizuna Otoshi | |||
| input = 63214A/C | |||
| subtitle = | |||
| image = FFS Jubei 63214P.png | |||
| caption = | |||
| data = | |||
{{AttackData-FFS | |||
| version = A/C | |||
| Damage = 25 | |||
| Stun = 3 | |||
| Guard = Throw | |||
| Startup = 1 | |||
| Active = 1 | |||
| Recovery = / | |||
| Total = / | |||
| Hit Adv = | |||
| Block Adv = / | |||
| Property = / | |||
| description = * More range than Jubei's normal throws and has good corner carry. | |||
}} | |||
}} | |||
=== | ===Desperation Move=== | ||
{| | ===== <span class="invisible-header">Dynamite Izuna Otoshi ([1]23B+C)</span> ===== | ||
|- | {{MoveData | ||
| | | name = Dynamite Izuna Otoshi | ||
| | | input = [1]23B+C | ||
| | | subtitle = When health is flashing | ||
| | | image = FFS Jubei 123BC.png | ||
|} | | caption = | ||
| data = | |||
{{AttackData-FFS | |||
| Damage = 48 | |||
| Stun = 4 | |||
| Guard = Throw | |||
| Startup = 1 | |||
| Active = 1 | |||
| Recovery = / | |||
| Total = / | |||
| Hit Adv = | |||
| Block Adv = / | |||
| Property = / | |||
| description = | |||
}} | |||
}} | |||
==Combos== | ==Combos== | ||
* '''(jX/meaty 2B) 5A/2A 5A 2C [4]6C''' - Will dizzy Andy, Billy, Cheng, Duck King, Joe (with 2B/jump in), Jubei, Kim (with 2B/jump in), Laurence (with jC/D), Mai, Terry and Tung. | |||
* (Corner) '''jD 2B [4]6C 5A 2C [4]6C''' - Will dizzy the whole cast. Can redizzy for a touch-of-death against Andy, Billy, Cheng, Duck King, Joe, Jubei, Kim, Mai, Terry and Tung. Back up about half screen for the redizzy vs small characters like Mai and Tung to avoid cornering yourself after jD. | |||
* '''Back Plane Corner Tick Combo''' - Jump B, crouch A, crouch A, C+D cancel into Desperation throw | * '''Back Plane Corner Tick Combo''' - Jump B, crouch A, crouch A, C+D cancel into Desperation throw | ||
* Close A x 1-4 > cr.C > Senbei Shuriken (C) | * Close A x 1-4 > cr.C > Senbei Shuriken (C) | ||
Revision as of 03:59, 9 October 2024
Introduction
| Pros | Cons |
|---|---|
|
|
Move List
Close Standing Normals
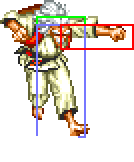
c5A
| Damage | Stun | Guard | Startup | Active | Recovery | Total | Hit Adv | Block Adv | Property | |
|---|---|---|---|---|---|---|---|---|---|---|
| 6 | 2 | Mid | 3 | 4 | 4 | 10 | +8 | +9 | Cancel | |
| ||||||||||
c5B
| Damage | Stun | Guard | Startup | Active | Recovery | Total | Hit Adv | Block Adv | Property |
|---|---|---|---|---|---|---|---|---|---|
| 8 | 2 | Mid | 4 | 7 | 5 | 15 | +4 | +5 | Cancel |
c5C
| Damage | Stun | Guard | Startup | Active | Recovery | Total | Hit Adv | Block Adv | Property |
|---|---|---|---|---|---|---|---|---|---|
| 14 | 4 | Mid | 8 | 8 | 12 | 27 | +4 | +3 | Cancel |
c5D
| Damage | Stun | Guard | Startup | Active | Recovery | Total | Hit Adv | Block Adv | Property |
|---|---|---|---|---|---|---|---|---|---|
| 16 | 4 | Mid | 8 | 11 | 8 | 26 | +5 | +4 | Cancel |
Far Standing Normals
f5A
| Damage | Stun | Guard | Startup | Active | Recovery | Total | Hit Adv | Block Adv | Property | |
|---|---|---|---|---|---|---|---|---|---|---|
| 5 | 2 | Mid | 3 | 4 | 4 | 10 | +8 | +9 | Cancel | |
| ||||||||||
f5B
| Damage | Stun | Guard | Startup | Active | Recovery | Total | Hit Adv | Block Adv | Property |
|---|---|---|---|---|---|---|---|---|---|
| 6 | 2 | Mid | 4 | 7 | 5 | 15 | +4 | +5 | Cancel |
f5C
| Damage | Stun | Guard | Startup | Active | Recovery | Total | Hit Adv | Block Adv | Property |
|---|---|---|---|---|---|---|---|---|---|
| 12 | 4 | Mid | 8 | 8 | 12 | 27 | +3 | +2 | / |
f5D
| Damage | Stun | Guard | Startup | Active | Recovery | Total | Hit Adv | Block Adv | Property |
|---|---|---|---|---|---|---|---|---|---|
| 14 | 4 | Mid | 8 | 11 | 9 | 27 | +3 | +2 | / |
Crouching Normals
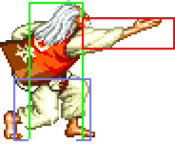
2A
| Damage | Stun | Guard | Startup | Active | Recovery | Total | Hit Adv | Block Adv | Property | |
|---|---|---|---|---|---|---|---|---|---|---|
| 5 | 2 | Mid | 4 | 4 | 5 | 12 | +7 | +8 | Cancel | |
| ||||||||||
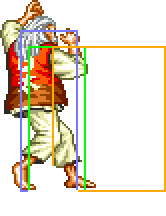
2B
| Damage | Stun | Guard | Startup | Active | Recovery | Total | Hit Adv | Block Adv | Property | |
|---|---|---|---|---|---|---|---|---|---|---|
| 6 | 2 | Low | 5 | 7 | 6 | 17 | +3 | +4 | Cancel | |
| ||||||||||
2C
| Damage | Stun | Guard | Startup | Active | Recovery | Total | Hit Adv | Block Adv | Property |
|---|---|---|---|---|---|---|---|---|---|
| 12 | 4 | Mid | 6 | 8 | 10 | 23 | +6 | +5 | Cancel |
2D
| Damage | Stun | Guard | Startup | Active | Recovery | Total | Hit Adv | Block Adv | Property | |
|---|---|---|---|---|---|---|---|---|---|---|
| 14 | 4 | Low | 7 | 15 | 17 | 38 | KD | -10 | / | |
| ||||||||||
Air Normals
jA
| Damage | Stun | Guard | Startup | Active | Recovery | Total | Hit Adv | Block Adv | Property |
|---|---|---|---|---|---|---|---|---|---|
| 6 | 2 | Overhead | 5 | ∞ | - | - | - | - | - |
jB
| Damage | Stun | Guard | Startup | Active | Recovery | Total | Hit Adv | Block Adv | Property |
|---|---|---|---|---|---|---|---|---|---|
| 8 | 2 | Overhead | 5 | ∞ | - | - | - | - | - |
jC
| Damage | Stun | Guard | Startup | Active | Recovery | Total | Hit Adv | Block Adv | Property |
|---|---|---|---|---|---|---|---|---|---|
| 14 | 4 | Overhead | 6 | 17 | - | - | - | - | - |
jD
| Version | Damage | Stun | Guard | Startup | Active | Recovery | Total | Hit Adv | Block Adv | Property | |
|---|---|---|---|---|---|---|---|---|---|---|---|
| Neutral Jump | 16 | 4 | Overhead | 6 | 17 | - | - | - | - | - | |
| Diagonal Jump | 16 | 4 | Overhead | 7 | 17 | - | - | - | - | - | |
| |||||||||||
System Normals
Blowback Attack
| Version | Damage | Stun | Guard | Startup | Active | Recovery | Total | Hit Adv | Block Adv | Property |
|---|---|---|---|---|---|---|---|---|---|---|
| Front Lane | 22 | 5 | Mid | 9 | 8 | 19 | 35 | KD | -8 | Cancel, Lane Shift |
| Back Lane | 22 | 5 | Mid | 16 | 10 | 8 | 33 | KD | +1 | Cancel, Lane Shift |
Lane Attack
| Damage | Stun | Guard | Startup | Active | Recovery | Total | Hit Adv | Block Adv | Property | |
|---|---|---|---|---|---|---|---|---|---|---|
| 18 | 0 | Overhead | 9 | - | 4 | - | - | - | / | |
| ||||||||||
Dodge Attack
| Damage | Stun | Guard | Startup | Active | Recovery | Total | Hit Adv | Block Adv | Property | |
|---|---|---|---|---|---|---|---|---|---|---|
| 11 | 5 | Mid | 10 | 11 | 11 | 31 | Air(+18) | -3 | Cancel, Upper-Body Invuln 1-20F | |
| ||||||||||
Throws
C Throw
| Damage | Stun | Guard | Startup | Active | Recovery | Total | Hit Adv | Block Adv | Property | |
|---|---|---|---|---|---|---|---|---|---|---|
| 26 | 3 | Throw | 1 | 1 | / | - | KD | / | / | |
| ||||||||||
3C Throw
| Damage | Stun | Guard | Startup | Active | Recovery | Total | Hit Adv | Block Adv | Property | |
|---|---|---|---|---|---|---|---|---|---|---|
| 28 | 3 | Throw | 1 | 1 | / | - | KD | / | / | |
| ||||||||||
9C Throw
| Damage | Stun | Guard | Startup | Active | Recovery | Total | Hit Adv | Block Adv | Property | |
|---|---|---|---|---|---|---|---|---|---|---|
| 24~48 (4 x 6~12) | 3 | Throw | 1 | 1 | / | - | KD | / | / | |
| ||||||||||
6D Throw
| Damage | Stun | Guard | Startup | Active | Recovery | Total | Hit Adv | Block Adv | Property | |
|---|---|---|---|---|---|---|---|---|---|---|
| 8~32 (4 x 2~8) | 0 | Throw | 1 | 1 | / | - | KD | / | / | |
| ||||||||||
4D Throw
| Damage | Stun | Guard | Startup | Active | Recovery | Total | Hit Adv | Block Adv | Property | |
|---|---|---|---|---|---|---|---|---|---|---|
| 26 | 3 | Throw | 1 | 1 | / | - | KD | / | / | |
| ||||||||||
Air Throw
| Damage | Stun | Guard | Startup | Active | Recovery | Total | Hit Adv | Block Adv | Property |
|---|---|---|---|---|---|---|---|---|---|
| 26 | 3 | Throw | 1 | 1 | / | - | KD | / | / |
Special Moves
Senbe Shuriken ([4]6P)
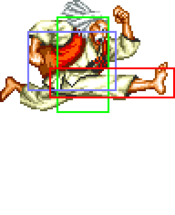
Jubei throws a rice cracker. Very good projectile.
| Version | Damage | Stun | Guard | Startup | Active | Recovery | Total | Hit Adv | Block Adv | Property | |
|---|---|---|---|---|---|---|---|---|---|---|---|
| A | 7 (1) | 3 | Mid | 7 | - | 24 | - | +9 | +6 | / | |
| |||||||||||
| C | 14 (3) | 6 | Mid | 10 | - | 29 | - | +12 | +5 | / | |
| |||||||||||
Nihon Seoi Dash ([4]6K)
Running throw that swaps sides on hit.
| Version | Damage | Stun | Guard | Startup | Active | Recovery | Total | Hit Adv | Block Adv | Property | |
|---|---|---|---|---|---|---|---|---|---|---|---|
| B | 16 | 3 | Throw | 12 | 9 | 15 | 35 | - | / | / | |
| |||||||||||
| D | 22 | 6 | Throw | 14 | 21 | 15 | 39 | -1 | / | / | |
| |||||||||||
Ooizuna Otoshi ([2]8P)
| Version | Damage | Stun | Guard | Startup | Active | Recovery | Total | Hit Adv | Block Adv | Property | |
|---|---|---|---|---|---|---|---|---|---|---|---|
| A/C | 21 | 3 | Throw | 1 | 1 | / | / | - | / | / | |
| |||||||||||
Neko Jarashi (63214P)
| Version | Damage | Stun | Guard | Startup | Active | Recovery | Total | Hit Adv | Block Adv | Property | |
|---|---|---|---|---|---|---|---|---|---|---|---|
| A/C | 25 | 3 | Throw | 1 | 1 | / | / | - | / | / | |
| |||||||||||
Desperation Move
Dynamite Izuna Otoshi ([1]23B+C)
| Damage | Stun | Guard | Startup | Active | Recovery | Total | Hit Adv | Block Adv | Property |
|---|---|---|---|---|---|---|---|---|---|
| 48 | 4 | Throw | 1 | 1 | / | / | - | / | / |
Combos
- (jX/meaty 2B) 5A/2A 5A 2C [4]6C - Will dizzy Andy, Billy, Cheng, Duck King, Joe (with 2B/jump in), Jubei, Kim (with 2B/jump in), Laurence (with jC/D), Mai, Terry and Tung.
- (Corner) jD 2B [4]6C 5A 2C [4]6C - Will dizzy the whole cast. Can redizzy for a touch-of-death against Andy, Billy, Cheng, Duck King, Joe, Jubei, Kim, Mai, Terry and Tung. Back up about half screen for the redizzy vs small characters like Mai and Tung to avoid cornering yourself after jD.
- Back Plane Corner Tick Combo - Jump B, crouch A, crouch A, C+D cancel into Desperation throw
- Close A x 1-4 > cr.C > Senbei Shuriken (C)
- cr.A x 1 - 3 > cr.C > Senbei Shuriken (C)
- (in the corner) Senbei Shuriken (C) > B > A > Senbei Shuriken (A) > A x 2 > Senbei Shuriken (A)
Strategies
From Trieu over on SNK-Capcom:
"Not really a glitch, but definitely hard to get out of. You basically throw a cookie at your opponent in the corner and do the special grab move, which is forward, half circle back, then straight forward again and press the C button.
So it's from the middle, to 3 o'clock, half circle to 9 o'clock, back to 3 o'clock and press C button, then throw cookie, then do it again. This only works if the opponent keeps blocking, because if the opponent gets hit, the "glitch" doesn't work."
The Basics
Advanced Strategy
- I played a lot of Fatal Fury Special these past few days and came across a lot of weird and interesting things with Jubei. I find that using him for cross ups and then doing crouching 'B' or 'A' and following up with either a Senbei-Shuriken or Nihon-Seoi Dash makes it very easy for a lot of other player to get caught in trap. The Senbei-Shuriken I would recommend doing instead of the Nihon-Seoi Dash seeing as you can keep adding more hits even after you throw the *heh* Cookie.
- Neko-Jarashi *HCB+C up close* is a cool command throw for just doing a fair amount of damage. It's like a Zangief's piledriver but it's esier to get results with it.
- The Ooizuna-Otoshi I only really use for stunned oppoents due to it being a charge down/up move which needs to be done very close. I find that Jubei's abilites make him an excellent turtle fighter but he CAN be offensive if you desire to go that route. A varity of jumping D's can be used to do similar combos overall and just make anyone facing Jubie have a bad day.
- I don't know if Jubei is really considered top tier but, I think he is up there. The game is just too damn easy to win with using him. I think I'll see what else I can do with him seeing as I think he might have some other things I haven't tried yet. Either way, I hope what i said is worth the read. I don't consider myself an awesome player but, I stil love this game enough to play it.
Credit to BonusKun
- When he goes into the SDM Mode. A simple Jump Attack (light kick), down light kick, CD Attack, buffered into SDM is a combo. It is unblockable. Either the opponent eats the light kick + CD attack which kicks him to the other plane or take the SDM.
Credit to Zakyn
- The short charge time of the 'Cookie Cutter' projectile combined with his uber AA low.D sweep attack can zone very effectively (only a handfull of air attacks in the game can beat his slide). Once your mobility is limited, he can start mixing up between Cookies and the 'Nihon Seoi' dashing grab, then working in ticks like the one you already mentioned.
- The best Jubei grab tactic I've yet seen is one Middlekick does. He cancels (short)B Nihon Seoi dash off a low.C so that it just whiffs, then goes straight into the UF + C 'Choke Hold'. Many people dont know abt it, but the Choke Hold is as powerfull as a Super! This technique works much like Boxer's whiffed Dashupper into throw in the SF2 games.
- Due to the sweep, you cannot jump against Jubei, fortunately in FFS many characters have ground attacks that can beat sweep attacks clean (like Terry's CD, Cheng's standing D, Mai's Flame Fandango etc), these will also beat the dash grab, really enabling you to stand your ground, where you can then start to bring your characters own strengths into the match. Some characters will then be able to outfireball Jubei, forcing him to jump or can win on snuff/hit-trades with longrange attacks. Some even have moves that can go under the Cookie Cutter like Joe and Tung's low.D.
Credit to Crayfish
