(→Special Moves: revamped descriptions for many of the special moves, increasing accuracy and clarity) |
(→4HK) |
||
| Line 380: | Line 380: | ||
* Causes a knockdown on counterhit | * Causes a knockdown on counterhit | ||
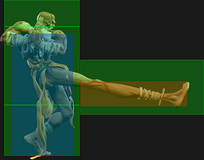
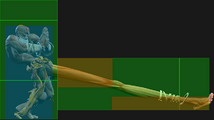
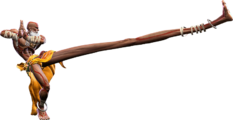
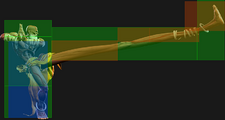
Slow but rewarding anti-air | Slow but rewarding anti-air. It's far more lenient to use on reaction than 4HP despite what the frame data may say, as Dhalsim quickly crouches low to the ground during the startup, reducing the chance of jump-ins hitting him. Counterhit juggles into 1HK are possible in the corner, and Lvl 1 Super midscreen. | ||
Dhalsim | |||
}} | }} | ||
Revision as of 02:52, 18 August 2023
| Early game information
This game is relatively new, and its pages are still being written. Some information may be mildly inaccurate or missing altogether. You can join the SF6 Resource Hub for more info on editing and other ways you can potentially help with this resource. |
Introduction
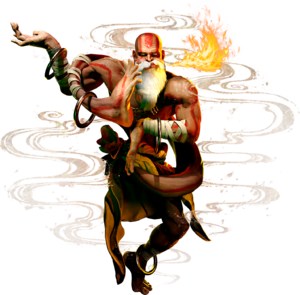
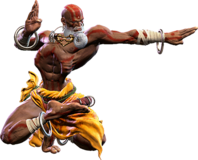
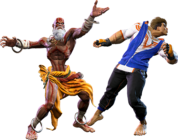
A monk and yoga master from India who has served as a guide for countless suffering souls. Prefers to avoid conflict when possible, but his innate hatred of evil compels him to dispense stern justice.
It isn't a stretch to say that Dhalsim is an expert of proactively frustrating his opponent with a plethora of projectiles, unique movement, and multifarious normals that threaten almost every space of the stage. Dhalsim's win condition is achieved using these tools to force blunders that open opponents up to his strong mixup and okizeme options.
As a master of the art of yoga, Dhalsim is all about patient play and dedicated but rewarding moves. The key element of Dhalsim's kit is that many of his tools are very slow, but cash out for large reward if they land. For example, Dhalsim's 5HP, 5HK, and j.HP are slow to start up but deal great damage if they land and have exceptional reach. Dhalsim's jump might be slow, but it allows him a large amount of control over the screen thanks to his stellar air normals, and synergizes well with his divekick, Yoga Float and Yoga Teleport abilities. All of Dhalsim's crouching kicks slide him forward for dealing with opposing projectiles and other high attacks, and he has a good number of cancelable pokes that lead into respectable damage and okizeme. Overall, Dhalsim is very dominant at controlling the screen whether he's in the air or on the floor.
Dhalsim is also well known for his stellar setplay. If Dhalsim has gotten you blocking for long enough, he can set up for powerful mixup scenarios using Yoga Arch. The fireball launched from Yoga Arch controls a large portion of the screen and is difficult to deal with unless you spend resources, giving Dhalsim a way to funnel you into specific responses. Similarly, Dhalsim's reward once he's gotten a hit is fairly good. He does great damage and can often spend resources to set up for additional mixup scenarios to snowball his damage. His various Teleports also allow him to go on the offensive once he has an opponent afraid of his reach, opening them up for simple, yet devastating returns.
Dhalsim's largest weakness should be obvious - his speed. While a fair tradeoff for his reach, Dhalsim is undeniably one of the slowest characters in the game, both on the ground and in the air. He often requires additional setup to make situations like strike/throw possible where other characters can threaten it in basic pressure. His speed also makes him a prime target for aggressive characters, and he often has to fight hard to control neutral against them. Without a fully invulnerable reversal to bank on, Dhalsim often has to be very careful when he's in a pressure situation.
Overall, Dhalsim is a great character for those who have the patience and confidence to play him. If you like belligerent screen control combined with lots of reward for zen-like patience, begin your inner cultivation with Dhalsim.
Yoga!
| Pick if you like: | Avoid if you dislike: |
|---|---|
|
|
Classic & Modern Versions Comparison
| Missing Normals |
|
|---|---|
| Missing Command Normals |
|
| Shortcut-Only Specials |
|
| Assist Combos |
|
| Miscellaneous Changes |
|
| Dhalsim | |
|---|---|
| Vitals | |
| Life Points | 10000 |
| Ground Movement | |
| Forward Walk Speed | 0.028 |
| Backward Walk Speed | 0.025 |
| Forward Dash Speed | 25 |
| Backward Dash Speed | 23 |
| Forward Dash Distance | 1.467 |
| Backward Dash Distance | 1.00 |
| Drive Rush Min. Distance (Throw) | 0.471 |
| Drive Rush Min. Distance (Block) | 1.787 |
| Drive Rush Max Distance | 2.700 |
| Jumping | |
| Jump Speed | 4+68+3 |
| Jump Apex | 2.178 |
| Forward Jump Distance | 2.04 |
| Backward Jump Distance | 1.768 |
| Throws | |
| Throw Range | 0.8 |
| Throw Hurtbox | 0.33 |
| Frame Data Glossary - SF6 | |
|---|---|
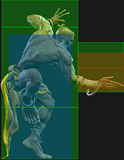
| Hitbox Images |
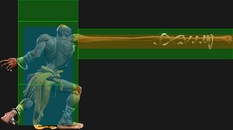
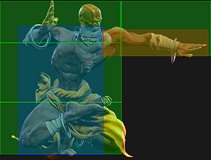
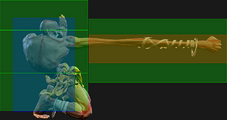
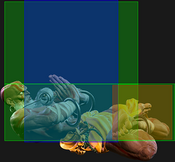
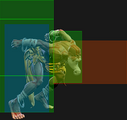
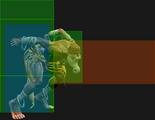
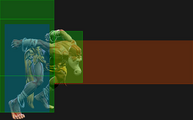
🟥 (Red): Attack hitbox
🟩 (Green): Vulnerable hurtbox that can be hit by strikes/projectiles
🟦 (Blue): Vulnerable throw hurtbox
|
| Active |
How many frames a move remains active (can hurt opponents) for. For projectiles with a maximum active period, a value may be listed in [brackets], but this number is not factored into the move's total frame count.
|
| Cancel |
Available options for canceling one move into another move.
|
| Cancel Hitconfirm Windows |
Hitconfirm reaction windows into Special Moves, Target Combos, and Super Arts.
|
| Damage |
Attack damage on hit. Multi-hit moves may have the damage listed for individual hits as X,Y (or sometimes X*Y). Sometimes a move's damage changes depending on which active frame connects, or on cinematic vs. non-cinematic hits; in this case, multiple values may be listed, and it will be clarified in the move description.
|
| Damage Scaling |
Some moves cause additional damage scaling in combos. Refer to Game Data page for a more detailed breakdown. Scaling Types:
|
| Drive Rush Cancel Advantage |
Refers to the frame advantage when canceling a normal, command normal, or Target Combo into Drive Rush on hit or block (abbreviated as DRC for Drive Rush Cancel). This is calculated at the moment a follow-up attack can be input, not at the moment the character can block or perform movement options. An attack that with DRC +8 on Hit can link into an 8-frame attack, and DRC +4 on Block can create a true blockstring into a 4-frame attack. Note that any DRC on Block worse than +4 cannot form a true blockstring, allowing the opponent to interrupt with an invincible reversal. Most light normals are slightly negative after a DRC on block, meaning the opponent can mash their fastest normal to guarantee a counter-hit (though this requires fast reactions). The attacking character could punish this with Light > DRC into an immediate invincible attack, but this would be an incredibly expensive and high-risk gambit.
|
| Forced Knockdown |
Most airborne command normals, special moves, and Super Arts put the user in a "Forced Knockdown" state. While in this state, an air knockdown will occur when being hit by any attack, even if it would otherwise cause an air reset. As an example, Ryu's 2HP causes an air reset when used as an anti-air. Against a move like Cammy's Hooligan Combination, however, the 2HP puts her into an air knockdown state. This allows Ryu to successfully cancel 2HP into Shoryuken for a juggle, similar to how a Drive Impact wall splat works. Taking advantage of Forced Knockdown juggles is important for dealing with moves like Ken's Dragonlash, Dhalsim's Air Teleport, or Kimberly's 6HK~Hop sequence. Moves that already cause an air knockdown, like most j.MP air-to-airs, will not display the "Forced Knockdown" message.
|
| Guard |
Refers to the direction an attack must be blocked. L is for Low attacks (must be blocked crouching), H is for High attacks/overheads (must be blocked standing), LH is for attacks that can be blocked crouching or standing. T is for Throw attacks which cannot be blocked.
|
| Juggles |
When a character is put into an Air Knockdown state, it is often possible to follow up with a Juggle attack before they hit the ground. In the simplest terms, there are 2 main juggle states:
The following is a more detailed overview of the SF6 juggle system:
Juggle Start (JS): When starting a juggle, the opponent's JC will be set to this value. May be different vs. standing and airborne opponents.
Juggle Increase (JI): When opponent is already in a juggle state, attacks will increase the opponent's JC by this amount.
Juggle Limit (JL): Property of an attack hitbox that determines whether it connects on a juggled opponent. The JL must be ≥ the opponent's JC to hit successfully.
An example to tie everything together:
Drive Rush notes:
More recently, the official definitions used by Capcom are slightly different than these community-designated terms. When reading official patch notes, the following terms are used instead:
|
| On Hit/Block |
These are frame advantage values when the attack hits or is blocked. If the number is positive, then the move will recover before the defender can act again. If the number is negative, the defender will be able to act before the attacker and maybe even punish. KD refers to knockdown on hit, and the listed KD Advantage refers to how many frames the attacker can act before the defender finishes their wakeup animation.
|
| Recovery |
How many frames it takes for a move to finish after the active frames have finished. For projectiles, recovery is considered to begin after the first active frame.
|
| Startup |
How many frames it takes before the move becomes 'active' or have a hit box. The last startup frame and the first active frame are the same frame, meaning all values are written as Startup + 1.
|
| IASA / Actionable Recovery |
Some moves play out an extended recovery animation when no other button/direction is input (for crouching moves, it applies when holding any down direction). These are often referred to as "actionable recovery" frames; in some games, the term IASA (Interruptible As Soon As) refers to the frame that Actionable Recovery begins. Letting the Actionable Recovery frames play out can change the character's position, potentially setting up spacing traps by recovering farther away. For example, Manon 5HP will recover much farther away from the opponent if no input is performed immediately after her recovery; holding back or down-back to block will keep her much closer to the opponent.
|
Normals
Standing Normals
5LP
| Startup | Active | Recovery | Cancel | Damage | Guard | On Hit | On Block |
|---|---|---|---|---|---|---|---|
| 4 | 3 | 8 | Chn Sp SA | 300 | LH | +4 | -1 |
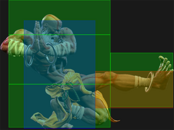
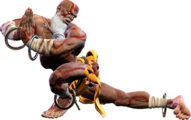
Dhalsim's fastest normal. Like many 5LPs in the game, it's best used as an abare or to check your opponent rushing in.
In terms of combo usage, 5LP can reliably link into 2LP and itself. Unfortunately, Dhalsim needs to spend drive meter to reliably combo into a special, the only one being OD Yoga Fire. If you have the extra bar, it's better to go for a drive rush combo for higher reward and damage.
The other best-case usage for 5LP is combo filler after a drive rush cancel. It leaves Dhalsim +8 on hit, allowing you to link into his various medium normals.
Many combos involving this move can often be substituted for 2LP which has one more frame of startup but has slightly better range.
5MP
| Startup | Active | Recovery | Cancel | Damage | Guard | On Hit | On Block |
|---|---|---|---|---|---|---|---|
| 14 | 3 | 19 | - | 700 | LH | 0 | -5 |
A poke that can hit the opponent at roundstart distance. Use it in conjunction with Yoga Fire and Yoga Arch to force the opponent to block, making them lose valuable drive gauge.
Dhalsim’s 5MP and his other pokes have combo potential if you can time your fireballs to hit the opponent before or after your poke hits them. For example, at roundstart distance, you can do M Yoga Arch > 5MP > *fireball hit* > 5HP. This also works well as a blockstring.
5MP can also be a great button to throw out at the very start of a round. If the opponent chooses to jump in, 5MP will recover in time for you to anti-air with 4MP.
Opponents will often use Drive Impact to beat this move, so be careful not to be too predictable. It’s possible to recover in time to counter it, but only if they DI within a few frames before your active frames start.
5HP
| Startup | Active | Recovery | Cancel | Damage | Guard | On Hit | On Block |
|---|---|---|---|---|---|---|---|
| 16 | 4 | 27 | - | 1000 | LH | -6 | -11 |
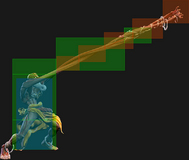
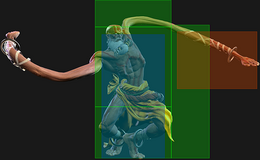
Dhalsim’s longest normal. It doesn’t quite hit at fullscreen — its range is merely a few steps back from roundstart distance. It has a very long extended hurtbox, so be careful not to whiff this move.
It has considerable knockback on both hit and block.
Like his other pokes, you should use 5HP in conjunction with Yoga Fire and Yoga Arch to force the opponent to block, making them lose valuable drive gauge. This move in particular causes the opponent to lose half a drive bar on block, making it extremely good in this niche.
Punish Counter causes a knockdown on hit, greatly expanding the distance between you and your opponent. However, if you’re actively trying to punish something from far away (like Lily building stocks), the very handy special-cancellable 5HK will grant you far better reward.
5LK
| Startup | Active | Recovery | Cancel | Damage | Guard | On Hit | On Block |
|---|---|---|---|---|---|---|---|
| 9 | 4 | 11 | Sp SA | 300 | LH | +2 | -6 |
A fast, special-cancellable midrange normal. You will occasionally use this as a whiff punishing tool and an abare in instances where the opponent is out of range of 2LP. It's also excellent at checking your opponent's ground approaches.
At max range, 5LK has very few reliable combo routes aside from Drive Rush or Level 1 Super, so make sure you have enough Drive Bar or Super Meter before attempting to capitalize on it.
5MK
| Startup | Active | Recovery | Cancel | Damage | Guard | On Hit | On Block |
|---|---|---|---|---|---|---|---|
| 12 | 3 | 18 | - | 600 | LH | -2 | -6 |
A poke similar to 5MP that has slightly less range but makes up for it by having slightly less startup and recovery. Its advantageous frame data makes it less susceptible to Drive Impact than 5MP.
Despite not being considered a Low, its angle also allows you to catch opponents in the event they attempt to check your other normals.
5HK
| Startup | Active | Recovery | Cancel | Damage | Guard | On Hit | On Block |
|---|---|---|---|---|---|---|---|
| 17 | 3 | 20 | Sp SA | 800 | LH | +3 | -6 |
- Puts airborne opponents into limited juggle state
A versatile poke and is by far the longest special-cancellable normal in the game. It has similar range to Dhalsim's 5HP but is slightly shorter.
This move serves as Dhalsim’s go-to punish combo starter after blocking a high-recovery move like a Shoryuken since it leaves him +21, allowing you to slip in another move without needing to spend meter.
You can capitalize on a Punish Counter at max range by canceling this move into Drive Rush and immediately performing a 2MK, leaving you +5 to +12.
It also serves as a surprisingly good long-range anti-air in instances where your opponent is trying to jump over a fullscreen Yoga Fire. Even without a counterhit, you can combo from an anti-air by Drive Rush canceling into 2MK and immediately linking into Level 1 or Level 3 Super.
5HK’s main drawback is that it will whiff on crouching opponents. Even then, it is difficult for the opponent to punish it unless they are close to you.
Crouching Normals
2LP
| Startup | Active | Recovery | Cancel | Damage | Guard | On Hit | On Block |
|---|---|---|---|---|---|---|---|
| 5 | 3 | 9 | Chn Sp SA | 300 | LH | +4 | -1 |
A quick crouching jab. This move allows Dhalsim to complete one of his only meterless light combos from up close, in 2LP XX HK Yoga Blast. Can also be used in pressure as it's not too bad on block and hit. Link into this move once the opponent is out of range of 5LP.
2MP
| Startup | Active | Recovery | Cancel | Damage | Guard | On Hit | On Block |
|---|---|---|---|---|---|---|---|
| 12 | 3 | 16 | Sp SA | 600 | LH | 0 | -4 |
Use this move to force the opponent to respect your grounded zoning. Opponents that would otherwise use Drive Impact to catch your high-recovery normals can be caught themselves by your own Drive Impact.
This move only has 16 frames of recovery, so even if you miss the cancel window to counter a drive impact with your own, it’s very possible to do so afterwards.
Once you’ve conditioned the opponent to acknowledge the threat of countering their Drive Impact with your own, canceling 2MP into Yoga Arch can prevent jump-ins and can give you a safe mixup opportunity. Canceling into Yoga Fire can also be rewarding as it serves as both a frametrap and, depending on the spacing, a safe setup for 2MK.
It’s also serves as a great midrange combo starter if you can confirm 2MP into Drive Rush and then proceed to combo with 2LP or 4MK.
2HP
| Startup | Active | Recovery | Cancel | Damage | Guard | On Hit | On Block |
|---|---|---|---|---|---|---|---|
| 19 | 4 | 24 | - | 800 | L | -1 | -12 |
With quick reactions, this can be used to low profile many fireballs while counterattacking, making this an excellent response to them. As opposed to Dhalsim's other anti-fireball tool, 2HK, 2HP allows you to maintain your position from the opponent to continue zoning.
2LK
| Startup | Active | Recovery | Cancel | Damage | Guard | On Hit | On Block |
|---|---|---|---|---|---|---|---|
| 4 | 7 | 16 | - | 200 | L | -5(+1) | -10(-4) |
A slide which starts up and recovers pretty quickly. Unfortunately it isn't really good at sliding under fireballs, but it does make for an unorthodox anti-crossup tool by allowing you to slide underneath the opponent's hitbox.
2MK
| Startup | Active | Recovery | Cancel | Damage | Guard | On Hit | On Block |
|---|---|---|---|---|---|---|---|
| 10 | 13 | 14 | - | 500 | L | -3(+9) | -10(+2) |
- Applies a 20% damage scaling penalty to the next hit when used as a combo starter (100/80/70/60...)
Dhalsim’s most versatile slide. If you manage to hit the opponent at the tip of this move (which is roughly an inch forward from roundstart distance), you can be up to +9 on block, allowing you to perform meterless combos from midrange.
If you’ve spaced this move correctly, it puts you at point-blank range from the opponent which is perfect for setting up a strike/throw mixup on block.
It’s also a great answer to fireballs if you’re in range. If used in this manner, there is more leniency on spacing due to Punish Counter giving you 4 more plus frames on hit.
Performing Yoga Arch beforehand can make you safe even if you don’t space 2MK correctly. If the opponent chooses to punish your 2MK, they will instead get hit with the incoming fireball, setting you up for a potent combo on hit, or a mixup on block.
2HK
| Startup | Active | Recovery | Cancel | Damage | Guard | On Hit | On Block |
|---|---|---|---|---|---|---|---|
| 12 | 16 | 20 | - | 900 | L | HKD +22(+37) | -16(-1) |
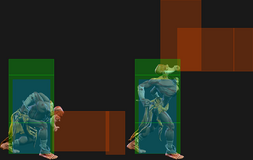
This slide causes a hard knockdown on hit and travels farther than 2MK.
Arguably a more reliable anti-fireball tool than 2MK since you don’t have to worry about spacing. However, setting up for a meaty can vary depending on the initial distance from the opponent. Here are some sample meaty setups:
- If you used 2HK at roundstart distance, TK j.2LK will leave you up to +3 on block.
- If you used 2HK at close range, TK j.2HK will leave you up to +2 on block.
If you’re in the corner, 2HK can also serve as a high-risk/low-reward option for getting out. The safest way to do this is [2HK hit > Forward Jump until you’re directly above the opponent xx Yoga Float (this covers both DPs, anti-airs, and you can contest air-to-airs with j.LP) xx Crossup j.HP to make your landing safe].
Jumping Normals
j.LP
| Startup | Active | Recovery | Cancel | Damage | Guard | On Hit | On Block |
|---|---|---|---|---|---|---|---|
| 4 | 4 | 3 land | - | 300 | H | +8(+13) | 0(+5) |
A short range slap. Has decent hitstun for linking into lights or 4MK after teleports, where this is most used. Note that it doesn't hit crouching opponents when used in this way.
j.MP
| Startup | Active | Recovery | Cancel | Damage | Guard | On Hit | On Block |
|---|---|---|---|---|---|---|---|
| 9 | 6 | 3 land | Sp | 700 | LH | +5(+13) | -1(+7) |
- Applies a 20% damage scaling penalty to the next hit when used as a combo starter (100/80/70/60...)
A far reaching punch. It can be cancelled into his special moves and float, which allows him to use this as a long range anti-air, provided you react fast enough.
j.HP
| Startup | Active | Recovery | Cancel | Damage | Guard | On Hit | On Block |
|---|---|---|---|---|---|---|---|
| 13 | 4 | 3 land | - | 800 | H | -5(+19) | -9(+15) |
- Applies a 20% damage scaling penalty to the next hit when used as a combo starter (100/80/70/60...)
A big swipe with a ton of range and coverage. On airborne opponents it spikes them into the ground, scoring you a knockdown, and on grounded opponents it has plenty of hitstun to combo out of. Especially useful after his teleport for pressure.
j.LK
| Startup | Active | Recovery | Cancel | Damage | Guard | On Hit | On Block |
|---|---|---|---|---|---|---|---|
| 6 | 4 | 3 land | - | 300 | H | -12(+8) | -15(+5) |
A very fast downward kick. This is good out of a very low air teleport, as it still functions as an overhead while also having just enough hitstun to combo out of. It also can function as an instant overhead to close out a round, though this is a very unsafe use for the move if it doesn't kill.
j.MK
| Startup | Active | Recovery | Cancel | Damage | Guard | On Hit | On Block |
|---|---|---|---|---|---|---|---|
| 11 | 6 | 3 land | - | 500 | H | -7(+13) | -11(+9) |
- Applies a 20% damage scaling penalty to the next hit when used as a combo starter (100/80/70/60...)
A move that reaches decently far below Dhalsim. A bit slow, so hard to use for instant overhead abuse or as a jump in from teleports.
j.HK
| Startup | Active | Recovery | Cancel | Damage | Guard | On Hit | On Block |
|---|---|---|---|---|---|---|---|
| 10 | 10 | 3 land | - | 800 | H | +5(+15) | +1(+11) |
- Applies a 20% damage scaling penalty to the next hit when used as a combo starter (100/80/70/60...)
One of Dhalsim's highest hitstun jump-in attacks, but it doesn't have a great hitbox for hitting crouchers so it's somewhat outclassed by j.HP.
Command Normals
4MP
| Startup | Active | Recovery | Cancel | Damage | Guard | On Hit | On Block |
|---|---|---|---|---|---|---|---|
| 8 | 6 | 16 | Sp SA | 700 | LH | +2 | -3 |
- Forces stand
An excellent anti-air. Being fast, wide and tall makes this an excellent choice. It also has some utility in grounded combos and drive rush conversions.
4HP
| Startup | Active | Recovery | Cancel | Damage | Guard | On Hit | On Block |
|---|---|---|---|---|---|---|---|
| 14 | 7 | 29 | Sp SA | 900 | LH | -9 | -16 |
- Causes a knockdown on counterhit
- Applies a 20% damage scaling penalty to the next hit when used as a combo starter (100/80/70/60...)
Slower than 4MP, but more range and higher reward to compensate.
4MK
| Startup | Active | Recovery | Cancel | Damage | Guard | On Hit | On Block |
|---|---|---|---|---|---|---|---|
| 7 | 4 | 17 | Sp SA | 600 | LH | +3 | 0 |
One of your main cancelling normals, as it has decent hitstun and good cancel options.
4HK
| Startup | Active | Recovery | Cancel | Damage | Guard | On Hit | On Block |
|---|---|---|---|---|---|---|---|
| 14 | 6 | 20 | - | 1000 | LH | 0 | -9 |
- Causes a knockdown on counterhit
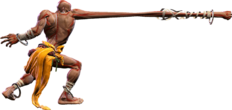
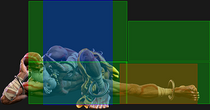
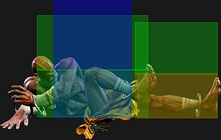
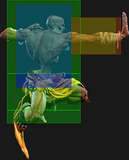
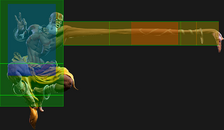
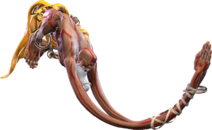
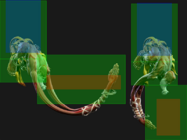
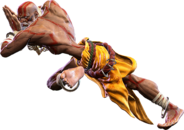
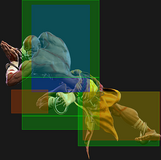
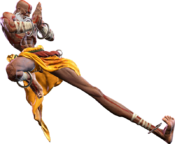
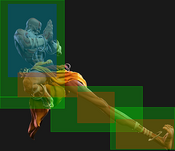
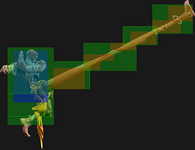
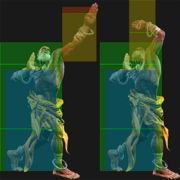
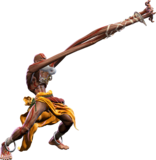
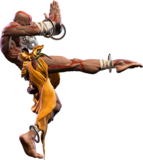
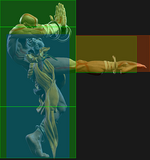
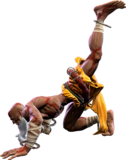
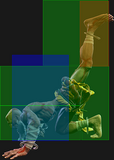
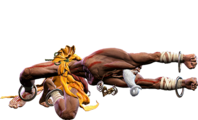
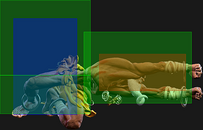
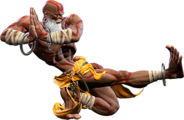
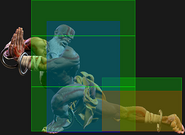
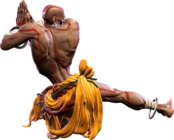
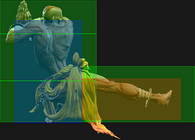
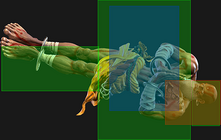
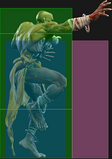
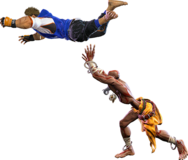
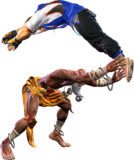
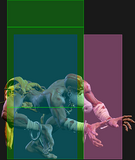
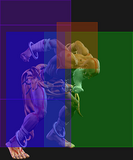
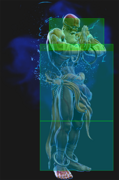
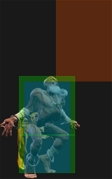
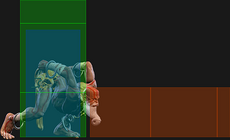
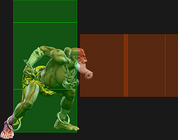
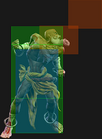
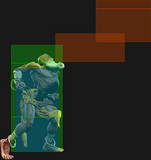
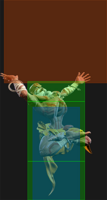
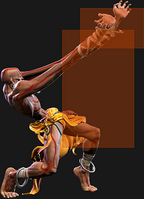
Slow but rewarding anti-air. It's far more lenient to use on reaction than 4HP despite what the frame data may say, as Dhalsim quickly crouches low to the ground during the startup, reducing the chance of jump-ins hitting him. Counterhit juggles into 1HK are possible in the corner, and Lvl 1 Super midscreen.
1HP
| Startup | Active | Recovery | Cancel | Damage | Guard | On Hit | On Block |
|---|---|---|---|---|---|---|---|
| 10 | 4 | 20 | Sp SA | 800 | LH | +3 | -3 |
A very good cancellable heavy for Dhalsim. This is one of his only cancels into HP Yoga Flame. Drive rushing into this move makes it +7 and you can link 4MK on hit.
1LK
| Startup | Active | Recovery | Cancel | Damage | Guard | On Hit | On Block |
|---|---|---|---|---|---|---|---|
| 5 | 3 | 10 | Chn | 200 | L | +1 | -5 |
A fast low kick. Allows him to start a combo from a low that can actually be confirmed into a special move.
1MK
| Startup | Active | Recovery | Cancel | Damage | Guard | On Hit | On Block |
|---|---|---|---|---|---|---|---|
| 8 | 3 | 20 | Sp SA | 500 | L | -3 | -7 |
- Applies a 20% damage scaling penalty to the next hit when used as a combo starter (100/80/70/60...)
A decent range low option with much safer frame data than his slides. Can be used in some meaty combos or empty cancelling.
1HK
| Startup | Active | Recovery | Cancel | Damage | Guard | On Hit | On Block |
|---|---|---|---|---|---|---|---|
| 9 | 3 | 22 | - | 900 | L | HKD +33 | -7 |
A quick low sweep. Knocks down on hit. Notable for having juggle potential, allowing this to link after certain moves in the corner like HK Yoga Blast for slightly higher damage.
j.2LP
| Startup | Active | Recovery | Cancel | Damage | Guard | On Hit | On Block |
|---|---|---|---|---|---|---|---|
| 10 | until land | 9 land | Sp | 500 | LH | -18(+8) | -22(+4) |
Can be cancelled on hit or block into any special. Does not cancel into float.
j.2K
No results
- Applies a 20% damage scaling penalty to the next hit when used as a combo starter (100/80/70/60...)
A very slow semi-divekick. Hard to make safe or plus, and can grant some combos if you hit at the feet.
Target Combos
Dhalsim has no target combos
Throws
Forward Throw (LPLK)
| Startup | Active | Recovery | Cancel | Damage | Guard | On Hit | On Block |
|---|---|---|---|---|---|---|---|
| 5 | 3 | 23 | - | 1200 (2040) | T | KD +31 | - |
Standard forward throw. Performing a Drive Rush into 2MK will hit meaty and leave you +5 on block. Otherwise, can be used to reset a situation.
Back Throw (4LPLK)
| Startup | Active | Recovery | Cancel | Damage | Guard | On Hit | On Block |
|---|---|---|---|---|---|---|---|
| 5 | 3 | 23 | - | 1200 (2040) | T | KD +19 | - |
Standard back throw. Use this to switch sides with your opponent if they try to corner you.
Crouch Throw (2LPLK)
| Startup | Active | Recovery | Cancel | Damage | Guard | On Hit | On Block |
|---|---|---|---|---|---|---|---|
| 5 | 3 | 23 | - | 1200 (2040) | T | KD +35 | - |
Unique throw for Dhalsim. Chucks the opponent much farther than his standard forward throw, making it useful for re-establishing distance for his zoning. Trickier to land due to the unconventional input, but is also much more rewarding. Dhalsim also goes low to grab at his opponent's feet, potentially allowing him to avoid high swings.
Is not considered a command grab, and thus can be teched normally.
Drive System
Drive Impact (HPHK)
| Startup | Active | Recovery | Cancel | Damage | Guard | On Hit | On Block |
|---|---|---|---|---|---|---|---|
| 26 | 2 | 35 | - | 800 | LH | KD +35 / Wall Splat KD +65 | -3 / Wall Splat HKD +72 |
See Drive Impact
When cancelled from a normal, these are the important blockstring gaps; a gap of N will trade with an N-frame startup attack; [] = Burnout
- -
- Note: A gap ≥ 6f can be thrown, and a gap ≥ 9f can be jumped out of by most characters
Drive Reversal (6HPHK)
| Startup | Active | Recovery | Cancel | Damage | Guard | On Hit | On Block |
|---|---|---|---|---|---|---|---|
| 20 | 3(6)3 | 26(32) | - | 250x2 recoverable | LH | KD +24 | -6 |
See Drive Reversal
- Full Invuln: 1-22f; Armor Break
Primary method of getting out of tough situations, due to Dhalsim's lack of reliable meter-less reversals.
Drive Parry (MPMK)
| Startup | Active | Recovery | Cancel | Damage | Guard | On Hit | On Block |
|---|---|---|---|---|---|---|---|
| 1 | 12 or until released | 33(1)(11) | - | - | - | - | - |
See Drive Parry
- Perfect Parry has only 1f recovery, and disables the opponent from canceling their attack
- Perfect Parry vs. projectiles puts you into a fixed 11f recovery
Drive Rush (66)
No results
See Drive Rush. Frame data shown in (parentheses) refers to Parry Drive Rush.
- Distance:
- 0.471 (min, cancel into immediate Throw)
- 1.787 (min, earliest blocking/movement frame)
- 2.700 (max, final DR frame)
- See Strategy page for Blockstring Gaps and Combo Routes
Special Moves
Yoga Fire (236P)
| Startup | Active | Recovery | Cancel | Damage | Guard | On Hit | On Block |
|---|---|---|---|---|---|---|---|
| 15(11) | - | 33 | SA3 | 600 | LH | -2 | -6 |
| Startup | Active | Recovery | Cancel | Damage | Guard | On Hit | On Block |
|---|---|---|---|---|---|---|---|
| 43 | - | 30 | SA3 | 400x2 | LH | KD +51 | -1 |
| Startup | Active | Recovery | Cancel | Damage | Guard | On Hit | On Block |
|---|---|---|---|---|---|---|---|
| 13 | - | 32 | SA2 SA3 | 500x2 | LH | KD +49 | -3 |
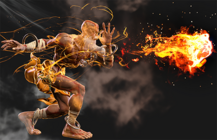
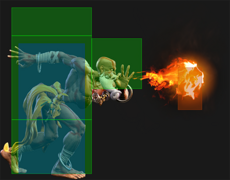
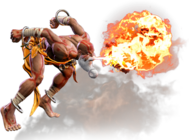
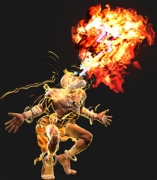
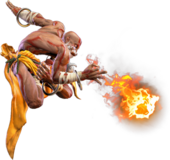
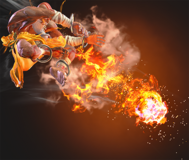
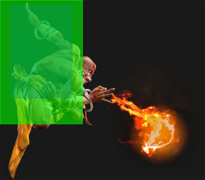
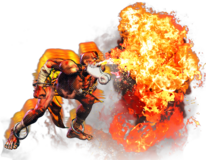
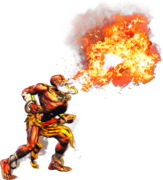
An solid fireball that travels a bit slower than most. It can be charged by holding the button for an additional hit and more damage. The OD version is fast enough to combo from lights and gives very good oki, making it a reliable combo ender. Overall, it's very good at complimenting Dhalsim's space control, especially when cancelling his long reaching buttons on block.
Yoga Arch (236K)
| Startup | Active | Recovery | Cancel | Damage | Guard | On Hit | On Block |
|---|---|---|---|---|---|---|---|
| 18 | [81+10] | 27 | SA3 | 600 | LH | +1 | -1 |
| Startup | Active | Recovery | Cancel | Damage | Guard | On Hit | On Block |
|---|---|---|---|---|---|---|---|
| 18 | [190+10] | 27 | SA2 SA3 | 500x2 | LH | +1 | -3 |
- LK+MK and LK+HK bounce forward
- MK+HK go over the opponents head and bounce back towards you
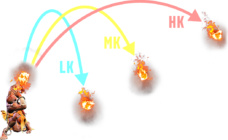
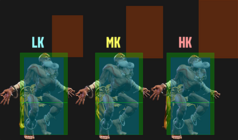
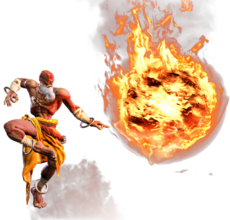
A fireball that travels upward in an arc. One of Dhalsim's most unique tools, primarily used for pressure setups and controlling the air. If it does hit an airborne opponent, it puts them in a juggle state that you can fairly consistently get moves like 2MK, 2HK, or Yoga Blast off of. The OD versions hit and bounce twice on the ground as they travel, holding down a lot of space for quite some time. Does not disappear if you get hit, allowing it to hit the opponent out of their combos after they attempt to mash out of your pressure. This move does still create a big opening for an opponent to move in on you in neutral, so it must be used more mindfully than a regular fireball.
If HK Yoga Arch is done point blank in the corner, it is possible for it to instantly hit the opponent regardless of if they are standing or crouching. This is useful for corner combos as it can leave you plus enough to link, but it is especially good when combined with the lack of pushback on 1MK, giving you an infinite blockstring on an opponent's Burnout.
Yoga Flame (63214P)
| Startup | Active | Recovery | Cancel | Damage | Guard | On Hit | On Block |
|---|---|---|---|---|---|---|---|
| 16 | 15 | 15 | SA3 | 800 | LH | KD +33 | -4 |
- Clashes with 1 hit of a non-OD fireball
| Startup | Active | Recovery | Cancel | Damage | Guard | On Hit | On Block |
|---|---|---|---|---|---|---|---|
| 20 | 15 | 17 | SA3 | 450x2 | LH | KD +33 | -4 |
- Clashes with 2 hits of a non-OD fireball
| Startup | Active | Recovery | Cancel | Damage | Guard | On Hit | On Block |
|---|---|---|---|---|---|---|---|
| 26 | 17 | 16 | SA3 | 400x3 | LH | KD +45(+47) | -4(-2) |
- Clashes with 3 hits of a non-OD fireball
| Startup | Active | Recovery | Cancel | Damage | Guard | On Hit | On Block |
|---|---|---|---|---|---|---|---|
| 18 | 5,5,5,5,5 | 24 | SA2 SA3 | 100x2,200x3 (800) | LH | KD +50 | -11 |
- Clashes with 2 hits of an OD fireball
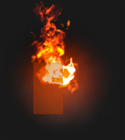
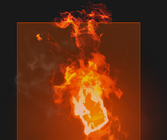
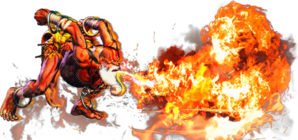
One of Dhalsim's main pressure, meaty and frame trap tools. Though HK Yoga Blast is typically a better resourceless combo ender as it is faster, does the same damage, and gives better oki; Yoga Flame is still sometimes usable in combos if the opponent is crouching or at a longer range. The HP version is especially notable for its range, drive damage, and built-in three hits, beating Drive Impact by itself. The OD version is a combo-oriented launcher that allows for followups on hit, which tends to be Dhalsim's most efficient use of Drive for damage. The MP version is also a bit notable in that it can clash with two hit non-OD fireballs, such as Ryu's Denjin Hadouken and Guile's Sonic Cross.
Every non-OD version is -4 on block naturally, but the incredibly long active frames make each of them very strong meaties that can be made upwards of +10 with the right setups. Combined with the Drive damage, it will condition opponents to parry on wakeup, which then lets you strike/throw them for even greater reward.
Yoga Blast (63214K)
| Startup | Active | Recovery | Cancel | Damage | Guard | On Hit | On Block |
|---|---|---|---|---|---|---|---|
| 12 | 10 | 23 | SA3 | 1000 | LH | KD +39 | -6 |
- Clashes with 1 hit of a non-OD fireball
| Startup | Active | Recovery | Cancel | Damage | Guard | On Hit | On Block |
|---|---|---|---|---|---|---|---|
| 15 | 10 | 20 | SA3 | 1200 | LH | KD +42 | -3 |
- Clashes with 1 hit of a non-OD fireball
| Startup | Active | Recovery | Cancel | Damage | Guard | On Hit | On Block |
|---|---|---|---|---|---|---|---|
| 15 | 10 | 20 | SA3 | 1200 | LH | KD +42 | -3 |
- Clashes with 1 hit of a non-OD fireball
| Startup | Active | Recovery | Cancel | Damage | Guard | On Hit | On Block |
|---|---|---|---|---|---|---|---|
| 12 | 10 | 20 | SA2 SA3 | 500x2 | LH | KD +42 | 0 |
- Clashes with 2 hits of an OD fireball
Dhalsim's main combo ender on standing opponents—the main strategy to make it hit even if they're crouching, however, is to use 4MP earlier in the combo in order to force the opponent to stand (e.g. Drive Rush 2LP > 4MP > HK Yoga Blast). The OD version has the speed of the light version and more range than the heavy version, while also launching higher, allowing for combos into Lvl 2 Super. Outside of combos, it doesn't see much practical use outside of being a rewarding but very predictive anti-air that allows for followups depending on how it hits. Another theoretical use of it is to clash fireballs, as each version has notably lower recovery time than a fireball (including Yoga Fire), potentially leaving you plus or even in the situation.
Yoga Comet (j.63214P)
| Startup | Active | Recovery | Cancel | Damage | Guard | On Hit | On Block |
|---|---|---|---|---|---|---|---|
| 30 | [~55] | 8 land | - | 800 | LH | -4~ | -2~ |
| Startup | Active | Recovery | Cancel | Damage | Guard | On Hit | On Block |
|---|---|---|---|---|---|---|---|
| 30 | until land | 3 land | - | 600x2 | LH | +5~ | +6~ |
Another unique space control move, and the only real air fireball in the game (until Akuma is added). Dhalsim shoots a fireball diagonally downward across the screen. Each of the meterless versions have different speeds and travel distances, dissipating after a set time. The OD version does not dissipate and allows you to act after launching the projectile, letting you go into any other air action. A very notable property of this move is that it is treated independently from your other fireball moves, allowing you to have it on screen at the same time as Yoga Fire and Yoga Arch. Because of this, you can use it to deny approaches while you set up your slower fireballs to continue pressure and suffocate the opponent with projectiles.
Yoga Float (2KK)
| Startup | Active | Recovery | Cancel | Damage | Guard | On Hit | On Block |
|---|---|---|---|---|---|---|---|
| 36 | (85) | 20+3 land | - | - | - | - | - |
| Startup | Active | Recovery | Cancel | Damage | Guard | On Hit | On Block |
|---|---|---|---|---|---|---|---|
| 15 | (81) | 18+3 land | - | - | - | - | - |
Dhalsim floats in the air for a little over 100 frames. An extremely versatile and unique movement option that defines Dhalsim's air game alongside Teleport. Once the float has initiated, you can press forward and backward to levitate in that direction freely with a movespeed that far exceeds his grounded walk. You can also use any air move out of it, ending the float and causing you to fall to the ground if it was a normal. Jumping and doing an instant Yoga Float in the air is much faster than doing it off the ground, so the ground version is typically only used if you're cancelling into it. Short hops, air-to-airs, and divekick spacing are just a few big applications to keep in mind for this move.
Yoga Teleport (6/4 + PPP/KKK)
No results
- Full Invuln: 5-15f
No results
- Full Invuln: 5-15f
No results
- Full Invuln: 10-15f
No results
- Full Invuln: 10-15f
Another huge movement option for Dhalsim that allows him to quickly reposition himself on the screen to maintain a preferred range, get out of a dangerous position, or mix the opponent up. Teleporting backwards has a fixed distance regardless of what buttons you use, but teleporting forward puts you directly behind your opponent with punches and in front of your opponent with kicks. Has some invincibility, but it's not frame 1, so it isn't a true reversal like it is in previous games. The grounded version tend to have invulnerability faster, making them better for avoiding certain moves, but the air version can be made harder to react to as you're able to do it instantly off a jump and immediately fall with a j.LP to check or cross up the opponent. The air version can be used for safejumps, while the grounded version can be used for strike/throw when the knockdown doesn't give enough time to safejump. Since Dhalsim has many slow-moving projectiles to control space, it's quite easy for him to set up a fireball and then teleport behind the opponent as it's about to hit to instantly swap the side they need to block it from.
Super Arts
Level 1 Super (236236P)
| Startup | Active | Recovery | Cancel | Damage | Guard | On Hit | On Block |
|---|---|---|---|---|---|---|---|
| 10 | 104 | 15 | - | 1920 (792 rec oB) |
LH | KD +29 | -10 |
| Startup | Active | Recovery | Cancel | Damage | Guard | On Hit | On Block |
|---|---|---|---|---|---|---|---|
| 10 | 104 | 15 | - | 2100 (792 rec oB) |
LH | KD +29 | -10 |
| Startup | Active | Recovery | Cancel | Damage | Guard | On Hit | On Block |
|---|---|---|---|---|---|---|---|
| 10 | 84 | 40 | - | 2040 (792 rec oB) |
LH | KD +27 | -22 |
- Throw Invuln: 1-11f; Armor Break
- Depletes 1/2 Drive bar from opponent on hit
- 30% minimum damage scaling
A great combo ender which works in almost any juggle for good damage and a setup opportunity. Each version has its own unique advantages and disadvantages:
- LP has the best range, reaching nearly 1/2 screen
- MP does the most damage, but has less range than the other versions
- HP has the best KD Advantage and a great disjointed hitbox for mid-range anti-airs, but whiffs on crouching opponents and is the most unsafe on block
This Super has no strike or projectile invincibility, making it overall weak as a reversal; however, the throw invincibility can allow Dhalsim to escape corner throw loops. Since most players do not hesitate to pressure Dhalsim in the corner, it may occasionally be worth the risk.
Level 2 Super (214214K)
| Startup | Active | Recovery | Cancel | Damage | Guard | On Hit | On Block |
|---|---|---|---|---|---|---|---|
| 7 | [142+20] | 60 | - | 450x4,1000 (2800) | LH | KD +50 | -4 |
- Full Invuln: 1-9f; Armor Break (all versions)
- 40% minimum damage scaling (all versions)
- 5-hit projectile; depletes 1 Drive bar from opponent on hit
| Startup | Active | Recovery | Cancel | Damage | Guard | On Hit | On Block |
|---|---|---|---|---|---|---|---|
| 23~70 | [142+20] | 58 | - | 400x6,700 (3100) | LH | KD | - |
- 7-hit projectile; depletes 1.4 Drive bars from opponent on hit
| Startup | Active | Recovery | Cancel | Damage | Guard | On Hit | On Block |
|---|---|---|---|---|---|---|---|
| 71~91 | [142+20] | 58 | - | 375x8,1000 (4000) | LH | KD | - |
- 9-hit projectile; depletes 1.8 Drive bar from opponent on hit
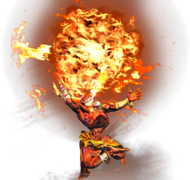
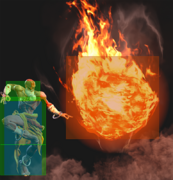
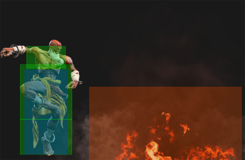
Dhalsim launches a large fireball upwards at an arc; if the initial hit doesn't connect, it will come back down with a trajectory based on which button strength was used. Holding the button will charge it up to become more powerful, which also increases the size of the hitbox. If the hitbox above Dhalsim's head makes contact with the opponent, he will immediately release the attack.
This Super actually has true invincibility, making it a viable reversal and anti-air. However, it will not connect on crouching opponents until it comes down from its arc, so pressuring with a crouching button is safe to his 1-bar and 2-bar reversals.
By activating at range or after a knockdown, this Super can be used to set up tricky mixups. It's also great against opponents in Burnout, as it becomes hard to avoid the chip damage. It can be juggled into, such as after a Punish Counter 4HP at certain ranges.
Level 3 Super (236236K)
| Startup | Active | Recovery | Cancel | Damage | Guard | On Hit | On Block |
|---|---|---|---|---|---|---|---|
| 10 | 5 | 75 | - | 4000 | LH | HKD +19 | -62 |
- Full Invuln: 1-14f; Armor Break
- Depletes 1.5 Drive bars from opponent on hit
- Cinematic time regenerates ~2 Drive bars for Dhalsim
- 50% minimum damage scaling
| Startup | Active | Recovery | Cancel | Damage | Guard | On Hit | On Block |
|---|---|---|---|---|---|---|---|
| 10 | 5 | 75 | - | 4500 | LH | HKD +19 | -62 |
- Full Invuln: 1-14f; Armor Break
- Depletes 2 Drive bars from opponent on hit
- Cinematic time regenerates ~2.5 Drive bars for Dhalsim
- 50% minimum damage scaling; available at 25% HP or below
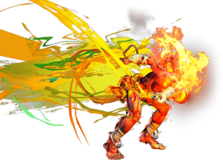
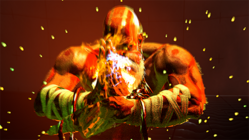
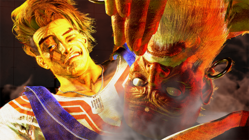
A cinematic super where Dhalsim whips his opponent in the air with his limbs, then headbutts them to the ground again. It is Dhalsim's only "true" reversal, making it a very expensive defensive guess. At 10f startup, it is possible for some meaty light normals to recover safely before this Super connects, so even this is not a guaranteed option against the opponent's pressure. It does good damage in combos and juggles, and has a large anti-air hitbox that will make the opponent think twice about jumping over an extended limb.
Taunts
Neutral Taunt (5PPPKKK)
| Startup | Active | Recovery | Cancel | Damage | Guard | On Hit | On Block |
|---|---|---|---|---|---|---|---|
| 190 (total) | - | - | - | - | - | - | - |
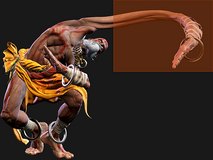
Dhalsim's arm will stretch a different distance depending on how far you are away from the opponent when you taunt.
Forward Taunt (6PPPKKK)
| Startup | Active | Recovery | Cancel | Damage | Guard | On Hit | On Block |
|---|---|---|---|---|---|---|---|
| 380 (total) | - | - | - | - | - | - | - |
Dhalsim high profiles many low attacks during this taunt.
Back Taunt (4PPPKKK)
| Startup | Active | Recovery | Cancel | Damage | Guard | On Hit | On Block |
|---|---|---|---|---|---|---|---|
| 430 (total) | - | - | - | - | - | - | - |
Dhalsim high profiles many low attacks during this taunt.
