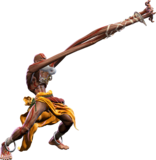
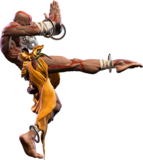
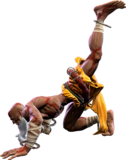
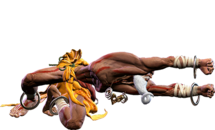
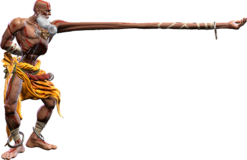
(→2LK) |
(→2MK) |
||
| Line 136: | Line 136: | ||
| info = | | info = | ||
{{AttackDataCargo-SF6/Query|dhalsim_2mk}} | {{AttackDataCargo-SF6/Query|dhalsim_2mk}} | ||
Another slide. This one is an excellent fireball answer, as if it's spaced or on PC it can be linked out of into many options for canceling, and actually does slide under fireballs quite well. Note that it's not actually fireball invincible in any way. | |||
}} | }} | ||
Revision as of 00:29, 30 June 2023
| Early game information
This game is relatively new, and its pages are still being written. Some information may be mildly inaccurate or missing altogether. You can join the SF6 Resource Hub for more info on editing and other ways you can potentially help with this resource. |
Introduction
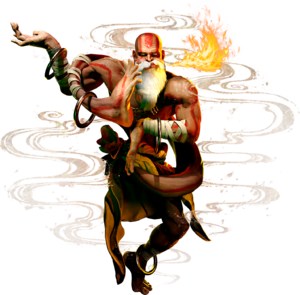
A monk and yoga master from India who has served as a guide for countless suffering souls. Prefers to avoid conflict when possible, but his innate hatred of evil compels him to dispense stern justice.
It isn't a stretch to say that Dhalsim is an expert of proactively frustrating his opponent with a plethora of projectiles, unique movement, and multifarious normals that threaten almost every space of the stage. Dhalsim's win condition is achieved using these tools to force blunders that open opponents up to his strong mixup and okizeme options.
As a master of the art of yoga, Dhalsim is all about patient play and dedicated but rewarding moves. The key element of Dhalsim's kit is that many of his tools are very slow, but cash out for large reward if they land. For example, Dhalsim's 5HP, 5HK, and j.HP are slow to start up but deal great damage if they land and have exceptional reach. Dhalsim's jump might be slow, but it allows him a large amount of control over the screen thanks to his stellar air normals, and synergizes well with his divekick, Yoga Float and Yoga Teleport abilities. All of Dhalsim's crouching kicks slide him forward for dealing with opposing projectiles and other high attacks, and he has a good number of cancelable pokes that lead into respectable damage and okizeme. Overall, Dhalsim is very dominant at controlling the screen whether he's in the air or on the floor.
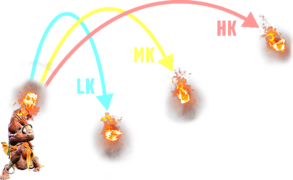
Dhalsim is also well known for his stellar setplay. If Dhalsim has gotten you blocking for long enough, he can set up for powerful mixup scenarios using Yoga Arch. The fireball launched from Yoga Arch controls a large portion of the screen and is difficult to deal with unless you spend resources, giving Dhalsim a way to funnel you into specific responses. Similarly, Dhalsim's reward once he's gotten a hit is fairly good. He does great damage and can often spend resources to set up for additional mixup scenarios to snowball his damage. His various Teleports also allow him to go on the offensive once he has an opponent afraid of his reach, opening them up for simple, yet devastating returns.
Dhalsim's largest weakness should be obvious - his speed. While a fair tradeoff for his reach, Dhalsim is undeniably one of the slowest characters in the game, both on the ground and in the air. He often requires additional setup to make situations like strike/throw possible where other characters can threaten it in basic pressure. His speed also makes him a prime target for aggressive characters, and he often has to fight hard to control neutral against them. Without a fully invulnerable reversal to bank on, Dhalsim often has to be very careful when he's in a pressure situation.
Overall, Dhalsim is a great character for those who have the patience and confidence to play him. If you like belligerent screen control combined with lots of reward for zen-like patience, begin your inner cultivation with Dhalsim.
Yoga!
| Pick if you like: | Avoid if you dislike: |
|---|---|
|
|
Classic & Modern Versions Comparison
| Missing Normals |
|
|---|---|
| Missing Command Normals |
|
| Shortcut-Only Specials |
|
| Assist Combos |
|
| Miscellaneous Changes |
|
| Dhalsim | |
|---|---|
| Vitals | |
| Life Points | 10000 |
| Ground Movement | |
| Forward Walk Speed | 0.028 |
| Backward Walk Speed | 0.025 |
| Forward Dash Speed | 25 |
| Backward Dash Speed | 23 |
| Forward Dash Distance | 1.467 |
| Backward Dash Distance | 1.00 |
| Drive Rush Min. Distance (Throw) | 0.471 |
| Drive Rush Min. Distance (Block) | 1.787 |
| Drive Rush Max Distance | 2.700 |
| Jumping | |
| Jump Speed | 4+68+3 |
| Jump Apex | 2.178 |
| Forward Jump Distance | 2.04 |
| Backward Jump Distance | 1.768 |
| Throws | |
| Throw Range | 0.8 |
| Throw Hurtbox | 0.33 |
| Frame Data Glossary - SF6 | |
|---|---|
| Hitbox Images |
🟥 (Red): Attack hitbox
🟩 (Green): Vulnerable hurtbox that can be hit by strikes/projectiles
🟦 (Blue): Vulnerable throw hurtbox
|
| Active |
How many frames a move remains active (can hurt opponents) for. For projectiles with a maximum active period, a value may be listed in [brackets], but this number is not factored into the move's total frame count.
|
| Cancel |
Available options for canceling one move into another move.
|
| Cancel Hitconfirm Windows |
Hitconfirm reaction windows into Special Moves, Target Combos, and Super Arts.
|
| Damage |
Attack damage on hit. Multi-hit moves may have the damage listed for individual hits as X,Y (or sometimes X*Y). Sometimes a move's damage changes depending on which active frame connects, or on cinematic vs. non-cinematic hits; in this case, multiple values may be listed, and it will be clarified in the move description.
|
| Damage Scaling |
Some moves cause additional damage scaling in combos. Refer to Game Data page for a more detailed breakdown. Scaling Types:
|
| Drive Rush Cancel Advantage |
Refers to the frame advantage when canceling a normal, command normal, or Target Combo into Drive Rush on hit or block (abbreviated as DRC for Drive Rush Cancel). This is calculated at the moment a follow-up attack can be input, not at the moment the character can block or perform movement options. An attack that with DRC +8 on Hit can link into an 8-frame attack, and DRC +4 on Block can create a true blockstring into a 4-frame attack. Note that any DRC on Block worse than +4 cannot form a true blockstring, allowing the opponent to interrupt with an invincible reversal. Most light normals are slightly negative after a DRC on block, meaning the opponent can mash their fastest normal to guarantee a counter-hit (though this requires fast reactions). The attacking character could punish this with Light > DRC into an immediate invincible attack, but this would be an incredibly expensive and high-risk gambit.
|
| Forced Knockdown |
Most airborne command normals, special moves, and Super Arts put the user in a "Forced Knockdown" state. While in this state, an air knockdown will occur when being hit by any attack, even if it would otherwise cause an air reset. As an example, Ryu's 2HP causes an air reset when used as an anti-air. Against a move like Cammy's Hooligan Combination, however, the 2HP puts her into an air knockdown state. This allows Ryu to successfully cancel 2HP into Shoryuken for a juggle, similar to how a Drive Impact wall splat works. Taking advantage of Forced Knockdown juggles is important for dealing with moves like Ken's Dragonlash, Dhalsim's Air Teleport, or Kimberly's 6HK~Hop sequence. Moves that already cause an air knockdown, like most j.MP air-to-airs, will not display the "Forced Knockdown" message.
|
| Guard |
Refers to the direction an attack must be blocked. L is for Low attacks (must be blocked crouching), H is for High attacks/overheads (must be blocked standing), LH is for attacks that can be blocked crouching or standing. T is for Throw attacks which cannot be blocked.
|
| Juggles |
When a character is put into an Air Knockdown state, it is often possible to follow up with a Juggle attack before they hit the ground. In the simplest terms, there are 2 main juggle states:
The following is a more detailed overview of the SF6 juggle system:
Juggle Start (JS): When starting a juggle, the opponent's JC will be set to this value. May be different vs. standing and airborne opponents.
Juggle Increase (JI): When opponent is already in a juggle state, attacks will increase the opponent's JC by this amount.
Juggle Limit (JL): Property of an attack hitbox that determines whether it connects on a juggled opponent. The JL must be ≥ the opponent's JC to hit successfully.
An example to tie everything together:
Drive Rush notes:
More recently, the official definitions used by Capcom are slightly different than these community-designated terms. When reading official patch notes, the following terms are used instead:
|
| On Hit/Block |
These are frame advantage values when the attack hits or is blocked. If the number is positive, then the move will recover before the defender can act again. If the number is negative, the defender will be able to act before the attacker and maybe even punish. KD refers to knockdown on hit, and the listed KD Advantage refers to how many frames the attacker can act before the defender finishes their wakeup animation.
|
| Recovery |
How many frames it takes for a move to finish after the active frames have finished. For projectiles, recovery is considered to begin after the first active frame.
|
| Startup |
How many frames it takes before the move becomes 'active' or have a hit box. The last startup frame and the first active frame are the same frame, meaning all values are written as Startup + 1.
|
| IASA / Actionable Recovery |
Some moves play out an extended recovery animation when no other button/direction is input (for crouching moves, it applies when holding any down direction). These are often referred to as "actionable recovery" frames; in some games, the term IASA (Interruptible As Soon As) refers to the frame that Actionable Recovery begins. Letting the Actionable Recovery frames play out can change the character's position, potentially setting up spacing traps by recovering farther away. For example, Manon 5HP will recover much farther away from the opponent if no input is performed immediately after her recovery; holding back or down-back to block will keep her much closer to the opponent.
|
Normals
Standing Normals
5LP
| Startup | Active | Recovery | Cancel | Damage | Guard | On Hit | On Block |
|---|---|---|---|---|---|---|---|
| 4 | 3 | 8 | Chn Sp SA | 300 | LH | +4 | -1 |
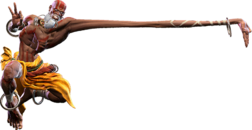
Your fastest normal. Decent range, but the fact that it's 4f allows you to use it for mashing. Can link into 4MK or 4MP on PC.
5MP
| Startup | Active | Recovery | Cancel | Damage | Guard | On Hit | On Block |
|---|---|---|---|---|---|---|---|
| 14 | 3 | 19 | - | 700 | LH | 0 | -5 |
Fast, long reaching, and safe poke. Excellent for controlling midrange space and pre-emptively stopping the opponent from throwing projectiles.
5HP
| Startup | Active | Recovery | Cancel | Damage | Guard | On Hit | On Block |
|---|---|---|---|---|---|---|---|
| 16 | 4 | 27 | - | 1000 | LH | -6 | -11 |
Dhalsim's main answer to projectiles that isn't throwing one of his own. Against projectiles that travel like Hadoukens, his arms will go under the opponent and smack them out of their fireball. Unfortunately, depending on the speed of the projectile, Dhalsim can get hit himself out of 5HP's recovery.
5LK
| Startup | Active | Recovery | Cancel | Damage | Guard | On Hit | On Block |
|---|---|---|---|---|---|---|---|
| 9 | 4 | 11 | Sp SA | 300 | LH | +2 | -6 |
One of your few cancelable zoom normals. At maximum range this doesn't really have any cancel routes except for a cancel into Level 1, so maybe only save it for mindgames and empty cancelling.
5MK
| Startup | Active | Recovery | Cancel | Damage | Guard | On Hit | On Block |
|---|---|---|---|---|---|---|---|
| 12 | 3 | 18 | - | 600 | LH | -2 | -6 |
A solid poke, but mostly outshined by 5MP as that has more damage, more range, less startup and recovery, and is even one frame safer on block. It hits low profile opponents though!
5HK
| Startup | Active | Recovery | Cancel | Damage | Guard | On Hit | On Block |
|---|---|---|---|---|---|---|---|
| 17 | 3 | 20 | Sp SA | 800 | LH | +3 | -6 |
- Puts airborne opponents into limited juggle state
One of Dhalsim's longest range attacks that also special cancels.
Crouching Normals
2LP
| Startup | Active | Recovery | Cancel | Damage | Guard | On Hit | On Block |
|---|---|---|---|---|---|---|---|
| 5 | 3 | 9 | Chn Sp SA | 300 | LH | +4 | -1 |
A quick crouching jab. This move allows Dhalsim to complete one of his only meterless light combos from up close, in 2LP XX HK Yoga Blast. Can also be used in pressure as it's not too bad on block and hit.
2MP
| Startup | Active | Recovery | Cancel | Damage | Guard | On Hit | On Block |
|---|---|---|---|---|---|---|---|
| 12 | 3 | 16 | Sp SA | 600 | LH | 0 | -4 |
Another cancelable zoom normal. This one has decent reach, and cannot be ducked at long range like 5HK can. However, its cancel routes are slightly awkward.
2HP
| Startup | Active | Recovery | Cancel | Damage | Guard | On Hit | On Block |
|---|---|---|---|---|---|---|---|
| 19 | 4 | 24 | - | 800 | L | -1 | -12 |
With quick reactions, this can be used to low profile many fireballs while counterattacking, making this an excellent response to them.
2LK
| Startup | Active | Recovery | Cancel | Damage | Guard | On Hit | On Block |
|---|---|---|---|---|---|---|---|
| 4 | 7 | 16 | - | 200 | L | -5(+1) | -10(-4) |
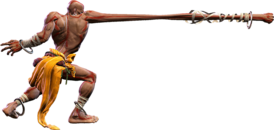
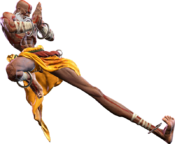
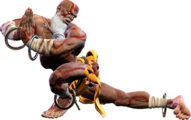
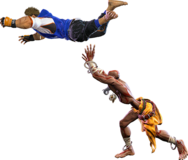
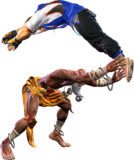
A slide which starts up and recovers pretty quickly. Unfortunately it isn't really good at sliding under fireballs, but it does make for an unorthodox anti-air by sliding underneath them.
2MK
| Startup | Active | Recovery | Cancel | Damage | Guard | On Hit | On Block |
|---|---|---|---|---|---|---|---|
| 10 | 13 | 14 | - | 500 | L | -3(+9) | -10(+2) |
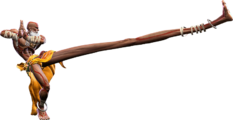
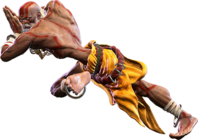
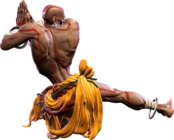
Another slide. This one is an excellent fireball answer, as if it's spaced or on PC it can be linked out of into many options for canceling, and actually does slide under fireballs quite well. Note that it's not actually fireball invincible in any way.
2HK
| Startup | Active | Recovery | Cancel | Damage | Guard | On Hit | On Block |
|---|---|---|---|---|---|---|---|
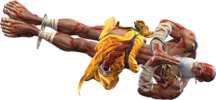
| 12 | 16 | 20 | - | 900 | L | HKD +22(+37) | -16(-1) |
Jumping Normals
j.LP
| Startup | Active | Recovery | Cancel | Damage | Guard | On Hit | On Block |
|---|---|---|---|---|---|---|---|
| 4 | 4 | 3 land | - | 300 | H | +8(+13) | 0(+5) |
j.MP
| Startup | Active | Recovery | Cancel | Damage | Guard | On Hit | On Block |
|---|---|---|---|---|---|---|---|
| 9 | 6 | 3 land | Sp | 700 | LH | +5(+13) | -1(+7) |
j.HP
| Startup | Active | Recovery | Cancel | Damage | Guard | On Hit | On Block |
|---|---|---|---|---|---|---|---|
| 13 | 4 | 3 land | - | 800 | H | -5(+19) | -9(+15) |
j.LK
| Startup | Active | Recovery | Cancel | Damage | Guard | On Hit | On Block |
|---|---|---|---|---|---|---|---|
| 6 | 4 | 3 land | - | 300 | H | -12(+8) | -15(+5) |
j.MK
| Startup | Active | Recovery | Cancel | Damage | Guard | On Hit | On Block |
|---|---|---|---|---|---|---|---|
| 11 | 6 | 3 land | - | 500 | H | -7(+13) | -11(+9) |
j.HK
Command Normals
4MP
| Startup | Active | Recovery | Cancel | Damage | Guard | On Hit | On Block |
|---|---|---|---|---|---|---|---|
| 8 | 6 | 16 | Sp SA | 700 | LH | +2 | -3 |
4HP
| Startup | Active | Recovery | Cancel | Damage | Guard | On Hit | On Block |
|---|---|---|---|---|---|---|---|
| 14 | 7 | 29 | Sp SA | 900 | LH | -9 | -16 |
4MK
| Startup | Active | Recovery | Cancel | Damage | Guard | On Hit | On Block |
|---|---|---|---|---|---|---|---|
| 7 | 4 | 17 | Sp SA | 600 | LH | +3 | 0 |
4HK
| Startup | Active | Recovery | Cancel | Damage | Guard | On Hit | On Block |
|---|---|---|---|---|---|---|---|
| 14 | 6 | 20 | - | 1000 | LH | 0 | -9 |
1HP
| Startup | Active | Recovery | Cancel | Damage | Guard | On Hit | On Block |
|---|---|---|---|---|---|---|---|
| 10 | 4 | 20 | Sp SA | 800 | LH | +3 | -3 |
1LK
| Startup | Active | Recovery | Cancel | Damage | Guard | On Hit | On Block |
|---|---|---|---|---|---|---|---|
| 5 | 3 | 10 | Chn | 200 | L | +1 | -5 |
1MK
| Startup | Active | Recovery | Cancel | Damage | Guard | On Hit | On Block |
|---|---|---|---|---|---|---|---|
| 8 | 3 | 20 | Sp SA | 500 | L | -3 | -7 |
1HK
| Startup | Active | Recovery | Cancel | Damage | Guard | On Hit | On Block |
|---|---|---|---|---|---|---|---|
| 9 | 3 | 22 | - | 900 | L | HKD +33 | -7 |
j.2LP
| Startup | Active | Recovery | Cancel | Damage | Guard | On Hit | On Block |
|---|---|---|---|---|---|---|---|
| 10 | until land | 9 land | Sp | 500 | LH | -18(+8) | -22(+4) |
j.2K
No results
Target Combos
Dhalsim has no target combos
Throws
Forward Throw (LPLK)
| Startup | Active | Recovery | Cancel | Damage | Guard | On Hit | On Block |
|---|---|---|---|---|---|---|---|
| 5 | 3 | 23 | - | 1200 (2040) | T | KD +31 | - |
Back Throw (4LPLK)
| Startup | Active | Recovery | Cancel | Damage | Guard | On Hit | On Block |
|---|---|---|---|---|---|---|---|
| 5 | 3 | 23 | - | 1200 (2040) | T | KD +19 | - |
Crouch Throw (2LPLK)
Drive System
Drive Impact (HPHK)
| Startup | Active | Recovery | Cancel | Damage | Guard | On Hit | On Block |
|---|---|---|---|---|---|---|---|
| 26 | 2 | 35 | - | 800 | LH | KD +35 / Wall Splat KD +65 | -3 / Wall Splat HKD +72 |
See Drive Impact
When cancelled from a normal, these are the important blockstring gaps; a gap of N will trade with an N-frame startup attack; [] = Burnout
- -
- Note: A gap ≥ 6f can be thrown, and a gap ≥ 9f can be jumped out of by most characters
Drive Reversal (6HPHK)
| Startup | Active | Recovery | Cancel | Damage | Guard | On Hit | On Block |
|---|---|---|---|---|---|---|---|
| 20 | 3(6)3 | 26(32) | - | 250x2 recoverable | LH | KD +24 | -6 |
See Drive Reversal
- Full Invuln: 1-22f; Armor Break
Drive Parry (MPMK)
| Startup | Active | Recovery | Cancel | Damage | Guard | On Hit | On Block |
|---|---|---|---|---|---|---|---|
| 1 | 12 or until released | 33(1)(11) | - | - | - | - | - |
See Drive Parry
- Perfect Parry has only 1f recovery, and disables the opponent from canceling their attack
- Perfect Parry vs. projectiles puts you into a fixed 11f recovery
Drive Rush (66)
No results
See Drive Rush. Frame data shown in (parentheses) refers to the version used after Parry.
- Notable Drive Rush cancel combo routes:
- Notable Drive Rush cancel blockstring gaps:
Special Moves
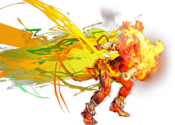
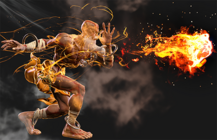
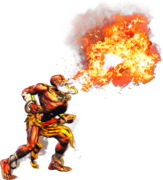
Yoga Fire (236P)
| Startup | Active | Recovery | Cancel | Damage | Guard | On Hit | On Block |
|---|---|---|---|---|---|---|---|
| 15(11) | - | 33 | SA3 | 600 | LH | -2 | -6 |
| Startup | Active | Recovery | Cancel | Damage | Guard | On Hit | On Block |
|---|---|---|---|---|---|---|---|
| 43 | - | 30 | SA3 | 400x2 | LH | KD +51 | -1 |
| Startup | Active | Recovery | Cancel | Damage | Guard | On Hit | On Block |
|---|---|---|---|---|---|---|---|
| 13 | - | 32 | SA2 SA3 | 500x2 | LH | KD +49 | -3 |
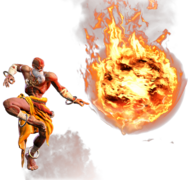
Yoga Arch (236K)
| Startup | Active | Recovery | Cancel | Damage | Guard | On Hit | On Block |
|---|---|---|---|---|---|---|---|
| 18 | [81+10] | 27 | SA3 | 600 | LH | +1 | -1 |
| Startup | Active | Recovery | Cancel | Damage | Guard | On Hit | On Block |
|---|---|---|---|---|---|---|---|
| 18 | [190+10] | 27 | SA2 SA3 | 500x2 | LH | +1 | -3 |
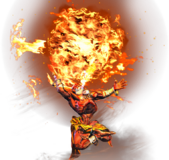
Yoga Flame (63214P)
| Startup | Active | Recovery | Cancel | Damage | Guard | On Hit | On Block |
|---|---|---|---|---|---|---|---|
| 16 | 15 | 15 | SA3 | 800 | LH | KD +33 | -4 |
| Startup | Active | Recovery | Cancel | Damage | Guard | On Hit | On Block |
|---|---|---|---|---|---|---|---|
| 20 | 15 | 17 | SA3 | 450x2 | LH | KD +33 | -4 |
| Startup | Active | Recovery | Cancel | Damage | Guard | On Hit | On Block |
|---|---|---|---|---|---|---|---|
| 26 | 17 | 16 | SA3 | 400x3 | LH | KD +45(+47) | -4(-2) |
| Startup | Active | Recovery | Cancel | Damage | Guard | On Hit | On Block |
|---|---|---|---|---|---|---|---|
| 18 | 5,5,5,5,5 | 24 | SA2 SA3 | 100x2,200x3 (800) | LH | KD +50 | -11 |
Yoga Blast (63214K)
| Startup | Active | Recovery | Cancel | Damage | Guard | On Hit | On Block |
|---|---|---|---|---|---|---|---|
| 12 | 10 | 23 | SA3 | 1000 | LH | KD +39 | -6 |
| Startup | Active | Recovery | Cancel | Damage | Guard | On Hit | On Block |
|---|---|---|---|---|---|---|---|
| 15 | 10 | 20 | SA3 | 1200 | LH | KD +42 | -3 |
| Startup | Active | Recovery | Cancel | Damage | Guard | On Hit | On Block |
|---|---|---|---|---|---|---|---|
| 15 | 10 | 20 | SA3 | 1200 | LH | KD +42 | -3 |
| Startup | Active | Recovery | Cancel | Damage | Guard | On Hit | On Block |
|---|---|---|---|---|---|---|---|
| 12 | 10 | 20 | SA2 SA3 | 500x2 | LH | KD +42 | 0 |
Yoga Comet (j.63214P)
| Startup | Active | Recovery | Cancel | Damage | Guard | On Hit | On Block |
|---|---|---|---|---|---|---|---|
| 30 | [~55] | 8 land | - | 800 | LH | -4~ | -2~ |
| Startup | Active | Recovery | Cancel | Damage | Guard | On Hit | On Block |
|---|---|---|---|---|---|---|---|
| 30 | until land | 3 land | - | 600x2 | LH | +5~ | +6~ |
Yoga Float (2KK)
| Startup | Active | Recovery | Cancel | Damage | Guard | On Hit | On Block |
|---|---|---|---|---|---|---|---|
| 36 | (85) | 20+3 land | - | - | - | - | - |
| Startup | Active | Recovery | Cancel | Damage | Guard | On Hit | On Block |
|---|---|---|---|---|---|---|---|
| 15 | (81) | 18+3 land | - | - | - | - | - |
Yoga Teleport (6/4 + PPP/KKK)
No results
No results No results No results
Super Arts
Level 1 Super (236236P)
| Startup | Active | Recovery | Cancel | Damage | Guard | On Hit | On Block |
|---|---|---|---|---|---|---|---|
| 10 | 104 | 15 | - | 1920 (792 rec oB) |
LH | KD +29 | -10 |
| Startup | Active | Recovery | Cancel | Damage | Guard | On Hit | On Block |
|---|---|---|---|---|---|---|---|
| 10 | 104 | 15 | - | 2100 (792 rec oB) |
LH | KD +29 | -10 |
| Startup | Active | Recovery | Cancel | Damage | Guard | On Hit | On Block |
|---|---|---|---|---|---|---|---|
| 10 | 84 | 40 | - | 2040 (792 rec oB) |
LH | KD +27 | -22 |
Level 2 Super (214214K)
| Startup | Active | Recovery | Cancel | Damage | Guard | On Hit | On Block |
|---|---|---|---|---|---|---|---|
| 7 | [142+20] | 60 | - | 450x4,1000 (2800) | LH | KD +50 | -4 |
| Startup | Active | Recovery | Cancel | Damage | Guard | On Hit | On Block |
|---|---|---|---|---|---|---|---|
| 23~70 | [142+20] | 58 | - | 400x6,700 (3100) | LH | KD | - |
| Startup | Active | Recovery | Cancel | Damage | Guard | On Hit | On Block |
|---|---|---|---|---|---|---|---|
| 71~91 | [142+20] | 58 | - | 375x8,1000 (4000) | LH | KD | - |
Level 3 Super (236236K)
| Startup | Active | Recovery | Cancel | Damage | Guard | On Hit | On Block |
|---|---|---|---|---|---|---|---|
| 10 | 5 | 75 | - | 4000 | LH | HKD +19 | -62 |
| Startup | Active | Recovery | Cancel | Damage | Guard | On Hit | On Block |
|---|---|---|---|---|---|---|---|
| 10 | 5 | 75 | - | 4500 | LH | HKD +19 | -62 |
Taunts
Neutral Taunt (5PPPKKK)
| Startup | Active | Recovery | Cancel | Damage | Guard | On Hit | On Block |
|---|---|---|---|---|---|---|---|
| 190 (total) | - | - | - | - | - | - | - |
Forward Taunt (6PPPKKK)
| Startup | Active | Recovery | Cancel | Damage | Guard | On Hit | On Block |
|---|---|---|---|---|---|---|---|
| 380 (total) | - | - | - | - | - | - | - |
Back Taunt (4PPPKKK)
| Startup | Active | Recovery | Cancel | Damage | Guard | On Hit | On Block |
|---|---|---|---|---|---|---|---|
| 430 (total) | - | - | - | - | - | - | - |
