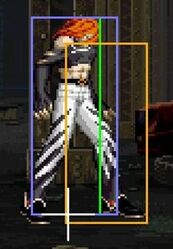
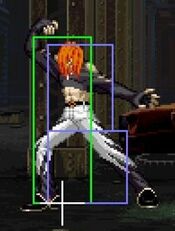
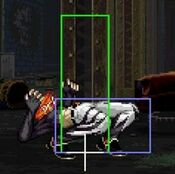
m (→Move List) |
(Cleaned up page. Conforms with other pages. Other small modifications done.) |
||
| Line 1: | Line 1: | ||
{{MOTW Character Intro|char=Freeman |content= | {{MOTW Character Intro|char=Freeman |content= | ||
==Introduction== | ==Introduction== | ||
| Line 36: | Line 34: | ||
==Move List== | ==Move List== | ||
Frame Data Source: https://w.atwiki.jp/garoumow/pages/28.html and https://w.atwiki.jp/garoumow/pages/75.html | Frame Data Source: https://w.atwiki.jp/garoumow/pages/28.html and https://w.atwiki.jp/garoumow/pages/75.html | ||
{{MOTW Legend}} | {{MOTW Legend}} | ||
===Close Standing Normals=== | ===Close Standing Normals=== | ||
===== <span class="invisible-header"></span> ===== | ===== <span class="invisible-header"></span> ===== | ||
<font style="visibility:hidden" size="0"></font> | <font style="visibility:hidden" size="0"></font> | ||
| Line 52: | Line 54: | ||
|version=Cl. {{Icon-SNK|A}} | |version=Cl. {{Icon-SNK|A}} | ||
|Damage=4 | |Damage=4 | ||
|Guard= | |Guard=Mid | ||
|Startup=4 | |Startup=4 | ||
|Active=4 | |Active=4 | ||
| Line 69: | Line 71: | ||
{{AttackData-Garou | {{AttackData-Garou | ||
|version=Cl. {{Icon-SNK|A}}>{{Icon-SNK|A}} | |version=Cl. {{Icon-SNK|A}}>{{Icon-SNK|A}} | ||
|Damage=4,9 | |Damage=4, 9 | ||
|Guard=HL | |Guard=HL | ||
|Startup=4 | |Startup=4 | ||
| Line 80: | Line 82: | ||
|Cancel on Hit=No | |Cancel on Hit=No | ||
|Cancel on Block=No | |Cancel on Block=No | ||
|Guard Crush Value=4,9 | |Guard Crush Value=4, 9 | ||
|description= Target combo from cl.5A. | |description= Target combo from cl.5A. | ||
}} | }} | ||
{{AttackData-Garou | {{AttackData-Garou | ||
|version=Cl. {{Icon-SNK|A}}>{{Icon-SNK|A}}>{{Icon-SNK|A}} | |version=Cl. {{Icon-SNK|A}}>{{Icon-SNK|A}}>{{Icon-SNK|A}} | ||
|Damage=4,9,8 | |Damage=4, 9, 8 | ||
|Guard=HL | |Guard=HL | ||
|Startup=3 | |Startup=3 | ||
| Line 96: | Line 98: | ||
|Cancel on Hit=No | |Cancel on Hit=No | ||
|Cancel on Block=No | |Cancel on Block=No | ||
|Guard Crush Value=4,9,9 | |Guard Crush Value=4, 9, 9 | ||
|description= Target combo from cl.5A. Bad damage and you're minus in hit, never do this | |description= Target combo from cl.5A. Bad damage and you're minus in hit, never do this | ||
}} | }} | ||
}} | }} | ||
===== <span class="invisible-header"></span> ===== | ===== <span class="invisible-header"></span> ===== | ||
| Line 111: | Line 115: | ||
{{AttackData-Garou | {{AttackData-Garou | ||
|Damage=6 | |Damage=6 | ||
|Guard= | |Guard=Mid | ||
|Startup=3 | |Startup=3 | ||
|Active=4 | |Active=4 | ||
| Line 122: | Line 126: | ||
|Cancel on Block=Yes/chainable | |Cancel on Block=Yes/chainable | ||
|Guard Crush Value=4 | |Guard Crush Value=4 | ||
|description=Very fast, | |description=Very fast, advantageous move. Proximity normal, so tricky to get in range for, but useful for pressure and hitconfirms. | ||
}} | }} | ||
}} | }} | ||
===== <span class="invisible-header"></span> ===== | ===== <span class="invisible-header"></span> ===== | ||
| Line 136: | Line 142: | ||
{{AttackData-Garou | {{AttackData-Garou | ||
|Damage=10 | |Damage=10 | ||
|Guard= | |Guard=Mid | ||
|Startup=7 | |Startup=7 | ||
|Active=3 | |Active=3 | ||
| Line 147: | Line 153: | ||
|Cancel on Block=Yes | |Cancel on Block=Yes | ||
|Guard Crush Value=5 | |Guard Crush Value=5 | ||
|description=very unsafe naturally, but | |description=very unsafe naturally, but FCing it makes it very plus znd helpful for punishes | ||
}} | }} | ||
}} | }} | ||
===== <span class="invisible-header"></span> ===== | ===== <span class="invisible-header"></span> ===== | ||
| Line 161: | Line 169: | ||
|data= | |data= | ||
{{AttackData-Garou | {{AttackData-Garou | ||
|Damage=6,6 | |Damage=6, 6 | ||
|Guard= | |Guard=Mid | ||
|Startup=4 | |Startup=4 | ||
|Active=3,3 | |Active=3, 3 | ||
|Recovery=20 | |Recovery=20 | ||
|Total=30 | |Total=30 | ||
| Line 172: | Line 180: | ||
|Cancel on Hit=Yes (1st hit) | |Cancel on Hit=Yes (1st hit) | ||
|Cancel on Block=Yes (1st hit) | |Cancel on Block=Yes (1st hit) | ||
|Guard Crush Value=3,3 | |Guard Crush Value=3, 3 | ||
|description=Decent proximity normal. Your heavy hitconfirm of choice, as FCing this gives you enough time to link into 2C for optimal punishes. Make sure to cancel before the second hit. | |description=Decent proximity normal. Your heavy hitconfirm of choice, as FCing this gives you enough time to link into 2C for optimal punishes. Make sure to cancel before the second hit. | ||
}} | }} | ||
}} | }} | ||
===Far Standing Normals=== | ===Far Standing Normals=== | ||
===== <span class="invisible-header"></span> ===== | ===== <span class="invisible-header"></span> ===== | ||
<font style="visibility:hidden" size="0"></font> | <font style="visibility:hidden" size="0"></font> | ||
| Line 189: | Line 200: | ||
|version=Far {{Icon-SNK|A}} | |version=Far {{Icon-SNK|A}} | ||
|Damage=5 | |Damage=5 | ||
|Guard= | |Guard=Mid | ||
|Startup=4 | |Startup=4 | ||
|Active=4 | |Active=4 | ||
| Line 204: | Line 215: | ||
{{AttackData-Garou | {{AttackData-Garou | ||
|version=Far {{Icon-SNK|A}}>{{Icon-SNK|A}} | |version=Far {{Icon-SNK|A}}>{{Icon-SNK|A}} | ||
|Damage=5,8 | |Damage=5, 8 | ||
|Guard= | |Guard=Mid | ||
|Startup=3 | |Startup=3 | ||
|Active=3 | |Active=3 | ||
| Line 215: | Line 226: | ||
|Cancel on Hit=No | |Cancel on Hit=No | ||
|Cancel on Block=No | |Cancel on Block=No | ||
|Guard Crush Value=4,9 | |Guard Crush Value=4, 9 | ||
|description= Target combo from f.5A. | |description= Target combo from f.5A. | ||
}} | }} | ||
}} | }} | ||
===== <span class="invisible-header"></span> ===== | ===== <span class="invisible-header"></span> ===== | ||
| Line 230: | Line 243: | ||
{{AttackData-Garou | {{AttackData-Garou | ||
|Damage=7 | |Damage=7 | ||
|Guard= | |Guard=Mid | ||
|Startup=5 | |Startup=5 | ||
|Active=4 | |Active=4 | ||
| Line 244: | Line 257: | ||
}} | }} | ||
}} | }} | ||
===== <span class="invisible-header"></span> ===== | ===== <span class="invisible-header"></span> ===== | ||
| Line 256: | Line 271: | ||
{{AttackData-Garou | {{AttackData-Garou | ||
|Damage=14 | |Damage=14 | ||
|Guard= | |Guard=Mid | ||
|Startup=9 | |Startup=9 | ||
|Active=3, «2», 4 | |Active=3, «2», 4 | ||
| Line 270: | Line 285: | ||
}} | }} | ||
}} | }} | ||
===== <span class="invisible-header"></span> ===== | ===== <span class="invisible-header"></span> ===== | ||
| Line 281: | Line 298: | ||
{{AttackData-Garou | {{AttackData-Garou | ||
|Damage=14 | |Damage=14 | ||
|Guard= | |Guard=Mid | ||
|Startup=8 | |Startup=8 | ||
|Active=3 | |Active=3 | ||
| Line 295: | Line 312: | ||
}} | }} | ||
}} | }} | ||
===Crouching Normals=== | ===Crouching Normals=== | ||
===== <span class="invisible-header"></span> ===== | ===== <span class="invisible-header"></span> ===== | ||
<font style="visibility:hidden" size="0"></font> | <font style="visibility:hidden" size="0"></font> | ||
| Line 307: | Line 327: | ||
{{AttackData-Garou | {{AttackData-Garou | ||
|Damage=4 | |Damage=4 | ||
|Guard= | |Guard=Mid | ||
|Startup=5 | |Startup=5 | ||
|Active=4 | |Active=4 | ||
| Line 321: | Line 341: | ||
}} | }} | ||
}} | }} | ||
===== <span class="invisible-header"></span> ===== | ===== <span class="invisible-header"></span> ===== | ||
| Line 332: | Line 354: | ||
{{AttackData-Garou | {{AttackData-Garou | ||
|Damage=6 | |Damage=6 | ||
|Guard= | |Guard=Low | ||
|Startup=4 | |Startup=4 | ||
|Active=4 | |Active=4 | ||
| Line 343: | Line 365: | ||
|Cancel on Block=Yes | |Cancel on Block=Yes | ||
|Guard Crush Value=4 | |Guard Crush Value=4 | ||
|description=Your typical crouching | |description=Your typical crouching B, which means its great for pressure, combos and poking. Self-chainable and combos into rekkas and Full Blast. | ||
}} | }} | ||
}} | }} | ||
===== <span class="invisible-header"></span> ===== | ===== <span class="invisible-header"></span> ===== | ||
| Line 357: | Line 381: | ||
{{AttackData-Garou | {{AttackData-Garou | ||
|Damage=10 | |Damage=10 | ||
|Guard= | |Guard=Mid | ||
|Startup=6 | |Startup=6 | ||
|Active=2 | |Active=2 | ||
| Line 368: | Line 392: | ||
|Cancel on Block=Yes | |Cancel on Block=Yes | ||
|Guard Crush Value=5 | |Guard Crush Value=5 | ||
|description=Great normal: very plus on block/hit at +4 (enough for a 2b to be a combo), deals good damage and combos into damaging confirms like | |description=Great normal: very plus on block/hit at +4 (enough for a 2b to be a combo), deals good damage and combos into damaging confirms like Nightmare A. Has decent range and good ground priority. | ||
}} | }} | ||
}} | }} | ||
| Line 382: | Line 406: | ||
{{AttackData-Garou | {{AttackData-Garou | ||
|Damage=10 | |Damage=10 | ||
|Guard= | |Guard=Low | ||
|Startup=10 | |Startup=10 | ||
|Active=3 | |Active=3 | ||
| Line 396: | Line 420: | ||
}} | }} | ||
}} | }} | ||
===Jumping Normals=== | ===Jumping Normals=== | ||
===== <span class="invisible-header"></span> ===== | ===== <span class="invisible-header"></span> ===== | ||
<font style="visibility:hidden" size="0"></font> | <font style="visibility:hidden" size="0"></font> | ||
| Line 408: | Line 435: | ||
{{AttackData-Garou | {{AttackData-Garou | ||
|Damage=6 | |Damage=6 | ||
|Guard= | |Guard=High | ||
|Startup=4 | |Startup=4 | ||
|Active=10 | |Active=10 | ||
| Line 422: | Line 449: | ||
}} | }} | ||
}} | }} | ||
===== <span class="invisible-header"></span> ===== | ===== <span class="invisible-header"></span> ===== | ||
| Line 433: | Line 462: | ||
{{AttackData-Garou | {{AttackData-Garou | ||
|Damage=6 | |Damage=6 | ||
|Guard= | |Guard=High | ||
|Startup=5 | |Startup=5 | ||
|Active=9 | |Active=9 | ||
| Line 447: | Line 476: | ||
}} | }} | ||
}} | }} | ||
===== <span class="invisible-header"></span> ===== | ===== <span class="invisible-header"></span> ===== | ||
| Line 458: | Line 489: | ||
{{AttackData-Garou | {{AttackData-Garou | ||
|Damage=10 | |Damage=10 | ||
|Guard= | |Guard=High | ||
|Startup=9 | |Startup=9 | ||
|Active=5 | |Active=5 | ||
| Line 471: | Line 502: | ||
|description=Good aggressive air normal, for air-to-ground approaches. Slower, but better hitbox | |description=Good aggressive air normal, for air-to-ground approaches. Slower, but better hitbox | ||
Can beat out | Can beat out upper-body evasion attacks. | ||
}} | }} | ||
}} | }} | ||
===== <span class="invisible-header"></span> ===== | ===== <span class="invisible-header"></span> ===== | ||
| Line 485: | Line 518: | ||
{{AttackData-Garou | {{AttackData-Garou | ||
|Damage=10 | |Damage=10 | ||
|Guard= | |Guard=High | ||
|Startup=10 | |Startup=10 | ||
|Active=6 | |Active=6 | ||
| Line 500: | Line 533: | ||
}} | }} | ||
=== | |||
===Universal Moves=== | |||
===== <span class="invisible-header"></span> ===== | ===== <span class="invisible-header"></span> ===== | ||
<font style="visibility:hidden" size="0"></font> | <font style="visibility:hidden" size="0"></font> | ||
| Line 506: | Line 542: | ||
|image=Garou_Freeman_AB.jpg | |image=Garou_Freeman_AB.jpg | ||
|name=St. {{Icon-SNK|A}}{{Icon-SNK|B}} | |name=St. {{Icon-SNK|A}}{{Icon-SNK|B}} | ||
|subtitle= | |subtitle=Lower-body evasion attack | ||
|caption= | |caption= | ||
|data= | |data= | ||
{{AttackData-Garou | {{AttackData-Garou | ||
|Damage=10 | |Damage=10 | ||
|Guard= | |Guard=Overhead | ||
|Startup=21 | |Startup=21 | ||
|Active=3 | |Active=3 | ||
| Line 525: | Line 561: | ||
}} | }} | ||
}} | }} | ||
===== <span class="invisible-header"></span> ===== | ===== <span class="invisible-header"></span> ===== | ||
| Line 531: | Line 569: | ||
|image= | |image= | ||
|name=Cr. {{Icon-SNK|A}}{{Icon-SNK|B}} | |name=Cr. {{Icon-SNK|A}}{{Icon-SNK|B}} | ||
|subtitle= | |subtitle=Upper-body evasion attack | ||
|caption= | |caption= | ||
|data= | |data= | ||
{{AttackData-Garou | {{AttackData-Garou | ||
|Damage=10 | |Damage=10 | ||
|Guard= | |Guard=Mid | ||
|Startup=8 | |Startup=8 | ||
|Active=3 | |Active=3 | ||
| Line 550: | Line 588: | ||
}} | }} | ||
}} | }} | ||
===== <span class="invisible-header"></span> ===== | ===== <span class="invisible-header"></span> ===== | ||
| Line 555: | Line 595: | ||
{{MoveData | {{MoveData | ||
|image= | |image= | ||
|name=T.O.P. Attack | |name=Overkill (T.O.P. Attack) | ||
| | |input={{Icon-SNK|C}}{{Icon-SNK|D}} | ||
|caption= | |caption= | ||
|data= | |data= | ||
{{AttackData-Garou | {{AttackData-Garou | ||
|Damage= | |Damage= | ||
|Guard= | |Guard=Mid | ||
|Startup=16 | |Startup=16 | ||
|Active= | |Active= | ||
| Line 575: | Line 615: | ||
}} | }} | ||
}} | }} | ||
===Throws=== | ===Throws=== | ||
| Line 582: | Line 624: | ||
{{MoveData | {{MoveData | ||
|image=Garou_Freeman_Grab.jpg | |image=Garou_Freeman_Grab.jpg | ||
|name=Close {{Motion|4}}/{{Motion|6}}+{{Icon-SNK|C}} | |name=Gore Fest | ||
|subtitle= | |input='''Close''' {{Motion|4}}/{{Motion|6}}+{{Icon-SNK|C}} | ||
|caption= | |subtitle= | ||
|caption= | |||
|data= | |data= | ||
{{AttackData-Garou | {{AttackData-Garou | ||
| Line 602: | Line 645: | ||
}} | }} | ||
}} | }} | ||
===Feint Cancels=== | ===Feint Cancels=== | ||
| Line 610: | Line 655: | ||
|image=Garou_Freeman_ForwardTaunt.jpg | |image=Garou_Freeman_ForwardTaunt.jpg | ||
|name={{Motion|6}}+{{Icon-SNK|A}}+{{Icon-SNK|C}} | |name={{Motion|6}}+{{Icon-SNK|A}}+{{Icon-SNK|C}} | ||
|subtitle= | |subtitle=Forward Feint | ||
|caption= | |caption= | ||
|data= | |data= | ||
| Line 626: | Line 671: | ||
|Cancel on Block= | |Cancel on Block= | ||
|Guard Crush Value= | |Guard Crush Value= | ||
|description= Mimics the | |description= Mimics the animation of a delayed Full Blast after blackout. | ||
}} | }} | ||
}} | }} | ||
===== <span class="invisible-header"></span> ===== | |||
<font style="visibility:hidden" size="0"></font> | <font style="visibility:hidden" size="0"></font> | ||
{{MoveData | {{MoveData | ||
|image=Garou_Freeman_DownTaunt.jpg | |image=Garou_Freeman_DownTaunt.jpg | ||
|name={{Motion|2}}+{{Icon-SNK|A}}+{{Icon-SNK|C}} | |name={{Motion|2}}+{{Icon-SNK|A}}+{{Icon-SNK|C}} | ||
|subtitle= | |subtitle=Down Feint | ||
|caption= | |caption= | ||
|data= | |data= | ||
| Line 651: | Line 698: | ||
|Cancel on Block= | |Cancel on Block= | ||
|Guard Crush Value= | |Guard Crush Value= | ||
|description= Mimics the start of | |description= Mimics the start of Phobia (and to a less extent Nightmare). | ||
Has upper-body invincibility when his body is lowered. | |||
Has upper body invincibility when his body is lowered. | |||
}} | }} | ||
}} | }} | ||
===Special Moves=== | ===Special Moves=== | ||
| Line 671: | Line 719: | ||
|version={{Motion|214}}+{{Icon-SNK|A}} | |version={{Motion|214}}+{{Icon-SNK|A}} | ||
|Damage=8 | |Damage=8 | ||
|Guard= | |Guard=Mid | ||
|Startup=9 | |Startup=9 | ||
|Active= | |Active= | ||
| Line 693: | Line 741: | ||
|version={{Motion|214}}+{{Icon-SNK|A}} > {{Motion|214}}+{{Icon-SNK|A}} | |version={{Motion|214}}+{{Icon-SNK|A}} > {{Motion|214}}+{{Icon-SNK|A}} | ||
|Damage=8 | |Damage=8 | ||
|Guard= | |Guard=Low | ||
|Startup= | |Startup= | ||
|Active= | |Active= | ||
| Line 710: | Line 758: | ||
|version={{Motion|214}}+{{Icon-SNK|A}} > {{Motion|214}}+{{Icon-SNK|A}} > {{Motion|214}}+{{Icon-SNK|A}} | |version={{Motion|214}}+{{Icon-SNK|A}} > {{Motion|214}}+{{Icon-SNK|A}} > {{Motion|214}}+{{Icon-SNK|A}} | ||
|Damage=8 | |Damage=8 | ||
|Guard= | |Guard=Mid | ||
|Startup= | |Startup= | ||
|Active= | |Active= | ||
| Line 725: | Line 773: | ||
}} | }} | ||
}} | }} | ||
===== <span class="invisible-header"></span> ===== | ===== <span class="invisible-header"></span> ===== | ||
| Line 738: | Line 788: | ||
|version={{Motion|214}}+{{Icon-SNK|C}} | |version={{Motion|214}}+{{Icon-SNK|C}} | ||
|Damage=8 | |Damage=8 | ||
|Guard= | |Guard=Mid | ||
|Startup=14 | |Startup=14 | ||
|Active= | |Active= | ||
| Line 759: | Line 809: | ||
|version={{Motion|214}}+{{Icon-SNK|C}} > {{Motion|214}}+{{Icon-SNK|C}} | |version={{Motion|214}}+{{Icon-SNK|C}} > {{Motion|214}}+{{Icon-SNK|C}} | ||
|Damage=8 | |Damage=8 | ||
|Guard= | |Guard=Mid | ||
|Startup= | |Startup= | ||
|Active= | |Active= | ||
| Line 776: | Line 826: | ||
|version={{Motion|214}}+{{Icon-SNK|C}} > {{Motion|214}}+{{Icon-SNK|C}} > {{Motion|214}}+{{Icon-SNK|C}} | |version={{Motion|214}}+{{Icon-SNK|C}} > {{Motion|214}}+{{Icon-SNK|C}} > {{Motion|214}}+{{Icon-SNK|C}} | ||
|Damage=8 | |Damage=8 | ||
|Guard= | |Guard=Mid | ||
|Startup= | |Startup= | ||
|Active= | |Active= | ||
| Line 791: | Line 841: | ||
}} | }} | ||
}} | }} | ||
===== <span class="invisible-header"></span> ===== | ===== <span class="invisible-header"></span> ===== | ||
| Line 804: | Line 856: | ||
|version={{Motion|236}}+{{Icon-SNK|A}} | |version={{Motion|236}}+{{Icon-SNK|A}} | ||
|Damage=17 | |Damage=17 | ||
|Guard= | |Guard=Mid | ||
|Startup=18 | |Startup=18 | ||
|Active= | |Active= | ||
| Line 822: | Line 874: | ||
|version={{Motion|236}}+{{Icon-SNK|C}} | |version={{Motion|236}}+{{Icon-SNK|C}} | ||
|Damage=21 | |Damage=21 | ||
|Guard= | |Guard=Mid | ||
|Startup=28 | |Startup=28 | ||
|Active= | |Active= | ||
| Line 838: | Line 890: | ||
}} | }} | ||
}} | }} | ||
===== <span class="invisible-header"></span> ===== | ===== <span class="invisible-header"></span> ===== | ||
| Line 850: | Line 904: | ||
{{AttackData-Garou | {{AttackData-Garou | ||
|version={{Motion|214}}+{{Icon-SNK|B}} | |version={{Motion|214}}+{{Icon-SNK|B}} | ||
|Damage=9,9 | |Damage=9, 9 | ||
|Guard= | |Guard=High | ||
|Startup=29 | |Startup=29 | ||
|Active= | |Active= | ||
| Line 861: | Line 915: | ||
|Cancel on Hit= | |Cancel on Hit= | ||
|Cancel on Block= | |Cancel on Block= | ||
|Guard Crush Value=4,4 | |Guard Crush Value=4, 4 | ||
|description=Leaps to the air to do a slow, overhead attack. The slow startup combined with the low reward makes this move never worth using. | |description=Leaps to the air to do a slow, overhead attack. The slow startup combined with the low reward makes this move never worth using. | ||
| Line 868: | Line 922: | ||
{{AttackData-Garou | {{AttackData-Garou | ||
|version={{Motion|214}}+{{Icon-SNK|D}} | |version={{Motion|214}}+{{Icon-SNK|D}} | ||
|Damage=10,10 | |Damage=10, 10 | ||
|Guard= | |Guard=High | ||
|Startup=41 | |Startup=41 | ||
|Active= | |Active= | ||
| Line 879: | Line 933: | ||
|Cancel on Hit= | |Cancel on Hit= | ||
|Cancel on Block= | |Cancel on Block= | ||
|Guard Crush Value=4,4 | |Guard Crush Value=4, 4 | ||
|description= Impossible to just defend at 0-pixel health bar. | |description= Impossible to just defend at 0-pixel health bar. | ||
}} | }} | ||
}} | }} | ||
===== <span class="invisible-header"></span> ===== | ===== <span class="invisible-header"></span> ===== | ||
| Line 896: | Line 952: | ||
|version={{Motion|623}}+{{Icon-SNK|A}} | |version={{Motion|623}}+{{Icon-SNK|A}} | ||
|Damage=18 | |Damage=18 | ||
|Guard= | |Guard=Mid | ||
|Startup=17 | |Startup=17 | ||
|Active= | |Active= | ||
| Line 914: | Line 970: | ||
|version={{Motion|623}}+{{Icon-SNK|C}} | |version={{Motion|623}}+{{Icon-SNK|C}} | ||
|Damage=22 | |Damage=22 | ||
|Guard= | |Guard=Mid | ||
|Startup=20 | |Startup=20 | ||
|Active= | |Active= | ||
| Line 930: | Line 986: | ||
}} | }} | ||
}} | }} | ||
===== <span class="invisible-header"></span> ===== | ===== <span class="invisible-header"></span> ===== | ||
| Line 973: | Line 1,031: | ||
}} | }} | ||
}} | }} | ||
===== <span class="invisible-header"></span> ===== | ===== <span class="invisible-header"></span> ===== | ||
| Line 1,016: | Line 1,076: | ||
}} | }} | ||
}} | }} | ||
===Super Moves=== | ===Super Moves=== | ||
| Line 1,025: | Line 1,087: | ||
|data= | |data= | ||
{{AttackData-Garou | {{AttackData-Garou | ||
|version = {{Motion|236}},{{Motion|236}} + {{Icon-SNK|A}} | |version = {{Motion|236}},{{Motion|236}} + {{Icon-SNK|A}} <br>(Can Hold {{Icon-SNK|A}}) | ||
|Damage=33 | |Damage=33 | ||
|Guard= | |Guard=Mid | ||
|Startup=11 | |Startup=11 | ||
|Active= | |Active= | ||
| Line 1,041: | Line 1,103: | ||
Impossible to just defend at 0-pixel health bar. | Impossible to just defend at 0-pixel health bar. | ||
When the button is held, startup can be delayed 1~48F max after blackout. | |||
}} | }} | ||
{{AttackData-Garou | {{AttackData-Garou | ||
| header = | | header = | ||
|version ={{Motion|236}},{{Motion|236}} + {{Icon-SNK|C}} | |version ={{Motion|236}},{{Motion|236}} + {{Icon-SNK|C}} <br>(Can Hold {{Icon-SNK|C}}) | ||
|Damage=23,26 | |Damage=23, 26 | ||
|Guard= | |Guard=Mid | ||
|Startup=11 | |Startup=11 | ||
|Active= | |Active= | ||
| Line 1,056: | Line 1,120: | ||
|Cancel on Hit= | |Cancel on Hit= | ||
|Cancel on Block= | |Cancel on Block= | ||
|Guard Crush Value= | |Guard Crush Value=15×2 | ||
|description=1~11F full-body invincibility. Attack guaranteed to go through entire startup and come out. Has a projectile hitbox/hurtbox. | |description=1~11F full-body invincibility. Attack guaranteed to go through entire startup and come out. Has a projectile hitbox/hurtbox. | ||
| Line 1,062: | Line 1,126: | ||
Impossible to just defend at 0-pixel health bar. | Impossible to just defend at 0-pixel health bar. | ||
When the button is held, startup can be delayed 1~48F max after blackout. | |||
}} | }} | ||
}} | }} | ||
| Line 1,093: | Line 1,160: | ||
| header = | | header = | ||
|version ={{Motion|236}},{{Motion|236}} + {{Icon-SNK|D}} | |version ={{Motion|236}},{{Motion|236}} + {{Icon-SNK|D}} | ||
|Damage= | |Damage=7×5, 25 | ||
|Guard= | |Guard= | ||
|Startup=9 | |Startup=9 | ||
| Line 1,106: | Line 1,173: | ||
|Guard Crush Value= | |Guard Crush Value= | ||
|description= 1~9F full-body invincibility, 10~36F full-body counter. | |description= 1~9F full-body invincibility, 10~36F full-body counter. | ||
}} | }} | ||
}} | }} | ||
Revision as of 02:28, 25 March 2023
Introduction
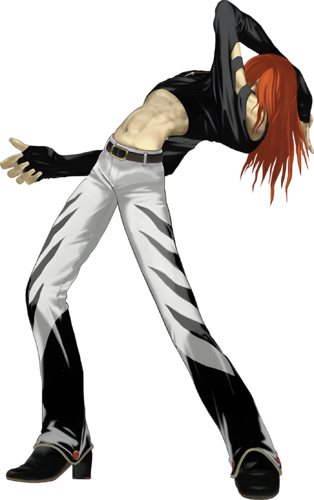
A Criminal in Second South that had a similar look about a fusion of Iori and Benimaru.
Later,in KOF 12 Iori based his new non-flame moveset about him.
Gameplay
Freeman's gameplan is to use his good movement and normals to establish pressure with his rekkas.
| Strengths | Weaknesses |
|---|---|
|
|
Character Colors
Move List
Frame Data Source: https://w.atwiki.jp/garoumow/pages/28.html and https://w.atwiki.jp/garoumow/pages/75.html
| Data Help | |
|---|---|
| Disclaimer: This is meant to teach basic terminology used when describing moves. | |
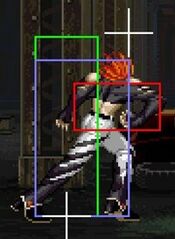
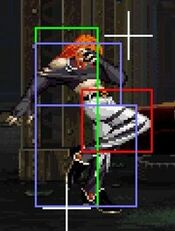
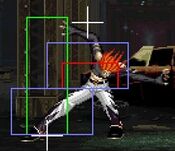
| Hitbox: | A predefined area (usually a rectangle or rectangles) that tells the game how any given attack can come in contact with a character. Hitboxes are invisible to the player when normally playing. |
| Hurtbox: | A predefined area (usually a group of rectangles) that tell the game how your character is allowed to get hit by any incoming attack. Specifically, you'll get hit by (or block) an attack if that attack's hitbox ever overlaps your hurtbox. |
| Throw Box/Range: | Active throw frames and range. Your opponent will be thrown in this field if not in block or hit stun. |
| Projectile Box: | Hitbox on a projectile attack. |
| Guard/Counter Box: | The Guard Box or Counter Box. This appears when blocking or using a counter move. |
| Push Box: | Has no bearing on hit/hurt boxes. Just prevents characters to not pass through each other. (Also known as "Collision Box".) |
| Startup | The number of frames before an attack can hit the opponent. Does not include the first active frame. |
| Guard | The way this move must be blocked.
High or H or Overhead (especially when from the ground) -- must be blocked standing. |
| Damage | "Basic" damage -- Unmodified damage values
"Correct" damage -- Damage values accounting for damage scaling, TOP multiplier, and defense rate |
| Guard Crush Value | Decreases the defender's guard durability gauge by this value. |
| +X | Attacker has X number of advantage frames. |
| -X | Attacker has X number of disadvantage frames. |
| KD | Short for "knockdown", knocks down opponent on hit. |
| ◯ | Cancelable on both hit and block. |
| ∞ | Chain cancelable with the same button (renda cancel). |
| ※ | Cancelable on the first hit/part only. |
| 《X》OR «X» OR <<X>> OR (X) | X number of inactive frames between hits of multihit moves. |
| △ | Only cancelable on block. |
| ▽ | Only cancelable on hit. |
| × OR X | Not cancelable. |
Close Standing Normals
| Damage | Guard | Startup | Active | Recovery | Total |
|---|---|---|---|---|---|
| 6 | Mid | 3 | 4 | 5 | 12 |
| Hit Adv | Block Adv | Cancel on Hit | Cancel on Block | Guard Crush Value | |
| +6 | +6 | Yes/chainable | Yes/chainable | 4 | |
|
Very fast, advantageous move. Proximity normal, so tricky to get in range for, but useful for pressure and hitconfirms. | |||||
| Damage | Guard | Startup | Active | Recovery | Total |
|---|---|---|---|---|---|
| 10 | Mid | 7 | 3 | 25 | 35 |
| Hit Adv | Block Adv | Cancel on Hit | Cancel on Block | Guard Crush Value | |
| -7 | -7 | Yes | Yes | 5 | |
|
very unsafe naturally, but FCing it makes it very plus znd helpful for punishes | |||||
| Damage | Guard | Startup | Active | Recovery | Total |
|---|---|---|---|---|---|
| 6, 6 | Mid | 4 | 3, 3 | 20 | 30 |
| Hit Adv | Block Adv | Cancel on Hit | Cancel on Block | Guard Crush Value | |
| -2 | -2 | Yes (1st hit) | Yes (1st hit) | 3, 3 | |
|
Decent proximity normal. Your heavy hitconfirm of choice, as FCing this gives you enough time to link into 2C for optimal punishes. Make sure to cancel before the second hit. | |||||
Far Standing Normals
| Damage | Guard | Startup | Active | Recovery | Total |
|---|---|---|---|---|---|
| 7 | Mid | 5 | 4 | 16 | 25 |
| Hit Adv | Block Adv | Cancel on Hit | Cancel on Block | Guard Crush Value | |
| -5 | -5 | Yes | Yes | 4 | |
|
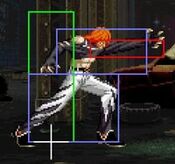
Standing poke with speed, cancellable and actually a good hitbox to beat lows. Has a good bunch of recovery and is vrry minus, so be sure to always buffer rekkas, and dont throw this out often | |||||
| Damage | Guard | Startup | Active | Recovery | Total |
|---|---|---|---|---|---|
| 14 | Mid | 9 | 3, «2», 4 | 11 | 29 |
| Hit Adv | Block Adv | Cancel on Hit | Cancel on Block | Guard Crush Value | |
| +1 | +1 | No | No | 5 | |
|
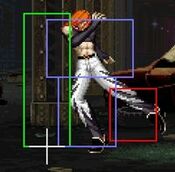
One of Freeman's few anti air options. While it may be a bit slow, its got solid hitboxes and is plus on block, without too much recovery. | |||||
| Damage | Guard | Startup | Active | Recovery | Total |
|---|---|---|---|---|---|
| 14 | Mid | 8 | 3 | 20 | 31 |
| Hit Adv | Block Adv | Cancel on Hit | Cancel on Block | Guard Crush Value | |
| -2 | -2 | No | Yes | 5 |
Crouching Normals
| Damage | Guard | Startup | Active | Recovery | Total |
|---|---|---|---|---|---|
| 4 | Mid | 5 | 4 | 6 | 15 |
| Hit Adv | Block Adv | Cancel on Hit | Cancel on Block | Guard Crush Value | |
| +5 | +5 | Yes/chainable | Yes/chainable | 4 |
| Damage | Guard | Startup | Active | Recovery | Total |
|---|---|---|---|---|---|
| 6 | Low | 4 | 4 | 6 | 14 |
| Hit Adv | Block Adv | Cancel on Hit | Cancel on Block | Guard Crush Value | |
| +5 | +5 | Yes | Yes | 4 | |
|
Your typical crouching B, which means its great for pressure, combos and poking. Self-chainable and combos into rekkas and Full Blast. | |||||
| Damage | Guard | Startup | Active | Recovery | Total |
|---|---|---|---|---|---|
| 10 | Mid | 6 | 2 | 15 | 23 |
| Hit Adv | Block Adv | Cancel on Hit | Cancel on Block | Guard Crush Value | |
| +4 | +4 | Yes | Yes | 5 | |
|
Great normal: very plus on block/hit at +4 (enough for a 2b to be a combo), deals good damage and combos into damaging confirms like Nightmare A. Has decent range and good ground priority. | |||||
| Damage | Guard | Startup | Active | Recovery | Total |
|---|---|---|---|---|---|
| 10 | Low | 10 | 3 | 28 | 41 |
| Hit Adv | Block Adv | Cancel on Hit | Cancel on Block | Guard Crush Value | |
| KD | -10 | No | No | 5 |
Jumping Normals
| Damage | Guard | Startup | Active | Recovery | Total |
|---|---|---|---|---|---|
| 6 | High | 4 | 10 | - | - |
| Hit Adv | Block Adv | Cancel on Hit | Cancel on Block | Guard Crush Value | |
| - | - | No | No | 4 | |
|
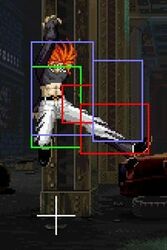
Quick air move with decent hitbox for meeting opponents in the air | |||||
| Damage | Guard | Startup | Active | Recovery | Total |
|---|---|---|---|---|---|
| 6 | High | 5 | 9 | - | - |
| Hit Adv | Block Adv | Cancel on Hit | Cancel on Block | Guard Crush Value | |
| - | - | No | No | 4 | |
|
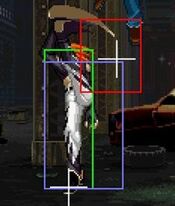
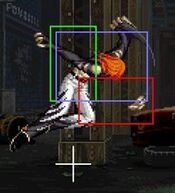
More range but the hurtbox is also extended. Decent quick jump-in and alternative air poke | |||||
| Damage | Guard | Startup | Active | Recovery | Total |
|---|---|---|---|---|---|
| 10 | High | 9 | 5 | - | - |
| Hit Adv | Block Adv | Cancel on Hit | Cancel on Block | Guard Crush Value | |
| - | - | No | No | 5 | |
|
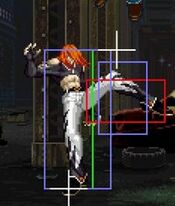
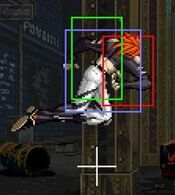
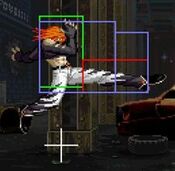
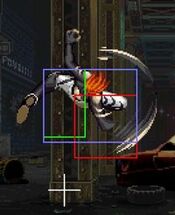
Good aggressive air normal, for air-to-ground approaches. Slower, but better hitbox Can beat out upper-body evasion attacks. | |||||
| Damage | Guard | Startup | Active | Recovery | Total |
|---|---|---|---|---|---|
| 10 | High | 10 | 6 | - | - |
| Hit Adv | Block Adv | Cancel on Hit | Cancel on Block | Guard Crush Value | |
| - | - | No | No | 5 |
Universal Moves
| Damage | Guard | Startup | Active | Recovery | Total |
|---|---|---|---|---|---|
| 10 | Overhead | 21 | 3 | 17 | 41 |
| Hit Adv | Block Adv | Cancel on Hit | Cancel on Block | Guard Crush Value | |
| -1 | +5 | No | No | 6 |
| Damage | Guard | Startup | Active | Recovery | Total |
|---|---|---|---|---|---|
| 10 | Mid | 8 | 3 | 20 | 31 |
| Hit Adv | Block Adv | Cancel on Hit | Cancel on Block | Guard Crush Value | |
| -4 | +2 | Yes | No | 6 | |
|
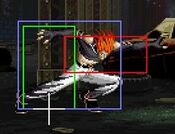
1~6F of upper body invincibility. Last 3F has full-body invincibility. | |||||
| Damage | Guard | Startup | Active | Recovery | Total |
|---|---|---|---|---|---|
| - | Mid | 16 | - | - | - |
| Hit Adv | Block Adv | Cancel on Hit | Cancel on Block | Guard Crush Value | |
| KD | -11 | - | - | 25 | |
|
Freeman slashes above, from the front to the back. Too slow to serve as an anti air, and ots high guard damage doesnt mean much when its very unsafe on block. You could space it to make it harder to punish but you shouldnt use it for pressure to begin with. Pretty bad TOP move. | |||||
Throws
| Damage | Guard | Startup | Active | Recovery | Total |
|---|---|---|---|---|---|
| 14 | - | 1 | - | - | - |
| Hit Adv | Block Adv | Cancel on Hit | Cancel on Block | Guard Crush Value | |
| +73 | - | - | - | - | |
|
Typical throw with no particular characteristics | |||||
Feint Cancels
| Damage | Guard | Startup | Active | Recovery | Total |
|---|---|---|---|---|---|
| - | - | - | - | - | 11 |
| Hit Adv | Block Adv | Cancel on Hit | Cancel on Block | Guard Crush Value | |
| - | - | - | - | - | |
|
Mimics the animation of a delayed Full Blast after blackout. | |||||
| Damage | Guard | Startup | Active | Recovery | Total |
|---|---|---|---|---|---|
| - | - | - | - | - | 10 |
| Hit Adv | Block Adv | Cancel on Hit | Cancel on Block | Guard Crush Value | |
| - | - | - | - | - | |
|
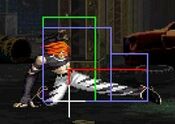
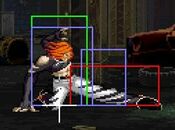
Mimics the start of Phobia (and to a less extent Nightmare). Has upper-body invincibility when his body is lowered. | |||||
Special Moves
Super Moves
