No edit summary |
(Modified Freeman header) |
||
| Line 1: | Line 1: | ||
{{MOTW Character | {{MOTW Character Intro|char=Freeman |content= | ||
[[File:Freeman.PNG|right]] | [[File:Freeman.PNG|right]] | ||
==Introduction== | ==Introduction== | ||
| Line 9: | Line 8: | ||
Later,in KOF 12 Iori based his new non-flame moveset about him. | Later,in KOF 12 Iori based his new non-flame moveset about him. | ||
{| | == Gameplay == | ||
{{Content Box|content= | |||
'''Freeman's''' gameplan is to use his good movement and normals to establish pressure with his rekkas. | |||
| | {{ProConTable | ||
* Many fast, safe/adv. Buttons for poking and pressure | |pros= | ||
* Rekkas are very versitile, uses for combos, pressure, poking and meter building all very effectively. | * '''Many fast, safe/adv. Buttons for poking and pressure''' | ||
*Basic but reliable damage output from all convertable hits. | * '''Rekkas are very versitile, uses for combos, pressure, poking and meter building all very effectively.''' | ||
* Full Force is a strong S-Power | * '''Basic but reliable damage output from all convertable hits.''' | ||
| | * '''Full Force is a strong S-Power''' | ||
* A lot of useless or bad specials, including his TOP move and one of his supers | |cons= | ||
* Low Defense Ratio | * '''A lot of useless or bad specials, including his TOP move and one of his supers''' | ||
* Limited reliable options vs. Jumpers | * '''Low Defense Ratio''' | ||
* Comparatively short and limited conversions, even if rewarding. | * '''Limited reliable options vs. Jumpers''' | ||
* '''Comparatively short and limited conversions, even if rewarding.''' | |||
}} | |||
}} | |||
}} | |||
'''Character Colors''' | '''Character Colors''' | ||
Revision as of 05:26, 18 January 2023
Introduction
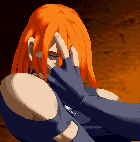
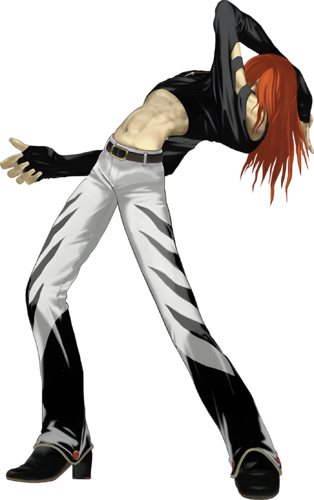
A Criminal in Second South that had a similar look about a fusion of Iori and Benimaru.
Later,in KOF 12 Iori based his new non-flame moveset about him.
Gameplay
Freeman's gameplan is to use his good movement and normals to establish pressure with his rekkas.
| Strengths | Weaknesses |
|---|---|
|
|
Character Colors
Move List
Frame Data Source: https://w.atwiki.jp/garoumow/pages/28.html and Howard's Arena
| Data Help | |
|---|---|
| Disclaimer: This is meant to teach basic terminology used when describing moves. | |
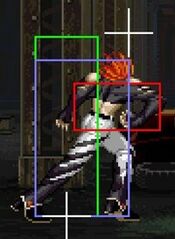
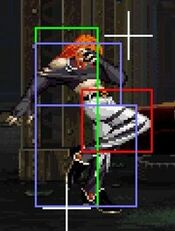
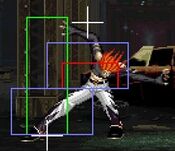
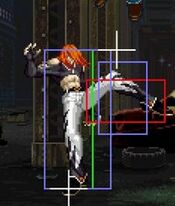
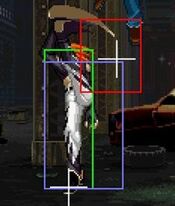
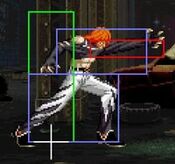
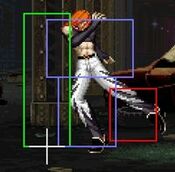
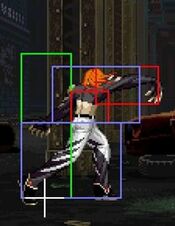
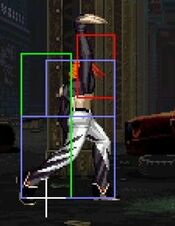
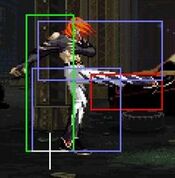
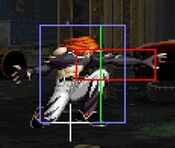
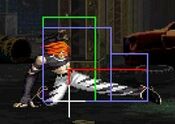
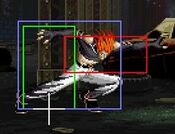
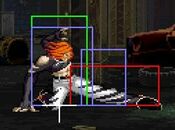
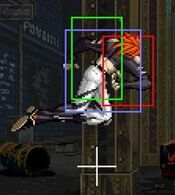
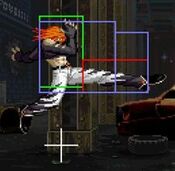
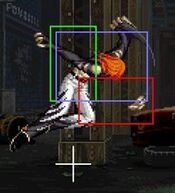
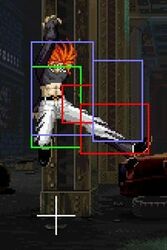
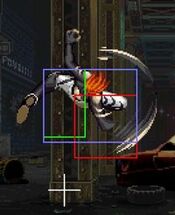
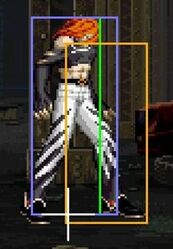
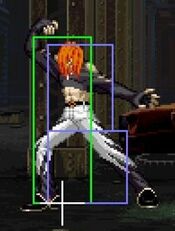
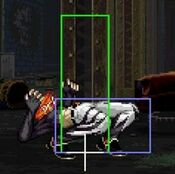
| Hitbox: | A predefined area (usually a rectangle or rectangles) that tells the game how any given attack can come in contact with a character. Hitboxes are invisible to the player when normally playing. |
| Hurtbox: | A predefined area (usually a group of rectangles) that tell the game how your character is allowed to get hit by any incoming attack. Specifically, you'll get hit by (or block) an attack if that attack's hitbox ever overlaps your hurtbox. |
| Throw Box/Range: | Active throw frames and range. Your opponent will be thrown in this field if not in block or hit stun. |
| Projectile Box: | Hitbox on a projectile attack. |
| Guard/Counter Box: | The Guard Box or Counter Box. This appears when blocking or using a counter move. |
| Push Box: | Has no bearing on hit/hurt boxes. Just prevents characters to not pass through each other. (Also known as "Collision Box".) |
| Startup | The number of frames before an attack can hit the opponent. Does not include the first active frame. |
| Guard | The way this move must be blocked.
High or H or Overhead (especially when from the ground) -- must be blocked standing. |
| Damage | "Basic" damage -- Unmodified damage values
"Correct" damage -- Damage values accounting for damage scaling, TOP multiplier, and defense rate |
| Guard Crush Value | Decreases the defender's guard durability gauge by this value. |
| +X | Attacker has X number of advantage frames. |
| -X | Attacker has X number of disadvantage frames. |
| KD | Short for "knockdown", knocks down opponent on hit. |
| ◯ | Cancelable on both hit and block. |
| ∞ | Chain cancelable with the same button (renda cancel). |
| ※ | Cancelable on the first hit/part only. |
| 《X》OR «X» OR <<X>> OR (X) | X number of inactive frames between hits of multihit moves. |
| △ | Only cancelable on block. |
| ▽ | Only cancelable on hit. |
| × OR X | Not cancelable. |
Close Standing Normals
| Damage | Guard | Startup | Active | Recovery | Total |
|---|---|---|---|---|---|
| 6 | 4 | 3 | 4 | 5 | 12 |
| Hit Adv | Block Adv | Cancel on Hit | Cancel on Block | Guard Crush Value | |
| +6 | +6 | Yes | Yes | - | |
|
Very fast, advantagous move. Proximity normal, so tricky to get in range for, but useful for pressure and hitconfirms. | |||||
| Damage | Guard | Startup | Active | Recovery | Total |
|---|---|---|---|---|---|
| 10 | - | 7 | 3 | 25 | - |
| Hit Adv | Block Adv | Cancel on Hit | Cancel on Block | Guard Crush Value | |
| -7 | -7 | Yes | Yes | - | |
|
very unsafe naturally, but fcing it makes it very plus znd helpful for punishes | |||||
| Damage | Guard | Startup | Active | Recovery | Total |
|---|---|---|---|---|---|
| 6,6 | 3,3 | 4 | 3,3 | 20 | - |
| Hit Adv | Block Adv | Cancel on Hit | Cancel on Block | Guard Crush Value | |
| -2 | -2 | Yes (1st hit) | Yes (1st hit) | - | |
|
Decent proximity normal. Your heavy hitconfirm of choice, as FCing this gives you enough time to link into 2C for optimal punishes. Make sure to cancel before the second hit. | |||||
Far Standing Normals
| Damage | Guard | Startup | Active | Recovery | Total |
|---|---|---|---|---|---|
| 5 | 4 | 4 | 4 | 12 | - |
| Hit Adv | Block Adv | Cancel on Hit | Cancel on Block | Guard Crush Value | |
| -1 | -1 | Yes | Yes | - | |
|
Average far jab. Decent ground poke, but moreso valuable as a fast anti air, even if mediocre | |||||
| Damage | Guard | Startup | Active | Recovery | Total |
|---|---|---|---|---|---|
| 7 | 4 | 5 | 4 | 16 | 25 |
| Hit Adv | Block Adv | Cancel on Hit | Cancel on Block | Guard Crush Value | |
| -5 | -5 | Yes | Yes | - | |
|
Standing poke with speed, cancellable and actually a good hitbox to beat lows. Has a good bunch of recovery and is vrry minus, so be sure to always buffer rekkas, and dont throw this out often | |||||
| Damage | Guard | Startup | Active | Recovery | Total |
|---|---|---|---|---|---|
| 14 | 5 | 9 | 3(2)4 | 11 | - |
| Hit Adv | Block Adv | Cancel on Hit | Cancel on Block | Guard Crush Value | |
| +1 | +1 | No | No | - | |
|
One of Freeman's few anti air options. While it may be a bit slow, its got solid hitboxes and is plus on block, without too much recovery. | |||||
| Damage | Guard | Startup | Active | Recovery | Total |
|---|---|---|---|---|---|
| - | - | 8 | - | - | - |
| Hit Adv | Block Adv | Cancel on Hit | Cancel on Block | Guard Crush Value | |
| -2 | -2 | No | Yes | - |
Crouching Normals
| Damage | Guard | Startup | Active | Recovery | Total |
|---|---|---|---|---|---|
| - | - | 5 | - | - | - |
| Hit Adv | Block Adv | Cancel on Hit | Cancel on Block | Guard Crush Value | |
| +4 | +4 | Yes | Yes | - |
| Damage | Guard | Startup | Active | Recovery | Total |
|---|---|---|---|---|---|
| 6 | 4 | 4 | 4 | 6 | 14 |
| Hit Adv | Block Adv | Cancel on Hit | Cancel on Block | Guard Crush Value | |
| +4 | +4 | Yes | Yes | - | |
|
Your typical crouching b, which means its great for pressure, combos and poking. Self-chainable and combos into rekkas and 236236P | |||||
| Damage | Guard | Startup | Active | Recovery | Total |
|---|---|---|---|---|---|
| 10 | 5 | 6 | 2 | 15 | 23 |
| Hit Adv | Block Adv | Cancel on Hit | Cancel on Block | Guard Crush Value | |
| +4 | +4 | Yes | Yes | - | |
|
Great normal: very plus on block/hit at +4 (enough for a 2b to be a combo), deals good damage and combos into damaging confirms like 236A. Has decent range and good ground priority. | |||||
| Damage | Guard | Startup | Active | Recovery | Total |
|---|---|---|---|---|---|
| - | - | 10 | - | - | - |
| Hit Adv | Block Adv | Cancel on Hit | Cancel on Block | Guard Crush Value | |
| KD | -10 | No | No | - |
Jumping Normals
| Damage | Guard | Startup | Active | Recovery | Total |
|---|---|---|---|---|---|
| 6 | 4 | 4 | 10 | - | - |
| Hit Adv | Block Adv | Cancel on Hit | Cancel on Block | Guard Crush Value | |
| - | - | - | - | - | |
|
Quick air move with decent hitbox for meeting opponents in the air | |||||
| Damage | Guard | Startup | Active | Recovery | Total |
|---|---|---|---|---|---|
| 6 | 4 | 5 | 9 | - | - |
| Hit Adv | Block Adv | Cancel on Hit | Cancel on Block | Guard Crush Value | |
| - | - | - | - | - | |
|
More range but the hurtbox is also extended. Decent quick jump-in and alternative air poke | |||||
| Damage | Guard | Startup | Active | Recovery | Total |
|---|---|---|---|---|---|
| 10 | 5 | 9 | 5 | - | - |
| Hit Adv | Block Adv | Cancel on Hit | Cancel on Block | Guard Crush Value | |
| - | - | - | - | - | |
|
Good aggressive air normal, for air-to-ground approaches. Slower, but better hitbox | |||||
| Damage | Guard | Startup | Active | Recovery | Total |
|---|---|---|---|---|---|
| - | - | 10 | - | - | - |
| Hit Adv | Block Adv | Cancel on Hit | Cancel on Block | Guard Crush Value | |
| - | - | - | - | - |
Command Normals
| Damage | Guard | Startup | Active | Recovery | Total |
|---|---|---|---|---|---|
| 10 | 6 | 21 | 3 | 17 | - |
| Hit Adv | Block Adv | Cancel on Hit | Cancel on Block | Guard Crush Value | |
| -1 | +5 | - | - | - |
| Damage | Guard | Startup | Active | Recovery | Total |
|---|---|---|---|---|---|
| 10 | 6 | 8 | 3 | 20 | - |
| Hit Adv | Block Adv | Cancel on Hit | Cancel on Block | Guard Crush Value | |
| -4 | +2 | Yes | No | - | |
|
1-6f of upper body invuln. | |||||
| Damage | Guard | Startup | Active | Recovery | Total |
|---|---|---|---|---|---|
| - | 25 | 16 | - | - | - |
| Hit Adv | Block Adv | Cancel on Hit | Cancel on Block | Guard Crush Value | |
| KD | -11 | - | - | - | |
|
Freeman slashes above, from the front to the back. Too slow to serve as an anti air, and ots high guard damage doesnt mean much when its very unsafe on block. You could space it to make it harder to punish but you shouldnt use it for pressure to begin with. Pretty bad TOP move. | |||||
Throws
| Damage | Guard | Startup | Active | Recovery | Total |
|---|---|---|---|---|---|
| 14 | - | 1 | - | - | - |
| Hit Adv | Block Adv | Cancel on Hit | Cancel on Block | Guard Crush Value | |
| - | - | - | - | - | |
|
Typical throw with no particular characteristics | |||||
Feint Cancels
| Damage | Guard | Startup | Active | Recovery | Total |
|---|---|---|---|---|---|
| - | - | - | - | - | - |
| Hit Adv | Block Adv | Cancel on Hit | Cancel on Block | Guard Crush Value | |
| - | - | - | - | - |
| Damage | Guard | Startup | Active | Recovery | Total |
|---|---|---|---|---|---|
| - | - | - | - | - | - |
| Hit Adv | Block Adv | Cancel on Hit | Cancel on Block | Guard Crush Value | |
| - | - | - | - | - |
Special Moves
Super Moves
Attack Notes
His dash is different from the rest of the cast, if you maintain forward (forward neutral forward+hold) his dash will travel more distance.
You can alternate between rekka C and A, therefore it is recomended to always use the A version for the 3rd rekka as it is the safest one, and prefer the A version as well as 2nd since it hits low and has the best frame advantage.
Also note that if you are out of range, you can whiff cancel rekkas (karacancel), for example 2C > rekka A(whiff) karacancel 2nd rekka A (will combo with the 2C). It is also a blockstring on block.
A simple pressure string would be rekka A > rekka A > 2C > rekka A karacancel into rekka A.
You can make your opponent guess by delaying your rekkas or doing something else (mainly after the 2nd rekka A).
Other than his rekkas, his special moves are either unsafe or can be reacted to easily so it is not recommended to use them.
His far C is an amazing poke as it covers the air very well.
He is one of the few characters able to confirm his super via 3 lights midscreen : clB 2B stA Super (use the 2B 236AD 236A shortcut for easy execution).
Combos
Basic Combos
Crouching B 1~3 times (at least one if not at corner)-->QCB+A (x3)
Jumping C or D-->Down+AB-->QCB+C (x3)
Jumping C or D-->Standing C-->QCF+A
Jumping C or D-->Standing C-->QCFx2+P
Crouching B 1~3 times (at least one if not at corner)-->QCFx2+P
Advanced Combos
Jumping C or D-->Down+AB-Feint->Crouching C-->QCFx2+P (Better chance of working at the corner)
HCF+K, Break-->Standing C-Feint->Crouching C-->QCFx2+P
T.O.P. Notes
Freeman's TOP move is a barrier that surrounds his body. Recovery on the move is ok, but be cautious.
Basic Strategy
Freeman is a pure ground rushdown character based on quick and speedyful combos, your main objetive in far combat is to use your grab and break and in close combat to use your rekkas for pressure.
He is a bottom tier along with Tizoc due that his Break Shot and Feint Moves are more a tactic than a combo adding.
Freeman is a bit of an odd character. On paper, he looks fantastic, with decent speed, good damage behind his attacks, and invincibility frames on a lot of his specials. However, he suffers three crippling flaws: worst brake move in the game, terrible combo-ability, and lack of any sort of a jump-in stopper. The last one is the worst; he somewhat makes up for poor combo-ability with his powerful attacks, but since almost any character can jump in on him at will, there is little he can do on defense.
Advanced Tactics
In-depth video lecture on Freeman. Please use the timestamps to navigate the topics.
<https://youtu.be/nBjUODl3c40>
Matchup Notes
To come.
