RedSodaPop (talk | contribs) No edit summary |
|||
| Line 20: | Line 20: | ||
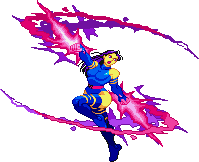
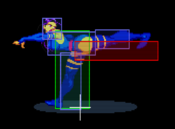
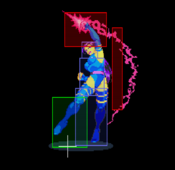
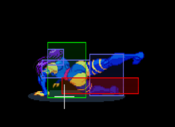
Taunt - Psylocke is the only character whose taunt is simply the Start button. Her moving hand is an active hitbox and can do damage, dizzy if the opponent is in the red, and even kill if the opponent has zero vital. It can also cancel standing normals, but not crouching ones. Psylocke remains taunting until hit or the player moves her. | Taunt - Psylocke is the only character whose taunt is simply the Start button. Her moving hand is an active hitbox and can do damage, dizzy if the opponent is in the red, and even kill if the opponent has zero vital. It can also cancel standing normals, but not crouching ones. Psylocke remains taunting until hit or the player moves her. | ||
=====<font style="visibility:hidden; float:right">LP</font>===== | |||
{{MoveData | |||
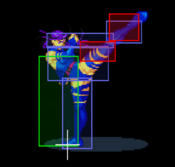
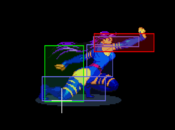
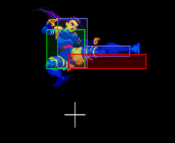
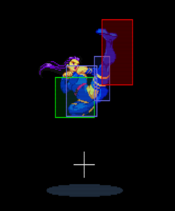
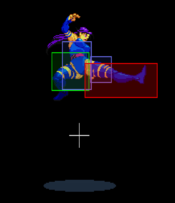
|image=COTA_psylocke_LP.png | |||
|caption= | |||
|name= | |||
|input=LP | |||
|data= | |||
{{AttackData-XCOTA | |||
|Startup=5 | |||
|Active=2-4? | |||
|Recovery=1 | |||
|Adv. Hit=5 | |||
|Adv. Guard=6 | |||
|Adv. Dash=9 | |||
}} | |||
}} | |||
=====<font style="visibility:hidden; float:right">MP</font>===== | |||
{{MoveData | |||
|image=COTA_psylocke_MP.png | |||
|caption= | |||
|name= | |||
|input=MP | |||
|data= | |||
{{AttackData-XCOTA | |||
|Startup=6 | |||
|Active=4 | |||
|Recovery=6 | |||
|Adv. Hit=2 | |||
|Adv. Guard=2 | |||
|Adv. Dash=2 | |||
}} | |||
}} | |||
=====<font style="visibility:hidden; float:right">HP</font>===== | |||
{{MoveData | |||
|image=COTA_psylocke_HP.png | |||
|caption= | |||
|name= | |||
|input=HP | |||
|data= | |||
{{AttackData-XCOTA | |||
|Startup=6-8 | |||
|Active=8 | |||
|Recovery=12 | |||
|Adv. Hit=-8 | |||
|Adv. Guard=-15 | |||
|Adv. Dash=-9 | |||
}} | |||
}} | |||
=====<font style="visibility:hidden; float:right">LK</font>===== | |||
{{MoveData | |||
|image=COTA_psylocke_LK.png | |||
|caption= | |||
|name= | |||
|input=LK | |||
|data= | |||
{{AttackData-XCOTA | |||
|Startup=5 | |||
|Active=2-4 | |||
|Recovery=2 | |||
|Adv. Hit=4 | |||
|Adv. Guard=6 | |||
|Adv. Dash=6 | |||
}} | |||
}} | |||
=====<font style="visibility:hidden; float:right">MK</font>===== | |||
{{MoveData | |||
|image=COTA_psylocke_MK.png | |||
|caption= | |||
|name= | |||
|input=MK | |||
|data= | |||
{{AttackData-XCOTA | |||
|Startup=5-7 | |||
|Active=6-7 | |||
|Recovery=3 | |||
|Adv. Hit=8 | |||
|Adv. Guard=5 | |||
|Adv. Dash=5 | |||
}} | |||
}} | |||
=====<font style="visibility:hidden; float:right">HK</font>===== | |||
{{MoveData | |||
|image=COTA_psylocke_HK.png | |||
|caption= | |||
|name= | |||
|input=HK | |||
|data= | |||
{{AttackData-XCOTA | |||
|Startup=9 | |||
|Active=8 | |||
}} | |||
}} | |||
=====<font style="visibility:hidden; float:right">c.LP</font>===== | |||
{{MoveData | |||
|image=COTA_psylocke_c.LP.png | |||
|caption= | |||
|name= | |||
|input=c.LP | |||
|data= | |||
{{AttackData-XCOTA | |||
|Startup=3-5 | |||
|Active=4 | |||
|Recovery=1 | |||
|Adv. Hit=3 | |||
|Adv. Guard=5 | |||
|Adv. Dash=5 | |||
}} | |||
}} | |||
=====<font style="visibility:hidden; float:right">c.MP</font>===== | |||
{{MoveData | |||
|image=COTA_psylocke_c.MP.png | |||
|caption= | |||
|name= | |||
|input=c.MP | |||
|data= | |||
{{AttackData-XCOTA | |||
|Startup=6 | |||
|Active=4 | |||
|Recovery=4 | |||
|Adv. Hit=6 | |||
|Adv. Guard=3 | |||
|Adv. Dash=3 | |||
}} | |||
}} | |||
=====<font style="visibility:hidden; float:right">c.HP</font>===== | |||
{{MoveData | |||
|image=COTA_psylocke_c.HP.png | |||
|caption= | |||
|name= | |||
|input=c.HP | |||
|data= | |||
{{AttackData-XCOTA | |||
|Startup=6 | |||
|Active=8 | |||
|Recovery=15 | |||
|Adv. Hit=Launches | |||
|Adv. Guard=-5 | |||
|Adv. Dash=-5 | |||
}} | |||
}} | |||
=====<font style="visibility:hidden; float:right">c.LK</font>===== | |||
{{MoveData | |||
|image=COTA_psylocke_c.LK.png | |||
|caption= | |||
|name= | |||
|input=c.LK | |||
|data= | |||
{{AttackData-XCOTA | |||
|Startup=5 | |||
|Active=2 | |||
|Recovery=2 | |||
|Adv. Hit=7 | |||
|Adv. Guard=6 | |||
|Adv. Dash=6 | |||
}} | |||
}} | |||
=====<font style="visibility:hidden; float:right">c.MK</font>===== | |||
{{MoveData | |||
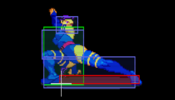
|image=COTA_psylocke_c.MK.png | |||
|caption= | |||
|name= | |||
|input=c.MK | |||
|data= | |||
{{AttackData-XCOTA | |||
|Startup=7 | |||
|Active=4 | |||
|Recovery=5 | |||
|Adv. Hit=Launches | |||
|Adv. Guard=0 | |||
|Adv. Dash=0 | |||
}} | |||
}} | |||
=====<font style="visibility:hidden; float:right">c.HK</font>===== | |||
{{MoveData | |||
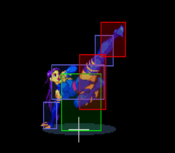
|image=COTA_psylocke_c.HK.png | |||
|caption= | |||
|name= | |||
|input=c.HK | |||
|data= | |||
{{AttackData-XCOTA | |||
|Startup=7 | |||
|Active=8 | |||
|Recovery=21 | |||
|Adv. Hit=KD | |||
|Adv. Guard=-11 | |||
|Adv. Dash=-11 | |||
}} | |||
}} | |||
=====<font style="visibility:hidden; float:right">6MK</font>===== | |||
{{MoveData | |||
|image=COTA_psylocke_6MK.png | |||
|caption= | |||
|name= | |||
|input=6MK | |||
|data= | |||
{{AttackData-XCOTA | |||
|Startup=22 | |||
|Active=6 | |||
|Recovery=11 | |||
|Adv. Hit=1 | |||
|Adv. Guard=-6 | |||
|Adv. Dash=-- | |||
}} | |||
}} | |||
=====<font style="visibility:hidden; float:right">4HK</font>===== | |||
{{MoveData | |||
|image=COTA_psylocke_4HK.png | |||
|caption= | |||
|name= | |||
|input=4HK | |||
|data= | |||
{{AttackData-XCOTA | |||
|Startup=40 | |||
|Active=4 | |||
|Recovery=11 | |||
|Adv. Hit=8 | |||
|Adv. Guard=-1 | |||
|Adv. Dash=-- | |||
}} | |||
}} | |||
=====<font style="visibility:hidden; float:right">6HK</font>===== | |||
{{MoveData | |||
|image=COTA_psylocke_6HK.png | |||
|caption= | |||
|name= | |||
|input=6HK | |||
|data= | |||
{{AttackData-XCOTA | |||
|Startup=9 | |||
|Active=8 | |||
|Recovery=19 | |||
}} | |||
}} | |||
=====<font style="visibility:hidden; float:right">j.LP</font>===== | |||
{{MoveData | |||
|image=COTA_psylocke_j.LP.png | |||
|caption= | |||
|name= | |||
|input=j.LP | |||
|data= | |||
{{AttackData-XCOTA | |||
|Startup=5 | |||
|Active=12 | |||
|Recovery=4 | |||
|Adv. Hit=-- | |||
|Adv. Guard=-- | |||
|Adv. Dash=-- | |||
}} | |||
}} | |||
=====<font style="visibility:hidden; float:right">j.MP</font>===== | |||
{{MoveData | |||
|image=COTA_psylocke_j.MP.png | |||
|caption= | |||
|name= | |||
|input=j.MP | |||
|data= | |||
{{AttackData-XCOTA | |||
|Startup=6 | |||
|Active=10 | |||
|Recovery=3 | |||
|Adv. Hit=-- | |||
|Adv. Guard=-- | |||
|Adv. Dash=-- | |||
}} | |||
}} | |||
=====<font style="visibility:hidden; float:right">j.HP</font>===== | |||
{{MoveData | |||
|image=COTA_psylocke_j.HP.png | |||
|caption= | |||
|name= | |||
|input=j.HP | |||
|data= | |||
{{AttackData-XCOTA | |||
|Startup=8 | |||
|Active=14 | |||
|Recovery=5 | |||
|Adv. Hit=-- | |||
|Adv. Guard=-- | |||
|Adv. Dash=-- | |||
}} | |||
}} | |||
=====<font style="visibility:hidden; float:right">j.LK</font>===== | |||
{{MoveData | |||
|image=COTA_psylocke_j.LK.png | |||
|caption= | |||
|name= | |||
|input=j.LK | |||
|data= | |||
{{AttackData-XCOTA | |||
|Startup=5 | |||
|Active=12 | |||
|Recovery=5 | |||
|Adv. Hit=-- | |||
|Adv. Guard=-- | |||
|Adv. Dash=-- | |||
}} | |||
}} | |||
=====<font style="visibility:hidden; float:right">j.MK</font>===== | |||
{{MoveData | |||
|image=COTA_psylocke_j.MK.png | |||
|caption= | |||
|name= | |||
|input=j.MK | |||
|data= | |||
{{AttackData-XCOTA | |||
|Startup=7 | |||
|Active=4 | |||
|Recovery=16 | |||
|Adv. Hit=-- | |||
|Adv. Guard=-- | |||
|Adv. Dash=-- | |||
}} | |||
}} | |||
=====<font style="visibility:hidden; float:right">j.HK</font>===== | |||
{{MoveData | |||
|image=COTA_psylocke_j.HK.png | |||
|caption= | |||
|name= | |||
|input=j.HK | |||
|data= | |||
{{AttackData-XCOTA | |||
|Startup=8 | |||
|Active=10 | |||
|Recovery=5 | |||
|Adv. Hit=-- | |||
|Adv. Guard=-- | |||
|Adv. Dash=-- | |||
}} | |||
}} | |||
=====<font style="visibility:hidden; float:right">236L/M/HP</font>===== | |||
{{MoveData | |||
|image=COTA_psylocke_236L/M/HP.png | |||
|caption= | |||
|name= | |||
|input=236L/M/HP | |||
|data= | |||
{{AttackData-XCOTA | |||
|Startup=8 | |||
|Active=proj. | |||
|Recovery=42 | |||
|Adv. Hit=-- | |||
|Adv. Guard=-- | |||
|Adv. Dash=-- | |||
}} | |||
}} | |||
=====<font style="visibility:hidden; float:right">236LK</font>===== | |||
{{MoveData | |||
|image=COTA_psylocke_236LK.png | |||
|caption= | |||
|name= | |||
|input=236LK | |||
|data= | |||
{{AttackData-XCOTA | |||
|Startup=8 | |||
|Active=12 | |||
|Recovery=23 | |||
|Adv. Hit=1 | |||
|Adv. Guard=-20 | |||
|Adv. Dash=-- | |||
}} | |||
}} | |||
=====<font style="visibility:hidden; float:right">236MK</font>===== | |||
{{MoveData | |||
|image=COTA_psylocke_236MK.png | |||
|caption= | |||
|name= | |||
|input=236MK | |||
|data= | |||
{{AttackData-XCOTA | |||
|Startup=8 | |||
|Active=12 | |||
|Recovery=35 | |||
|Adv. Hit=-6 | |||
|Adv. Guard=-27 | |||
|Adv. Dash=-- | |||
}} | |||
}} | |||
=== | =====<font style="visibility:hidden; float:right">236HK</font>===== | ||
{{MoveData | |||
|image=COTA_psylocke_236HK.png | |||
|caption= | |||
|name= | |||
|input=236HK | |||
|data= | |||
{{AttackData-XCOTA | |||
|Startup=8 | |||
|Active=12 | |||
|Recovery=41 | |||
|Adv. Dash=-- | |||
}} | |||
}} | |||
=====<font style="visibility:hidden; float:right">j.236L/M/HK</font>===== | |||
{{MoveData | |||
|image=COTA_psylocke_j.236L/M/HK.png | |||
|caption= | |||
HK - | |name= | ||
|input=j.236L/M/HK | |||
|data= | |||
{{AttackData-XCOTA | |||
|Startup=8 | |||
|Active=12 | |||
|Recovery=doesn't recover till she lands + about 20 more frames of recovery once she lands | |||
}} | |||
}} | |||
=====<font style="visibility:hidden; float:right">214X</font>===== | |||
{{MoveData | |||
|image=COTA_psylocke_214X.png | |||
|caption= | |||
|name= | |||
|input=214X | |||
|data= | |||
{{AttackData-XCOTA | |||
|Startup=53 | |||
|Active=-- | |||
|Recovery=-- | |||
|Adv. Hit=-- | |||
|Adv. Guard=-- | |||
|Adv. Dash=-- | |||
}} | |||
}} | |||
=====<font style="visibility:hidden; float:right">236PP</font>===== | |||
{{MoveData | |||
|image=COTA_psylocke_236PP.png | |||
|caption= | |||
|name= | |||
|input=236PP | |||
|data= | |||
{{AttackData-XCOTA | |||
|Startup=23 | |||
|Active=67 | |||
|Recovery=0 | |||
|Adv. Hit=KD/Untechable till grounded | |||
|Adv. Guard=7 | |||
|Adv. Dash=-- | |||
}} | |||
}} | |||
=== X-Special === | === X-Special === | ||
Revision as of 18:39, 15 June 2022
Introduction/Summary
Very good at rushing down and very high combo potential. Her fast regular jump and quick/well angled Hard jumping attacks give her almost an XvSF Sabretooth-like jumping pattern vs big characters.
Ground Chain: Zig Zag 1
Normal Jump Chain: Zig Zag 1 Rules with NJ limits
Super Jump Chain: Zig Zag 1
Tech hit type: Counter Throw
Weight Class: Feather
Moves List
Normal Moves
Psylocke can double jump. During a bounce recovery though, this is disabled (yet is not for Cyclops).
Can self-chain all her lights and mediums (s.MP is quirky). Range on c.LP, c.LK and c.HK are bad.
Taunt - Psylocke is the only character whose taunt is simply the Start button. Her moving hand is an active hitbox and can do damage, dizzy if the opponent is in the red, and even kill if the opponent has zero vital. It can also cancel standing normals, but not crouching ones. Psylocke remains taunting until hit or the player moves her.
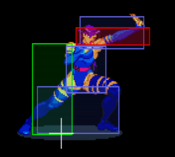
LP
| Damage | Guard | Startup | Active |
|---|---|---|---|
| - | - | 5 | 2-4? |
| Recovery | Adv. Hit | Adv. Guard | Adv. Dash |
| 1 | 5 | 6 | 9 |
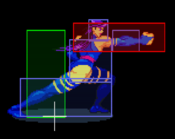
MP
| Damage | Guard | Startup | Active |
|---|---|---|---|
| - | - | 6 | 4 |
| Recovery | Adv. Hit | Adv. Guard | Adv. Dash |
| 6 | 2 | 2 | 2 |
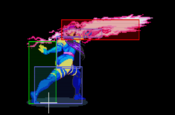
HP
| Damage | Guard | Startup | Active |
|---|---|---|---|
| - | - | 6-8 | 8 |
| Recovery | Adv. Hit | Adv. Guard | Adv. Dash |
| 12 | -8 | -15 | -9 |
LK
| Damage | Guard | Startup | Active |
|---|---|---|---|
| - | - | 5 | 2-4 |
| Recovery | Adv. Hit | Adv. Guard | Adv. Dash |
| 2 | 4 | 6 | 6 |
MK
| Damage | Guard | Startup | Active |
|---|---|---|---|
| - | - | 5-7 | 6-7 |
| Recovery | Adv. Hit | Adv. Guard | Adv. Dash |
| 3 | 8 | 5 | 5 |
HK
| Damage | Guard | Startup | Active |
|---|---|---|---|
| - | - | 9 | 8 |
| Recovery | Adv. Hit | Adv. Guard | Adv. Dash |
| - | - | - | - |
c.LP
| Damage | Guard | Startup | Active |
|---|---|---|---|
| - | - | 3-5 | 4 |
| Recovery | Adv. Hit | Adv. Guard | Adv. Dash |
| 1 | 3 | 5 | 5 |
c.MP
| Damage | Guard | Startup | Active |
|---|---|---|---|
| - | - | 6 | 4 |
| Recovery | Adv. Hit | Adv. Guard | Adv. Dash |
| 4 | 6 | 3 | 3 |
c.HP
| Damage | Guard | Startup | Active |
|---|---|---|---|
| - | - | 6 | 8 |
| Recovery | Adv. Hit | Adv. Guard | Adv. Dash |
| 15 | Launches | -5 | -5 |
c.LK
| Damage | Guard | Startup | Active |
|---|---|---|---|
| - | - | 5 | 2 |
| Recovery | Adv. Hit | Adv. Guard | Adv. Dash |
| 2 | 7 | 6 | 6 |
c.MK
| Damage | Guard | Startup | Active |
|---|---|---|---|
| - | - | 7 | 4 |
| Recovery | Adv. Hit | Adv. Guard | Adv. Dash |
| 5 | Launches | 0 | 0 |
c.HK
| Damage | Guard | Startup | Active |
|---|---|---|---|
| - | - | 7 | 8 |
| Recovery | Adv. Hit | Adv. Guard | Adv. Dash |
| 21 | KD | -11 | -11 |
6MK
| Damage | Guard | Startup | Active |
|---|---|---|---|
| - | - | 22 | 6 |
| Recovery | Adv. Hit | Adv. Guard | Adv. Dash |
| 11 | 1 | -6 | -- |
4HK
| Damage | Guard | Startup | Active |
|---|---|---|---|
| - | - | 40 | 4 |
| Recovery | Adv. Hit | Adv. Guard | Adv. Dash |
| 11 | 8 | -1 | -- |
6HK
| Damage | Guard | Startup | Active |
|---|---|---|---|
| - | - | 9 | 8 |
| Recovery | Adv. Hit | Adv. Guard | Adv. Dash |
| 19 | - | - | - |
j.LP
| Damage | Guard | Startup | Active |
|---|---|---|---|
| - | - | 5 | 12 |
| Recovery | Adv. Hit | Adv. Guard | Adv. Dash |
| 4 | -- | -- | -- |
j.MP
| Damage | Guard | Startup | Active |
|---|---|---|---|
| - | - | 6 | 10 |
| Recovery | Adv. Hit | Adv. Guard | Adv. Dash |
| 3 | -- | -- | -- |
j.HP
| Damage | Guard | Startup | Active |
|---|---|---|---|
| - | - | 8 | 14 |
| Recovery | Adv. Hit | Adv. Guard | Adv. Dash |
| 5 | -- | -- | -- |
j.LK
| Damage | Guard | Startup | Active |
|---|---|---|---|
| - | - | 5 | 12 |
| Recovery | Adv. Hit | Adv. Guard | Adv. Dash |
| 5 | -- | -- | -- |
j.MK
| Damage | Guard | Startup | Active |
|---|---|---|---|
| - | - | 7 | 4 |
| Recovery | Adv. Hit | Adv. Guard | Adv. Dash |
| 16 | -- | -- | -- |
j.HK
| Damage | Guard | Startup | Active |
|---|---|---|---|
| - | - | 8 | 10 |
| Recovery | Adv. Hit | Adv. Guard | Adv. Dash |
| 5 | -- | -- | -- |
236L/M/HP
| Damage | Guard | Startup | Active |
|---|---|---|---|
| - | - | 8 | proj. |
| Recovery | Adv. Hit | Adv. Guard | Adv. Dash |
| 42 | -- | -- | -- |
236LK
| Damage | Guard | Startup | Active |
|---|---|---|---|
| - | - | 8 | 12 |
| Recovery | Adv. Hit | Adv. Guard | Adv. Dash |
| 23 | 1 | -20 | -- |
236MK
| Damage | Guard | Startup | Active |
|---|---|---|---|
| - | - | 8 | 12 |
| Recovery | Adv. Hit | Adv. Guard | Adv. Dash |
| 35 | -6 | -27 | -- |
236HK
| Damage | Guard | Startup | Active |
|---|---|---|---|
| - | - | 8 | 12 |
| Recovery | Adv. Hit | Adv. Guard | Adv. Dash |
| 41 | - | - | -- |
j.236L/M/HK
| Damage | Guard | Startup | Active |
|---|---|---|---|
| - | - | 8 | 12 |
| Recovery | Adv. Hit | Adv. Guard | Adv. Dash |
| doesn't recover till she lands + about 20 more frames of recovery once she lands | - | - | - |
214X
| Damage | Guard | Startup | Active |
|---|---|---|---|
| - | - | 53 | -- |
| Recovery | Adv. Hit | Adv. Guard | Adv. Dash |
| -- | -- | -- | -- |
236PP
| Damage | Guard | Startup | Active |
|---|---|---|---|
| - | - | 23 | 67 |
| Recovery | Adv. Hit | Adv. Guard | Adv. Dash |
| 0 | KD/Untechable till grounded | 7 | -- |
X-Special
Ninjitsu Split: D,DB,B+K(+ another button to control where your solid is) (ground only)
During this move, even your solid self can pass through the opponent (but can still be hit).
To change where your solid self is, do the motion again, and hit one of the buttons (positions follow the button layout, eg lights put you leftmost, mediums in middle, hards rightmost). You won't have any visual confirmation that your position has changed, and you can change in the air.
Your shadows CANNOT hit the opponent. You can change position while hitting, blocking, or even being hit.
You can build meter while split is active.
Split will end if you are thrown.
Super Attacks
Psi-Thrust: D,DF,F+2P (then direction), then direction + punch for another thrust (ground/air)
Startup: 19f | Invul: 7f
A bit of startup (easy to combo however) but no recovery, even on block. After they're hit, the opponent will be in fall stun until they land.
The Basics
SJ back and psi-flash spam is good for building meter and can be hard for the inexperienced to get around.
Dash s.MP (blocked), back + HK (xx Psi-flash as needed) makes for a good poke and run tactic. Pushback off the blocked attack plus the little backward jump of back+HK takes you quite a ways from the opponent.
Jump forward, j.HP, j.HK can be obnoxious to deal with, and combos on a lot of tall characters. Just be careful of someone jumping up and throwing you.
Advanced Strategy
Corner throw traps (After the second throw, combo to dizzy. Unless the opponent attacks, the throw limiter will prevent another throw attempt):
Feather -
d.c.mk..(slight pause) c.mk, c.hp, jump toward and throw
Match-ups
- Vs. Psylocke (self):
On ground level, Psi-thrust will go under an MP Psi-blast.
Psi-blast's don't cancel each other. This can make moving around the screen feel almost like a shooter game.
- Vs. Akuma:
His air fireball spamming can be as annoying, if not moreso than yours. Plus, he throws out two. He has IMMENSE dizzy power, especially on his Hurricane kick.
- Vs. Colossus:
A big target like Sentinel, he will try to throw you all day, so your strings and positioning must be tight. Shoulder Charge will go through Psy-Flash and at full meter, Guard Cancel Super becomes a concern.
- Vs. Cyclops:
And you thought your normals were gdlk? Optic blast might be slow, but he can zap you through predictable Psy-flashes.
- Vs. Iceman:
Psi-blast doesn't chip Iceman, or cause him pushback. Iceman is good at controlling space and hitting hard, but incorrect guesses on his part give you a way in.
- Vs. Omega Red :
Hold toward (6) [s.LP, s.HK]x N can repeat a few times. Coil goes right through the Psy-blast, so don't spam it predictably.
Get meter to tech ASAP as he can easily dizzy/kill off a single throw.
Omega Red has an obnoxious pixie crouch that can duck many of your grounded normals, including ones that look like they should hit.
He can duck: c.LP, c.MP, s.MP, s.MK and c.HP. And of course the higher ones like standing lights and s.HP.
- Vs. Sentinel:
[j.HP, j.HK] x N can infinite. Sentinel also can't duck your standing lights, meaning you can keep him pinned an push him in the corner. Sentinel's throw range is ridiculous though, so any gap in your blockstrings means he can attempt to mash throw. If you are without meter to tech, that likely means more than half your life will disappear.
- Vs. Silver Samurai:
Make live combo videos. Star and Psy-flash cancel each other.
When he has full meter, be careful hanging around the top of the screen as his super will hit you.
- Vs. Spiral:
Psy-flash spamming can make it hard for Spiral to get swords going, but once she does, she can make it difficult for you to spam Psy-flash. Psy-flash will be cancelled by a sword.
- Vs. Storm:
Play who can run away more. Psy-flash and Typhoon cancel each other. Storm's invulnerable frames on her dash may mean she can work her way past your Psy-flashe's easier.
- Vs. Wolverine:
Wolverine can Berserker Barrage under MP Psi-blast at any point. He'll also likely try to belly slide under fireballs.
Once he has meter, guard cancel super is a threat.
Like Omega Red, Wolverine had a very low pixie crouch that can duck many of your grounded normals, including ones that look like they should hit.
He can duck: c.LP, c.MP, and s.MP. And of course the higher ones like standing lights and s.HP. He cannot duck s.MK or c.HP the way Omega Red can.
Combos
[s.LP, 6+HK (roll over)] xN can combo in to itself vs a lot of characters. Pushback can become an issue and it doesn't seem to work reliably on superheavies.
Featherweight to Omega Red (corner):
launcher: c.mk, c.hp (there's a tiny pause between these. Listen for the opponent hitting wall and use that as cue if it helps)
aircombo: sj.lk x2(somewhat slowly), sj.lk, sj.mk, sj,hk.. sj.lk, sj.mk (land)
relauncher: c.hp
relaunch modifiers: If you think they're getting too low, add a s.lk before c.hp, and/or delay the sj back up ever so slightly to allow the launcher to maximize it's height. You can also add a c.mk instead, but it must be chained to c.hp quickly.
light and middleweight launchers: d.c.mk..c.mk, c.hp
middleweight/OR relauncher: c.mk, c.hp
OR launcher: c.mk, c.hp.. c.hp
general aircombo modifiers: You can substitute sj.lp for the last sj.lk on the way down, especially if you feel they're getting too high.
If you want to throw in a super in the air, do sj.mp or sj.mp, sj.mk after your sj's apexed and you're on the way down. After the super you have a big window to combo the throw, or you can juggle them back down, or just relaunch if you land first. They'll be in stun 'till they hit the ground. It's better to Super during a super jump rather than while you're on the ground, if you do it on the ground you'll be in normal jump mode when it's over and limited in what you can do, comparatively (unless you're doing the super as part of a low juggle).
Vs. Psylocke Combo Notes:
Psylocke has a long OTG time, a somewhat longer time to crash and wakeup for dizzy (leaving longer time to setup combos/positioning), and is vulnerable to sweep juggles.
