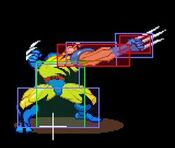
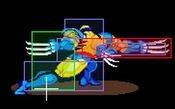
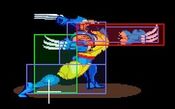
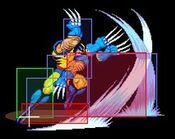
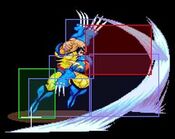
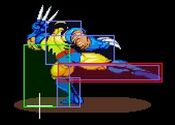
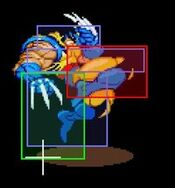
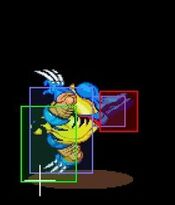
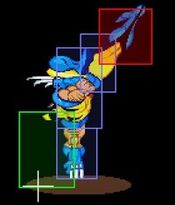
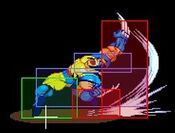
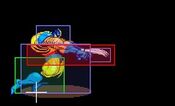
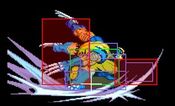
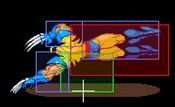
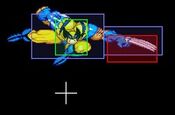
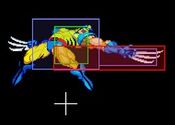
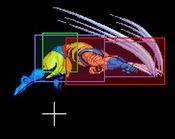
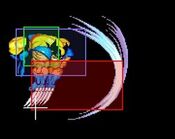
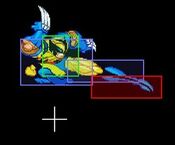
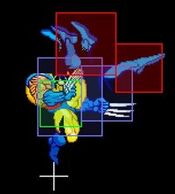
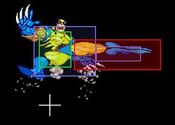
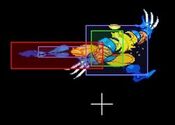
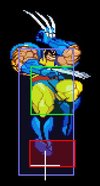
Standing Normals
| Damage | Guard | Startup | Active | ||
|---|---|---|---|---|---|
| - | Any | 4 | - | ||
| Recovery | Adv. Hit | Adv. Guard | Adv. Dash | ||
| - | - | - | - | ||
|
Fast jab, can be used to escape pressure or poke | |||||
| Damage | Guard | Startup | Active | ||
|---|---|---|---|---|---|
| - | Any | 6 | - | ||
| Recovery | Adv. Hit | Adv. Guard | Adv. Dash | ||
| - | - | - | - | ||
|
Chains into itself, useful in juggles | |||||
| Damage | Guard | Startup | Active | ||
|---|---|---|---|---|---|
| - | Any | 8 | - | ||
| Recovery | Adv. Hit | Adv. Guard | Adv. Dash | ||
| - | - | - | - | ||
|
Big button that can be used to punish from a distance or anti air, also very useful as a launcher | |||||
| Damage | Guard | Startup | Active | ||
|---|---|---|---|---|---|
| - | Any | 5 | - | ||
| Recovery | Adv. Hit | Adv. Guard | Adv. Dash | ||
| - | - | - | - | ||
|
Slower than 5LP but very powerful when used during a dash since it provides more hitstun and can link into 2HK | |||||
| Damage | Guard | Startup | Active | ||
|---|---|---|---|---|---|
| - | Any | 4 | - | ||
| Recovery | Adv. Hit | Adv. Guard | Adv. Dash | ||
| - | - | - | - | ||
|
Fast button thats very useful for launching feather weights and lightweights, can cross crush in the corner and useful as a punish when 5HK would whiff | |||||
| Damage | Guard | Startup | Active | ||
|---|---|---|---|---|---|
| - | Any | 4 | - | ||
| Recovery | Adv. Hit | Adv. Guard | Adv. Dash | ||
| - | - | - | - | ||
|
The God button. Fantastic anti air, very powerful, launches, can be chained into jab to cancel recovery, useful in pressure and pays your taxes | |||||
Crouching Normals
| Damage | Guard | Startup | Active | ||
|---|---|---|---|---|---|
| - | Any | 4 | - | ||
| Recovery | Adv. Hit | Adv. Guard | Adv. Dash | ||
| - | - | - | - | ||
|
Fast button that can be used for abare but 2LK provides better uses due to its recovery | |||||
| Damage | Guard | Startup | Active | ||
|---|---|---|---|---|---|
| - | Any | 8 | - | ||
| Recovery | Adv. Hit | Adv. Guard | Adv. Dash | ||
| - | - | - | - | ||
|
Useful for adjusting juggle heights, otherwise not used much | |||||
| Damage | Guard | Startup | Active | ||
|---|---|---|---|---|---|
| - | Any | 8 | - | ||
| Recovery | Adv. Hit | Adv. Guard | Adv. Dash | ||
| - | - | - | - | ||
|
Can cross crush but 5MK is better at that, mostly used after 2HK for stun | |||||
| Damage | Guard | Startup | Active | ||
|---|---|---|---|---|---|
| - | Any | 4 | - | ||
| Recovery | Adv. Hit | Adv. Guard | Adv. Dash | ||
| - | - | - | - | ||
|
Very fast low, great for dashing pressure and high low mixup, can link into 2HK if done after a dash, use this button alot | |||||
| Damage | Guard | Startup | Active | ||
|---|---|---|---|---|---|
| - | Any | 7 | - | ||
| Recovery | Adv. Hit | Adv. Guard | Adv. Dash | ||
| - | - | - | - | ||
|
Sweep, somewhat slow and very niche as it just knocksdown and doesnt give any reward | |||||
| Damage | Guard | Startup | Active | ||
|---|---|---|---|---|---|
| - | Any | 10 | - | ||
| Recovery | Adv. Hit | Adv. Guard | Adv. Dash | ||
| - | - | - | - | ||
|
Wolverines slowest normal but very big, moves forward, can cross crush and shits out stun however make sure to either chain into cr.LP or SJC Fastfall since it has alot of recovery | |||||
Jumping Normals
| Damage | Guard | Startup | Active | ||
|---|---|---|---|---|---|
| - | High | 4 | - | ||
| Recovery | Adv. Hit | Adv. Guard | Adv. Dash | ||
| - | - | - | - | ||
|
Instant overhead if done immediately after fastfall (Check command normals section), useful in mixups | |||||
| Damage | Guard | Startup | Active | ||
|---|---|---|---|---|---|
| - | High | 6 | - | ||
| Recovery | Adv. Hit | Adv. Guard | Adv. Dash | ||
| - | - | - | - | ||
|
can be used after fastfall for a slower overhead than j.LP but you can combo after fastfall j.MP more consistently, mostly used in infinites or a very niche air to air | |||||
| Damage | Guard | Startup | Active | ||
|---|---|---|---|---|---|
| - | High | 8 | - | ||
| Recovery | Adv. Hit | Adv. Guard | Adv. Dash | ||
| - | - | - | - | ||
|
RAH RAH, massive hitbox, very strong jump in, fastfall j.HP controls alot of space, can be safe to just throw it whilst superjumping, backhopping this move can make it a good annoying poke that your opponent will have to deal with | |||||
| Damage | Guard | Startup | Active | ||
|---|---|---|---|---|---|
| - | High | 4 | - | ||
| Recovery | Adv. Hit | Adv. Guard | Adv. Dash | ||
| - | - | - | - | ||
|
Rising instant overhead that is a little tricky to hit on low crouchers (Wolvie, Spiral and Omega Red), can combo after with backhop or fastfall but its VERY tricky to do | |||||
| Damage | Guard | Startup | Active | ||
|---|---|---|---|---|---|
| - | High | 8 | - | ||
| Recovery | Adv. Hit | Adv. Guard | Adv. Dash | ||
| - | - | - | - | ||
|
Good Air to Air | |||||
| Damage | Guard | Startup | Active | ||
|---|---|---|---|---|---|
| - | High | 8 | - | ||
| Recovery | Adv. Hit | Adv. Guard | Adv. Dash | ||
| - | - | - | - | ||
|
Wolviecopter, very versatile air button, backhopping this button can cause very tricky left right mixups, useful in juggles, can cross crush and can be used as an air to air | |||||
Command Normals
| Damage | Guard | Startup | Active | ||
|---|---|---|---|---|---|
| - | Low | - | - | ||
| Recovery | Adv. Hit | Adv. Guard | Adv. Dash | ||
| - | - | - | - | ||
|
Imagine sweep but alot better, Can be used for movement as wolverine can go flying if done after a dash, Super jump cancellable on frame 1 so can catch aerial opponents off guard and air throw, also low profiles alot of moves (as if Wolverine needed more low profile), can also combo after | |||||
| Damage | Guard | Startup | Active | ||
|---|---|---|---|---|---|
| - | Any | - | - | ||
| Recovery | Adv. Hit | Adv. Guard | Adv. Dash | ||
| - | - | - | - | ||
|
Fastfall, has different properties if done from regular jump or super jump Jump: can be whiff cancelled into any jumping punch normal and can chain into them on hit Superjump: Cannot be cancelled into any buttons however it is still very useful for fastfalling and continuing pressure, if the stomp itself connects and you backhop it you get the properties of normal jump stomp so you can chain into a punch | |||||
Unique Systems
Walljump Wolverine can jump/SJ near a wall and press the opposite direction to walljump
Backhop After an aerial normal connects (Hit or Block), Pressing back (4) will cause wolverine to hop off of the opponent, this has several uses such as poking and running away, squeezing out damage when cornered and or left right mixups. You can influence the direction only when used during a normal jump by either holding 4 or 7
Taunt LP, MK, MK, HP, MP Builds meter, thats about it
Throws
MP throw: Mashable throw that tosses them after, with a that lets you OTG after (Use this throw)
HP throw: Mashable throw that kicks them into the ground after, with no follow up time at all except for extremely rare/specific setups (Avoid this throw)
Air throw (MP/HP): Looks like an air version of the MP ground throw but you can only OTG Akuma and Cyclops
Escape Tech: Wolverine is invincible for a bit, then has normal jump rule actions and can block on the way down
Safe Fall: Wolverine is invincible from the tech point until he flips off the landing.
