Introduction/Summary
If you're a fan of low-tier and uphill battles, Silver Samurai is your man. While he's certainly handicapped, his battles are not unwinnable.
Silver Samurai had more options in older versions (2.x's, Japan/Asia versions) simply from his Shuriken hitting slower, allowing for better/easier combos.
Attack Chain
Ground Chain: Weak Start, Up One*
Normal Jump Chain: Weak Start Cross (must be Punch to Kick OR Kick to Punch)
Super Jump Chain: Weak Start, Up One
| Strengths | Weaknesses |
|---|---|
|
|
Moves List
Normal Moves
LP: Staple poke, quick and good range. Has a second animation in a self-chain. When poking with this and keeping them in blockstun, do not push too quickly or you'll get the multi-slashes special.
Startup: 3f
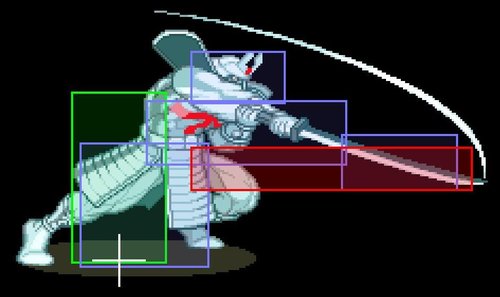
MP: A slow two hitting move, the second hit launches. You generally need to dash to have the second hit combo, but against heavier characters, it still won't combo there. There are 14 non-hitting frames between the attacks.
Startup: 5f
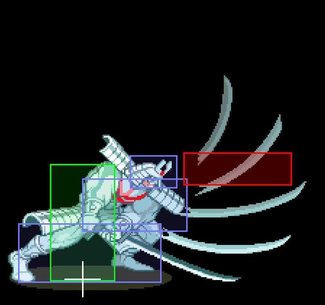
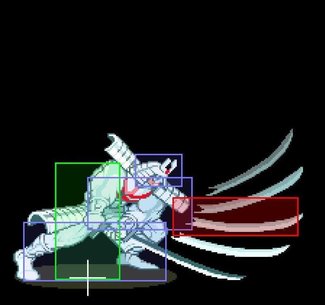
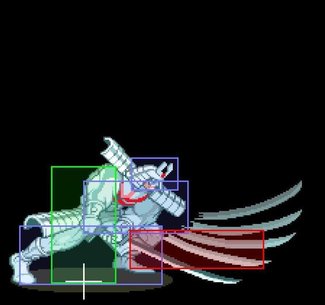
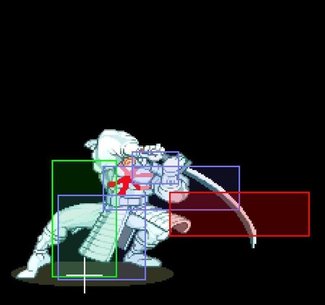
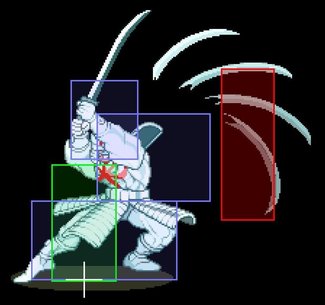
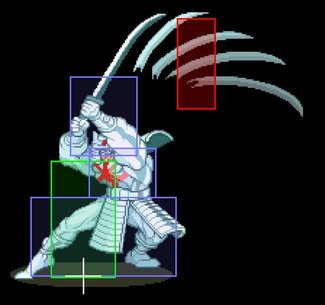
HP: Can be crouch cancelled, but only at a certain point. Ok as an anti-air but not great. Lots of stun on the ground, especially off of a dash. If hit as a juggle, it will launch higher. Press HP again at the end of the animation to get to get a sweeping slice doesn't hit low despite looking like it should. If this second slice hits, it will count as a floor cracking hit on breakable floor stages.
Startup: 8f
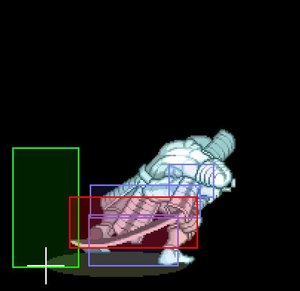
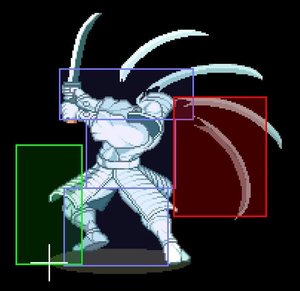
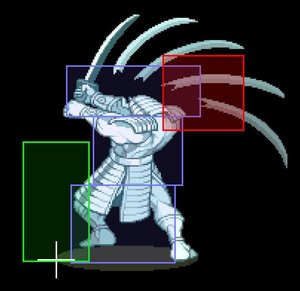
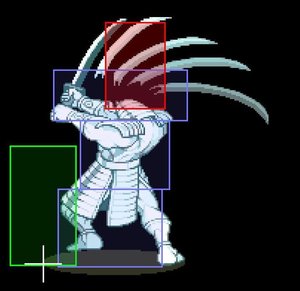
LK: Quick, but can't self chain, also has less range than s.LP and more recovery, so it should be cancelled to something. Off of a dash only, it has more hitstun than dashing s.LP and can combo into s.HK on many characters.
Startup: 3f
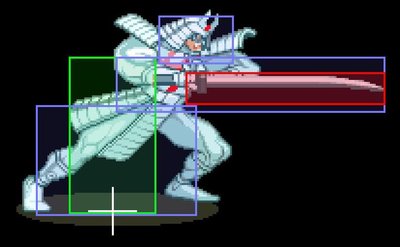
MK: Long range poke with meh recovery.
Startup: 5f
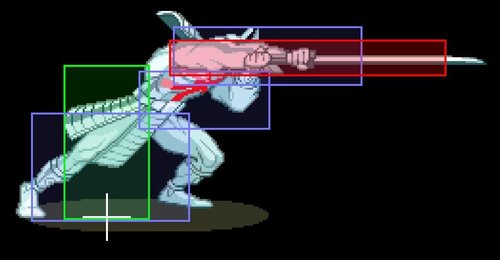
HK: You hop into the air and move forward with a stab. Once your feet leave the ground, you can't SJ but you can still do specials that you can do in the air. Will knock them away a bit then cause them to bounce. Not an overhead.
Startup: 16f
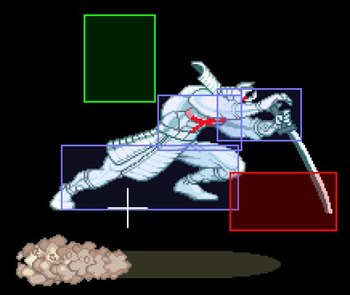
* This move has a glitch. Described at the end of the page.
c.LP: Much less range than s.LP, and 1f slower. Has an extra animation thrown in on a self-chain, making it slower than just linking. Derp.
Startup: 4f
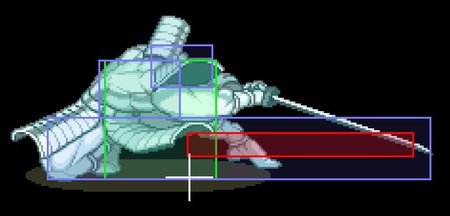
c.MP: Your longest range move. Great poke but recovery is so-so, try not to be on top of them with it. Look at that sexy redbox!
Startup: 5f
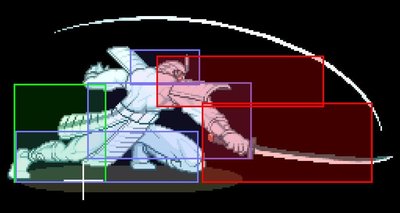
c.HP: Launcher, good for dash-back anti-air if you have the room. Hitbox on it is not quite as good as it looks. This can miss some characters at point blank range, especially if they lean forward in their dizzies.
Startup: 8f
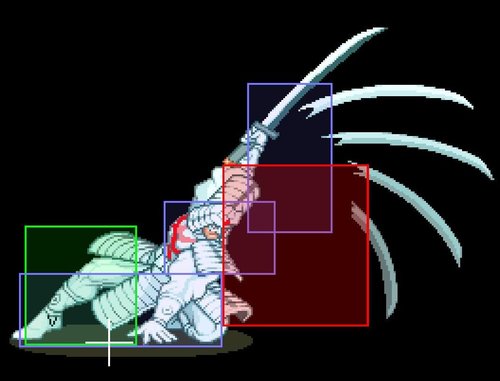
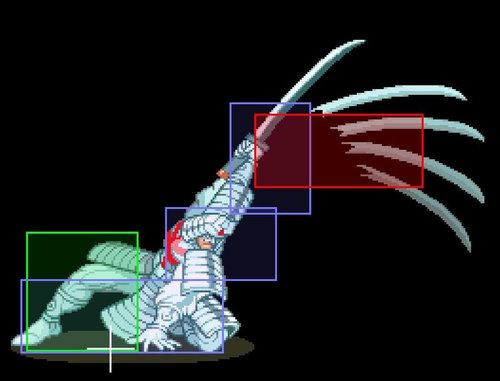
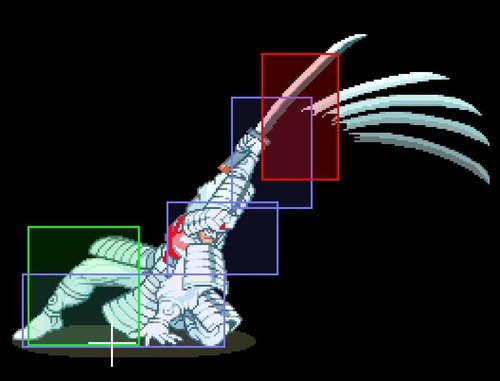
c.LK: A very long range poke. Too bad it can be blocked low. Quick but long recovery.
Startup: 3f
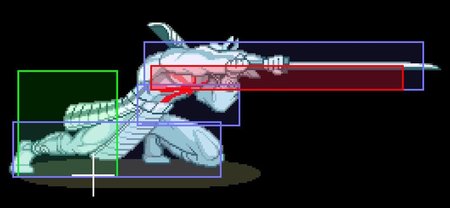
c.MK: Launcher and good AA if you can space it.
Startup: 5f
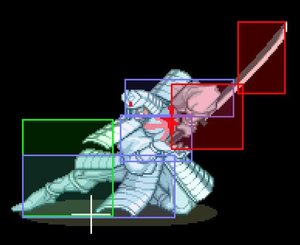
c.HK: A sweep that can be blocked standing. Slow recovering one at that.
Startup: 8f
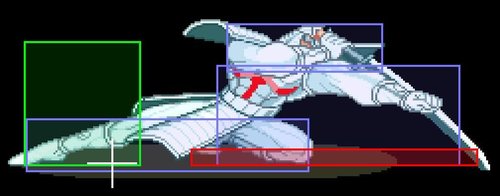
j.LP: Quick starting poke that will juggle downwards slightly. Slow recovery on it, so no self chaining or linking.
Startup: 3f
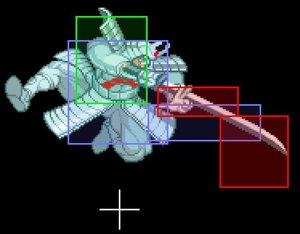
j.MP: Fairly quick move that as a juggle, keeps them relatively "with" you. Doesn't recover fast enough to combo with other normals though, but on certain characters you can combo into a Star. Also decent for attacking upward with since on the swing around there's a small hitbox above him.
Startup: 5f
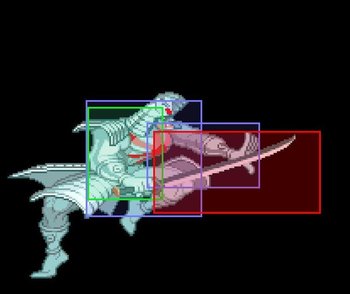
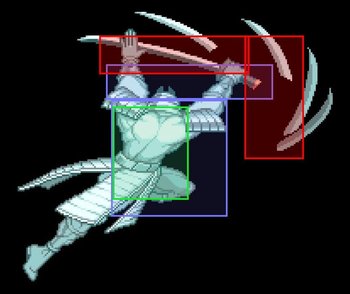
j.HP: Good air to ground/jump-in, but once you do this, you can't do any other attacks in the air without cancelling into a special.
Startup: 8f
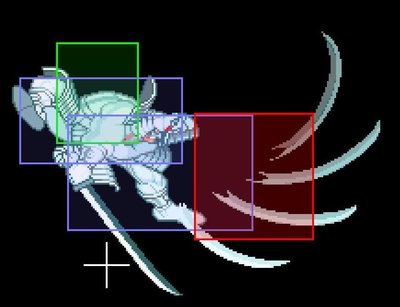
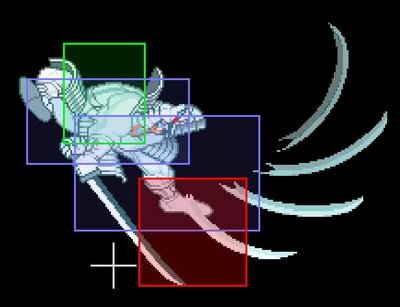
j.LK: Quick and a crazy awesome hitbox that can crossup! The lower part extends under his boot, while the long part goes back to his opposite knee. Not too much stun though and knocks down as a juggle. Slow recovery means no self-chain/link fun. Also, the opponent can block this even if they are crouching.
Startup: 3f
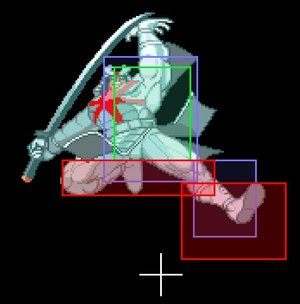
j.MK: GREAT for chasing superjumpers. Fairly bad recovery though, so you really need to poke them with the tip at far ranges. Knocks upward as a juggle, but since the hitbox is far and high, it can be difficult and will generally only hit them as you are falling under.
Startup: 5f
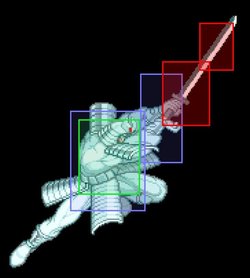
j.HK: Stabdown. Knocks downward in a juggle, and like j.HP you can't do any more moves without a special cancel. If you manage to hit them standing on the floor with this, it will immediately bounce them off the ground. The hitbox is extremely narrow and your pushbox well above, so it has some crossup potential coming down. The problem is when they bounce, they're going to recover before you, making this a dangerous move for you.
Startup: 8f
Throws
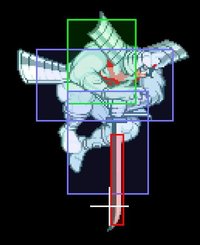
Sam's throws are weak compared to other characters, as he does not have much of a follow up. Silver Samurai can only throw people behind him, regardless of what direction you hold to make the throw.
MP Throw: Hold toward/back and hit MP. You'll toss the opponent behind you about a screen distance away. Your recovery is pretty long, so unless you happen to be throwing them with your back near the corner AND they have a long OTG time (like Cyclops), follow ups are unlikely.
HP Throw: Hold toward/back and hit HP. Stab and throw them right behind you. They're very close you on this throw, but unless they have a long OTG time, you won't get a follow up.
Air Throw: Hold toward/back and hit MP or HP. Looks like the MP ground throw but in the air. You can get a follow up but it's distance and OTG time dependent. If you get the throw early in a superjump, you'll keep flying upward after the throw ends. You can get a double air-throw if your back is to the corner, and it should be easy to follow up after depending on the height when thrown and the opponent. You can double air throw off a normal jump.
Tech-Hit:
Escape tech - Sam is invincible until his flipout, then has a point where he cannot block before any actions are re-enabled. Once the actions come back, he can attack, special or block on the way down.
Safe fall tech - Same as above.
States
Walking: Forward walk is very slow, backward walk is a little quicker.
Dashing: Sam's forward dash is fairly quick and goes a pretty long way. Backdash is a hop, and you'll bounce if you are hit out of it. You'll be grounded if you attack, though.
Jumping: Forward jump doesn't go particularly far (unless off a dash), backjump goes a little further. You can only perform one special during a normal jump. Superjump has a small startup delay.
OTG Wakeup: Sam crashes pretty quick off of throws, meaning there isn't much OTG time for him.
Dizzy: While he has a quick crash animation, he gets up a little slow. He does lean forward slightly, but is so wide chances are nothing will miss him.
Special Moves
Shuriken: D,DF,F+P (ground/air)
Startup: 13 frames (all)
Meter gain: +10 | Hit: +5 | Blocked: +2
LP - slow, MP - medium, HP - "fast". Guideable after throwing, air version has less recovery than ground.
These can be canceled out by other projectiles, or even hit out of the air with a normal.
If you nick them barely on the first hit, then guide the star just slightly up/down then back towards the opponent, you can get a single hit, then delay the rest of the hits, giving you more time to combo. Very positioning dependent and tough to do in a real match.
Multi-Slashes: F,D,DF+P, then P rapidly OR P rapidly.
Startup: 24 frames with rapid punching (Jab), 22 frames with DP+HP
(Dashing or cancelling a dashing normal with this seems to alter properties?)
Meter gain: +10 and another +10 when dashed | Hit: +2 per hit | Blocked: +1 per block
Active: Depends on
Recovery: 38 frames
Double Tap forward to do a slight dash with it, it will end after the dash. Pretty poor startup and awful recovery, but decent hitboxes. Has some situational uses, but not much since you're probably going to get tagged on the recovery. The slashes are considered projectiles, yet won't stop projectiles..
X-Specials
Evasion: D,DF,F+K (ground/air)
Meter cost: 48
Invcinible frames: 52
You become invincible until you reappear. When done on the ground, you are fully invincible with no recovery. In the air, you have at least one frame of recovery where you can't block.
If you SJ and Evasion, you'll restart your upward momentum once it's finished, unlike with a Star which stops your momentum.
Multi-hit Shadows: D,DB,B+3K (ground only)
Meter cost: 71
You gain shadows that hit multiple times, and vanish after a certain number of hits (or period of time if hits isn't used up). The more hard hits used, the quicker they vanish. It seems a few hits can initially chip, but after those few they no longer hit on block (or possibly at all!). Even air attacks can be crouch blocked during this.
If you are hit out of the startup, you'll still keep the powerup.
Elemental Swords: D,DB,B+P (ground only)
Meter cost: 71
LONG startup and if you are hit out of it, you won't get the powerup. Once your meter drains, the powerup is actually active.
LP - Electric. Seems to randomly add multiple hits to a sword attack, and some height on some launchers. More research needed
MP - Ice. Easily the best one. A sword hit will freeze the opponent, next hit will unfreeze them, and they can be frozen again. Most combo opportunities lie here. More in #ice_notes
HP - Fire. More damage.
Once you've chosen the element, you can't change to another until it's duration ends. You can combine Element with Shadows (not exactly useful in a real match).
∗ When Ice Sword is active, air throws do not keep the opponent in stun until they land. They recover in the air.
Super Attacks
Reimaiken: D,DF,F+3P (ground only)
Startup: 23 frames, First 8 frames invulnerable
Active: 108 frames
Meter: Uses all
Recovery: 15 frames
Covers all but the furthest point on the ground in lightning at fullscreen distance. It has some startup but is still comboable. If you're hit out of the startup, you lose 1/4 of your meter. Mash for more hits. There's some recovery(not a ton) so use with caution for chip. Reimaiken can be very good for when people jump up and try to control airspace or build meter, and you zap them from underneath, particularly if they are crossing over you high up and mid-screen.
From the right distance (not point blank) it can be an effective frame trap vs aggressive people who try to punish your laggy normals.
Triple Shuriken: D,DB,B+3P (ground only)
Startup: 13f, first 7f invulnerable
Meter: Uses all
The group is controllable, and they don't break when hit. These are good for when people get overconfident in punching through your normal stars.
The Basics
Sam plays a slow and meticulous game of poking and chip. While there is some combo potential in the corner, there is not much you can do combo-wise when mid-screen or off of throws.
Jab poke/rush can stop an opponents advance, keep them pinned, and chips while you build meter. Jab high then low if they like to duck under your second standing one. Don't push too fast or you'll get am unsafe, long recovering multi-slash special. It should be noted that self-chaining the crouching jab (c.LP) onto itself adds an extra animation, and makes it SLOWER. Linking, or going s.LP, c.LP, is best to prevent this.
It's tempting to cancel all of your slow-recovering moves with a Star, but this is easily jumped over. Superjumping, then throwing a Star is a little better, but the opponent will eventually work their way around if you get too predictable, especially since so many can punch right through it and hit you.
The delay in Silver Samurai's super-jump makes him particularly vulnerable to people who are trying to throw you through your strings. You might be trying to cancel the recovery of a hard attack to a superjump, but then find yourself getting thrown because your superjump startup is so slow. Positioning is very important with Sam, you don't want the enemy to be too close to you, unless you are going for the throw.
Noob Trap - s.LP x2, s.HK xx Star. This can be jumped and attacked out of, so it's not something to go for if the opponent knows how to get out.
Evasion Tactics
It's best to make sure you still have meter to tech throws after doing an Evasion, since you're stuck in one place for quite some time. An opponent can still try to throw you as you recover (and may likely beat your attempt to throw first).
Cancelling j.HK with Evasion is a good way to avoid people mashing during the recovery of the bounce should they have gotten hit. You are vulnerable for a frame or so reappearing in the air, so best not to use this too much.
Ice Sword Combos and Notes:
Ground to ground sword hits will freeze them standing, even launchers. This means launchers WON'T launch if they are the initial freezing hit.
If the combometer resets, that means the opponent had a chance to mash out. If opponent sucks at mashing, redizzying is possible.
If you refreeze them on the way up with sj j.MK, they bounce extremely high and give a long time to follow up. Sometimes enough for a shadow swords power up if you have the meter!
Another way to pop most lighter characters high is dash s.LP-s.LP (second chain), c.MK.
On stages with breakable floors, the bounce of a frozen opponent will count as a hit towards breaking the floor.
Random Notes:
Spiral Stage - If Sam does an HP throw on a already-cracked floor, the next breakable floor below will crack after the second character touches it.
Shadows + Fire sword does massive damage, but good luck getting both of those.
s.HK landing glitch - If you hit 214 LP or MP as you are landing and have no meter, you will "fall through the floor" before re-landing on a normal axis.
While "falling", you can throw a star and remain there until you recover. Attempting to stay down there throwing star after star is possible, but very difficult.
If you SJ, you will immediately return to your normal axis for the jump startup.
If you attempt to do Multi-Slashes, you will also return to your normal axis.
s.MP oddity - Also seems to have odd cancel properties when meterless with 214 LPx2, HPx2 and PP if done quickly during the startup phase. This glitch doesn't work with an Element sword active, but will work with shadows active.
Advanced Strategy
Matchups
- vs Psylocke
c.HP won't hit a standing/walking forward or dizzy Psylocke at point blank range.
s.LK won't hit Psylocke in her leaning forward dizzy frames at point blank range.
- vs Sentinel
He has massive throw range, and will likely be mashing to throw to catch any holes in your poke strings. He's a big target but can easily punch through your stuff and not care about trades since they are massively in his favor. RMK doesn't even seem to hurt him that much.
- vs Colossus
A fearless Colossus will gladly trade blows with you in an attempt to out-damage and dizzy you first. Play it safe and punish if he disrespects your offense.
- vs Iceman
c.MK won't hit a standing/walking forward Iceman at point blank range.
c.HP won't hit him walking forward
His s.HK is a long range, disjointed hitbox which is likely going to go through your stuff and hit you.
- vs Cyclops
Launch, j.MK xx Star (stronger ones) is very likely to combo on Cyclops, and give you a chance to combo out of. (corner)
Be careful of him invincible DP'ing through your pokes. The crazy hitboxes on his normals can easily break through your Stars and hit you at the same time.
- vs Wolverine
c.MP is a good ground poke to keep him from rushing in. If he gets too close, he might be able to throw your forward extended throwbox.
He'll very likely try to mash through your stars, which can mean lots of trades in his favor.
Jump forward and j.MP to punish straight ahead blocked Drill Claws. Jump and j.MK to punish blocked ones that came from above
