Introduction
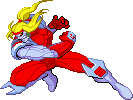
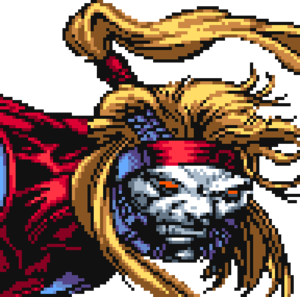
Omega red is an all rounder character that can be played with any playstyle due to the amount of tools he has at his disposal. He can work as a rushdown character with long pressure sequences and great mixup potential due to his very quick and low IAD and the ability to link his 2LK into 5MP and get a combo off of it. He can also work as a defensive character with very long ranged pokes and the ability to convert off of said long ranged pokes like 5HP.
Attack Chain
Ground Chain: Punch to Kick (any)
Normal Jump Chain: Punch to Kick (any)
Super Jump Chain: Zig Zag 1
Pushback Factor: (TBA)
Stamina Rank: 4th (TBC)
| Strengths | Weaknesses |
|---|---|
|
|
Moves List
Normal Moves
LP: Good range for a jab. Self-chainable.
Startup: 2f | Active: 4f
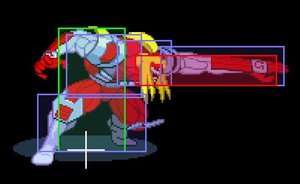
MP: Launcher. A pretty quick uppercut that makes a great poke and an alright anti-air.
Startup: 4f | Active: 8f
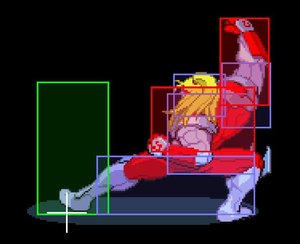
HP: Very long range coil whip, but not quite as long as it looks. The recovery is long, so always be ready to cancel it with something. Though not shown here, this moves his throwable box forward significantly and can mess with attempts to throw him (even on recovery) at point blank range.
Startup: 8f | Active: 8f
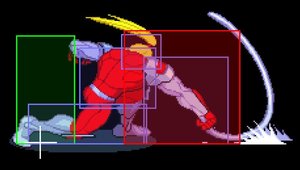
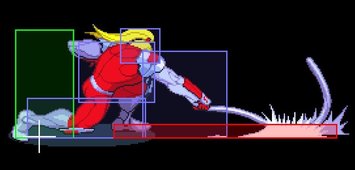
LK: Self-chainable, but poor range compared to LP. Best used to whiff cancel MPs or HPs.
Startup: 2f
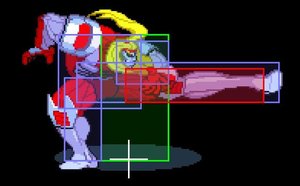
MK: Knock away. A back-kick that can make an alright anti-air, comes out quick but the recovery's a bit high for poking uses.
Startup: 4f
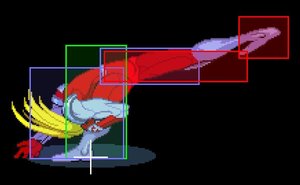
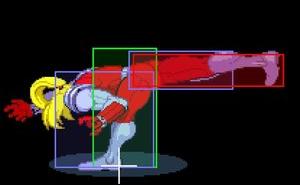
HK: Knock away. Double kick that looks almost like a normal version of an Omega Strike. Less range than a s.HP, best used in combos.
Startup: 12f
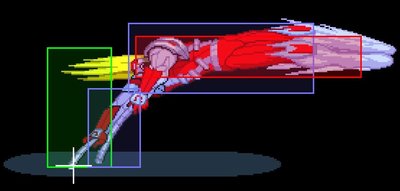
c.LP: Same as standing but range is a tiny fraction shorter.
Start: 2f
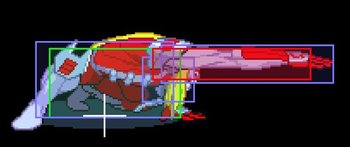
c.MP: Launcher. A coil whip uppercut with a little better vertical range than s.MP but a little longer startup.
Start: 8f
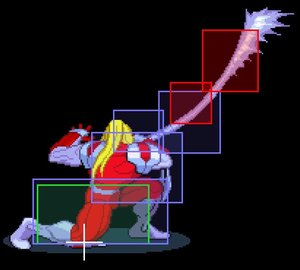
c.HP: Multi-hitting double coil twirl with a lot of startup, micro-launches. Not much utility outside of being fancy in a combo. Maybe building meter in a blockstring against a fat croucher.
Start: 12f
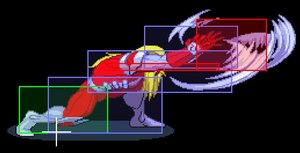
c.LK: Even less range than standing LK, best used to whiff cancel MPs or HPs.
Start: 2f
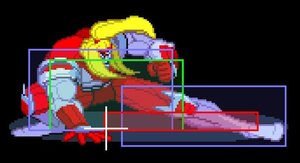
c.MK: Sweep with a tiny bit less range than a s.LP. Recovery is long so best cancel with an Omega Strike or SJ/IAD for some wakeup games.
Start: 8f
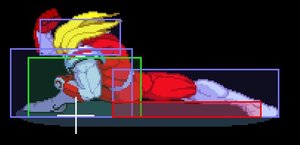
c.HK: Burrows coils that come out in one of three ranges. DB - close, D - mid-range, DF - far. Can be blocked high, will knock-away if they it.
Start: 22f
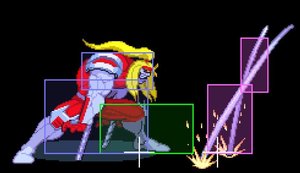
j.LP: A small coil twirl that can self-chain. Does a good job of keeping most opponents with you in a juggle and is the basis for his super-easy corner infinite.
If you mash quick enough, the hitbox is always active with no gap.
Start: 3f
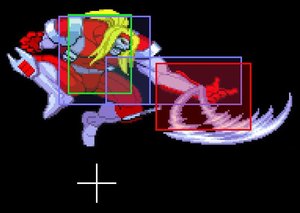
j.MP: Mid-air uppercut that only hits where the arm is on the high upswing. Thus the opponent must be above in-front of you to hit. Good window to combo an upward coil
Start: 8f
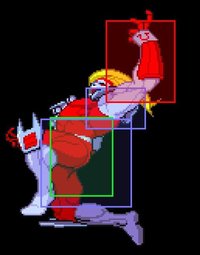
j.HP: Multi-hit coil cloud that sends the opponent down if used during juggle. A favored jump-in and air-to-air attack due to the multi-hits and horizontal range. As a jump-in though, he's vulnerable in the body.
Start: 8f
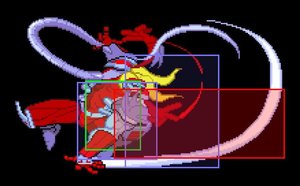
j.LK: Less range than j.LP, mostly just used as part of a chain combo.
Start: 2f
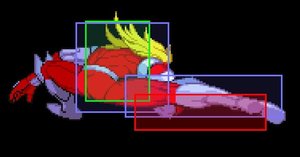
j.MK: Less range than j.LK but a little more stun. Can combo into a coil if done fast enough and close enough.
Start: 6f
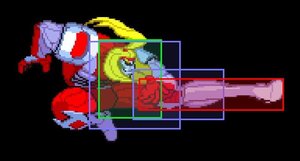
j.HK: Long range, long stun, big damage kick that goes out front. As a juggle it arcs them upward with plenty of time to coil, or follow up in other ways depending on where they are. Good as a jump in and air-to-air as well.
Start: 9f
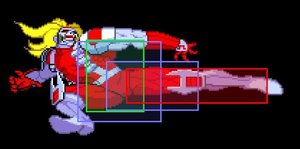
Air Dash: 2P or F,F in air. After a coil, you can air dash again, and coil again, even in Normal Jump mode (and you gain 2 normal attacks again). SJ [Coil,(recall),Air Dash] x N can be used to pester the opponent from above or stall for time/meter, especially on breaking floor stages.
Taunt: mk, lp, down, lk, mp - builds meter, can cancel normals but the taunt itself lasts too long
MP Throw: Recovery on this is longer compared to HP (plus possibly less of a stun bonus), so followup is more limited.
HP Throw: Causes them to bounce after, and you recover quicker, allowing for much greater followup options.
MP/HP Air Throw: Both versions grab them out of the air and bounce them like an HP throw, with you
Tech Hit:
-On Escape tech, Omega is invulnerable on the way down, and unable to do any action.
-On Safe Fall tech, Omega performs a "handstand", which the height will vary depending on how late the tech is performed. You're invlunerable until after the flip. From there, you must air dash or special in order to be able to do anything other than block, and your attacks are within Normal Jump rules.
Special Moves
Carbonadium Coils - D,DF,F+ Punch or Kick (Can be done in air, kick in air only)
-LP: Straight ahead coil.
-MP: Diagonal up-forward coil.
-HP: Straight up coil.
-LK: Straight ahead coil.
-MK: Diagonal down-forward coil.
-HK: Straight down coil.
+5 meter basic | +5 meter on block | +10 on grab | +10 on each slam/toss | variable meter gain when mashing K
Ground Startup: 17f
Air startup: 16f
--Back + any button to recall.
--When it grabs, mash Punch to drain health and Kick to drain meter. You can mash both to go from draining a small bit of one to a small bit of the other during the same coil grab.
--Coil Grab counts as a throw-type, so is subject to the "two throws per combo/juggle" limit. If you've used up your allowed throws, the next coil will pass harmlessly through the opponent. Also if you try to combo another throw, it simply won't work.
--Coil Slamming--
After a coil grab, hold a direction and hit any attack to slam and/or toss the opponent. Whether you are able to slam more than once (max 2) depends on a few factors.
-- The coil must be "long" enough.
-- You cannot have used a throw or another coil in the combo OR juggle (eg they haven't landed yet), the second slam counts against your 2nd allowed throw in the "two throws per combo" limit.
Coil Throw Directions on Ground:
Back OR Forward throws the opponent behind you, if they have a long OTG time (like Cyclops), OTG options are possible.
Down+Forward or Down+Back slams the opponent in that direction.
Up throws them straight up, Up+Forward throws them in a similar way to straight up, but they move forward slightly.
Up+Back throws them in more of an arc, if your back is to the corner and the opponent is heavy+ you can SJ up and air combo off it.
Coil Throw Notes in Air:
If you throw the opponent Down+Forward on a short coil in the air (the coil can't "reach" the ground during the slam), the opponent will "bounce" back up and travel a bit and be in stun until they crash into the ground. This is important in combos, and provides an easy way to combo into Omega Destroyer on many characters.
Omega Strike - D,DF,F+K
--Back + any Kick to recall, Down + any Kick to cancel where you are. If near a wall, the wall will cancel it as if you had hit Down+Kick.
--LK: Travels across the ground, has the longest D+K recovery because Omega lands on the ground, but still useful for combos, especially as a dizzying hit.
--MK: Travels diagonally up-forward, possibly most useful for combos.
--HK: Travels straight up, combo uses seem very limited.
--Strikes that end in the air leave you in normal jump mode.
+10 meter basic | +10 meter on block | +20 meter on hit
Startup: 19f
Omega Strike can be useful as a string, to cancel moves or to get around, but it's not as fast and abuseable as in MSHvSF. Shorter crouchers can be a problem, especially when pulling back LK Strike, as your recoil pushbox can drag them back with you.
The length of the hitboxes (both sides of the centerpoint axis) and it's forward motion means if you land on it while it's moving and potentially crossing you up, it can be difficult to block or seem unblockable. (LK and MK versions)
Super Attacks
Omega Destroyer - D,DF,F+2P
Startup: 35f | Invuln: 8f | Active: 136f | Recovery: 45f (approx)
A good deal of startup and a great deal of recovery. It deals alot of chip damage, but shouldn't be used just for chip, unless you're sure it will kill. Easiest ways to combo into it are off an "air bounce" (down+forward) air coil, or an HP throw. If put late into a combo the damage is greatly reduced.
The Basics
Omega Red is the shortest croucher in the game.
Pokes
Due to the "any" punch to kick chain, Omega Red can poke with s.HP and cancel it's recovery with c.LK. [Dashing s.HP, (wiff) c.LK] x N will loop on many characters, but on the lighter weights pushback fights you hard. On heavier characters, there isn't enough pushback and you can end up hitting the c.LK, which will screw the combo.
Tech Hit/Throw Game
Omega Red is one of two characters (Wolverine being the other) who "handstand" for their safe fall tech (their tech after they take initial throw damage), and are invincible until that animation ends. After this, Omega Red is still in the air and can attack (normal jump rules). During an escape tech (before any damage occurs), Omega Red is mostly* invincible and can't do anything until landed. This could lead to getting throw trapped in the corner, if the player doesn't time their throws better than the opponent. Safe-falling as soon as taking the initial throw damage may be a better option for such players.
- Some escape tech-ers are vulnerable during their starting escape frames.
While it's generally preferred to take their health during a coil grab, taking a little bit of meter can rob them of their super or the ability to tech any follow up throws. This is particularly true against Counter-Throwers, as Escape/Safe-Fallers will just burn their meter to escape the coil. If they just reached Level 2, you might want to try draining meter as fast as possible to try and stop them, then drain health and toss before they can mash out.
Advanced Strategy
Advanced Tactics
Cancel laggy kick normals moves with superjump, instant air dash and jab, or instant air dash, tap back to put on the breaks then hit a normal to fill space. That can cover you better and be a little less predictable instead of always cancelling in to coil, SJ air coil or some version of Omega Strike.
Match-ups
General: Counter-throwers cannot escape the coils.
Short crouchers can end up getting pulled back by an Omega Strike that goes over their heads then is recalled, as it has no pushbox when active.
- Vs. Omega Red (self):
- Vs. Akuma:
Throw Akuma down-right on the ground on a semi-short coil and he'll bounce as if you threw him down-forward in the air, leaving even more time for follow up attacks. Even enough to super.
- Vs. Colossus:
For Russia! Watch for Shoulder Charges which can ping the coils off when the armor is active.
- Vs. Cyclops:
Cyclops' long OTG time make him prey for cross-screen c.f.HK xx LP Coil. Example, Cyke in corner:
s.HP xx LP Coil (drain), toss behind, c.f.HK xx LP Coil, toss behind, d.s.HP, c.f.HK xx LK Omega Strike.
- Vs. Iceman:
Watch for s.HK spam. If you're air-coiling near the ground, you'll likely be in range to get hit by this.
Iceman's short OTG time make restanding him off a throw a bit difficult compared to others.
- Vs. Psylocke:
Another one with long OTG time that you can abuse. Bonus, she dizzies easier and can't tech the coils.
- Vs. Sentinel:
j.HP (2-hits), 2.HK can loop but will likely push back too far after a few reps.
The coil may sometimes stun Sentinel but not grab him. This can be caused by the coiling hitting his Rocket Punch collision box.
- Vs. Silver Samurai:
- Vs. Spiral:
Spiral's tech hit glitch means you can coil/throw her as she's reappearing, and the coil/throw she teched doesn't count against the two throws rule.
Be careful when safe-falling vs Spiral, especially in the corner. She will likely try to SJ grapple you as you recover in the handstand.
- Vs. Storm:
A Storm with good execution can dash through the active part of your coils.
Long-range can end up a game of you trying to snag her through Typhoons, and her trying to worm her Typhoons around to hit you.
- Vs. Wolverine:
LP ground coils and LK Omega Strikes will wiff right over a crouching Wolv's head. If LK Strike passes over a crouching Wolvie and you call it back, Wolverine gets dragged back towards you.
You can duck grounded drill claws.
Combos
Simple Dizzy Anywhere Combo:
Feather to heavy -
HP throw, s.hp (otg) xx lk ostrike
Colossus - add s.hk after s.hp
Characters with decent OTG times, you can jab coil after the first s.hp, throw them downwards and then s.hp (otg) xx lk ostrike
Double drain to super for big damage combo (doesn't work in Spiral, Iceman or Sentinel), in corner:
jump [hk coil (should be point blank), drain, df toss (airdash after first toss only)] x2, land, Omega Destroyer.
You need a little bit of distance from the ground or the toss won't have the "bounce".
Superheavy infinites:
In corner-
[s.mp xx mk omega strike (wall cancels OS and you remain in air), j.mp as you fall] x N
Sometimes you need to take a step back after you land, or the wall will cancel you too soon and you won't have time to get a j.mp.
You can get away with missing it, provided you get one in as you land, but it could throw you off.
It's possible to get midscreen and to cross the screen with it, but you have to press down + kick to cancel the OStrike yourself.
On Sent, left corner only:
[s.mp xx lk ostrike] x N
Corner loops, feather to heavy:
launcher: s.mp
aircombo: sj.lp x 6, sj.hk (alternatively, you can use sj.lk, sj.mp instead of sj.hk, works better like this on Storm and Wolverine)
relauncher: just re-superjump
Another corner loop (doesn't work the same on Sentinel's stage):
launcher: s.mp
aircombo: sj.lp x2, sj.lk, sj.mk, sj.hp(3 or 4 hits), sj.hk
relauncher: just re-superjump
middleweights+: 1 sj.lp can be omitted, chain kicks a little slower
S.Samurai: add c.mp after you land before re-superjumping.
superheavy launch: d.s.mp, s.hk
aircombo: sj.lk, sj.mk, sj.hk.. sj.hp (1 hit), sj.hk
relauncher: s.mp
If you feel s.mp isn't launching heavier (but not superheavy) characters high enough, add a c.mp after launcher. If they seem to be getting too low, add a c.mp before you re-superjump. For superheavy, use s.mp, c.lk (whiff), s.mp.
