mNo edit summary |
|||
| Line 45: | Line 45: | ||
<font style="visibility:hidden" size="0"></font> | <font style="visibility:hidden" size="0"></font> | ||
{{MoveData | {{MoveData | ||
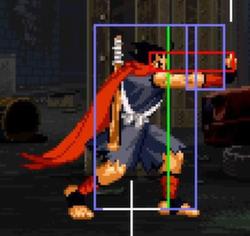
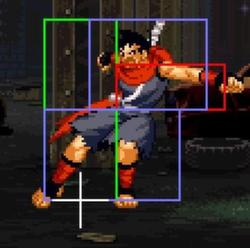
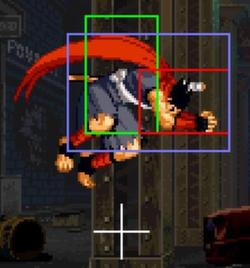
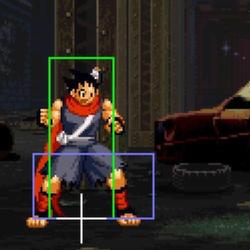
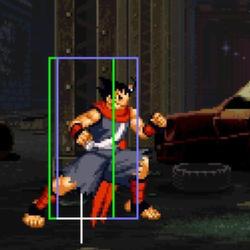
|image= | |image=[[File:Garou_Hokutomaru_cl.A.jpg]] | ||
|name=St. {{Icon-SNK|A}} | |name=St. {{Icon-SNK|A}} | ||
|subtitle= | |subtitle= | ||
| Line 70: | Line 70: | ||
<font style="visibility:hidden" size="0"></font> | <font style="visibility:hidden" size="0"></font> | ||
{{MoveData | {{MoveData | ||
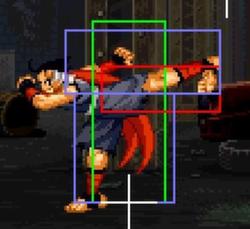
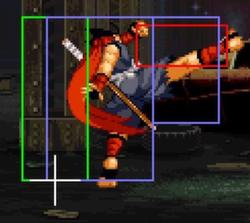
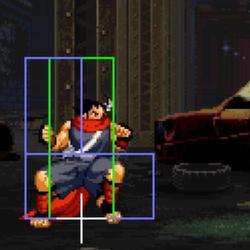
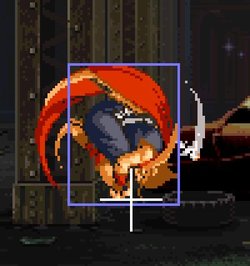
|image= | |image=[[File:Garou_Hokutomaru_cl.B.jpg]] | ||
|name=St. {{Icon-SNK|B}} | |name=St. {{Icon-SNK|B}} | ||
|subtitle= | |subtitle= | ||
| Line 95: | Line 95: | ||
<font style="visibility:hidden" size="0"></font> | <font style="visibility:hidden" size="0"></font> | ||
{{MoveData | {{MoveData | ||
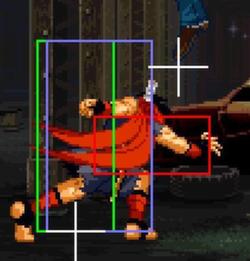
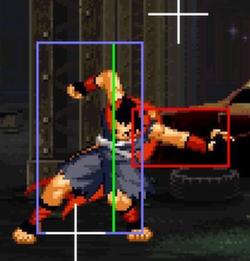
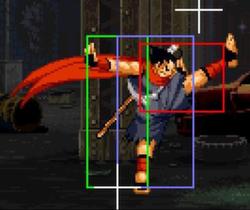
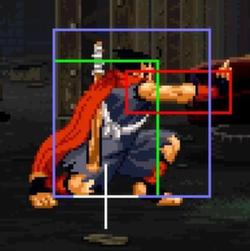
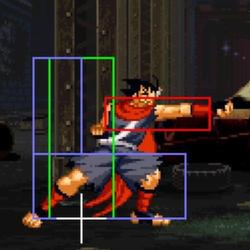
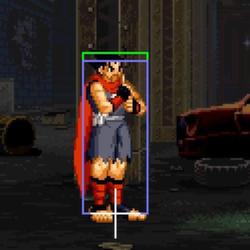
|image= | |image=[[File:Garou_Hokutomaru_cl.C-1.jpg]] | ||
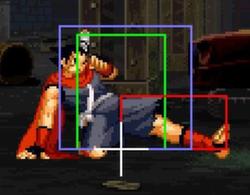
|image2=[[File:Garou_Hokutomaru_cl.C-2.jpg]] | |||
|name=St. {{Icon-SNK|C}} | |name=St. {{Icon-SNK|C}} | ||
|subtitle= | |subtitle= | ||
| Line 120: | Line 121: | ||
<font style="visibility:hidden" size="0"></font> | <font style="visibility:hidden" size="0"></font> | ||
{{MoveData | {{MoveData | ||
|image= | |image=[[File:Garou_Hokutomaru_cl.D.jpg]] | ||
|name=St. {{Icon-SNK|D}} | |name=St. {{Icon-SNK|D}} | ||
|subtitle= | |subtitle= | ||
| Line 146: | Line 147: | ||
<font style="visibility:hidden" size="0"></font> | <font style="visibility:hidden" size="0"></font> | ||
{{MoveData | {{MoveData | ||
|image= | |image=[[File:Garou_Hokutomaru_s.A.jpg]] | ||
|name=Far {{Icon-SNK|A}} | |name=Far {{Icon-SNK|A}} | ||
|subtitle= | |subtitle= | ||
| Line 171: | Line 172: | ||
<font style="visibility:hidden" size="0"></font> | <font style="visibility:hidden" size="0"></font> | ||
{{MoveData | {{MoveData | ||
|image= | |image=[[File:Garou_Hokutomaru_s.B.jpg]] | ||
|name=Far {{Icon-SNK|B}} | |name=Far {{Icon-SNK|B}} | ||
|subtitle= | |subtitle= | ||
| Line 196: | Line 197: | ||
<font style="visibility:hidden" size="0"></font> | <font style="visibility:hidden" size="0"></font> | ||
{{MoveData | {{MoveData | ||
|image= | |image=[[File:Garou_Hokutomaru_s.C.jpg]] | ||
|name=Far {{Icon-SNK|C}} | |name=Far {{Icon-SNK|C}} | ||
|subtitle= | |subtitle= | ||
| Line 221: | Line 222: | ||
<font style="visibility:hidden" size="0"></font> | <font style="visibility:hidden" size="0"></font> | ||
{{MoveData | {{MoveData | ||
|image= | |image=[[File:Garou_Hokutomaru_s.D.jpg]] | ||
|name=Far {{Icon-SNK|D}} | |name=Far {{Icon-SNK|D}} | ||
|subtitle= | |subtitle= | ||
| Line 247: | Line 248: | ||
<font style="visibility:hidden" size="0"></font> | <font style="visibility:hidden" size="0"></font> | ||
{{MoveData | {{MoveData | ||
|image= | |image=[[File:Garou_Hokutomaru_cr.A.jpg]] | ||
|name=Cr. {{Icon-SNK|A}} | |name=Cr. {{Icon-SNK|A}} | ||
|subtitle= | |subtitle= | ||
| Line 272: | Line 273: | ||
<font style="visibility:hidden" size="0"></font> | <font style="visibility:hidden" size="0"></font> | ||
{{MoveData | {{MoveData | ||
|image= | |image=[[File:Garou_Hokutomaru_cr.B.jpg]] | ||
|name=Cr. {{Icon-SNK|B}} | |name=Cr. {{Icon-SNK|B}} | ||
|subtitle= | |subtitle= | ||
| Line 297: | Line 298: | ||
<font style="visibility:hidden" size="0"></font> | <font style="visibility:hidden" size="0"></font> | ||
{{MoveData | {{MoveData | ||
|image= | |image=[[File:Garou_Hokutomaru_cr.C.jpg]] | ||
|name=Cr. {{Icon-SNK|C}} | |name=Cr. {{Icon-SNK|C}} | ||
|subtitle= | |subtitle= | ||
| Line 322: | Line 323: | ||
<font style="visibility:hidden" size="0"></font> | <font style="visibility:hidden" size="0"></font> | ||
{{MoveData | {{MoveData | ||
|image= | |image=[[File:Garou_Hokutomaru_cr.D.jpg]] | ||
|name=Cr. {{Icon-SNK|D}} | |name=Cr. {{Icon-SNK|D}} | ||
|subtitle= | |subtitle= | ||
| Line 348: | Line 349: | ||
<font style="visibility:hidden" size="0"></font> | <font style="visibility:hidden" size="0"></font> | ||
{{MoveData | {{MoveData | ||
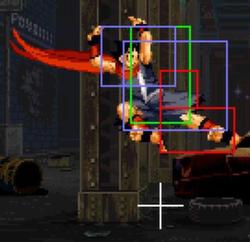
|image= | |image=[[File:Garou_Hokutomaru_j.A.jpg]] | ||
|name=Jump {{Icon-SNK|A}} | |name=Jump {{Icon-SNK|A}} | ||
|subtitle= | |subtitle= | ||
| Line 373: | Line 374: | ||
<font style="visibility:hidden" size="0"></font> | <font style="visibility:hidden" size="0"></font> | ||
{{MoveData | {{MoveData | ||
|image= | |image=[[File:Garou_Hokutomaru_j.B.jpg]] | ||
|name=Jump {{Icon-SNK|B}} | |name=Jump {{Icon-SNK|B}} | ||
|subtitle= | |subtitle= | ||
| Line 398: | Line 399: | ||
<font style="visibility:hidden" size="0"></font> | <font style="visibility:hidden" size="0"></font> | ||
{{MoveData | {{MoveData | ||
|image= | |image=[[File:Garou_Hokutomaru_j.C.jpg]] | ||
|name=Jump {{Icon-SNK|C}} | |name=Jump {{Icon-SNK|C}} | ||
|subtitle= | |subtitle= | ||
| Line 423: | Line 424: | ||
<font style="visibility:hidden" size="0"></font> | <font style="visibility:hidden" size="0"></font> | ||
{{MoveData | {{MoveData | ||
|image= | |image=[[File:Garou_Hokutomaru_j.D.jpg]] | ||
|name=Jump {{Icon-SNK|D}} | |name=Jump {{Icon-SNK|D}} | ||
|subtitle= | |subtitle= | ||
| Line 446: | Line 447: | ||
===Command Normals=== | ===Command Normals=== | ||
===== <span class="invisible-header"></span> ===== | |||
<font style="visibility:hidden" size="0"></font> | |||
{{MoveData | |||
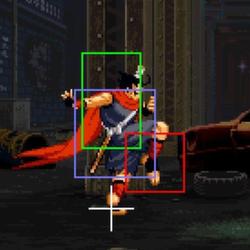
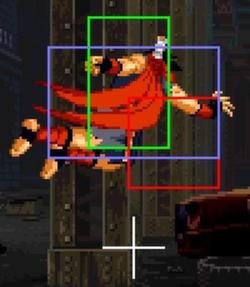
|image=[[File:Garou_Hokutomaru_3B.jpg]] | |||
|name=[[File:df.png]]{{Icon-SNK|B}} | |||
|subtitle= | |||
|caption= | |||
|data= | |||
{{AttackData-Garou | |||
|Damage= | |||
|Guard= | |||
|Startup= | |||
|Active= | |||
|Recovery= | |||
|Total= | |||
|Hit Adv= | |||
|Block Adv= | |||
|Feint Cancel= | |||
|Cancel on Hit= | |||
|Cancel on Block= | |||
|Guard Crush Value= | |||
|description= | |||
}} | |||
}} | |||
===== <span class="invisible-header"></span> ===== | |||
<font style="visibility:hidden" size="0"></font> | |||
{{MoveData | |||
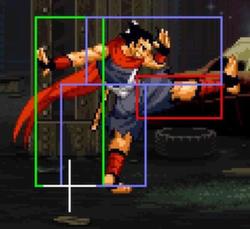
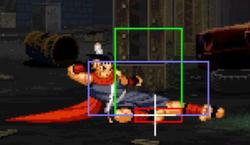
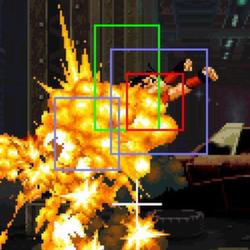
|image=[[File:Garou_Hokutomaru_3D-1.jpg]] | |||
|image2=[[File:Garou_Hokutomaru_3D-2.jpg]] | |||
|name=[[File:df.png]]{{Icon-SNK|D}} | |||
|subtitle= | |||
|caption= | |||
|data= | |||
{{AttackData-Garou | |||
|Damage= | |||
|Guard= | |||
|Startup= | |||
|Active= | |||
|Recovery= | |||
|Total= | |||
|Hit Adv= | |||
|Block Adv= | |||
|Feint Cancel= | |||
|Cancel on Hit= | |||
|Cancel on Block= | |||
|Guard Crush Value= | |||
|description= | |||
}} | |||
}} | |||
'''Double Jump''': [[File:u.png]], [[File:u.png]]''<br> | '''Double Jump''': [[File:u.png]], [[File:u.png]]''<br> | ||
===Throws=== | ===Throws=== | ||
Revision as of 12:39, 15 December 2021
Introduction
| Pros | Cons |
|---|---|
|
|
Character Colors
Move List
Esoterics
Frame Data Source: https://w.atwiki.jp/garoumow/pages/27.html
Legend:
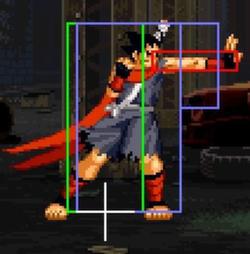
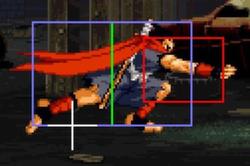
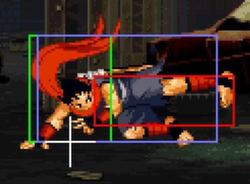
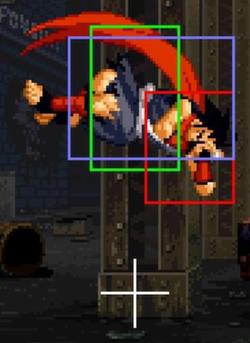
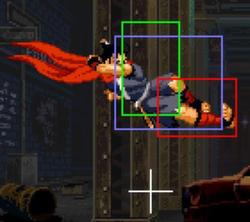
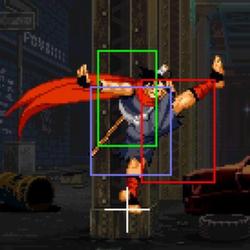
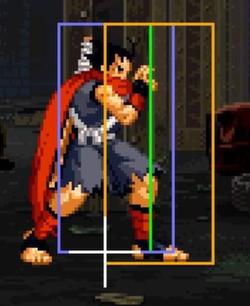
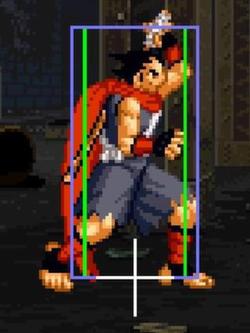
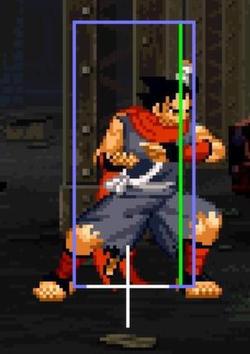
- Hit Box: Area that will hit the opponent
- Hurt Box: Area where you can get hit. A move is invincible if the Hurt Box is absent.
- Throw Box/Range: Active throw frames and range. Your opponent will be thrown in this field if not in block or hit stun.
- Projectile Box: Hit box on a projectile attack.
- Guard/Counter Box: The Guard Box or Counter Box. This appears when blocking or using a counter move.
- Push Box: Has no bearing on hurt/hit boxes. Just allows characters to not pass through each other.
- Command = the input for the attack.
- Start Up = How many start up frames a move/attack has.
- Hit = When the attack hits.
- Block = When the attack is blocked.
- + signifies how many advantage frames the attacker has.
- - signifies how many disadvantage frames the attacker has.
- KD means the attack will knock the opponent down.
Close Standing Normals
| Damage | Guard | Startup | Active | Recovery | Total |
|---|---|---|---|---|---|
| - | - | - | - | - | - |
| Hit Adv | Block Adv | Cancel on Hit | Cancel on Block | Guard Crush Value | |
| - | - | - | - | - | |
|
Standing jab. | |||||
| Damage | Guard | Startup | Active | Recovery | Total |
|---|---|---|---|---|---|
| - | - | - | - | - | - |
| Hit Adv | Block Adv | Cancel on Hit | Cancel on Block | Guard Crush Value | |
| - | - | - | - | - |
| Damage | Guard | Startup | Active | Recovery | Total |
|---|---|---|---|---|---|
| - | - | - | - | - | - |
| Hit Adv | Block Adv | Cancel on Hit | Cancel on Block | Guard Crush Value | |
| - | - | - | - | - |
| Damage | Guard | Startup | Active | Recovery | Total |
|---|---|---|---|---|---|
| - | - | - | - | - | - |
| Hit Adv | Block Adv | Cancel on Hit | Cancel on Block | Guard Crush Value | |
| - | - | - | - | - |
Far Standing Normals
| Damage | Guard | Startup | Active | Recovery | Total |
|---|---|---|---|---|---|
| - | - | - | - | - | - |
| Hit Adv | Block Adv | Cancel on Hit | Cancel on Block | Guard Crush Value | |
| - | - | - | - | - |
| Damage | Guard | Startup | Active | Recovery | Total |
|---|---|---|---|---|---|
| - | - | - | - | - | - |
| Hit Adv | Block Adv | Cancel on Hit | Cancel on Block | Guard Crush Value | |
| - | - | - | - | - |
| Damage | Guard | Startup | Active | Recovery | Total |
|---|---|---|---|---|---|
| - | - | - | - | - | - |
| Hit Adv | Block Adv | Cancel on Hit | Cancel on Block | Guard Crush Value | |
| - | - | - | - | - |
| Damage | Guard | Startup | Active | Recovery | Total |
|---|---|---|---|---|---|
| - | - | - | - | - | - |
| Hit Adv | Block Adv | Cancel on Hit | Cancel on Block | Guard Crush Value | |
| - | - | - | - | - |
Crouching Normals
| Damage | Guard | Startup | Active | Recovery | Total |
|---|---|---|---|---|---|
| - | - | - | - | - | - |
| Hit Adv | Block Adv | Cancel on Hit | Cancel on Block | Guard Crush Value | |
| - | - | - | - | - |
| Damage | Guard | Startup | Active | Recovery | Total |
|---|---|---|---|---|---|
| - | - | - | - | - | - |
| Hit Adv | Block Adv | Cancel on Hit | Cancel on Block | Guard Crush Value | |
| - | - | - | - | - |
| Damage | Guard | Startup | Active | Recovery | Total |
|---|---|---|---|---|---|
| - | - | - | - | - | - |
| Hit Adv | Block Adv | Cancel on Hit | Cancel on Block | Guard Crush Value | |
| - | - | - | - | - |
| Damage | Guard | Startup | Active | Recovery | Total |
|---|---|---|---|---|---|
| - | - | - | - | - | - |
| Hit Adv | Block Adv | Cancel on Hit | Cancel on Block | Guard Crush Value | |
| - | - | - | - | - |
Jumping Normals
| Damage | Guard | Startup | Active | Recovery | Total |
|---|---|---|---|---|---|
| - | - | - | - | - | - |
| Hit Adv | Block Adv | Cancel on Hit | Cancel on Block | Guard Crush Value | |
| - | - | - | - | - |
| Damage | Guard | Startup | Active | Recovery | Total |
|---|---|---|---|---|---|
| - | - | - | - | - | - |
| Hit Adv | Block Adv | Cancel on Hit | Cancel on Block | Guard Crush Value | |
| - | - | - | - | - |
| Damage | Guard | Startup | Active | Recovery | Total |
|---|---|---|---|---|---|
| - | - | - | - | - | - |
| Hit Adv | Block Adv | Cancel on Hit | Cancel on Block | Guard Crush Value | |
| - | - | - | - | - |
| Damage | Guard | Startup | Active | Recovery | Total |
|---|---|---|---|---|---|
| - | - | - | - | - | - |
| Hit Adv | Block Adv | Cancel on Hit | Cancel on Block | Guard Crush Value | |
| - | - | - | - | - |
Command Normals
| Damage | Guard | Startup | Active | Recovery | Total |
|---|---|---|---|---|---|
| - | - | - | - | - | - |
| Hit Adv | Block Adv | Cancel on Hit | Cancel on Block | Guard Crush Value | |
| - | - | - | - | - |
| Damage | Guard | Startup | Active | Recovery | Total |
|---|---|---|---|---|---|
| - | - | - | - | - | - |
| Hit Adv | Block Adv | Cancel on Hit | Cancel on Block | Guard Crush Value | |
| - | - | - | - | - |
Throws
Feint Cancels
Special Moves
Super Moves
Attributes
When a move can be canceled, it can either be canceled into a special/super/feint. Some moves that can't be canceled when they hit can be canceled when the opponent blocks while some moves that can be Special/Super canceled cannot be Feint Canceled.
Frame Data
Legend :
Command = the input for the attack.
Start Up = How many start up frames an attack has.
Hit = When the attack hits.
Block = When the attack is blocked.
+ signifies how many advantage frames the attacker has.
- signifies how many disadvantage frames the attacker has.
KD means the attack will knock the opponent down.
Data from Howard's Arena
Attack Notes
Chou Hissatsu Tatsumaki-
S. Power does a total of 32 points of damage.
P. Power does a total of 47 points of damage.
Chou Hissatsu Shuriken-
This S. Power does a total of 33 points of damage, if the final shuriken isn't fired early.
Chou Hissatsu Kunai-
This S. Power does a total of 45 points of damage, if the final kunai isn't fired early.
Combos
Anywhere
Corner only
Hitboxes
| Command | Total Frames |
| Close |
x |
| Command | Total Frames |
| x |
| Command | Total Frames |
| x |
| Command | Start Up | Hit | Guard |
| Close |
4 | +6 | +6 |
| Command | Start Up | Hit | Guard |
| Close |
4 | +3 | +3 |
| Command | Start Up | Hit | Guard |
| Close |
5 | +2 | +2 |
| Command | Start Up | Hit | Guard |
| Close |
3 | -1 | -1 |
| Command | Start Up | Hit | Guard |
| Far |
4 | +5 | +5 |
| Command | Start Up | Hit | Guard |
| Far |
6 | +1 | +1 |
| Command | Start Up | Hit | Guard |
| Far |
11 | -10 | -10 |
| Command | Start Up | Hit | Guard |
| Far |
11 | -3 | -3 |
| Command | Start Up | Hit | Guard |
| 4 | +5 | +5 |
| Command | Start Up | Hit | Guard |
| 5 | +1 | +2 |
| Command | Start Up | Hit | Guard |
| 6 | -20 | -20 |
| Command | Start Up | Hit | Guard |
| 10 | KD | -14 |
| Command | Start Up | Hit | Guard |
| Jumping |
6 | ? | ? |
| Command | Start Up | Hit | Guard |
| Jumping |
3 | ? | ? |
| Command | Start Up | Hit | Guard |
| Jumping |
6 | ? | ? |
| Command | Start Up | Hit | Guard |
| Jumping |
7 | ? | ? |
| Command | Start Up | Hit | Guard |
| 18 | -1 | +5 |
| Command | Start Up | Hit | Guard |
| 10 | +1 | +7 |
| Command | Start Up | Hit | Guard |
| --- |
x | -12 | -6 |
| Command | Start Up | Hit | Guard |
| 7 | KD | -15 |
| Command | Start Up | Hit | Guard |
| 8 | KD | -13 |
| Command | Start Up | Hit | Guard |
| 10 | KD | -34 |
T.O.P. Notes
This is a rising attack that is good for one hit and travels at a 45 degree angle. It has a slow start and can be used as an anti-air. Don't ever get this attack blocked!
Basic Strategy
Hokutomaru is a mid-low tier character with all around moves based on speed moves.
His projectiles can be in ground or air, they are weaks but faster, his Kuuhadan its a good middle range anti air and also his blade move its quick and your main 2-in-1 combo meterless ender.
His corner game is one of his objetives due that their faint moves and breaks can be connected in a same corner combo, along with a command move that is your corner link.
His Super Move homage to Mai Shiranui its your anti air close combat tool and best corner combo ender, and the Projectile Spam Super Move its your midscreen combo ender.
He had low stamina as Hotaru or Freeman but his moves are useful to zone or rush, and his T.O.P. Attack its a bit awful.
Advanced Tactics
In-depth video lecture on Hokutomaru. Please use the timestamps to navigate the topics.
Matchup info
Rock Howard
 X
X 
5 - 5
(Slightly favorable matchup)
Kim Dong-Hwan
 X
X 
5 - 5
(Slightly unfavorable matchup)
Hotaru Futaba
 X
X 
5 - 5
(Slightly unfavorable matchup)
Marco Rodrigez
 X
X 
5 - 5
(Slightly unfavorable matchup)
Terry Bogard
 X
X 
5 - 5
(Slightly favorable matchup)
Kevin Rian
 X
X 
3 - 7
(Highly unfavorable matchup)
Freeman
 X
X 
5 - 5
(Slightly favorable matchup)
The Griffon
 X
X 
6 - 4
(Favorable matchup)
B. Jenet
 X
X 
3 - 7
(Highly unfavorable matchup)
Gato
 X
X 
3 - 7
(Highly unfavorable matchup)
Kim Jae Hoon
 X
X 
5 - 5
(Fair matchup)
Grant
 X
X 
4 - 6
(Unfavorable matchup)
Kain R. Heinlein
 X
X 
4 - 6
(Unfavorable matchup)
