| (113 intermediate revisions by 8 users not shown) | |||
| Line 1: | Line 1: | ||
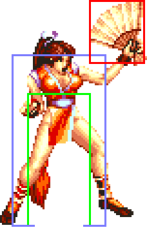
[[File:Ffspecmai.png|right|The Enchanting Ninja Maid]] | |||
[[File:Ffspecmai_colors.png|right]] | |||
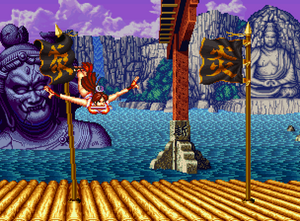
[[File:FFS_Mai_Stage.png|thumb|Mai's stage is special as only on it her Musasabi No Mai special move will fly her to one of its flagpoles instead of the stage wall.]] | |||
{{TOClimit|3}} | |||
= | ==Introduction== | ||
"Nippon Ichi!" Easily one of gaming's most iconic characters, Mai Shiranui takes to the fighting stage in Fatal Fury Special as a powerful zoning character, capable of shutting anyone out with ease. Easy to play as right away, she has great anti-air tools, a great fireball, a deadly (albeit very risky) super, simple combos, rewarding damage, and a unique stage where she actually gains an additional advantage from it, Mai Shiranui is holding nothing back. Her super is very risky as already mentioned, as while it does great damage and decent chip damage, everyone can very easily punish her on block and can be predictable. Her mobility too is not the greatest, albeit not as bad as some other characters. And while she may seem like a great glass cannon type character, she's not. You must play her defensively as a strict keepaway character. But no matter who she's up against, chances are her impeccable zoning give her an advantage at all times as even her up close game isn't too lacking when she's forced to confront the opponent. | |||
== | {| | ||
|-style="text-align:left;" | |||
! Pros !! Cons | |||
|- style="vertical-align:top;text-align:left" | |||
| style="width: 50%;"| | |||
* Strong defense | |||
* Easy to use | |||
* Fast normals | |||
| style="width: 50%;"| | |||
* Jumps and backsteps are a bit quirky | |||
* Short combos | |||
* Not suited for rushdown | |||
|- | |||
|} | |||
== | ==Move List== | ||
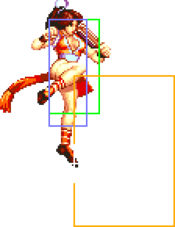
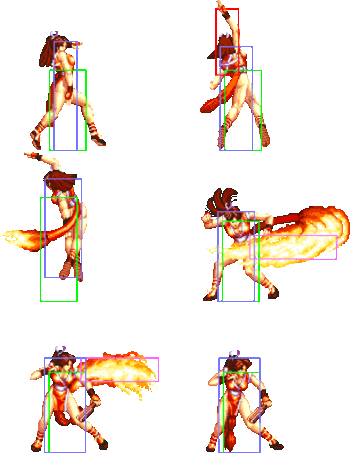
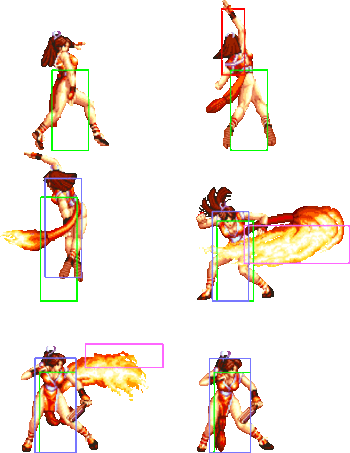
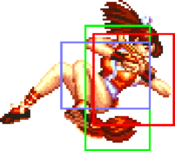
== | ===General Hurtboxes=== | ||
{| border="1em" cellspacing="0" style="border: 1px solid #999;" | |||
| align="center" | Standing || align="center" | Crouching || align="center" | Jumping || align="center" | Backdashing || align="center" | Taunting | |||
|- | |||
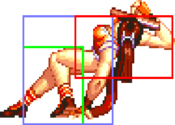
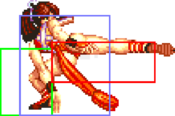
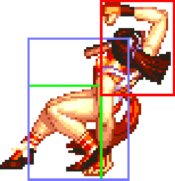
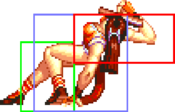
| align="center"; valign="bottom" | [[File:FFS Mai Standing.png|bottom]] || align="center"; valign="bottom" | [[File:FFS_Mai_Crouching.png|bottom]] || align="center"; valign="bottom" | [[File:FFS_Mai_Jumping_1.png|bottom]] [[File:FFS_Mai_Jumping_2.png|bottom]] || align="center"; valign="bottom" | [[File:FFS_Mai_Backdash.gif|bottom]] || align="center"; valign="bottom" | [[File:FFS_Mai_Taunt.gif|bottom|Ho~ho~ho!]] | |||
|- | |||
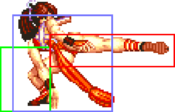
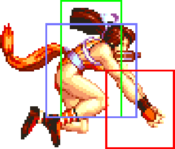
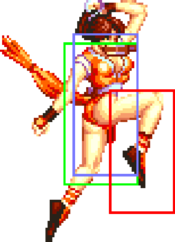
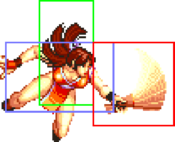
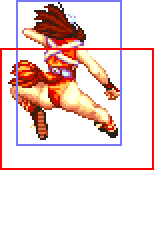
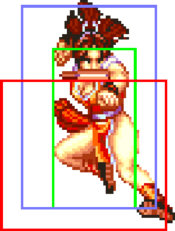
| align="center" | || align="center" | || align="center" | 57F (8+43+6) duration. || align="center" | Mai is grounded and can easily be thrown. 34F (28+6) duration. || align="center" | | |||
|} | |||
= | === Close Standing Normals === | ||
= | ===== <span class="invisible-header">c5A</span> ===== | ||
<font style="visibility:hidden" size="0"></font> | |||
{{MoveData | |||
|image=FFS_Mai_c5A.png | |||
|subtitle=Senda/扇打 | |||
|caption= | |||
|name=c5A | |||
|data= | |||
{{AttackData-FFS | |||
|Damage=6 | |||
|Stun=2 | |||
|Guard=Mid | |||
|Startup=4 | |||
|Active=7 | |||
|Recovery=6 | |||
|Total=16 | |||
|Hit Adv=+3 | |||
|Block Adv=+4 | |||
|Property=Kara Cancel | |||
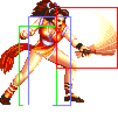
|description= * 2nd hitbox is +6 on hit and +7 on block. | |||
*Knockback is minimal, so you can combo into heavy Ryuuenbu from this. | |||
*Works as an emergency anti-air. | |||
<gallery class="mw-collapsible"> | |||
FFS Mai c5A.png| | |||
FFS Mai c5A 1.png| | |||
</gallery> | |||
}} | |||
}} | |||
= | ===== <span class="invisible-header">c5B</span> ===== | ||
<font style="visibility:hidden" size="0"></font> | |||
{{MoveData | |||
|image=FFS_Mai_c5B.png | |||
|subtitle=Tatsumakigeri/竜巻蹴り | |||
|caption= | |||
|name=c5B | |||
|data= | |||
{{AttackData-FFS | |||
|Damage=8 | |||
|Stun=2 | |||
|Guard=Mid | |||
|Startup=8 | |||
|Active=4 | |||
|Recovery=11 | |||
|Total=21 | |||
|Hit Adv=+1 | |||
|Block Adv=+2 | |||
|Property=Kara Cancel | |||
|description=*You're generally better off using close A, unless you need those extra 2 points of damage for your stun combo. | |||
*Whiffs against crouching Jubei. | |||
}} | |||
}} | |||
== | ===== <span class="invisible-header">c5C</span> ===== | ||
<font style="visibility:hidden" size="0"></font> | |||
{{MoveData | |||
|image=FFS_Mai_c5A.png | |||
|subtitle=Dai-senda/大扇打 | |||
|caption= | |||
|name=c5C | |||
|data= | |||
{{AttackData-FFS | |||
|Damage=14 | |||
|Stun=4 | |||
|Guard=Mid | |||
|Startup=8 | |||
|Active=7 | |||
|Recovery=17 | |||
|Total=31 | |||
|Hit Adv=0 | |||
|Block Adv=-1 | |||
|Property=Kara Cancel | |||
|description= * 2nd hitbox is +3 on hit and +2 on block. | |||
*Close A is generally better as a combo starter, as this one has too much knockback on hit to properly connect into heavy Ryuuenbu. You can still combo into Kachosen or super from this, though. | |||
<gallery class="mw-collapsible"> | |||
FFS Mai c5A.png| | |||
FFS Mai c5A 1.png| | |||
</gallery> | |||
}} | |||
}} | |||
== | ===== <span class="invisible-header">c5D</span> ===== | ||
<font style="visibility:hidden" size="0"></font> | |||
{{MoveData | |||
|image=FFS_Mai_c5B.png | |||
|subtitle=Tatsumakigeri/竜巻蹴り | |||
|caption= | |||
|name=c5D | |||
|data= | |||
{{AttackData-FFS | |||
|Damage=16 | |||
|Stun=4 | |||
|Guard=Mid | |||
|Startup=10 | |||
|Active=7 | |||
|Recovery=17 | |||
|Total=33 | |||
|Hit Adv=0 | |||
|Block Adv=-1 | |||
|Property=Kara Cancel | |||
|description=*Not much reason to use this, unless you want to combo into super. | |||
*Same hitbox as c5B. | |||
}} | |||
}} | |||
== | === Far Standing Normals === | ||
== | ===== <span class="invisible-header">f5A</span> ===== | ||
<font style="visibility:hidden" size="0"></font> | |||
{{MoveData | |||
|image=FFS_Mai_5A.png | |||
|subtitle=Sensu-uchi/扇子打ち | |||
|caption= | |||
|name=f5A | |||
|data= | |||
{{AttackData-FFS | |||
|Damage=4 | |||
|Stun=2 | |||
|Guard=Mid | |||
|Startup=6 | |||
|Active=4 | |||
|Recovery=10 | |||
|Total=19 | |||
|Hit Adv=+2 | |||
|Block Adv=+3 | |||
|Property=Kara Cancel | |||
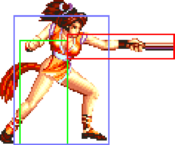
|description=*Mai's main ground poke. Very good reach for a light normal. | |||
*Doesn't combo into anything, but you can still create some powerful pressure by cancelling this into light Kachosen on hit or block. | |||
}} | |||
}} | |||
== | ===== <span class="invisible-header">f5B</span> ===== | ||
<font style="visibility:hidden" size="0"></font> | |||
{{MoveData | |||
|image=FFS_Mai_5B.png | |||
|subtitle=Taikuu Mai Kick/対空舞キック | |||
|caption= | |||
|name=f5B | |||
|data= | |||
{{AttackData-FFS | |||
|Damage=6 | |||
|Stun=2 | |||
|Guard=Mid | |||
|Startup=6 | |||
|Active=6 | |||
|Recovery=8 | |||
|Total=19 | |||
|Hit Adv=+2 | |||
|Block Adv=+3 | |||
|Property=Cancel | |||
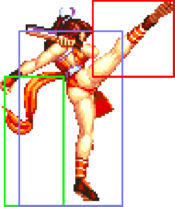
|description=*Mediocre anti-air. Mai has better options available. | |||
}} | |||
}} | |||
== | ===== <span class="invisible-header">f5C</span> ===== | ||
<font style="visibility:hidden" size="0"></font> | |||
{{MoveData | |||
|image=FFS_Mai_5C.png | |||
|subtitle=Taikuu Sensu-tsuki/対空扇子突き | |||
|caption= | |||
|name=f5C | |||
|data= | |||
{{AttackData-FFS | |||
|Damage=10 | |||
|Stun=4 | |||
|Guard=Mid | |||
|Startup=8 | |||
|Active=13 | |||
|Recovery=10 | |||
|Total=30 | |||
|Hit Adv=0 | |||
|Block Adv=-1 | |||
|Property= | |||
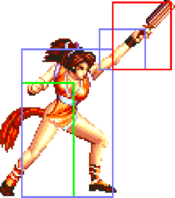
|description=*Another anti-air normal. Pretty good, but you'll still want to use heavy Ryuuenbu over this. | |||
}} | |||
}} | |||
== | ===== <span class="invisible-header">f5D</span> ===== | ||
<font style="visibility:hidden" size="0"></font> | |||
{{MoveData | |||
|image=FFS_Mai_5D.png | |||
|subtitle=Mai Kick/舞キック | |||
|caption= | |||
|name=f5D | |||
|data= | |||
{{AttackData-FFS | |||
|Damage=14 | |||
|Stun=4 | |||
|Guard=Mid | |||
|Startup=8 | |||
|Active=8 | |||
|Recovery=17 | |||
|Total=32 | |||
|Hit Adv=-2 | |||
|Block Adv=-3 | |||
|Property= | |||
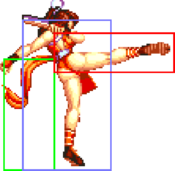
|description=*Decent reach, but can't be cancelled unlike Mai's other pokes and thus less useful. Largely outclassed by CD. | |||
}} | |||
}} | |||
== | === Crouching Normals === | ||
== | ===== <span class="invisible-header">2A</span> ===== | ||
<font style="visibility:hidden" size="0"></font> | |||
{{MoveData | |||
|image=FFS_Mai_2A.png | |||
|subtitle=Haimen Hiji-uchi/背面肘打ち | |||
|caption= | |||
|name=2A | |||
|data= | |||
{{AttackData-FFS | |||
|Damage=4 | |||
|Stun=2 | |||
|Guard=Mid | |||
|Startup=6 | |||
|Active=4 | |||
|Recovery=8 | |||
|Total=17 | |||
|Hit Adv=+4 | |||
|Block Adv=+5 | |||
|Property=Kara Cancel | |||
|description=*Not terrible, but Mai's other crouch buttons are better. | |||
}} | |||
}} | |||
== | ===== <span class="invisible-header">2B</span> ===== | ||
<font style="visibility:hidden" size="0"></font> | |||
{{MoveData | |||
|image=FFS_Mai_2B.png | |||
|subtitle=Kaerigeri/反り蹴り | |||
|caption= | |||
|name=2B | |||
|data= | |||
{{AttackData-FFS | |||
|Damage=6 | |||
|Stun=2 | |||
|Guard=Low | |||
|Startup=6 | |||
|Active=4 | |||
|Recovery=7 | |||
|Total=16 | |||
|Hit Adv=+5 | |||
|Block Adv=+6 | |||
|Property=Kara Cancel | |||
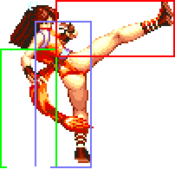
|description=*Has less range than 2D, despite using the same animation. Still a great low poke. | |||
}} | |||
}} | |||
== | ===== <span class="invisible-header">2C</span> ===== | ||
<font style="visibility:hidden" size="0"></font> | |||
{{MoveData | |||
|image=FFS_Mai_2C_1.png | |||
|image2=FFS_Mai_2C_2.png | |||
|subtitle=Haimen Hiji-uchi/背面肘打ち | |||
|caption= | |||
|name=2C | |||
|data= | |||
{{AttackData-FFS | |||
|Damage=12 | |||
|Stun=4 | |||
|Guard=Mid | |||
|Startup=5 | |||
|Active=10 | |||
|Recovery=18 | |||
|Total=32 | |||
|Hit Adv=-4 | |||
|Block Adv=-5 | |||
|Property=Kara Cancel | |||
|description=*Fast startup for a heavy normal. Cr. D has more reach, but you can combo off this. | |||
}} | |||
}} | |||
== | ===== <span class="invisible-header">2D</span> ===== | ||
<font style="visibility:hidden" size="0"></font> | |||
{{MoveData | |||
|image=FFS_Mai_2D.png | |||
|subtitle=Kaerigeri/反り蹴り | |||
|caption= | |||
|name=2D | |||
|data= | |||
{{AttackData-FFS | |||
|Damage=14 | |||
|Stun=4 | |||
|Guard=Low | |||
|Startup=8 | |||
|Active=11 | |||
|Recovery=21 | |||
|Total=39 | |||
|Hit Adv=KD | |||
|Block Adv=-9 | |||
|Property=Kara Cancel | |||
|description=*Superb sweep kick with great range and speed. Your most useful button in neutral along with 5A. | |||
*Can be cancelled into Kachosen to deal chip damage on block. | |||
}} | |||
}} | |||
== | === Jumping Normals === | ||
== | ===== <span class="invisible-header">jA</span> ===== | ||
<font style="visibility:hidden" size="0"></font> | |||
{{MoveData | |||
|image=FFS_Mai_jA.png | |||
|subtitle=Fuushaken/風車拳 | |||
|caption= | |||
|name=jA | |||
|data= | |||
{{AttackData-FFS | |||
|Damage=6 | |||
|Stun=2 | |||
|Guard=Overhead | |||
|Startup=5 | |||
|Active=∞ | |||
|Recovery= | |||
|Total= | |||
|Hit Adv= | |||
|Block Adv= | |||
|Property= | |||
|description=*Beats low profile anti-airs, like Joe/Jubei slides. | |||
}} | |||
}} | |||
== | ===== <span class="invisible-header">jB</span> ===== | ||
<font style="visibility:hidden" size="0"></font> | |||
{{MoveData | |||
|image=FFS_Mai_jB.png | |||
|subtitle=Shoukyaku/翔脚 | |||
|caption= | |||
|name=jB | |||
|data= | |||
{{AttackData-FFS | |||
|Damage=8 | |||
|Stun=2 | |||
|Guard=Overhead | |||
|Startup=10 | |||
|Active=∞ | |||
|Recovery= | |||
|Total= | |||
|Hit Adv= | |||
|Block Adv= | |||
|Property=Air | |||
|description=*Beats low profile anti-airs. Almost interchangeable with jump A. | |||
}} | |||
}} | |||
== Vs. Wolfgang Krauser == | ===== <span class="invisible-header">jC</span> ===== | ||
<font style="visibility:hidden" size="0"></font> | |||
{{MoveData | |||
|image=FFS_Mai_jC.png | |||
|subtitle=Shousenda/翔扇打 | |||
|caption= | |||
|name=jC | |||
|data= | |||
{{AttackData-FFS | |||
|version=Diagonal Jump | |||
|Damage=14 | |||
|Stun=4 | |||
|Guard=Overhead | |||
|Startup=5 | |||
|Active=8 | |||
|Recovery= | |||
|Total= | |||
|Hit Adv= | |||
|Block Adv= | |||
|Property= | |||
|description=*Fast startup and good horizontal reach. | |||
}} | |||
{{AttackData-FFS | |||
|header=no | |||
|version=Neutral Jump | |||
|Damage=14 | |||
|Stun=4 | |||
|Guard=Overhead | |||
|Startup=5 | |||
|Active=6 | |||
|Recovery= | |||
|Total= | |||
|Hit Adv= | |||
|Block Adv= | |||
|Property= | |||
|description=*Same as diagonal, but has less active frames for some reason. | |||
}} | |||
}} | |||
===== <span class="invisible-header">jD</span> ===== | |||
<font style="visibility:hidden" size="0"></font> | |||
{{MoveData | |||
|image=FFS Mai j9D.png | |||
|image2=FFS_Mai_jD.png | |||
|subtitle=Hayabusageri/ハヤブサ蹴り | |||
|caption=Diagonal Jump | |||
|caption2=Neutral Jump | |||
|name=jD | |||
|data= | |||
{{AttackData-FFS | |||
|version=Diagonal Jump | |||
|Damage=16 | |||
|Stun=4 | |||
|Guard=Overhead | |||
|Startup=5 | |||
|Active=20 | |||
|Recovery= | |||
|Total= | |||
|Hit Adv= | |||
|Block Adv= | |||
|Property= | |||
|description=*Pretty average jump-in. | |||
}} | |||
{{AttackData-FFS | |||
|header=no | |||
|version=Neutral Jump | |||
|Damage=16 | |||
|Stun=4 | |||
|Guard=Overhead | |||
|Startup=5 | |||
|Active=12 | |||
|Recovery= | |||
|Total= | |||
|Hit Adv= | |||
|Block Adv= | |||
|Property= | |||
|description=*You can air-to-air with this, but you're much better off using Mai's grounded anti-airs due to her slow pre-jump animation. | |||
}} | |||
}} | |||
=== Universal Mechanics === | |||
===== <span class="invisible-header">Lane Blast (CD)</span> ===== | |||
<font style="visibility:hidden" size="0"></font> | |||
{{MoveData | |||
|image=FFS_Mai_Blowback.png | |||
|image2=FFS_Mai_Blowback_Back.png | |||
|subtitle=Tensui no Mai/天水の舞 | |||
|caption=Front Lane | |||
|caption2=Back Lane | |||
|name=Lane Blast | |||
|input=C+D | |||
|data= | |||
{{AttackData-FFS | |||
|version=Front Lane | |||
|Damage=22 | |||
|Stun=5 | |||
|Guard=Mid | |||
|Startup=9 | |||
|Active=7 | |||
|Recovery=22 | |||
|Total=37 | |||
|Hit Adv=KD | |||
|Block Adv=-10 | |||
|Property=Cancel | |||
|description=*Fast startup as far as CD moves go, and the range isn't bad either. Useful move when cancelled into Kachosen on block. | |||
}} | |||
{{AttackData-FFS | |||
|header=no | |||
|version=Back Lane | |||
|Damage=22 | |||
|Stun=5 | |||
|Guard=Mid | |||
|Startup=11 | |||
|Active=7 | |||
|Recovery=17 | |||
|Total=34 | |||
|Hit Adv=KD | |||
|Block Adv=-5 | |||
|Property=Cancel | |||
|description=*Slower startup, more range. | |||
}} | |||
}} | |||
===== <span class="invisible-header">Lane Attack</span> ===== | |||
<font style="visibility:hidden" size="0"></font> | |||
{{MoveData | |||
|image=FFS Mai Lane Attack Front.png | |||
|image2=FFS_Mai_Lane_Attack.png | |||
|subtitle= | |||
|caption=Front Lane | |||
|caption2=Back Lane | |||
|name=Lane Attack | |||
|input=A/B/C/D from opposite lane | |||
|data=Mai has the same lane attack for punch and kick buttons. | |||
{{AttackData-FFS | |||
|version=A/B | |||
|Damage=18 | |||
|Stun=2 | |||
|Guard=Overhead | |||
|Startup=13 | |||
|Active= | |||
|Recovery=4 | |||
|Total= | |||
|Hit Adv= | |||
|Block Adv= | |||
|Property= | |||
|description= * A straight and fast lane attack. | |||
}} | |||
{{AttackData-FFS | |||
|header=no | |||
|version=C/D | |||
|Damage=18 | |||
|Stun=4 | |||
|Guard=Overhead | |||
|Startup=13 | |||
|Active= | |||
|Recovery=4 | |||
|Total= | |||
|Hit Adv= | |||
|Block Adv= | |||
|Property= | |||
|description= * A slower high angle lane attack. | |||
}} | |||
}} | |||
===== <span class="invisible-header">Dodge Attack</span> ===== | |||
<font style="visibility:hidden" size="0"></font> | |||
{{MoveData | |||
|image=FFS_Mai_Dodge_Attack.png | |||
|subtitle=Hanegeri/跳ね蹴り | |||
|caption= | |||
|name=Dodge Attack | |||
|input=6A during proximity guard | |||
|data= | |||
{{AttackData-FFS | |||
|Damage=11 | |||
|Stun=5 | |||
|Guard=Mid | |||
|Startup=15 | |||
|Active=16 | |||
|Recovery=15 | |||
|Total=45 | |||
|Hit Adv=Air reset | |||
|Block Adv=-12 | |||
|Property=Kara Cancel, Upper-Body Invuln 1-30F | |||
|description=*Very good reach. | |||
}} | |||
}} | |||
=== Throws === | |||
===== <span class="invisible-header">Fuusha Kuzushi (4/6C)</span> ===== | |||
<font style="visibility:hidden" size="0"></font> | |||
{{MoveData | |||
|image=FFS Mai Throw 1.png | |||
|caption= | |||
|name=Fuusha Kuzushi | |||
|input=close 4/6C | |||
|data= | |||
{{AttackData-FFS | |||
|Damage=26 | |||
|Stun=3 | |||
|range=16 | |||
|Guard=Throw | |||
|Startup=1 | |||
|Active=1 | |||
|Recovery= | |||
|Hit Adv=KD | |||
|Block Adv=/ | |||
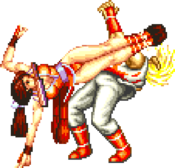
|description= * You can go for Mai's powerful 41236D okizeme after landing this. | |||
* Swaps sides. | |||
}} | |||
}} | |||
===== <span class="invisible-header">Yume Zakura (j2D)</span> ===== | |||
<font style="visibility:hidden" size="0"></font> | |||
{{MoveData | |||
|image=FFS Mai Air Throw.png | |||
|caption= | |||
|name=Yume Zakura | |||
|input=close j2D | |||
|data= | |||
{{AttackData-FFS | |||
|Damage=26 | |||
|Stun=3 | |||
|range=28 | |||
|Guard=Throw | |||
|Startup=1 | |||
|Active=1 | |||
|Recovery= | |||
|Hit Adv=KD | |||
|Block Adv=/ | |||
|description= * Air throw. Can be used to catch wakeup backdashes and lane attacks if your timing is on point. | |||
}} | |||
}} | |||
=== Special Moves === | |||
===== <span class="invisible-header">Kachosen (236P)</span> ===== | |||
{{MoveData | |||
| name = Kachosen | |||
| input = 236A/C | |||
| subtitle = | |||
| image = FFS Mai 236P.png | |||
| caption = Fan service. | |||
| data = | |||
{{AttackData-FFS | |||
| version = A | |||
| subtitle = | |||
| Damage = 14 (3) | |||
| Stun = 3 | |||
| Guard = Mid | |||
| Startup = 15 | |||
| Active = | |||
| Recovery = 36 | |||
| Total = 50 | |||
| Hit Adv = | |||
| Block Adv = | |||
| Property = | |||
| description = * Mai throws a fan at the enemy. Standard projectile that's generally very safe to use. It can be avoided with dodge attacks or low profile moves, however. | |||
* The fan visually moves around the hitbox, rarely overlapping with it, making it somewhat tricky to Dodge Attack. Occassionally the hitbox will jerk forward for a few frames as well. | |||
}} | |||
{{AttackData-FFS | |||
| header = no | |||
| version = C | |||
| subtitle = | |||
| Damage = 22 (5) | |||
| Stun = 6 | |||
| Guard = Mid | |||
| Startup = 17 | |||
| Active = | |||
| Recovery = 45 | |||
| Total = 61 | |||
| Hit Adv = | |||
| Block Adv = | |||
| Property = | |||
| description = * Projectile travels faster, but Mai recovers much slower making this riskier to use. Can be used to punish wakeup backsteps. | |||
}} | |||
}} | |||
===== <span class="invisible-header">Ryuenbu (214P)</span> ===== | |||
{{MoveData | |||
| name = Ryuenbu | |||
| input = 214A/C | |||
| subtitle = | |||
| image = FFS Mai Ryuenbu A.gif | |||
| image2 = FFS Mai Ryuenbu C.gif | |||
| caption = | |||
| data = | |||
{{AttackData-FFS | |||
| version = A | |||
| subtitle = | |||
| Damage = 16x2 (4x2) | |||
| Stun = 3x2 | |||
| Guard = Mid | |||
| Startup = 7 | |||
| Active = 2+2 (4) 12 | |||
| Recovery = 12 | |||
| Total = 38 | |||
| Hit Adv = KD | |||
| Block Adv = +1 | |||
| Property = Foot Invuln 11-18F | |||
| description = * -11 if only the first hit is blocked standing, or -9 crouching. | |||
*Comes out slightly faster, but isn't fully invulnerable during startup unlike the heavy version. Can be used to destroy enemy projectiles. | |||
}} | |||
{{AttackData-FFS | |||
| header = no | |||
| version = C | |||
| subtitle = | |||
| Damage = 22x2 (5x2) | |||
| Stun = 6x2 | |||
| Guard = Mid | |||
| Startup = 9 | |||
| Active = 2+2 (5) 17 | |||
| Recovery = 19 | |||
| Total = 54 | |||
| Hit Adv = KD | |||
| Block Adv = -6 | |||
| Property = Invincible 1-13F, Foot Invuln 14-23F | |||
| description = * -16 if only the first hit is blocked standing, or -22 crouching. | |||
*THIS is what makes Mai the top tier powerhouse she is. Invulnerable startup, so it's a foolproof anti-air when timed right, and it does crazy damage when both hits connect. | |||
*Excellent "get off me" tool against rushdown characters trying to pressure you up close. | |||
*Your main combo ender as well, although it only connects properly from close light attacks. | |||
}} | |||
}} | |||
===== <span class="invisible-header">Hissatsu Shinobibachi (41236D)</span> ===== | |||
{{MoveData | |||
| name = Hissatsu Shinobibachi | |||
| input = 41236D | |||
| subtitle = | |||
| image = FFS Mai Hissatsu.png | |||
| caption = | |||
| data = | |||
{{AttackData-FFS | |||
| subtitle = | |||
| Damage = 20 (5x2) | |||
| Stun = 3 | |||
| Guard = Mid | |||
| Startup = 26 | |||
| Active = 26 | |||
| Recovery = 6 | |||
| Total = 57 | |||
| Hit Adv = KD | |||
| Block Adv = -7 | |||
| Property = Invincible 11-14F, Low Profile 15-19F, Airborne 20-51F | |||
| description = *Flying elbow charge. Very unsafe on block unless it hits meaty, so use with caution. | |||
*Since Mai is off the ground, you can dodge and punish certain projectiles with this. | |||
*Note that there's no light version of this move. | |||
}} | |||
}} | |||
===== <span class="invisible-header">Musasabi no Mai ([2]8P)</span> ===== | |||
{{MoveData | |||
| name = Musasabi no Mai | |||
| input = [2]8A/C | |||
| subtitle = | |||
| image = FFS Mai Musasabi no Mai.gif | |||
| image2 = FFS Mai Musasabi no Mai MaiStage.gif | |||
| caption = | |||
| data = Charge time: 30F. | |||
{{AttackData-FFS | |||
| version = A (Non-Mai Stage) | |||
| subtitle = | |||
| Damage = 20 (5) | |||
| Stun = 3 | |||
| Guard = Mid | |||
| Startup = Jump + 16 | |||
| Active = 21 | |||
| Recovery = 18 | |||
| Total = | |||
| Hit Adv = KD | |||
| Block Adv = -1 at best | |||
| Property = Invuln 1-15F after touching wall | |||
| description = * Dives fullscreen. | |||
}} | |||
{{AttackData-FFS | |||
| header = no | |||
| version = C (Non-Mai Stage) | |||
| subtitle = | |||
| Damage = 20 (5) | |||
| Stun = 6 | |||
| Guard = Mid | |||
| Startup = Jump + 16 | |||
| Active = 21 | |||
| Recovery = 18 | |||
| Total = | |||
| Hit Adv = KD | |||
| Block Adv = -1 at best | |||
| Property = Invuln 1-15F after touching wall | |||
| description = * Dives at a steeper angle. | |||
}} | |||
{{AttackData-FFS | |||
| header = no | |||
| version = A (Mai's Stage) | |||
| subtitle = | |||
| Damage = 20 (5) | |||
| Stun = 3 | |||
| Guard = Mid | |||
| Startup = 30 | |||
| Active = 22 | |||
| Recovery = 20 | |||
| Total = | |||
| Hit Adv = KD | |||
| Block Adv = -3 at best | |||
| Property = Invincible 1-29F | |||
| description = * Even after it starts up, it takes 18 frames for Mai to return to the lane and hit her opponent. | |||
}} | |||
{{AttackData-FFS | |||
| header = no | |||
| version = C (Mai's Stage) | |||
| subtitle = | |||
| Damage = 20 (5) | |||
| Stun = 6 | |||
| Guard = Mid | |||
| Startup = 30 | |||
| Active = 22 | |||
| Recovery = 20 | |||
| Total = | |||
| Hit Adv = KD | |||
| Block Adv = -3 at best | |||
| Property = Invincible 1-29F | |||
| description = * Even after it starts up, it takes 18 frames for Mai to return to the lane and hit her opponent. | |||
}} | |||
}} | |||
===Super Move=== | |||
===== <span class="invisible-header">Chou Hissatsu Shinobibachi (616BC)</span> ===== | |||
<font style="visibility:hidden" size="0"></font> | |||
{{MoveData | |||
|image=FFS Mai Chou Hissatsu.gif | |||
|subtitle=When health is flashing | |||
|input=616B+C | |||
|caption= | |||
|name=Chou Hissatsu Shinobibachi | |||
|data= | |||
{{AttackData-FFS | |||
|Damage=30 (0 + 7x3) | |||
|Stun=4 | |||
|Guard=Mid | |||
|Startup=15 | |||
|Active=6+5+5+32 | |||
|Recovery=20 | |||
|Total=82 | |||
|Hit Adv=KD | |||
|Block Adv=-14 | |||
|Property=Invincible 15-18F, Upper-Body Invuln 19-23F, Airborne 26-62 | |||
|description=*Powered up version of Hissatsu Shinobibachi. Good chip kill move. One of the easier super inputs, too. | |||
*You can combo into this, but your standard C Ryuuenbu combos deal the same amount of damage, so it doesn't matter much. | |||
}} | |||
}} | |||
==Combos== | |||
* c5A/B > 214A/C | |||
* 2C > 236A - 31 damage | |||
* c5C/D > 616BC - 40/42 damage | |||
== Strategies == | |||
===The Basics=== | |||
If you're new to the game and want to start winning matches as fast as possible, you can't go wrong with picking Mai. Her gameplan is very simple but effective and revolves around a small number of moves. She's also one of the least demanding characters when it comes to execution: you don't need to learn any weird motions or long tricky combos to play her properly. Despite this, she's still extremely powerful even in high level play and does have a lot of tricks up her sleeve that give a dedicated player plenty of potential for improvement. In nearly all of her matchups, Mai plays a pure defensive keep-away game, using projectile pressure to force her opponents into taking risks and punishing all attempts at getting close with her heavy Ryuuenbu. | |||
The moves you'll be using in the most in neutral are: | |||
*Light Kachosen (236A): A great projectile that's very safe to use and gives Mai good spatial control. Use this as often as possible to pressure your opponent and force them to jump or do some sort of evasive action lest they keep taking chip damage. | |||
*Heavy Ryuuenbu (214C): Once your opponent goes for a jump or tries to challenge you up close, this is what you use to get them off your back. Fully invulnerable startup, making it very difficult for your opponent to counter this move with anything. Against jump-ins, you'll want to time this quite late so it catches your opponent during their landing recovery; this way the move hits twice dealing a ton of damage. | |||
*2D: One of the best sweep kicks in the game and possibly Mai's most useful normal. You can cancel it into 236A on block to continue your pressure and deal chip damage. | |||
*5A: Another great ground poke that's even faster than her sweep. You can also cancel this into 236A or other specials. | |||
Despite all her strengths, Mai does also have some weaknesses unique to her: she has ''twice'' as much jump start-up and landing recovery frames as average, and she's the only character to not be considered airborne during a backstep, making it possible for her to grabbed out of her backstep with any ground throw. Her walk speed and jump duration are still faster than average, though, so all things considered her overall mobility is still far from bad. | |||
Mai has the lowest stun threshold in the game: 13 points, tied with Tung and Jubei. This isn't a massive flaw due to her strong defensive tools and smaller than average size, but it does make her susceptible to re-dizzy TOD combos against characters with high stun potential like Duck and Jubei. There are quite a few situations where you can make use of Mai's small hurtboxes to avoid moves; most notably, you can crouch-walk past Jubei and Mai projectiles. | |||
===Advanced Strategy=== | |||
Hissatsu Shinobibachi (41236D) is generally unsafe, but can be made safe on block if it connects just as your opponent is getting up. You can follow it immediately with 214C to deal extra chip damage and punish anyone trying to press buttons against you. | |||
Backstep cancels are very useful for Mai: to gain extra frames of invulnerability, you can cancel the recovery of her backsteps into 214C. | |||
==Matchups== | |||
===Vs. Andy Bogard=== | |||
5 - 5 | |||
Andy has excellent anti-projectile tools making it hard to keep him out. Use Kachosen with caution especially when you're in the range of his light Kuuha Dan. Heavy Ryuuenbu works well against Andy's Zaneiken, dealing great damage if you can land both hits. | |||
===Vs. Axel Hawk=== | |||
5.5 - 4.5 | |||
Mai is better at zoning, but Axel's dodge attack makes it possible for him to get in despite his poor mobility. The odds are still on your side as it takes quite a bit of skill and effort for Axel to clear all the hurdles and get within striking distance. Keep him out so he doesn't get a chance to threaten you with his excellent 2D and 5B pokes. | |||
===Vs. Big Bear=== | |||
6 - 4 | |||
Bear doesn't need to respect your projectile zoning as he can just go past Kachosen utilizing the upper body invincibility of his Giant Bomb tackle. Use 2B and 2D to stop him from getting into throw range instead. | |||
===Vs. Billy Kane=== | |||
4.5 - 5.5 | |||
Billy's long range normals allow him to safely poke you without fear of getting countered by your Ryuuenbu, so you'll want to keep him either very far away or within the distance of your fastest pokes. | |||
===Vs. Cheng Sinzan=== | |||
6 - 4 | |||
Cheng is big and slow, so keeping him out isn't terribly difficult as long as you don't get caught off guard by his balloon special. Abuse Kachosen as much as you can. | |||
===Vs. Duck King=== | |||
6.5 - 3.5 | |||
Even though Mai has a huge advantage in neutral thanks to her zoning and long reaching pokes, all it takes is one bad slip-up for you to lose a round as Duck's long combos make stunning Mai a trivial task. His Needle Low slide goes under Mai's projectiles, but you can easily beat it with your sweep. | |||
===Vs. Geese Howard=== | |||
5.5 - 4.5 | |||
Either spam projectiles and force Geese to approach you, or go past his Reppuken with a well timed Hissatsu Shinobibachi and challenge him up close. Poke him with your lows and Ryuuenbu to avoid getting countered with Atemi Nage. | |||
===Vs. Joe Higashi=== | |||
4 - 6 | |||
Possibly the toughest matchup for Mai since Joe's projectiles have better frame data and they can't be avoided with a dodge attack. Joe, on the other hand, can low profile and punish Mai's Kachosen with his slide kick, so use projectiles with caution if he's in the range for a slide. If you go for a jump-in (as you most likely eventually have to), use your light attacks - they don't have much range, but they beat Joe's low profile anti-airs. To avoid taking chip damage, light Ryuenbu can be used to destroy Joe's projectiles. | |||
===Vs. Jubei Yamada=== | |||
6 - 4 | |||
Very fun matchup due to the fact you can both low profile each other's projectiles. Mai has a slight advantage as she can simply crouch or crouch-walk past Senbeis while Jubei has to commit to a slide or repeated 2B. You still take chip damage if you block a Senbei while crouching, so you have to let go of block to dodge them. 2B and 2D are both great pokes against Jubei. | |||
===Vs. Kim Kaphwan=== | |||
4 - 6 | |||
Use projectiles with extreme caution. 5C, 5B and 214C can all be used to keep Kim from divekicking you all day. Kim's combos are a big threat to Mai due to her low stun resistance, so avoid taking unnecessary risks especially when Kim is in close range. | |||
===Vs. Laurence Blood=== | |||
6 - 4 | |||
Zone him with projectiles and anti-air with 214C, as usual - Laurence's floaty jumps give you plenty of time to react. Be mindful of the range of his moves, as he can hit you from quite a distance away. If he keeps avoiding your projectiles with his dodge attack, go for a sweep kick. | |||
===Vs. Mai Shiranui=== | |||
5 - 5 | |||
You're guaranteed to have access to the better version of Musasabi no Mai in a mirror match, but obviously this goes for your opponent as well - you can counter the move with a well timed 214C. Just like in the Jubei matchup, crouch walk can be used to get past projectiles. | |||
===Vs. Ryo Sakazaki=== | |||
===Vs. Terry Bogard=== | |||
6.5 - 3.5 | |||
Terry gets bullied hard by zoning. He does have an anti-projectile tool in the form of heavy Crack Shoot, but using it to counter Mai's projectiles requires perfect timing and spacing so it's not a massive threat to you - throwing fans is generally very safe against Terry. As long as you anti-air his jumps with 214C, he'll have a very difficult time trying to get close. Still, he's got the combos to potentially TOD you off a single mistake, so never let your guard down. | |||
===Vs. Tung Fu Rue=== | |||
6.5 - 3.5 | |||
Tung can low profile Mai's projectiles with 2D or repeated 2B, but it's still tough for him to get past your zoning. Even if Tung does manage to get in, you can always backstep away or stuff his close range moves with a heavy Ryuuenbu. Tung has enough combo potential to stun you off a jump-in, so be sure to anti-air all jump attempts. | |||
===Vs. Wolfgang Krauser=== | |||
5 - 5 | |||
Clash of the zoners. You can dodge and punish low Blitzball with a well timed Hissatsu Shinobibachi, but Krauser may occasionally mix it up with high Blitz, so there's some risk involved. His Leg Tomahawk goes over Mai's projectiles, but you can make it whiff simply by crouching - it'll connect and do chip damage if you're crouch-blocking, though. | |||
The matchup differs slightly depending on which stage you're on; Musasabi no Mai is a lot harder for Krauser to counter on Mai's home stage and it makes for a good anti-fireball move, so she gets a minor advantage. | |||
{{Navbox-FFS}} | |||
[[Category:Fatal Fury Special]] | |||
[[Category:Mai Shiranui]] | |||
Latest revision as of 12:46, 27 April 2025
Introduction
"Nippon Ichi!" Easily one of gaming's most iconic characters, Mai Shiranui takes to the fighting stage in Fatal Fury Special as a powerful zoning character, capable of shutting anyone out with ease. Easy to play as right away, she has great anti-air tools, a great fireball, a deadly (albeit very risky) super, simple combos, rewarding damage, and a unique stage where she actually gains an additional advantage from it, Mai Shiranui is holding nothing back. Her super is very risky as already mentioned, as while it does great damage and decent chip damage, everyone can very easily punish her on block and can be predictable. Her mobility too is not the greatest, albeit not as bad as some other characters. And while she may seem like a great glass cannon type character, she's not. You must play her defensively as a strict keepaway character. But no matter who she's up against, chances are her impeccable zoning give her an advantage at all times as even her up close game isn't too lacking when she's forced to confront the opponent.
| Pros | Cons |
|---|---|
|
|
Move List
General Hurtboxes
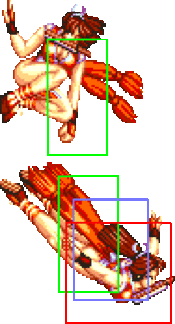
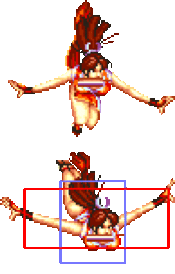
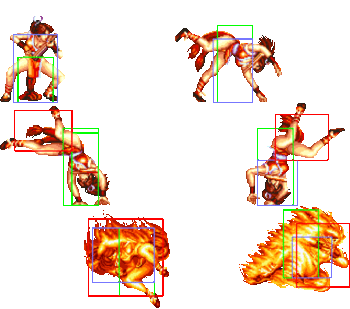
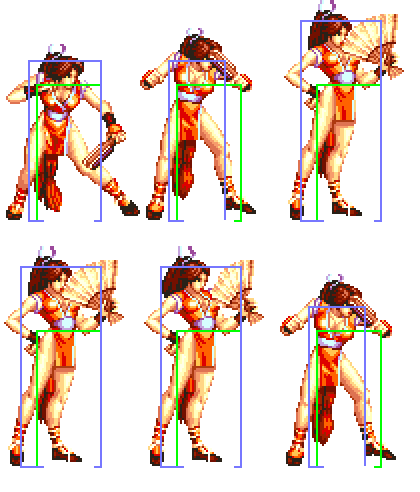
| Standing | Crouching | Jumping | Backdashing | Taunting |
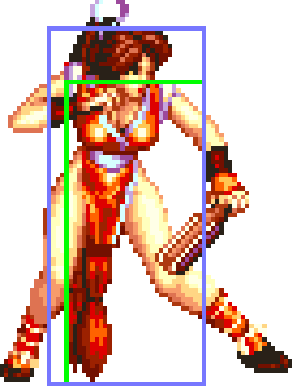 |
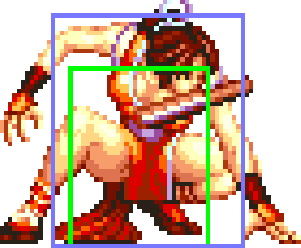 |
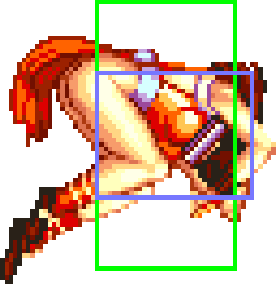  |
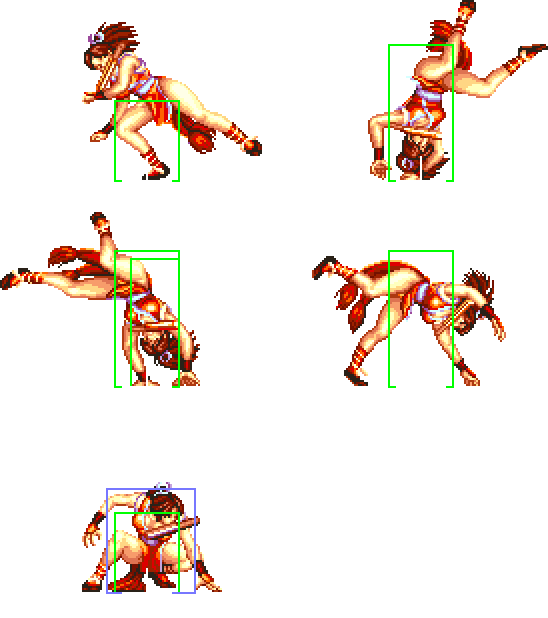 |
|
| 57F (8+43+6) duration. | Mai is grounded and can easily be thrown. 34F (28+6) duration. |
Close Standing Normals
c5A
c5B
| Damage | Stun | Guard | Startup | Active | Recovery | Total | Hit Adv | Block Adv | Property | |
|---|---|---|---|---|---|---|---|---|---|---|
| 8 | 2 | Mid | 8 | 4 | 11 | 21 | +1 | +2 | Kara Cancel | |
| ||||||||||
c5C
| Damage | Stun | Guard | Startup | Active | Recovery | Total | Hit Adv | Block Adv | Property | |
|---|---|---|---|---|---|---|---|---|---|---|
| 14 | 4 | Mid | 8 | 7 | 17 | 31 | 0 | -1 | Kara Cancel | |
c5D
| Damage | Stun | Guard | Startup | Active | Recovery | Total | Hit Adv | Block Adv | Property | |
|---|---|---|---|---|---|---|---|---|---|---|
| 16 | 4 | Mid | 10 | 7 | 17 | 33 | 0 | -1 | Kara Cancel | |
| ||||||||||
Far Standing Normals
f5A
| Damage | Stun | Guard | Startup | Active | Recovery | Total | Hit Adv | Block Adv | Property | |
|---|---|---|---|---|---|---|---|---|---|---|
| 4 | 2 | Mid | 6 | 4 | 10 | 19 | +2 | +3 | Kara Cancel | |
| ||||||||||
f5B
| Damage | Stun | Guard | Startup | Active | Recovery | Total | Hit Adv | Block Adv | Property | |
|---|---|---|---|---|---|---|---|---|---|---|
| 6 | 2 | Mid | 6 | 6 | 8 | 19 | +2 | +3 | Cancel | |
| ||||||||||
f5C
| Damage | Stun | Guard | Startup | Active | Recovery | Total | Hit Adv | Block Adv | Property | |
|---|---|---|---|---|---|---|---|---|---|---|
| 10 | 4 | Mid | 8 | 13 | 10 | 30 | 0 | -1 | - | |
| ||||||||||
f5D
| Damage | Stun | Guard | Startup | Active | Recovery | Total | Hit Adv | Block Adv | Property | |
|---|---|---|---|---|---|---|---|---|---|---|
| 14 | 4 | Mid | 8 | 8 | 17 | 32 | -2 | -3 | - | |
| ||||||||||
Crouching Normals
2A
| Damage | Stun | Guard | Startup | Active | Recovery | Total | Hit Adv | Block Adv | Property | |
|---|---|---|---|---|---|---|---|---|---|---|
| 4 | 2 | Mid | 6 | 4 | 8 | 17 | +4 | +5 | Kara Cancel | |
| ||||||||||
2B
| Damage | Stun | Guard | Startup | Active | Recovery | Total | Hit Adv | Block Adv | Property | |
|---|---|---|---|---|---|---|---|---|---|---|
| 6 | 2 | Low | 6 | 4 | 7 | 16 | +5 | +6 | Kara Cancel | |
| ||||||||||
2C
| Damage | Stun | Guard | Startup | Active | Recovery | Total | Hit Adv | Block Adv | Property | |
|---|---|---|---|---|---|---|---|---|---|---|
| 12 | 4 | Mid | 5 | 10 | 18 | 32 | -4 | -5 | Kara Cancel | |
| ||||||||||
2D
| Damage | Stun | Guard | Startup | Active | Recovery | Total | Hit Adv | Block Adv | Property | |
|---|---|---|---|---|---|---|---|---|---|---|
| 14 | 4 | Low | 8 | 11 | 21 | 39 | KD | -9 | Kara Cancel | |
| ||||||||||
Jumping Normals
jA
| Damage | Stun | Guard | Startup | Active | Recovery | Total | Hit Adv | Block Adv | Property | |
|---|---|---|---|---|---|---|---|---|---|---|
| 6 | 2 | Overhead | 5 | ∞ | - | - | - | - | - | |
| ||||||||||
jB
| Damage | Stun | Guard | Startup | Active | Recovery | Total | Hit Adv | Block Adv | Property | |
|---|---|---|---|---|---|---|---|---|---|---|
| 8 | 2 | Overhead | 10 | ∞ | - | - | - | - | Air | |
| ||||||||||
jC
| Version | Damage | Stun | Guard | Startup | Active | Recovery | Total | Hit Adv | Block Adv | Property | |
|---|---|---|---|---|---|---|---|---|---|---|---|
| Diagonal Jump | 14 | 4 | Overhead | 5 | 8 | - | - | - | - | - | |
| |||||||||||
| Neutral Jump | 14 | 4 | Overhead | 5 | 6 | - | - | - | - | - | |
| |||||||||||
jD
| Version | Damage | Stun | Guard | Startup | Active | Recovery | Total | Hit Adv | Block Adv | Property | |
|---|---|---|---|---|---|---|---|---|---|---|---|
| Diagonal Jump | 16 | 4 | Overhead | 5 | 20 | - | - | - | - | - | |
| |||||||||||
| Neutral Jump | 16 | 4 | Overhead | 5 | 12 | - | - | - | - | - | |
| |||||||||||
Universal Mechanics
Lane Blast (CD)
| Version | Damage | Stun | Guard | Startup | Active | Recovery | Total | Hit Adv | Block Adv | Property | |
|---|---|---|---|---|---|---|---|---|---|---|---|
| Front Lane | 22 | 5 | Mid | 9 | 7 | 22 | 37 | KD | -10 | Cancel | |
| |||||||||||
| Back Lane | 22 | 5 | Mid | 11 | 7 | 17 | 34 | KD | -5 | Cancel | |
| |||||||||||
Lane Attack
| Version | Damage | Stun | Guard | Startup | Active | Recovery | Total | Hit Adv | Block Adv | Property | |
|---|---|---|---|---|---|---|---|---|---|---|---|
| A/B | 18 | 2 | Overhead | 13 | - | 4 | - | - | - | - | |
| |||||||||||
| C/D | 18 | 4 | Overhead | 13 | - | 4 | - | - | - | - | |
| |||||||||||
Dodge Attack
| Damage | Stun | Guard | Startup | Active | Recovery | Total | Hit Adv | Block Adv | Property | |
|---|---|---|---|---|---|---|---|---|---|---|
| 11 | 5 | Mid | 15 | 16 | 15 | 45 | Air reset | -12 | Kara Cancel, Upper-Body Invuln 1-30F | |
| ||||||||||
Throws
Fuusha Kuzushi (4/6C)
| Damage | Stun | Range | Guard | Startup | Active | Recovery | Total | Hit Adv | Block Adv | Property |
|---|---|---|---|---|---|---|---|---|---|---|
| 26 | 3 | 16 | Throw | 1 | 1 | - | - | KD | / | - |
| ||||||||||
Yume Zakura (j2D)
| Damage | Stun | Range | Guard | Startup | Active | Recovery | Total | Hit Adv | Block Adv | Property |
|---|---|---|---|---|---|---|---|---|---|---|
| 26 | 3 | 28 | Throw | 1 | 1 | - | - | KD | / | - |
| ||||||||||
Special Moves
Kachosen (236P)
| Version | Damage | Stun | Guard | Startup | Active | Recovery | Total | Hit Adv | Block Adv | Property | |
|---|---|---|---|---|---|---|---|---|---|---|---|
| A | 14 (3) | 3 | Mid | 15 | - | 36 | 50 | - | - | - | |
| |||||||||||
| C | 22 (5) | 6 | Mid | 17 | - | 45 | 61 | - | - | - | |
| |||||||||||
Ryuenbu (214P)
| Version | Damage | Stun | Guard | Startup | Active | Recovery | Total | Hit Adv | Block Adv | Property | |
|---|---|---|---|---|---|---|---|---|---|---|---|
| A | 16x2 (4x2) | 3x2 | Mid | 7 | 2+2 (4) 12 | 12 | 38 | KD | +1 | Foot Invuln 11-18F | |
| |||||||||||
| C | 22x2 (5x2) | 6x2 | Mid | 9 | 2+2 (5) 17 | 19 | 54 | KD | -6 | Invincible 1-13F, Foot Invuln 14-23F | |
| |||||||||||
Hissatsu Shinobibachi (41236D)
| Damage | Stun | Guard | Startup | Active | Recovery | Total | Hit Adv | Block Adv | Property | |
|---|---|---|---|---|---|---|---|---|---|---|
| 20 (5x2) | 3 | Mid | 26 | 26 | 6 | 57 | KD | -7 | Invincible 11-14F, Low Profile 15-19F, Airborne 20-51F | |
| ||||||||||
Musasabi no Mai ([2]8P)
| Version | Damage | Stun | Guard | Startup | Active | Recovery | Total | Hit Adv | Block Adv | Property | |
|---|---|---|---|---|---|---|---|---|---|---|---|
| A (Non-Mai Stage) | 20 (5) | 3 | Mid | Jump + 16 | 21 | 18 | - | KD | -1 at best | Invuln 1-15F after touching wall | |
| |||||||||||
| C (Non-Mai Stage) | 20 (5) | 6 | Mid | Jump + 16 | 21 | 18 | - | KD | -1 at best | Invuln 1-15F after touching wall | |
| |||||||||||
| A (Mai's Stage) | 20 (5) | 3 | Mid | 30 | 22 | 20 | - | KD | -3 at best | Invincible 1-29F | |
| |||||||||||
| C (Mai's Stage) | 20 (5) | 6 | Mid | 30 | 22 | 20 | - | KD | -3 at best | Invincible 1-29F | |
| |||||||||||
Super Move
Chou Hissatsu Shinobibachi (616BC)
| Damage | Stun | Guard | Startup | Active | Recovery | Total | Hit Adv | Block Adv | Property | |
|---|---|---|---|---|---|---|---|---|---|---|
| 30 (0 + 7x3) | 4 | Mid | 15 | 6+5+5+32 | 20 | 82 | KD | -14 | Invincible 15-18F, Upper-Body Invuln 19-23F, Airborne 26-62 | |
| ||||||||||
Combos
- c5A/B > 214A/C
- 2C > 236A - 31 damage
- c5C/D > 616BC - 40/42 damage
Strategies
The Basics
If you're new to the game and want to start winning matches as fast as possible, you can't go wrong with picking Mai. Her gameplan is very simple but effective and revolves around a small number of moves. She's also one of the least demanding characters when it comes to execution: you don't need to learn any weird motions or long tricky combos to play her properly. Despite this, she's still extremely powerful even in high level play and does have a lot of tricks up her sleeve that give a dedicated player plenty of potential for improvement. In nearly all of her matchups, Mai plays a pure defensive keep-away game, using projectile pressure to force her opponents into taking risks and punishing all attempts at getting close with her heavy Ryuuenbu.
The moves you'll be using in the most in neutral are:
- Light Kachosen (236A): A great projectile that's very safe to use and gives Mai good spatial control. Use this as often as possible to pressure your opponent and force them to jump or do some sort of evasive action lest they keep taking chip damage.
- Heavy Ryuuenbu (214C): Once your opponent goes for a jump or tries to challenge you up close, this is what you use to get them off your back. Fully invulnerable startup, making it very difficult for your opponent to counter this move with anything. Against jump-ins, you'll want to time this quite late so it catches your opponent during their landing recovery; this way the move hits twice dealing a ton of damage.
- 2D: One of the best sweep kicks in the game and possibly Mai's most useful normal. You can cancel it into 236A on block to continue your pressure and deal chip damage.
- 5A: Another great ground poke that's even faster than her sweep. You can also cancel this into 236A or other specials.
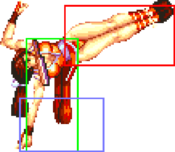
Despite all her strengths, Mai does also have some weaknesses unique to her: she has twice as much jump start-up and landing recovery frames as average, and she's the only character to not be considered airborne during a backstep, making it possible for her to grabbed out of her backstep with any ground throw. Her walk speed and jump duration are still faster than average, though, so all things considered her overall mobility is still far from bad.
Mai has the lowest stun threshold in the game: 13 points, tied with Tung and Jubei. This isn't a massive flaw due to her strong defensive tools and smaller than average size, but it does make her susceptible to re-dizzy TOD combos against characters with high stun potential like Duck and Jubei. There are quite a few situations where you can make use of Mai's small hurtboxes to avoid moves; most notably, you can crouch-walk past Jubei and Mai projectiles.
Advanced Strategy
Hissatsu Shinobibachi (41236D) is generally unsafe, but can be made safe on block if it connects just as your opponent is getting up. You can follow it immediately with 214C to deal extra chip damage and punish anyone trying to press buttons against you.
Backstep cancels are very useful for Mai: to gain extra frames of invulnerability, you can cancel the recovery of her backsteps into 214C.
Matchups
Vs. Andy Bogard
5 - 5
Andy has excellent anti-projectile tools making it hard to keep him out. Use Kachosen with caution especially when you're in the range of his light Kuuha Dan. Heavy Ryuuenbu works well against Andy's Zaneiken, dealing great damage if you can land both hits.
Vs. Axel Hawk
5.5 - 4.5
Mai is better at zoning, but Axel's dodge attack makes it possible for him to get in despite his poor mobility. The odds are still on your side as it takes quite a bit of skill and effort for Axel to clear all the hurdles and get within striking distance. Keep him out so he doesn't get a chance to threaten you with his excellent 2D and 5B pokes.
Vs. Big Bear
6 - 4
Bear doesn't need to respect your projectile zoning as he can just go past Kachosen utilizing the upper body invincibility of his Giant Bomb tackle. Use 2B and 2D to stop him from getting into throw range instead.
Vs. Billy Kane
4.5 - 5.5
Billy's long range normals allow him to safely poke you without fear of getting countered by your Ryuuenbu, so you'll want to keep him either very far away or within the distance of your fastest pokes.
Vs. Cheng Sinzan
6 - 4
Cheng is big and slow, so keeping him out isn't terribly difficult as long as you don't get caught off guard by his balloon special. Abuse Kachosen as much as you can.
Vs. Duck King
6.5 - 3.5
Even though Mai has a huge advantage in neutral thanks to her zoning and long reaching pokes, all it takes is one bad slip-up for you to lose a round as Duck's long combos make stunning Mai a trivial task. His Needle Low slide goes under Mai's projectiles, but you can easily beat it with your sweep.
Vs. Geese Howard
5.5 - 4.5
Either spam projectiles and force Geese to approach you, or go past his Reppuken with a well timed Hissatsu Shinobibachi and challenge him up close. Poke him with your lows and Ryuuenbu to avoid getting countered with Atemi Nage.
Vs. Joe Higashi
4 - 6
Possibly the toughest matchup for Mai since Joe's projectiles have better frame data and they can't be avoided with a dodge attack. Joe, on the other hand, can low profile and punish Mai's Kachosen with his slide kick, so use projectiles with caution if he's in the range for a slide. If you go for a jump-in (as you most likely eventually have to), use your light attacks - they don't have much range, but they beat Joe's low profile anti-airs. To avoid taking chip damage, light Ryuenbu can be used to destroy Joe's projectiles.
Vs. Jubei Yamada
6 - 4
Very fun matchup due to the fact you can both low profile each other's projectiles. Mai has a slight advantage as she can simply crouch or crouch-walk past Senbeis while Jubei has to commit to a slide or repeated 2B. You still take chip damage if you block a Senbei while crouching, so you have to let go of block to dodge them. 2B and 2D are both great pokes against Jubei.
Vs. Kim Kaphwan
4 - 6
Use projectiles with extreme caution. 5C, 5B and 214C can all be used to keep Kim from divekicking you all day. Kim's combos are a big threat to Mai due to her low stun resistance, so avoid taking unnecessary risks especially when Kim is in close range.
Vs. Laurence Blood
6 - 4
Zone him with projectiles and anti-air with 214C, as usual - Laurence's floaty jumps give you plenty of time to react. Be mindful of the range of his moves, as he can hit you from quite a distance away. If he keeps avoiding your projectiles with his dodge attack, go for a sweep kick.
Vs. Mai Shiranui
5 - 5
You're guaranteed to have access to the better version of Musasabi no Mai in a mirror match, but obviously this goes for your opponent as well - you can counter the move with a well timed 214C. Just like in the Jubei matchup, crouch walk can be used to get past projectiles.
Vs. Ryo Sakazaki
Vs. Terry Bogard
6.5 - 3.5
Terry gets bullied hard by zoning. He does have an anti-projectile tool in the form of heavy Crack Shoot, but using it to counter Mai's projectiles requires perfect timing and spacing so it's not a massive threat to you - throwing fans is generally very safe against Terry. As long as you anti-air his jumps with 214C, he'll have a very difficult time trying to get close. Still, he's got the combos to potentially TOD you off a single mistake, so never let your guard down.
Vs. Tung Fu Rue
6.5 - 3.5
Tung can low profile Mai's projectiles with 2D or repeated 2B, but it's still tough for him to get past your zoning. Even if Tung does manage to get in, you can always backstep away or stuff his close range moves with a heavy Ryuuenbu. Tung has enough combo potential to stun you off a jump-in, so be sure to anti-air all jump attempts.
Vs. Wolfgang Krauser
5 - 5
Clash of the zoners. You can dodge and punish low Blitzball with a well timed Hissatsu Shinobibachi, but Krauser may occasionally mix it up with high Blitz, so there's some risk involved. His Leg Tomahawk goes over Mai's projectiles, but you can make it whiff simply by crouching - it'll connect and do chip damage if you're crouch-blocking, though.
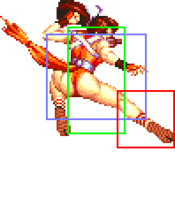
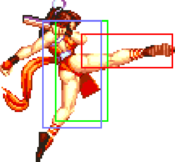
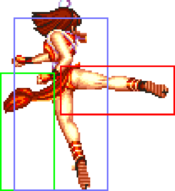
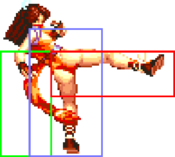
The matchup differs slightly depending on which stage you're on; Musasabi no Mai is a lot harder for Krauser to counter on Mai's home stage and it makes for a good anti-fireball move, so she gets a minor advantage.
