Joel Morales (talk | contribs) mNo edit summary |
|||
| (70 intermediate revisions by 6 users not shown) | |||
| Line 1: | Line 1: | ||
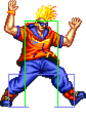
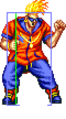
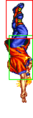
[[File:Ffspecduck.png|right|The Brutal Break Dancer]] | |||
[[File:Ffspecduck_colors.png|right]] | |||
{{TOClimit|3}} | |||
= | ==Introduction== | ||
A breakdancing close range speedster that also gets grappler privileges once he has access to his super. Deadly if he gets in, harmless if he doesn't. | |||
{| | |||
|-style="text-align:left;" | |||
! Pros !! Cons | |||
|- style="vertical-align:top;text-align:left" | |||
| style="width: 50%;"| | |||
* Fast in every way possible | |||
* Flashiest combos in the game | |||
* Extremely useful super move... | |||
| style="width: 50%;"| | |||
* ...which is also extremely tricky to pull off | |||
* Effective only in close range | |||
* Unsafe specials | |||
|- | |||
|} | |||
== | ==Move List== | ||
== | ===General Hurtboxes=== | ||
{| border="1em" cellspacing="0" style="border: 1px solid #999;" | |||
| align="center" | Standing || align="center" | Crouching || align="center" | Jumping || align="center" | Backdashing || align="center" | Taunting | |||
|- | |||
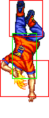
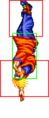
| align="center"; valign="bottom" | [[File:FFS Duck Stand.png|bottom]] || align="center"; valign="bottom" | [[File:FFS Duck Crouch.png|bottom]] || align="center"; valign="bottom" | [[File:FFS Duck 214K_6.png|bottom]] || align="center"; valign="bottom" | [[File:FFS Duck Backdash.gif|bottom]] || align="center"; valign="bottom" | [[File:FFS Duck Taunt.gif|bottom|Come on baby!]] | |||
|- | |||
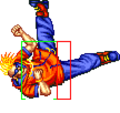
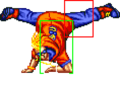
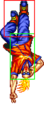
| align="center" | || align="center" | || align="center" | 52F (4+45+3) duration. || align="center" | Duck is considered airborne until recovery. 31F (28+3) duration. || align="center" | | |||
|} | |||
== | ===Close Standing Normals=== | ||
= | ===== <span class="invisible-header">c5A</span> ===== | ||
<font style="visibility:hidden" size="0"></font> | |||
{{MoveData | |||
|image=FFS_Duck_c5A.png | |||
|subtitle=Funk Elbow/ファンクエルボー | |||
|caption= | |||
|name=c5A | |||
|data= | |||
{{AttackData-FFS | |||
|Damage=9 | |||
|Stun=2 | |||
|Guard=Mid | |||
|Startup=3 | |||
|Active=3 | |||
|Recovery=4 | |||
|Total=9 | |||
|Hit Adv=+9 | |||
|Block Adv=+10 | |||
|Property=Kara Cancel | |||
|description= * Links into itself a large amount of times thanks to Duck's walk speed, often leading to dizzy/death. | |||
* Even when blocked, it leads to suffocating pressure. | |||
}} | |||
}} | |||
= | ===== <span class="invisible-header">c5B</span> ===== | ||
<font style="visibility:hidden" size="0"></font> | |||
{{MoveData | |||
|image=FFS_Duck_c5B.png | |||
|subtitle=Beat Low/ビートロー | |||
|caption= | |||
|name=c5B | |||
|data= | |||
{{AttackData-FFS | |||
|Damage=11 | |||
|Stun=2 | |||
|Guard=Mid | |||
|Startup=4 | |||
|Active=4 | |||
|Recovery=8 | |||
|Total=15 | |||
|Hit Adv=+4 | |||
|Block Adv=+5 | |||
|Property=Kara Cancel | |||
|description=*Gives less frame advantage than c5A, but hits all crouching characters. | |||
}} | |||
}} | |||
= | ===== <span class="invisible-header">c5C</span> ===== | ||
<font style="visibility:hidden" size="0"></font> | |||
{{MoveData | |||
|image=FFS_Duck_c5C.png | |||
|subtitle=Mad Spin/マッドスピン | |||
|caption= | |||
|name=c5C | |||
|data= | |||
{{AttackData-FFS | |||
|Damage=18x2 | |||
|Stun=4x2 | |||
|Guard=Mid | |||
|Startup=9 | |||
|Active=4 (15) 6 | |||
|Recovery=8 | |||
|Total=41 | |||
|Hit Adv=-9 | |||
|Block Adv=-10 | |||
|Property=Kara Cancel, Feet Invuln 7-23F, 28-33F | |||
|description= * Advantage is from the first hit only. | |||
*Two hits, but the second one never connects due to the amount of pushback on hit. Unsafe on block unless cancelled. No need to use this. | |||
<gallery class="mw-collapsible"> | |||
FFS Duck c5C.png| | |||
FFS Duck c5C 1.png| | |||
FFS Duck c5C 2.png| | |||
FFS Duck c5C 3.png| | |||
</gallery> | |||
}} | |||
}} | |||
== | ===== <span class="invisible-header">c5D</span> ===== | ||
<font style="visibility:hidden" size="0"></font> | |||
{{MoveData | |||
|image=FFS_Duck_c5D.png | |||
|subtitle=Tower Back Kick/タワーバックキック | |||
|caption= | |||
|name=c5D | |||
|data= | |||
{{AttackData-FFS | |||
|Damage=15 | |||
|Stun=4 | |||
|Guard=Mid | |||
|Startup=10 | |||
|Active=10 | |||
|Recovery=13 | |||
|Total=32 | |||
|Hit Adv=+1 | |||
|Block Adv=0 | |||
|Property=Kara Cancel | |||
|description=*Solid close range anti-air. | |||
}} | |||
}} | |||
== | ===Far Standing Normals=== | ||
== | ===== <span class="invisible-header">f5A</span> ===== | ||
<font style="visibility:hidden" size="0"></font> | |||
{{MoveData | |||
|image=FFS_Duck_f5A.png | |||
|subtitle=Funk Reverse/ファンクリバース | |||
|caption= | |||
|name=f5A | |||
|data= | |||
{{AttackData-FFS | |||
|Damage=7 | |||
|Stun=2 | |||
|Guard=Mid | |||
|Startup=4 | |||
|Active=4 | |||
|Recovery=8 | |||
|Total=15 | |||
|Hit Adv=+4 | |||
|Block Adv=+5 | |||
|Property=Kara Cancel | |||
|description=*Decent as an anti-air. Beats Kim divekicks. | |||
}} | |||
}} | |||
== | ===== <span class="invisible-header">f5B</span> ===== | ||
<font style="visibility:hidden" size="0"></font> | |||
{{MoveData | |||
|image=FFS_Duck_f5B.png | |||
|subtitle=Beat Side/ビートサイド | |||
|caption= | |||
|name=f5B | |||
|data= | |||
{{AttackData-FFS | |||
|Damage=9 | |||
|Stun=2 | |||
|Guard=Mid | |||
|Startup=5 | |||
|Active=4 | |||
|Recovery=12 | |||
|Total=20 | |||
|Hit Adv=0 | |||
|Block Adv=+1 | |||
|Property=Kara Cancel | |||
|description=*Links from c5A, can combo into Dancing Dive, thus mainly used in combos. | |||
}} | |||
}} | |||
== | ===== <span class="invisible-header">f5C</span> ===== | ||
<font style="visibility:hidden" size="0"></font> | |||
{{MoveData | |||
|image=FFS_Duck_f5C.png | |||
|subtitle=Turn Chop/ターンチョップ | |||
|caption= | |||
|name=f5C | |||
|data= | |||
{{AttackData-FFS | |||
|Damage=16 | |||
|Stun=4 | |||
|Guard=Mid | |||
|Startup=12 | |||
|Active=5 | |||
|Recovery=5 | |||
|Total=21 | |||
|Hit Adv=+14 | |||
|Block Adv=+13 | |||
|Property=Cancel | |||
|description= * Moves forward while boasting a great hitbox and frame advantage. Also one of the only cancellable far heavy normals in the game. | |||
*One of the very few Duck normals that hits past point-blank range, so you'll be using this ''a lot''. | |||
}} | |||
}} | |||
== | ===== <span class="invisible-header">f5D</span> ===== | ||
<font style="visibility:hidden" size="0"></font> | |||
{{MoveData | |||
|image=FFS_Duck_f5D.png | |||
|subtitle=Windmill/ウインドミル | |||
|caption= | |||
|name=f5D | |||
|data= | |||
{{AttackData-FFS | |||
|Damage=18 | |||
|Stun=4 | |||
|Guard=Mid | |||
|Startup=9 | |||
|Active=3 (2) 2 | |||
|Recovery=34 | |||
|Total=49 | |||
|Hit Adv=-18 | |||
|Block Adv=-19 | |||
|Property= | |||
|description=*Can beat low profile moves, but risky to use due to the long recovery. | |||
<gallery class="mw-collapsible"> | |||
FFS Duck f5D.png| | |||
FFS Duck f5D 1.png| | |||
</gallery> | |||
}} | |||
}} | |||
== | ===Crouching Normals=== | ||
== | ===== <span class="invisible-header">2A</span> ===== | ||
<font style="visibility:hidden" size="0"></font> | |||
{{MoveData | |||
|image=FFS_Duck_2A.png | |||
|subtitle=Reverse Jab/リバースジャブ | |||
|caption= | |||
|name=2A | |||
|data= | |||
{{AttackData-FFS | |||
|Damage=7 | |||
|Stun=2 | |||
|Guard=Mid | |||
|Startup=3 | |||
|Active=4 | |||
|Recovery=5 | |||
|Total=11 | |||
|Hit Adv=+7 | |||
|Block Adv=+8 | |||
|Property=Kara Cancel | |||
|description= * Easily links to itself or other normals. | |||
*Excellent close range blockstring and combo tool, especially against small characters. | |||
}} | |||
}} | |||
== | ===== <span class="invisible-header">2B</span> ===== | ||
<font style="visibility:hidden" size="0"></font> | |||
{{MoveData | |||
|image=FFS_Duck_2B.png | |||
|subtitle=Slide Kick/スライドキック | |||
|caption= | |||
|name=2B | |||
|data= | |||
{{AttackData-FFS | |||
|Damage=9 | |||
|Stun=2 | |||
|Guard=Low | |||
|Startup=4 | |||
|Active=4 | |||
|Recovery=5 | |||
|Total=12 | |||
|Hit Adv=+7 | |||
|Block Adv=+8 | |||
|Property=Kara Cancel | |||
|description= * Easily links to itself or other normals. | |||
*Great low combo starter. | |||
}} | |||
}} | |||
== | ===== <span class="invisible-header">2C</span> ===== | ||
<font style="visibility:hidden" size="0"></font> | |||
{{MoveData | |||
|image=FFS Duck 2C.png | |||
|subtitle=Missile Head/ミサイルヘッド | |||
|caption= | |||
|name=2C | |||
|data= | |||
{{AttackData-FFS | |||
|Damage=11x2 | |||
|Stun=4x2 | |||
|Guard=Mid | |||
|Startup=7 | |||
|Active=3+8 | |||
|Recovery=18 | |||
|Total=35 | |||
|Hit Adv=-1 | |||
|Block Adv=0 | |||
|Property=Kara Cancel | |||
|description=*Won't hit unless you're right next to your opponent, and at that range you're better off using your jabs. | |||
*Not too great as an anti-air either, as it ends up trading most of the time. | |||
<gallery class="mw-collapsible"> | |||
FFS Duck 2C.png| | |||
FFS Duck 2C 1.png| | |||
</gallery> | |||
}} | |||
}} | |||
== | ===== <span class="invisible-header">2D</span> ===== | ||
<font style="visibility:hidden" size="0"></font> | |||
{{MoveData | |||
|image=FFS_Duck_2D.png | |||
|subtitle=Back Spin/バックスピン | |||
|caption= | |||
|name=2D | |||
|data= | |||
{{AttackData-FFS | |||
|Damage=13 | |||
|Stun=4 | |||
|Guard=Low | |||
|Startup=4 | |||
|Active=2 (3) 2 | |||
|Recovery=23 | |||
|Total=33 | |||
|Hit Adv=KD | |||
|Block Adv=-7 | |||
|Property=/ | |||
|description=*Fast startup, but very poor range for a sweep. If you want a knockdown, you're much better off using 3D. | |||
<gallery class="mw-collapsible"> | |||
FFS Duck 2D.png| | |||
FFS Duck 2D 1.png| | |||
</gallery> | |||
}} | |||
}} | |||
== | ===Jumping Normals=== | ||
== | ===== <span class="invisible-header">jA</span> ===== | ||
<font style="visibility:hidden" size="0"></font> | |||
{{MoveData | |||
|image=FFS_Duck_jA.png | |||
|subtitle=Condor Chop/コンドルチョップ | |||
|caption= | |||
|name=jA | |||
|data= | |||
{{AttackData-FFS | |||
|Damage=9 | |||
|Stun=2 | |||
|Guard=Overhead | |||
|Startup=5 | |||
|Active=∞ | |||
|Recovery=/ | |||
|Total=/ | |||
|Hit Adv= | |||
|Block Adv= | |||
|Property= | |||
|description= * Same frame data for diagonal and neutral jumps. | |||
}} | |||
}} | |||
== | ===== <span class="invisible-header">jB</span> ===== | ||
<font style="visibility:hidden" size="0"></font> | |||
{{MoveData | |||
|image=FFS_Duck_jB.png | |||
|image2=FFS_Duck_j8B.png | |||
|subtitle=Duck Attack/ダックキック <br> Condor Kick/コンドルキック | |||
|caption=Diagonal Jump | |||
|caption2=Neutral Jump | |||
|name=jB | |||
|data= | |||
{{AttackData-FFS | |||
|Damage=11 | |||
|Stun=2 | |||
|Guard=Overhead | |||
|Startup=5 | |||
|Active=∞ | |||
|Recovery=/ | |||
|Total=/ | |||
|Hit Adv= | |||
|Block Adv= | |||
|Property= | |||
|description= * Same frame data for diagonal and neutral jumps. | |||
*Diagonal version doesn't cross up, unlike its heavy counterpart. It does stay active for the entire duration of the jump, though. | |||
}} | |||
}} | |||
== | ===== <span class="invisible-header">jC</span> ===== | ||
<font style="visibility:hidden" size="0"></font> | |||
{{MoveData | |||
|image=FFS_Duck_jC.png | |||
|subtitle=Gyro Chop/ジャイロチョップ | |||
|caption= | |||
|name=jC | |||
|data= | |||
{{AttackData-FFS | |||
|version=Diagonal Jump | |||
|Damage=18 | |||
|Stun=4 | |||
|Guard=Overhead | |||
|Startup=6 | |||
|Active=19 | |||
|Recovery=/ | |||
|Total=/ | |||
|Hit Adv= | |||
|Block Adv= | |||
|Property= | |||
|description=*Has minor option select potential since the command can overlap with his air grab. Not too noteworthy otherwise, even though the peace sign is a nice touch. | |||
}} | |||
{{AttackData-FFS | |||
|header=no | |||
|version=Neutral Jump | |||
|Damage=18 | |||
|Stun=4 | |||
|Guard=Overhead | |||
|Startup=7 | |||
|Active=19 | |||
|Recovery=/ | |||
|Total=/ | |||
|Hit Adv= | |||
|Block Adv= | |||
|Property= | |||
|description= | |||
}} | |||
}} | |||
== | ===== <span class="invisible-header">jD</span> ===== | ||
<font style="visibility:hidden" size="0"></font> | |||
{{MoveData | |||
|image=FFS_Duck_jD.png | |||
|image2=FFS_Duck_j8D.png | |||
|subtitle= | |||
|caption=Diagonal Jump | |||
|caption2=Neutral Jump | |||
|name=jD | |||
|data= | |||
{{AttackData-FFS | |||
|version=Diagonal Jump | |||
|subtitle=Gyro Attack/ジャイロアタック | |||
|Damage=20 | |||
|Stun=4 | |||
|Guard=Overhead | |||
|Startup=5 | |||
|Active=20 | |||
|Recovery=/ | |||
|Total=/ | |||
|Hit Adv= | |||
|Block Adv= | |||
|Property= | |||
|description= * Crosses up. Duck's main jump-in. | |||
}} | |||
{{AttackData-FFS | |||
|header=no | |||
|version=Neutral Jump | |||
|subtitle=Butt Kick/バットキック | |||
|Damage=20 | |||
|Stun=4 | |||
|Guard=Overhead | |||
|Startup=5 | |||
|Active=15 | |||
|Recovery=/ | |||
|Total=/ | |||
|Hit Adv= | |||
|Block Adv= | |||
|Property= | |||
|description= | |||
}} | |||
}} | |||
===Universal Mechanics=== | |||
===== <span class="invisible-header">Lane Blast (CD)</span> ===== | |||
<font style="visibility:hidden" size="0"></font> | |||
{{MoveData | |||
|image=FFS_Duck_CD_Front.png | |||
|image2=FFS_Duck_CD_Back.png | |||
|subtitle=Rolling Sobat/ローリングソバット | |||
|caption=Front Lane | |||
|caption2=Back Lane | |||
|name=Lane Blast | |||
|input=C+D | |||
|data= | |||
{{AttackData-FFS | |||
|version=Front Lane | |||
|Damage=22 | |||
|Stun=5 | |||
|Guard=Mid | |||
|Startup=11 | |||
|Active=4 | |||
|Recovery=13 | |||
|Total=27 | |||
|Hit Adv=KD | |||
|Block Adv=+2 | |||
|Property=Cancel, Lane Shift, Feet Invuln 6-18F | |||
|description=*Fast startup for a CD. Pretty good counter against Burn Knuckle, Zaneiken and the like. | |||
}} | |||
{{AttackData-FFS | |||
|header=no | |||
|version=Back Lane | |||
|Damage=22 | |||
|Stun=5 | |||
|Guard=Mid | |||
|Startup=10 | |||
|Active=4 | |||
|Recovery=13 | |||
|Total=26 | |||
|Hit Adv=KD | |||
|Block Adv=+2 | |||
|Property=Cancel, Lane Shift, Feet Invuln 10-18F | |||
|description=*Startup is faster by one frame, more or less the same otherwise. | |||
}} | |||
}} | |||
===== <span class="invisible-header">Lane Attack</span> ===== | |||
<font style="visibility:hidden" size="0"></font> | |||
{{MoveData | |||
|image=FFS_Duck_Lane_Attack_Front.png | |||
|image2=FFS Duck Lane Attack Back.png | |||
|subtitle=Spin Attack/スピンアタック | |||
|caption=Front Lane | |||
|caption2=Back Lane | |||
|name=Lane Attack | |||
|input=A/B/C/D from opposite lane | |||
|data=Duck has the same lane attack for punch and kick buttons. | |||
{{AttackData-FFS | |||
|version=A/B | |||
|Damage=18 | |||
|Stun=2 | |||
|Guard=Overhead | |||
|Startup= | |||
|Active= | |||
|Recovery=4 | |||
|Total= | |||
|Hit Adv= | |||
|Block Adv= | |||
|Property=/ | |||
|description= * Straight and fast lane attack. | |||
}} | |||
{{AttackData-FFS | |||
|header=no | |||
|version=C/D | |||
|Damage=18 | |||
|Stun=4 | |||
|Guard=Overhead | |||
|Startup= | |||
|Active= | |||
|Recovery=4 | |||
|Total= | |||
|Hit Adv= | |||
|Block Adv= | |||
|Property=/ | |||
|description= * Slower high-angle lane attack. | |||
}} | |||
}} | |||
===== <span class="invisible-header">Dodge Attack</span> ===== | |||
<font style="visibility:hidden" size="0"></font> | |||
{{MoveData | |||
|image=FFS_Duck_Dodge_Attack 1.png | |||
|subtitle=Sway Ground Kick/スウェーグランドキック | |||
|caption= | |||
|name=Dodge Attack | |||
|input=6A during proximity guard | |||
|data= | |||
{{AttackData-FFS | |||
|Damage=11 | |||
|Stun=5 | |||
|Guard=Mid | |||
|Startup=12 | |||
|Active=9 | |||
|Recovery=14 | |||
|Total=34 | |||
|Hit Adv=Air Reset | |||
|Block Adv=+3 | |||
|Property=Cancel, Upper-Body Invuln 1-20F | |||
|description= | |||
<gallery class="mw-collapsible"> | |||
FFS Duck Dodge Attack.png|Startup | |||
FFS Duck Dodge Attack 1.png| | |||
FFS Duck Dodge Attack 2.png|Recovery | |||
</gallery> | |||
}} | |||
}} | |||
===Throws=== | |||
===== <span class="invisible-header">Rolling Neck Throw (4/6C)</span> ===== | |||
<font style="visibility:hidden" size="0"></font> | |||
{{MoveData | |||
|image=FFS_Duck_C Throw 1.png | |||
|caption= | |||
|name=Rolling Neck Throw | |||
|input=close 4/6C | |||
|data= | |||
{{AttackData-FFS | |||
|Damage=26 | |||
|Stun=3 | |||
|range=15 | |||
|Guard=Throw | |||
|Startup=1 | |||
|Active=1 | |||
|Recovery=/ | |||
|Hit Adv=KD (+67) | |||
|Block Adv=/ | |||
|Property=/ | |||
|description= * Switches sides. | |||
}} | |||
}} | |||
===== <span class="invisible-header">Reverse Breaker (j2C)</span> ===== | |||
<font style="visibility:hidden" size="0"></font> | |||
{{MoveData | |||
|image=FFS_Duck_Air Throw.png | |||
|caption= | |||
|name=Reverse Breaker | |||
|input=close j2C | |||
|data= | |||
{{AttackData-FFS | |||
|Damage=26 | |||
|Stun=3 | |||
|range=28 | |||
|Guard=Throw | |||
|Startup=1 | |||
|Active=1 | |||
|Recovery=/ | |||
|Hit Adv=KD (+66) | |||
|Block Adv=/ | |||
|Property=/ | |||
|description= * Can also be input with 1C and 3C. | |||
<gallery class="mw-collapsible"> | |||
FFS Duck Air Throw 1.png| | |||
</gallery> | |||
}} | |||
}} | |||
===Special Moves=== | |||
===== <span class="invisible-header">Needle Low (3D)</span> ===== | |||
<font style="visibility:hidden" size="0"></font> | |||
{{MoveData | |||
|image=FFS_Duck_3D.png | |||
|subtitle= | |||
|caption= | |||
|name=Needle Low | |||
|input=3D | |||
|data= | |||
{{AttackData-FFS | |||
|Damage=7 | |||
|Stun=6 | |||
|Guard=Low | |||
|Startup=13 | |||
|Active=21 | |||
|Recovery=13 | |||
|Total=46 | |||
|Hit Adv=KD | |||
|Block Adv=-16 | |||
|Property=Upper-Body Invuln 13-33F | |||
|description= * Can be used to go under fireballs. | |||
*Doesn't do much damage on its own, but knocks down on hit and gives Duck a chance to start his close range pressure. Essential move. | |||
}} | |||
}} | |||
===== <span class="invisible-header">Head Spin Attack ([4]6P)</span> ===== | |||
{{MoveData | |||
| name = Head Spin Attack | |||
| input = [4]6A/C | |||
| subtitle = | |||
| image = FFS Duck 46P.png | |||
| caption = | |||
| data =A Blanka ball. The only move in Duck's repertoire that hits even from full screen, so it's a valuable tool despite its risks. | |||
* Can be input with either 3P, 6P or 9P which can make this move come out by accident, especially with the A version's quick charge time. Simultaneous AC/AD inputs can be used to execute A normals with charge (for Dodge Attack or walking 5A/2A strings). | |||
{{AttackData-FFS | |||
| version = A | |||
| subtitle = | |||
| Damage = 16 (4) | |||
| Stun = 3 | |||
| Guard = Mid | |||
| Startup = 6 | |||
| Active = 30 | |||
| Recovery = 13 | |||
| Total = 48 | |||
| Hit Adv = -9 | |||
| Block Adv = -12 | |||
| Property = Invincible 1-5F, Lower-Body Invuln 6-35F | |||
| description = * Charge time: 26F. | |||
*Faster startup but much worse recovery compared to the heavy version. Can be used after landing a Break Spiral to get back in faster. | |||
}} | |||
{{AttackData-FFS | |||
| header = no | |||
| version = C | |||
| subtitle = | |||
| Damage = 24 (6) | |||
| Stun = 6 | |||
| Guard = Mid | |||
| Startup = 12 | |||
| Active = 24 | |||
| Recovery = 20 | |||
| Total = 56 | |||
| Hit Adv = -2 | |||
| Block Adv = -8 | |||
| Property = Airborne 10-36F | |||
| description = * Charge time: 51F. | |||
*Safe on block, but still very risky if your opponent backsteps and the move ends up whiffing. Decent as a combo ender. | |||
}} | |||
}} | |||
===== <span class="invisible-header">Dancing Dive (214K)</span> ===== | |||
{{MoveData | |||
| name = Dancing Dive | |||
| input = 214B/D | |||
| subtitle = | |||
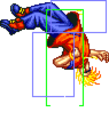
| image = FFS Duck 214K 3.png | |||
| caption = | |||
| data = Can go over most fireballs but is highly punishable if whiffed/blocked. | |||
<gallery class="mw-collapsible mw-collapsed" data-expandtext="show detailed hitboxes" data-collapsetext="hide detailed hitboxes"> | |||
FFS Duck Dodge Attack.png|Upper-Body Invuln | |||
FFS Duck 214K 1.png| | |||
FFS Duck 214K 2.png|First Hit | |||
FFS Duck 214K 3.png|Second Hit | |||
FFS Duck 214K 4.png| | |||
FFS Duck 214K 5.png| | |||
FFS Duck 214K 6.png| | |||
FFS Duck 214K 7.png| | |||
</gallery> | |||
{{AttackData-FFS | |||
| version = B | |||
| subtitle = | |||
| Damage = 10x2 (2x2) | |||
| Stun = 3x2 | |||
| Guard = Mid | |||
| Startup = 8 | |||
| Active = 2+15 | |||
| Recovery = 27 | |||
| Total = 51 | |||
| Hit Adv = KD (2nd hit) | |||
| Block Adv = -20 | |||
| Property = Upper-Body Invuln 1-5F | |||
| description = * Great in combos. | |||
}} | |||
{{AttackData-FFS | |||
| header = no | |||
| version = D | |||
| subtitle = | |||
| Damage = 20 (5x2) | |||
| Stun = 6 | |||
| Guard = Mid | |||
| Startup = 10 | |||
| Active = 2+15 | |||
| Recovery = 30 | |||
| Total = 56 | |||
| Hit Adv = KD (both hits) | |||
| Block Adv = -19 | |||
| Property = Upper-Body Invuln 1-7F | |||
| description = * Travels farther than the B version. | |||
* Can only hit once. | |||
}} | |||
}} | |||
===== <span class="invisible-header">Beat Rush (646C)</span> ===== | |||
{{MoveData | |||
| name = Beat Rush | |||
| input = 646C | |||
| subtitle = | |||
| image = FFS Duck 646C 3.png | |||
| caption = | |||
| data = | |||
{{AttackData-FFS | |||
| Damage = 7 (1x4 + 1x2) | |||
| Stun = 3 | |||
| Guard = Mid | |||
| Startup = 4 | |||
| Active = 3 (2) 3 (5) 3 (7) 3 (19) 15 | |||
| Recovery = 1 | |||
| Total = 64 | |||
| Hit Adv = Bad / KD | |||
| Block Adv = -26 (3rd hit) ~ +12 (5th hit) | |||
| Property = Throw Invincible | |||
| description = Duck unleashes a flurry of attacks... that don't combo into each other. | |||
* If used normally, the opponent will be pushed away and the later hits will whiff. If the final hit connects, it will either knock down on hit or do 2 hits of chip and leave Duck with frame advantage. | |||
* The throw invincibility makes the 5th hit a usable meaty if the opponent has no reversal. | |||
<gallery class="mw-collapsible"> | |||
FFS Duck 646C.png| | |||
FFS Duck 646C.png| | |||
FFS Duck 646C 1.png| | |||
FFS Duck 646C 2.png| | |||
FFS Duck 646C 3.png| | |||
</gallery> | |||
}} | |||
}} | |||
===== <span class="invisible-header">Break Storm (2369K)</span> ===== | |||
{{MoveData | |||
| name = Break Storm | |||
| input = 2369B/D | |||
| subtitle = | |||
| image = FFS Duck 2369K.png | |||
| caption = | |||
| data = Advantage values are for the 3rd hit. First 2 hits do NOT knock down and can leave Duck punishable on hit. | |||
<gallery class="mw-collapsible mw-collapsed" data-expandtext="show detailed hitboxes" data-collapsetext="hide detailed hitboxes"> | |||
FFS Duck 2369K.png| | |||
FFS Duck 2369K 1.png| | |||
FFS Duck 2369K 2.png| | |||
FFS Duck 2369K 3.png| | |||
FFS Duck 2369K 4.png| | |||
FFS Duck 2369K 5.png| | |||
FFS Duck 2369K 6.png| | |||
FFS Duck 2369K 7.png| | |||
FFS Duck 214K 4.png|Facing the other direction | |||
FFS Duck 214K 6.png| | |||
FFS Duck 214K 7.png| | |||
</gallery> | |||
{{AttackData-FFS | |||
| version = B | |||
| Damage = 7x3 (1x4) | |||
| Stun = 3x3 | |||
| Guard = Mid | |||
| Startup = 9 | |||
| Active = 3 (2) 3 (2) 15 | |||
| Recovery = 26 | |||
| Total = 59 | |||
| Hit Adv = KD | |||
| Block Adv = -10 | |||
| Property = Invincible 1-33F | |||
| description = * Invulnerable anti-air and reversal. Safer than the heavy version. | |||
}} | |||
{{AttackData-FFS | |||
| header = no | |||
| version = D | |||
| Damage = 14x3 (3x4) | |||
| Stun = 6x3 | |||
| Guard = Mid | |||
| Startup = 9 | |||
| Active = 3 (2) 3 (2) 23 | |||
| Recovery = 35 | |||
| Total = 76 | |||
| Hit Adv = KD | |||
| Block Adv = -37 | |||
| Property = Invincible 1-41F | |||
| description = * Travels farther than the B version. Use with caution, as it's incredibly unsafe if the last hit fails to land. | |||
* Massive stun potential (18 points) if you can land all 3 hits, but you'll need to be point blank for that to happen. | |||
}} | |||
}} | |||
===Desperation Move=== | |||
===== <span class="invisible-header">Break Spiral (4123692BC)</span> ===== | |||
{{MoveData | |||
| name = Break Spiral | |||
| input = 4123692B+C | |||
| subtitle = When health is flashing | |||
| image = FFS Duck 4123692BC 1.gif | |||
| caption = | |||
| data = | |||
{{AttackData-FFS | |||
| Damage = 48 | |||
| Stun = 4 | |||
| range = 59 | |||
| Guard = Throw | |||
| Startup = 1 | |||
| Active = 1 | |||
| Recovery = / | |||
| Total = / | |||
| Hit Adv = KD (+66) | |||
| Block Adv = / | |||
| Property = | |||
| description = * A huge damage instant throw with fantastic range and no whiff animation. | |||
* The final 2 input can alternatively be a 1 or 3. Going from 9 to 3 is the easiest input method. | |||
}} | |||
}} | |||
==Combos== | |||
* (2B,) c5A/2A x N > f5B > 214D | |||
Hold 6/3 for more hits. 2A will hit crouching opponents. | |||
* 2C (2 hits) > 214D | |||
* f5C > 214D | |||
* f5C x 2 > [4]6P | |||
== Strategy == | |||
=== The Basics === | |||
Key Moves include: | |||
* '''c5A'''/'''2A''' are fast buttons with insane frame advantage which when combined with Duck's movespeed allow him to do microwalk touch-of-stun combos and lengthy blockstring pressure. When the opponent is backturned, it is easy to continue the combo till death. c5A is more advantageous while 2A hits crouching characters and isn't limited by proximity | |||
* '''f5C''' moves forward and is advantageous on block, allowing Duck to pressure from farther away (even with repeated f5Cs) | |||
* '''3D''' cleanly goes under any projectile that doesn't crawl along the ground (except Cheng's 236A) and can be spaced to be safe on block | |||
* '''f5A''' and '''CD''' can be used as anti-airs, or walking underneath the opponent | |||
* '''[4]6A/C''' can be used for chip damage or as a callout, though it's not very rewarding | |||
* '''2369B/D''' is invincible but too small and unsafe to be used outside of specific situations | |||
* '''4123693BC''' has an extremely difficult input but makes Duck a much more versatile character when mastered. Great to use from a backdash, as a tick throw, or to punish from far range. Performing the "Standing Break Spiral" can be assisted by kara cancelling from a normal | |||
=== Advanced Strategy === | |||
==== Performing Break Spiral ==== | |||
Doing a raw standing Break Spiral requires inputting 3BC within 3 frames of inputting 9 which is extremely difficult and not recommended. Thankfully, there are a multitude of easier methods to execute the move. | |||
* The easiest and most obvious ways to buffer Break Spiral are when landing from a jump, waking up, or during a backdash, however these are very easy to opponents to see coming and none of them can be used as part of Duck's offense. Using Break Spiral to cancel a backdash's recovery is still a very strong defensive option. | |||
* An easy way to incorporate Break Spiral offensively is to use 2B at a range where it just barely whiffs and kara cancelling it. Unlike the above methods this cannot be reacted to, and is not terribly risky if misspaced as 2B is a strong low-risk attack. Input as 412'''3B'''693BC. | |||
* Tick throwing the opponent after a light normal is the most deadly application of Break Spiral, but is quite difficult. In order to execute it consistently, some explanation is needed. | |||
** Break Spiral has a generous 13F acceptance period between individual inputs of the 4123693BC motion. This means that a slow input such as 4 (wait 12F) 1 (wait 12F) 2 (wait 12F) 3 (wait 12F) 6 (wait 12F) 9 (wait 12F) 3BC is a valid Break Spiral. 3 and BC are not counted as separate inputs and must both be input within 13F of the 9 input. Inputting a slow Break Spiral is useful for tick throwing after a blocked 2A for example. Normally the huge frame advantage (+8) would make this impossible without doing a raw standing Break Spiral, but if 9 is input right before Duck recovers then there can be up to a 4 frame window to input the delayed 3BC. | |||
* Tick throws after a blocked Lane Blast are also possible and not too difficult | |||
* Break Spiral's instant startup and long range enables many great punishes to the opponent's negative attacks. | |||
* If 3D gets blocked there's no harm in buffering Break Spiral for a possible tick throw, but the opponent will often be out of range unless in the corner or if 3D was poorly spaced. | |||
* Whiffing c5D over the opponent's head is an extremely easy way to buffer Break Spiral, but this is only useful for an easy kill on a dizzy opponent instead of risking a dropped combo. | |||
* c5C, despite being quite a bad normal, can cancel into an unjumpable Break Spiral on block. | |||
[https://youtu.be/R21XxJ6VSfY Break Spiral Showcase] | |||
[https://youtu.be/9rOAeJ14QjE Break Spiral Handcam Showcase] | |||
==Matchups== | |||
===Vs. Andy Bogard=== | |||
===Vs. Axel Hawk=== | |||
===Vs. Big Bear=== | |||
===Vs. Billy Kane=== | |||
===Vs. Cheng Sinzan=== | |||
===Vs. Duck King=== | |||
===Vs. Geese Howard=== | |||
===Vs. Joe Higashi=== | |||
===Vs. Jubei Yamada=== | |||
===Vs. Kim Kaphwan=== | |||
===Vs. Laurence Blood=== | |||
===Vs. Mai Shiranui=== | |||
===Vs. Ryo Sakazaki=== | |||
===Vs. Terry Bogard=== | |||
===Vs. Tung Fu Rue=== | |||
===Vs. Wolfgang Krauser=== | |||
{{Navbox-FFS}} | |||
[[Category:Fatal Fury Special]] | [[Category:Fatal Fury Special]] | ||
[[Category:Duck King]] | |||
Latest revision as of 20:19, 1 July 2025


Introduction
A breakdancing close range speedster that also gets grappler privileges once he has access to his super. Deadly if he gets in, harmless if he doesn't.
| Pros | Cons |
|---|---|
|
|
Move List
General Hurtboxes
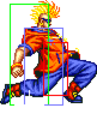
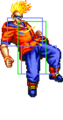
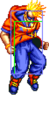
| Standing | Crouching | Jumping | Backdashing | Taunting |
 |
 |
 |
 |

|
| 52F (4+45+3) duration. | Duck is considered airborne until recovery. 31F (28+3) duration. |
Close Standing Normals
c5A
c5A
Funk Elbow/ファンクエルボー
Funk Elbow/ファンクエルボー

| Damage | Stun | Guard | Startup | Active | Recovery | Total | Hit Adv | Block Adv | Property | |
|---|---|---|---|---|---|---|---|---|---|---|
| 9 | 2 | Mid | 3 | 3 | 4 | 9 | +9 | +10 | Kara Cancel | |
| ||||||||||
c5B
c5B
Beat Low/ビートロー
Beat Low/ビートロー

| Damage | Stun | Guard | Startup | Active | Recovery | Total | Hit Adv | Block Adv | Property | |
|---|---|---|---|---|---|---|---|---|---|---|
| 11 | 2 | Mid | 4 | 4 | 8 | 15 | +4 | +5 | Kara Cancel | |
| ||||||||||
c5C
c5C
Mad Spin/マッドスピン
Mad Spin/マッドスピン

| Damage | Stun | Guard | Startup | Active | Recovery | Total | Hit Adv | Block Adv | Property | |
|---|---|---|---|---|---|---|---|---|---|---|
| 18x2 | 4x2 | Mid | 9 | 4 (15) 6 | 8 | 41 | -9 | -10 | Kara Cancel, Feet Invuln 7-23F, 28-33F | |
| ||||||||||


c5D
c5D
Tower Back Kick/タワーバックキック
Tower Back Kick/タワーバックキック

| Damage | Stun | Guard | Startup | Active | Recovery | Total | Hit Adv | Block Adv | Property | |
|---|---|---|---|---|---|---|---|---|---|---|
| 15 | 4 | Mid | 10 | 10 | 13 | 32 | +1 | 0 | Kara Cancel | |
| ||||||||||
Far Standing Normals
f5A
f5A
Funk Reverse/ファンクリバース
Funk Reverse/ファンクリバース

| Damage | Stun | Guard | Startup | Active | Recovery | Total | Hit Adv | Block Adv | Property | |
|---|---|---|---|---|---|---|---|---|---|---|
| 7 | 2 | Mid | 4 | 4 | 8 | 15 | +4 | +5 | Kara Cancel | |
| ||||||||||
f5B
f5B
Beat Side/ビートサイド
Beat Side/ビートサイド

| Damage | Stun | Guard | Startup | Active | Recovery | Total | Hit Adv | Block Adv | Property | |
|---|---|---|---|---|---|---|---|---|---|---|
| 9 | 2 | Mid | 5 | 4 | 12 | 20 | 0 | +1 | Kara Cancel | |
| ||||||||||
f5C
f5C
Turn Chop/ターンチョップ
Turn Chop/ターンチョップ

| Damage | Stun | Guard | Startup | Active | Recovery | Total | Hit Adv | Block Adv | Property | |
|---|---|---|---|---|---|---|---|---|---|---|
| 16 | 4 | Mid | 12 | 5 | 5 | 21 | +14 | +13 | Cancel | |
| ||||||||||
f5D
f5D
Windmill/ウインドミル
Windmill/ウインドミル

| Damage | Stun | Guard | Startup | Active | Recovery | Total | Hit Adv | Block Adv | Property | |
|---|---|---|---|---|---|---|---|---|---|---|
| 18 | 4 | Mid | 9 | 3 (2) 2 | 34 | 49 | -18 | -19 | - | |
| ||||||||||

Crouching Normals
2A
2A
Reverse Jab/リバースジャブ
Reverse Jab/リバースジャブ

| Damage | Stun | Guard | Startup | Active | Recovery | Total | Hit Adv | Block Adv | Property | |
|---|---|---|---|---|---|---|---|---|---|---|
| 7 | 2 | Mid | 3 | 4 | 5 | 11 | +7 | +8 | Kara Cancel | |
| ||||||||||
2B
2B
Slide Kick/スライドキック
Slide Kick/スライドキック

| Damage | Stun | Guard | Startup | Active | Recovery | Total | Hit Adv | Block Adv | Property | |
|---|---|---|---|---|---|---|---|---|---|---|
| 9 | 2 | Low | 4 | 4 | 5 | 12 | +7 | +8 | Kara Cancel | |
| ||||||||||
2C
2C
Missile Head/ミサイルヘッド
Missile Head/ミサイルヘッド

| Damage | Stun | Guard | Startup | Active | Recovery | Total | Hit Adv | Block Adv | Property | |
|---|---|---|---|---|---|---|---|---|---|---|
| 11x2 | 4x2 | Mid | 7 | 3+8 | 18 | 35 | -1 | 0 | Kara Cancel | |
| ||||||||||

2D
2D
Back Spin/バックスピン
Back Spin/バックスピン

| Damage | Stun | Guard | Startup | Active | Recovery | Total | Hit Adv | Block Adv | Property | |
|---|---|---|---|---|---|---|---|---|---|---|
| 13 | 4 | Low | 4 | 2 (3) 2 | 23 | 33 | KD | -7 | / | |
| ||||||||||

Jumping Normals
jA
jA
Condor Chop/コンドルチョップ
Condor Chop/コンドルチョップ

| Damage | Stun | Guard | Startup | Active | Recovery | Total | Hit Adv | Block Adv | Property | |
|---|---|---|---|---|---|---|---|---|---|---|
| 9 | 2 | Overhead | 5 | ∞ | / | / | - | - | - | |
| ||||||||||
jB
jB
Duck Attack/ダックキック
Condor Kick/コンドルキック
Duck Attack/ダックキック
Condor Kick/コンドルキック


| Damage | Stun | Guard | Startup | Active | Recovery | Total | Hit Adv | Block Adv | Property | |
|---|---|---|---|---|---|---|---|---|---|---|
| 11 | 2 | Overhead | 5 | ∞ | / | / | - | - | - | |
| ||||||||||
jC
jC
Gyro Chop/ジャイロチョップ
Gyro Chop/ジャイロチョップ

| Version | Damage | Stun | Guard | Startup | Active | Recovery | Total | Hit Adv | Block Adv | Property | |
|---|---|---|---|---|---|---|---|---|---|---|---|
| Diagonal Jump | 18 | 4 | Overhead | 6 | 19 | / | / | - | - | - | |
| |||||||||||
| Neutral Jump | 18 | 4 | Overhead | 7 | 19 | / | / | - | - | - | |
jD
jD


| Version | Damage | Stun | Guard | Startup | Active | Recovery | Total | Hit Adv | Block Adv | Property | |
|---|---|---|---|---|---|---|---|---|---|---|---|
| Diagonal Jump Gyro Attack/ジャイロアタック |
20 | 4 | Overhead | 5 | 20 | / | / | - | - | - | |
| |||||||||||
| Neutral Jump Butt Kick/バットキック |
20 | 4 | Overhead | 5 | 15 | / | / | - | - | - | |
Universal Mechanics
Lane Blast (CD)
Lane Blast
Rolling Sobat/ローリングソバット
C+D
Rolling Sobat/ローリングソバット
C+D


| Version | Damage | Stun | Guard | Startup | Active | Recovery | Total | Hit Adv | Block Adv | Property | |
|---|---|---|---|---|---|---|---|---|---|---|---|
| Front Lane | 22 | 5 | Mid | 11 | 4 | 13 | 27 | KD | +2 | Cancel, Lane Shift, Feet Invuln 6-18F | |
| |||||||||||
| Back Lane | 22 | 5 | Mid | 10 | 4 | 13 | 26 | KD | +2 | Cancel, Lane Shift, Feet Invuln 10-18F | |
| |||||||||||
Lane Attack
Lane Attack
Spin Attack/スピンアタック
A/B/C/D from opposite lane
Spin Attack/スピンアタック
A/B/C/D from opposite lane


Duck has the same lane attack for punch and kick buttons.
| Version | Damage | Stun | Guard | Startup | Active | Recovery | Total | Hit Adv | Block Adv | Property | |
|---|---|---|---|---|---|---|---|---|---|---|---|
| A/B | 18 | 2 | Overhead | - | - | 4 | - | - | - | / | |
| |||||||||||
| C/D | 18 | 4 | Overhead | - | - | 4 | - | - | - | / | |
| |||||||||||
Dodge Attack
Dodge Attack
Sway Ground Kick/スウェーグランドキック
6A during proximity guard
Sway Ground Kick/スウェーグランドキック
6A during proximity guard

| Damage | Stun | Guard | Startup | Active | Recovery | Total | Hit Adv | Block Adv | Property | |
|---|---|---|---|---|---|---|---|---|---|---|
| 11 | 5 | Mid | 12 | 9 | 14 | 34 | Air Reset | +3 | Cancel, Upper-Body Invuln 1-20F | |
| ||||||||||


Throws
Rolling Neck Throw (4/6C)
Rolling Neck Throw
close 4/6C
close 4/6C

| Damage | Stun | Range | Guard | Startup | Active | Recovery | Total | Hit Adv | Block Adv | Property |
|---|---|---|---|---|---|---|---|---|---|---|
| 26 | 3 | 15 | Throw | 1 | 1 | / | - | KD (+67) | / | / |
| ||||||||||
Reverse Breaker (j2C)
Reverse Breaker
close j2C
close j2C

| Damage | Stun | Range | Guard | Startup | Active | Recovery | Total | Hit Adv | Block Adv | Property |
|---|---|---|---|---|---|---|---|---|---|---|
| 26 | 3 | 28 | Throw | 1 | 1 | / | - | KD (+66) | / | / |
| ||||||||||

Special Moves
Needle Low (3D)
Needle Low
3D
3D

| Damage | Stun | Guard | Startup | Active | Recovery | Total | Hit Adv | Block Adv | Property | |
|---|---|---|---|---|---|---|---|---|---|---|
| 7 | 6 | Low | 13 | 21 | 13 | 46 | KD | -16 | Upper-Body Invuln 13-33F | |
| ||||||||||
Head Spin Attack ([4]6P)
Head Spin Attack
[4]6A/C
[4]6A/C

A Blanka ball. The only move in Duck's repertoire that hits even from full screen, so it's a valuable tool despite its risks.
- Can be input with either 3P, 6P or 9P which can make this move come out by accident, especially with the A version's quick charge time. Simultaneous AC/AD inputs can be used to execute A normals with charge (for Dodge Attack or walking 5A/2A strings).
| Version | Damage | Stun | Guard | Startup | Active | Recovery | Total | Hit Adv | Block Adv | Property | |
|---|---|---|---|---|---|---|---|---|---|---|---|
| A | 16 (4) | 3 | Mid | 6 | 30 | 13 | 48 | -9 | -12 | Invincible 1-5F, Lower-Body Invuln 6-35F | |
| |||||||||||
| C | 24 (6) | 6 | Mid | 12 | 24 | 20 | 56 | -2 | -8 | Airborne 10-36F | |
| |||||||||||
Dancing Dive (214K)
Dancing Dive
214B/D
214B/D

Can go over most fireballs but is highly punishable if whiffed/blocked.
Upper-Body Invuln

First Hit

Second Hit


| Version | Damage | Stun | Guard | Startup | Active | Recovery | Total | Hit Adv | Block Adv | Property | |
|---|---|---|---|---|---|---|---|---|---|---|---|
| B | 10x2 (2x2) | 3x2 | Mid | 8 | 2+15 | 27 | 51 | KD (2nd hit) | -20 | Upper-Body Invuln 1-5F | |
| |||||||||||
| D | 20 (5x2) | 6 | Mid | 10 | 2+15 | 30 | 56 | KD (both hits) | -19 | Upper-Body Invuln 1-7F | |
| |||||||||||
Beat Rush (646C)
Beat Rush
646C
646C

| Damage | Stun | Guard | Startup | Active | Recovery | Total | Hit Adv | Block Adv | Property | |
|---|---|---|---|---|---|---|---|---|---|---|
| 7 (1x4 + 1x2) | 3 | Mid | 4 | 3 (2) 3 (5) 3 (7) 3 (19) 15 | 1 | 64 | Bad / KD | -26 (3rd hit) ~ +12 (5th hit) | Throw Invincible | |
|
Duck unleashes a flurry of attacks... that don't combo into each other.
| ||||||||||


Break Storm (2369K)
Break Storm
2369B/D
2369B/D

Advantage values are for the 3rd hit. First 2 hits do NOT knock down and can leave Duck punishable on hit.
Facing the other direction


| Version | Damage | Stun | Guard | Startup | Active | Recovery | Total | Hit Adv | Block Adv | Property | |
|---|---|---|---|---|---|---|---|---|---|---|---|
| B | 7x3 (1x4) | 3x3 | Mid | 9 | 3 (2) 3 (2) 15 | 26 | 59 | KD | -10 | Invincible 1-33F | |
| |||||||||||
| D | 14x3 (3x4) | 6x3 | Mid | 9 | 3 (2) 3 (2) 23 | 35 | 76 | KD | -37 | Invincible 1-41F | |
| |||||||||||
Desperation Move
Break Spiral (4123692BC)
Break Spiral
When health is flashing
4123692B+C
When health is flashing
4123692B+C

| Damage | Stun | Range | Guard | Startup | Active | Recovery | Total | Hit Adv | Block Adv | Property |
|---|---|---|---|---|---|---|---|---|---|---|
| 48 | 4 | 59 | Throw | 1 | 1 | / | / | KD (+66) | / | - |
| ||||||||||
Combos
- (2B,) c5A/2A x N > f5B > 214D
Hold 6/3 for more hits. 2A will hit crouching opponents.
- 2C (2 hits) > 214D
- f5C > 214D
- f5C x 2 > [4]6P
Strategy
The Basics
Key Moves include:
- c5A/2A are fast buttons with insane frame advantage which when combined with Duck's movespeed allow him to do microwalk touch-of-stun combos and lengthy blockstring pressure. When the opponent is backturned, it is easy to continue the combo till death. c5A is more advantageous while 2A hits crouching characters and isn't limited by proximity
- f5C moves forward and is advantageous on block, allowing Duck to pressure from farther away (even with repeated f5Cs)
- 3D cleanly goes under any projectile that doesn't crawl along the ground (except Cheng's 236A) and can be spaced to be safe on block
- f5A and CD can be used as anti-airs, or walking underneath the opponent
- [4]6A/C can be used for chip damage or as a callout, though it's not very rewarding
- 2369B/D is invincible but too small and unsafe to be used outside of specific situations
- 4123693BC has an extremely difficult input but makes Duck a much more versatile character when mastered. Great to use from a backdash, as a tick throw, or to punish from far range. Performing the "Standing Break Spiral" can be assisted by kara cancelling from a normal
Advanced Strategy
Performing Break Spiral
Doing a raw standing Break Spiral requires inputting 3BC within 3 frames of inputting 9 which is extremely difficult and not recommended. Thankfully, there are a multitude of easier methods to execute the move.
- The easiest and most obvious ways to buffer Break Spiral are when landing from a jump, waking up, or during a backdash, however these are very easy to opponents to see coming and none of them can be used as part of Duck's offense. Using Break Spiral to cancel a backdash's recovery is still a very strong defensive option.
- An easy way to incorporate Break Spiral offensively is to use 2B at a range where it just barely whiffs and kara cancelling it. Unlike the above methods this cannot be reacted to, and is not terribly risky if misspaced as 2B is a strong low-risk attack. Input as 4123B693BC.
- Tick throwing the opponent after a light normal is the most deadly application of Break Spiral, but is quite difficult. In order to execute it consistently, some explanation is needed.
- Break Spiral has a generous 13F acceptance period between individual inputs of the 4123693BC motion. This means that a slow input such as 4 (wait 12F) 1 (wait 12F) 2 (wait 12F) 3 (wait 12F) 6 (wait 12F) 9 (wait 12F) 3BC is a valid Break Spiral. 3 and BC are not counted as separate inputs and must both be input within 13F of the 9 input. Inputting a slow Break Spiral is useful for tick throwing after a blocked 2A for example. Normally the huge frame advantage (+8) would make this impossible without doing a raw standing Break Spiral, but if 9 is input right before Duck recovers then there can be up to a 4 frame window to input the delayed 3BC.
- Tick throws after a blocked Lane Blast are also possible and not too difficult
- Break Spiral's instant startup and long range enables many great punishes to the opponent's negative attacks.
- If 3D gets blocked there's no harm in buffering Break Spiral for a possible tick throw, but the opponent will often be out of range unless in the corner or if 3D was poorly spaced.
- Whiffing c5D over the opponent's head is an extremely easy way to buffer Break Spiral, but this is only useful for an easy kill on a dizzy opponent instead of risking a dropped combo.
- c5C, despite being quite a bad normal, can cancel into an unjumpable Break Spiral on block.


