|
|
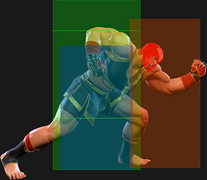
| (2 intermediate revisions by the same user not shown) |
| Line 156: |
Line 156: |
| | info = | | | info = |
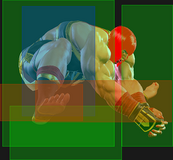
| {{AttackDataCargo-SF6/Query|marisa_2lp}} | | {{AttackDataCargo-SF6/Query|marisa_2lp}} |
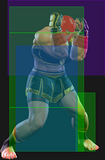
| * Chains into {{clr|L|2LP}}/{{clr|L|2LK}} (2f gap when chained into itself) | | * Chains into {{clr|L|2LP}}/{{clr|L|2LK}} |
| * '''Cancel Hitconfirm Window:''' 15f | | * '''Cancel Hitconfirm Window:''' 15f |
| ** Special cancel is delayed until after active frames ({{clr|DR|DR}}: after 2nd recovery frame) | | ** Special cancel is delayed until after active frames ({{clr|DR|DR}}: after 2nd recovery frame) |
| * '''{{clr|DR|Drive Rush}} cancel advantage:''' {{sf6-adv|P|+3}} oH / {{sf6-adv|M|-3}} oB | | * '''{{clr|DR|Drive Rush}} cancel advantage:''' {{sf6-adv|P|+3}} oH / {{sf6-adv|M|-2}} oB |
| * Applies 20% damage scaling to next hit when beginning a combo (100/80/70...) | | * Applies 20% damage scaling to next hit when beginning a combo (100/80/70...) |
| <br> | | <br> |
| Line 206: |
Line 206: |
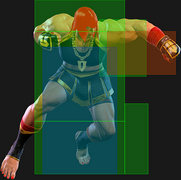
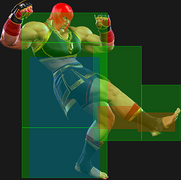
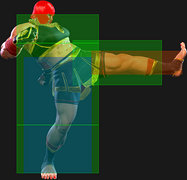
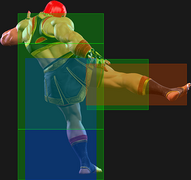
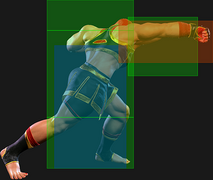
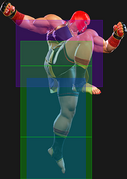
| {{AttackDataCargo-SF6/Query|marisa_2hp_hold}} | | {{AttackDataCargo-SF6/Query|marisa_2hp_hold}} |
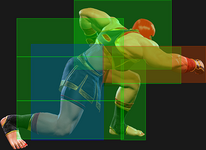
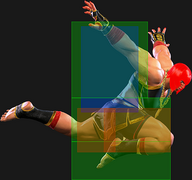
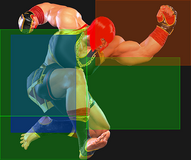
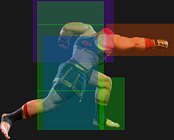
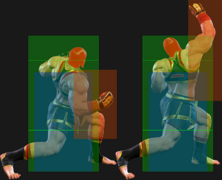
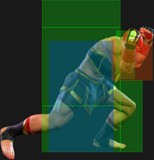
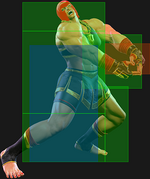
| * '''Anti-Air Invuln (Head):''' 20-31f (cannot hit cross-up) | | * '''Anti-Air Invuln (Head):''' 20-31f (cannot hit cross-up) |
| | * '''Cancel Hitconfirm Window:''' 20f (Super) |
| * Releasing the button on frames 5-16 results in uncharged version with 4f startup | | * Releasing the button on frames 5-16 results in uncharged version with 4f startup |
| * Only first 2 active frames hit grounded; active frames 3-6 only hit airborne | | * Only first 2 active frames hit grounded; active frames 3-6 only hit airborne |
| Line 214: |
Line 215: |
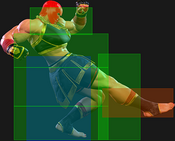
| Charged {{clr|H|2HP}} is primarily combo filler as it leaves the opponent in juggle state. While charging can lead to big damage if it hits an aerial opponent, whiffing leaves you wide-open to an easy punish, so it's not recommended unless you have a huge read on an opponent's jump habits. | | Charged {{clr|H|2HP}} is primarily combo filler as it leaves the opponent in juggle state. While charging can lead to big damage if it hits an aerial opponent, whiffing leaves you wide-open to an easy punish, so it's not recommended unless you have a huge read on an opponent's jump habits. |
|
| |
|
| As a punish starter, both versions launch the opponent high into the air. Marisa can implement several charged normals or Target Combos afterwards, or even cancel into charged Level 1 for some incredible damage. | | As a punish starter, both versions launch the opponent high into the air. Marisa can implement several charged normals or Target Combos afterwards, or even cancel into a fully charged {{clr|SA|SA1}} for some incredible damage. |
| }} | | }} |
|
| |
|
| Line 231: |
Line 232: |
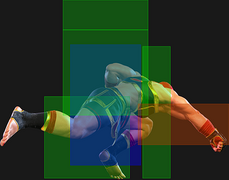
| * Applies 20% damage scaling to next hit when beginning a combo (100/80/70...) | | * Applies 20% damage scaling to next hit when beginning a combo (100/80/70...) |
| <br> | | <br> |
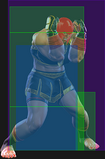
| Your only conventional low combo starter, but a good one at least. Generally used to combo into {{clr|L|2LP}} > {{clr|L|214LP}} for a quick confirm. | | Your only conventional low combo starter, but a good one at least. Generally used to combo into {{clr|L|2LP}} > {{clr|L|214LP}} for a quick confirm. It doesn't gain much as a starter from {{clr|DR|Drive Rush}} unless you also score a {{clr|PC|Counter-hit}}, after which you can link into a stronger button like {{clr|M|5MP}}, {{clr|M|2MP}}, or {{clr|H|4HP}}. |
| }} | | }} |
|
| |
|
| Line 245: |
Line 246: |
| | info = | | | info = |
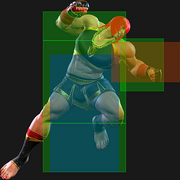
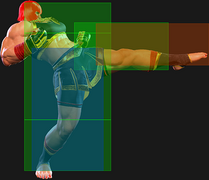
| {{AttackDataCargo-SF6/Query|marisa_2mk}} | | {{AttackDataCargo-SF6/Query|marisa_2mk}} |
| | * Applies 20% damage scaling to next hit when beginning a combo (100/80/70...) |
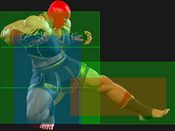
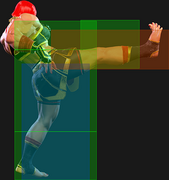
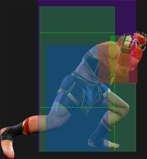
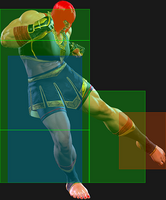
| Your go to low poke with good range and hitbox priority. Unlike most {{clr|M|2MKs}}, this cannot be special canceled. {{sf6-adv|VP|+7}} on hit from {{clr|DR|Drive Rush}}, allowing decent conversions if hit close enough. | | Your go to low poke with good range and hitbox priority. Unlike most {{clr|M|2MKs}}, this cannot be special canceled. {{sf6-adv|VP|+7}} on hit from {{clr|DR|Drive Rush}}, allowing decent conversions if hit close enough. |
|
| |
|
| Line 886: |
Line 888: |
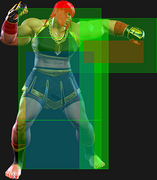
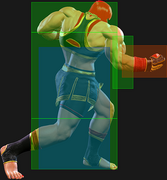
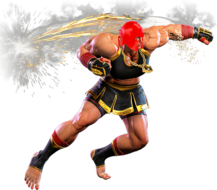
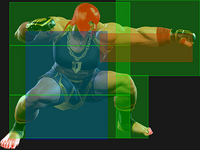
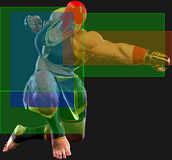
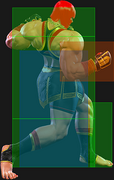
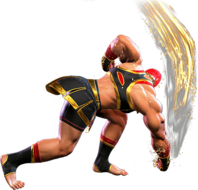
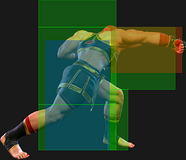
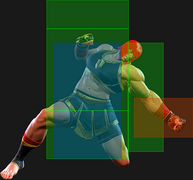
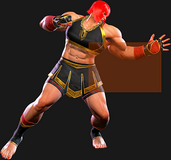
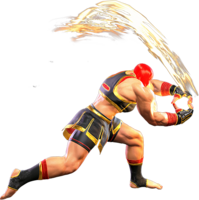
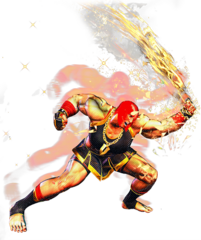
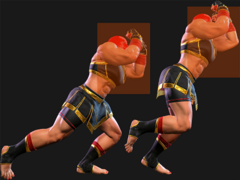
| An armored straight punch that "stabs" the opponent, Gladius has multiple applications for offense, defense, and neutral. | | An armored straight punch that "stabs" the opponent, Gladius has multiple applications for offense, defense, and neutral. |
|
| |
|
| Marisa can harass opponents in the mid-range and chip away at their Drive gauge while taking advantage of the high pushback to keep herself safe. This is fairly easy to do, as even a ranged 5MP~MP canceled into Gladius is usually safe on block. Higher strength versions have more range in exchange for slower startup; it's important not to whiff in neutral, as Gladius is easily whiff punished. If the opponent has a strong cancelable low poke, the lack of lower-body armor makes this move much risker to use in neutral; it still remains effective in combos and blockstrings, however. | | Marisa can harass opponents in the mid-range and chip away at their Drive gauge while taking advantage of the high pushback to keep herself safe. This is fairly easy to do, as even a ranged {{clr|M|5MP}}~{{clr|M|MP}} canceled into Gladius is usually safe on block. Higher strength versions have more range in exchange for slower startup; it's important not to whiff in neutral, as Gladius is easily whiff punished. If the opponent has a strong cancelable low poke, the lack of lower-body armor makes this move much risker to use in neutral; it still remains effective in combos and blockstrings, however. |
|
| |
|
| The most important attribute of Gladius is its ability to charge into a more powerful version by holding the button. A fully charged Gladius breaks armor, rendering {{clr|DR|Drive Impact}} useless unless they predict an early release. The OD version even breaks armor without charge, making it the best version to use if you want to guarantee safety. Partially charging the attack also makes it harder for the opponent to Perfect Parry on reaction, somewhat mitigating one of Marisa's biggest weaknesses. Be aware that charging gives the opponent more time to react with something like an invincible Super, which will break Marisa's armor and interrupt any gap in the blockstring. | | The most important attribute of Gladius is its ability to charge into a more powerful version by holding the button. A fully charged Gladius breaks armor, rendering {{clr|DR|Drive Impact}} useless unless they predict an early release. The {{clr|OD|OD}} version even breaks armor without charge, making it the best version to use if you want to guarantee safety. Partially charging the attack also makes it harder for the opponent to Perfect Parry on reaction, somewhat mitigating one of Marisa's biggest weaknesses. Be aware that charging gives the opponent more time to react with something like an invincible {{clr|SA|Super}}, which will break Marisa's armor and interrupt any gap in the blockstring. |
|
| |
|
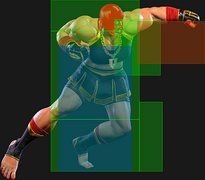
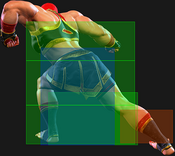
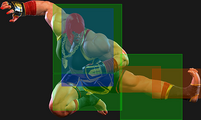
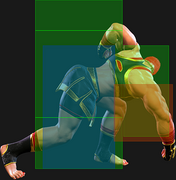
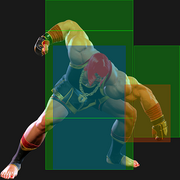
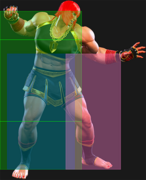
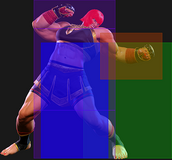
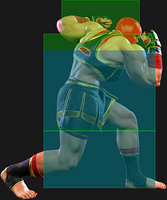
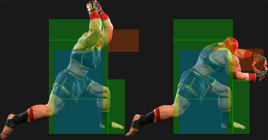
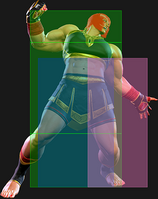
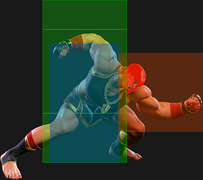
| Gladius's armor only covers the upper half of her hurtbox; any attack with a low enough hitbox will hit Marisa out of startup. She also loses any remaining armor the moment the button is released. The punch release starts up surprisingly fast after a partial charge, allowing Marisa to punish absorbed jump-ins or projectiles fairly consistently on reaction to the armor activation. This makes it a semi-consistent anti-air, though it's more easily baited by an empty jump than her other options like 214LP. | | Gladius's armor only covers the upper half of her hurtbox; any attack with a low enough hitbox will hit Marisa out of startup. She also loses any remaining armor the moment the button is released. The punch release starts up surprisingly fast after a partial charge, allowing Marisa to punish absorbed jump-ins or projectiles fairly consistently on reaction to the armor activation. This makes it a semi-consistent anti-air, though it's more easily baited by an empty jump than her other options like {{clr|L|214LP}}. |
|
| |
|
| As a combo ender, Gladius is highly damaging, but pushes the opponent far away. Marisa thrives off momentum, so it's important to pick combo routes that will take you to the corner, or use an alternative ender midscreen. It is cancelable into {{clr|SA|SA3}} (and {{clr|SA|SA2}} for the OD version), and can potentially even be single-hit-confirmed on reaction. Be aware that these Super cancels can whiff midscreen from farther ranges, so they should only be done in guaranteed combo situations or in the corner. | | As a combo ender, Gladius is highly damaging, but pushes the opponent far away. Marisa thrives off momentum, so it's important to pick combo routes that will take you to the corner, or use an alternative ender midscreen. It is cancelable into {{clr|SA|SA3}} (and {{clr|SA|SA2}} for the {{clr|OD|OD}} version), and can potentially even be single-hit-confirmed on reaction. Be aware that these {{clr|SA|Super}} cancels can whiff midscreen from farther ranges, so they should only be done in guaranteed combo situations or in the corner. |
| }} | | }} |
| |-| | | |-| |
| Line 924: |
Line 926: |
| * Applies 30% damage scaling to next hit when beginning a combo (100/70/60...) | | * Applies 30% damage scaling to next hit when beginning a combo (100/70/60...) |
| <br> | | <br> |
| The fully charged version of Gladius shuts down {{clr|DR|Drive Impact}}, which would otherwise be a potent counter to Marisa's moveset. The slow startup makes it easy to interrupt with a jump or a Super on reaction, so it's important to mix up the timing so that the opponent can't overly rely on any one defensive option. Many opponents will instead attempt to Perfect Parry in response to the slow startup. Mixing between slower and faster versions makes this hard to do on reaction, as it's not immediately obvious which strength Marisa is using (except for the OD version, of course). By making the opponent block or parry, you put yourself at excellent frame advantage and can continue enforcing your pressure at will. | | The fully charged version of Gladius shuts down {{clr|DR|Drive Impact}}, which would otherwise be a potent counter to Marisa's moveset. The slow startup makes it easy to interrupt with a jump or a {{clr|SA|Super}} on reaction, so it's important to mix up the timing so that the opponent can't overly rely on any one defensive option. Many opponents will instead attempt to Perfect Parry in response to the slow startup. Mixing between slower and faster versions makes this hard to do on reaction, as it's not immediately obvious which strength Marisa is using (except for the {{clr|OD|OD}} version, of course). By making the opponent block or parry, you put yourself at excellent frame advantage and can continue enforcing your pressure at will. |
|
| |
|
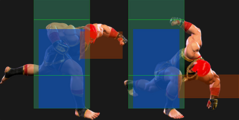
| The armor still loses to low-angled hitboxes just like the uncharged versions. The reel back animation and variable charge timing makes it hard for the opponent to throw out a low poke to intercept at mid-range, however. | | The armor still loses to low-angled hitboxes just like the uncharged versions. The reel back animation and variable charge timing makes it hard for the opponent to throw out a low poke to intercept at mid-range, however. |
| Line 1,003: |
Line 1,005: |
| | info = | | | info = |
| {{AttackDataCargo-SF6/Query|marisa_623lp}} | | {{AttackDataCargo-SF6/Query|marisa_623lp}} |
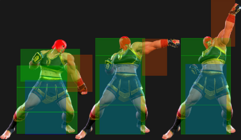
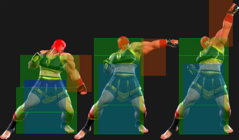
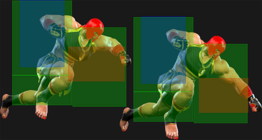
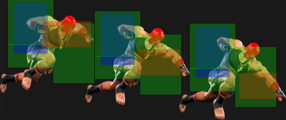
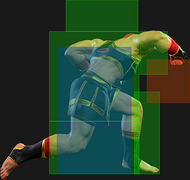
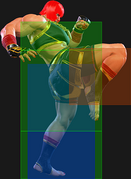
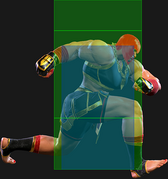
| * '''High/Mid Armor (1-hit):''' 7-11f; '''Lower Body Projectile Invuln:''' 12-27f | | * '''High/Mid Armor (1-hit):''' 7-11f; '''Low Crush / Lower Body Projectile Invuln:''' 12-27f |
| * '''Airborne''' 11-30f ({{FKD}} state) | | * '''Airborne''' 11-30f ({{FKD}} state) |
| * {{clr|PC|Punish Counter}}: HKD +58(59) Slide; hits 1f later vs. crouching opponents | | * {{clr|PC|Punish Counter}}: HKD +58(59) Slide; hits 1f later vs. crouching opponents |
| {{AttackDataCargo-SF6/Query|marisa_623mp}} | | {{AttackDataCargo-SF6/Query|marisa_623mp}} |
| * '''High/Mid Armor (1-hit):''' 7-13f; '''Lower Body Projectile Invuln:''' 12-30f | | * '''High/Mid Armor (1-hit):''' 7-13f; '''Low Crush / Lower Body Projectile Invuln:''' 12-30f |
| * '''Airborne''' 14-33f ({{FKD}} state) | | * '''Airborne''' 14-33f ({{FKD}} state) |
| * {{clr|PC|Punish Counter}}: HKD +58(59) Slide; hits 1f later vs. crouching opponents | | * {{clr|PC|Punish Counter}}: HKD +58(59) Slide; hits 1f later vs. crouching opponents |
| {{AttackDataCargo-SF6/Query|marisa_623hp}} | | {{AttackDataCargo-SF6/Query|marisa_623hp}} |
| * '''High/Mid Armor (1-hit):''' 10-15f; '''Lower Body Projectile Invuln:''' 12-34f | | * '''High/Mid Armor (1-hit):''' 10-15f; '''Low Crush / Lower Body Projectile Invuln:''' 9-34f |
| * '''Airborne''' 17-37f ({{FKD}} state) | | * '''Airborne''' 17-37f ({{FKD}} state) |
| * {{clr|PC|Punish Counter}}: HKD +58(59) Slide; hits 1f later vs. crouching opponents | | * {{clr|PC|Punish Counter}}: HKD +58(59) Slide; hits 1f later vs. crouching opponents |
| {{AttackDataCargo-SF6/Query|marisa_623pp}} | | {{AttackDataCargo-SF6/Query|marisa_623pp}} |
| * '''High/Mid Armor (1-hit):''' 6-12f; '''Lower Body Projectile Invuln:''' 12-30f; Armor Break | | * '''High/Mid Armor (1-hit):''' 6-12f; '''Low Crush / Lower Body Projectile Invuln:''' 12-30f; Armor Break |
| * '''Airborne''' 14-33f ({{FKD}} state) | | * '''Airborne''' 14-33f ({{FKD}} state) |
| * Puts opponent into {{sf6-jug|limited juggle}} OTG state | | * Puts opponent into {{sf6-jug|limited juggle}} OTG state |
| Line 1,024: |
Line 1,026: |
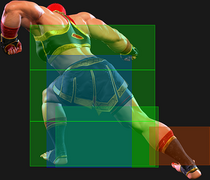
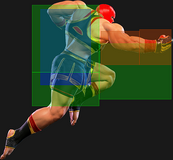
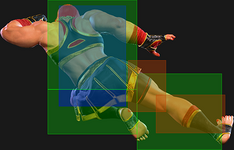
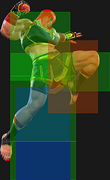
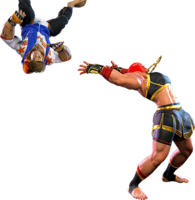
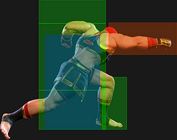
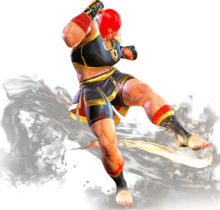
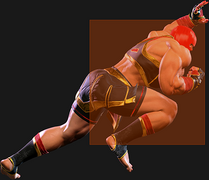
| Marisa jumps into the air and swings downward with a Superman punch; heavier button strengths are slower but travel much farther. Phalanx is a great approach tool in neutral, hopping over low pokes and most projectiles (including tall ones like Guile Sonic Cross or JP's Torbalan/Embrace). All versions are plus on block, but heavier versions leave Marisa closer to the opponent for improved mixups and pressure; it also gains an extra frame of advantage if the opponent is crouching. | | Marisa jumps into the air and swings downward with a Superman punch; heavier button strengths are slower but travel much farther. Phalanx is a great approach tool in neutral, hopping over low pokes and most projectiles (including tall ones like Guile Sonic Cross or JP's Torbalan/Embrace). All versions are plus on block, but heavier versions leave Marisa closer to the opponent for improved mixups and pressure; it also gains an extra frame of advantage if the opponent is crouching. |
|
| |
|
| Phalanx is a bit too slow to use on reaction against fireballs, so it's generally used predictively. Opponents expecting this move can counter it with an anti-air DP or a Perfect Parry, or simply swat Marisa out of the air with a higher-hitting button. {{clr|DR|Drive Impact}} is also a threat, but the OD version breaks armor and the meterless versions recover fast enough to {{clr|DR|counter-DI}} if the opponent times it too late. | | Phalanx is a bit too slow to use on reaction against fireballs, so it's generally used predictively. Opponents expecting this move can counter it with an anti-air DP or a Perfect Parry, or simply swat Marisa out of the air with a higher-hitting button. {{clr|DR|Drive Impact}} is also a threat, but the {{clr|OD|OD}} version breaks armor and the meterless versions recover fast enough to {{clr|DR|counter-DI}} if the opponent times it too late. |
|
| |
|
| Meterless versions allow for safe jump setups with its +42 knockdown advantage, but the required button strength depends on the specific combo route used. OD Phalanx is one of Marisa's most important combo extenders; any juggle into 4HP > 623PP near the corner gives Marisa a huge damage follow-up. | | Meterless versions allow for safe jump setups with its +42 knockdown advantage, but the required button strength depends on the specific combo route used. {{clr|OD|OD Phalanx}} is one of Marisa's most important combo extenders; any juggle into {{clr|H|4HP}} > {{clr|OD|623PP}} near the corner gives Marisa a huge damage follow-up. |
| }} | | }} |
|
| |
|


