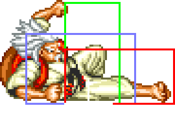
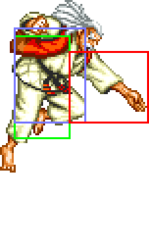
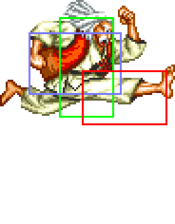
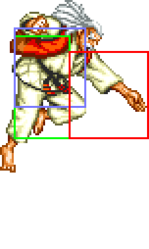
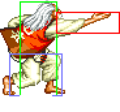
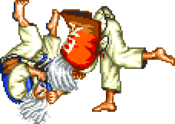
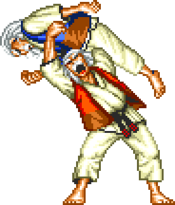
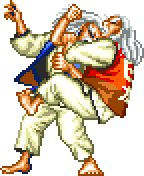
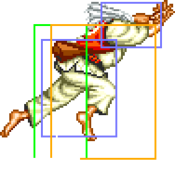
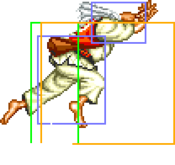
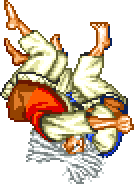
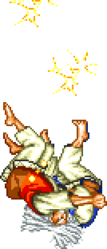
| (18 intermediate revisions by the same user not shown) | |||
| Line 24: | Line 24: | ||
==Move List== | ==Move List== | ||
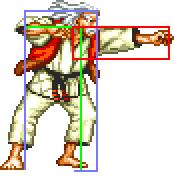
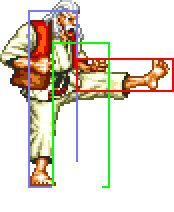
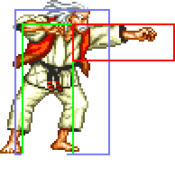
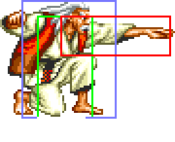
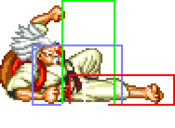
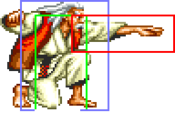
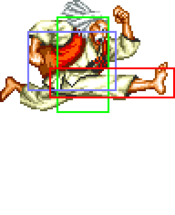
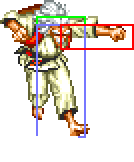
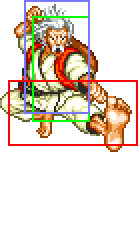
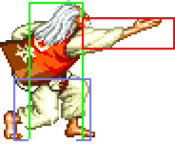
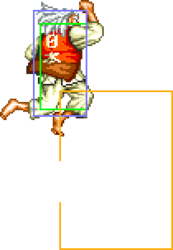
===General Hurtboxes=== | |||
{| border="1em" cellspacing="0" style="border: 1px solid #999;" | {| border="1em" cellspacing="0" style="border: 1px solid #999;" | ||
| align="center" | Standing/Taunting || align="center" | Crouching || align="center" | Jumping | | align="center" | Standing/Taunting || align="center" | Crouching || align="center" | Jumping || align="center" | Dizzy | ||
|- | |- | ||
| align="center"; valign="bottom" | [[File:FFS Jubei Stand.png|bottom]] [[File:FFS Jubei Taunt.png|bottom]] || align="center"; valign="bottom" | [[File:FFS Jubei Crouch.png|bottom]] || align="center"; valign="bottom" | [[File:FFS Jubei Jump.png|bottom]] | | align="center"; valign="bottom" | [[File:FFS Jubei Stand.png|bottom]] [[File:FFS Jubei Taunt.png|bottom]] || align="center"; valign="bottom" | [[File:FFS Jubei Crouch.png|bottom]] || align="center"; valign="bottom" | [[File:FFS Jubei Jump.png|bottom]] || align="center"; valign="bottom" | [[File:FFS Jubei Stun.gif|bottom]] | ||
|- | |- | ||
| align="center" | || align="center" | || align="center" | Descending hurtbox. 54F (4+47+3) duration. | | align="center" | || align="center" | || align="center" | Descending hurtbox. 54F (4+47+3) duration. || align="center" | Final 19F are invincible and unmashable. | ||
|} | |} | ||
| Line 76: | Line 77: | ||
|Block Adv=+5 | |Block Adv=+5 | ||
|Property=Kara Cancel | |Property=Kara Cancel | ||
|description=*Gives less frame advantage than 5A and 2A, so you're better off using your jabs in close range. | |description= * Pulls Jubei's hurtbox back and has a completely disjointed hitbox. Not so valuable in close proximity, but the far version functions identically, making it useful for anti-air and counterpoking. | ||
* Gives less frame advantage than 5A and 2A, so you're better off using your jabs in close range. | |||
* In corner combos, this does more damage than 5A and can link unscaled to 5A. | |||
}} | }} | ||
}} | }} | ||
| Line 122: | Line 125: | ||
|Block Adv=+4 | |Block Adv=+4 | ||
|Property=Kara Cancel | |Property=Kara Cancel | ||
|description= | |description= * A beefed up version of 5B that can be used for the same purposes. | ||
}} | }} | ||
}} | }} | ||
| Line 170: | Line 173: | ||
|Block Adv=+5 | |Block Adv=+5 | ||
|Property=Kara Cancel | |Property=Kara Cancel | ||
|description=*With proper spacing, you can anti-air some moves with this. Useful against jump-ins that beat your usual low profile anti-airs. | |description= Identical to close 5B. | ||
* With proper spacing, you can anti-air some moves with this. Useful against jump-ins that beat your usual low profile anti-airs. | |||
}} | }} | ||
}} | }} | ||
| Line 200: | Line 204: | ||
<font style="visibility:hidden" size="0"></font> | <font style="visibility:hidden" size="0"></font> | ||
{{MoveData | {{MoveData | ||
|image= | |image=FFS_Jubei_5B.png | ||
|subtitle= | |subtitle= | ||
|caption= | |caption= | ||
| Line 216: | Line 220: | ||
|Block Adv=+2 | |Block Adv=+2 | ||
|Property=/ | |Property=/ | ||
|description= * | |description= * Subtly inferior to c5D data-wise and cannot be cancelled, though it can still anti-air. | ||
}} | }} | ||
}} | }} | ||
| Line 555: | Line 559: | ||
===Throws=== | ===Throws=== | ||
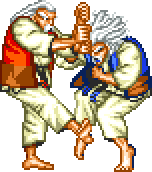
===== <span class="invisible-header">Ippon Seoi (4/6C)</span> ===== | ===== <span class="invisible-header">Ippon Seoi (4/6C)</span> ===== | ||
<font style="visibility:hidden" size="0"></font> | <font style="visibility:hidden" size="0"></font> | ||
{{MoveData | {{MoveData | ||
|image=FFS_Jubei_C_Throw.png | |image=FFS_Jubei_C_Throw 1.png | ||
|caption= | |caption= | ||
|name=Ippon Seoi | |name=Ippon Seoi | ||
| Line 569: | Line 571: | ||
|Damage=26 | |Damage=26 | ||
|Stun=3 | |Stun=3 | ||
|range=20 | |||
|Guard=Throw | |Guard=Throw | ||
|Startup=1 | |Startup=1 | ||
| Line 577: | Line 580: | ||
|Property=/ | |Property=/ | ||
|description= * Swaps sides. | |description= * Swaps sides. | ||
}} | }} | ||
}} | }} | ||
| Line 585: | Line 585: | ||
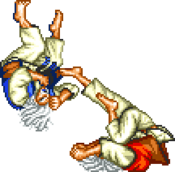
===== <span class="invisible-header">Taware Nage (3C)</span> ===== | ===== <span class="invisible-header">Taware Nage (3C)</span> ===== | ||
{{MoveData | {{MoveData | ||
|image=FFS_Jubei_3C_Throw.png | |image=FFS_Jubei_3C_Throw 1.png | ||
|caption= | |caption= | ||
|name=Tawara Nage | |name=Tawara Nage | ||
| Line 593: | Line 593: | ||
|Damage=28 | |Damage=28 | ||
|Stun=3 | |Stun=3 | ||
|range=20 | |||
|Guard=Throw | |Guard=Throw | ||
|Startup=1 | |Startup=1 | ||
| Line 602: | Line 603: | ||
|description= * Above average damage. | |description= * Above average damage. | ||
* Swaps sides. | * Swaps sides. | ||
}} | }} | ||
}} | }} | ||
| Line 610: | Line 608: | ||
===== <span class="invisible-header">Kumo Koroshi (9C)</span> ===== | ===== <span class="invisible-header">Kumo Koroshi (9C)</span> ===== | ||
{{MoveData | {{MoveData | ||
|image=FFS_Jubei_9C_Throw.png | |image=FFS_Jubei_9C_Throw 1.png | ||
|caption= | |caption= | ||
|name=Kumo Koroshi | |name=Kumo Koroshi | ||
| Line 618: | Line 616: | ||
|Damage=24~48 (4 x 6~12) | |Damage=24~48 (4 x 6~12) | ||
|Stun=0 | |Stun=0 | ||
|range=20 | |||
|Guard=Throw | |Guard=Throw | ||
|Startup=1 | |Startup=1 | ||
| Line 628: | Line 627: | ||
* Jubei's most damaging normal throw on average as it requires fast reactions and TAS mashing to reduce to 6 hits. | * Jubei's most damaging normal throw on average as it requires fast reactions and TAS mashing to reduce to 6 hits. | ||
* Swaps sides. | * Swaps sides. | ||
}} | }} | ||
}} | }} | ||
| Line 637: | Line 633: | ||
<font style="visibility:hidden" size="0"></font> | <font style="visibility:hidden" size="0"></font> | ||
{{MoveData | {{MoveData | ||
|image=FFS_Jubei_6D_Throw.png | |image=FFS_Jubei_6D_Throw 1.png | ||
|caption= | |caption= | ||
|name=Benkei Nakashi | |name=Benkei Nakashi | ||
| Line 645: | Line 641: | ||
|Damage=8~32 (4 x 2~8) | |Damage=8~32 (4 x 2~8) | ||
|Stun=0 | |Stun=0 | ||
|range=20 | |||
|Guard=Throw | |Guard=Throw | ||
|Startup=1 | |Startup=1 | ||
| Line 653: | Line 650: | ||
|Property=/ | |Property=/ | ||
|description= * Hold throw. Opponent can mash to reduce hits. | |description= * Hold throw. Opponent can mash to reduce hits. | ||
* On average this is Jubei's least damaging throw as the long delay between hits makes mashing out of it easy. | * On average this is Jubei's least damaging throw as the long delay between hits makes mashing out of it easy. Avoid using this. | ||
* | * Has a special voice line if used against another Jubei. | ||
}} | }} | ||
}} | }} | ||
| Line 664: | Line 658: | ||
<font style="visibility:hidden" size="0"></font> | <font style="visibility:hidden" size="0"></font> | ||
{{MoveData | {{MoveData | ||
|image= | |image=FFS_Jubei_4D_Throw 1.png | ||
|caption= | |caption= | ||
|name=Tomoe Nage | |name=Tomoe Nage | ||
| Line 672: | Line 666: | ||
|Damage=26 | |Damage=26 | ||
|Stun=3 | |Stun=3 | ||
|range=20 | |||
|Guard=Throw | |Guard=Throw | ||
|Startup=1 | |Startup=1 | ||
| Line 680: | Line 675: | ||
|Property=/ | |Property=/ | ||
|description= * Swaps sides. | |description= * Swaps sides. | ||
}} | }} | ||
}} | }} | ||
| Line 697: | Line 689: | ||
|Damage=26 | |Damage=26 | ||
|Stun=3 | |Stun=3 | ||
|range=32 | |||
|Guard=Throw | |Guard=Throw | ||
|Startup=1 | |Startup=1 | ||
| Line 720: | Line 713: | ||
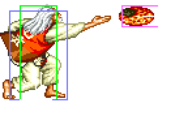
| image = FFS Jubei 46P.png | | image = FFS Jubei 46P.png | ||
| caption = | | caption = | ||
| data = Jubei throws a rice cracker. | | data = Jubei throws a rice cracker. Extremely low recovery projectile that can be linked out of in the corner. | ||
{{AttackData-FFS | {{AttackData-FFS | ||
| version = A | | version = A | ||
| Line 734: | Line 727: | ||
| Block Adv = +6 | | Block Adv = +6 | ||
| Property = / | | Property = / | ||
| description = * Charge time: | | description = The core of Jubei's neutral, having the shortest recovery of any fireball in the game. It is near impossible to jump over this without getting punished. | ||
* Charge time: 51F. | |||
* Projectile travels slower. | * Projectile travels slower. | ||
}} | }} | ||
| Line 751: | Line 745: | ||
| Block Adv = +5 | | Block Adv = +5 | ||
| Property = / | | Property = / | ||
| description = * Charge time: | | description = Charges and recovers slower than the A version, but is Jubei's best special to combo into. | ||
* Charge time: 61F. | |||
* Projectile travels faster. | * Projectile travels faster. | ||
}} | }} | ||
}} | }} | ||
| Line 766: | Line 760: | ||
| caption = B | | caption = B | ||
| caption2 = D | | caption2 = D | ||
| data = Running throw that swaps sides on hit. Charge time for both versions is | | data = Running throw that swaps sides on hit. Requires a reversal to escape when used as a tick throw and is difficult to react to, even in neutral. | ||
* Charge time for both versions is 51F. | |||
{{AttackData-FFS | {{AttackData-FFS | ||
| version = B | | version = B | ||
| Line 772: | Line 767: | ||
| Damage = 16 | | Damage = 16 | ||
| Stun = 3 | | Stun = 3 | ||
| range = 17 | |||
| Guard = Throw | | Guard = Throw | ||
| Startup = 12 | | Startup = 12 | ||
| Line 788: | Line 784: | ||
| Damage = 22 | | Damage = 22 | ||
| Stun = 6 | | Stun = 6 | ||
| range = 37 | |||
| Guard = Throw | | Guard = Throw | ||
| Startup = 14 | | Startup = 14 | ||
| Line 796: | Line 793: | ||
| Block Adv = / | | Block Adv = / | ||
| Property = / | | Property = / | ||
| description = * Travels almost the full screen. | | description = * Travels almost the full screen. | ||
}} | }} | ||
}} | }} | ||
| Line 805: | Line 802: | ||
| input = [2]8A/C | | input = [2]8A/C | ||
| subtitle = | | subtitle = | ||
| image = FFS Jubei | | image = FFS Jubei 28P 1.png | ||
| caption = | | caption = | ||
| data =Looks very cool but has lower damage than other throws and an awkward input. | | data =Looks very cool but has lower damage than other throws and an awkward input. | ||
* Charge time for both versions is | * Charge time for both versions is 46F. | ||
* Same range as a basic ground throw. | * Same range as a basic ground throw. | ||
{{AttackData-FFS | {{AttackData-FFS | ||
| version = A | | version = A | ||
| Line 818: | Line 812: | ||
| Damage = 21 | | Damage = 21 | ||
| Stun = 3 | | Stun = 3 | ||
| range = 20 | |||
| Guard = Throw | | Guard = Throw | ||
| Startup = 1 | | Startup = 1 | ||
| Line 834: | Line 829: | ||
| Damage = 21 | | Damage = 21 | ||
| Stun = 6 | | Stun = 6 | ||
| range = 20 | |||
| Guard = Throw | | Guard = Throw | ||
| Startup = 1 | | Startup = 1 | ||
| Line 851: | Line 847: | ||
| input = 63214C | | input = 63214C | ||
| subtitle = | | subtitle = | ||
| image = FFS Jubei 63214C | | image = FFS Jubei 63214C 2.png | ||
| caption = | | caption = | ||
| data = | | data = | ||
| Line 857: | Line 853: | ||
| Damage = 25 | | Damage = 25 | ||
| Stun = 3 | | Stun = 3 | ||
| range = 43 | |||
| Guard = Throw | | Guard = Throw | ||
| Startup = 1 | | Startup = 1 | ||
| Line 866: | Line 863: | ||
| Property = / | | Property = / | ||
| description = * Unlike Jubei's other throws, this has far range, is easily bufferable and has good corner carry. Ignoring a small loss in damage, this throw does it all. | | description = * Unlike Jubei's other throws, this has far range, is easily bufferable and has good corner carry. Ignoring a small loss in damage, this throw does it all. | ||
}} | }} | ||
}} | }} | ||
| Line 879: | Line 873: | ||
| input = [1]23B+C | | input = [1]23B+C | ||
| subtitle = When health is flashing | | subtitle = When health is flashing | ||
| image = FFS Jubei 123BC.png | | image = FFS Jubei 123BC 1.png | ||
| caption = | | caption = | ||
| data = | | data = | ||
| Line 885: | Line 879: | ||
| Damage = 48 | | Damage = 48 | ||
| Stun = 4 | | Stun = 4 | ||
| range = 43 | |||
| Guard = Throw | | Guard = Throw | ||
| Startup = 1 | | Startup = 1 | ||
| Line 893: | Line 888: | ||
| Block Adv = / | | Block Adv = / | ||
| Property = / | | Property = / | ||
| description = * Charge time: | | description = * Charge time: 61F. | ||
* Farther range than other throws, tied with 63214C. | * Farther range than other throws, tied with 63214C. | ||
* Jubei's best punish after a midscreen dizzy. | |||
}} | }} | ||
}} | }} | ||
| Line 907: | Line 900: | ||
Dizzy combo. Can redizzy against Andy, Billy, Cheng, Duck King, Joe, Jubei, Kim, Mai, Terry and Tung. Does not work on Geese or Krauser. Back up about half screen for the redizzy vs small characters like Mai and Tung to avoid cornering yourself after jD. Against Andy, Axel, Cheng, Duck, Jubei and Laurence, 2A can be used instead of 5A to optimize the combo up to 58 damage. | Dizzy combo. Can redizzy against Andy, Billy, Cheng, Duck King, Joe, Jubei, Kim, Mai, Terry and Tung. Does not work on Geese or Krauser. Back up about half screen for the redizzy vs small characters like Mai and Tung to avoid cornering yourself after jD. Against Andy, Axel, Cheng, Duck, Jubei and Laurence, 2A can be used instead of 5A to optimize the combo up to 58 damage. | ||
== | == Strategy == | ||
===The Basics=== | ===The Basics=== | ||
| Line 927: | Line 920: | ||
As for the others, | As for the others, | ||
* '''4/6C and 4D''' are ordinary sideswap throws with nothing special going on. They aren't tied to the best normals on whiff but have the strength of being | * '''4/6C and 4D''' are ordinary sideswap throws with nothing special going on. They aren't tied to the best normals on whiff but have the strength of being doable while blocking or (for 6C) walking. | ||
* '''9C''' is a very high damaging hold throw that is insanely difficult to mash out of, but risks an unwanted jump if whiffed. | * '''9C''' is a very high damaging hold throw that is insanely difficult to mash out of, but risks an unwanted jump if whiffed. | ||
* '''j2D''' is great like all air throws are, but it's hard to use when Jubei doesn't like to jump and already has great anti-air options on the ground. | * '''j2D''' is great like all air throws are, but it's hard to use when Jubei doesn't like to jump and already has great anti-air options on the ground. | ||
| Line 937: | Line 930: | ||
* When Jubei's CD is blocked in the corner, it can be cancelled late into an instant command grab that hits the opponent just as they exit blockstun. The only way to avoid the command grab is with an invincible reversal, and since Jubei will have no recovery if the grab whiffs he can meaty a reversal backdash. 5A/2A CD in the front lane is an easy frame trap that sets up this situation, and can give enough time to charge Jubei's [1]23BC if started from 2A. | * When Jubei's CD is blocked in the corner, it can be cancelled late into an instant command grab that hits the opponent just as they exit blockstun. The only way to avoid the command grab is with an invincible reversal, and since Jubei will have no recovery if the grab whiffs he can meaty a reversal backdash. 5A/2A CD in the front lane is an easy frame trap that sets up this situation, and can give enough time to charge Jubei's [1]23BC if started from 2A. | ||
==Matchups== | |||
===Vs. Andy Bogard=== | |||
5 - 5 | 5 - 5 | ||
===Vs. Axel Hawk=== | |||
6 - 4 | 6 - 4 | ||
| Line 949: | Line 942: | ||
Front lane CD will reliably trade with Axel's air normals. Jubei can crouch under Axel's lane attacks. | Front lane CD will reliably trade with Axel's air normals. Jubei can crouch under Axel's lane attacks. | ||
===Vs. Big Bear=== | |||
6.5 - 3.5 | 6.5 - 3.5 | ||
| Line 955: | Line 948: | ||
Jubei can low profile and punish all of Big Bear's air normals with 2B and 2D. | Jubei can low profile and punish all of Big Bear's air normals with 2B and 2D. | ||
===Vs. Billy Kane=== | |||
6 - 4 | 6 - 4 | ||
===Vs. Cheng Sinzan=== | |||
6.5 - 3.5 | 6.5 - 3.5 | ||
| Line 965: | Line 958: | ||
2B and 2D can low profile Cheng's 2[8]A/C. | 2B and 2D can low profile Cheng's 2[8]A/C. | ||
===Vs. Duck King=== | |||
6.5 - 3.5 | 6.5 - 3.5 | ||
| Line 971: | Line 964: | ||
Jubei can low profile and punish all of Duck King's air normals with 2B and 2D. Duck can slide under Jubei's fireballs with 3D and go over Jubei's slide with his [4]6P. | Jubei can low profile and punish all of Duck King's air normals with 2B and 2D. Duck can slide under Jubei's fireballs with 3D and go over Jubei's slide with his [4]6P. | ||
===Vs. Geese Howard=== | |||
6 - 4 | 6 - 4 | ||
| Line 977: | Line 970: | ||
None of Geese's air normals can hit Jubei out of his low profile 2B and 2D, but of course he has Shippuken as an option. | None of Geese's air normals can hit Jubei out of his low profile 2B and 2D, but of course he has Shippuken as an option. | ||
===Vs. Joe Higashi=== | |||
3.5 - 6.5 | 3.5 - 6.5 | ||
| Line 983: | Line 976: | ||
Jubei can't rely on 2B/D to anti-air Joe's jB, and since it also crosses up it's difficult to punish by walking under. Jubei's crackers can get punished by Joe's 2D close up or overpowered by his tornadoes from a distance. | Jubei can't rely on 2B/D to anti-air Joe's jB, and since it also crosses up it's difficult to punish by walking under. Jubei's crackers can get punished by Joe's 2D close up or overpowered by his tornadoes from a distance. | ||
===Vs. Jubei Yamada=== | |||
5 - 5 | 5 - 5 | ||
| Line 989: | Line 982: | ||
Jubei can low profile and punish all of his own air normals with 2B and 2D. Both Jubeis can also 2D slide under each other's fireballs or spam 2B to quickly dodge while keeping the cracker on screen so the enemy Jubei can't throw another. | Jubei can low profile and punish all of his own air normals with 2B and 2D. Both Jubeis can also 2D slide under each other's fireballs or spam 2B to quickly dodge while keeping the cracker on screen so the enemy Jubei can't throw another. | ||
===Vs. Kim Kaphwan=== | |||
4 - 6 | 4 - 6 | ||
| Line 995: | Line 988: | ||
Jubei can low profile and punish all of Kim's air normals and even his divekicks with 2B and 2D. | Jubei can low profile and punish all of Kim's air normals and even his divekicks with 2B and 2D. | ||
===Vs. Laurence Blood=== | |||
7 - 3 | 7 - 3 | ||
| Line 1,001: | Line 994: | ||
Jubei can low profile and punish all of Laurence's air normals with 2B and 2D. | Jubei can low profile and punish all of Laurence's air normals with 2B and 2D. | ||
===Vs. Mai Shiranui=== | |||
4 - 6 | 4 - 6 | ||
| Line 1,007: | Line 1,000: | ||
Mai can crouchwalk under Jubei's crackers. Jubei can duck under Mai's projectile with repeated 2B's, letting him keep charge to retaliate with a cracker and keeping the fan on screen longer, preventing Mai from throwing another. The Mai stage version of Musasabi no Mai can be low profiled with 2B and 2D. | Mai can crouchwalk under Jubei's crackers. Jubei can duck under Mai's projectile with repeated 2B's, letting him keep charge to retaliate with a cracker and keeping the fan on screen longer, preventing Mai from throwing another. The Mai stage version of Musasabi no Mai can be low profiled with 2B and 2D. | ||
===Vs. Ryo Sakazaki=== | |||
===Vs. Terry Bogard=== | |||
6 - 4 | 6 - 4 | ||
===Vs. Tung Fu Rue=== | |||
6 - 4 | 6 - 4 | ||
| Line 1,019: | Line 1,012: | ||
Tung can low profile Jubei's crackers with his 2B and 2D. Jubei can crouch under Tung's lane attacks. | Tung can low profile Jubei's crackers with his 2B and 2D. Jubei can crouch under Tung's lane attacks. | ||
===Vs. Wolfgang Krauser=== | |||
6 - 4 | 6 - 4 | ||
Latest revision as of 20:14, 1 July 2025
Introduction
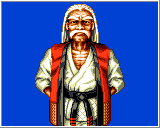
Jubei is a high tier charge character who uses his low-risk projectile to put his opponent in a vicious cycle of cracker-dodging where they dare not jump or face the wrath of his godly anti-air game. He has a wide variety of throws but they're mostly for show, zoning is his thing through and through. He also has a strong combo game. If Jubei loses the life lead he will be the one trapped in a vicious cycle as he is forced to approach the opponent with his floaty jump and lack of mobility options.
| Pros | Cons |
|---|---|
|
|
Move List
General Hurtboxes
| Standing/Taunting | Crouching | Jumping | Dizzy |
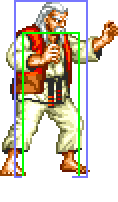  |
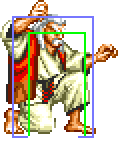 |
 |
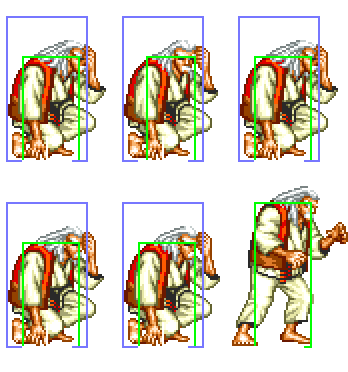
|
| Descending hurtbox. 54F (4+47+3) duration. | Final 19F are invincible and unmashable. |
Close Standing Normals
c5A
| Damage | Stun | Guard | Startup | Active | Recovery | Total | Hit Adv | Block Adv | Property | |
|---|---|---|---|---|---|---|---|---|---|---|
| 6 | 2 | Mid | 3 | 4 | 4 | 10 | +8 | +9 | Kara Cancel | |
| ||||||||||
c5B
| Damage | Stun | Guard | Startup | Active | Recovery | Total | Hit Adv | Block Adv | Property | |
|---|---|---|---|---|---|---|---|---|---|---|
| 8 | 2 | Mid | 4 | 7 | 5 | 15 | +4 | +5 | Kara Cancel | |
| ||||||||||
c5C
| Damage | Stun | Guard | Startup | Active | Recovery | Total | Hit Adv | Block Adv | Property | |
|---|---|---|---|---|---|---|---|---|---|---|
| 14 | 4 | Mid | 8 | 8 | 12 | 27 | +4 | +3 | Kara Cancel | |
| ||||||||||
c5D
| Damage | Stun | Guard | Startup | Active | Recovery | Total | Hit Adv | Block Adv | Property | |
|---|---|---|---|---|---|---|---|---|---|---|
| 16 | 4 | Mid | 8 | 11 | 8 | 26 | +5 | +4 | Kara Cancel | |
| ||||||||||
Far Standing Normals
f5A
| Damage | Stun | Guard | Startup | Active | Recovery | Total | Hit Adv | Block Adv | Property | |
|---|---|---|---|---|---|---|---|---|---|---|
| 5 | 2 | Mid | 3 | 4 | 4 | 10 | +8 | +9 | Kara Cancel | |
| ||||||||||
f5B
| Damage | Stun | Guard | Startup | Active | Recovery | Total | Hit Adv | Block Adv | Property | |
|---|---|---|---|---|---|---|---|---|---|---|
| 6 | 2 | Mid | 4 | 7 | 5 | 15 | +4 | +5 | Kara Cancel | |
|
Identical to close 5B.
| ||||||||||
f5C
| Damage | Stun | Guard | Startup | Active | Recovery | Total | Hit Adv | Block Adv | Property | |
|---|---|---|---|---|---|---|---|---|---|---|
| 12 | 4 | Mid | 8 | 8 | 12 | 27 | +3 | +2 | / | |
| ||||||||||
f5D
| Damage | Stun | Guard | Startup | Active | Recovery | Total | Hit Adv | Block Adv | Property | |
|---|---|---|---|---|---|---|---|---|---|---|
| 14 | 4 | Mid | 8 | 11 | 9 | 27 | +3 | +2 | / | |
| ||||||||||
Crouching Normals
2A
| Damage | Stun | Guard | Startup | Active | Recovery | Total | Hit Adv | Block Adv | Property | |
|---|---|---|---|---|---|---|---|---|---|---|
| 5 | 2 | Mid | 4 | 4 | 5 | 12 | +7 | +8 | Kara Cancel | |
| ||||||||||
2B
| Damage | Stun | Guard | Startup | Active | Recovery | Total | Hit Adv | Block Adv | Property | |
|---|---|---|---|---|---|---|---|---|---|---|
| 6 | 2 | Low | 5 | 7 | 6 | 17 | +3 | +4 | Kara Cancel | |
| ||||||||||
2C
| Damage | Stun | Guard | Startup | Active | Recovery | Total | Hit Adv | Block Adv | Property | |
|---|---|---|---|---|---|---|---|---|---|---|
| 12 | 4 | Mid | 6 | 8 | 10 | 23 | +6 | +5 | Kara Cancel | |
| ||||||||||
2D
Jumping Normals
jA
| Damage | Stun | Guard | Startup | Active | Recovery | Total | Hit Adv | Block Adv | Property | |
|---|---|---|---|---|---|---|---|---|---|---|
| 6 | 2 | Overhead | 5 | ∞ | - | - | - | - | - | |
| ||||||||||
jB
| Damage | Stun | Guard | Startup | Active | Recovery | Total | Hit Adv | Block Adv | Property | |
|---|---|---|---|---|---|---|---|---|---|---|
| 8 | 2 | Overhead | 5 | ∞ | - | - | - | - | - | |
| ||||||||||
jC
| Damage | Stun | Guard | Startup | Active | Recovery | Total | Hit Adv | Block Adv | Property | |
|---|---|---|---|---|---|---|---|---|---|---|
| 14 | 4 | Overhead | 6 | 17 | - | - | - | - | - | |
| ||||||||||
jD
| Version | Damage | Stun | Guard | Startup | Active | Recovery | Total | Hit Adv | Block Adv | Property |
|---|---|---|---|---|---|---|---|---|---|---|
| Diagonal Jump | 16 | 4 | Overhead | 7 | 17 | - | - | - | - | - |
| Neutral Jump | 16 | 4 | Overhead | 6 | 17 | - | - | - | - | - |
Universal Mechanics
Lane Blast (CD)
| Version | Damage | Stun | Guard | Startup | Active | Recovery | Total | Hit Adv | Block Adv | Property | |
|---|---|---|---|---|---|---|---|---|---|---|---|
| Front Lane | 22 | 5 | Mid | 9 | 8 | 19 | 35 | KD | -8 | Cancel, Lane Shift | |
| |||||||||||
| Back Lane | 22 | 5 | Mid | 16 | 10 | 8 | 33 | KD | +1 | Cancel, Lane Shift | |
| |||||||||||
Lane Attack
| Version | Damage | Stun | Guard | Startup | Active | Recovery | Total | Hit Adv | Block Adv | Property | |
|---|---|---|---|---|---|---|---|---|---|---|---|
| A/B | 18 | 2 | Overhead | 9 | - | 4 | - | - | - | / | |
| |||||||||||
| C/D | 18 | 4 | Overhead | 9 | - | 4 | - | - | - | / | |
| |||||||||||
Dodge Attack
Throws
Ippon Seoi (4/6C)
| Damage | Stun | Range | Guard | Startup | Active | Recovery | Total | Hit Adv | Block Adv | Property |
|---|---|---|---|---|---|---|---|---|---|---|
| 26 | 3 | 20 | Throw | 1 | 1 | / | - | KD | / | / |
| ||||||||||
Taware Nage (3C)
| Damage | Stun | Range | Guard | Startup | Active | Recovery | Total | Hit Adv | Block Adv | Property |
|---|---|---|---|---|---|---|---|---|---|---|
| 28 | 3 | 20 | Throw | 1 | 1 | / | - | KD | / | / |
| ||||||||||
Kumo Koroshi (9C)
| Damage | Stun | Range | Guard | Startup | Active | Recovery | Total | Hit Adv | Block Adv | Property |
|---|---|---|---|---|---|---|---|---|---|---|
| 24~48 (4 x 6~12) | 0 | 20 | Throw | 1 | 1 | / | - | - | / | / |
| ||||||||||
Benkei Nakashi (6D)
| Damage | Stun | Range | Guard | Startup | Active | Recovery | Total | Hit Adv | Block Adv | Property |
|---|---|---|---|---|---|---|---|---|---|---|
| 8~32 (4 x 2~8) | 0 | 20 | Throw | 1 | 1 | / | - | KD | / | / |
| ||||||||||
Tomoe Nage (4D)
| Damage | Stun | Range | Guard | Startup | Active | Recovery | Total | Hit Adv | Block Adv | Property |
|---|---|---|---|---|---|---|---|---|---|---|
| 26 | 3 | 20 | Throw | 1 | 1 | / | - | KD | / | / |
| ||||||||||
Izuna Otoshi (j2D)
Special Moves
Senbei Shuriken ([4]6P)
| Version | Damage | Stun | Guard | Startup | Active | Recovery | Total | Hit Adv | Block Adv | Property | |
|---|---|---|---|---|---|---|---|---|---|---|---|
| A | 7 (1) | 3 | Mid | 7 | - | 24 | 30 | +9 | +6 | / | |
|
The core of Jubei's neutral, having the shortest recovery of any fireball in the game. It is near impossible to jump over this without getting punished.
| |||||||||||
| C | 14 (3) | 6 | Mid | 10 | - | 29 | 38 | +12 | +5 | / | |
|
Charges and recovers slower than the A version, but is Jubei's best special to combo into.
| |||||||||||
Nihon Seoi Dash ([4]6K)
- Charge time for both versions is 51F.
| Version | Damage | Stun | Range | Guard | Startup | Active | Recovery | Total | Hit Adv | Block Adv | Property |
|---|---|---|---|---|---|---|---|---|---|---|---|
| B | 16 | 3 | 17 | Throw | 12 | 9 | 15 | 35 | KD (+2) | / | / |
| |||||||||||
| D | 22 | 6 | 37 | Throw | 14 | 21 | 15 | 49 | KD (-1) | / | / |
| |||||||||||
Dai-Izuna Otoshi ([2]8P)
- Charge time for both versions is 46F.
- Same range as a basic ground throw.
| Version | Damage | Stun | Range | Guard | Startup | Active | Recovery | Total | Hit Adv | Block Adv | Property |
|---|---|---|---|---|---|---|---|---|---|---|---|
| A | 21 | 3 | 20 | Throw | 1 | 1 | / | / | - | / | / |
| |||||||||||
| C | 21 | 6 | 20 | Throw | 1 | 1 | / | / | - | / | / |
Neko Jarashi (63214C)
| Damage | Stun | Range | Guard | Startup | Active | Recovery | Total | Hit Adv | Block Adv | Property |
|---|---|---|---|---|---|---|---|---|---|---|
| 25 | 3 | 43 | Throw | 1 | 1 | / | / | - | / | / |
| ||||||||||
Desperation Move
Dynamite Izuna Otoshi ([1]23B+C)
| Damage | Stun | Range | Guard | Startup | Active | Recovery | Total | Hit Adv | Block Adv | Property |
|---|---|---|---|---|---|---|---|---|---|---|
| 48 | 4 | 43 | Throw | 1 | 1 | / | / | - | / | / |
| ||||||||||
Combos
- (jX/meaty 2B/5A/2A) 5A/2A 2A 2C [4]6C - 32 Damage
With two lights this combo will dizzy Billy, Jubei, Mai, Terry and Tung. Adding a third light (usually with backturn starter or anti-air 2B) will stun Andy, Cheng, Duck, Joe and Kim, and a heavy jump-in will get Axel and Laurence. 5A and 2A are interchangeable as combo fodder but each have their own advantages: c5A does 1 more damage than 2A so it is better when linking lights while 2A is better for the 2C link as it will always reset scaling.
- (Corner) jD 2B [4]6C 5A 2C [4]6C - 54 Damage
Dizzy combo. Can redizzy against Andy, Billy, Cheng, Duck King, Joe, Jubei, Kim, Mai, Terry and Tung. Does not work on Geese or Krauser. Back up about half screen for the redizzy vs small characters like Mai and Tung to avoid cornering yourself after jD. Against Andy, Axel, Cheng, Duck, Jubei and Laurence, 2A can be used instead of 5A to optimize the combo up to 58 damage.
Strategy
The Basics
Despite having so many unique throws, Jubei is actually an extremely defensive character whose gameplan is centered around his [4]6P rice cracker projectile. Jubei's crackers have extremely quick startup and recovery compared to most other projectiles, so he wants to throw them as much as he can.
If the opponent tries to jump over Jubei's crackers he can abuse the low profile on 2B and 2D to beat almost every jumping normal in the game. 2D covers more ground and is easier to use while 2B can lead into a full combo if it hits meaty, but requires proper positioning and timing. Many characters simply have no way to beat these deadly anti-airs and are heavily discouraged from jumping forward, ever. See which characters can't touch Jubei out of these moves in the Matchups section. In matchups where 2B and 2D can get stuffed, Jubei has a great dodge attack, but be sure to input it as 3A or 6A+C to get around its input overlap with [4]6A.
Jubei doesn't like to jump himself, as his jump is very floaty and often a much riskier option than patiently throwing crackers. That being said, his air normals are still very good.
Throw Evaluation
Jubei's most important throws are:
- 63214C, which has great range and carries the opponent to the corner.
- 3C, a high damage side swapping throw that's tied to Jubei's strong 2C.
- [4]6K, which is a decent running throw but shines as a command dash.
As for the others,
- 4/6C and 4D are ordinary sideswap throws with nothing special going on. They aren't tied to the best normals on whiff but have the strength of being doable while blocking or (for 6C) walking.
- 9C is a very high damaging hold throw that is insanely difficult to mash out of, but risks an unwanted jump if whiffed.
- j2D is great like all air throws are, but it's hard to use when Jubei doesn't like to jump and already has great anti-air options on the ground.
- [1]23BC has great range and huge damage but is highly situational thanks to its charge input and desperation health requirement. It's quite useful after a midscreen dizzy.
- 6D and [2]8P are good for a laugh. Don't use them over any other throw.
Advanced Strategy
- When Jubei's CD is blocked in the corner, it can be cancelled late into an instant command grab that hits the opponent just as they exit blockstun. The only way to avoid the command grab is with an invincible reversal, and since Jubei will have no recovery if the grab whiffs he can meaty a reversal backdash. 5A/2A CD in the front lane is an easy frame trap that sets up this situation, and can give enough time to charge Jubei's [1]23BC if started from 2A.
Matchups
Vs. Andy Bogard
5 - 5
Vs. Axel Hawk
6 - 4
Front lane CD will reliably trade with Axel's air normals. Jubei can crouch under Axel's lane attacks.
Vs. Big Bear
6.5 - 3.5
Jubei can low profile and punish all of Big Bear's air normals with 2B and 2D.
Vs. Billy Kane
6 - 4
Vs. Cheng Sinzan
6.5 - 3.5
2B and 2D can low profile Cheng's 2[8]A/C.
Vs. Duck King
6.5 - 3.5
Jubei can low profile and punish all of Duck King's air normals with 2B and 2D. Duck can slide under Jubei's fireballs with 3D and go over Jubei's slide with his [4]6P.
Vs. Geese Howard
6 - 4
None of Geese's air normals can hit Jubei out of his low profile 2B and 2D, but of course he has Shippuken as an option.
Vs. Joe Higashi
3.5 - 6.5
Jubei can't rely on 2B/D to anti-air Joe's jB, and since it also crosses up it's difficult to punish by walking under. Jubei's crackers can get punished by Joe's 2D close up or overpowered by his tornadoes from a distance.
Vs. Jubei Yamada
5 - 5
Jubei can low profile and punish all of his own air normals with 2B and 2D. Both Jubeis can also 2D slide under each other's fireballs or spam 2B to quickly dodge while keeping the cracker on screen so the enemy Jubei can't throw another.
Vs. Kim Kaphwan
4 - 6
Jubei can low profile and punish all of Kim's air normals and even his divekicks with 2B and 2D.
Vs. Laurence Blood
7 - 3
Jubei can low profile and punish all of Laurence's air normals with 2B and 2D.
Vs. Mai Shiranui
4 - 6
Mai can crouchwalk under Jubei's crackers. Jubei can duck under Mai's projectile with repeated 2B's, letting him keep charge to retaliate with a cracker and keeping the fan on screen longer, preventing Mai from throwing another. The Mai stage version of Musasabi no Mai can be low profiled with 2B and 2D.
Vs. Ryo Sakazaki
Vs. Terry Bogard
6 - 4
Vs. Tung Fu Rue
6 - 4
Tung can low profile Jubei's crackers with his 2B and 2D. Jubei can crouch under Tung's lane attacks.
Vs. Wolfgang Krauser
6 - 4
Jubei can low profile and punish all of Krauser's air normals with 2B and 2D. Jubei can also 2D under low blitzball. Leg Tomahawk can be low profiled and the heavy version can even be crouched under if Jubei isn't holding block. Jubei can crouch under Krauser's lane attacks.
