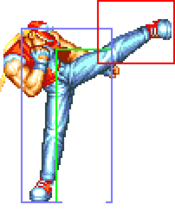
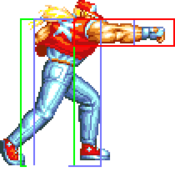
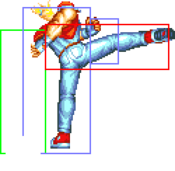
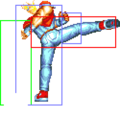
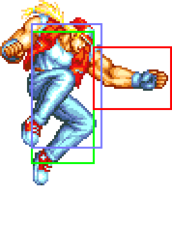
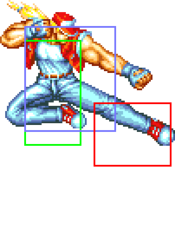
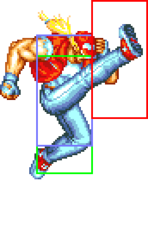
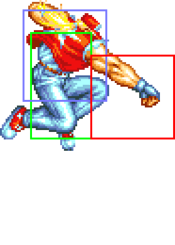
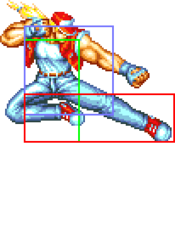
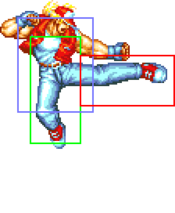
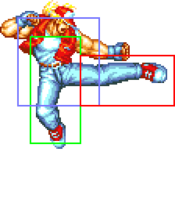
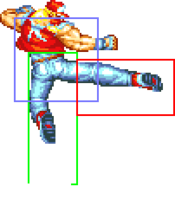
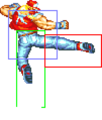
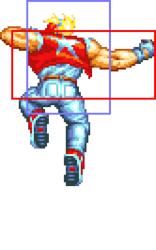
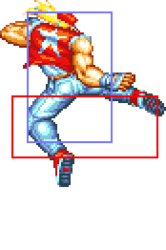
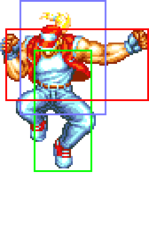
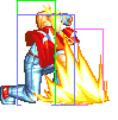
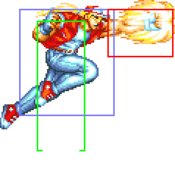
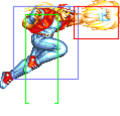
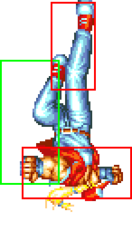
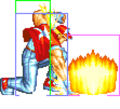
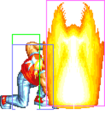
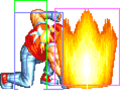
(→Combos) |
|||
| (30 intermediate revisions by 2 users not shown) | |||
| Line 4: | Line 4: | ||
==Introduction== | ==Introduction== | ||
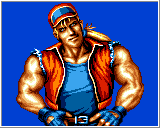
SNK's iconic poster boy and main character of the series, Terry comes with the usual protagonist kit of specials consisting of a projectile, invulnerable anti-air and an advancing special. Arguably the most balanced character of the game, which is both his biggest strength and weakness; while he doesn't struggle too hard against any character, he doesn't have too many advantageous matchups either. | |||
{| | {| | ||
|-style="text-align:left;" | |-style="text-align:left;" | ||
| Line 20: | Line 21: | ||
==Move List== | ==Move List== | ||
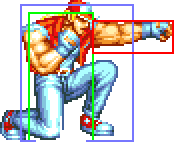
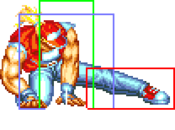
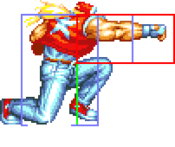
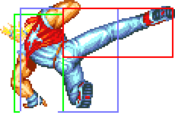
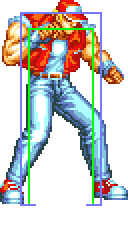
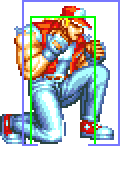
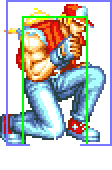
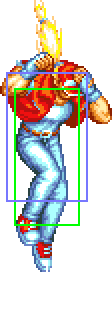
===General Hurtboxes=== | |||
{| border="1em" cellspacing="0" style="border: 1px solid #999;" | {| border="1em" cellspacing="0" style="border: 1px solid #999;" | ||
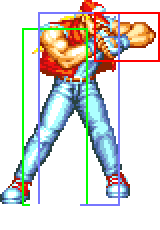
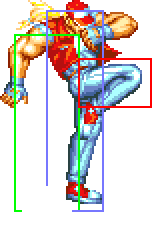
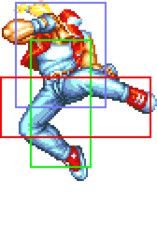
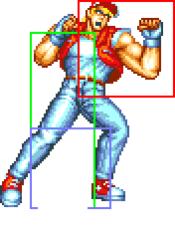
| align="center" | Standing/Taunting || align="center" | Crouching || align="center" | | | align="center" | Standing/Taunting || align="center" | Crouching || align="center" | Crawling || align="center" | Jumping | ||
|- | |- | ||
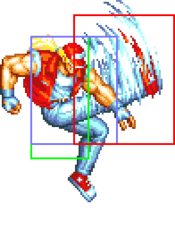
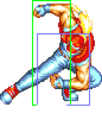
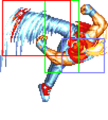
| align="center"; valign="bottom" | [[File:FFS Terry Stand.png|bottom]] || align="center"; valign="bottom" | [[File:FFS Terry Crouch.png|bottom]] || align="center"; valign="bottom" | [[File:FFS Terry Crouchwalk.png|bottom]] || align="center"; valign="bottom" | [[File:FFS Terry Jump.png|bottom]] | | align="center"; valign="bottom" | [[File:FFS Terry Stand.png|bottom]] || align="center"; valign="bottom" | [[File:FFS Terry Crouch.png|bottom]] || align="center"; valign="bottom" | [[File:FFS Terry Crouchwalk.png|bottom]] || align="center"; valign="bottom" | [[File:FFS Terry Jump.png|bottom]] | ||
| Line 49: | Line 52: | ||
|Block Adv=+10 | |Block Adv=+10 | ||
|Property=Kara Cancel | |Property=Kara Cancel | ||
|description= | |description=With its rapid-fire ability it's used for close poking where you can attempt a throw once they're relaxed enough. If you sense they'll try to counter your throw, link in a 2A x 1~2 -> 2C -> 2147B combo. This only whiffs against a handful of characters when crouching: Mai and the old geezers. 2A has similar uses. | ||
}} | }} | ||
}} | }} | ||
| Line 57: | Line 60: | ||
{{MoveData | {{MoveData | ||
|image=FFS_Terry_c5B.png | |image=FFS_Terry_c5B.png | ||
|subtitle=ひざ蹴り | |subtitle=Knee Strike/ひざ蹴り | ||
|caption= | |caption= | ||
|name=c5B | |name=c5B | ||
| Line 72: | Line 75: | ||
|Block Adv=+3 | |Block Adv=+3 | ||
|Property=Kara Cancel | |Property=Kara Cancel | ||
|description= | |description=Not really noteworthy as close A and 2A are much more advantageous and come out faster. | ||
}} | }} | ||
}} | }} | ||
| Line 95: | Line 98: | ||
|Block Adv=+5 | |Block Adv=+5 | ||
|Property=Kara Cancel | |Property=Kara Cancel | ||
|description= | |description=Great for combos and plenty of stun. Allows easy hit-confirms from the second hit. | ||
<gallery class="mw-collapsible"> | <gallery class="mw-collapsible"> | ||
FFS_Terry_c5C.png | FFS_Terry_c5C.png | ||
| Line 147: | Line 150: | ||
|Block Adv=+10 | |Block Adv=+10 | ||
|Property=Kara Cancel | |Property=Kara Cancel | ||
|description= | |description=Low risk jab that can be used to beat the opponent's advancing moves. Can link into 2D for a knockdown. | ||
}} | }} | ||
}} | }} | ||
| Line 170: | Line 173: | ||
|Block Adv=+2 | |Block Adv=+2 | ||
|Property=Kara Cancel | |Property=Kara Cancel | ||
|description= | |description=Outside of Dodge Attack, this is Terry's only anti-air normal. Make sure to be outside of c5B's proximity when anti-airing. | ||
}} | }} | ||
}} | }} | ||
| Line 193: | Line 196: | ||
|Block Adv=0 | |Block Adv=0 | ||
|Property= | |Property= | ||
|description= | |description=Fairly poor move as it has very little reach and whiffs against several characters if they're crouching. Not cancellable either. | ||
}} | }} | ||
}} | }} | ||
| Line 216: | Line 219: | ||
|Block Adv=-8 | |Block Adv=-8 | ||
|Property= | |Property= | ||
|description= | |description=Good reach. Terry's main long distance poke along with 2D. | ||
<gallery class="mw-collapsible"> | <gallery class="mw-collapsible"> | ||
FFS Terry f5D.png| | FFS Terry f5D.png| | ||
| Line 245: | Line 248: | ||
|Block Adv=+9 | |Block Adv=+9 | ||
|Property=Kara Cancel | |Property=Kara Cancel | ||
|description= | |description=Good combo starter, especially against small characters. Links to itself and 2C. | ||
}} | }} | ||
}} | }} | ||
| Line 268: | Line 271: | ||
|Block Adv=+2 | |Block Adv=+2 | ||
|Property= | |Property= | ||
|description= | |description=Unfortunately cannot be linked out of, though it can combo into 214A if the opponent is standing. | ||
}} | }} | ||
}} | }} | ||
| Line 291: | Line 294: | ||
|Block Adv=+4 | |Block Adv=+4 | ||
|Property=Kara Cancel | |Property=Kara Cancel | ||
|description= | |description=A great combo move because it links easily from any A normal and combos easily into 214A and 2147B. This also has its own specific uses - like being able to beat Billy's Sansestukon both on reaction, depending on distance; and by throwing the punch before Billy's attack appears. | ||
}} | }} | ||
}} | }} | ||
| Line 314: | Line 317: | ||
|Block Adv=-3 | |Block Adv=-3 | ||
|Property= | |Property= | ||
|description= | |description=Terry's main mid-distance poking weapon. Very good reach and because it can be canceled, allows him to get right in the opponent's face and start his rush patterns. Your most frequent cancels should be into either version of Crack Shoot and for special purposes, a 236A when your opponent expects the Crack Shoot or an A Burn Knuckle. The Burn Knuckle whiffs against the smaller characters such as Mai and the old geezers, where you can throw them the instant you land. | ||
}} | }} | ||
}} | }} | ||
| Line 324: | Line 327: | ||
{{MoveData | {{MoveData | ||
|image=FFS_Terry_jA.png | |image=FFS_Terry_jA.png | ||
|subtitle=ジャンプ手刀 | |subtitle=Jump Chop/ジャンプ手刀 | ||
|caption= | |caption= | ||
|name=jA | |name=jA | ||
| Line 339: | Line 342: | ||
|Block Adv= | |Block Adv= | ||
|Property= | |Property= | ||
|description= | |description=This is what you get if you attempt to do a light Rising Tackle without having a full charge, and it might occasionally save you as it's a passable air-to-air move. Not something you want to use on purpose, though, as Terry has better options. | ||
}} | }} | ||
}} | }} | ||
| Line 366: | Line 369: | ||
|Property= | |Property= | ||
|description= * Same frame data for diagonal and neutral jumps. | |description= * Same frame data for diagonal and neutral jumps. | ||
* Diagonal version is great against anti-air sliding attacks; mix-up by landing into a throw or an A x n-> 2C combo. | |||
}} | }} | ||
}} | }} | ||
| Line 373: | Line 377: | ||
{{MoveData | {{MoveData | ||
|image=FFS_Terry_jC.png | |image=FFS_Terry_jC.png | ||
|subtitle=ジャンプ正拳突き | |subtitle=Jump Thrust/ジャンプ正拳突き | ||
|caption= | |caption= | ||
|name=jC | |name=jC | ||
|data= | |data= | ||
{{AttackData-FFS | {{AttackData-FFS | ||
|Damage=18 | |Damage=18 | ||
|Stun=4 | |Stun=4 | ||
| Line 389: | Line 392: | ||
|Block Adv= | |Block Adv= | ||
|Property= | |Property= | ||
|description= | |description=Strong hitbox with more reach than you'd expect. Very good air-to-air. | ||
}} | }} | ||
}} | }} | ||
| Line 416: | Line 419: | ||
|Block Adv= | |Block Adv= | ||
|Property= | |Property= | ||
|description= | |description=Can cross-up, and is useful for the occasional air-to-air. | ||
}} | }} | ||
{{AttackData-FFS | {{AttackData-FFS | ||
|header=no | |header=no | ||
|version=Neutral Jump | |version=Neutral Jump | ||
|subtitle=ジャンプ後ろ回し蹴り | |subtitle=Jump Spin Kick/ジャンプ後ろ回し蹴り | ||
|Damage=16 | |Damage=16 | ||
|Stun=4 | |Stun=4 | ||
| Line 432: | Line 435: | ||
|Block Adv= | |Block Adv= | ||
|Property= | |Property= | ||
|description= | |description=Good air-to-air. | ||
}} | }} | ||
}} | }} | ||
| Line 461: | Line 464: | ||
|Block Adv=-3 | |Block Adv=-3 | ||
|Property=Cancel, Lane Shift, Foot Invuln 4-32F | |Property=Cancel, Lane Shift, Foot Invuln 4-32F | ||
|description= | |description=Great for beating all sliding attacks (Duck, Laurence, Jubei and Joe) and once in full swing, will beat low-to-the-ground crouching kicks from Bear, Geese and Mai. Also has great priority and makes a decent meaty. As it can be used while crouching it allows Terry to keep his charge for a Rising Tackle. | ||
<gallery class="mw-collapsible"> | <gallery class="mw-collapsible"> | ||
FFS Terry CD Front.png| | FFS Terry CD Front.png| | ||
| Line 484: | Line 487: | ||
|Block Adv=-3 | |Block Adv=-3 | ||
|Property=Cancel, Lane Shift, Foot Invuln 4-30F | |Property=Cancel, Lane Shift, Foot Invuln 4-30F | ||
|description= | |description=Quicker in the back lane and has a slightly different hitbox. | ||
<gallery class="mw-collapsible"> | <gallery class="mw-collapsible"> | ||
FFS Terry CD Back.png| | FFS Terry CD Back.png| | ||
| Line 509: | Line 512: | ||
|name=Lane Attack | |name=Lane Attack | ||
|input=A/B/C/D from opposite lane | |input=A/B/C/D from opposite lane | ||
|data= | |data= * Cells with two values (X/Y) list the front lane to back lane data first, then vice-versa. | ||
{{AttackData-FFS | {{AttackData-FFS | ||
|version=A | |version=A | ||
| Line 517: | Line 520: | ||
|Guard=Overhead | |Guard=Overhead | ||
|Startup=13 | |Startup=13 | ||
|Active= | |Active=18/17 | ||
|Recovery=4 | |Recovery=4 | ||
|Total= | |Total=34/33 | ||
|Hit Adv= | |Hit Adv=+5/+7 | ||
|Block Adv= | |Block Adv=+12/+14 | ||
|Property=/ | |Property=/ | ||
|description= * Straight and fast cross-lane punch. | |description= * Straight and fast cross-lane punch. Whiffs on crouchers. | ||
* Doesn't hit the back lane until frame 25 and the front lane until frame 26. | |||
}} | }} | ||
{{AttackData-FFS | {{AttackData-FFS | ||
| Line 533: | Line 537: | ||
|Guard=Overhead | |Guard=Overhead | ||
|Startup=13 | |Startup=13 | ||
|Active= | |Active=18/17 | ||
|Recovery=4 | |Recovery=4 | ||
|Total= | |Total=34/33 | ||
|Hit Adv= | |Hit Adv=+5/+7 | ||
|Block Adv= | |Block Adv=+12/+14 | ||
|Property=/ | |Property=/ | ||
|description= * Straight cross-lane kick. | |description= * Straight cross-lane kick. | ||
* Doesn't hit the back lane until frame 25 and the front lane until frame 26. | |||
}} | }} | ||
{{AttackData-FFS | {{AttackData-FFS | ||
| Line 549: | Line 554: | ||
|Guard=Overhead | |Guard=Overhead | ||
|Startup=13 | |Startup=13 | ||
|Active= | |Active=39/36 | ||
|Recovery=4 | |Recovery=4 | ||
|Total= | |Total=55/52 | ||
|Hit Adv= | |Hit Adv=+4/+8 | ||
|Block Adv= | |Block Adv=+11/+15 | ||
|Property=/ | |Property=/ | ||
|description= * Slower high angle punch. | |description= * Slower high angle punch. Whiffs on crouchers. | ||
* Doesn't hit the back lane until frame 45 and the front lane until frame 46. | |||
}} | }} | ||
{{AttackData-FFS | {{AttackData-FFS | ||
| Line 565: | Line 571: | ||
|Guard=Overhead | |Guard=Overhead | ||
|Startup=13 | |Startup=13 | ||
|Active= | |Active=39/36 | ||
|Recovery=4 | |Recovery=4 | ||
|Total= | |Total=55/52 | ||
|Hit Adv= | |Hit Adv=+4/+8 | ||
|Block Adv= | |Block Adv=+11/+15 | ||
|Property=/ | |Property=/ | ||
|description= * Slower high-angle kick. | |description= * Slower high-angle kick. | ||
* Doesn't hit the back lane until frame 45 and the front lane until frame 46. | |||
}} | }} | ||
}} | }} | ||
| Line 595: | Line 602: | ||
|Block Adv= | |Block Adv= | ||
|Property=Cancel, Upper-Body Invuln 1-24F※ | |Property=Cancel, Upper-Body Invuln 1-24F※ | ||
|description= | |description=This uppercut is great for opponents who try to rush with moves like: Burn Knuckle, Crack Shoot, Tung's 214P, Laurence's Bloody Spin. Also a good anti-air. | ||
※Hurtbox is slightly taller during 9-15F. | ※Hurtbox is slightly taller during 9-15F. | ||
<gallery class="mw-collapsible"> | <gallery class="mw-collapsible"> | ||
FFS_Terry_Dodge_Attack.png|Startup | FFS_Terry_Dodge_Attack.png|Startup | ||
FFS Terry Dodge Attack 1.png| | FFS Terry Dodge Attack 1.png| | ||
FFS Terry Dodge Attack 2.png| | FFS Terry Dodge Attack 2.png|9-15F | ||
FFS Terry Dodge Attack 3.png| | FFS Terry Dodge Attack 3.png| | ||
FFS Terry Dodge Attack 4.png|Recovery | FFS Terry Dodge Attack 4.png|Recovery | ||
</gallery> | </gallery> | ||
| Line 612: | Line 620: | ||
<font style="visibility:hidden" size="0"></font> | <font style="visibility:hidden" size="0"></font> | ||
{{MoveData | {{MoveData | ||
|image=FFS_Terry_Throw.png | |image=FFS_Terry_Throw 1.png | ||
|caption= | |caption= | ||
|name=Buster Throw | |name=Buster Throw | ||
| Line 620: | Line 628: | ||
|Damage=26 | |Damage=26 | ||
|Stun=3 | |Stun=3 | ||
|range=20 | |||
|Guard=Throw | |Guard=Throw | ||
|Startup=1 | |Startup=1 | ||
|Active=1 | |Active=1 | ||
|Recovery=/ | |Recovery=/ | ||
|Hit Adv=KD (+ | |Hit Adv=KD (+75) | ||
|Block Adv=/ | |Block Adv=/ | ||
|Property=/ | |Property=/ | ||
|description= * Switches sides. | |description= * Switches sides. | ||
}} | }} | ||
}} | }} | ||
| Line 643: | Line 649: | ||
| image = FFS Terry 236P 2.png | | image = FFS Terry 236P 2.png | ||
| caption = | | caption = | ||
| data = | | data = Cannot be avoided by Dodge Attacks. | ||
<gallery class="mw-collapsible"> | <gallery class="mw-collapsible"> | ||
FFS Terry 236P.png| | FFS Terry 236P.png| | ||
| Line 662: | Line 668: | ||
| Block Adv = -2 | | Block Adv = -2 | ||
| Property = | | Property = | ||
| description = | | description = Comes out quicker but travels slower. | ||
*Will combo in special circumstances: opponent dizzy, back facing Terry, in the corner. | |||
}} | }} | ||
{{AttackData-FFS | {{AttackData-FFS | ||
| Line 678: | Line 685: | ||
| Block Adv = -8 | | Block Adv = -8 | ||
| Property = | | Property = | ||
| description = | | description = Comes out slower but travels faster. | ||
}} | }} | ||
}} | }} | ||
| Line 707: | Line 714: | ||
| Block Adv = -9 | | Block Adv = -9 | ||
| Property = Throw Invincible | | Property = Throw Invincible | ||
| description = | | description = Safe when spaced so it barely hits, but your options are limited from that position. Very quick and can be used to punish blocked moves such as Cheng's [2]8P, both versions of Laurence's 41236P and the A version of Rising Tackle. | ||
}} | }} | ||
{{AttackData-FFS | {{AttackData-FFS | ||
| Line 723: | Line 730: | ||
| Block Adv = -7 | | Block Adv = -7 | ||
| Property = Throw Invincible | | Property = Throw Invincible | ||
| description = | | description = Only safe when blocked at a full-screen's distance. It's okay to use once in a while during full-screen A Power Wave volleys. Can be used to retaliate after a blocked Kim divekick, even beating the extra kick that Kim can perform as he's landing. | ||
}} | }} | ||
}} | }} | ||
| Line 734: | Line 741: | ||
| image = FFS Terry 28A.png | | image = FFS Terry 28A.png | ||
| caption = | | caption = | ||
| data = | | data =The A version is a quick anti-air reversal with great reach thanks to the fist that Terry stretches out. Will go through close projectiles and hit cleanly, knocking them down. Up to 3 hits when blocked. May be safe from punishment against some characters when all 3 hits are blocked. | ||
<gallery class="mw-collapsible"> | <gallery class="mw-collapsible"> | ||
FFS Terry 28A.png| | FFS Terry 28A.png| | ||
| Line 778: | Line 785: | ||
| image = FFS Terry 2147K 5.png | | image = FFS Terry 2147K 5.png | ||
| caption = | | caption = | ||
| data = | | data =Terry's breadwinner. Great trap and mix-ups. Can travel over projectiles cleanly when performed before the projectile materializes: Hurricane Upper, Mai's fan, Jubei's crackers, Geese's A Reppu Ken; Power Wave, Krauser's Low Blitz Ball and perhaps more. Safe when blocked except for a handful of instances. The D version has more start-up than the B version but is safer when blocked and leaves Terry at a further distance. The B version is great to combo from his crouching C. When the B Crack Shoot is blocked, Terry is vulnerable to Cheng's [4]6B, Duck, Jubei and Bear's command throw. Even if it hits, say from a 2C 2147B combo, he is still vulnerable to these throws. Take caution. Both versions hit twice hit depending on character and distance. | ||
<gallery class="mw-collapsible mw-collapsed" data-expandtext="show detailed hitboxes" data-collapsetext="hide detailed hitboxes"> | <gallery class="mw-collapsible mw-collapsed" data-expandtext="show detailed hitboxes" data-collapsetext="hide detailed hitboxes"> | ||
FFS Terry 2147K.png| | FFS Terry 2147K.png| | ||
| Line 831: | Line 838: | ||
| image = FFS Terry 21416BC 2.png | | image = FFS Terry 21416BC 2.png | ||
| caption = | | caption = | ||
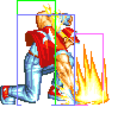
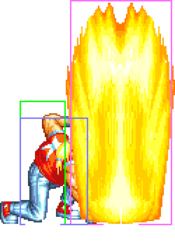
| data = | | data =Will absorb projectiles. Anti-air. Mix in between your Power Waves when at some distance. And mix-up with a 2D 236A and 2D Power Geyser. Great for a corner, meaty block-damage pressure sequence, where you recover while the opponent is in block-stun from the Geyser so you can lock them down with 2A 2C Crack Shoot etc. | ||
{{AttackData-FFS | {{AttackData-FFS | ||
| Damage = 48 (12) | | Damage = 48 (12) | ||
| Line 854: | Line 861: | ||
}} | }} | ||
== | ==Combos== | ||
'''General Notes: When a combo into either 214A or 2147B(1) is possible, 214A will do more damage and knock down but tends to only work against standing characters, while 2147B is better at hitting crouching/short characters. 2147D can be used against a standing backturned opponent and will hit twice for massive damage and stun.''' | |||
{| border="1em" cellpadding="3" cellspacing="0" | {| border="1em" cellpadding="3" cellspacing="0" | ||
! align="center" | '''Combo''' !! align="center" | '''Damage''' !! align="center" | '''Stun''' !! align="center" | '''Notes''' | |||
|- | |- | ||
| | | c5A x N, 2C > 214A/2147B(1) || 58/57 || 23 || Hold 6 between 5A's for more hits. Listed damage from 6 c5A's. | ||
| | |||
| | |||
| | |||
|- | |- | ||
| | | 2A x N, 2C > 2147B(1) || 36 || 11 || Hold 3 or 6 between 2A's for more hits. Combo for crouching/small characters. 2147B will still whiff on crouching Jubei. Listed damage from 2 2A's | ||
| | |||
| | |||
| | |||
|- | |- | ||
| | | 2B > 214A || 14 || 5 || Will whiff on crouching/small characters | ||
| | |||
| | |||
| | |||
|- | |- | ||
| c5A x N, f5A x N, 2D | | c5A x N, f5A x N, 2D || 59 || 20 || At max range 2D can link where 2C cannot. Listed damage from 6 c5A's and 2 f5A's. | ||
| | |||
| | |||
| | |||
|- | |- | ||
| | | c5C(2) > 214A/2147B || 32/33~38 || 11~14 || 2147B may hit once or twice depending on character. | ||
| | |||
| | |||
| | |||
|- | |- | ||
|236A | | (corner) 236A(far distance) > 214C/2147D(1) || 35/31 || 12 || 236A will do 6 dizzy instead of 3 while Terry is in a heavy special's animation when it hits. | ||
| | |||
| | |||
| | |||
|- | |- | ||
|} | |} | ||
== | ==Strategy== | ||
===The Basics=== | |||
===Advanced Strategy=== | |||
== | ==Matchups== | ||
===Vs. Andy Bogard=== | |||
===Vs. Axel Hawk=== | |||
===Vs. Big Bear=== | |||
===Vs. Billy Kane=== | |||
===Vs. Cheng Sinzan=== | |||
===Vs. Duck King=== | |||
===Vs. Geese Howard=== | |||
===Vs. Joe Higashi=== | |||
===Vs. Jubei Yamada=== | |||
===Vs. Kim Kaphwan=== | |||
===Vs. Laurence Blood=== | |||
===Vs. Mai Shiranui=== | |||
===Vs. Ryo Sakazaki=== | |||
===Vs. Terry Bogard=== | |||
===Vs. Tung Fu Rue=== | |||
===Vs. Wolfgang Krauser=== | |||
{{Navbox-FFS}} | {{Navbox-FFS}} | ||
[[Category:Fatal Fury Special]] | [[Category:Fatal Fury Special]] | ||
[[Category:Terry Bogard]] | [[Category:Terry Bogard]] | ||
Latest revision as of 16:26, 9 June 2025
Introduction
SNK's iconic poster boy and main character of the series, Terry comes with the usual protagonist kit of specials consisting of a projectile, invulnerable anti-air and an advancing special. Arguably the most balanced character of the game, which is both his biggest strength and weakness; while he doesn't struggle too hard against any character, he doesn't have too many advantageous matchups either.
| Strengths | Weaknesses |
|---|---|
|
|
Move List
General Hurtboxes
| Standing/Taunting | Crouching | Crawling | Jumping |
 |
 |
 |
|
| 54F (4+47+3) duration. |
Close Standing Normals
c5A
| Damage | Stun | Guard | Startup | Active | Recovery | Total | Hit Adv | Block Adv | Property | |
|---|---|---|---|---|---|---|---|---|---|---|
| 8 | 2 | Mid | 3 | 3 | 4 | 9 | +9 | +10 | Kara Cancel | |
|
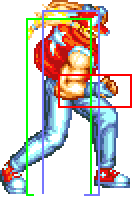
With its rapid-fire ability it's used for close poking where you can attempt a throw once they're relaxed enough. If you sense they'll try to counter your throw, link in a 2A x 1~2 -> 2C -> 2147B combo. This only whiffs against a handful of characters when crouching: Mai and the old geezers. 2A has similar uses. | ||||||||||
c5B
| Damage | Stun | Guard | Startup | Active | Recovery | Total | Hit Adv | Block Adv | Property | |
|---|---|---|---|---|---|---|---|---|---|---|
| 10 | 2 | Mid | 8 | 6 | 8 | 21 | +2 | +3 | Kara Cancel | |
|
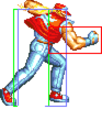
Not really noteworthy as close A and 2A are much more advantageous and come out faster. | ||||||||||
c5C
c5D
| Damage | Stun | Guard | Startup | Active | Recovery | Total | Hit Adv | Block Adv | Property |
|---|---|---|---|---|---|---|---|---|---|
| 20 | 4 | Mid | 8 | 9 | 25 | 41 | -10 | -11 | Kara Cancel |
Far Standing Normals
f5A
| Damage | Stun | Guard | Startup | Active | Recovery | Total | Hit Adv | Block Adv | Property | |
|---|---|---|---|---|---|---|---|---|---|---|
| 6 | 2 | Mid | 3 | 3 | 4 | 9 | +9 | +10 | Kara Cancel | |
|
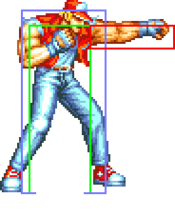
Low risk jab that can be used to beat the opponent's advancing moves. Can link into 2D for a knockdown. | ||||||||||
f5B
| Damage | Stun | Guard | Startup | Active | Recovery | Total | Hit Adv | Block Adv | Property | |
|---|---|---|---|---|---|---|---|---|---|---|
| 8 | 2 | Mid | 5 | 7 | 8 | 20 | +1 | +2 | Kara Cancel | |
|
Outside of Dodge Attack, this is Terry's only anti-air normal. Make sure to be outside of c5B's proximity when anti-airing. | ||||||||||
f5C
| Damage | Stun | Guard | Startup | Active | Recovery | Total | Hit Adv | Block Adv | Property | |
|---|---|---|---|---|---|---|---|---|---|---|
| 16 | 4 | Mid | 10 | 8 | 14 | 31 | +1 | 0 | - | |
|
Fairly poor move as it has very little reach and whiffs against several characters if they're crouching. Not cancellable either. | ||||||||||
f5D
Crouching Normals
2A
| Damage | Stun | Guard | Startup | Active | Recovery | Total | Hit Adv | Block Adv | Property | |
|---|---|---|---|---|---|---|---|---|---|---|
| 6 | 2 | Mid | 4 | 3 | 5 | 11 | +8 | +9 | Kara Cancel | |
|
Good combo starter, especially against small characters. Links to itself and 2C. | ||||||||||
2B
| Damage | Stun | Guard | Startup | Active | Recovery | Total | Hit Adv | Block Adv | Property | |
|---|---|---|---|---|---|---|---|---|---|---|
| 8 | 2 | Low | 7 | 6 | 9 | 21 | +1 | +2 | - | |
|
Unfortunately cannot be linked out of, though it can combo into 214A if the opponent is standing. | ||||||||||
2C
| Damage | Stun | Guard | Startup | Active | Recovery | Total | Hit Adv | Block Adv | Property | |
|---|---|---|---|---|---|---|---|---|---|---|
| 16 | 4 | Mid | 7 | 9 | 10 | 25 | +5 | +4 | Kara Cancel | |
|
A great combo move because it links easily from any A normal and combos easily into 214A and 2147B. This also has its own specific uses - like being able to beat Billy's Sansestukon both on reaction, depending on distance; and by throwing the punch before Billy's attack appears. | ||||||||||
2D
| Damage | Stun | Guard | Startup | Active | Recovery | Total | Hit Adv | Block Adv | Property | |
|---|---|---|---|---|---|---|---|---|---|---|
| 14 | 4 | Low | 8 | 8 | 19 | 35 | KD | -3 | - | |
|
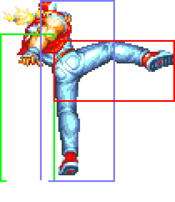
Terry's main mid-distance poking weapon. Very good reach and because it can be canceled, allows him to get right in the opponent's face and start his rush patterns. Your most frequent cancels should be into either version of Crack Shoot and for special purposes, a 236A when your opponent expects the Crack Shoot or an A Burn Knuckle. The Burn Knuckle whiffs against the smaller characters such as Mai and the old geezers, where you can throw them the instant you land. | ||||||||||
Jumping Normals
jA
| Damage | Stun | Guard | Startup | Active | Recovery | Total | Hit Adv | Block Adv | Property | |
|---|---|---|---|---|---|---|---|---|---|---|
| 8 | 2 | Overhead | 6 | ∞ | / | / | - | - | - | |
|
This is what you get if you attempt to do a light Rising Tackle without having a full charge, and it might occasionally save you as it's a passable air-to-air move. Not something you want to use on purpose, though, as Terry has better options. | ||||||||||
jB
| Damage | Stun | Guard | Startup | Active | Recovery | Total | Hit Adv | Block Adv | Property | |
|---|---|---|---|---|---|---|---|---|---|---|
| 10 | 2 | Overhead | 6 | ∞ | / | / | - | - | - | |
| ||||||||||
jC
| Damage | Stun | Guard | Startup | Active | Recovery | Total | Hit Adv | Block Adv | Property | |
|---|---|---|---|---|---|---|---|---|---|---|
| 18 | 4 | Overhead | 6 | 17 | / | / | - | - | - | |
|
Strong hitbox with more reach than you'd expect. Very good air-to-air. | ||||||||||
jD
| Version | Damage | Stun | Guard | Startup | Active | Recovery | Total | Hit Adv | Block Adv | Property | |
|---|---|---|---|---|---|---|---|---|---|---|---|
| Diagonal Jump Jump Terry Kick/ジャンプテリーキック |
20 | 4 | Overhead | 8 | 17 | / | / | - | - | - | |
|
Can cross-up, and is useful for the occasional air-to-air. | |||||||||||
| Neutral Jump Jump Spin Kick/ジャンプ後ろ回し蹴り |
16 | 4 | Overhead | 11 | 10 | / | / | - | - | - | |
|
Good air-to-air. | |||||||||||
Universal Mechanics
Lane Blast (CD)
| Version | Damage | Stun | Guard | Startup | Active | Recovery | Total | Hit Adv | Block Adv | Property | |
|---|---|---|---|---|---|---|---|---|---|---|---|
| Front Lane | 22 | 5 | Mid | 19 | 9 | 13 | 40 | KD | -3 | Cancel, Lane Shift, Foot Invuln 4-32F | |
|
Great for beating all sliding attacks (Duck, Laurence, Jubei and Joe) and once in full swing, will beat low-to-the-ground crouching kicks from Bear, Geese and Mai. Also has great priority and makes a decent meaty. As it can be used while crouching it allows Terry to keep his charge for a Rising Tackle. | |||||||||||
| Back Lane | 22 | 5 | Mid | 16 | 9 | 13 | 37 | KD | -3 | Cancel, Lane Shift, Foot Invuln 4-30F | |
Lane Attack
- Cells with two values (X/Y) list the front lane to back lane data first, then vice-versa.
| Version | Damage | Stun | Guard | Startup | Active | Recovery | Total | Hit Adv | Block Adv | Property | |
|---|---|---|---|---|---|---|---|---|---|---|---|
| A Jump Lariat Punch/ジャンプラリアットパンチ |
20 | 2 | Overhead | 13 | 18/17 | 4 | 34/33 | +5/+7 | +12/+14 | / | |
| |||||||||||
| B Jump Knee Attack/ジャンプニーアタック |
20 | 2 | Overhead | 13 | 18/17 | 4 | 34/33 | +5/+7 | +12/+14 | / | |
| |||||||||||
| C Jump Lariat Punch/ジャンプラリアットパンチ |
20 | 4 | Overhead | 13 | 39/36 | 4 | 55/52 | +4/+8 | +11/+15 | / | |
| |||||||||||
| D Jump Knee Attack/ジャンプニーアタック |
20 | 4 | Overhead | 13 | 39/36 | 4 | 55/52 | +4/+8 | +11/+15 | / | |
| |||||||||||
Dodge Attack
| Damage | Stun | Guard | Startup | Active | Recovery | Total | Hit Adv | Block Adv | Property | |
|---|---|---|---|---|---|---|---|---|---|---|
| 11 | 5 | Mid | 9 | 7+9 | 12 | 36 | Air Reset | - | Cancel, Upper-Body Invuln 1-24F※ | |
Throws
Buster Throw (4/6C)
| Damage | Stun | Range | Guard | Startup | Active | Recovery | Total | Hit Adv | Block Adv | Property |
|---|---|---|---|---|---|---|---|---|---|---|
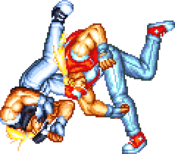
| 26 | 3 | 20 | Throw | 1 | 1 | / | - | KD (+75) | / | / |
| ||||||||||
Special Moves
Power Wave (236P)
| Version | Damage | Stun | Guard | Startup | Active | Recovery | Total | Hit Adv | Block Adv | Property | |
|---|---|---|---|---|---|---|---|---|---|---|---|
| A | 16 (4) | 3 | Mid | 19 | - | 36 | 54 | -3 | -2 | - | |
|
Comes out quicker but travels slower.
| |||||||||||
| C | 22 (5) | 6 | Mid | 23 | - | 38 | 60 | +3 | -8 | - | |
|
Comes out slower but travels faster. | |||||||||||
Burn Knuckle (214P)
| Version | Damage | Stun | Guard | Startup | Active | Recovery | Total | Hit Adv | Block Adv | Property | |
|---|---|---|---|---|---|---|---|---|---|---|---|
| A | 16 (4) | 3 | Mid | 14 | 16 | 11 | 40 | Air Reset (+12) | -9 | Throw Invincible | |
|
Safe when spaced so it barely hits, but your options are limited from that position. Very quick and can be used to punish blocked moves such as Cheng's [2]8P, both versions of Laurence's 41236P and the A version of Rising Tackle. | |||||||||||
| C | 22 (5) | 6 | Mid | 29 | 16 | 13 | 57 | KD (+71) | -7 | Throw Invincible | |
|
Only safe when blocked at a full-screen's distance. It's okay to use once in a while during full-screen A Power Wave volleys. Can be used to retaliate after a blocked Kim divekick, even beating the extra kick that Kim can perform as he's landing. | |||||||||||
Rising Tackle ([2]8P)
| Version | Damage | Stun | Guard | Startup | Active | Recovery | Total | Hit Adv | Block Adv | Property | |
|---|---|---|---|---|---|---|---|---|---|---|---|
| A | 14 (3x3) | 3 | Mid | 13 | 6+6+3 | 29 | 56 | KD (+13) | -16 | Invincible 1-24F, Throw Invincible | |
| |||||||||||
| C | 20 (5) | 6 | Mid | 18 | 5+5+5+3 | 40 | 75 | KD (+42) | -40 | Invincible 1-25F, Throw Invincible | |
| |||||||||||
Crack Shoot (2147K)
| Version | Damage | Stun | Guard | Startup | Active | Recovery | Total | Hit Adv | Block Adv | Property | |
|---|---|---|---|---|---|---|---|---|---|---|---|
| B | 13x2 (3x2) | 3x2 | Mid | 10 | 6x3 | 16 | 43 | -1 | -10 | Throw Invincible | |
| |||||||||||
| D | 18x2 (4x2) | 6x2 | Mid | 15 | 8+8+4 | 19 | 53 | -2 | -9 | Throw Invincible | |
| |||||||||||
Desperation Move
Power Geyser (21416BC)
| Damage | Stun | Guard | Startup | Active | Recovery | Total | Hit Adv | Block Adv | Property | |
|---|---|---|---|---|---|---|---|---|---|---|
| 48 (12) | 4 | Mid | 27 | 22 | 24 | 72 | +74 | -4 | - | |
Combos
General Notes: When a combo into either 214A or 2147B(1) is possible, 214A will do more damage and knock down but tends to only work against standing characters, while 2147B is better at hitting crouching/short characters. 2147D can be used against a standing backturned opponent and will hit twice for massive damage and stun.
| Combo | Damage | Stun | Notes |
|---|---|---|---|
| c5A x N, 2C > 214A/2147B(1) | 58/57 | 23 | Hold 6 between 5A's for more hits. Listed damage from 6 c5A's. |
| 2A x N, 2C > 2147B(1) | 36 | 11 | Hold 3 or 6 between 2A's for more hits. Combo for crouching/small characters. 2147B will still whiff on crouching Jubei. Listed damage from 2 2A's |
| 2B > 214A | 14 | 5 | Will whiff on crouching/small characters |
| c5A x N, f5A x N, 2D | 59 | 20 | At max range 2D can link where 2C cannot. Listed damage from 6 c5A's and 2 f5A's. |
| c5C(2) > 214A/2147B | 32/33~38 | 11~14 | 2147B may hit once or twice depending on character. |
| (corner) 236A(far distance) > 214C/2147D(1) | 35/31 | 12 | 236A will do 6 dizzy instead of 3 while Terry is in a heavy special's animation when it hits. |
