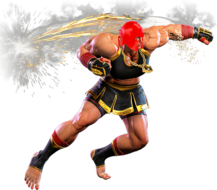
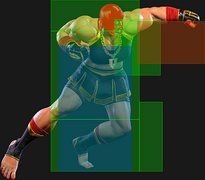
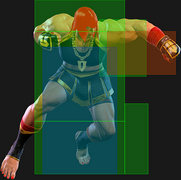
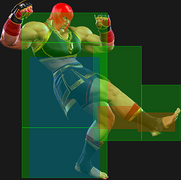
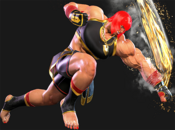
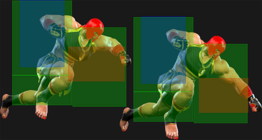
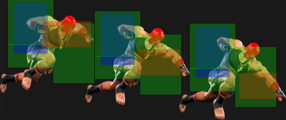
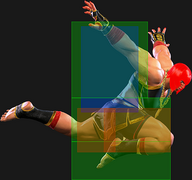
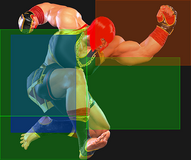
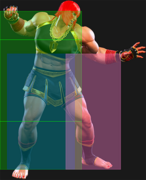
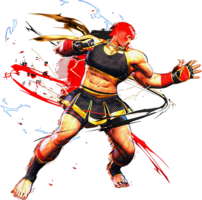
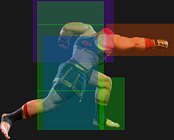
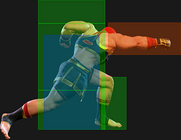
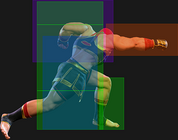
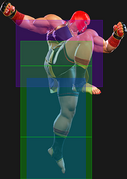
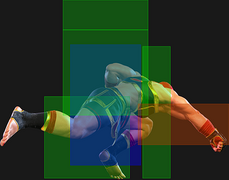
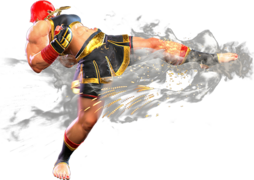
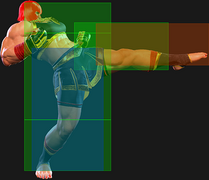
|
|
| (22 intermediate revisions by 2 users not shown) |
| Line 8: |
Line 8: |
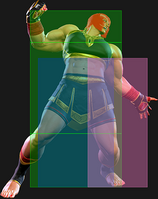
| | title = Standing Light Punch | | | title = Standing Light Punch |
| | subtitle = | | | subtitle = |
| | input = 5LP | | | input = {{Classic_sf6}} 5LP<br>{{Modern_sf6}} 5L |
| | images = | | | images = |
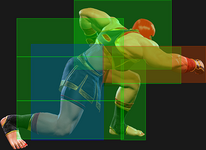
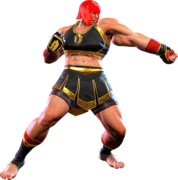
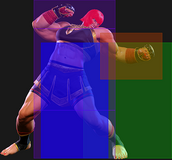
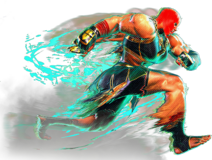
| {{MoveDataCargoImage|marisa_5lp|imageHeight=180px|caption=}} | | {{MoveDataCargoImage|marisa_5lp|imageHeight=180px|caption=}} |
| Line 18: |
Line 18: |
| * Applies 20% damage scaling to next hit when beginning a combo (100/80/70...) | | * Applies 20% damage scaling to next hit when beginning a combo (100/80/70...) |
| <br> | | <br> |
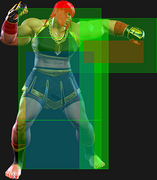
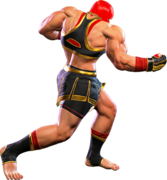
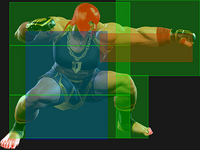
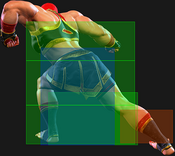
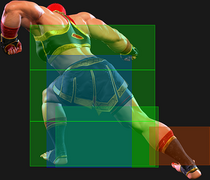
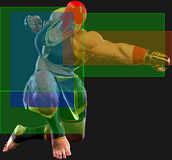
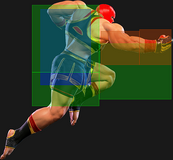
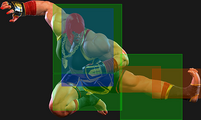
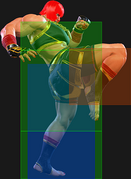
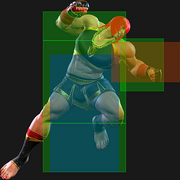
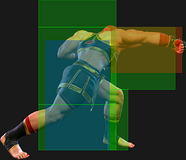
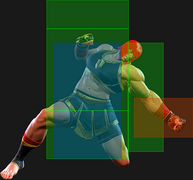
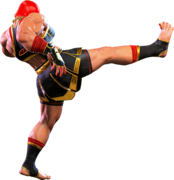
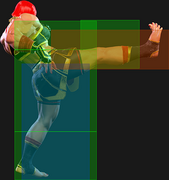
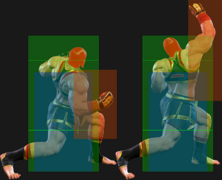
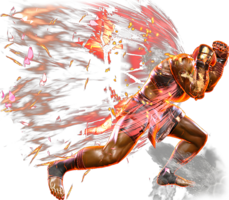
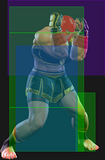
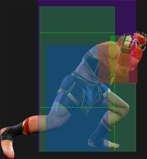
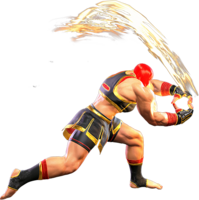
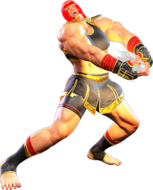
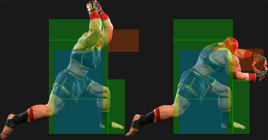
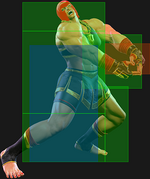
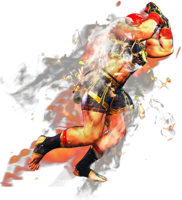
| A jab with good range but, slower startup than most light normals. It is not special cancelable, and only combos into the {{clr|L|5LP}}~{{clr|L|LP}} Target Combo with the bonus advantage from counter-hit, Punish Counter, or {{clr|DR|Drive Rush}}. This TC can also cause an air reset if juggled into, though Marisa usually prefers to cash out for big damage instead. Besides the Target Combo, {{clr|L|5LP}} has little use due to its poor frame data. | | A jab with good range but, slower startup than most light normals. It is not special cancelable, and only combos into the {{clr|L|5LP}}~{{clr|L|LP}} Target Combo with the bonus advantage from {{clr|PC|Counter-hit}}, {{clr|PC|Punish Counter}}, or {{clr|DR|Drive Rush}}. This TC can also cause an air reset if juggled into, though Marisa usually prefers to cash out for big damage instead. Besides the Target Combo, {{clr|L|5LP}} has little use due to its poor frame data. |
| }} | | }} |
|
| |
|
| Line 25: |
Line 25: |
| | title = Standing Medium Punch | | | title = Standing Medium Punch |
| | subtitle = | | | subtitle = |
| | input = 5MP | | | input = {{Classic_sf6}} 5MP<br>{{Modern_sf6}} A[M] |
| | images = | | | images = |
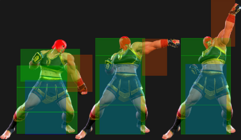
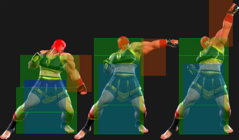
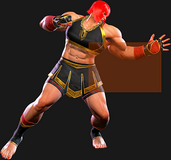
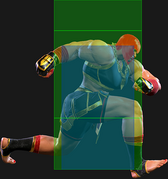
| {{MoveDataCargoImage|marisa_5mp|imageHeight=180px|caption=}} | | {{MoveDataCargoImage|marisa_5mp|imageHeight=180px|caption=}} |
| Line 44: |
Line 44: |
| | title = Standing Heavy Punch | | | title = Standing Heavy Punch |
| | subtitle = | | | subtitle = |
| | input = 5HP (HOLD OK) | | | input = {{Classic_sf6}} 5HP (HOLD OK)<br>{{Modern_sf6}} 5H (HOLD OK) |
| | images = | | | images = |
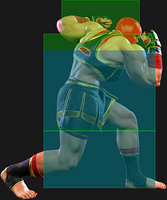
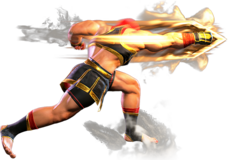
| {{MoveDataCargoImage|imageHeight=170px|marisa_5hp|caption=}} | | {{MoveDataCargoImage|imageHeight=170px|marisa_5hp|caption=}} |
| Line 67: |
Line 67: |
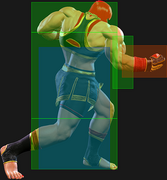
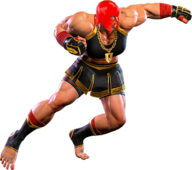
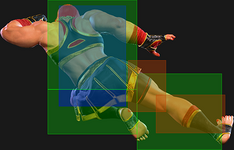
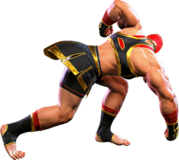
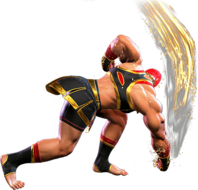
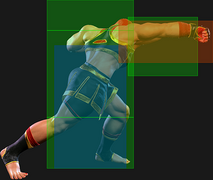
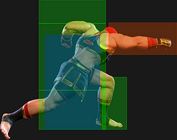
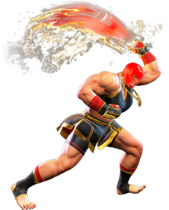
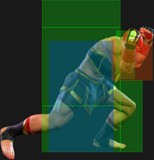
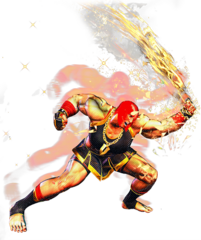
| An approaching downward hook, useful for whiff punishing and {{clr|DR|Drive Rush}} pressure. Not cancelable, but has a notable follow-up like her other standing punches; it can also be charged for significant advantage on hit and block. | | An approaching downward hook, useful for whiff punishing and {{clr|DR|Drive Rush}} pressure. Not cancelable, but has a notable follow-up like her other standing punches; it can also be charged for significant advantage on hit and block. |
|
| |
|
| Charged {{clr|H|5HP}} is your biggest Punish Counter starter, becoming {{sf6-adv|VP|+15}} on PC. Be ready to let this rip any time the opponent uses a particularly unsafe move, like a reversal or Super. | | Charged {{clr|H|5HP}} is your biggest {{clr|PC|Punish Counter}} starter, becoming {{sf6-adv|VP|+15}} on {{clr|PC|PC}}. Be ready to let this rip any time the opponent uses a particularly unsafe move, like a reversal or {{clr|SA|Super}}. |
| }} | | }} |
|
| |
|
| Line 74: |
Line 74: |
| | title = Standing Light Kick | | | title = Standing Light Kick |
| | subtitle = | | | subtitle = |
| | input = 5LK | | | input = {{Classic_sf6}} 5LK<br>{{Modern_sf6}} -- |
| | images = | | | images = |
| {{MoveDataCargoImage|marisa_5lk|imageHeight=180px|caption=}} | | {{MoveDataCargoImage|marisa_5lk|imageHeight=180px|caption=}} |
| Line 86: |
Line 86: |
| * Applies 20% damage scaling to next hit when beginning a combo (100/80/70...) | | * Applies 20% damage scaling to next hit when beginning a combo (100/80/70...) |
| <br> | | <br> |
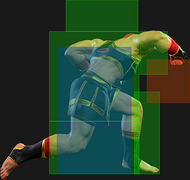
| A quick shin kick and Marisa's farthest reaching light normal. Extremely limited follow-up options even on counter-hit, with only {{clr|SA|SA2}} connecting at max range. {{clr|L|214LP}} is also semi-reliable if connecting from slightly closer. | | A quick shin kick and Marisa's farthest reaching light normal. Extremely limited follow-up options even on {{clr|PC|Counter-hit}}, with only {{clr|SA|SA2}} connecting at max range. {{clr|L|214LP}} is also semi-reliable if connecting from slightly closer. |
|
| |
|
| Useful as a low-commitment neutral check, particularly against {{clr|DR|Drive Impact}} when buffering ({{clr|DR|DR}}/{{clr|DR|DI}}/Gladius). | | Useful as a low-commitment neutral check, particularly against {{clr|DR|Drive Impact}} when buffering ({{clr|DR|DR}}/{{clr|DR|DI}}/Gladius). |
| Line 97: |
Line 97: |
| | title = Standing Medium Kick | | | title = Standing Medium Kick |
| | subtitle = | | | subtitle = |
| | input = 5MK | | | input = {{Classic_sf6}} 5MK<br>{{Modern_sf6}} 5M |
| | images = | | | images = |
| {{MoveDataCargoImage|marisa_5mk|imageHeight=190px|caption=}} | | {{MoveDataCargoImage|marisa_5mk|imageHeight=190px|caption=}} |
| Line 116: |
Line 116: |
| | title = Standing Heavy Kick | | | title = Standing Heavy Kick |
| | subtitle = | | | subtitle = |
| | input = 5HK (HOLD OK) | | | input = {{Classic_sf6}} 5HK (HOLD OK)<br>{{Modern_sf6}} -- |
| | images = | | | images = |
| {{MoveDataCargoImage|imageHeight=180px|marisa_5hk|caption=}} | | {{MoveDataCargoImage|imageHeight=180px|marisa_5hk|caption=}} |
| Line 138: |
Line 138: |
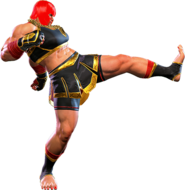
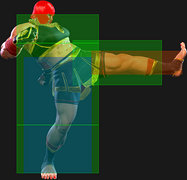
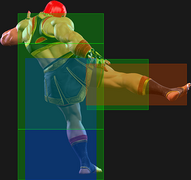
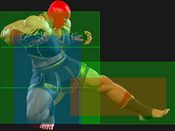
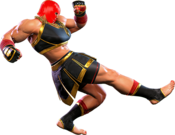
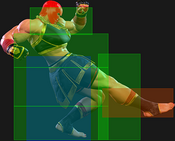
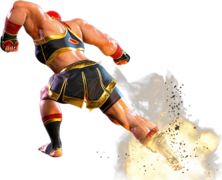
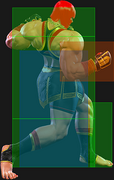
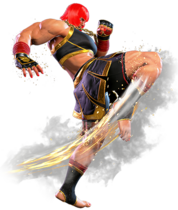
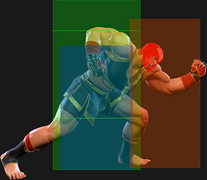
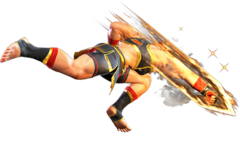
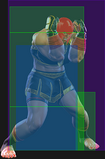
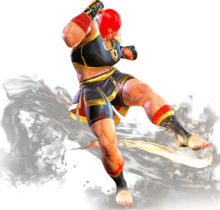
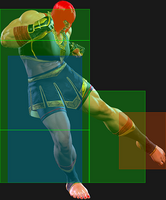
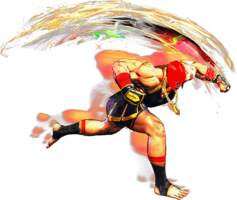
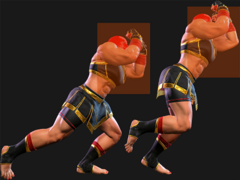
| A slow, long-range roundhouse kick that moves Marisa forward, with even more range on the charged version. | | A slow, long-range roundhouse kick that moves Marisa forward, with even more range on the charged version. |
|
| |
|
| This move is most important for its Punish Counter properties, launching the opponent high into the air for an easy confirm into a high damage juggle. | | This move is most important for its {{clr|PC|Punish Counter}} properties, launching the opponent high into the air for an easy confirm into a high damage juggle. |
|
| |
|
| At 15 frames, {{clr|H|5HK}} is too slow to whiff punish many moves on reaction, but it is a high-damage whiff punish against any move with a long recovery. | | At 15 frames, {{clr|H|5HK}} is too slow to whiff punish many moves on reaction, but it is a high-damage whiff punish against any move with a long recovery. |
| Line 149: |
Line 149: |
| | title = Crouching Light Punch | | | title = Crouching Light Punch |
| | subtitle = | | | subtitle = |
| | input = 2LP | | | input = {{Classic_sf6}} 2LP<br>{{Modern_sf6}} 2L |
| | images = | | | images = |
| {{MoveDataCargoImage|imageHeight=150px|marisa_2lp|caption=}} | | {{MoveDataCargoImage|imageHeight=150px|marisa_2lp|caption=}} |
| Line 156: |
Line 156: |
| | info = | | | info = |
| {{AttackDataCargo-SF6/Query|marisa_2lp}} | | {{AttackDataCargo-SF6/Query|marisa_2lp}} |
| * Chains into {{clr|L|2LP}}/{{clr|L|2LK}} (4f gap when chained into itself) | | * Chains into {{clr|L|2LP}}/{{clr|L|2LK}} |
| * '''Cancel Hitconfirm Window:''' 15f | | * '''Cancel Hitconfirm Window:''' 15f |
| ** Special cancel is delayed until after active frames ({{clr|DR|DR}}: after 1st recovery frame) | | ** Special cancel is delayed until after active frames ({{clr|DR|DR}}: after 2nd recovery frame) |
| * '''{{clr|DR|Drive Rush}} cancel advantage:''' {{sf6-adv|P|+3}} oH / {{sf6-adv|M|-3}} oB | | * '''{{clr|DR|Drive Rush}} cancel advantage:''' {{sf6-adv|P|+3}} oH / {{sf6-adv|M|-2}} oB |
| * Applies 20% damage scaling to next hit when beginning a combo (100/80/70...) | | * Applies 20% damage scaling to next hit when beginning a combo (100/80/70...) |
| <br> | | <br> |
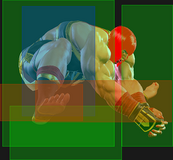
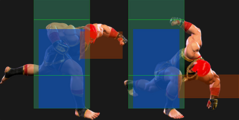
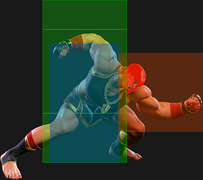
| A crouching jab with good range, and Marisa's quickest attack at only 4f startup. Can be buffered into {{clr|L|214LP}} for a combo conversion, but has few other useful cancel routes unless benefiting from {{clr|DR|Drive Rush}} or Punish Counter bonus advantage. | | A crouching jab with good range, and Marisa's quickest attack at only 4f startup. Can be buffered into {{clr|L|214LP}} for a combo conversion, but has few other useful cancel routes unless benefiting from {{clr|DR|Drive Rush}} or {{clr|PC|Punish Counter}} bonus advantage. |
| | |
| In light chains, it leaves a 4f gap, allowing the opponent to force a trade to escape pressure. This trade is usually worse for Marisa since she is in a Punish Counter state while the opponent will only be counter-hit.
| |
| }} | | }} |
|
| |
|
| Line 171: |
Line 169: |
| | title = Crouching Medium Punch | | | title = Crouching Medium Punch |
| | subtitle = | | | subtitle = |
| | input = 2MP | | | input = {{Classic_sf6}} 2MP<br>{{Modern_sf6}} 2M |
| | images = | | | images = |
| {{MoveDataCargoImage|imageHeight=140px|marisa_2mp|caption=}} | | {{MoveDataCargoImage|imageHeight=140px|marisa_2mp|caption=}} |
| Line 190: |
Line 188: |
| | title = Crouching Heavy Punch | | | title = Crouching Heavy Punch |
| | subtitle = | | | subtitle = |
| | input = 2HP (HOLD OK) | | | input = {{Classic_sf6}} 2HP (HOLD OK)<br>{{Modern_sf6}} 2H (HOLD OK) |
| | images = | | | images = |
| {{MoveDataCargoImage|imageHeight=180px|marisa_2hp|caption=}} | | {{MoveDataCargoImage|imageHeight=180px|marisa_2hp|caption=}} |
| Line 208: |
Line 206: |
| {{AttackDataCargo-SF6/Query|marisa_2hp_hold}} | | {{AttackDataCargo-SF6/Query|marisa_2hp_hold}} |
| * '''Anti-Air Invuln (Head):''' 20-31f (cannot hit cross-up) | | * '''Anti-Air Invuln (Head):''' 20-31f (cannot hit cross-up) |
| | * '''Cancel Hitconfirm Window:''' 20f (Super) |
| * Releasing the button on frames 5-16 results in uncharged version with 4f startup | | * Releasing the button on frames 5-16 results in uncharged version with 4f startup |
| * Only first 2 active frames hit grounded; active frames 3-6 only hit airborne | | * Only first 2 active frames hit grounded; active frames 3-6 only hit airborne |
| Line 216: |
Line 215: |
| Charged {{clr|H|2HP}} is primarily combo filler as it leaves the opponent in juggle state. While charging can lead to big damage if it hits an aerial opponent, whiffing leaves you wide-open to an easy punish, so it's not recommended unless you have a huge read on an opponent's jump habits. | | Charged {{clr|H|2HP}} is primarily combo filler as it leaves the opponent in juggle state. While charging can lead to big damage if it hits an aerial opponent, whiffing leaves you wide-open to an easy punish, so it's not recommended unless you have a huge read on an opponent's jump habits. |
|
| |
|
| As a punish starter, both versions launch the opponent high into the air. Marisa can implement several charged normals or Target Combos afterwards for some incredible damage. | | As a punish starter, both versions launch the opponent high into the air. Marisa can implement several charged normals or Target Combos afterwards, or even cancel into a fully charged {{clr|SA|SA1}} for some incredible damage. |
| }} | | }} |
|
| |
|
| Line 223: |
Line 222: |
| | title = Crouching Light Kick | | | title = Crouching Light Kick |
| | subtitle = | | | subtitle = |
| | input = 2LK | | | input = {{Classic_sf6}} 2LK<br>{{Modern_sf6}} A[L] |
| | images = | | | images = |
| {{MoveDataCargoImage|marisa_2lk|caption=}} | | {{MoveDataCargoImage|marisa_2lk|caption=}} |
| Line 233: |
Line 232: |
| * Applies 20% damage scaling to next hit when beginning a combo (100/80/70...) | | * Applies 20% damage scaling to next hit when beginning a combo (100/80/70...) |
| <br> | | <br> |
| Your only conventional low combo starter, but a good one at least. Generally used to combo into {{clr|L|2LP}} > {{clr|L|214LP}} for a quick confirm. | | Your only conventional low combo starter, but a good one at least. Generally used to combo into {{clr|L|2LP}} > {{clr|L|214LP}} for a quick confirm. It doesn't gain much as a starter from {{clr|DR|Drive Rush}} unless you also score a {{clr|PC|Counter-hit}}, after which you can link into a stronger button like {{clr|M|5MP}}, {{clr|M|2MP}}, or {{clr|H|4HP}}. |
| }} | | }} |
|
| |
|
| Line 240: |
Line 239: |
| | title = Crouching Medium Kick | | | title = Crouching Medium Kick |
| | subtitle = | | | subtitle = |
| | input = 2MK | | | input = {{Classic_sf6}} 2MK<br>{{Modern_sf6}} -- |
| | images = | | | images = |
| {{MoveDataCargoImage|marisa_2mk|caption=}} | | {{MoveDataCargoImage|marisa_2mk|caption=}} |
| Line 247: |
Line 246: |
| | info = | | | info = |
| {{AttackDataCargo-SF6/Query|marisa_2mk}} | | {{AttackDataCargo-SF6/Query|marisa_2mk}} |
| Your go to low poke with good range and hitbox priority. Unlike most {{clr|M|2MKs}}, this cannot be special canceled; your combo options are limited even with counter-hits and {{clr|DR|Drive Rush}}. | | * Applies 20% damage scaling to next hit when beginning a combo (100/80/70...) |
| | Your go to low poke with good range and hitbox priority. Unlike most {{clr|M|2MKs}}, this cannot be special canceled. {{sf6-adv|VP|+7}} on hit from {{clr|DR|Drive Rush}}, allowing decent conversions if hit close enough. |
|
| |
|
| Important for checking the opponent at mid-range or preventing them from freely walking back out of your offense. | | Important for checking the opponent at mid-range or preventing them from freely walking back out of your offense. |
| Line 256: |
Line 256: |
| | title = Crouching Heavy Kick | | | title = Crouching Heavy Kick |
| | subtitle = | | | subtitle = |
| | input = 2HK (HOLD OK) | | | input = {{Classic_sf6}} 2HK (HOLD OK)<br>{{Modern_sf6}} 3H (HOLD OK) |
| | images = | | | images = |
| {{MoveDataCargoImage|marisa_2hk|caption=}} | | {{MoveDataCargoImage|marisa_2hk|caption=}} |
| Line 267: |
Line 267: |
| | info = | | | info = |
| {{AttackDataCargo-SF6/Query|marisa_2hk}} | | {{AttackDataCargo-SF6/Query|marisa_2hk}} |
| * {{clr|PC|Counter-hit/Punish Counter}}: HKD +44 | | * {{clr|PC|Punish Counter}}: HKD +44 |
| * Has juggle potential; not a Hard Knockdown when juggled into | | * Has juggle potential |
| * Can hold button for 20f to improve properties | | * Can hold button for 20f to improve properties |
| {{AttackDataCargo-SF6/Query|marisa_2hk_hold}} | | {{AttackDataCargo-SF6/Query|marisa_2hk_hold}} |
| * {{clr|PC|Counter-hit/Punish Counter}}: HKD +50 | | * {{clr|PC|Punish Counter}}: HKD +50 |
| * 3f extra recovery on whiff | | * 3f extra recovery on whiff |
| * Has juggle potential; not a Hard Knockdown when juggled into | | * Has juggle potential |
| * Releasing the button on frames 7-15 results in an uncharged {{clr|H|2HK}} with 4f additional startup | | * Releasing the button on frames 7-15 results in an uncharged {{clr|H|2HK}} with 4f additional startup |
| <br> | | <br> |
| Line 287: |
Line 287: |
| | title = Jumping Light Punch | | | title = Jumping Light Punch |
| | subtitle = | | | subtitle = |
| | input = j.LK | | | input = {{Classic_sf6}} j.LP<br>{{Modern_sf6}} j.L |
| | images = | | | images = |
| {{MoveDataCargoImage|imageHeight=160px|marisa_jlp|caption=}} | | {{MoveDataCargoImage|imageHeight=160px|marisa_jlp|caption=}} |
| Line 302: |
Line 302: |
| | title = Jumping Medium Punch | | | title = Jumping Medium Punch |
| | subtitle = | | | subtitle = |
| | input = j.MP | | | input = {{Classic_sf6}} j.MP<br>{{Modern_sf6}} j.M |
| | images = | | | images = |
| {{MoveDataCargoImage|imageHeight=160px|marisa_jmp|caption=}} | | {{MoveDataCargoImage|imageHeight=160px|marisa_jmp|caption=}} |
| Line 311: |
Line 311: |
| * Puts airborne opponents into {{sf6-jug|limited juggle}} state | | * Puts airborne opponents into {{sf6-jug|limited juggle}} state |
| * Chains into {{clr|M|j.MP}}~{{clr|M|MP}} Target Combo for a spike knockdown | | * Chains into {{clr|M|j.MP}}~{{clr|M|MP}} Target Combo for a spike knockdown |
| | * '''Lower Body Projectile Invuln''' 7-21f (except around the attack hitbox) |
| | ** Cannot be used to avoid the 2nd hit of JP's {{clr|OD|OD Amnesia}} bombs |
| <br> | | <br> |
| An excellent air-to-air option with a target combo follow-up. Overall solid alternative to {{clr|H|2HP}} when it comes to checking jump-ins. | | An excellent air-to-air option with a target combo follow-up. Overall solid alternative to {{clr|H|2HP}} when it comes to checking jump-ins. |
| Line 319: |
Line 321: |
| | title = Jumping Heavy Punch | | | title = Jumping Heavy Punch |
| | subtitle = | | | subtitle = |
| | input = j.HP | | | input = {{Classic_sf6}} j.HP (HOLD OK)<br>{{Modern_sf6}} j.H (HOLD OK) |
| | images = | | | images = |
| {{MoveDataCargoImage|marisa_jhp|caption=}} | | {{MoveDataCargoImage|marisa_jhp|caption=}} |
| Line 332: |
Line 334: |
| * Can hold HP for 20f to improve properties | | * Can hold HP for 20f to improve properties |
| * Spike knockdown vs. airborne opponents | | * Spike knockdown vs. airborne opponents |
| | * '''Lower Body Projectile Invuln''' 9-23f (except around the attack hitbox) |
| | ** Cannot be used to avoid the 2nd hit of JP's {{clr|OD|OD Amnesia}} bombs |
| {{AttackDataCargo-SF6/Query|marisa_jhp_hold}} | | {{AttackDataCargo-SF6/Query|marisa_jhp_hold}} |
| * Spike knockdown on hit | | * Spike knockdown on hit |
| * Releasing HP on frames 5-19 results in uncharged version with 5f startup | | * Releasing HP on frames 5-19 results in uncharged version with 5f startup |
| | * '''Lower Body Projectile Invuln''' 28-37f (except around the attack hitbox) |
| | ** Cannot be used to avoid the 2nd hit of JP's {{clr|OD|OD Amnesia}} bombs |
| <br> | | <br> |
| A hard-hitting downward punch that can be charged for more damage and deliver a hard knockdown. Be sure not to hold the button too long if you want the uncharged version, otherwise the attack may not come out before you land. | | A hard-hitting downward punch that can be charged for more damage and deliver a hard knockdown. Be sure not to hold the button too long if you want the uncharged version, otherwise the attack may not come out before you land. |
| Line 343: |
Line 349: |
| | title = Jumping Light Kick | | | title = Jumping Light Kick |
| | subtitle = | | | subtitle = |
| | input = j.LK | | | input = {{Classic_sf6}} j.LK<br>{{Modern_sf6}} j.A[L] |
| | images = | | | images = |
| {{MoveDataCargoImage|imageHeight=180px|marisa_jlk|caption=}} | | {{MoveDataCargoImage|imageHeight=180px|marisa_jlk|caption=}} |
| Line 362: |
Line 368: |
| | title = Jumping Medium Kick | | | title = Jumping Medium Kick |
| | subtitle = | | | subtitle = |
| | input = j.MK | | | input = {{Classic_sf6}} j.MK<br>{{Modern_sf6}} j.A[M] |
| | images = | | | images = |
| {{MoveDataCargoImage|marisa_jmk|imageHeight=120px|caption=}} | | {{MoveDataCargoImage|marisa_jmk|imageHeight=120px|caption=}} |
| Line 369: |
Line 375: |
| | info = | | | info = |
| {{AttackDataCargo-SF6/Query|marisa_jmk}} | | {{AttackDataCargo-SF6/Query|marisa_jmk}} |
| | * '''Lower Body Projectile Invuln''' 8-25f (except around the attack hitbox) |
| | ** Cannot be used to avoid the 2nd hit of JP's {{clr|OD|OD Amnesia}} bombs |
| <br> | | <br> |
| Huge range makes this Marisa's best low commitment poke from the air. Can use as an air-to-air or a stray poke from a neutral/back-jump, but Marisa has better options for jump-ins. | | Huge range makes this Marisa's best low commitment poke from the air. Can use as an air-to-air or a stray poke from a neutral/back-jump, but Marisa has better options for jump-ins. |
| Line 377: |
Line 385: |
| | title = Jumping Heavy Kick | | | title = Jumping Heavy Kick |
| | subtitle = | | | subtitle = |
| | input = j.HK | | | input = {{Classic_sf6}} j.HK (HOLD OK)<br>{{Modern_sf6}} j.A[H] |
| | images = | | | images = |
| {{MoveDataCargoImage|imageHeight=120px|marisa_jhk|caption=}} | | {{MoveDataCargoImage|imageHeight=120px|marisa_jhk|caption=}} |
| Line 387: |
Line 395: |
| {{AttackDataCargo-SF6/Query|marisa_jhk}} | | {{AttackDataCargo-SF6/Query|marisa_jhk}} |
| * Can hold HK for 20f to improve properties | | * Can hold HK for 20f to improve properties |
| | * '''Lower Body Projectile Invuln''' 10-21f (except around the attack hitbox) |
| | ** Cannot be used to avoid the 2nd hit of JP's {{clr|OD|OD Amnesia}} bombs |
| {{AttackDataCargo-SF6/Query|marisa_jhk_hold}} | | {{AttackDataCargo-SF6/Query|marisa_jhk_hold}} |
| * Spike knockdown on hit | | * Spike knockdown on hit |
| * Releasing HK on frames 7-19 results in uncharged version with 3f startup | | * Releasing HK on frames 7-19 results in uncharged version with 3f startup |
| | * '''Lower Body Projectile Invuln''' 29-37f (except around the attack hitbox) |
| | ** Cannot be used to avoid the 2nd hit of JP's {{clr|OD|OD Amnesia}} bombs |
| <br> | | <br> |
| A hard-hitting angled kick that can be charged for more damage. The range and angle makes this a solid jump-in option for air assaults. Be sure not to hold the button too long if you want the uncharged version, otherwise the attack may not come out before you land. | | A hard-hitting angled kick that can be charged for more damage. The range and angle makes this a solid jump-in option for air assaults. Be sure not to hold the button too long if you want the uncharged version, otherwise the attack may not come out before you land. |
| Line 400: |
Line 412: |
| | title = Novacule 1 | | | title = Novacule 1 |
| | subtitle = | | | subtitle = |
| | input = 6MP | | | input = {{Classic_sf6}} 6MP<br>{{Modern_sf6}} 6M |
| | images = | | | images = |
| {{MoveDataCargoImage|imageHeight=160px|marisa_6mp|caption=}} | | {{MoveDataCargoImage|imageHeight=160px|marisa_6mp|caption=}} |
| Line 409: |
Line 421: |
| * '''Cancel Hitconfirm Window:''' 20f (TC) | | * '''Cancel Hitconfirm Window:''' 20f (TC) |
| <br> | | <br> |
| The forward movement during startup makes this Marisa's farthest reaching medium poke. Useful for landing counter-hits against the opponent's light buffers, allowing a consistent link into {{clr|L|2LP}}. When used as an approach out of {{clr|DR|Drive Rush}}, Marisa gets slight advantage and block and a light extension on hit, though her reward on a counter-hit here is much more damaging with a link to {{clr|H|4HP}}. | | The forward movement during startup makes this Marisa's farthest reaching medium poke. Useful for landing {{clr|PC|Counter-hits}} against the opponent's light buffers, allowing a consistent link into {{clr|L|2LP}}. When used as an approach out of {{clr|DR|Drive Rush}}, Marisa gets slight advantage and block and a light extension on hit, though her reward on a {{clr|PC|Counter-hit}} here is much more damaging with a link to {{clr|H|4HP}}. |
|
| |
|
| Can be hitconfirmed into one of two follow-up Target Combos, though both have a very niche use. | | Can be hitconfirmed into one of two follow-up Target Combos, though both have a very niche use. |
| Line 418: |
Line 430: |
| | title = Magna Bunker | | | title = Magna Bunker |
| | subtitle = | | | subtitle = |
| | input = 4HP | | | input = {{Classic_sf6}} 4HP<br>{{Modern_sf6}} 4H |
| | images = | | | images = |
| {{MoveDataCargoImage|imageHeight=190px|marisa_4hp|caption=}} | | {{MoveDataCargoImage|imageHeight=190px|marisa_4hp|caption=}} |
| Line 441: |
Line 453: |
| * '''{{clr|DR|Drive Rush}} cancel advantage:''' {{sf6-adv|VP|+23}} oH / {{sf6-adv|VP|+14}} oB | | * '''{{clr|DR|Drive Rush}} cancel advantage:''' {{sf6-adv|VP|+23}} oH / {{sf6-adv|VP|+14}} oB |
| <br> | | <br> |
| Lead uppercut. Marisa's most important normal for combos, leading into important special moves like {{clr|H|214HP}} for huge, meter-efficient damage. Requires a Punish Counter or {{clr|DR|Drive Rush}} cancel to link into this move. | | Lead uppercut. Marisa's most important normal for combos, leading into important special moves like {{clr|H|214HP}} for huge, meter-efficient damage. Requires a {{clr|PC|Punish Counter}} or {{clr|DR|Drive Rush}} cancel to link into this move. |
|
| |
|
| The charged version is an important punish starter against highly unsafe move, and is also instrumental to some of Marisa's juggle routes, particularly after a {{clr|DR|DI}} wallsplat. It's also excellent for pressuring the opponent's wakeup, though its charge time makes it semi-reactable with Perfect Parry. | | The charged version is an important punish starter against highly unsafe move, and is also instrumental to some of Marisa's juggle routes, particularly after a {{clr|DR|DI}} wallsplat. It's also excellent for pressuring the opponent's wakeup, though its charge time makes it semi-reactable with Perfect Parry. |
| Line 450: |
Line 462: |
| | title = Malleus Breaker 1 | | | title = Malleus Breaker 1 |
| | subtitle = Overhead | | | subtitle = Overhead |
| | input = 3HP | | | input = {{Classic_sf6}} 3HP<br>{{Modern_sf6}} -- |
| | images = | | | images = |
| {{MoveDataCargoImage|imageHeight=160px|marisa_3hp|caption=}} | | {{MoveDataCargoImage|imageHeight=160px|marisa_3hp|caption=}} |
| Line 478: |
Line 490: |
| | title = Falx Crusher 1 | | | title = Falx Crusher 1 |
| | subtitle = | | | subtitle = |
| | input = 6HK | | | input = {{Classic_sf6}} 6HK<br>{{Modern_sf6}} 6H or A[H] |
| | images = | | | images = |
| {{MoveDataCargoImage|imageHeight=200px|marisa_6hk|caption=}} | | {{MoveDataCargoImage|imageHeight=200px|marisa_6hk|caption=}} |
| Line 511: |
Line 523: |
| | title = Caelum Arc | | | title = Caelum Arc |
| | subtitle = | | | subtitle = |
| | input = nj.2HP | | | input = {{Classic_sf6}} nj.2HP (HOLD OK)<br>{{Modern_sf6}} nj.2H (HOLD OK) |
| | images = | | | images = |
| {{MoveDataCargoImage|imageHeight=120px|marisa_nj2hp|caption=}} | | {{MoveDataCargoImage|imageHeight=120px|marisa_nj2hp|caption=}} |
| Line 522: |
Line 534: |
| * Can hit cross-up; spike knockdown vs. airborne opponents | | * Can hit cross-up; spike knockdown vs. airborne opponents |
| * Can hold button 20f for improved properties | | * Can hold button 20f for improved properties |
| | * '''Lower Body Projectile Invuln''' 9f~land (except around the attack hitbox) |
| | ** Cannot be used to avoid the 2nd hit of JP's {{clr|OD|OD Amnesia}} bombs |
| {{AttackDataCargo-SF6/Query|marisa_nj2hp_hold}} | | {{AttackDataCargo-SF6/Query|marisa_nj2hp_hold}} |
| * Can hit cross-up; spike knockdown vs. grounded/airborne opponents | | * Can hit cross-up; spike knockdown vs. grounded/airborne opponents |
| * Releasing the button on frames 5-19 results in uncharged {{clr|H|nj.2HP}} with 4f additional startup | | * Releasing the button on frames 5-19 results in uncharged {{clr|H|nj.2HP}} with 4f additional startup |
| | * '''Lower Body Projectile Invuln''' 28f~land (except around the attack hitbox) |
| | ** Cannot be used to avoid the 2nd hit of JP's {{clr|OD|OD Amnesia}} bombs |
| <br> | | <br> |
| An interesting air command normal that has a wide horizontal hitbox. The cross-up hitbox prevents opponents from easily walking or dashing under Marisa's neutral jumps, forcing them to anti-air or back up to avoid it. | | An interesting air command normal that has a wide horizontal hitbox. The cross-up hitbox prevents opponents from easily walking or dashing under Marisa's neutral jumps, forcing them to anti-air or back up to avoid it. Deals the most drive damage of Marisa's jump buttons. |
| }} | | }} |
| <br> | | <br> |
| Line 535: |
Line 551: |
| | title = Light Two Hitter | | | title = Light Two Hitter |
| | subtitle = | | | subtitle = |
| | input = 5LP~LP | | | input = {{Classic_sf6}} 5LP~LP<br>{{Modern_sf6}} 5L~L |
| | images = | | | images = |
| {{MoveDataCargoImage|imageHeight=170px|marisa_5lp_lp|caption=Clef Cannon}} | | {{MoveDataCargoImage|imageHeight=170px|marisa_5lp_lp|caption=Clef Cannon}} |
| Line 548: |
Line 564: |
| * Applies an extra 5% damage scaling to next attack when comboed into (e.g. from CH 5LP) | | * Applies an extra 5% damage scaling to next attack when comboed into (e.g. from CH 5LP) |
| <br> | | <br> |
| A Target Combo follow-up from {{clr|L|5LP}}. Not a true combo unless the first hit is enhanced by Counter-hit, Punish Counter, or {{clr|DR|Drive Rush}}. Punishable on block, so it should be canceled into {{clr|L|236LP}} for safety if you don't see the Counter-hit indicator. A {{clr|M|236MP}} cancel can also be used as a frame trap, but this leaves a small gap that the opponent can reversal through. | | A Target Combo follow-up from {{clr|L|5LP}}. Not a true combo unless the first hit is enhanced by {{clr|PC|Counter-hit}}, {{clr|PC|Punish Counter}}, or {{clr|DR|Drive Rush}}. Punishable on block, so it should be canceled into {{clr|L|236LP}} for safety if you don't see the {{clr|PC|Counter-hit}} indicator. A {{clr|M|236MP}} cancel can also be used as a frame trap, but this leaves a small gap that the opponent can reversal through. |
|
| |
|
| The small gap between the two jabs allows for a frame trap against mashers, but also an easy parry window, so be careful using this too predictably. After a blocked {{clr|L|5LP}}, the {{clr|L|LP}} follow-up has an unusually large cancel window for a light normal, making it possible to hitconfirm with good reactions. This can allow a stronger cancel like {{clr|OD|214PP}} even without reacting to a Counter-hit indicator. | | The small gap between the two jabs allows for a frame trap against mashers, but also an easy parry window, so be careful using this too predictably. After a blocked {{clr|L|5LP}}, the {{clr|L|LP}} follow-up has an unusually large cancel window for a light normal, making it possible to hitconfirm with good reactions. This can allow a stronger cancel like {{clr|OD|214PP}} even without reacting to a {{clr|PC|Counter-hit}} indicator. |
| }} | | }} |
|
| |
|
| Line 557: |
Line 573: |
| | title = Medium Two Hitter | | | title = Medium Two Hitter |
| | subtitle = | | | subtitle = |
| | input = 5MP~MP | | | input = {{Classic_sf6}} 5MP~MP<br>{{Modern_sf6}} A[M]~M |
| | images = | | | images = |
| {{MoveDataCargoImage|imageHeight=190px|marisa_5mp_mp|caption=}} | | {{MoveDataCargoImage|imageHeight=190px|marisa_5mp_mp|caption=}} |
| Line 575: |
Line 591: |
| On block, every special move except the very unsafe {{clr|L|214LP}} leaves a gap that can be interrupted. This allows opponents with an invincible Super with 8f or less startup to punish almost anything Marisa does. The only way to prevent this is to {{clr|DR|Drive Rush}} cancel into a 5f or faster button like {{clr|L|2LP}} or {{clr|L|2LK}}. | | On block, every special move except the very unsafe {{clr|L|214LP}} leaves a gap that can be interrupted. This allows opponents with an invincible Super with 8f or less startup to punish almost anything Marisa does. The only way to prevent this is to {{clr|DR|Drive Rush}} cancel into a 5f or faster button like {{clr|L|2LP}} or {{clr|L|2LK}}. |
|
| |
|
| Against opponents without a reversal Super option, canceling into Gladius with variable strengths and charge timing makes it much harder for the opponent to counter. Charged Gladius armor can beat most {{clr|OD|OD}} reversal options. Being too predictable with your cancel allows opponents to Perfect Parry; if you predict this and feel like taking a big risk, you can opt for no cancel, then walk up and throw the parry recovery. | | Against opponents without a reversal Super option, canceling into Gladius with variable strengths and charge timing makes it much harder for the opponent to counter. Charged Gladius armor can beat some {{clr|OD|OD}} reversal options, and charged OD Gladius beats all of them. Being too predictable with your cancel allows opponents to Perfect Parry; if you predict this and feel like taking a big risk, you can opt for no cancel, then walk up and throw the parry recovery. |
| }} | | }} |
|
| |
|
| Line 582: |
Line 598: |
| | title = Heavy Two Hitter | | | title = Heavy Two Hitter |
| | subtitle = | | | subtitle = |
| | input = 5HP~HP | | | input = {{Classic_sf6}} 5HP~HP<br>{{Modern_sf6}} 5H~H |
| | images = | | | images = |
| {{MoveDataCargoImage|imageHeight=160px|marisa_5hp_hp|caption=}} | | {{MoveDataCargoImage|imageHeight=160px|marisa_5hp_hp|caption=}} |
| Line 592: |
Line 608: |
| * () refers to scaled damage after {{clr|H|5HP}}/{{clr|H|5[HP]}} combo starter | | * () refers to scaled damage after {{clr|H|5HP}}/{{clr|H|5[HP]}} combo starter |
| <br> | | <br> |
| A Target Combo extension from Marisa's long-range {{clr|H|5HP}} that allows her to maintain pressure on block. There is an interruptible gap that loses to 5f or faster normals unless she starts with {{clr|DR|Drive Rush}}, uses Charged {{clr|H|5[HP]}}, or the opponent is in Burnout. This makes it a bit less oppressive as an approach, but if the opponent always sticks out a fast button you may be able to make them whiff to set up a spacing trap after {{clr|H|5HP}} instead. | | A Target Combo extension from Marisa's long-range {{clr|H|5HP}} that allows her to maintain pressure on block. On a grounded hit or low-height juggle near the corner, this sets up a safe jump. There is an interruptible gap that loses to 5f or faster normals unless she starts with {{clr|DR|Drive Rush}}, uses Charged {{clr|H|5[HP]}}, or the opponent is in Burnout. This makes it a bit less oppressive as an approach, but if the opponent always sticks out a fast button you may be able to make them whiff to set up a spacing trap after {{clr|H|5HP}} instead. |
|
| |
|
| Even in cases where the opponent can't mash reversal light normals on block, the threat of reversals or Perfect Parry makes this Target Combo risky to throw out predictably. Be aware that {{clr|DR|Drive Impact}} during the gap will beat the regular TC, but if Marisa starts with {{clr|DR|Drive Rush}} or Charged {{clr|H|5[HP]}} then she recovers in time for a {{clr|DR|counter-DI}}. | | Even in cases where the opponent can't mash reversal light normals on block, the threat of reversals or Perfect Parry makes this Target Combo risky to throw out predictably. Be aware that {{clr|DR|Drive Impact}} during the gap will beat the regular TC, but if Marisa starts with {{clr|DR|Drive Rush}} or Charged {{clr|H|5[HP]}} then she recovers in time for a {{clr|DR|counter-DI}}. |
| Line 601: |
Line 617: |
| | title = Novacule Swipe | | | title = Novacule Swipe |
| | subtitle = | | | subtitle = |
| | input = 6MP~HP | | | input = {{Classic_sf6}} 6MP~HP<br>{{Modern_sf6}} 6M~M |
| | images = | | | images = |
| {{MoveDataCargoImage|imageHeight=160px|marisa_6mp_hp|caption=}} | | {{MoveDataCargoImage|imageHeight=160px|marisa_6mp_hp|caption=}} |
| Line 610: |
Line 626: |
| * True blockstring from {{clr|M|6MP}} even at max delay | | * True blockstring from {{clr|M|6MP}} even at max delay |
| <br> | | <br> |
| A sweeping low follow-up from {{clr|M|6MP}}. Like most low knockdowns, this is quite unsafe; however, it's fairly easy to hitconfirm due to the lenient cancel window. This ender is required if the opponent is crouching, since the {{clr|H|HK}} ender whiffs on crouching and {{clr|M|6MP}} only allows links in Counter-hit. | | A sweeping low follow-up from {{clr|M|6MP}}. Like most low knockdowns, this is quite unsafe; however, it's fairly easy to hitconfirm due to the lenient cancel window. This ender is required if the opponent is crouching, since the {{clr|H|HK}} ender whiffs on crouching and {{clr|M|6MP}} only allows links in {{clr|PC|Counter-hit}}. |
| }} | | }} |
|
| |
|
| Line 617: |
Line 633: |
| | title = Novacule Thrust | | | title = Novacule Thrust |
| | subtitle = | | | subtitle = |
| | input = 6MP~HK | | | input = {{Classic_sf6}} 6MP~HK<br>{{Modern_sf6}} 6M~H |
| | images = | | | images = |
| {{MoveDataCargoImage|imageHeight=180px|marisa_6mp_hk|caption=}} | | {{MoveDataCargoImage|imageHeight=180px|marisa_6mp_hk|caption=}} |
| Line 629: |
Line 645: |
| ** Super cancel is delayed until after 3rd active frame | | ** Super cancel is delayed until after 3rd active frame |
| <br> | | <br> |
| A more rewarding ender from {{clr|M|6MP}} due to its launch and Super cancel, but requires you to confirm that the opponent is standing to avoid a punish. Can also be used in some juggles (like {{clr|DR|DR~}}{{clr|M|6MP}} after Punish Counter {{clr|H|5HK}}), though it's not particularly rewarding compared to many of Marisa's juggle options. Notably optimal if you want to combo level 1 without spending extra drive from a 236KK wallsplat. | | A more rewarding ender from {{clr|M|6MP}} due to its launch and Super cancel, but requires you to confirm that the opponent is standing to avoid a punish. Can also be used in some juggles (like {{clr|DR|DR~}}{{clr|M|6MP}} after {{clr|PC|Punish Counter}} {{clr|H|5HK}}), though it's not particularly rewarding compared to many of Marisa's juggle options. Notably optimal if you want to combo level 1 without spending extra drive from a 236KK wallsplat. |
|
| |
|
| Against {{clr|DR|Drive Impact}}, the Super cancel on the 2nd hit can only save Marisa if the opponent starts their armor right as {{clr|M|6MP}} is connecting. Don't try to use this TC as a reaction counter when you see {{clr|M|6MP}} get absorbed. | | Against {{clr|DR|Drive Impact}}, the Super cancel on the 2nd hit can only save Marisa if the opponent starts their armor right as {{clr|M|6MP}} is connecting. Don't try to use this TC as a reaction counter when you see {{clr|M|6MP}} get absorbed. |
| Line 638: |
Line 654: |
| | title = Malleus Breaker 2 | | | title = Malleus Breaker 2 |
| | subtitle = | | | subtitle = |
| | input = 3HP~3HP | | | input = {{Classic_sf6}} 3HP~3HP<br>{{Modern_sf6}} -- |
| | images = | | | images = |
| {{MoveDataCargoImage|imageHeight=180px|marisa_3hp_3hp|caption=}} | | {{MoveDataCargoImage|imageHeight=180px|marisa_3hp_3hp|caption=}} |
| Line 656: |
Line 672: |
| | title = Falx Crusher 2 | | | title = Falx Crusher 2 |
| | subtitle = | | | subtitle = |
| | input = 6HK~6HK | | | input = {{Classic_sf6}} 6HK~6HK<br>{{Modern_sf6}} 6H~6H |
| | images = | | | images = |
| {{MoveDataCargoImage|imageHeight=200px|marisa_6hk_6hk|caption=}} | | {{MoveDataCargoImage|imageHeight=200px|marisa_6hk_6hk|caption=}} |
| Line 677: |
Line 693: |
| | title = Volare Combo | | | title = Volare Combo |
| | subtitle = | | | subtitle = |
| | input = j.MP~MP | | | input = {{Classic_sf6}} j.MP~j.MP<br>{{Modern_sf6}} j.M~j.M |
| | images = | | | images = |
| {{MoveDataCargoImage|imageHeight=160px|marisa_jmp_mp|caption=}} | | {{MoveDataCargoImage|imageHeight=160px|marisa_jmp_mp|caption=}} |
| Line 695: |
Line 711: |
| | title = Forward Throw | | | title = Forward Throw |
| | subtitle = | | | subtitle = |
| | input = LPLK | | | input = {{Classic_sf6}} LPLK<br>{{Modern_sf6}} LM |
| | images = | | | images = |
| {{MoveDataCargoImage|imageHeight=160px|marisa_lplk|caption=}} | | {{MoveDataCargoImage|imageHeight=160px|marisa_lplk|caption=}} |
| Line 704: |
Line 720: |
| * {{clr|PC|Punish Counter}}: HKD +23 | | * {{clr|PC|Punish Counter}}: HKD +23 |
| * Applies 20% immediate damage scaling when comboed into (e.g. after Crumple) | | * Applies 20% immediate damage scaling when comboed into (e.g. after Crumple) |
| | * Successful Throw Escape builds {{clr|DR|1 Drive Gauge}} and {{clr|SA|10% Super Gauge}} for defender |
| | ** Awarded to random player if Throws are input simultaneously |
| <br> | | <br> |
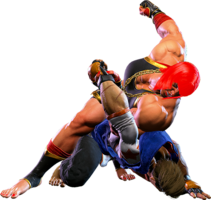
| Marisa can dash after a corner Forward Throw to become {{sf6-adv|P|+1}} at point blank; this does not allow for a true throw loop, as the opponent's reversal 4f normal will beat an immediate throw. The threat of {{clr|L|2LP}} may convince them not to mash, but it's not the most rewarding option for her. A dash does allow Marisa to walk back for a shimmy, which can lead to immense damage if the opponent takes the bait. However, characters with longer throw range (Marisa, Blanka, E. Honda, and Zangief) can throw her out of this shimmy attempt unless they delay their throw tech by several frames. | | Marisa can dash after a corner Forward Throw to become {{sf6-adv|P|+1}} at point blank; this does not allow for a true throw loop, as the opponent's reversal 4f normal will beat an immediate throw. The threat of {{clr|L|2LP}} may convince them not to mash, but it's not the most rewarding option for her. A dash does allow Marisa to walk back for a shimmy, which can lead to immense damage if the opponent takes the bait. However, characters with longer throw range (Marisa, Blanka, E. Honda, and Zangief) can throw her out of this shimmy attempt unless they delay their throw tech by several frames. |
|
| |
|
| {{clr|DR|Drive Rush}} allows Marisa to enact a true throw loop at the cost of 1 Drive bar per attempt. She can also delay her attack in order to bait invincible reversals during the {{clr|DR|Drive Rush}} animation. Mixing throw with powerful starters like {{clr|DR|DR~}}{{clr|M|5MK}} and {{clr|DR|DR~}}{{clr|H|5HP}} can quickly overwhelm a cornered opponent. | | {{clr|DR|Drive Rush}} allows Marisa to enact a true throw loop at the cost of 1 Drive bar per attempt. She can also delay her attack in order to bait invincible reversals during the {{clr|DR|Drive Rush}} animation. Mixing throw with powerful starters like {{clr|DR|DR~}}{{clr|H|5HP}} and {{clr|H|6[HK]}} can quickly overwhelm a cornered opponent. |
| }} | | }} |
|
| |
|
| Line 714: |
Line 732: |
| | title = Back Throw | | | title = Back Throw |
| | subtitle = | | | subtitle = |
| | input = 4LPLK | | | input = {{Classic_sf6}} 4LPLK<br>{{Modern_sf6}} 4LM |
| | images = | | | images = |
| {{MoveDataCargoImage|marisa_4lplk|imageHeight=200px|caption=}} | | {{MoveDataCargoImage|marisa_4lplk|imageHeight=200px|caption=}} |
| Line 724: |
Line 742: |
| * {{clr|PC|Punish Counter}}: HKD +33 | | * {{clr|PC|Punish Counter}}: HKD +33 |
| * Applies 20% immediate damage scaling when comboed into (e.g. after Crumple) | | * Applies 20% immediate damage scaling when comboed into (e.g. after Crumple) |
| | * Successful Throw Escape builds {{clr|DR|1 Drive Gauge}} and {{clr|SA|10% Super Gauge}} for defender |
| | ** Awarded to random player if Throws are input simultaneously |
| <br> | | <br> |
| After throwing the opponent back into the corner, Marisa has fairly weak meterless oki; she can't dash to get back in throw range, and her conversions on a counter-hit are very limited. Using {{clr|DR|Drive Rush}} allows her to get close enough for much more powerful mixups; for example, {{clr|DR|DR~}}{{clr|H|5[HP]}} is {{sf6-adv|VP|+8}} on block and trades with reversal 4f normals for high damage trade combos. | | After throwing the opponent back into the corner, Marisa has fairly weak meterless oki; she can't dash to get back in throw range, and her conversions on a {{clr|PC|Counter-hit}} are very limited. Using {{clr|DR|Drive Rush}} allows her to get close enough for much more powerful mixups; for example, {{clr|DR|DR~}}{{clr|H|5[HP]}} is {{sf6-adv|VP|+8}} on block and trades with reversal 4f normals for high damage trade combos. |
|
| |
|
| Midscreen, even {{clr|DR|Drive Rush}} won't get Marisa back into throw range, but she can still threaten opponents with a manually timed {{clr|DR|DR~}}{{clr|M|6MP}} or {{clr|DR|DR~}}{{clr|H|5HP}} to beat the opponent's 4f normals and deal a little Drive gauge damage. | | Midscreen, even {{clr|DR|Drive Rush}} won't get Marisa back into throw range, but she can still threaten opponents with a manually timed {{clr|DR|DR~}}{{clr|M|6MP}} or {{clr|DR|DR~}}{{clr|H|5HP}} to beat the opponent's 4f normals and deal a little Drive gauge damage. |
| Line 746: |
Line 766: |
| * On Hit/PC: Applies 20% damage scaling to next hit when beginning a combo | | * On Hit/PC: Applies 20% damage scaling to next hit when beginning a combo |
| * On Block: Applies 20% scaling multiplier to all follow-up hits after Wall Splat; the next attack can incur additional Starter Scaling | | * On Block: Applies 20% scaling multiplier to all follow-up hits after Wall Splat; the next attack can incur additional Starter Scaling |
| * Combos when canceled from {{clr|H|4[HP]}} or Punish Counter {{clr|H|4HP}}/{{clr|H|6HK}}/{{clr|H|6[HK]}} (no corner wallsplat; useful for depleting Drive gauge, especially after Perfect Parry) | | * Combos when canceled from {{clr|H|4[HP]}} or {{clr|PC|Punish Counter}} {{clr|H|4HP}}/{{clr|H|6HK}}/{{clr|H|6[HK]}} (no corner wallsplat; useful for depleting Drive gauge, especially after Perfect Parry) |
| * A blocked {{clr|DR|DI}} can combo into another {{clr|DR|DI}} if opponent is not fully cornered (Stuns if opponent has less than 1.5 Drive bars) | | * A blocked {{clr|DR|DI}} can combo into another {{clr|DR|DI}} if opponent is not fully cornered (Stuns if opponent has less than 1.5 Drive bars) |
| ** This happens because a blocked {{clr|DR|DI}} is not considered a "hit" for combo purposes | | ** This happens because a blocked {{clr|DR|DI}} is not considered a "hit" for combo purposes |
| Line 766: |
Line 786: |
| * '''Zangief ({{clr|H|5[HP]}})''', frame 4 armor | | * '''Zangief ({{clr|H|5[HP]}})''', frame 4 armor |
|
| |
|
| It's important to use a blockstring that cannot be absorbed by their armor/counter moves. Ideally, the string should also not be a true combo, or it will cause a Lock and prevent Stun.<br>{{clr|OD|*}} Denotes a move that causes Lock on Counter-hit, allowing the opponent to escape a Stun by mashing on wakeup. | | It's important to use a blockstring that cannot be absorbed by their armor/counter moves. Ideally, the string should also not be a true combo, or it will cause a Lock and prevent Stun.<br>{{clr|OD|*}} Denotes a move that causes Lock on {{clr|PC|Counter-hit}}, allowing the opponent to escape a Stun by mashing on wakeup. |
| * {{clr|H|6HK}}{{clr|OD|*}} > {{clr|DR|DI}}: 1f blockstring gap prevents opponent from absorbing the hit | | * {{clr|H|6HK}}{{clr|OD|*}} > {{clr|DR|DI}}: 1f blockstring gap prevents opponent from absorbing the hit |
| * {{clr|H|4[HP]}}{{clr|OD|*}} > delay {{clr|DR|DI}}: 1-2f blockstring gap prevents opponent from absorbing the hit (must delay until final 2 cancel frames) | | * {{clr|H|4[HP]}}{{clr|OD|*}} > delay {{clr|DR|DI}}: 1-2f blockstring gap prevents opponent from absorbing the hit (must delay until final 2 cancel frames) |
| Line 776: |
Line 796: |
| | title = Drive Reversal | | | title = Drive Reversal |
| | subtitle = | | | subtitle = |
| | input = 6HPHK | | | input = {{Classic_sf6}} 6HPHK<br>{{Modern_sf6}} 6DI |
| | images = | | | images = |
| {{MoveDataCargoImage|imageHeight=200px|marisa_6hphk|caption=}} | | {{MoveDataCargoImage|imageHeight=200px|marisa_6hphk|caption=}} |
| Line 797: |
Line 817: |
| | title = Drive Parry | | | title = Drive Parry |
| | subtitle = | | | subtitle = |
| | input = MPMK | | | input = {{Classic_sf6}} MPMK<br>{{Modern_sf6}} DP |
| | images = | | | images = |
| {{MoveDataCargoImage|imageHeight=200px|marisa_mpmk|caption=}} | | {{MoveDataCargoImage|imageHeight=200px|marisa_mpmk|caption=}} |
| Line 848: |
Line 868: |
| {{MoveDataCargo | | {{MoveDataCargo |
| | title = Gladius | | | title = Gladius |
| | subtitle = | | | subtitle = Armor Punch |
| | input = 236P (HOLD OK) | | | input = {{Classic_sf6}} 236P (HOLD OK)<br>{{Modern_sf6}} 236X or 5S (L) |
| | images = | | | images = |
| {{MoveDataCargoImage|imageHeight=160px|marisa_236lp|caption=}} | | {{MoveDataCargoImage|imageHeight=160px|marisa_236lp|caption=}} |
| Line 884: |
Line 904: |
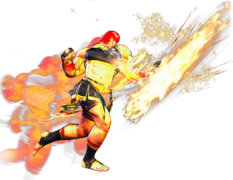
| An armored straight punch that "stabs" the opponent, Gladius has multiple applications for offense, defense, and neutral. | | An armored straight punch that "stabs" the opponent, Gladius has multiple applications for offense, defense, and neutral. |
|
| |
|
| Marisa can harass opponents in the mid-range and chip away at their Drive gauge while taking advantage of the high pushback to keep herself safe. This is fairly easy to do, as even a ranged 5MP~MP canceled into Gladius is usually safe on block. Higher strength versions have more range in exchange for slower startup; it's important not to whiff in neutral, as Gladius is easily whiff punished. If the opponent has a strong cancelable low poke, the lack of lower-body armor makes this move much risker to use in neutral; it still remains effective in combos and blockstrings, however. | | Marisa can harass opponents in the mid-range and chip away at their Drive gauge while taking advantage of the high pushback to keep herself safe. This is fairly easy to do, as even a ranged {{clr|M|5MP}}~{{clr|M|MP}} canceled into Gladius is usually safe on block. Higher strength versions have more range in exchange for slower startup; it's important not to whiff in neutral, as Gladius is easily whiff punished. If the opponent has a strong cancelable low poke, the lack of lower-body armor makes this move much risker to use in neutral; it still remains effective in combos and blockstrings, however. |
|
| |
|
| The most important attribute of Gladius is its ability to charge into a more powerful version by holding the button. A fully charged Gladius breaks armor, rendering {{clr|DR|Drive Impact}} useless unless they predict an early release. The OD version even breaks armor without charge, making it the best version to use if you want to guarantee safety. Partially charging the attack also makes it harder for the opponent to Perfect Parry on reaction, somewhat mitigating one of Marisa's biggest weaknesses. Be aware that charging gives the opponent more time to react with something like an invincible Super, which will break Marisa's armor and interrupt any gap in the blockstring. | | The most important attribute of Gladius is its ability to charge into a more powerful version by holding the button. A fully charged Gladius breaks armor, rendering {{clr|DR|Drive Impact}} useless unless they predict an early release. The {{clr|OD|OD}} version even breaks armor without charge, making it the best version to use if you want to guarantee safety. Partially charging the attack also makes it harder for the opponent to Perfect Parry on reaction, somewhat mitigating one of Marisa's biggest weaknesses. Be aware that charging gives the opponent more time to react with something like an invincible {{clr|SA|Super}}, which will break Marisa's armor and interrupt any gap in the blockstring. |
|
| |
|
| Gladius's armor only covers the upper half of her hurtbox; any attack with a low enough hitbox will hit Marisa out of startup. She also loses any remaining armor the moment the button is released. The punch release starts up surprisingly fast after a partial charge, allowing Marisa to punish absorbed jump-ins or projectiles fairly consistently on reaction to the armor activation. This makes it a semi-consistent anti-air, though it's more easily baited by an empty jump than her other options like 214LP. | | Gladius's armor only covers the upper half of her hurtbox; any attack with a low enough hitbox will hit Marisa out of startup. She also loses any remaining armor the moment the button is released. The punch release starts up surprisingly fast after a partial charge, allowing Marisa to punish absorbed jump-ins or projectiles fairly consistently on reaction to the armor activation. This makes it a semi-consistent anti-air, though it's more easily baited by an empty jump than her other options like {{clr|L|214LP}}. |
|
| |
|
| As a combo ender, Gladius is highly damaging, but pushes the opponent far away. Marisa thrives off momentum, so it's important to pick combo routes that will take you to the corner, or use an alternative ender midscreen. It is cancelable into {{clr|SA|SA3}} (and {{clr|SA|SA2}} for the OD version), and can potentially even be single-hit-confirmed on reaction. Be aware that these Super cancels can whiff midscreen from farther ranges, so they should only be done in guaranteed combo situations or in the corner. | | As a combo ender, Gladius is highly damaging, but pushes the opponent far away. Marisa thrives off momentum, so it's important to pick combo routes that will take you to the corner, or use an alternative ender midscreen. It is cancelable into {{clr|SA|SA3}} (and {{clr|SA|SA2}} for the {{clr|OD|OD}} version), and can potentially even be single-hit-confirmed on reaction. Be aware that these {{clr|SA|Super}} cancels can whiff midscreen from farther ranges, so they should only be done in guaranteed combo situations or in the corner. |
| }} | | }} |
| |-| | | |-| |
| Line 896: |
Line 916: |
| {{MoveDataCargo | | {{MoveDataCargo |
| | title = Gladius | | | title = Gladius |
| | subtitle = | | | subtitle = Armor Punch |
| | input = 236P (HOLD OK) | | | input = {{Classic_sf6}} 236[P]<br>{{Modern_sf6}} 236[X] or 5[S] (L) |
| | images = | | | images = |
| {{MoveDataCargoImage|imageHeight=140px|marisa_236lp_hold|caption=}} | | {{MoveDataCargoImage|imageHeight=140px|marisa_236lp_hold|caption=}} |
| Line 922: |
Line 942: |
| * Applies 30% damage scaling to next hit when beginning a combo (100/70/60...) | | * Applies 30% damage scaling to next hit when beginning a combo (100/70/60...) |
| <br> | | <br> |
| The fully charged version of Gladius shuts down {{clr|DR|Drive Impact}}, which would otherwise be a potent counter to Marisa's moveset. The slow startup makes it easy to interrupt with a jump or a Super on reaction, so it's important to mix up the timing so that the opponent can't overly rely on any one defensive option. Many opponents will instead attempt to Perfect Parry in response to the slow startup. Mixing between slower and faster versions makes this hard to do on reaction, as it's not immediately obvious which strength Marisa is using (except for the OD version, of course). By making the opponent block or parry, you put yourself at excellent frame advantage and can continue enforcing your pressure at will. | | The fully charged version of Gladius shuts down {{clr|DR|Drive Impact}}, which would otherwise be a potent counter to Marisa's moveset. The slow startup makes it easy to interrupt with a jump or a {{clr|SA|Super}} on reaction, so it's important to mix up the timing so that the opponent can't overly rely on any one defensive option. Many opponents will instead attempt to Perfect Parry in response to the slow startup. Mixing between slower and faster versions makes this hard to do on reaction, as it's not immediately obvious which strength Marisa is using (except for the {{clr|OD|OD}} version, of course). By making the opponent block or parry, you put yourself at excellent frame advantage and can continue enforcing your pressure at will. |
|
| |
|
| The armor still loses to low-angled hitboxes just like the uncharged versions. The reel back animation and variable charge timing makes it hard for the opponent to throw out a low poke to intercept at mid-range, however. | | The armor still loses to low-angled hitboxes just like the uncharged versions. The reel back animation and variable charge timing makes it hard for the opponent to throw out a low poke to intercept at mid-range, however. |
| Line 934: |
Line 954: |
| | title = Dimachaerus | | | title = Dimachaerus |
| | subtitle = Uppercut | | | subtitle = Uppercut |
| | input = 214P | | | input = {{Classic_sf6}} 214P<br>{{Modern_sf6}} 214X or 4S (M) |
| | images = | | | images = |
| {{MoveDataCargoImage|imageHeight=190px|marisa_214lp|caption=}} | | {{MoveDataCargoImage|imageHeight=190px|marisa_214lp|caption=}} |
| Line 944: |
Line 964: |
| * '''Cancel Hitconfirm Window:''' 24f (Super) / 34f (follow-up, only combos up to 32f) | | * '''Cancel Hitconfirm Window:''' 24f (Super) / 34f (follow-up, only combos up to 32f) |
| {{AttackDataCargo-SF6/Query|marisa_214mp}} | | {{AttackDataCargo-SF6/Query|marisa_214mp}} |
| * '''Anti-Air Invuln:''' 6-19f (Head only) | | * '''Anti-Air Invuln:''' 6-19f (Upper body) |
| * '''Cancel Hitconfirm Window:''' 24f (Super) / 34f (follow-up) | | * '''Cancel Hitconfirm Window:''' 24f (Super) / 34f (follow-up) |
| {{AttackDataCargo-SF6/Query|marisa_214hp}} | | {{AttackDataCargo-SF6/Query|marisa_214hp}} |
| Line 953: |
Line 973: |
| * '''Cancel Hitconfirm Window:''' 25f (Super) / 37f (follow-up) | | * '''Cancel Hitconfirm Window:''' 25f (Super) / 37f (follow-up) |
| <br> | | <br> |
| Your primary anti-air, combo ender for light confirms, and extension tool for most anything else. Extremely punishable if blocked, so make sure to properly confirm into this special. Each version can connect from a button of its corresponding strength (e.g. 2LP > 214LP, 5MP~MP > 214MP, 4HP > 214HP). OD version connects from any Medium cancelable normals. | | Your primary anti-air special, light hitconfirm ender, and combo extension tool. Extremely punishable if blocked, so make sure to properly confirm into this special. Each version can connect from a button of its corresponding strength (e.g. {{clr|L|2LP}} > {{clr|L|214LP}}, {{clr|M|5MP}}~{{clr|M|MP}} > {{clr|M|214MP}}, {{clr|H|4HP}} > {{clr|H|214HP}}). The {{clr|OD|OD}} version connects from any cancelable Medium normals. It's important to keep the opponent grounded when routing a Dimachaerus combo, as it has no juggle potential in {{sf6-jug|limited juggle}} scenarios. |
|
| |
|
| Heavy version should be utilized wherever possible over the OD version. The heavy version allows for extensions similar to the Overdrive version that deal more damage and don't have the drawback of using Drive Meter.
| | {{clr|L|214LP}} is Marisa's only special move ender that works from a light hitconfirm starter, granting her a basic knockdown with midscreen {{clr|DR|Drive Rush}} oki or a cancel into {{clr|SA|SA3}} if you forgo the {{clr|L|~6LP}} follow-up. It's also a decent anti-air, having full body air invuln and the least forward movement on startup. It's harder to use than most dedicated anti-air uppercut moves, often whiffing under close jumps, but is often necessary (especially against divekick characters). |
|
| |
|
| Light version is, in theory, your best anti-air with air invuln, good damage, and the follow-up leaving the opponent close where Marisa wants them. In practice, Dimachaerus is somewhat slow, and an opponent jumping in close will cross Marisa up due to Dimachaerus's forward movement making this a less consistent anti-air as you'd like. Still an important Anti-Air tool to keep in the pocket, especially against moves that rely on air invulnerability (Such as Honda's Sumo Slam).
| | {{clr|M|214MP}} is similar to the {{clr|L|LP}} version, but with slower startup limiting it to medium normal starters. It's a solid meterless option and can lead to slightly better midscreen oki. As an anti-air, this version is much more rewarding than {{clr|L|214LP}} due to the follow-up's ground bounce property. Unfortunately, its startup, forward movement, and lack of lower body air invuln makes this hard to use on reaction. |
| | |
| | {{clr|H|214HP}} is the hardest to route into, but by far the most rewarding with its high ground bounce. Outside of punish scenarios, setting this up usually requires a {{clr|DR|Drive Rush}} confirm into {{clr|H|4HP}}. {{clr|OD|214PP}} is similarly rewarding and much easier to combo into with its faster startup, making it the ender of choice from a {{clr|M|5MP}}~{{clr|M|MP}} confirm. |
| }} | | }} |
|
| |
|
| Line 963: |
Line 985: |
| {{MoveDataCargo | | {{MoveDataCargo |
| | title = Dimachaerus Follow-up | | | title = Dimachaerus Follow-up |
| | subtitle = | | | subtitle = Uppercut Follow-up |
| | input = 214P~6P | | | input = {{Classic_sf6}} 214P~6P<br>{{Modern_sf6}} 214X~6X or 4S~6S (M) |
| | images = | | | images = |
| {{MoveDataCargoImage|imageHeight=210px|marisa_214lp_6p|caption=}} | | {{MoveDataCargoImage|imageHeight=210px|marisa_214lp_6p|caption=}} |
| Line 982: |
Line 1,004: |
| * Counts as 2 hits for damage scaling when comboed into (applies to next hit) | | * Counts as 2 hits for damage scaling when comboed into (applies to next hit) |
| <br> | | <br> |
| A follow-up to Dimachaerus that can only come out on hit or when absorbed by armor. Unless canceling into a Super, there is no reason not to input this move every time; 214PP can technically lead to a safe jump j.LK, but this would never be worth the huge damage sacrifice. | | A follow-up to Dimachaerus that can only come out on hit or when absorbed by armor. Unless canceling into a {{clr|SA|Super}}, there is no reason not to input this move every time. |
|
| |
|
| The LP version is a simple knockdown ender, as is the MP version on grounded opponents. Using MP Dimachaerus as an anti-air allows the follow-up to ground bounce high enough for a follow-up juggle; depending on the timing, you may need to delay the 6P to connect properly. The HP and OD versions ground bounce even on grounded opponents, leading to extremely damaging combos despite the extra damage scaling applied to the juggle follow-ups. | | The {{clr|L|LP}} version is a simple knockdown ender, granting midscreen oki with {{clr|DR|Drive Rush}}, like an auto-timed meaty {{clr|DR|DR~}}{{clr|H|4HP}} for huge frame advantage. The {{clr|M|MP}} works similarly on grounded opponents, but gets a much more rewarding ground bounce after anti-air {{clr|M|214MP}}. Depending on the juggle height, this may require a delay on the {{clr|M|~6P}} ender. The {{clr|H|HP}} and {{clr|OD|OD}} versions ground bounce even on grounded opponents, leading to extremely powerful combos even with their added damage scaling. |
| }} | | }} |
|
| |
|
| Line 991: |
Line 1,013: |
| | title = Phalanx | | | title = Phalanx |
| | subtitle = Superman Punch | | | subtitle = Superman Punch |
| | input = 623P | | | input = {{Classic_sf6}} 623P<br>{{Modern_sf6}} 623X or 2S (M) |
| | images = | | | images = |
| {{MoveDataCargoImage|imageHeight=160px|marisa_623lp|caption=}} | | {{MoveDataCargoImage|imageHeight=160px|marisa_623lp|caption=}} |
| Line 999: |
Line 1,021: |
| | info = | | | info = |
| {{AttackDataCargo-SF6/Query|marisa_623lp}} | | {{AttackDataCargo-SF6/Query|marisa_623lp}} |
| * '''High/Mid Armor (1-hit):''' 7-11f; '''Lower Body Projectile Invuln:''' 12-27f | | * '''High/Mid Armor (1-hit):''' 7-11f; '''Low Crush / Lower Body Projectile Invuln:''' 12-27f |
| * '''Airborne''' 11-30f ({{FKD}} state) | | * '''Airborne''' 11-30f ({{FKD}} state) |
| * {{clr|PC|Punish Counter}}: HKD +58(59) Slide; hits 1f later vs. crouching opponents | | * {{clr|PC|Punish Counter}}: HKD +58(59) Slide; hits 1f later vs. crouching opponents |
| {{AttackDataCargo-SF6/Query|marisa_623mp}} | | {{AttackDataCargo-SF6/Query|marisa_623mp}} |
| * '''High/Mid Armor (1-hit):''' 7-13f; '''Lower Body Projectile Invuln:''' 12-30f | | * '''High/Mid Armor (1-hit):''' 7-13f; '''Low Crush / Lower Body Projectile Invuln:''' 12-30f |
| * '''Airborne''' 14-33f ({{FKD}} state) | | * '''Airborne''' 14-33f ({{FKD}} state) |
| * {{clr|PC|Punish Counter}}: HKD +58(59) Slide; hits 1f later vs. crouching opponents | | * {{clr|PC|Punish Counter}}: HKD +58(59) Slide; hits 1f later vs. crouching opponents |
| {{AttackDataCargo-SF6/Query|marisa_623hp}} | | {{AttackDataCargo-SF6/Query|marisa_623hp}} |
| * '''High/Mid Armor (1-hit):''' 10-15f; '''Lower Body Projectile Invuln:''' 12-34f | | * '''High/Mid Armor (1-hit):''' 10-15f; '''Low Crush / Lower Body Projectile Invuln:''' 9-34f |
| * '''Airborne''' 17-37f ({{FKD}} state) | | * '''Airborne''' 17-37f ({{FKD}} state) |
| * {{clr|PC|Punish Counter}}: HKD +58(59) Slide; hits 1f later vs. crouching opponents | | * {{clr|PC|Punish Counter}}: HKD +58(59) Slide; hits 1f later vs. crouching opponents |
| {{AttackDataCargo-SF6/Query|marisa_623pp}} | | {{AttackDataCargo-SF6/Query|marisa_623pp}} |
| * '''High/Mid Armor (1-hit):''' 6-12f; '''Lower Body Projectile Invuln:''' 12-30f; Armor Break | | * '''High/Mid Armor (1-hit):''' 6-12f; '''Low Crush / Lower Body Projectile Invuln:''' 12-30f; Armor Break |
| * '''Airborne''' 14-33f ({{FKD}} state) | | * '''Airborne''' 14-33f ({{FKD}} state) |
| * Puts opponent into {{sf6-jug|limited juggle}} OTG state | | * Puts opponent into {{sf6-jug|limited juggle}} OTG state |
| Line 1,020: |
Line 1,042: |
| Marisa jumps into the air and swings downward with a Superman punch; heavier button strengths are slower but travel much farther. Phalanx is a great approach tool in neutral, hopping over low pokes and most projectiles (including tall ones like Guile Sonic Cross or JP's Torbalan/Embrace). All versions are plus on block, but heavier versions leave Marisa closer to the opponent for improved mixups and pressure; it also gains an extra frame of advantage if the opponent is crouching. | | Marisa jumps into the air and swings downward with a Superman punch; heavier button strengths are slower but travel much farther. Phalanx is a great approach tool in neutral, hopping over low pokes and most projectiles (including tall ones like Guile Sonic Cross or JP's Torbalan/Embrace). All versions are plus on block, but heavier versions leave Marisa closer to the opponent for improved mixups and pressure; it also gains an extra frame of advantage if the opponent is crouching. |
|
| |
|
| Phalanx is a bit too slow to use on reaction against fireballs, so it's generally used predictively. Opponents expecting this move can counter it with an anti-air DP or a Perfect Parry, or simply swat Marisa out of the air with a higher-hitting button. {{clr|DR|Drive Impact}} is also a threat, but the OD version breaks armor and the meterless versions recover fast enough to {{clr|DR|counter-DI}} if the opponent times it too late. | | Phalanx is a bit too slow to use on reaction against fireballs, so it's generally used predictively. Opponents expecting this move can counter it with an anti-air DP or a Perfect Parry, or simply swat Marisa out of the air with a higher-hitting button. {{clr|DR|Drive Impact}} is also a threat, but the {{clr|OD|OD}} version breaks armor and the meterless versions recover fast enough to {{clr|DR|counter-DI}} if the opponent times it too late. |
|
| |
|
| Meterless versions allow for safe jump setups with its +42 knockdown advantage, but the required button strength depends on the specific combo route used. OD Phalanx is one of Marisa's most important combo extenders; any juggle into 4HP > 623PP near the corner gives Marisa a huge damage follow-up. | | Meterless versions allow for safe jump setups with its +42 knockdown advantage, but the required button strength depends on the specific combo route used. {{clr|OD|OD Phalanx}} is one of Marisa's most important combo extenders; any juggle into {{clr|H|4HP}} > {{clr|OD|623PP}} near the corner gives Marisa a huge damage follow-up. |
| }} | | }} |
|
| |
|
| Line 1,029: |
Line 1,051: |
| | title = Quadriga | | | title = Quadriga |
| | subtitle = Step Kick | | | subtitle = Step Kick |
| | input = 236K | | | input = {{Classic_sf6}} 236K<br>{{Modern_sf6}} -- |
| | images = | | | images = |
| {{MoveDataCargoImage|imageHeight=180px|marisa_236lk|caption=}} | | {{MoveDataCargoImage|imageHeight=180px|marisa_236lk|caption=}} |
| Line 1,057: |
Line 1,079: |
| {{MoveDataCargo | | {{MoveDataCargo |
| | title = Scutum | | | title = Scutum |
| | subtitle = | | | subtitle = Counter Stance |
| | input = 214K | | | input = {{Classic_sf6}} 214K<br>{{Modern_sf6}} 6S |
| | images = | | | images = |
| {{MoveDataCargoImage|imageHeight=220px|marisa_214k|caption=Mind the Achilles' Heel}} | | {{MoveDataCargoImage|imageHeight=220px|marisa_214k|caption=Mind the Achilles' Heel}} |
| Line 1,078: |
Line 1,100: |
| * Armor Break | | * Armor Break |
| * Triggers automatically after absorbing attack; can hold button to remain in stance after attack | | * Triggers automatically after absorbing attack; can hold button to remain in stance after attack |
| * Marisa incurs only 6f armor hitstop (usually results in +1 Counter-hit rather than +3 Punish Counter vs. medium/heavy attacks) | | * Marisa incurs only 6f armor hitstop (usually results in {{sf6-adv|P|+1}} {{clr|PC|Counter-hit}} rather than {{sf6-adv|P|+3}} {{clr|PC|Punish Counter}} vs. medium/heavy attacks) |
| * Punish Counter state for entire duration | | * {{clr|PC|Punish Counter}} state for entire duration |
| Scutum grants Marisa upper body armor, making it useful as an anti-air or against certain predictable high/mid attacks. Not suitable as a wakeup reversal since the armor doesn't activate until frame 3. The armor activation is determined by hitbox position; some lows hit high enough to be absorbed, while some high/mid attacks hit below the armor box. | | Scutum grants Marisa upper body armor, making it useful as an anti-air or against certain predictable high/mid attacks. Not suitable as a wakeup reversal since the armor doesn't activate until frame 3. The armor activation is determined by hitbox position; some lows hit high enough to be absorbed, while some high/mid attacks hit below the armor box. At only {{sf6-adv|P|+1}} on hit when countering most moves, the reward Scutum grants is less than ideal, and arguably almost disadvantageous for Marisa. |
| {{AttackDataCargo-SF6/Query|marisa_214kk}} | | {{AttackDataCargo-SF6/Query|marisa_214kk}} |
| * '''Full Body Armor (2-hit):''' 1-28(58)f; triggers Counter-attack | | * '''Full Body Armor (2-hit):''' 1-28(58)f; triggers Counter-attack |
| Line 1,090: |
Line 1,112: |
| * '''Armor:''' 1-10f; Armor Break | | * '''Armor:''' 1-10f; Armor Break |
| * Triggers automatically after absorbing attack; can hold button to remain in stance after attack | | * Triggers automatically after absorbing attack; can hold button to remain in stance after attack |
| * Marisa incurs only 6f armor hitstop (usually results in +1 Counter-hit rather than +3 Punish Counter vs. medium/heavy attacks) | | * Marisa incurs only 6f armor hitstop (usually results in {{sf6-adv|P|+1}} {{clr|PC|Counter-hit}} rather than {{sf6-adv|P|+3}} {{clr|PC|Punish Counter}} vs. medium/heavy attacks) |
| * Punish Counter state for entire duration | | * {{clr|PC|Punish Counter}} state for entire duration |
| With 2 hits of armors starting on frame 1, this is a much better defensive option than meterless Scutum. It can even absorb lows, but is still vulnerable to throws and armor breaking attacks. The early armor makes it useful vs. safe jumps involving medium/heavy normals; a perfectly timed light air normal will be able to land and block. | | With 2 hits of armors starting on frame 1, this is a much better defensive option than meterless Scutum. It can even absorb lows, but is still vulnerable to throws and armor breaking attacks. The early armor makes it useful vs. safe jumps involving medium/heavy normals; a perfectly timed light air normal will be able to land and block. Immensely risky when used as a reversal, losing 3 bars of Drive Gauge if Marisa is thrown. |
|
| |
|
| Like all armored moves, Marisa still takes 50% recoverable damage when absorbing attacks; this means she can be KO'd when this move is used at low health. | | Like all armored moves, Marisa still takes 50% recoverable damage when absorbing attacks; this means she can be KO'd when this move is used at low health. |
| Line 1,100: |
Line 1,122: |
| {{MoveDataCargo | | {{MoveDataCargo |
| | title = Tonitrus | | | title = Tonitrus |
| | subtitle = | | | subtitle = Scutum Punch |
| | input = 214K~P~P | | | input = {{Classic_sf6}} 214K~P~P<br>{{Modern_sf6}} 6S~5S~S |
| | images = | | | images = |
| {{MoveDataCargoImage|imageHeight=200px|marisa_214k_p|caption=}} | | {{MoveDataCargoImage|imageHeight=200px|marisa_214k_p|caption=}} |
| Line 1,114: |
Line 1,136: |
| * 1st active frame only hits airborne opponents (causes spike knockdown) | | * 1st active frame only hits airborne opponents (causes spike knockdown) |
| * '''Cancel Hitconfirm Window:''' 16f (Follow-up; 17f if 1st active frame hits airborne) | | * '''Cancel Hitconfirm Window:''' 16f (Follow-up; 17f if 1st active frame hits airborne) |
| * Punish Counter state for entire duration | | * {{clr|PC|Punish Counter}} state for entire duration |
| {{AttackDataCargo-SF6/Query|marisa_214k_p_p}} | | {{AttackDataCargo-SF6/Query|marisa_214k_p_p}} |
| * True blockstring from 214K~P overhead starter | | * True blockstring from 214K~P overhead starter |
| * Punish Counter state for entire duration | | * {{clr|PC|Punish Counter}} state for entire duration |
| <br> | | <br> |
| Marisa makes a heart shaped double handed punch. This overhead follow-up is the safest ender out of Scutum, though the slow animation makes it vulnerable to armored attacks like {{clr|DR|Drive Impact}}. The 2nd hit is unsafe and fairly hard to hitconfirm, so should be used sparingly unless you can react. | | Marisa makes a heart shaped double handed punch. This overhead follow-up is the safest ender out of Scutum, though the slow animation makes it vulnerable to armored attacks like {{clr|DR|Drive Impact}}. The 2nd hit is unsafe and fairly hard to hitconfirm, so should be used sparingly unless you can react. |
| Line 1,127: |
Line 1,149: |
| {{MoveDataCargo | | {{MoveDataCargo |
| | title = Procella | | | title = Procella |
| | subtitle = | | | subtitle = Scutum Kick |
| | input = 214K~K | | | input = {{Classic_sf6}} 214K~K<br>{{Modern_sf6}} 6S~4S |
| | images = | | | images = |
| {{MoveDataCargoImage|imageHeight=210px|marisa_214k_k|caption=}} | | {{MoveDataCargoImage|imageHeight=210px|marisa_214k_k|caption=}} |
| Line 1,135: |
Line 1,157: |
| | info = | | | info = |
| {{AttackDataCargo-SF6/Query|marisa_214k_k}} | | {{AttackDataCargo-SF6/Query|marisa_214k_k}} |
| * Punish Counter state for entire duration | | * {{clr|PC|Punish Counter}} state for entire duration |
| <br> | | <br> |
| A low-hitting sweep from Scutum that steps forward during startup. While the similar startup time makes it difficult to react between the overhead and low enders, this attack is very unsafe if blocked/parried. Additionally, opponents jumping back expecting command grab may end up getting a free punish as this propels Marisa toward them, so use this only if you've conditioned the opponent to expect an overhead. | | A low-hitting sweep from Scutum that steps forward during startup. While the similar startup time makes it difficult to react between the overhead and low enders, this attack is very unsafe if blocked/parried. Additionally, opponents jumping back expecting command grab may end up getting a free punish as this propels Marisa toward them, so use this only if you've conditioned the opponent to expect an overhead. |
| Line 1,145: |
Line 1,167: |
| {{MoveDataCargo | | {{MoveDataCargo |
| | title = Enfold | | | title = Enfold |
| | subtitle = | | | subtitle = Scutum Throw |
| | input = 214K~LPLK | | | input = {{Classic_sf6}} 214K~LPLK<br>{{Modern_sf6}} 6S~2S |
| | images = | | | images = |
| {{MoveDataCargoImage|imageHeight=200px|marisa_214k_lplk|caption=Pankration itself.}} | | {{MoveDataCargoImage|imageHeight=200px|marisa_214k_lplk|caption=Pankration itself.}} |
| Line 1,153: |
Line 1,175: |
| | info = | | | info = |
| {{AttackDataCargo-SF6/Query|marisa_214k_lplk}} | | {{AttackDataCargo-SF6/Query|marisa_214k_lplk}} |
| * Punish Counter state for entire duration | | * {{clr|PC|Punish Counter}} state for entire duration |
| * Range: 1.11 (final active frame: 1.17) | | * Range: 1.11 (final active frame: 1.17) |
| ** Includes the 0.22 forward movement from 214K startup | | ** Includes the 0.22 forward movement from 214K startup |
| Line 1,168: |
Line 1,190: |
| | title = Javelin of Marisa | | | title = Javelin of Marisa |
| | subtitle = Level 1 Super Art | | | subtitle = Level 1 Super Art |
| | input = 236236P | | | input = {{classic_sf6}} 236236P (HOLD OK)<br>{{Modern_sf6}} 236236L or 5HS or 6HS |
| | images = | | | images = |
| {{MoveDataCargoImage|imageHeight=200px|marisa_236236p|caption=}} | | {{MoveDataCargoImage|imageHeight=200px|marisa_236236p|caption=}} |
| Line 1,186: |
Line 1,208: |
| {{AttackDataCargo-SF6/Query|marisa_236236p_hold}} | | {{AttackDataCargo-SF6/Query|marisa_236236p_hold}} |
| * '''Strike/Throw Invuln:''' 1f (until freeze); '''Armor (2-hit):''' 1-47f; Armor Break | | * '''Strike/Throw Invuln:''' 1f (until freeze); '''Armor (2-hit):''' 1-47f; Armor Break |
| * Frames 1-27f trigger a cinematic counter when absorbing a strike | | * Frames 1-27f trigger a cinematic counter when absorbing a strike or throw |
| * After release, active frames 1-3 trigger a cinematic hit (higher damage/KD advantage) | | * After release, active frames 1-3 trigger a cinematic hit (higher damage/KD advantage) |
| * '''Drive Gauge Depletion:''' 0.75 bars (hit) / 0.25 bars (block) | | * '''Drive Gauge Depletion:''' 0.75 bars (hit) / 0.25 bars (block) |
| Line 1,196: |
Line 1,218: |
| Armored haymaker Super Art that can be charged to change its properties. | | Armored haymaker Super Art that can be charged to change its properties. |
|
| |
|
| The uncharged version is quite slow as a reversal, and Marisa takes armor damage that can lead to a KO at very low health. All versions lose to throws, and can be too slow to counter some meaty projectiles on wakeup. | | The uncharged version is quite slow as a reversal, and Marisa takes armor damage that can lead to a KO at very low health. It loses to throws, and can be too slow to counter some meaty projectiles on wakeup. |
|
| |
|
| The held version is a much better reversal due to the cinematic counter that triggers when absorbing a strike; this counter does not cause Marisa to take any armor damage, but can be baited with safe jump timing. The held counter does not lose to Armor Break attacks; for example, a normal canceled into {{clr|SA|236236[P]}} will beat the opponent's Drive Reversal unless they delay it significantly. | | The held version is a much better reversal due to the cinematic counter that triggers when absorbing strikes and throws; this counter does not cause Marisa to take any armor damage, but can be baited with safe jump timing. The held counter does not lose to Armor Break attacks; for example, a normal canceled into {{clr|SA|236236[P]}} will beat the opponent's Drive Reversal unless they delay it significantly. |
|
| |
|
| Javelin is fairly easy to route as a combo ender for a relatively cheap 3000-4000 damage from most common routes. If the opponent is midscreen, this causes a reset to neutral that gives up all of Marisa's momentum. The charged version can always land after an {{clr|OD|OD Phalanx}} corner wall splat for some extra damage. If the held version connects at max distance (active frames 4-6), it triggers a weaker version that does reduced damage and Drive depletion and is no longer a hard knockdown. | | Javelin is fairly easy to route as a combo ender for a relatively cheap 3000-4000 damage from most common routes. If the opponent is midscreen, this causes a reset to neutral that gives up all of Marisa's momentum. The charged version can always land after an {{clr|OD|OD Phalanx}} corner wall splat, and when canceled from {{clr|H|2[HP]}} for some extra damage. If the held version connects at max distance (active frames 4-6), it triggers a weaker version that does reduced damage and Drive depletion and is no longer a Hard Knockdown. |
| }} | | }} |
|
| |
|
| Line 1,207: |
Line 1,229: |
| | title = Meteorite | | | title = Meteorite |
| | subtitle = Level 2 Super Art | | | subtitle = Level 2 Super Art |
| | input = 214214P | | | input = {{classic_sf6}} 214214P<br>{{Modern_sf6}} 214214M or 4HS |
| | images = | | | images = |
| {{MoveDataCargoImage|imageHeight=200px|marisa_214214p|1|caption=}} | | {{MoveDataCargoImage|imageHeight=200px|marisa_214214p|1|caption=}} |
| Line 1,218: |
Line 1,240: |
| | info = | | | info = |
| {{AttackDataCargo-SF6/Query|marisa_214214p}} | | {{AttackDataCargo-SF6/Query|marisa_214214p}} |
| * '''Full Invuln:''' 1-15f; Armor Break | | * '''Full Invuln:''' 1-16f; '''Airborne''' 17-47f ({{FKD}} state); Armor Break |
| * '''Airborne''' 16-47f ({{FKD}} state)
| | * Can be steered by holding Back or Forward |
| * '''Drive Gauge Depletion:''' 1 bar (hit) / 0.5 bars (block); 0.25 bars per blocked hit | | * '''Drive Gauge Depletion:''' 1 bar (hit) / 0.5 bars (block); 0.25 bars per blocked hit |
| ** Non-cinematic downward slam deals full Drive Damage on hit | | ** Non-cinematic downward slam deals full Drive Damage on hit |
| * 40% minimum damage scaling; applies 15% immediate scaling when comboed into | | * 40% minimum damage scaling; applies 15% immediate scaling when comboed into |
| <br> | | <br> |
| Marisa launches herself upward and slams the opponent back to the ground. The full invincibility makes it a more consistent reversal than {{clr|SA|SA1}}, as well as a strong anti-air that's easy to input when buffering 214P (her other go-to anti-air). It can also be a useful juggle ender, granting better damage and positioning than {{clr|SA|SA1}} (especially midscreen). | | Marisa launches herself upward and slams the opponent back to the ground. If the first hit connects, it triggers a cinematic hit that does above average damage for a {{clr|SA|Level 2 Super}}, but the immediate damage scaling weakens it slightly in combos. If the first hit whiffs or is blocked, Marisa continues the attack with a downward slam that does 500 less damage than the cinematic version (while still dealing 1 full bar of Drive damage on hit). This second attack can easily be avoided with a jump, but Marisa's collision box stretches downward far enough that the opponent can't walk or dash under her without a low-profile move. |
| | |
| | The full invincibility makes {{clr|SA|SA2}} a more reliable reversal than {{clr|SA|SA1}} if the opponent has projectile-based pressure, but the startup is slow enough that some characters can safely jab Marisa on wakeup. It's also a fairly effective anti-air that can be quickly input while buffering 214P (her other go-to anti-air). Holding back during startup makes the opponent less likely to cross over Marisa, while holding forward allows it to work more consistently at longer ranges. |
|
| |
|
| If the first hit connects, it triggers a cinematic hit that does above average damage for a {{clr|SA|Level 2 Super}}. On block or whiff, Marisa continues the attack with a downward slam that does 500 less damage than the cinematic version (while still dealing 1 full bar of Drive damage on hit). This second attack can easily be avoided with a jump, but Marisa's collision box stretches downward far enough that the opponent can't walk or dash under her without a low-profile move.
| | As a juggle ender, it can tack on solid damage from more starters than {{clr|SA|SA1}}, but it doesn't lead to real oki even in the corner. However, in situations where a fully charged {{clr|SA|SA1}} is possible, you can sometimes even get more damage spending 1 bar than by spending 2. |
| }} | | }} |
|
| |
|
| Line 1,233: |
Line 1,257: |
| | title = Goddess of the Hunt | | | title = Goddess of the Hunt |
| | subtitle = Level 3 Super Art | | | subtitle = Level 3 Super Art |
| | input = 236236K | | | input = {{classic_sf6}} 236236K<br>{{Modern_sf6}} 236236H or 2HS |
| | images = | | | images = |
| {{MoveDataCargoImage|imageHeight=140px|marisa_236236k|caption=}} | | {{MoveDataCargoImage|imageHeight=140px|marisa_236236k|caption=}} |
| Line 1,264: |
Line 1,288: |
| | title = Neutral Taunt | | | title = Neutral Taunt |
| | subtitle = | | | subtitle = |
| | input = 5PPPKKK | | | input = {{classic_sf6}} 5PPPKKK<br>{{Modern_sf6}} 5LMHS+DP+A |
| | images = | | | images = |
| {{MoveDataCargoImage|imageHeight=200px|marisa_5pppkkk|caption='' "I may need a second helping of you!" ''}} | | {{MoveDataCargoImage|imageHeight=200px|marisa_5pppkkk|caption='' "I may need a second helping of you!" ''}} |
| Line 1,275: |
Line 1,299: |
| | title = Forward Taunt | | | title = Forward Taunt |
| | subtitle = | | | subtitle = |
| | input = 6PPPKKK | | | input = {{classic_sf6}} 6PPPKKK<br>{{Modern_sf6}} 6LMHS+DP+A |
| | images = | | | images = |
| {{MoveDataCargoImage|imageHeight=180px|marisa_6pppkkk|caption='' "Come on, the first hit's free." ''}} | | {{MoveDataCargoImage|imageHeight=180px|marisa_6pppkkk|caption='' "Come on, the first hit's free." ''}} |
| Line 1,290: |
Line 1,314: |
| | title = Back Taunt | | | title = Back Taunt |
| | subtitle = | | | subtitle = |
| | input = 4PPPKKK | | | input = {{classic_sf6}} 4PPPKKK<br>{{Modern_sf6}} 4LMHS+DP+A |
| | images = | | | images = |
| {{MoveDataCargoImage|imageHeight=200px|marisa_4pppkkk|caption='' "This will be fun! *crack*" ''}} | | {{MoveDataCargoImage|imageHeight=200px|marisa_4pppkkk|caption='' "This will be fun! *crack*" ''}} |


