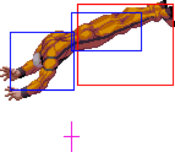
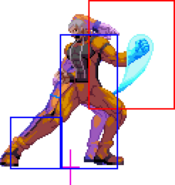
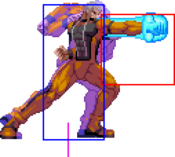
m (added video) |
mNo edit summary |
||
| (12 intermediate revisions by 2 users not shown) | |||
| Line 1: | Line 1: | ||
{{Character Subnav ROTD|name=Radel}} | {{Character Subnav ROTD|name=Radel}} | ||
<center>'''Move List Showcase''' <br> | <center>'''Move List Showcase''' <br> | ||
<youtube>wMd587Wk8eg</youtube></center> | <youtube>wMd587Wk8eg</youtube></center> | ||
==Movelist== | ==Movelist== | ||
=== | ====Impact==== | ||
[[File:Snka.gif]][[File:Snka.gif]][[File:Snka.gif]][[File:Snkc.gif]][[File:Snkd.gif]] | |||
''(Air)'' [[File:Snka.gif]][[File:Snka.gif]][[File:Snka.gif]][[File:Snkc.gif]][[File:Snkd.gif]] | |||
=== | ====Command Normals==== | ||
{{df}}[[File:Snkb.gif]] | |||
: | |||
====Special Moves==== | |||
: | {{qcf}}[[File:Snka.gif]]/[[File:Snkc.gif]] - Escape | ||
{{hcb}}[[File:Snka.gif]]/[[File:Snkc.gif]]~{{qcb}}[[File:Snka.gif]]/[[File:Snkc.gif]] - Head Execution | |||
{{hcb}}[[File:Snkb.gif]]/[[File:Snkd.gif]] - Screw Kick | |||
: | |||
{{dp}}[[File:Snka.gif]]/[[File:Snkc.gif]] - Dead Dragon | |||
====Super Moves==== | |||
: | {{qcf}}{{hcb}}[[File:Snka.gif]]/[[File:Snkc.gif]] - Silent Sword | ||
=== | |||
''' | ==Close Normals== | ||
: | {{MoveData | ||
|image=ROTD_Radel_clA.png | |||
|caption= | |||
|name=cl.A | |||
|data= | |||
{{AttackData-ROTD | |||
|Damage=6 | |||
|Guard=Mid | |||
|Stun=2 | |||
|Cancel=Chain, Command, Special | |||
|Startup=4 | |||
|Active=5 | |||
|Recovery=5 | |||
|Adv. Hit=+1 | |||
|Adv. Guard=0 | |||
|description= | |||
}} | |||
}} | |||
{{MoveData | |||
|image=ROTD_Radel_clB.png | |||
|caption= | |||
|name=cl.B | |||
|data= | |||
{{AttackData-ROTD | |||
|Damage=8 | |||
|Guard=Mid | |||
|Stun=4 | |||
|Cancel=Command, Special | |||
|Startup=5 | |||
|Active=3 | |||
|Recovery=7 | |||
|Adv. Hit=+1 | |||
|Adv. Guard=0 | |||
|description= | |||
}} | |||
}} | |||
{{MoveData | |||
|image=ROTD_Radel_clC.png | |||
|caption= | |||
|name=cl.C | |||
|data= | |||
{{AttackData-ROTD | |||
|Damage=16 | |||
|Guard=Mid | |||
|Stun=8 | |||
|Cancel=Command, Special | |||
|Startup=6 | |||
|Active=2 | |||
|Recovery=12 | |||
|Adv. Hit=+1 | |||
|Adv. Guard=-5 | |||
|description= | |||
}} | |||
}} | |||
{{MoveData | |||
|image=ROTD_Radel_clD.png | |||
|caption= | |||
|name=cl.D | |||
|data= | |||
{{AttackData-ROTD | |||
|Damage=21 (6+15) | |||
|Guard=Mid | |||
|Stun=10 (4+6) | |||
|Cancel=Command, Special | |||
|Startup=5 | |||
|Active=1+4 | |||
|Recovery=27 | |||
|Adv. Hit=-12 | |||
|Adv. Guard=-18 | |||
|description= | |||
}} | |||
}} | |||
==Standing Normals== | |||
{{MoveData | |||
|image=ROTD_Radel_stA.png | |||
|caption= | |||
|name=st.A | |||
|data= | |||
{{AttackData-ROTD | |||
|Damage=8 | |||
|Guard=Mid | |||
|Stun=2 | |||
|Cancel=Chain, Command, Special | |||
|Startup=5 | |||
|Active=5 | |||
|Recovery=6 | |||
|Adv. Hit=0 | |||
|Adv. Guard=-1 | |||
|description=Great tool to bully your opponent with. You can cancel into 236A or both supers from this poke. | |||
}} | |||
}} | |||
{{MoveData | |||
|image=ROTD_Radel_stB.png | |||
|caption= | |||
|name=st.B | |||
|data= | |||
{{AttackData-ROTD | |||
|Damage=10 | |||
|Guard=Mid | |||
|Stun=5 | |||
|Cancel= | |||
|Startup=10 | |||
|Active=7 | |||
|Recovery=13 | |||
|Adv. Hit=-9 | |||
|Adv. Guard=-10 | |||
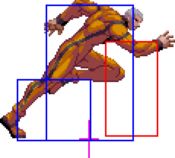
|description=A slide of sorts which hits mid. | |||
}} | |||
}} | |||
{{MoveData | |||
|image=ROTD_Radel_stC.png | |||
|caption= | |||
|name=st.C | |||
|data= | |||
{{AttackData-ROTD | |||
|Damage=18 | |||
|Guard=Mid | |||
|Stun=10 | |||
|Cancel= | |||
|Startup=12 | |||
|Active=11 | |||
|Recovery=11 | |||
|Adv. Hit=-6/-3 | |||
|Adv. Guard=-9 | |||
|description= You can link 5A off of this, but it's not the best use case. Use 2C for a combo tool. | |||
}} | |||
}} | |||
{{MoveData | |||
|image=ROTD_Radel_stD.png | |||
|caption= | |||
|name=st.D | |||
|data= | |||
{{AttackData-ROTD | |||
|Damage=20 | |||
|Guard=Mid | |||
|Stun=12 | |||
|Cancel= | |||
|Startup=15 | |||
|Active=4 | |||
|Recovery=15 | |||
|Adv. Hit=-3/0 | |||
|Adv. Guard=-6 | |||
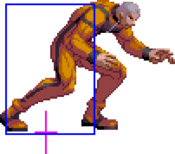
|description=Huge low crush which moves Radel forward. One of his big normals he bullies with. | |||
}} | |||
}} | |||
==Crouching Normals== | |||
{{MoveData | |||
|image=ROTD_Radel_crA.png | |||
|caption= | |||
|name=cr.A | |||
|data= | |||
{{AttackData-ROTD | |||
|Damage=6 | |||
|Guard=Mid | |||
|Stun=2 | |||
|Cancel=Chain, Command, Special | |||
|Startup=4 | |||
|Active=5 | |||
|Recovery=5 | |||
|Adv. Hit=+1 | |||
|Adv. Guard=0 | |||
|description=Great light check, you can combo into 236A or both supers off of this. | |||
}} | |||
}} | |||
{{MoveData | |||
|image=ROTD_Radel_crB.png | |||
|caption= | |||
|name=cr.B | |||
|data= | |||
{{AttackData-ROTD | |||
|Damage=8 | |||
|Guard=Low | |||
|Stun=4 | |||
|Cancel=Command, Special | |||
|Startup=13 | |||
|Active=4 | |||
|Recovery=10 | |||
|Adv. Hit=-3 | |||
|Adv. Guard=-4 | |||
|description=A small slide which doesn't chain. The hitbox appears the frame Radel stops moving. | |||
}} | |||
}} | |||
{{MoveData | |||
|image=ROTD_Radel_crC.png | |||
|caption= | |||
|name=cr.C | |||
|data= | |||
{{AttackData-ROTD | |||
|Damage=16 | |||
|Guard=Mid | |||
|Stun=8 | |||
|Cancel=Command, Special | |||
|Startup=6 | |||
|Active=3 | |||
|Recovery=13 | |||
|Adv. Hit=+3 | |||
|Adv. Guard=-3 | |||
|description=Big cancellable button, but it doesn't combo into 3B at max range. Good for punishing things at mid/close ranges where you cannot run up and punish. | |||
}} | |||
}} | |||
{{MoveData | |||
|image=ROTD_Radel_crD.png | |||
|caption= | |||
|name=cr.D | |||
|data= | |||
{{AttackData-ROTD | |||
|Damage=20 | |||
|Guard=Low | |||
|Stun=15 | |||
|Cancel= | |||
|Startup=7 | |||
|Active=4 | |||
|Recovery=17 | |||
|Adv. Hit=KD | |||
|Adv. Guard=-4 | |||
|description=Safe sweep, fast to recover. | |||
}} | |||
}} | |||
==Jumping Normals== | |||
{{MoveData | |||
|image=ROTD_Radel_jA.png | |||
|caption= | |||
|name=j.A | |||
|data= | |||
{{AttackData-ROTD | |||
|Damage=8 | |||
|Guard=High/Air | |||
|Stun=6 | |||
|Cancel=Special | |||
|Startup=3 | |||
|Active=16 | |||
|Recovery= | |||
|Adv. Hit= | |||
|Adv. Guard= | |||
|description= | |||
}} | |||
}} | |||
{{MoveData | |||
|image=ROTD_Radel_jB.png | |||
|caption= | |||
|name=j.B | |||
|data= | |||
{{AttackData-ROTD | |||
|Damage=10 | |||
|Guard=High/Air | |||
|Stun=8 | |||
|Cancel=Special | |||
|Startup=3 | |||
|Active=10 | |||
|Recovery= | |||
|Adv. Hit= | |||
|Adv. Guard= | |||
|description= | |||
}} | |||
}} | |||
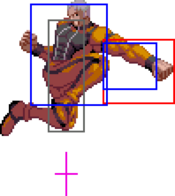
{{MoveData | |||
|image=ROTD_Radel_jC.png | |||
|caption= | |||
|name=j.C | |||
|data= | |||
{{AttackData-ROTD | |||
|Damage=14 | |||
|Guard=High/Air | |||
|Stun=12 | |||
|Cancel=Special | |||
|Startup=6 | |||
|Active=12 | |||
|Recovery= | |||
|Adv. Hit= | |||
|Adv. Guard= | |||
|description= | |||
}} | |||
}} | |||
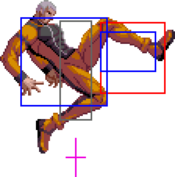
{{MoveData | |||
|image=ROTD_Radel_stD.png | |||
|caption= | |||
|name=j.D | |||
|data= | |||
{{AttackData-ROTD | |||
|Damage=16 | |||
|Guard=High/Air | |||
|Stun=12 | |||
|Cancel=Special | |||
|Startup=6 | |||
|Active=8 | |||
|Recovery= | |||
|Adv. Hit= | |||
|Adv. Guard= | |||
|description=Same hitbox as stand D. | |||
}} | |||
}} | |||
==Command Normals== | |||
{{MoveData | |||
|image=ROTD_Radel_3B.png | |||
|caption= | |||
|name=3B | |||
|data= | |||
{{AttackData-ROTD | |||
|Damage=20 (10+10) | |||
|Guard=Mid | |||
|Stun=16 (8+8) | |||
|Cancel=Special | |||
|Startup=13 | |||
|Active=3+(8)+4 | |||
|Recovery=31 | |||
|Adv. Hit=-16 | |||
|Adv. Guard=-22 | |||
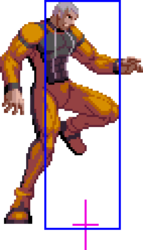
|description=Two-hit kick. Radel's main command normal to link from normals into specials/supers. Both hits can be cancelled. Not a low despite appearances. | |||
}} | |||
}} | |||
==Throws== | |||
{{MoveData | |||
|image=ROTD_Radel_throw.png | |||
|caption= | |||
|name=4/6C | |||
|data= | |||
{{AttackData-ROTD | |||
|Damage=20 | |||
|Guard= | |||
|Stun=0 | |||
|Cancel= | |||
|Startup=1 | |||
|Active=1 | |||
|Recovery= | |||
|Adv. Hit=KD | |||
|Adv. Guard= | |||
|description=A leg lock which throws the opponent fullscreen. | |||
}} | |||
}} | |||
==System== | |||
{{MoveData | |||
|image=ROTD_Radel_clC.png | |||
|caption=BC | |||
|name=Tag-In | |||
|data= | |||
{{AttackData-ROTD | |||
|Damage=16 | |||
|Guard=Mid | |||
|Stun=0 | |||
|Cancel=Command, Special | |||
|Startup=6 (1-11 invuln) | |||
|Active=2 | |||
|Recovery=25 | |||
|Adv. Hit=KD | |||
|Adv. Guard=-10 | |||
|description= | |||
}} | |||
}} | |||
{{MoveData | |||
|image=ROTD_Radel_stD.png | |||
|caption=gcCD | |||
|name=Guard Cancel | |||
|data= | |||
{{AttackData-ROTD | |||
|Damage=10 | |||
|Guard=Mid | |||
|Stun=10 | |||
|Cancel= | |||
|Startup=13 (1-16 invuln) | |||
|Active=4 | |||
|Recovery=21 | |||
|Adv. Hit=KD | |||
|Adv. Guard=-8 | |||
|description= | |||
}} | |||
}} | |||
{{MoveData | |||
|image=ROTD_Radel_CD.png | |||
|caption=CD | |||
|name=First Impact | |||
|data= | |||
{{AttackData-ROTD | |||
|Damage=5+5×5 | |||
|Guard=Mid | |||
|Stun=0 | |||
|Cancel=Hit: Command, Special | |||
|Startup=14 | |||
|Active=4 | |||
|Recovery=31 | |||
|Adv. Hit=KD | |||
|Adv. Guard=-18 | |||
|description=Can also be used as a low crush, considering it shares the same hitbox as stand D. | |||
}} | |||
}} | |||
{{MoveData | |||
|image=ROTD_Radel_run.png | |||
|image2=ROTD_Radel_236BC.png | |||
|caption=236CD | |||
|caption2=236CD~236CD | |||
|name=Duplex Attack | |||
|data= | |||
{{AttackData-ROTD | |||
|Damage=30 | |||
|Guard=Mid | |||
|Stun=0 | |||
|Cancel= | |||
|Startup=4 | |||
|Active=60 | |||
|Recovery=29 | |||
|Adv. Hit=KD | |||
|Adv. Guard=-13 | |||
|description=Your partner must be alive and able to tag in. | |||
}} | |||
{{AttackData-ROTD | |||
|Damage=27 (35 with Annie) | |||
|Guard= | |||
|Stun=0 | |||
|Cancel= | |||
|Startup= | |||
|Active= | |||
|Recovery= | |||
|Adv. Hit=KD | |||
|Adv. Guard= | |||
|description=Follow up with another 236BC for more damage. Costs an extra bar. | |||
}} | |||
}} | |||
==Special Moves== | |||
{{MoveData | |||
|image=ROTD_Radel_236P.png | |||
|caption=236A/C | |||
|name=Escape | |||
|data= | |||
{{AttackData-ROTD | |||
|Damage=22 (4+18) | |||
|Guard=Mid | |||
|Stun=12 (4+8) | |||
|Cancel= | |||
|Startup=11 | |||
|Active=3+(9)+21 | |||
|Recovery=10 | |||
|Adv. Hit=KD | |||
|Adv. Guard=-14 | |||
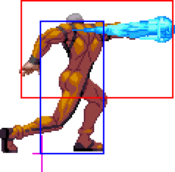
|description=Big shoulder ram into an even bigger punch. The light version hits twice. If you're too close to a wall, you can miss your wall hit since it causes a wall splat. | |||
}} | |||
{{AttackData-ROTD | |||
|Damage=24 (4+5+15) | |||
|Guard=Mid | |||
|Stun=20 (4+8+8) | |||
|Cancel= | |||
|Startup=13 | |||
|Active=3+(7)+2+21 | |||
|Recovery=10 | |||
|Adv. Hit=KD | |||
|Adv. Guard=-14 | |||
|description=Heavy version hits thrice and moves Radel forward a little more. Both versions do a lot of stun damage and are just as unsafe, so just use this in combos. Second hitbox only used for this version. | |||
}} | |||
}} | |||
{{MoveData | |||
|image=ROTD_Radel_63214P.png | |||
|image2=ROTD_Radel_63214P_214P.png | |||
|caption=63214A/C | |||
|caption2=63214A/C~214A/C | |||
|name=Head Execution | |||
|data= | |||
{{AttackData-ROTD | |||
|Damage=20 | |||
|Guard= | |||
|Stun=0 | |||
|Cancel= | |||
|Startup=1 | |||
|Active=1 | |||
|Recovery=40 | |||
|Adv. Hit=KD | |||
|Adv. Guard= | |||
|description=Radel flips over the opponent's shoulders and throws them. This doesn't break the wall. | |||
}} | |||
{{AttackData-ROTD | |||
|Damage=10 | |||
|Guard= | |||
|Stun=4 | |||
|Cancel= | |||
|Startup=32 | |||
|Active=27 | |||
|Recovery=13 | |||
|Adv. Hit=KD | |||
|Adv. Guard= | |||
|description=A followup which breaks the wall. In the corner, Radel can substitute this for a jab reset or even a Duplex. If he's too close in the corner, the opponent can tech the recovery just in time to punish him. | |||
}} | |||
}} | |||
{{MoveData | |||
|image=ROTD_Radel_63214K.png | |||
|image2=ROTD_Radel_63214D.png | |||
|caption=63214B/D | |||
|caption2=63214D | |||
|name=Screw Kick | |||
|data= | |||
{{AttackData-ROTD | |||
|Damage=15 (5+10) | |||
|Guard=Mid, Mid/Air | |||
|Stun=12 (6+6) | |||
|Cancel= | |||
|Startup=13 | |||
|Active=4+(6)+4 | |||
|Recovery=34 | |||
|Adv. Hit=KD | |||
|Adv. Guard=-21 | |||
|description=Big ol' donkey kick. Light version hits twice and causes a regular knockdown — not a wall splat. | |||
}} | |||
{{AttackData-ROTD | |||
|Damage=20 (5+5+10) | |||
|Guard=Mid/Air×2, Mid | |||
|Stun=18 (6×3) | |||
|Cancel= | |||
|Startup=12 | |||
|Active=4+(5)+4+(10)+6 | |||
|Recovery=32 | |||
|Adv. Hit=KD | |||
|Adv. Guard=-21 | |||
|description=Heavy version hits thrice. Hard to punish thanks to the last kick's pushback; requires a run-in. Said kick also causes a wall splat, which has the same problem with wall hits as Escape. | |||
}} | |||
}} | |||
{{MoveData | |||
|image=ROTD_Radel_623P.png | |||
|caption=623A/C | |||
|name=Dead Dragon | |||
|data= | |||
{{AttackData-ROTD | |||
|Damage=18 | |||
|Guard=Mid/Air | |||
|Stun=10 | |||
|Cancel= | |||
|Startup=15 (1-11 invuln) | |||
|Active=3+4+4 | |||
|Recovery=29 | |||
|Adv. Hit=KD | |||
|Adv. Guard=-20 | |||
|description=DP with a few invincibility frames at the start. Both versions launch the opponent fullscreen and are excellent gambits if you want to hit the wall. | |||
}} | |||
{{AttackData-ROTD | |||
|Damage=20 (5+15) | |||
|Guard=Mid, Mid/Air | |||
|Stun=11 (5+6) | |||
|Cancel= | |||
|Startup=10 (1-9 invuln) | |||
|Active=3+4+4 | |||
|Recovery=23 | |||
|Adv. Hit=KD | |||
|Adv. Guard=-14 | |||
|description=Less invincible, but a true reversal which moves a great amount forward. Often used to YOLO. Hits twice. | |||
}} | |||
}} | |||
==Super Moves== | |||
{{MoveData | |||
|image=ROTD_Radel_2363214P.png | |||
|image2=ROTD_Radel_2363214A.png | |||
|image3=ROTD_Radel_2363214C.png | |||
|caption=2363214A/C | |||
|caption2=2363214A | |||
|caption3=2363214C | |||
|name=Silent Sword | |||
|data= | |||
{{AttackData-ROTD | |||
|Damage=40 (5×3+25) | |||
|Guard=Mid | |||
|Stun=16 (4×4) | |||
|Cancel= | |||
|Startup=9 (1-8 invuln) | |||
|Active=4+(8)+2+(10)+2+(10)+21 | |||
|Recovery=17 | |||
|Adv. Hit=KD | |||
|Adv. Guard=-21 | |||
|description=A flurry of punches which ends in a knockdown. Inflicts great amounts of stun. If it hits an airborne opponent, it jails them to the ground for the rest of the hits. Runs halfscreen. | |||
}} | |||
{{AttackData-ROTD | |||
|Damage=50 (5×6+30) | |||
|Guard=Mid | |||
|Stun=28 (4×7) | |||
|Cancel= | |||
|Startup=8 (1-7 invuln) | |||
|Active=6+6+(8)+2+(10)+2+(12)+2+(10)+2+(10)+21 | |||
|Recovery=25 | |||
|Adv. Hit=KD | |||
|Adv. Guard=-29 | |||
|description=Scaling cuts into the damage considerably, but the sheer amount of stun makes up for it. However, it causes a wall splat, which deprives him of a wall hit if he's too close. Runs fullscreen. | |||
}} | |||
}} | |||
[[Category:Rage of the Dragons]] | [[Category:Rage of the Dragons]] | ||
{{Rage Of The Dragons}} | {{Rage Of The Dragons}} | ||
Latest revision as of 23:39, 22 November 2024
Movelist
Impact
Command Normals
Special Moves
Super Moves
Close Normals
| Damage | Guard | Stun | Cancel | |
|---|---|---|---|---|
| 6 | Mid | 2 | Chain, Command, Special | |
| Startup | Active | Recovery | Adv. Hit | Adv. Guard |
| 4 | 5 | 5 | +1 | 0 |
| Damage | Guard | Stun | Cancel | |
|---|---|---|---|---|
| 8 | Mid | 4 | Command, Special | |
| Startup | Active | Recovery | Adv. Hit | Adv. Guard |
| 5 | 3 | 7 | +1 | 0 |
| Damage | Guard | Stun | Cancel | |
|---|---|---|---|---|
| 16 | Mid | 8 | Command, Special | |
| Startup | Active | Recovery | Adv. Hit | Adv. Guard |
| 6 | 2 | 12 | +1 | -5 |
| Damage | Guard | Stun | Cancel | |
|---|---|---|---|---|
| 21 (6+15) | Mid | 10 (4+6) | Command, Special | |
| Startup | Active | Recovery | Adv. Hit | Adv. Guard |
| 5 | 1+4 | 27 | -12 | -18 |
Standing Normals
| Damage | Guard | Stun | Cancel | ||
|---|---|---|---|---|---|
| 8 | Mid | 2 | Chain, Command, Special | ||
| Startup | Active | Recovery | Adv. Hit | Adv. Guard | |
| 5 | 5 | 6 | 0 | -1 | |
|
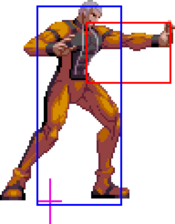
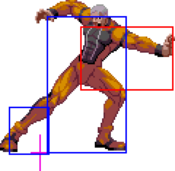
Great tool to bully your opponent with. You can cancel into 236A or both supers from this poke. | |||||
| Damage | Guard | Stun | Cancel | ||
|---|---|---|---|---|---|
| 10 | Mid | 5 | - | ||
| Startup | Active | Recovery | Adv. Hit | Adv. Guard | |
| 10 | 7 | 13 | -9 | -10 | |
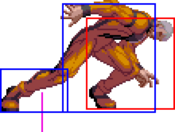
|
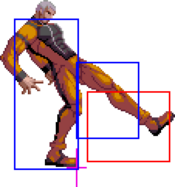
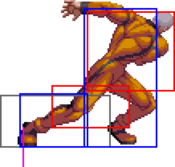
A slide of sorts which hits mid. | |||||
| Damage | Guard | Stun | Cancel | ||
|---|---|---|---|---|---|
| 18 | Mid | 10 | - | ||
| Startup | Active | Recovery | Adv. Hit | Adv. Guard | |
| 12 | 11 | 11 | -6/-3 | -9 | |
|
You can link 5A off of this, but it's not the best use case. Use 2C for a combo tool. | |||||
| Damage | Guard | Stun | Cancel | ||
|---|---|---|---|---|---|
| 20 | Mid | 12 | - | ||
| Startup | Active | Recovery | Adv. Hit | Adv. Guard | |
| 15 | 4 | 15 | -3/0 | -6 | |
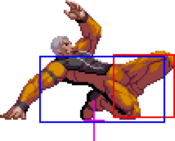
|
Huge low crush which moves Radel forward. One of his big normals he bullies with. | |||||
Crouching Normals
| Damage | Guard | Stun | Cancel | ||
|---|---|---|---|---|---|
| 6 | Mid | 2 | Chain, Command, Special | ||
| Startup | Active | Recovery | Adv. Hit | Adv. Guard | |
| 4 | 5 | 5 | +1 | 0 | |
|
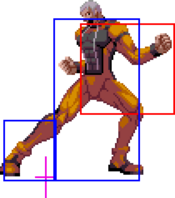
Great light check, you can combo into 236A or both supers off of this. | |||||
| Damage | Guard | Stun | Cancel | ||
|---|---|---|---|---|---|
| 8 | Low | 4 | Command, Special | ||
| Startup | Active | Recovery | Adv. Hit | Adv. Guard | |
| 13 | 4 | 10 | -3 | -4 | |
|
A small slide which doesn't chain. The hitbox appears the frame Radel stops moving. | |||||
| Damage | Guard | Stun | Cancel | ||
|---|---|---|---|---|---|
| 16 | Mid | 8 | Command, Special | ||
| Startup | Active | Recovery | Adv. Hit | Adv. Guard | |
| 6 | 3 | 13 | +3 | -3 | |
|
Big cancellable button, but it doesn't combo into 3B at max range. Good for punishing things at mid/close ranges where you cannot run up and punish. | |||||
| Damage | Guard | Stun | Cancel | ||
|---|---|---|---|---|---|
| 20 | Low | 15 | - | ||
| Startup | Active | Recovery | Adv. Hit | Adv. Guard | |
| 7 | 4 | 17 | KD | -4 | |
|
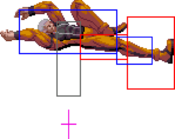
Safe sweep, fast to recover. | |||||
Jumping Normals
| Damage | Guard | Stun | Cancel | |
|---|---|---|---|---|
| 8 | High/Air | 6 | Special | |
| Startup | Active | Recovery | Adv. Hit | Adv. Guard |
| 3 | 16 | - | - | - |
| Damage | Guard | Stun | Cancel | |
|---|---|---|---|---|
| 10 | High/Air | 8 | Special | |
| Startup | Active | Recovery | Adv. Hit | Adv. Guard |
| 3 | 10 | - | - | - |
| Damage | Guard | Stun | Cancel | |
|---|---|---|---|---|
| 14 | High/Air | 12 | Special | |
| Startup | Active | Recovery | Adv. Hit | Adv. Guard |
| 6 | 12 | - | - | - |
| Damage | Guard | Stun | Cancel | ||
|---|---|---|---|---|---|
| 16 | High/Air | 12 | Special | ||
| Startup | Active | Recovery | Adv. Hit | Adv. Guard | |
| 6 | 8 | - | - | - | |
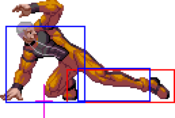
|
Same hitbox as stand D. | |||||
Command Normals
| Damage | Guard | Stun | Cancel | ||
|---|---|---|---|---|---|
| 20 (10+10) | Mid | 16 (8+8) | Special | ||
| Startup | Active | Recovery | Adv. Hit | Adv. Guard | |
| 13 | 3+(8)+4 | 31 | -16 | -22 | |
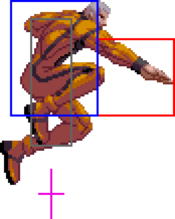
|
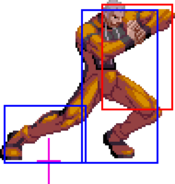
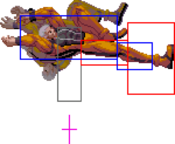
Two-hit kick. Radel's main command normal to link from normals into specials/supers. Both hits can be cancelled. Not a low despite appearances. | |||||
Throws
| Damage | Guard | Stun | Cancel | ||
|---|---|---|---|---|---|
| 20 | - | 0 | - | ||
| Startup | Active | Recovery | Adv. Hit | Adv. Guard | |
| 1 | 1 | - | KD | - | |
|
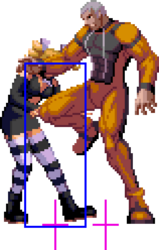
A leg lock which throws the opponent fullscreen. | |||||
System
| Damage | Guard | Stun | Cancel | |
|---|---|---|---|---|
| 16 | Mid | 0 | Command, Special | |
| Startup | Active | Recovery | Adv. Hit | Adv. Guard |
| 6 (1-11 invuln) | 2 | 25 | KD | -10 |
| Damage | Guard | Stun | Cancel | |
|---|---|---|---|---|
| 10 | Mid | 10 | - | |
| Startup | Active | Recovery | Adv. Hit | Adv. Guard |
| 13 (1-16 invuln) | 4 | 21 | KD | -8 |
| Damage | Guard | Stun | Cancel | ||
|---|---|---|---|---|---|
| 5+5×5 | Mid | 0 | Hit: Command, Special | ||
| Startup | Active | Recovery | Adv. Hit | Adv. Guard | |
| 14 | 4 | 31 | KD | -18 | |
|
Can also be used as a low crush, considering it shares the same hitbox as stand D. | |||||
| Damage | Guard | Stun | Cancel | ||
|---|---|---|---|---|---|
| 30 | Mid | 0 | - | ||
| Startup | Active | Recovery | Adv. Hit | Adv. Guard | |
| 4 | 60 | 29 | KD | -13 | |
|
Your partner must be alive and able to tag in. | |||||
| Damage | Guard | Stun | Cancel | ||
| 27 (35 with Annie) | - | 0 | - | ||
| Startup | Active | Recovery | Adv. Hit | Adv. Guard | |
| - | - | - | KD | - | |
|
Follow up with another 236BC for more damage. Costs an extra bar. | |||||
Special Moves
| Damage | Guard | Stun | Cancel | ||
|---|---|---|---|---|---|
| 22 (4+18) | Mid | 12 (4+8) | - | ||
| Startup | Active | Recovery | Adv. Hit | Adv. Guard | |
| 11 | 3+(9)+21 | 10 | KD | -14 | |
|
Big shoulder ram into an even bigger punch. The light version hits twice. If you're too close to a wall, you can miss your wall hit since it causes a wall splat. | |||||
| Damage | Guard | Stun | Cancel | ||
| 24 (4+5+15) | Mid | 20 (4+8+8) | - | ||
| Startup | Active | Recovery | Adv. Hit | Adv. Guard | |
| 13 | 3+(7)+2+21 | 10 | KD | -14 | |
|
Heavy version hits thrice and moves Radel forward a little more. Both versions do a lot of stun damage and are just as unsafe, so just use this in combos. Second hitbox only used for this version. | |||||
| Damage | Guard | Stun | Cancel | ||
|---|---|---|---|---|---|
| 20 | - | 0 | - | ||
| Startup | Active | Recovery | Adv. Hit | Adv. Guard | |
| 1 | 1 | 40 | KD | - | |
|
Radel flips over the opponent's shoulders and throws them. This doesn't break the wall. | |||||
| Damage | Guard | Stun | Cancel | ||
| 10 | - | 4 | - | ||
| Startup | Active | Recovery | Adv. Hit | Adv. Guard | |
| 32 | 27 | 13 | KD | - | |
|
A followup which breaks the wall. In the corner, Radel can substitute this for a jab reset or even a Duplex. If he's too close in the corner, the opponent can tech the recovery just in time to punish him. | |||||
| Damage | Guard | Stun | Cancel | ||
|---|---|---|---|---|---|
| 15 (5+10) | Mid, Mid/Air | 12 (6+6) | - | ||
| Startup | Active | Recovery | Adv. Hit | Adv. Guard | |
| 13 | 4+(6)+4 | 34 | KD | -21 | |
|
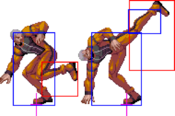
Big ol' donkey kick. Light version hits twice and causes a regular knockdown — not a wall splat. | |||||
| Damage | Guard | Stun | Cancel | ||
| 20 (5+5+10) | Mid/Air×2, Mid | 18 (6×3) | - | ||
| Startup | Active | Recovery | Adv. Hit | Adv. Guard | |
| 12 | 4+(5)+4+(10)+6 | 32 | KD | -21 | |
|
Heavy version hits thrice. Hard to punish thanks to the last kick's pushback; requires a run-in. Said kick also causes a wall splat, which has the same problem with wall hits as Escape. | |||||
| Damage | Guard | Stun | Cancel | ||
|---|---|---|---|---|---|
| 18 | Mid/Air | 10 | - | ||
| Startup | Active | Recovery | Adv. Hit | Adv. Guard | |
| 15 (1-11 invuln) | 3+4+4 | 29 | KD | -20 | |
|
DP with a few invincibility frames at the start. Both versions launch the opponent fullscreen and are excellent gambits if you want to hit the wall. | |||||
| Damage | Guard | Stun | Cancel | ||
| 20 (5+15) | Mid, Mid/Air | 11 (5+6) | - | ||
| Startup | Active | Recovery | Adv. Hit | Adv. Guard | |
| 10 (1-9 invuln) | 3+4+4 | 23 | KD | -14 | |
|
Less invincible, but a true reversal which moves a great amount forward. Often used to YOLO. Hits twice. | |||||
Super Moves
| Damage | Guard | Stun | Cancel | ||
|---|---|---|---|---|---|
| 40 (5×3+25) | Mid | 16 (4×4) | - | ||
| Startup | Active | Recovery | Adv. Hit | Adv. Guard | |
| 9 (1-8 invuln) | 4+(8)+2+(10)+2+(10)+21 | 17 | KD | -21 | |
|
A flurry of punches which ends in a knockdown. Inflicts great amounts of stun. If it hits an airborne opponent, it jails them to the ground for the rest of the hits. Runs halfscreen. | |||||
| Damage | Guard | Stun | Cancel | ||
| 50 (5×6+30) | Mid | 28 (4×7) | - | ||
| Startup | Active | Recovery | Adv. Hit | Adv. Guard | |
| 8 (1-7 invuln) | 6+6+(8)+2+(10)+2+(12)+2+(10)+2+(10)+21 | 25 | KD | -29 | |
|
Scaling cuts into the damage considerably, but the sheer amount of stun makes up for it. However, it causes a wall splat, which deprives him of a wall hit if he's too close. Runs fullscreen. | |||||
