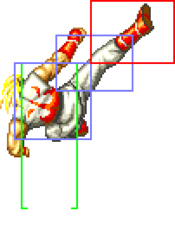
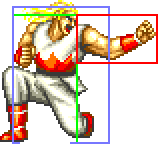
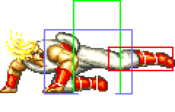
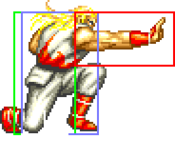
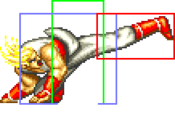
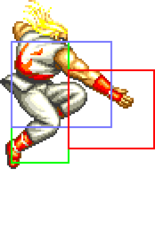
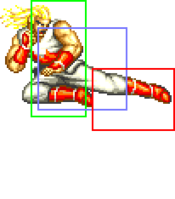
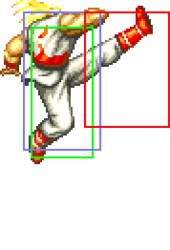
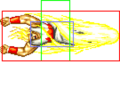
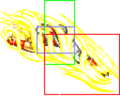
m (categorized as stub) |
|||
| (134 intermediate revisions by 8 users not shown) | |||
| Line 1: | Line 1: | ||
[[File:Ffspecandy.png|right|The Baron of Bone-Breaking]] | |||
[[File:Ffspecandy_colors.png|right]] | |||
{{TOClimit|3}} | |||
= | ==Introduction== | ||
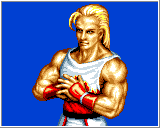
Andy is a top tier all-rounder with great movement and neutral. His most important feature is his heavy Zaneiken, a safe fullscreen elbow that opponents will have to respect at all times. | |||
== | {| | ||
|-style="text-align:left;" | |||
! Pros !! Cons | |||
|- style="vertical-align:top;text-align:left" | |||
| style="width: 50%;"| | |||
* Amazing specials | |||
* Great mobility | |||
* Hard to pin down | |||
| style="width: 50%;"| | |||
* Short range on normals | |||
* Has to constantly get into close range to deal damage | |||
* Commands take some time to get used to, super move has very limited use | |||
|- | |||
|} | |||
== | ==Move List== | ||
== | ===General Hurtboxes=== | ||
{| border="1em" cellspacing="0" style="border: 1px solid #999;" | |||
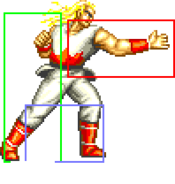
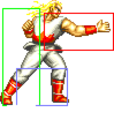
| align="center" | Standing/Taunting || align="center" | Crouching || align="center" | Jumping | |||
|- | |||
| align="center"; valign="bottom" | [[File:FFS Andy Stand.png|bottom]] [[File:FFS Andy Taunt.png|bottom]] || align="center"; valign="bottom" | [[File:FFS Andy Crouch.png|bottom]] || align="center"; valign="bottom" | [[File:FFS Andy Jump.png|bottom]] [[File:FFS Andy Jump 1.png|bottom]] | |||
|- | |||
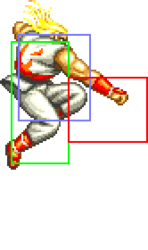
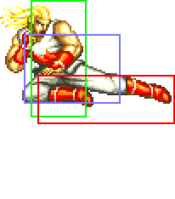
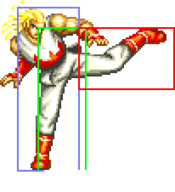
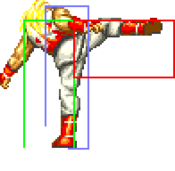
| align="center" | || align="center" | || align="center" | Cycles between hurtboxes during diagonal jumps. 52F (4+45+3) duration. | |||
|} | |||
= | ===Close Standing Normals=== | ||
= | ===== <span class="invisible-header">c5A</span> ===== | ||
<font style="visibility:hidden" size="0"></font> | |||
{{MoveData | |||
|image=FFS_Andy_c5A.png | |||
|subtitle=Magari/曲がり | |||
|caption= | |||
|name=c5A | |||
|data= | |||
{{AttackData-FFS | |||
|Damage=8 | |||
|Stun=2 | |||
|Guard=Mid | |||
|Startup=8 | |||
|Active=4 | |||
|Recovery=3 | |||
|Total=14 | |||
|Hit Adv=+9 | |||
|Block Adv=+10 | |||
|Property=Kara Cancel | |||
|description= * Slow startup for an A normal, but it easily combos unscaled into itself and c5D. | |||
*Mainly used as a stun combo starter. | |||
}} | |||
}} | |||
= | ===== <span class="invisible-header">c5B</span> ===== | ||
<font style="visibility:hidden" size="0"></font> | |||
{{MoveData | |||
|image=FFS_Andy_c5B.png | |||
|subtitle=Tsukigeri/突き蹴り | |||
|caption= | |||
|name=c5B | |||
|data= | |||
{{AttackData-FFS | |||
|Damage=10 | |||
|Stun=2 | |||
|Guard=Mid | |||
|Startup=4 | |||
|Active=6 | |||
|Recovery=5 | |||
|Total=14 | |||
|Hit Adv=+5 | |||
|Block Adv=+6 | |||
|Property=Kara Cancel | |||
|description=*Faster startup than close A, but gives much less advantage on hit and block so it doesn't see much use. | |||
}} | |||
}} | |||
== | ===== <span class="invisible-header">c5C</span> ===== | ||
<font style="visibility:hidden" size="0"></font> | |||
{{MoveData | |||
|image=FFS_Andy_c5C.png | |||
|subtitle=Kaiten Magari/回転曲がり | |||
|caption= | |||
|name=c5C | |||
|data= | |||
{{AttackData-FFS | |||
|Damage=18 | |||
|Stun=4 | |||
|Guard=Mid | |||
|Startup=10 | |||
|Active=15 | |||
|Recovery=6 | |||
|Total=30 | |||
|Hit Adv=+3 | |||
|Block Adv=+2 | |||
|Property=Kara Cancel | |||
|description= *Slower startup and worse range than close D. Decent frame advantage if it hits meaty, though. | |||
<gallery class="mw-collapsible"> | |||
FFS Andy c5C.png| | |||
FFS Andy c5C 1.png| | |||
</gallery> | |||
}} | |||
}} | |||
== | ===== <span class="invisible-header">c5D</span> ===== | ||
<font style="visibility:hidden" size="0"></font> | |||
{{MoveData | |||
|image=FFS_Andy_c5D.png | |||
|subtitle=Kaiten Gyakugeri/回転逆蹴り | |||
|caption= | |||
|name=c5D | |||
|data= | |||
{{AttackData-FFS | |||
|Damage=20 | |||
|Stun=4 | |||
|Guard=Mid | |||
|Startup=8 | |||
|Active=10 | |||
|Recovery=28 | |||
|Total=45 | |||
|Hit Adv=-14 | |||
|Block Adv=-15 | |||
|Property=Kara Cancel | |||
|description= * Good anti-air. Can be linked into from c5A. | |||
*Often used in combos and blockstrings. | |||
}} | |||
}} | |||
== | ===Far Standing Normals=== | ||
== | ===== <span class="invisible-header">f5A</span> ===== | ||
<font style="visibility:hidden" size="0"></font> | |||
{{MoveData | |||
|image=FFS_Andy_f5A.png | |||
|subtitle=Hajiki/弾き | |||
|caption= | |||
|name=f5A | |||
|data= | |||
{{AttackData-FFS | |||
|Damage=6 | |||
|Stun=2 | |||
|Guard=Mid | |||
|Startup=5 | |||
|Active=4 | |||
|Recovery=4 | |||
|Total=12 | |||
|Hit Adv=+8 | |||
|Block Adv=+9 | |||
|Property=Kara Cancel | |||
|description=*Standard low risk, low return light. Whiffs against most crouching characters. | |||
}} | |||
}} | |||
== | ===== <span class="invisible-header">f5B</span> ===== | ||
<font style="visibility:hidden" size="0"></font> | |||
{{MoveData | |||
|image=FFS_Andy_f5B.png | |||
|subtitle=Tsukikaeshi-geri/突き返し蹴り | |||
|caption= | |||
|name=f5B | |||
|data= | |||
{{AttackData-FFS | |||
|Damage=8 | |||
|Stun=2 | |||
|Guard=Mid | |||
|Startup=8 | |||
|Active=9 | |||
|Recovery=12 | |||
|Total=28 | |||
|Hit Adv=-5 | |||
|Block Adv=-4 | |||
|Property=Kara Cancel | |||
|description= * Andy's farthest reaching normal. | |||
*Great button to pressure with when cancelled into Hishoken or Zaneiken on block. | |||
}} | |||
}} | |||
== | ===== <span class="invisible-header">f5C</span> ===== | ||
<font style="visibility:hidden" size="0"></font> | |||
{{MoveData | |||
|image=FFS_Andy_f5C.png | |||
|subtitle=Kaiten-uchi/回転打ち | |||
|caption= | |||
|name=f5C | |||
|data= | |||
{{AttackData-FFS | |||
|Damage=16 | |||
|Stun=4 | |||
|Guard=Mid | |||
|Startup=8 | |||
|Active=12 | |||
|Recovery=16 | |||
|Total=35 | |||
|Hit Adv=-5 | |||
|Block Adv=-6 | |||
|Property=/ | |||
|description= * Good anti-air. | |||
}} | |||
}} | |||
== | ===== <span class="invisible-header">f5D</span> ===== | ||
<font style="visibility:hidden" size="0"></font> | |||
{{MoveData | |||
|image=FFS_Andy_f5D.png | |||
|subtitle=Tatsumakigeri/竜巻蹴り | |||
|caption= | |||
|name=f5D | |||
|data= | |||
{{AttackData-FFS | |||
|Damage=18 | |||
|Stun=4 | |||
|Guard=Mid | |||
|Startup=8 | |||
|Active=11 | |||
|Recovery=18 | |||
|Total=36 | |||
|Hit Adv=-6 | |||
|Block Adv=-7 | |||
|Property=/ | |||
|description= * Good anti-air. Useful in situations where Shoryudan doesn't have enough horizontal reach. | |||
}} | |||
}} | |||
== | ===Crouching Normals=== | ||
== | ===== <span class="invisible-header">2A</span> ===== | ||
<font style="visibility:hidden" size="0"></font> | |||
{{MoveData | |||
|image=FFS_Andy_2A.png | |||
|subtitle=Shagami Uraken/しゃがみ裏拳 | |||
|caption= | |||
|name=2A | |||
|data= | |||
{{AttackData-FFS | |||
|Damage=6 | |||
|Stun=2 | |||
|Guard=Mid | |||
|Startup=3 | |||
|Active=4 | |||
|Recovery=4 | |||
|Total=10 | |||
|Hit Adv=+8 | |||
|Block Adv=+9 | |||
|Property=Kara Cancel | |||
|description=*Andy's fastest normal, making it an excellent pressure tool. Links into itself and can combo into Zaneiken. | |||
}} | |||
}} | |||
== | ===== <span class="invisible-header">2B</span> ===== | ||
<font style="visibility:hidden" size="0"></font> | |||
{{MoveData | |||
|image=FFS_Andy_2B.png | |||
|subtitle=Haraigeri/払い蹴り | |||
|caption= | |||
|name=2B | |||
|data= | |||
{{AttackData-FFS | |||
|Damage=8 | |||
|Stun=2 | |||
|Guard=Low | |||
|Startup=10 | |||
|Active=7 | |||
|Recovery=4 | |||
|Total=20 | |||
|Hit Adv=+5 | |||
|Block Adv=+6 | |||
|Property=Kara Cancel | |||
|description= * Has low profile and can beat certain jumping attacks. Slow startup for a light normal, though. | |||
* Links to 2A. | |||
}} | |||
}} | |||
== | ===== <span class="invisible-header">2C</span> ===== | ||
<font style="visibility:hidden" size="0"></font> | |||
{{MoveData | |||
|image=FFS Andy 2C.png | |||
|subtitle=Shagamitsuki/しゃがみ直き | |||
|caption= | |||
|name=2C | |||
|data= | |||
{{AttackData-FFS | |||
|Damage=16 | |||
|Stun=4 | |||
|Guard=Mid | |||
|Startup=12 | |||
|Active=7 | |||
|Recovery=9 | |||
|Total=27 | |||
|Hit Adv=+8 | |||
|Block Adv=+7 | |||
|Property=Kara Cancel | |||
|description=*Basically a stronger but much slower version of 2A. Useful as you can easily combo into heavy Zaneiken from this. | |||
}} | |||
}} | |||
== | ===== <span class="invisible-header">2D</span> ===== | ||
<font style="visibility:hidden" size="0"></font> | |||
{{MoveData | |||
|image=FFS_Andy_2D.png | |||
|subtitle=Surigeri/摺り蹴り | |||
|caption= | |||
|name=2D | |||
|data= | |||
{{AttackData-FFS | |||
|Damage=14 | |||
|Stun=4 | |||
|Guard=Low | |||
|Startup=11 | |||
|Active=10 | |||
|Recovery=18 | |||
|Total=38 | |||
|Hit Adv=KD | |||
|Block Adv=-5 | |||
|Property=Kara Cancel | |||
|description=*Slow startup and recovery, but can low profile some moves like Mai's Kachosen. | |||
}} | |||
}} | |||
== | ===Jumping Normals=== | ||
== | ===== <span class="invisible-header">jA</span> ===== | ||
<font style="visibility:hidden" size="0"></font> | |||
{{MoveData | |||
|image=FFS_Andy_jA.png | |||
|subtitle=Shutou-Otoshi/手刀落とし | |||
|caption= | |||
|name=jA | |||
|data= | |||
{{AttackData-FFS | |||
|Damage=8 | |||
|Stun=2 | |||
|Guard=Overhead | |||
|Startup=5 | |||
|Active=∞ | |||
|Recovery=/ | |||
|Total=/ | |||
|Hit Adv= | |||
|Block Adv= | |||
|Property= | |||
|description=*Andy's jump kicks are much better, so don't bother using this. | |||
}} | |||
}} | |||
== | ===== <span class="invisible-header">jB</span> ===== | ||
<font style="visibility:hidden" size="0"></font> | |||
{{MoveData | |||
|image=FFS_Andy_jB.png | |||
|image2=FFS_Andy_j8B.png | |||
|subtitle=Tobigyakugeri/飛び逆蹴り | |||
|caption=Diagonal Jump | |||
|caption2=Neutral Jump | |||
|name=jB | |||
|data= | |||
{{AttackData-FFS | |||
|Damage=10 | |||
|Stun=2 | |||
|Guard=Overhead | |||
|Startup=5 | |||
|Active=∞ | |||
|Recovery=/ | |||
|Total=/ | |||
|Hit Adv= | |||
|Block Adv= | |||
|Property= | |||
|description= * Same frame data for neutral and diagonal jump. | |||
* Diagonal jump version has more vertical reach than jD. | |||
* Neutral jump version should be avoided as it has the same hitbox and startup as neutral jump D while doing less damage and stun. | |||
}} | |||
}} | |||
== | ===== <span class="invisible-header">jC</span> ===== | ||
<font style="visibility:hidden" size="0"></font> | |||
{{MoveData | |||
|image=FFS_Andy_jC.png | |||
|subtitle=Hishou-Otoshi/飛翔落とし | |||
|caption= | |||
|name=jC | |||
|data= | |||
{{AttackData-FFS | |||
|version=Diagonal Jump | |||
|Damage=18 | |||
|Stun=4 | |||
|Guard=Overhead | |||
|Startup=5 | |||
|Active=15 | |||
|Recovery=/ | |||
|Total=/ | |||
|Hit Adv= | |||
|Block Adv= | |||
|Property= | |||
|description= *Pretty much the same as jump A. No need to use. | |||
}} | |||
{{AttackData-FFS | |||
|header=no | |||
|version=Neutral Jump | |||
|Damage=18 | |||
|Stun=4 | |||
|Guard=Overhead | |||
|Startup=5 | |||
|Active=13 | |||
|Recovery=/ | |||
|Total=/ | |||
|Hit Adv= | |||
|Block Adv= | |||
|Property= | |||
|description= | |||
}} | |||
}} | |||
===== <span class="invisible-header">jD</span> ===== | |||
<font style="visibility:hidden" size="0"></font> | |||
{{MoveData | |||
|image=FFS_Andy_jD.png | |||
|image2=FFS_Andy_j8B.png | |||
|subtitle=Tobigyakugeri/飛び逆蹴り | |||
|caption=Diagonal Jump | |||
|caption2=Neutral Jump | |||
|name=jD | |||
|data= | |||
{{AttackData-FFS | |||
|version=Diagonal Jump | |||
|Damage=20 | |||
|Stun=4 | |||
|Guard=Overhead | |||
|Startup=6 | |||
|Active=15 | |||
|Recovery=/ | |||
|Total=/ | |||
|Hit Adv= | |||
|Block Adv= | |||
|Property= | |||
|description= * Same animation as jump B, but crosses up. Limited number of active frames, though. | |||
}} | |||
{{AttackData-FFS | |||
|header=no | |||
|version=Neutral Jump | |||
|Damage=20 | |||
|Stun=4 | |||
|Guard=Overhead | |||
|Startup=5 | |||
|Active=13 | |||
|Recovery=/ | |||
|Total=/ | |||
|Hit Adv= | |||
|Block Adv= | |||
|Property= | |||
|description= * Same hitbox and startup as neutral jump jB and does more damage. | |||
}} | |||
}} | |||
===Universal Mechanics=== | |||
===== <span class="invisible-header">Lane Blast (CD)</span> ===== | |||
<font style="visibility:hidden" size="0"></font> | |||
{{MoveData | |||
|image=FFS_Andy_CD_Front.png | |||
|image2=FFS_Andy_CD_Back.png | |||
|subtitle=Karigeri/刈り蹴り | |||
|caption=Front Lane | |||
|caption2=Back Lane | |||
|name=Lane Blast | |||
|input=C+D | |||
|data= | |||
{{AttackData-FFS | |||
|version=Front Lane | |||
|Damage=22 | |||
|Stun=5 | |||
|Guard=Mid | |||
|Startup=17 | |||
|Active=10 | |||
|Recovery=12 | |||
|Total=39 | |||
|Hit Adv=KD (+91) | |||
|Block Adv=-3 | |||
|Property=Cancel, Lane Shift | |||
|description=*Decent reach for an Andy normal. | |||
}} | |||
{{AttackData-FFS | |||
|header=no | |||
|version=Back Lane | |||
|Damage=22 | |||
|Stun=5 | |||
|Guard=Mid | |||
|Startup=14 | |||
|Active=9 | |||
|Recovery=10 | |||
|Total=32 | |||
|Hit Adv=KD (+83) | |||
|Block Adv=0 | |||
|Property=Cancel, Lane Shift | |||
|description=*Better than the front lane version due to having more compact frame data. | |||
}} | |||
}} | |||
===== <span class="invisible-header">Lane Attack</span> ===== | |||
<font style="visibility:hidden" size="0"></font> | |||
{{MoveData | |||
|image=FFS_Andy_Lane_Punch_Front.png | |||
|image2=FFS Andy Lane Kick Front.png | |||
|image3=FFS Andy Lane Punch Back.png | |||
|image4=FFS Andy Lane Kick Back.png | |||
|subtitle= | |||
|caption=Front Lane Punch | |||
|caption2=Front Lane Kick | |||
|caption3=Back Lane Punch | |||
|caption4=Back Lane Kick | |||
|name=Lane Attack | |||
|input=A/B/C/D from opposite lane | |||
|data= * Cells with two values (X/Y) list the front lane to back lane data first, then vice-versa. | |||
{{AttackData-FFS | |||
|version=A | |||
|Damage=20 | |||
|Stun=2 | |||
|Guard=Overhead | |||
|Startup=13 | |||
|Active=18/17 | |||
|Recovery=4 | |||
|Total=34/33 | |||
|Hit Adv=+5/+7 | |||
|Block Adv=+12/+14 | |||
|Property=/ | |||
|description= * Straight and fast cross-lane punch. Whiffs on crouchers. | |||
* Doesn't hit the back lane until frame 25 and the front lane until frame 26. | |||
}} | |||
{{AttackData-FFS | |||
|header=no | |||
|version=B | |||
|Damage=20 | |||
|Stun=2 | |||
|Guard=Overhead | |||
|Startup=17/22 | |||
|Active=14/8 | |||
|Recovery=4 | |||
|Total=34/33 | |||
|Hit Adv=+5/+7 | |||
|Block Adv=+12/+14 | |||
|Property=/ | |||
|description= * Straight cross-lane kick. The slower startup means it will usually lose to another lane attack. | |||
* Doesn't hit the back lane until frame 25 and the front lane until frame 26. | |||
}} | |||
{{AttackData-FFS | |||
|header=no | |||
|version=C | |||
|Damage=20 | |||
|Stun=4 | |||
|Guard=Overhead | |||
|Startup=13 | |||
|Active=39/36 | |||
|Recovery=4 | |||
|Total=55/52 | |||
|Hit Adv=+6/+8 | |||
|Block Adv=+11/+15 | |||
|Property=/ | |||
|description= * Slower high angle punch. Whiffs on crouchers. | |||
* Doesn't hit the back lane until frame 45 and the front lane until frame 46. | |||
}} | |||
{{AttackData-FFS | |||
|header=no | |||
|version=D | |||
|Damage=20 | |||
|Stun=4 | |||
|Guard=Overhead | |||
|Startup=17/22 | |||
|Active=35/27 | |||
|Recovery=4 | |||
|Total=55/52 | |||
|Hit Adv=+4/+8 | |||
|Block Adv=+11/+15 | |||
|Property=/ | |||
|description= * Slower high angle kick. The slower startup means it will usually lose to another lane attack. | |||
* Doesn't hit the back lane until frame 45 and the front lane until frame 46. | |||
}} | |||
}} | |||
===== <span class="invisible-header">Dodge Attack</span> ===== | |||
<font style="visibility:hidden" size="0"></font> | |||
{{MoveData | |||
|image=FFS_Andy_Dodge_Attack.png | |||
|subtitle=Hirate-Uchi/平手打ち | |||
|caption= | |||
|name=Dodge Attack | |||
|input=6A during proximity guard | |||
|data= | |||
{{AttackData-FFS | |||
|Damage=11 | |||
|Stun=5 | |||
|Guard=Mid | |||
|Startup=15 | |||
|Active=8 | |||
|Recovery=8 | |||
|Total=30 | |||
|Hit Adv=Air Reset (+24) | |||
|Block Adv=+3 | |||
|Property=Kara Cancel, Upper-Body Invuln 1-22F | |||
|description=*Pretty standard but good dodge attack. Has more range than most Andy normals. | |||
<gallery class="mw-collapsible"> | |||
FFS Andy Dodge Attack 1.png|Startup | |||
FFS Andy Dodge Attack.png| | |||
FFS Andy Dodge Attack 2.png|Recovery | |||
</gallery> | |||
}} | |||
}} | |||
===Throws=== | |||
===== <span class="invisible-header">Holding Throw (4/6C)</span> ===== | |||
<font style="visibility:hidden" size="0"></font> | |||
{{MoveData | |||
|image=FFS_Andy_Throw 1.png | |||
|caption= | |||
|name=Holding Throw | |||
|input=close 4/6C | |||
|data= | |||
{{AttackData-FFS | |||
|Damage=26 | |||
|Stun=3 | |||
|range=20 | |||
|Guard=Throw | |||
|Startup=1 | |||
|Active=1 | |||
|Recovery=/ | |||
|Hit Adv=KD (+74) | |||
|Block Adv=/ | |||
|Property=/ | |||
|description= * Swaps sides. | |||
}} | |||
}} | |||
===Special Moves=== | |||
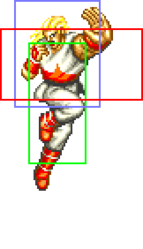
===== <span class="invisible-header">Hishou Ken (214P)</span> ===== | |||
{{MoveData | |||
| name = Hishou Ken | |||
| input = 214A/C | |||
| subtitle = | |||
| image = FFS Andy 214P 1.png | |||
| caption = | |||
| data = | |||
<gallery class="mw-collapsible"> | |||
FFS Andy 214P.png| | |||
FFS Andy 214P 1.png| | |||
</gallery> | |||
{{AttackData-FFS | |||
| version = A | |||
| subtitle = | |||
| Damage = 16 (4) | |||
| Stun = 3 | |||
| Guard = Mid | |||
| Startup = 22 | |||
| Active = | |||
| Recovery = 33 | |||
| Total = 54 | |||
| Hit Adv = 0 | |||
| Block Adv = +1 | |||
| Property = / | |||
| description = * Projectile travels slower. | |||
}} | |||
{{AttackData-FFS | |||
| header = no | |||
| version = C | |||
| subtitle = | |||
| Damage = 22 (5) | |||
| Stun = 6 | |||
| Guard = Mid | |||
| Startup = 26 | |||
| Active = | |||
| Recovery = 35 | |||
| Total = 60 | |||
| Hit Adv = +6 | |||
| Block Adv = -5 | |||
| Property = / | |||
| description = * Projectile travels faster. | |||
}} | |||
}} | |||
===== <span class="invisible-header">Shoryu Dan (236P)</span> ===== | |||
{{MoveData | |||
| name = Shoryu Dan | |||
| input = 236A/C | |||
| subtitle = | |||
| image = FFS Andy 236P 2.png | |||
| caption = | |||
| data = | |||
<gallery class="mw-collapsible"> | |||
FFS Andy 236P.png| | |||
FFS Andy 236P 1.png| | |||
FFS Andy 236P 2.png| | |||
FFS Andy 236P 3.png| | |||
</gallery> | |||
{{AttackData-FFS | |||
| version = A | |||
| subtitle = | |||
| Damage = 14 (3x2) | |||
| Stun = 3 | |||
| Guard = Mid | |||
| Startup = 10 | |||
| Active = 3+4+5+6 | |||
| Recovery = 20 | |||
| Total = 47 | |||
| Hit Adv = KD | |||
| Block Adv = -10 | |||
| Property = Invincible 1~18F | |||
| description = * Very good reversal and anti-air that also beats crossups. | |||
* The block disadvantage is quite good for a reversal, but it is prone to whiffing if not used at point blank. | |||
}} | |||
{{AttackData-FFS | |||
| header = no | |||
| version = C | |||
| subtitle = | |||
| Damage = 20 (5x2) | |||
| Stun = 6 | |||
| Guard = Mid | |||
| Startup = 13 | |||
| Active = 4+5+6+8 | |||
| Recovery = 31 | |||
| Total = 66 | |||
| Hit Adv = KD | |||
| Block Adv = -30 | |||
| Property = Invincible 1~24F | |||
| description = * Has slightly farther range, but the slower startup and longer recovery gives it more risk, making the A version typically preferred. | |||
* The additional invincibility makes this version better at beating an opponent's reversal if used as a callout. | |||
}} | |||
}} | |||
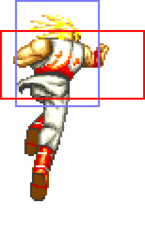
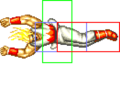
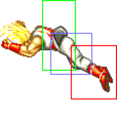
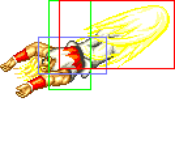
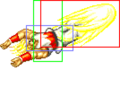
===== <span class="invisible-header">Zan Ei Ken ([1]6P)</span> ===== | |||
{{MoveData | |||
| name = Zaneiken | |||
| input = [1]6A/C | |||
| subtitle = | |||
| image = FFS Andy 16P.png | |||
| caption = | |||
| data = | |||
{{AttackData-FFS | |||
| version = A | |||
| subtitle = | |||
| Damage = 16 (4) | |||
| Stun = 3 | |||
| Guard = Mid | |||
| Startup = 10 | |||
| Active = 16 | |||
| Recovery = 2 | |||
| Total = 27 | |||
| Hit Adv = Air Reset | |||
| Block Adv = -6 | |||
| Property = Throw Invincible | |||
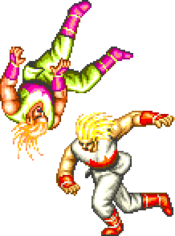
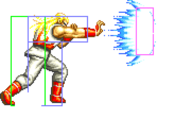
| description = * Charge time: 7F. | |||
* Andy charges about half of the screen. | |||
* Easily comboable into from lights. | |||
<gallery class="mw-collapsible"> | |||
FFS Andy 16P.png| | |||
FFS Andy 16P 1.png| | |||
FFS Andy 16P 2.png| | |||
</gallery> | |||
}} | |||
{{AttackData-FFS | |||
| header = no | |||
| version = C | |||
| subtitle = | |||
| Damage = 22 (5) | |||
| Stun = 6 | |||
| Guard = Mid | |||
| Startup = 13 | |||
| Active = 20 | |||
| Recovery = 2 | |||
| Total = 34 | |||
| Hit Adv = KD | |||
| Block Adv = -2 | |||
| Property = Throw Invincible | |||
| description = * Charge time: 13F. | |||
* Harder to combo into, but covers almost the entire screen very quickly and does tons of damage while being safe on block. | |||
* Difficult to react to and counterattacks can be baited by stopping short with the A version. | |||
<gallery class="mw-collapsible"> | |||
FFS Andy 16P.png| | |||
FFS Andy 16P 1.png| | |||
FFS Andy 16P 2.png| | |||
FFS Andy 16P 1.png| | |||
FFS Andy 16P.png| | |||
</gallery> | |||
}} | |||
}} | |||
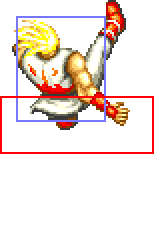
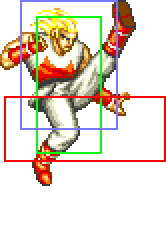
===== <span class="invisible-header">Kuuha Dan (19K)</span> ===== | |||
{{MoveData | |||
| name = Kuuha Dan | |||
| input = 19B/D | |||
| subtitle = | |||
| image = FFS Andy 19K.png | |||
| caption = | |||
| data = | |||
<gallery class="mw-collapsible"> | |||
FFS Andy 19K.png| | |||
FFS Andy 19K 1.png| | |||
FFS Andy 19K 2.png| | |||
FFS Andy 19K 3.png| | |||
</gallery> | |||
{{AttackData-FFS | |||
| version = B | |||
| Damage = 13x2 (3x2) | |||
| Stun = 3x2 | |||
| Guard = Mid | |||
| Startup = 16 | |||
| Active = 32 | |||
| Recovery = 9 | |||
| Total = 56 | |||
| Hit Adv = -11 | |||
| Block Adv = -14 | |||
| Property = Invincible 1~15F, Airborne 16~47F | |||
| description = * Goes over fireballs and is safe if spaced (like at the range an opponent would throw a fireball). The disjointed hitboxes make it difficult for the opponent to anti-air as well. | |||
* Andy can keep pressuring after with f5B and [1]6P. | |||
}} | |||
{{AttackData-FFS | |||
| header = no | |||
| version = D | |||
| Damage = 18 (4x2) | |||
| Stun = 6 | |||
| Guard = Mid | |||
| Startup = 16 | |||
| Active = 50 | |||
| Recovery = 12 | |||
| Total = 77 | |||
| Hit Adv = KD | |||
| Block Adv = -28 | |||
| Property = Invincible 1~15F, Airborne 16~65F | |||
| description = * Flies farther in a much higher arc and knocks down on hit. | |||
}} | |||
}} | |||
===Desperation Move=== | |||
===== <span class="invisible-header">Chou Reppa Dan ([2]36BD)</span> ===== | |||
{{MoveData | |||
| name = Chou Reppa Dan | |||
| input = [2]36B+D | |||
| subtitle = When health is flashing | |||
| image = FFS Andy 236BD.png | |||
| caption = | |||
| data = | |||
{{AttackData-FFS | |||
| Damage = 36 (9x2) | |||
| Stun = 4 | |||
| Guard = Mid | |||
| Startup = 21 | |||
| Active = 48 | |||
| Recovery = 24 | |||
| Total = 92 | |||
| Hit Adv = KD | |||
| Block Adv = -20 | |||
| Property = Airborne 21~68F | |||
| description = * Charge time: 60F. Must be charged with only 2. 1 and 3 are not valid charge directions. | |||
* Does a large amount of chip damage but is easily avoided by switching lanes. Combined with the cumbersome charge input and slow startup, it's very situational. | |||
<gallery class="mw-collapsible"> | |||
FFS Andy 236BD.png| | |||
FFS Andy 236BD 1.png| | |||
FFS Andy 236BD 2.png| | |||
FFS Andy 236BD 3.png| | |||
</gallery> | |||
}} | |||
}} | |||
==Combos== | |||
* '''(2A,) 2A, 2A > [1]6A''' - 23 Damage | |||
Confirmable BNB. Can also start from 2B. | |||
* '''2B > [1]6C''' - 27 Damage | |||
Hard knockdown from a low. Must be done point blank. | |||
* '''2C > [1]6C''' - 35 Damage | |||
Easy punish combo. | |||
* '''c5A, c5A, c5D > [1]6C''' - 55 Damage | |||
Ideal punish/dizzy combo. A jump-in starter must hit deep due to c5A's slow startup. | |||
* '''(Corner/meaty, far distance) 214A, [1]6C''' - 38 Damage | |||
== Strategy == | |||
===The Basics=== | |||
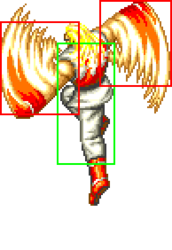
While Andy in Special has been slightly toned down from his FF2 appearance, he still boasts an amazing, well-rounded set of moves and remains a high tier character. His gameplan is largely centered around the Zaneiken, a high-speed elbow rush attack that gives him incredible ground mobility. Compared to the other two protagonist characters, Andy is much more focused on close range rushdown and hit-and-run style tactics rather than keepaway. While he does have a fireball, it's not used much for zoning due to it's long startup; instead, it's most effective when used in tandem with his other specials. An extremely common but effective tactic is to first throw a light Hishoken, and immediately follow it up with a heavy Zaneiken: the fireball will act as a "shield" of shorts in front of you, making it very difficult for the enemy to stop your approach. Even if the Zaneiken gets blocked, you're safe and free to backstep away before your enemy gets a chance to counterattack. A good chunk of the damage you deal as Andy comes from blocked Zaneikens alone, so don't be afraid to throw the move out a lot especially if your opponent is bad at countering it. Light Zaneiken travels about half the screen and has almost no recovery on whiff making it an excellent movement tool, but try to favor the heavy version when you actually want to hit your opponent as it's much safer on block. | |||
Kuuha Dan is your most reliable tool against projectiles, as Andy isn't going to win any projectile wars with his slow fireball. You can use it to fly past virtually all enemy projectiles, save for maybe Krauser's High Blitzball or Kaiser Wave, and punish your opponent before they're able to recover. Be very careful with your spacing, though, as it'll leave you defenseless right next to your enemy when blocked up close which will spell doom for Andy. On the other hand, when properly spaced, Kuuha Dan can actually be plus on block, allowing you to continue your offense. It even has some invincibility on startup, so you can use it as a (very risky) reversal if you wish. | |||
Andy's biggest weakness is his rather stubby normals, although it's not a huge issue thanks to him being able to get into close range much easier than most of the cast. The buttons you'll be using most commonly are 2A: a fast short range jab ideal for pressuring your opponent, 5B: a relatively long-reaching kick that can be cancelled into Hishoken or Zaneiken, and 2C: crouching heavy punch that can combo into Zaneiken. Both of his standing heavy kicks are great for anti-airing, and on top of that you've got Shoryudan, a dedicated anti-air special with a lot of startup invulnerability. Use your kick buttons if you're going for a jump-in: jB stays active for the entire duration of the jump, while jD can cross up. | |||
When playing Andy, it's important to keep your inputs as clean as possible and learn to perform the Zaneiken correctly early on. The game prioritizes 236P over [1]6P, so if there's any overlap with those two commands you'll always get a Shoryudan instead of Zaneiken. An accidental heavy Shoryudan at the wrong moment might cost you an entire round, so be very careful. It's a common enough occurrence that the Japanese community even has coined the term "shooting fireworks" for a Shoryudan done accidentally. | |||
===Advanced Strategy=== | |||
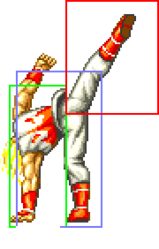
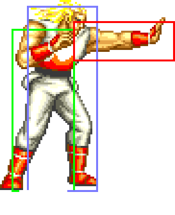
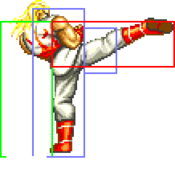
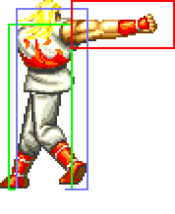
The "Zaneiken throw" is a rather nasty technique where you space a light Zaneiken so that it stops just before making contact with your enemy, and immediately go for a throw once you're in their face. Very hard to react to, but requires excellent spacing skills. | |||
Andy can cancel the recovery of his backstep into a Shoryudan to gain extra frames of invulnerability. Useful if you notice you're about to backstep right into a fireball. | |||
Andy's optimal combo is a bit tricky as it requires you to cancel a close D into heavy Zaneiken. This requires a strange "mini-charge" right after pressing D; try not to start it too early or you'll get crouch D instead of close D. It'll require some practice to get the timing right, but it's worth the effort. | |||
==Matchups== | |||
===Vs. Andy Bogard=== | |||
5 - 5 | |||
Dodge attack can be used to counter enemy Zaneikens. Of course, your opponent can do the same against you, so try not to be too predictable and keep them guessing between your Hishoken and Zaneiken. If you're locked in a fireball war, Kuuha Dan is your best option to get out of the situation. 2D and CD are great at stuffing Zaneiken, and 2D is great for pressure/oki in the corner as it will dodge Shoryudan when spaced and is generally difficult for Andy to punish. | |||
===Vs. Axel Hawk=== | |||
7 - 3 | |||
Big advantage for Andy. Axel is far too cumbersome to keep up with your movement, so you can get in and out with relative ease. Axel can't safely zone you out with his tornadoes either due to the threat of your Kuuha Dan. On top of that, Zaneiken hits Axel in his weak spot, boosting its already high damage by 25% every time you land it. Don't get too predictable with your offense, though, as Axel can still deal some heavy damage with good reads. His CD in particular can be used to stuff both your Zaneiken and Kuuha Dan, and it gives him good oki on hit. Watch out for his dodge attack too as it reaches much farther than than you'd expect. | |||
===Vs. Big Bear=== | |||
6 - 4 | |||
Your first instinct might be to try zoning the grappler out with your fireballs, but using Hishoken is a big risk due to Bear being able to charge past it with his tackle. Use your mobility to your advantage instead, pressure him in close range and backstep away before he gets a chance to counterattack. Andy's lows are too slow to be reliable against tackles, but dodge attack and Shoryudan both work wonders against the move. | |||
===Vs. Billy Kane=== | |||
5 - 5 | |||
Billy's strong pokes can be a problem for Andy as they can easily hit you out of a Zaneiken. Use the Hishoken + Zaneiken combination to your advantage to make it harder for Billy to stop your approach. Billy lacks high speed normals, so you'll have the advantage whenever you're close enough to hit him with 2A. Strike/throw mixups are also useful up close. Watch out for his super when he's low on health as you don't want to accidentally ram into it with Zaneiken. | |||
===Vs. Cheng Sinzan=== | |||
6 - 4 | |||
Cheng's arcing fireballs can be annoying for Andy as they can potentially hit you out of a both Zaneiken and Kuuha Dan. Fortunately, they have a rather long startup and recovery, so look for a gap in his defense and strike with heavy Zaneiken. Avoid doing long blockstrings as Cheng can easily break free with a light Hagan Geki. | |||
===Vs. Duck King=== | |||
6 - 4 | |||
Duck is all about close range pressure, so try to keep your distance and don't stay near him any longer than necessary. You can harass him with Hishokens from long range, but watch out whenever you're in range of his Needle Low as it can low profile fireballs. If you're being pressured up close, you can try breaking free with a Shoryudan or heavy Kuuha Dan, although simply backstepping away is usually the safest option. You can easily beat his Headspin Attack (Blanka Ball) with a dodge attack. | |||
===Vs. Geese Howard=== | |||
6 - 4 | |||
Make good use of light Kuuha Dan to get past Geese's fireball defense. Geese can use his upper Atemi Nage to counter both your Zaneiken and Kuuha Dan, but the timing for a successful counter varies depending on which move you'll use so take advantage of that and keep him guessing. Hishoken is also great against Atemi attempts. If Geese likes to throw Shippukens, you can try to zip past them with a well timed light Zaneiken and hit him with a punish combo as he lands. | |||
===Vs. Joe Higashi=== | |||
4 - 6 | |||
A zoner Andy has to respect. Joe's hurricanes are huge and have very little recovery, so punishing them with Kuuha Dan requires excellent timing and spacing. You can't dodge attack through them either, as the hitbox reaches all the way to the ground. If you see a suitable opening, charge in with Zaneiken and try to stay in close enough range that Joe can't get away with throwing projectiles. | |||
===Vs. Jubei Yamada=== | |||
5 - 5 | |||
Even though Jubei's projectiles have fast recovery, light Kuuha Dan still can be used to punish them. Make sure to space the move correctly, though, as Jubei may be able to punish it with a stun combo if it's done too close to your opponent. Dodge attack and 2D can be used to avoid projectiles as well. Jubei can low profile Andy's diagonal jD but not his jB. | |||
===Vs. Kim Kaphwan=== | |||
4 - 6 | |||
Very fast-paced matchup that's fun to watch. Unfortunately, Kim has the advantage here thanks to having a stronger set of normals with more reach, and more explosive combo damage. Use Hishokens with extreme caution as Kim can easily hit you out of its slow startup even from a distance with his divekicks. As Kim will generally approach you from the air, be always ready to stop his dives and jump-ins with a Shoryudan or close/far D. | |||
===Vs. Laurence Blood=== | |||
6 - 4 | |||
Mid range is where Laurence shines, so keep out of the reach of his pokes and either stay far away or right in his face where your fastest pokes stuff out all of his moves. Hishoken is useful here but carries some risk as Laurence's Bloody Cutter can beat it even from full screen. Laurence's jumps are extremely floaty, so even if he manages to avoid your Zaneiken with a neutral jump, you still have enough time to anti-air with close D. Don't let him chip you with his Bloody Spin; counter it with a dodge attack whenever possible. | |||
===Vs. Mai Shiranui=== | |||
5 - 5 | |||
Mai has excellent projectiles, but you still have many ways to deal with them; either use your dodge attack or 2D to avoid them or use Kuuha Dan. Mai's heavy Ryuuenbu can pose a big threat as it's fully invulnerable on startup and deals huge damage if both hits connect, so don't go blindly charging in with a Zaneiken and pick your timing carefully instead. | |||
===Vs. Ryo Sakazaki=== | |||
===Vs. Terry Bogard=== | |||
6 - 4 | |||
While Terry has a better set of normals and more combo damage, Andy still tends to control the neutral in this matchup thanks to his amazing specials. If you're locked in a projectile war, you can always beat a Power Wave with Kuuha Dan, while Terry has a much harder time trying to circumvent your projectiles. Once the Terry player is too afraid to throw out Power Waves out of fear of eating a counter hit, you can start pestering them with your Zaneiken offense. | |||
===Vs. Tung Fu Rue=== | |||
6 - 4 | |||
You might want to switch up your usual playstyle a bit here and go for a more defensive approach as Tung can be deadly up close. Throwing Hishokens from a distance is relatively safe against him, while far D and Shoryudan are enough to stop any jump-in attempt. While Zaneikens are still very useful, you need to pick your timing carefully as Tung can potentially even get a combo if they manage to stuff your Zaneiken with a light normal. | |||
===Vs. Wolfgang Krauser=== | |||
6 - 4 | |||
Krauser will try to keep you as far as possible with his array of fast fireballs, mostly sticking to the light low version of the move. Standard anti-projectile tactics work here; you can either avoid them with a well timed dodge attack, or fly past them with your Kuuha Dan. However, Krauser may occasionally throw you off by using high Blitzball, which can hit you out of both Kuuha Dan and Zaneiken. High Blitzballs will whiff if you're crouching, though, so it's possible to simply crouch walk past them. You'll have the advantage up close as Krauser doesn't have normals that are fast enough to contest your 2A. Watch out for his Atemi Nage though; you might want to pressure him with 2B and 2D occasionally as the counter doesn't work against lows. | |||
{{Navbox-FFS}} | |||
[[Category:Fatal Fury Special]] | [[Category:Fatal Fury Special]] | ||
[[Category:Andy Bogard]] | [[Category:Andy Bogard]] | ||
Latest revision as of 08:15, 7 May 2025
Introduction
Andy is a top tier all-rounder with great movement and neutral. His most important feature is his heavy Zaneiken, a safe fullscreen elbow that opponents will have to respect at all times.
| Pros | Cons |
|---|---|
|
|
Move List
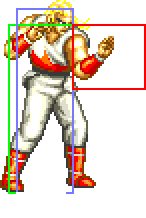
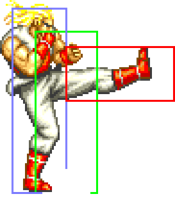
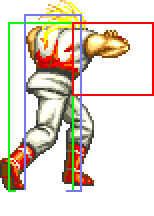
General Hurtboxes
| Standing/Taunting | Crouching | Jumping |
 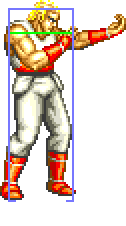 |
 |
 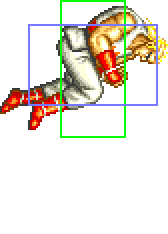
|
| Cycles between hurtboxes during diagonal jumps. 52F (4+45+3) duration. |
Close Standing Normals
c5A
| Damage | Stun | Guard | Startup | Active | Recovery | Total | Hit Adv | Block Adv | Property | |
|---|---|---|---|---|---|---|---|---|---|---|
| 8 | 2 | Mid | 8 | 4 | 3 | 14 | +9 | +10 | Kara Cancel | |
| ||||||||||
c5B
| Damage | Stun | Guard | Startup | Active | Recovery | Total | Hit Adv | Block Adv | Property | |
|---|---|---|---|---|---|---|---|---|---|---|
| 10 | 2 | Mid | 4 | 6 | 5 | 14 | +5 | +6 | Kara Cancel | |
| ||||||||||
c5C
c5D
| Damage | Stun | Guard | Startup | Active | Recovery | Total | Hit Adv | Block Adv | Property | |
|---|---|---|---|---|---|---|---|---|---|---|
| 20 | 4 | Mid | 8 | 10 | 28 | 45 | -14 | -15 | Kara Cancel | |
| ||||||||||
Far Standing Normals
f5A
| Damage | Stun | Guard | Startup | Active | Recovery | Total | Hit Adv | Block Adv | Property | |
|---|---|---|---|---|---|---|---|---|---|---|
| 6 | 2 | Mid | 5 | 4 | 4 | 12 | +8 | +9 | Kara Cancel | |
| ||||||||||
f5B
| Damage | Stun | Guard | Startup | Active | Recovery | Total | Hit Adv | Block Adv | Property | |
|---|---|---|---|---|---|---|---|---|---|---|
| 8 | 2 | Mid | 8 | 9 | 12 | 28 | -5 | -4 | Kara Cancel | |
| ||||||||||
f5C
| Damage | Stun | Guard | Startup | Active | Recovery | Total | Hit Adv | Block Adv | Property | |
|---|---|---|---|---|---|---|---|---|---|---|
| 16 | 4 | Mid | 8 | 12 | 16 | 35 | -5 | -6 | / | |
| ||||||||||
f5D
| Damage | Stun | Guard | Startup | Active | Recovery | Total | Hit Adv | Block Adv | Property | |
|---|---|---|---|---|---|---|---|---|---|---|
| 18 | 4 | Mid | 8 | 11 | 18 | 36 | -6 | -7 | / | |
| ||||||||||
Crouching Normals
2A
| Damage | Stun | Guard | Startup | Active | Recovery | Total | Hit Adv | Block Adv | Property | |
|---|---|---|---|---|---|---|---|---|---|---|
| 6 | 2 | Mid | 3 | 4 | 4 | 10 | +8 | +9 | Kara Cancel | |
| ||||||||||
2B
| Damage | Stun | Guard | Startup | Active | Recovery | Total | Hit Adv | Block Adv | Property | |
|---|---|---|---|---|---|---|---|---|---|---|
| 8 | 2 | Low | 10 | 7 | 4 | 20 | +5 | +6 | Kara Cancel | |
| ||||||||||
2C
| Damage | Stun | Guard | Startup | Active | Recovery | Total | Hit Adv | Block Adv | Property | |
|---|---|---|---|---|---|---|---|---|---|---|
| 16 | 4 | Mid | 12 | 7 | 9 | 27 | +8 | +7 | Kara Cancel | |
| ||||||||||
2D
| Damage | Stun | Guard | Startup | Active | Recovery | Total | Hit Adv | Block Adv | Property | |
|---|---|---|---|---|---|---|---|---|---|---|
| 14 | 4 | Low | 11 | 10 | 18 | 38 | KD | -5 | Kara Cancel | |
| ||||||||||
Jumping Normals
jA
| Damage | Stun | Guard | Startup | Active | Recovery | Total | Hit Adv | Block Adv | Property | |
|---|---|---|---|---|---|---|---|---|---|---|
| 8 | 2 | Overhead | 5 | ∞ | / | / | - | - | - | |
| ||||||||||
jB
| Damage | Stun | Guard | Startup | Active | Recovery | Total | Hit Adv | Block Adv | Property | |
|---|---|---|---|---|---|---|---|---|---|---|
| 10 | 2 | Overhead | 5 | ∞ | / | / | - | - | - | |
| ||||||||||
jC
| Version | Damage | Stun | Guard | Startup | Active | Recovery | Total | Hit Adv | Block Adv | Property | |
|---|---|---|---|---|---|---|---|---|---|---|---|
| Diagonal Jump | 18 | 4 | Overhead | 5 | 15 | / | / | - | - | - | |
| |||||||||||
| Neutral Jump | 18 | 4 | Overhead | 5 | 13 | / | / | - | - | - | |
jD
| Version | Damage | Stun | Guard | Startup | Active | Recovery | Total | Hit Adv | Block Adv | Property | |
|---|---|---|---|---|---|---|---|---|---|---|---|
| Diagonal Jump | 20 | 4 | Overhead | 6 | 15 | / | / | - | - | - | |
| |||||||||||
| Neutral Jump | 20 | 4 | Overhead | 5 | 13 | / | / | - | - | - | |
| |||||||||||
Universal Mechanics
Lane Blast (CD)
| Version | Damage | Stun | Guard | Startup | Active | Recovery | Total | Hit Adv | Block Adv | Property | |
|---|---|---|---|---|---|---|---|---|---|---|---|
| Front Lane | 22 | 5 | Mid | 17 | 10 | 12 | 39 | KD (+91) | -3 | Cancel, Lane Shift | |
| |||||||||||
| Back Lane | 22 | 5 | Mid | 14 | 9 | 10 | 32 | KD (+83) | 0 | Cancel, Lane Shift | |
| |||||||||||
Lane Attack
- Cells with two values (X/Y) list the front lane to back lane data first, then vice-versa.
| Version | Damage | Stun | Guard | Startup | Active | Recovery | Total | Hit Adv | Block Adv | Property | |
|---|---|---|---|---|---|---|---|---|---|---|---|
| A | 20 | 2 | Overhead | 13 | 18/17 | 4 | 34/33 | +5/+7 | +12/+14 | / | |
| |||||||||||
| B | 20 | 2 | Overhead | 17/22 | 14/8 | 4 | 34/33 | +5/+7 | +12/+14 | / | |
| |||||||||||
| C | 20 | 4 | Overhead | 13 | 39/36 | 4 | 55/52 | +6/+8 | +11/+15 | / | |
| |||||||||||
| D | 20 | 4 | Overhead | 17/22 | 35/27 | 4 | 55/52 | +4/+8 | +11/+15 | / | |
| |||||||||||
Dodge Attack
Throws
Holding Throw (4/6C)
| Damage | Stun | Range | Guard | Startup | Active | Recovery | Total | Hit Adv | Block Adv | Property |
|---|---|---|---|---|---|---|---|---|---|---|
| 26 | 3 | 20 | Throw | 1 | 1 | / | - | KD (+74) | / | / |
| ||||||||||
Special Moves
Hishou Ken (214P)
Shoryu Dan (236P)
| Version | Damage | Stun | Guard | Startup | Active | Recovery | Total | Hit Adv | Block Adv | Property | |
|---|---|---|---|---|---|---|---|---|---|---|---|
| A | 14 (3x2) | 3 | Mid | 10 | 3+4+5+6 | 20 | 47 | KD | -10 | Invincible 1~18F | |
| |||||||||||
| C | 20 (5x2) | 6 | Mid | 13 | 4+5+6+8 | 31 | 66 | KD | -30 | Invincible 1~24F | |
| |||||||||||
Zan Ei Ken ([1]6P)
| Version | Damage | Stun | Guard | Startup | Active | Recovery | Total | Hit Adv | Block Adv | Property | |
|---|---|---|---|---|---|---|---|---|---|---|---|
| A | 16 (4) | 3 | Mid | 10 | 16 | 2 | 27 | Air Reset | -6 | Throw Invincible | |
| C | 22 (5) | 6 | Mid | 13 | 20 | 2 | 34 | KD | -2 | Throw Invincible | |
Kuuha Dan (19K)
| Version | Damage | Stun | Guard | Startup | Active | Recovery | Total | Hit Adv | Block Adv | Property | |
|---|---|---|---|---|---|---|---|---|---|---|---|
| B | 13x2 (3x2) | 3x2 | Mid | 16 | 32 | 9 | 56 | -11 | -14 | Invincible 1~15F, Airborne 16~47F | |
| |||||||||||
| D | 18 (4x2) | 6 | Mid | 16 | 50 | 12 | 77 | KD | -28 | Invincible 1~15F, Airborne 16~65F | |
| |||||||||||
Desperation Move
Chou Reppa Dan ([2]36BD)
| Damage | Stun | Guard | Startup | Active | Recovery | Total | Hit Adv | Block Adv | Property | |
|---|---|---|---|---|---|---|---|---|---|---|
| 36 (9x2) | 4 | Mid | 21 | 48 | 24 | 92 | KD | -20 | Airborne 21~68F | |
Combos
- (2A,) 2A, 2A > [1]6A - 23 Damage
Confirmable BNB. Can also start from 2B.
- 2B > [1]6C - 27 Damage
Hard knockdown from a low. Must be done point blank.
- 2C > [1]6C - 35 Damage
Easy punish combo.
- c5A, c5A, c5D > [1]6C - 55 Damage
Ideal punish/dizzy combo. A jump-in starter must hit deep due to c5A's slow startup.
- (Corner/meaty, far distance) 214A, [1]6C - 38 Damage
Strategy
The Basics
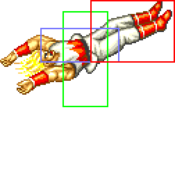
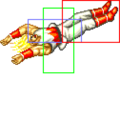
While Andy in Special has been slightly toned down from his FF2 appearance, he still boasts an amazing, well-rounded set of moves and remains a high tier character. His gameplan is largely centered around the Zaneiken, a high-speed elbow rush attack that gives him incredible ground mobility. Compared to the other two protagonist characters, Andy is much more focused on close range rushdown and hit-and-run style tactics rather than keepaway. While he does have a fireball, it's not used much for zoning due to it's long startup; instead, it's most effective when used in tandem with his other specials. An extremely common but effective tactic is to first throw a light Hishoken, and immediately follow it up with a heavy Zaneiken: the fireball will act as a "shield" of shorts in front of you, making it very difficult for the enemy to stop your approach. Even if the Zaneiken gets blocked, you're safe and free to backstep away before your enemy gets a chance to counterattack. A good chunk of the damage you deal as Andy comes from blocked Zaneikens alone, so don't be afraid to throw the move out a lot especially if your opponent is bad at countering it. Light Zaneiken travels about half the screen and has almost no recovery on whiff making it an excellent movement tool, but try to favor the heavy version when you actually want to hit your opponent as it's much safer on block.
Kuuha Dan is your most reliable tool against projectiles, as Andy isn't going to win any projectile wars with his slow fireball. You can use it to fly past virtually all enemy projectiles, save for maybe Krauser's High Blitzball or Kaiser Wave, and punish your opponent before they're able to recover. Be very careful with your spacing, though, as it'll leave you defenseless right next to your enemy when blocked up close which will spell doom for Andy. On the other hand, when properly spaced, Kuuha Dan can actually be plus on block, allowing you to continue your offense. It even has some invincibility on startup, so you can use it as a (very risky) reversal if you wish.
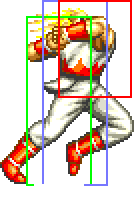
Andy's biggest weakness is his rather stubby normals, although it's not a huge issue thanks to him being able to get into close range much easier than most of the cast. The buttons you'll be using most commonly are 2A: a fast short range jab ideal for pressuring your opponent, 5B: a relatively long-reaching kick that can be cancelled into Hishoken or Zaneiken, and 2C: crouching heavy punch that can combo into Zaneiken. Both of his standing heavy kicks are great for anti-airing, and on top of that you've got Shoryudan, a dedicated anti-air special with a lot of startup invulnerability. Use your kick buttons if you're going for a jump-in: jB stays active for the entire duration of the jump, while jD can cross up.
When playing Andy, it's important to keep your inputs as clean as possible and learn to perform the Zaneiken correctly early on. The game prioritizes 236P over [1]6P, so if there's any overlap with those two commands you'll always get a Shoryudan instead of Zaneiken. An accidental heavy Shoryudan at the wrong moment might cost you an entire round, so be very careful. It's a common enough occurrence that the Japanese community even has coined the term "shooting fireworks" for a Shoryudan done accidentally.
Advanced Strategy
The "Zaneiken throw" is a rather nasty technique where you space a light Zaneiken so that it stops just before making contact with your enemy, and immediately go for a throw once you're in their face. Very hard to react to, but requires excellent spacing skills.
Andy can cancel the recovery of his backstep into a Shoryudan to gain extra frames of invulnerability. Useful if you notice you're about to backstep right into a fireball.
Andy's optimal combo is a bit tricky as it requires you to cancel a close D into heavy Zaneiken. This requires a strange "mini-charge" right after pressing D; try not to start it too early or you'll get crouch D instead of close D. It'll require some practice to get the timing right, but it's worth the effort.
Matchups
Vs. Andy Bogard
5 - 5
Dodge attack can be used to counter enemy Zaneikens. Of course, your opponent can do the same against you, so try not to be too predictable and keep them guessing between your Hishoken and Zaneiken. If you're locked in a fireball war, Kuuha Dan is your best option to get out of the situation. 2D and CD are great at stuffing Zaneiken, and 2D is great for pressure/oki in the corner as it will dodge Shoryudan when spaced and is generally difficult for Andy to punish.
Vs. Axel Hawk
7 - 3
Big advantage for Andy. Axel is far too cumbersome to keep up with your movement, so you can get in and out with relative ease. Axel can't safely zone you out with his tornadoes either due to the threat of your Kuuha Dan. On top of that, Zaneiken hits Axel in his weak spot, boosting its already high damage by 25% every time you land it. Don't get too predictable with your offense, though, as Axel can still deal some heavy damage with good reads. His CD in particular can be used to stuff both your Zaneiken and Kuuha Dan, and it gives him good oki on hit. Watch out for his dodge attack too as it reaches much farther than than you'd expect.
Vs. Big Bear
6 - 4
Your first instinct might be to try zoning the grappler out with your fireballs, but using Hishoken is a big risk due to Bear being able to charge past it with his tackle. Use your mobility to your advantage instead, pressure him in close range and backstep away before he gets a chance to counterattack. Andy's lows are too slow to be reliable against tackles, but dodge attack and Shoryudan both work wonders against the move.
Vs. Billy Kane
5 - 5
Billy's strong pokes can be a problem for Andy as they can easily hit you out of a Zaneiken. Use the Hishoken + Zaneiken combination to your advantage to make it harder for Billy to stop your approach. Billy lacks high speed normals, so you'll have the advantage whenever you're close enough to hit him with 2A. Strike/throw mixups are also useful up close. Watch out for his super when he's low on health as you don't want to accidentally ram into it with Zaneiken.
Vs. Cheng Sinzan
6 - 4
Cheng's arcing fireballs can be annoying for Andy as they can potentially hit you out of a both Zaneiken and Kuuha Dan. Fortunately, they have a rather long startup and recovery, so look for a gap in his defense and strike with heavy Zaneiken. Avoid doing long blockstrings as Cheng can easily break free with a light Hagan Geki.
Vs. Duck King
6 - 4
Duck is all about close range pressure, so try to keep your distance and don't stay near him any longer than necessary. You can harass him with Hishokens from long range, but watch out whenever you're in range of his Needle Low as it can low profile fireballs. If you're being pressured up close, you can try breaking free with a Shoryudan or heavy Kuuha Dan, although simply backstepping away is usually the safest option. You can easily beat his Headspin Attack (Blanka Ball) with a dodge attack.
Vs. Geese Howard
6 - 4
Make good use of light Kuuha Dan to get past Geese's fireball defense. Geese can use his upper Atemi Nage to counter both your Zaneiken and Kuuha Dan, but the timing for a successful counter varies depending on which move you'll use so take advantage of that and keep him guessing. Hishoken is also great against Atemi attempts. If Geese likes to throw Shippukens, you can try to zip past them with a well timed light Zaneiken and hit him with a punish combo as he lands.
Vs. Joe Higashi
4 - 6
A zoner Andy has to respect. Joe's hurricanes are huge and have very little recovery, so punishing them with Kuuha Dan requires excellent timing and spacing. You can't dodge attack through them either, as the hitbox reaches all the way to the ground. If you see a suitable opening, charge in with Zaneiken and try to stay in close enough range that Joe can't get away with throwing projectiles.
Vs. Jubei Yamada
5 - 5
Even though Jubei's projectiles have fast recovery, light Kuuha Dan still can be used to punish them. Make sure to space the move correctly, though, as Jubei may be able to punish it with a stun combo if it's done too close to your opponent. Dodge attack and 2D can be used to avoid projectiles as well. Jubei can low profile Andy's diagonal jD but not his jB.
Vs. Kim Kaphwan
4 - 6
Very fast-paced matchup that's fun to watch. Unfortunately, Kim has the advantage here thanks to having a stronger set of normals with more reach, and more explosive combo damage. Use Hishokens with extreme caution as Kim can easily hit you out of its slow startup even from a distance with his divekicks. As Kim will generally approach you from the air, be always ready to stop his dives and jump-ins with a Shoryudan or close/far D.
Vs. Laurence Blood
6 - 4
Mid range is where Laurence shines, so keep out of the reach of his pokes and either stay far away or right in his face where your fastest pokes stuff out all of his moves. Hishoken is useful here but carries some risk as Laurence's Bloody Cutter can beat it even from full screen. Laurence's jumps are extremely floaty, so even if he manages to avoid your Zaneiken with a neutral jump, you still have enough time to anti-air with close D. Don't let him chip you with his Bloody Spin; counter it with a dodge attack whenever possible.
Vs. Mai Shiranui
5 - 5
Mai has excellent projectiles, but you still have many ways to deal with them; either use your dodge attack or 2D to avoid them or use Kuuha Dan. Mai's heavy Ryuuenbu can pose a big threat as it's fully invulnerable on startup and deals huge damage if both hits connect, so don't go blindly charging in with a Zaneiken and pick your timing carefully instead.
Vs. Ryo Sakazaki
Vs. Terry Bogard
6 - 4
While Terry has a better set of normals and more combo damage, Andy still tends to control the neutral in this matchup thanks to his amazing specials. If you're locked in a projectile war, you can always beat a Power Wave with Kuuha Dan, while Terry has a much harder time trying to circumvent your projectiles. Once the Terry player is too afraid to throw out Power Waves out of fear of eating a counter hit, you can start pestering them with your Zaneiken offense.
Vs. Tung Fu Rue
6 - 4
You might want to switch up your usual playstyle a bit here and go for a more defensive approach as Tung can be deadly up close. Throwing Hishokens from a distance is relatively safe against him, while far D and Shoryudan are enough to stop any jump-in attempt. While Zaneikens are still very useful, you need to pick your timing carefully as Tung can potentially even get a combo if they manage to stuff your Zaneiken with a light normal.
Vs. Wolfgang Krauser
6 - 4
Krauser will try to keep you as far as possible with his array of fast fireballs, mostly sticking to the light low version of the move. Standard anti-projectile tactics work here; you can either avoid them with a well timed dodge attack, or fly past them with your Kuuha Dan. However, Krauser may occasionally throw you off by using high Blitzball, which can hit you out of both Kuuha Dan and Zaneiken. High Blitzballs will whiff if you're crouching, though, so it's possible to simply crouch walk past them. You'll have the advantage up close as Krauser doesn't have normals that are fast enough to contest your 2A. Watch out for his Atemi Nage though; you might want to pressure him with 2B and 2D occasionally as the counter doesn't work against lows.
