| (100 intermediate revisions by 4 users not shown) | |||
| Line 1: | Line 1: | ||
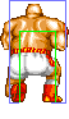
[[File:FFS_Axel_Portrait.png|right|The Iron-Knuckled Pugilist]] | |||
[[File:FFS_Axel_Colors.png|right]] | |||
[[File:FFS_Axel_Stage.png|thumb|Axel has a single lane stage. Lane changing is not possible and Lane Blasts will send characters into the electric ring for an additional 8 damage and 5 stun.]] | |||
= | ==Introduction== | ||
Previously a boss character in FF2, the heavyweight boxer Axel Hawk is made playable in Special and given a retooled moveset. In boxing terms, Axel's fighting style is closest to the out-boxer, heavily relying on long-range moves and good positioning to counter the opponent's attacks. He's one of the trickier characters to play, often requiring good reads to deal big damage, but can be deadly in the right hands. | |||
{| | |||
|-style="text-align:left;" | |||
! Pros !! Cons | |||
|- style="vertical-align:top;text-align:left" | |||
| style="width: 50%;"| | |||
* Downright godly dodge attack | |||
* Jumps are quicker than average | |||
* Good projectile and tons of anti-air moves | |||
* Decent chip damage | |||
| style="width: 50%;"| | |||
* Poor mobility | |||
* Slow recovery on most moves | |||
* Somewhat weak pressure | |||
* Takes more damage from hits to the stomach | |||
* His stage being limited to one lane is a double-edged sword, as lanes can compensate for his bad mobility | |||
|- | |||
|} | |||
==Move List== | |||
== | ===General Hurtboxes=== | ||
<span style="color: #7777ff"><big>Note: Attacks that hit Axel's stomach hurtbox (when present) will do 25% more damage (rounded down)</big></span> | |||
{| border="1em | {| border="1em" cellspacing="0" style="border: 1px solid #999;" | ||
| align="center" | Weak Point/Standing/Walking || align="center" | Crouching || align="center" | Jumping || align="center" | Taunting | |||
|- | |- | ||
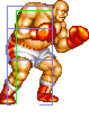
| | | align="center"; valign="bottom" | [[File:FFS Axel Weak Point.gif|bottom]] || align="center"; valign="bottom" | [[File:FFS Axel Crouch.png|bottom]] || align="center"; valign="bottom" | [[File:FFS Axel Jump.png|bottom]] [[File:FFS Axel Jump 1.png|bottom]] || align="center"; valign="bottom" | [[File:FFS Axel Taunt.png|bottom]] | ||
| | |||
| | |||
| | |||
| | |||
| | |||
| | |||
|- | |- | ||
| align="center" | Stomach hurtbox (flashing) takes extra damage. || align="center" | || align="center" | 50F (4+43+3) duration. || align="center" | | |||
|} | |} | ||
=== | ===Close Standing Normals=== | ||
===== <span class="invisible-header">c5A</span> ===== | |||
|- | <font style="visibility:hidden" size="0"></font> | ||
| | {{MoveData | ||
| | |image=FFS_Axel_c5A_2.png | ||
| | |subtitle=Body/ボディ | ||
| | |caption= | ||
| | |name=c5A | ||
|- | |data= | ||
| Axel | {{AttackData-FFS | ||
|Damage=12 | |||
|Stun=2 | |||
|Guard=Mid | |||
|Startup=6 | |||
|Active=5 | |||
|Recovery=7 | |||
|Total=17 | |||
|Hit Adv=+4 | |||
|Block Adv=+5 | |||
|Property=Kara Cancel | |||
|description= | |||
*Nothing too noteworthy. Can be easily cancelled into Axel Dance if you keep mashing A, but 2A does the job better. | |||
<gallery class="mw-collapsible mw-collapsed" data-expandtext="show detailed hitboxes" data-collapsetext="hide detailed hitboxes"> | |||
FFS Axel c5A.png|1-2F | |||
FFS Axel c5A_1.png|3-5F | |||
FFS Axel c5A_2.png|6-10F | |||
FFS Axel c5A_1.png|11-13F | |||
FFS Axel c5A.png|14-17F | |||
</gallery> | |||
}} | |||
}} | |||
|} | ===== <span class="invisible-header">c5B</span> ===== | ||
<font style="visibility:hidden" size="0"></font> | |||
{{MoveData | |||
|image=FFS_Axel_c5B 2.png | |||
|subtitle=Hook/フック | |||
|caption= | |||
|name=c5B | |||
|data= | |||
{{AttackData-FFS | |||
|Damage=8x2 | |||
|Stun=2x2 | |||
|Guard=Mid | |||
|Startup=6, 10 | |||
|Active=4+7 | |||
|Recovery=8 | |||
|Total=24 | |||
|Hit Adv=+1 | |||
|Block Adv=+4 | |||
|Property=Kara Cancel | |||
|description= | |||
*Hits twice, giving you plenty of time to cancel the move into a special. Potential for massive stun damage if both hits connect and you combo into heavy Axel Dance. | |||
<gallery class="mw-collapsible mw-collapsed" data-expandtext="show detailed hitboxes" data-collapsetext="hide detailed hitboxes"> | |||
FFS Axel c5B.png|1-2F | |||
FFS Axel c5B_1.png|3-5F | |||
FFS Axel c5B 2.png|6-9F | |||
FFS Axel c5B 3.png|10-16F | |||
FFS Axel c5B 4.png|17-20F | |||
FFS Axel c5B.png|21-24F | |||
</gallery> | |||
}} | |||
}} | |||
=== | ===== <span class="invisible-header">c5C</span> ===== | ||
<font style="visibility:hidden" size="0"></font> | |||
{{MoveData | |||
|image=FFS_Axel_c5C_2.png | |||
|subtitle=Under Punch/アンダーパンチ | |||
|caption= | |||
|name=c5C | |||
|data= | |||
{{AttackData-FFS | |||
|Damage=20 | |||
|Stun=4 | |||
|Guard=Mid | |||
|Startup=7 | |||
|Active=7 | |||
|Recovery=18 | |||
|Total=31 | |||
|Hit Adv=-1 | |||
|Block Adv=-2 | |||
|Property=Kara Cancel | |||
|description= | |||
*It's possible to combo into Tornado Upper from this, but you have better combo routes available. | |||
<gallery class="mw-collapsible mw-collapsed" data-expandtext="show detailed hitboxes" data-collapsetext="hide detailed hitboxes"> | |||
FFS Axel c5C.png|1-3F | |||
FFS Axel c5C_1.png|4-6F | |||
FFS Axel c5C_2.png|7-13F | |||
FFS Axel c5A_1.png|14-31F | |||
</gallery> | |||
}} | |||
}} | |||
===== <span class="invisible-header">c5D</span> ===== | |||
|- | <font style="visibility:hidden" size="0"></font> | ||
| | {{MoveData | ||
|- | |image=FFS_Axel_c5D 1.png | ||
|subtitle=Upper/アッパー | |||
|- | |caption= | ||
|name=c5D | |||
|data= | |||
{{AttackData-FFS | |||
|Damage=16 | |||
|Stun=4 | |||
|Guard=Mid | |||
|Startup=6 | |||
|Active=4+10 | |||
|Recovery=23 | |||
|Total=42 | |||
|Hit Adv=-13 | |||
|Block Adv=-14 | |||
|Property=Kara Cancel | |||
|description= | |||
*Not much reason to use this one. Mostly just "the move you get if Axel fails a throw attempt". | |||
<gallery class="mw-collapsible mw-collapsed" data-expandtext="show detailed hitboxes" data-collapsetext="hide detailed hitboxes"> | |||
FFS Axel c5A.png|1-2F | |||
FFS Axel c5A_1.png|3-5F | |||
FFS Axel c5D 1.png|6-9F | |||
FFS Axel c5D 2.png|10-19F | |||
FFS Axel c5D_3.png|20-28F | |||
FFS Axel c5A_1.png|29-42F | |||
</gallery> | |||
}} | |||
}} | |||
= | ===Far Standing Normals=== | ||
== | ===== <span class="invisible-header">f5A</span> ===== | ||
<font style="visibility:hidden" size="0"></font> | |||
* | {{MoveData | ||
|image=FFS_Axel_f5A 1.png | |||
|subtitle=Straight/ストレート | |||
|caption= | |||
|name=f5A | |||
|data= | |||
{{AttackData-FFS | |||
|Damage=10 | |||
|Stun=2 | |||
|Guard=Mid | |||
|Startup=6 | |||
|Active=9 | |||
|Recovery=6 | |||
|Total=20 | |||
|Hit Adv=+1 | |||
|Block Adv=+2 | |||
|Property=Kara Cancel | |||
|description= | |||
*Good poke, although slightly overshadowed by 5B. If done with a 46A input, you can option select between this button and Axel's amazing dodge attack, so it does see plenty of use. | |||
<gallery class="mw-collapsible mw-collapsed" data-expandtext="show detailed hitboxes" data-collapsetext="hide detailed hitboxes"> | |||
FFS Axel f5A.png|1-2F | |||
FFS Axel c5C 1.png|3-5F | |||
FFS Axel f5A 1.png|6-14F | |||
FFS Axel c5C 1.png|15-20F | |||
</gallery> | |||
}} | |||
}} | |||
===== <span class="invisible-header">f5B</span> ===== | |||
* | <font style="visibility:hidden" size="0"></font> | ||
{{MoveData | |||
|image=FFS_Axel_f5B 3.png | |||
|subtitle=Strike Hook/ストライクフック | |||
|caption= | |||
|name=f5B | |||
|data= | |||
{{AttackData-FFS | |||
|Damage=6 | |||
|Stun=2 | |||
|Guard=Mid | |||
|Startup=3 | |||
|Active=3+4+5 | |||
|Recovery=27 | |||
|Total=41 | |||
|Hit Adv=-23 | |||
|Block Adv=-22 | |||
|Property=Kara Cancel | |||
|description= | |||
*Now this is a button. Extremely fast startup, good range and works both as a ground poke and an anti-air. The recovery is terrible, but this is offset by the fact it's special cancelable. | |||
*You can create decent pressure by canceling this into a light Tornado Upper on block. | |||
<gallery class="mw-collapsible mw-collapsed" data-expandtext="show detailed hitboxes" data-collapsetext="hide detailed hitboxes"> | |||
FFS Axel f5B 2.png|1-2F | |||
FFS Axel f5B 3.png|3-5F | |||
FFS Axel f5B 4.png|6-9F | |||
FFS Axel f5B 5.png|10-14F | |||
FFS Axel f5B 6.png|15-31F | |||
FFS Axel c5C 1.png|32-41F | |||
</gallery> | |||
}} | |||
}} | |||
===== <span class="invisible-header">f5C</span> ===== | |||
* | <font style="visibility:hidden" size="0"></font> | ||
{{MoveData | |||
|image=FFS_Axel_f5C_2.png | |||
|subtitle=Slash Punch/スラッシュパンチ | |||
|caption= | |||
|name=f5C | |||
|data= | |||
{{AttackData-FFS | |||
|Damage=18 | |||
|Stun=4 | |||
|Guard=Mid | |||
|Startup=6 | |||
|Active=4+5 | |||
|Recovery=27 | |||
|Total=41 | |||
|Hit Adv=-13 | |||
|Block Adv=-14 | |||
|Property=/ | |||
|description= | |||
*It's possible to anti-air with this, but you have much better options available. The recovery is terrible, leaving you minus both on hit and block against a grounded opponent. | |||
<gallery class="mw-collapsible mw-collapsed" data-expandtext="show detailed hitboxes" data-collapsetext="hide detailed hitboxes"> | |||
FFS Axel c5C.png|1-2F | |||
FFS Axel f5C 1.png|3-5F | |||
FFS Axel f5C 2.png|6-9F | |||
FFS Axel f5C 3.png|10-14F | |||
FFS Axel f5C 4.png|15-31F | |||
FFS Axel c5C_1.png|32-41F | |||
</gallery> | |||
}} | |||
}} | |||
===== <span class="invisible-header">f5D</span> ===== | |||
* | <font style="visibility:hidden" size="0"></font> | ||
{{MoveData | |||
|image=FFS_Axel_f5D 3.png | |||
|subtitle=Step Upper/ステップアッパー | |||
|caption= | |||
|name=f5D | |||
|data= | |||
{{AttackData-FFS | |||
|Damage=14 | |||
|Stun=4 | |||
|Guard=Mid | |||
|Startup=9 | |||
|Active=3+4+4 | |||
|Recovery=27 | |||
|Total=46 | |||
|Hit Adv=-15 | |||
|Block Adv=-16 | |||
|Property=/ | |||
|description= | |||
*More or less the same as 5C, except with slower startup. Don't use. | |||
<gallery class="mw-collapsible mw-collapsed" data-expandtext="show detailed hitboxes" data-collapsetext="hide detailed hitboxes"> | |||
FFS Axel f5D.png|1-2F | |||
FFS Axel f5D 1.png|3-5F | |||
FFS Axel f5D 2.png|6-8F | |||
FFS Axel f5D 3.png|9-11F | |||
FFS Axel f5D 4.png|12-15F | |||
FFS Axel f5D 5.png|16-19F | |||
FFS Axel f5D 6.png|20-36F | |||
FFS Axel c5C 1.png|37-46F | |||
</gallery> | |||
}} | |||
}} | |||
===Crouching Normals=== | |||
===== <span class="invisible-header">2A</span> ===== | |||
* | <font style="visibility:hidden" size="0"></font> | ||
{{MoveData | |||
|image=FFS_Axel_2A.png | |||
|subtitle= Low Light Upper/ローライトアッパー | |||
|caption= | |||
|name=2A | |||
|data= | |||
{{AttackData-FFS | |||
|Damage=6 | |||
|Stun=2 | |||
|Guard=Mid | |||
|Startup=5 | |||
|Active=6 | |||
|Recovery=5 | |||
|Total=15 | |||
|Hit Adv=+5 | |||
|Block Adv=+6 | |||
|Property=Kara Cancel | |||
|description= | |||
*Mostly used to combo into light Axel Dance. | |||
<gallery class="mw-collapsible mw-collapsed" data-expandtext="show detailed hitboxes" data-collapsetext="hide detailed hitboxes"> | |||
FFS Axel Crouch.png|1-4F | |||
FFS Axel 2A.png|5-10F | |||
FFS Axel Crouch.png|11-15F | |||
</gallery> | |||
}} | |||
}} | |||
===== <span class="invisible-header">2B</span> ===== | |||
* | <font style="visibility:hidden" size="0"></font> | ||
{{MoveData | |||
|image=FFS_Axel_2B.png | |||
|subtitle=Ducking Jab/ダッキングジャブ | |||
|caption= | |||
|name=2B | |||
|data= | |||
{{AttackData-FFS | |||
|Damage=8 | |||
|Stun=2 | |||
|Guard=Low | |||
|Startup=5 | |||
|Active=7 | |||
|Recovery=8 | |||
|Total=19 | |||
|Hit Adv=+1 | |||
|Block Adv=+2 | |||
|Property=Kara Cancel | |||
|description= | |||
*Great low poke, although 2D only has 1 more frame of startup despite dealing twice the damage and a knockdown on hit. | |||
<gallery class="mw-collapsible mw-collapsed" data-expandtext="show detailed hitboxes" data-collapsetext="hide detailed hitboxes"> | |||
FFS Axel Crouch.png|1-4F | |||
FFS Axel 2B.png|5-11F | |||
FFS Axel Crouch.png|12-19F | |||
</gallery> | |||
}} | |||
}} | |||
===== <span class="invisible-header">2C</span> ===== | |||
* | <font style="visibility:hidden" size="0"></font> | ||
{{MoveData | |||
|image=FFS Axel 2C 1.png | |||
|subtitle=Wing Upper/ウイングアッパー | |||
|caption= | |||
|name=2C | |||
|data= | |||
{{AttackData-FFS | |||
|Damage=14 | |||
|Stun=4 | |||
|Guard=Mid | |||
|Startup=8 | |||
|Active=16 | |||
|Recovery=18 | |||
|Total=41 | |||
|Hit Adv=-10 | |||
|Block Adv=-11 | |||
|Property=Kara Cancel | |||
|description= | |||
*One of the strongest anti-air normals in the game. It doesn't have a lot of horizontal range, though, so it's best suited to beating close range jump-ins. | |||
*Works as a combo starter against a grounded opponent, but you have to be right next to your opponent for the move to land. | |||
<gallery class="mw-collapsible mw-collapsed" data-expandtext="show detailed hitboxes" data-collapsetext="hide detailed hitboxes"> | |||
FFS Axel 2C.png|1-7F | |||
FFS Axel 2C 1.png|8-23F | |||
FFS Axel 2C.png|24-41F | |||
</gallery> | |||
}} | |||
}} | |||
' | ===== <span class="invisible-header">2D</span> ===== | ||
* | <font style="visibility:hidden" size="0"></font> | ||
{{MoveData | |||
|image=FFS_Axel_2B.png | |||
|subtitle=Ducking Jab/ダッキングジャブ | |||
|caption= | |||
|name=2D | |||
|data= | |||
{{AttackData-FFS | |||
|Damage=16 | |||
|Stun=4 | |||
|Guard=Low | |||
|Startup=6 | |||
|Active=11 | |||
|Recovery=11 | |||
|Total=27 | |||
|Hit Adv=KD | |||
|Block Adv=+1 | |||
|Property=Kara Cancel | |||
|description= | |||
*Stronger version of 2B that's still very fast and safe. This should be your most commonly used button along with 5B. | |||
*Can be cancelled into Tornado Upper on block for some chip damage. | |||
<gallery class="mw-collapsible mw-collapsed" data-expandtext="show detailed hitboxes" data-collapsetext="hide detailed hitboxes"> | |||
FFS Axel Crouch.png|1-5F | |||
FFS Axel 2B.png|6-16F | |||
FFS Axel Crouch.png|17-27F | |||
</gallery> | |||
}} | |||
}} | |||
===Jumping Normals=== | |||
===== <span class="invisible-header">jA/B</span> ===== | |||
<font style="visibility:hidden" size="0"></font> | |||
{{MoveData | |||
|image=FFS_Axel_jA_1.png | |||
|subtitle=Kangaroo Hook/カンガルーフック | |||
|caption= | |||
|name=jA/B | |||
|data= | |||
{{AttackData-FFS | |||
|Damage=8 | |||
|Stun=2 | |||
|Guard=Overhead | |||
|Startup=5 | |||
|Active=7 + ∞ | |||
|Recovery= | |||
|Total= | |||
|Hit Adv= | |||
|Block Adv= | |||
|Property= | |||
|description= * There is no difference between jA and jB or their neutral/diagonal jump versions. | |||
<gallery class="mw-collapsible mw-collapsed" data-expandtext="show detailed hitboxes" data-collapsetext="hide detailed hitboxes"> | |||
FFS Axel jA.png|1-4F | |||
FFS Axel jA 1.png|5-11F | |||
FFS Axel jA 2.png|12-∞F | |||
</gallery> | |||
}} | |||
}} | |||
===== <span class="invisible-header">jC</span> ===== | |||
* | <font style="visibility:hidden" size="0"></font> | ||
{{MoveData | |||
|image=FFS_Axel_jA_1.png | |||
|subtitle=Double Kangaroo Punch/ダブルカンガルーパンチ | |||
|caption= | |||
|name=jC | |||
|data= | |||
{{AttackData-FFS | |||
|Damage=10x2 | |||
|Stun=4x2 | |||
|Guard=Overhead, Overhead | |||
|Startup=5, 16 | |||
|Active=11+8 | |||
|Recovery= | |||
|Total= | |||
|Hit Adv= | |||
|Block Adv= | |||
|Property= | |||
|description= * Hits twice. | |||
* No difference between neutral jump and diagonal jump versions. | |||
<gallery class="mw-collapsible mw-collapsed" data-expandtext="show detailed hitboxes" data-collapsetext="hide detailed hitboxes"> | |||
FFS Axel jA.png|1-4F | |||
FFS Axel jA 1.png|5-15F | |||
FFS Axel jA 2.png|16-23F | |||
FFS Axel jC 3.png|24-∞F | |||
</gallery> | |||
}} | |||
}} | |||
===== <span class="invisible-header">jD</span> ===== | |||
* | <font style="visibility:hidden" size="0"></font> | ||
{{MoveData | |||
|image=FFS_Axel_jA 1.png | |||
|subtitle=Double Kangaroo Punch/ダブルカンガルーパンチ | |||
|caption2=Diagonal & Neutral Jump | |||
|name=jD | |||
|data= | |||
{{AttackData-FFS | |||
|version=Diagonal Jump | |||
|Damage=10x2 | |||
|Stun=4x2 | |||
|Guard=Overhead, Overhead | |||
|Startup=10, 21 | |||
|Active=11+8 | |||
|Recovery= | |||
|Total= | |||
|Hit Adv= | |||
|Block Adv= | |||
|Property= | |||
|description= * Same as jC/j8C but has slower startup. | |||
*No reason to use this over jC. | |||
<gallery class="mw-collapsible mw-collapsed" data-expandtext="show detailed hitboxes" data-collapsetext="hide detailed hitboxes"> | |||
FFS Axel jA.png|1-9F | |||
FFS Axel jA 1.png|10-20F | |||
FFS Axel jA 2.png|21-28F | |||
FFS Axel jC 3.png|29-∞F | |||
</gallery> | |||
}} | |||
{{AttackData-FFS | |||
|header=no | |||
|version=Neutral Jump | |||
|Damage=10x2 | |||
|Stun=4x2 | |||
|Guard=Overhead, Overhead | |||
|Startup=5, 16 | |||
|Active=11+8 | |||
|Recovery= | |||
|Total= | |||
|Hit Adv= | |||
|Block Adv= | |||
|Property= | |||
|description= * Same as jC/j8C. | |||
<gallery class="mw-collapsible mw-collapsed" data-expandtext="show detailed hitboxes" data-collapsetext="hide detailed hitboxes"> | |||
FFS Axel jA.png|1-4F | |||
FFS Axel jA 1.png|5-15F | |||
FFS Axel jA 2.png|16-23F | |||
FFS Axel jC 3.png|24-∞F | |||
</gallery> | |||
}} | |||
}} | |||
===Universal Mechanics=== | |||
'' | ===== <span class="invisible-header">Lane Blast (CD)</span> ===== | ||
* | <font style="visibility:hidden" size="0"></font> | ||
{{MoveData | |||
|image=FFS_Axel_CD_Front 2.png | |||
|image2=FFS_Axel_CD_Back 2.png | |||
|subtitle=Atomic Bomber/アトミックボンバー | |||
|caption=Front Lane | |||
|caption2=Back Lane | |||
|name=Lane Blast | |||
|input=C+D | |||
|data= | |||
{{AttackData-FFS | |||
|version=Front Lane | |||
|Damage=22 | |||
|Stun=5 | |||
|Guard=Mid | |||
|Startup=9 | |||
|Active=8 | |||
|Recovery=14 | |||
|Total=30 | |||
|Hit Adv=KD | |||
|Block Adv=-3 | |||
|Property=Cancel, Lane Shift | |||
|description= | |||
*Your main anti-air in situations where 2C doesn't have enough horizontal reach. Excellent against Kim divekicks. | |||
*Great on Axel's own stage as it will deal extra damage and double the amount of stun. You can also okizeme with Axel Dance afterwards for good chip damage. | |||
<gallery class="mw-collapsible mw-collapsed" data-expandtext="show detailed hitboxes" data-collapsetext="hide detailed hitboxes"> | |||
FFS Axel CD Front.png|1-3F | |||
FFS Axel CD Front 1.png|4-8F | |||
FFS Axel CD Front 2.png|9-16F | |||
FFS Axel CD Front 3.png|17-23F | |||
FFS Axel c5C 1.png|24-30F | |||
</gallery> | |||
}} | |||
{{AttackData-FFS | |||
|header=no | |||
|version=Back Lane | |||
|Damage=22 | |||
|Stun=5 | |||
|Guard=Mid | |||
|Startup=12 | |||
|Active=8 | |||
|Recovery=8 | |||
|Total=27 | |||
|Hit Adv=KD | |||
|Block Adv=+3 | |||
|Property=Cancel, Lane Shift | |||
|description= * Slower and has a much worse hitbox. | |||
<gallery class="mw-collapsible mw-collapsed" data-expandtext="show detailed hitboxes" data-collapsetext="hide detailed hitboxes"> | |||
FFS Axel CD Back.png|1-5F | |||
FFS Axel CD Back 1.png|6-11F | |||
FFS Axel CD Back 2.png|12-19F | |||
FFS Axel CD Back 3.png|20-27F | |||
</gallery> | |||
}} | |||
}} | |||
=== | ===== <span class="invisible-header">Lane Attack</span> ===== | ||
<font style="visibility:hidden" size="0"></font> | |||
{{MoveData | |||
|image=FFS_Axel_Lane_Attack_Front.png | |||
|image2=FFS Axel Lane Attack Back.png | |||
|subtitle= | |||
|caption=Front Lane | |||
|caption2=Back Lane | |||
|name=Lane Attack | |||
|input=A/B/C/D from opposite lane | |||
|data=Axel has the same lane attack for punch and kick buttons. Unfortunately whiffs against crouching Duck, Jubei, Mai and Tung. | |||
<gallery class="mw-collapsible"> | |||
FFS Axel Lane Attack Front 1.png|Front Lane Attack Recovery | |||
FFS Axel Jump.png|Back Lane Attack Recovery | |||
</gallery> | |||
{{AttackData-FFS | |||
|version=A/B | |||
|Damage=20 | |||
|Stun=2 | |||
|Guard=Overhead | |||
|Startup=13 | |||
|Active= | |||
|Recovery=4 | |||
|Total= | |||
|Hit Adv= | |||
|Block Adv= | |||
|Property=/ | |||
|description= * A straight and fast lane attack. | |||
}} | |||
{{AttackData-FFS | |||
|header=no | |||
|version=C/D | |||
|Damage=20 | |||
|Stun=4 | |||
|Guard=Overhead | |||
|Startup=13 | |||
|Active= | |||
|Recovery=4 | |||
|Total= | |||
|Hit Adv= | |||
|Block Adv= | |||
|Property=/ | |||
|description= * A slower high angle lane attack. | |||
}} | |||
}} | |||
=== | ===== <span class="invisible-header">Dodge Attack</span> ===== | ||
<font style="visibility:hidden" size="0"></font> | |||
* | {{MoveData | ||
|image=FFS_Axel_Dodge_Attack 2.png | |||
|subtitle= | |||
|caption= | |||
|name=Dodge Attack | |||
|input=6A during proximity guard | |||
|data= | |||
{{AttackData-FFS | |||
|Damage=11 | |||
|Stun=5 | |||
|Guard=Mid | |||
|Startup=14 | |||
|Active=8 | |||
|Recovery=11 | |||
|Total=32 | |||
|Hit Adv=Air Reset | |||
|Block Adv=0 | |||
|Property=Kara Cancel, Invuln Above Knees 1-13F, Invuln Above Waist 14-21F | |||
|description= * Has huge range but a slightly larger hurtbox than other dodge attacks. Overall very good. | |||
<gallery class="mw-collapsible mw-collapsed" data-expandtext="show detailed hitboxes" data-collapsetext="hide detailed hitboxes"> | |||
FFS Axel Dodge Attack.png|1-7F | |||
FFS Axel Dodge Attack 1.png|8-13F | |||
FFS Axel Dodge Attack 2.png|14-21F | |||
FFS Axel Dodge Attack 3.png|22-27F | |||
FFS Axel Dodge Attack 4.png|28-32F | |||
</gallery> | |||
}} | |||
}} | |||
===Throws=== | ===Throws=== | ||
===== <span class="invisible-header">Hell Bomber (6D)</span> ===== | |||
*( | <font style="visibility:hidden" size="0"></font> | ||
{{MoveData | |||
|image=FFS_Axel_6D_Throw 1.png | |||
|caption= | |||
|name=Hell Bomber | |||
|input=close 6D | |||
|data= | |||
{{AttackData-FFS | |||
|Damage=16~32 (4 x 4~8) | |||
|Stun=0 | |||
|range=16 | |||
|Guard=Throw | |||
|Startup=1 | |||
|Active=1 | |||
|Recovery=/ | |||
|Hit Adv=KD/Air reset | |||
|Block Adv=/ | |||
|Property=/ | |||
|description= * Hold throw. Opponent can mash to reduce hits. | |||
}} | |||
}} | |||
===== <span class="invisible-header">Head Crush (4D)</span> ===== | |||
<font style="visibility:hidden" size="0"></font> | |||
{{MoveData | |||
|image=FFS_Axel_4D_Throw 1.png | |||
|caption= | |||
|name=Head Crush | |||
|input=close 4D | |||
|data= | |||
{{AttackData-FFS | |||
|Damage=16~32 (4 x 4~8) | |||
|Stun=0 | |||
|range=16 | |||
|Guard=Throw | |||
|Startup=1 | |||
|Active=1 | |||
|Recovery=/ | |||
|Hit Adv=KD/Air reset | |||
|Block Adv=/ | |||
|Property=/ | |||
|description= * Hold throw. Opponent can mash to reduce hits. | |||
* If all hits connect on a one-lane stage, the opponent will be thrown into the background for an additional 8 damage. Unlike background damage from a Lane Blast, though, no stun will be inflicted. | |||
}} | |||
}} | |||
===== <span class="invisible-header">Rolling Buster (9D)</span> ===== | |||
<font style="visibility:hidden" size="0"></font> | |||
{{MoveData | |||
|image=FFS_Axel_9D_Throw 1.png | |||
|caption= | |||
|name=Rolling Buster | |||
|input=close 9D | |||
|data= | |||
{{AttackData-FFS | |||
|Damage=24~52 (4 x 6~13) | |||
|Stun=0 | |||
|range=8 | |||
|Guard=Throw | |||
|Startup=1 | |||
|Active=1 | |||
|Recovery=/ | |||
|Hit Adv=KD/Air reset | |||
|Block Adv=/ | |||
|Property=/ | |||
|description= * Hold throw. Opponent can mash to reduce hits. | |||
* Deals serious damage, so some Axel players like to go for this instead of a combo if they manage to stun their opponent. The input is tricky, but you can buffer it during a whiffed close B to make it easier to land. | |||
* Tied for the shortest throw range in the game. | |||
}} | |||
}} | |||
===Special Moves=== | |||
===== <span class="invisible-header">Tornado Upper (236P)</span> ===== | |||
<font style="visibility:hidden" size="0"></font> | |||
{{MoveData | |||
| name = Tornado Upper | |||
| input = 236A/C | |||
| subtitle = | |||
| image = FFS Axel 236P 6.png | |||
| caption = | |||
| data = | |||
{{AttackData-FFS | |||
| version = A | |||
| subtitle = | |||
| Damage = 16 (4) | |||
| Stun = 3 | |||
| Guard = Mid | |||
| Startup = 15 | |||
| Active = | |||
| Recovery = 43 | |||
| Total = 57 | |||
| Hit Adv = -10 | |||
| Block Adv = -13 | |||
| Property = / | |||
| description = * Tornado travels slower. | |||
*Recovers faster than the heavy version, making it safer to use. | |||
<gallery class="mw-collapsible mw-collapsed" data-expandtext="show detailed hitboxes" data-collapsetext="hide detailed hitboxes"> | |||
FFS Axel c5C.png|1-3F | |||
FFS Axel 236P 1.png|4-6F | |||
FFS Axel 236P 2.png|7-10F | |||
FFS Axel 236P 3.png|11-14F | |||
FFS Axel 236P 4.png|15-18F | |||
FFS Axel 236P 5.png|19-23F | |||
FFS Axel 236P 6.png|24-46F | |||
FFS Axel c5C 1.png|47-57F | |||
</gallery> | |||
}} | |||
{{AttackData-FFS | |||
| header = no | |||
| version = C | |||
| subtitle = | |||
| Damage = 22 (5) | |||
| Stun = 6 | |||
| Guard = Mid | |||
| Startup = 20 | |||
| Active = | |||
| Recovery = 49 | |||
| Total = 68 | |||
| Hit Adv = -8 | |||
| Block Adv = -15 | |||
| Property = / | |||
| description = * Tornado travels faster. | |||
<gallery class="mw-collapsible mw-collapsed" data-expandtext="show detailed hitboxes" data-collapsetext="hide detailed hitboxes"> | |||
FFS Axel c5C.png|1-7F | |||
FFS Axel 236P 1.png|8-11F | |||
FFS Axel 236P 2.png|12-15F | |||
FFS Axel 236P 3.png|16-19F | |||
FFS Axel 236P 4.png|20-23F | |||
FFS Axel 236P 5.png|24-29F | |||
FFS Axel 236P 6.png|30-57F | |||
FFS Axel c5C 1.png|58-68F | |||
</gallery> | |||
}} | |||
}} | |||
===== <span class="invisible-header">Smash Bomber ([1]6P)</span> ===== | |||
<font style="visibility:hidden" size="0"></font> | |||
{{MoveData | |||
| name = Smash Bomber | |||
| input = [1]6A/C | |||
| subtitle = | |||
| image = FFS Axel 16P 4.png | |||
| caption = | |||
| data = | |||
{{AttackData-FFS | |||
| version = A | |||
| subtitle = | |||
| Damage = 18 (4) | |||
| Stun = 3 | |||
| Guard = Mid | |||
| Startup = 17 | |||
| Active = 5+6+6 | |||
| Recovery = 12 | |||
| Total = 45 | |||
| Hit Adv = Air Reset | |||
| Block Adv = -7 | |||
| Property = | |||
| description = * Charge time: 45F. | |||
*Axel Dance is better both as a combo ender and chip damage dealer, so this doesn't see too much use. However, it does leave Axel plus on block if done from the right distance, so it's not entirely useless. | |||
<gallery class="mw-collapsible mw-collapsed" data-expandtext="show detailed hitboxes" data-collapsetext="hide detailed hitboxes"> | |||
FFS Axel Jump.png|1-3F | |||
FFS Axel 16P 1.png|4-7F | |||
FFS Axel 16P 2.png|8-11F | |||
FFS Axel 16P 3.png|12-16F | |||
FFS Axel 16P 4.png|17-21F | |||
FFS Axel 16P 5.png|22-27F | |||
FFS Axel 16P 6.png|28-33F | |||
FFS Axel 16P 7.png|34-39F | |||
FFS Axel c5A 1.png|40-45F | |||
</gallery> | |||
}} | |||
{{AttackData-FFS | |||
| header = no | |||
| version = C | |||
| subtitle = | |||
| Damage = 24 (6) | |||
| Stun = 6 | |||
| Guard = Mid | |||
| Startup = 28 | |||
| Active = 7+9+9 | |||
| Recovery = 12 | |||
| Total = 64 | |||
| Hit Adv = KD | |||
| Block Adv = -19 | |||
| Property = | |||
| description = * Charge time: 60F. | |||
*Horribly slow. The frame data is just too terrible for this move to be useful, and it needs a somewhat lengthy charge as well. Avoid. | |||
<gallery class="mw-collapsible mw-collapsed" data-expandtext="show detailed hitboxes" data-collapsetext="hide detailed hitboxes"> | |||
FFS Axel Jump.png|1-6F | |||
FFS Axel 16P 1.png|7-12F | |||
FFS Axel 16P 2.png|13-19F | |||
FFS Axel 16P 3.png|20-27F | |||
FFS Axel 16P 4.png|28-34F | |||
FFS Axel 16P 5.png|35-43F | |||
FFS Axel 16P 6.png|44-52F | |||
FFS Axel 16P 7.png|53-58F | |||
FFS Axel c5A 1.png|59-64F | |||
</gallery> | |||
}} | |||
}} | |||
===== <span class="invisible-header">Axel Dance (Mash P)</span> ===== | |||
<font style="visibility:hidden" size="0"></font> | |||
{{MoveData | |||
| name = Axel Dance | |||
| input = Mash A/C | |||
| subtitle = | |||
| image = FFS Axel f5C 2.png | |||
| caption = | |||
| data = Elipses (...) indicate where the attack repeats if P continues to be mashed. Total frames and frame advantage assume no mashing after the move starts. | |||
{{AttackData-FFS | |||
| version = A | |||
| Damage = 12xN (3xN) | |||
| Stun = 3 | |||
| Guard = / | |||
| Startup = 7, 18, 29, 41 ... | |||
| Active = 4 (7) 4 (7) 4 (8) 2 ... | |||
| Recovery = 4 | |||
| Total = 46+ | |||
| Hit Adv = -6 | |||
| Block Adv = 0 | |||
| Property = / | |||
| description = *Landing this move should be your main goal in most matchups. Hits multiple times, so it deals a big amount of chip damage even when blocked. Don't mash for too long, though, or you'll be pushed away from your opponent and the move will become unsafe. | |||
<gallery class="mw-collapsible mw-collapsed" data-expandtext="show detailed hitboxes" data-collapsetext="hide detailed hitboxes"> | |||
FFS Axel c5C_1.png|1-3F | |||
FFS Axel c5C.png|4-6F | |||
FFS Axel MashP 2.png|7-8F | |||
FFS Axel f5C 2.png|9-10F | |||
FFS Axel MashP 4.png|11-12F | |||
FFS Axel MashP 5.png|13-15F | |||
FFS Axel f5D 1.png|16-17F | |||
FFS Axel MashP 7.png|18-19F | |||
FFS Axel f5D 3.png|20-21F | |||
FFS Axel MashP 9.png|22-23F | |||
FFS Axel MashP 10.png|24-25F | |||
FFS Axel MashP 11.png|26-28F | |||
FFS Axel f5B 3.png|29-30F | |||
FFS Axel f5B 4.png|31-32F | |||
FFS Axel MashP 14.png|33-34F | |||
FFS Axel MashP 15.png|35-37F | |||
FFS Axel c5C.png|38-40F | |||
FFS Axel MashP 2.png|41-42F | |||
FFS Axel c5C 1.png|43-46F | |||
</gallery> | |||
}} | |||
{{AttackData-FFS | |||
| header = no | |||
| version = C | |||
| Damage = 18xN (4xN) | |||
| Stun = 6 | |||
| Guard = / | |||
| Startup = 11, 24 ... | |||
| Active = 4 (9) 4 ... | |||
| Recovery = 12 | |||
| Total = 39+ | |||
| Hit Adv = +15 | |||
| Block Adv = +8 | |||
| Property = / | |||
| description = *An even better version, but requires some serious mashing skills for it to come out at all. | |||
<gallery class="mw-collapsible mw-collapsed" data-expandtext="show detailed hitboxes" data-collapsetext="hide detailed hitboxes"> | |||
FFS Axel c5C_1.png|1-5F | |||
FFS Axel c5C.png|6-10F | |||
FFS Axel MashP 2.png|11-12F | |||
FFS Axel f5C 2.png|13-14F | |||
FFS Axel MashP 4.png|15-16F | |||
FFS Axel MashP 5.png|17-21F | |||
FFS Axel f5D 1.png|22-23F | |||
FFS Axel MashP 7.png|24-25F | |||
FFS Axel f5D 3.png|26-27F | |||
FFS Axel MashP 9.png|28-29F | |||
FFS Axel MashP 10.png|30-31F | |||
FFS Axel MashP 11.png|32-33F | |||
FFS Axel c5C 1.png|34-39F | |||
</gallery> | |||
}} | |||
}} | |||
===Desperation Move=== | |||
===== <span class="invisible-header">Axel Rush (4632149BC)</span> ===== | |||
*( | <font style="visibility:hidden" size="0"></font> | ||
{{MoveData | |||
| name = Axel Rush | |||
| input = 4632149B+C | |||
| subtitle = When health is flashing | |||
| image = FFS Axel 4632149BC_5.png | |||
| caption = | |||
| data = | |||
{{AttackData-FFS | |||
| Damage = 48 (12x2) | |||
| Stun = 4 | |||
| Guard = Mid | |||
| Startup = 27, 37, 53 | |||
| Active = 6 (4) 10 (6) 10 | |||
| Recovery = 15 | |||
| Total = 77 | |||
| Hit Adv = KD | |||
| Block Adv = -11 | |||
| Property = / | |||
| description = * Can press BC before inputting 9 (463214BC9) to prevent an accidental jump. | |||
*Gives Axel a much needed speed boost and deals a ton of chip damage. Safe on block if it hits meaty. | |||
<gallery class="mw-collapsible mw-collapsed" data-expandtext="show detailed hitboxes" data-collapsetext="hide detailed hitboxes"> | |||
FFS Axel 4632149BC.png|1-4F | |||
FFS Axel 4632149BC 1.png|5-11F | |||
FFS Axel 4632149BC.png|12-17F | |||
FFS Axel c5C 1.png|18-22F | |||
FFS Axel 4632149BC 3.png|23-24F | |||
FFS Axel 4632149BC 4.png|25-26F | |||
FFS Axel 4632149BC 5.png|27-29F | |||
FFS Axel 4632149BC 6.png|30-32F | |||
FFS Axel 4632149BC 7.png|33-34F | |||
FFS Axel 4632149BC Leftover.png|35-36F | |||
FFS Axel 4632149BC 8.png|37-39F | |||
FFS Axel 4632149BC 9.png|40-43F | |||
FFS Axel 4632149BC Leftover 1.png|44-46F | |||
FFS Axel 4632149BC Leftover 2.png|47-48F | |||
FFS Axel 4632149BC Leftover 3.png|49-50F | |||
FFS Axel 4632149BC Leftover 4.png|51-52F | |||
FFS Axel 16P 4.png|53-55F | |||
FFS Axel 16P 5.png|56-59F | |||
FFS Axel 16P 6.png|60-62F | |||
FFS Axel 4632149BC 13.png|63-63F | |||
FFS Axel Jump.png|64-77F | |||
</gallery> | |||
}} | |||
}} | |||
==Combos== | |||
* jC/D, 2A > Mash A | |||
The Dance will get 2 hits if you jump from the front, or 3 hits if the combo is a crossup. | |||
* c5B > Mash A/C | |||
* 2C > [1]6A | |||
* c5C > 236A | |||
* Lane Attack > c5A > Mash A | |||
== | ==Strategy== | ||
' | ===The Basics=== | ||
Axel's kit, with its strong projectile and slew of good anti-air moves, is geared towards defensive play and has all the necessary tools for keeping your opponent at bay. However, his Tornado Upper has more recovery than your average projectile, which means that Axel often has to switch to offense when playing against characters who can turtle better than him. This can prove challenging, as Axel's walk speed is atrocious and he doesn't have any anti-projectile tools unique to him. However, his faster than average jump and excellent Dodge Attack make up for most of his flaws and allow him to get in against even the strongest zoners in the game when used correctly. | |||
Axel's normals are an extremely mixed bag, having both some of the best and some of the worst buttons in the game. You'll mostly be using the following moves in neutral: | |||
* | *5B: an excellent poke with good reach and a hitbox that even makes it a strong anti-air. You'll always want to cancel the move into a special both on hit and block, though, as the recovery is poor otherwise. | ||
*CD can similarly function both as a poke and anti-air, dealing good damage especially on 1-lane stages and giving great oki on hit. | |||
*2D: a very fast low with good reach that gives a knockdown on hit, and can be cancelled into specials on block. | |||
*2C makes for a great anti-air against close range jumps. | |||
' | Axel's Dodge Attack has by far the best reach in the game and properly utilizing the move is essential to his gameplan. Always do the move with a 46A input, as you might get an accidental Smash Bomber if you do it out of crouch block. | ||
Despite not having many links at all, Axel's combo damage can be explosive up close. None of Axel's combo enders knock down on hit, though, so try to maximize the stun value of your combo and always go for an Axel Dance if you land a jump-in. The heavy version in particular will do a massive amount of stun if it hits twice (6 x 2 = 12 points of stun!). Once your opponent is dizzy, you can go for another combo or Axel's high damage 9D throw. If your jump-in gets blocked, go for light Axel Dance as it's safer and better for dealing chip damage. It's also great for okizeme as Axel can't be grabbed out of it, making it safe against just about everything except for invulnerable reversals. | |||
'' | Axel's super has one of the trickiest inputs in the game but it's worth mastering as the movement boost he gets from it complements his otherwise poor mobility very well. While not quite as spammable as Kim's super, for example, it can be made safe on block if done from the correct distance or if it hits meaty. It hits twice when blocked, so it makes for a good chip kill move as well. | ||
Keep in mind that unlike other characters Axel can't throw with the C button; all of his 3 throws are performed using the D button instead. Axel's throw range is poor, but he's also a bit harder to grab than your average character. | |||
' | |||
===Advanced Strategy=== | |||
Close B will whiff against most opponents if they're dizzy. To make Axel's 9D throw easier to land, you can buffer it during a whiffed cl.B to avoid accidental jumps. | |||
''' | On Axel's stage, crouch walking past your opponent while they're knocked into the background by your Lane Blast will cause Axel's sprite to rapidly flicker left and right in a glitchy manner. It's customary to use this to style on your enemy and cause psychological damage. | ||
= | ==Matchups== | ||
===Vs. Andy Bogard=== | ===Vs. Andy Bogard=== | ||
3 - 7 | |||
Tough, as Andy can run circles around you with his high mobility. Axel is too slow to counter most of Andy's moves on reaction, so the key to winning this matchup is all about being able to read your opponent. Be prepared to throw out a lot of pre-emptive pokes to stop Andy from approaching with his Zaneiken; 2B and 2D are your best normals for that purpose. Use Tornado Upper with caution, as Andy can hit you out of its startup with a heavy Zaneiken, or fly past and punish it with Kuuha Dan. Axel's CD can be used to beat both moves, but it doesn't work as an option select as you have to time it differently depending on which move Andy uses. | |||
===Vs. Axel Hawk=== | ===Vs. Axel Hawk=== | ||
5 - 5 | |||
The rare Axel mirror match plays like a game of chicken: you'll be throwing Tornadoes at each other until one side yields and decides to go for the jump-in. Keep your eyes peeled and be ready to anti-air any jump attempts. | |||
===Vs. Big Bear=== | ===Vs. Big Bear=== | ||
6 - 4 | |||
The biggest advantage here is that Tornado Upper hits Bear's feet and thus he can't use his Giant Bomb tackle to get past your projectiles. He'll be forced to jump sooner or later, so be always prepared to anti-air and don't let him catch you off guard. Your low hitting 2B and 2D pokes are valuable here as well. | |||
===Vs. Billy Kane=== | ===Vs. Billy Kane=== | ||
3.5 - 6.5 | |||
Throwing Tornadoes from a distance unfortunately won't get you very far as Billy has several projectile-destroying specials, so it's better to work your way in. Billy's strong pokes and massive reach don't make things easy, but you can counter his long range moves with a dodge attack if your reads are on point. Once you're close enough, try to score a knockdown with 2D and pressure him with Axel Dance. | |||
This matchup is guaranteed to be 1 lane only, so lane switching is not an option for either player. Landing a CD here will give you massive frame advantage and bring Billy to the brink of getting stunned, so it's a move worth going for. | |||
===Vs. Cheng Sinzan=== | ===Vs. Cheng Sinzan=== | ||
4 - 6 | |||
You'll have to watch out for Cheng's balloon as it can easily hit you if you get too carried away throwing projectiles. On block, you can punish it with 5B cancelled into Tornado, or 5D (possibly the only worthwhile use for this button?). Use 2B and 2D a lot, as they can beat Cheng's Hagan Geki. | |||
===Vs. Duck King=== | ===Vs. Duck King=== | ||
6 - 4 | |||
A matchup where you'll want to turtle as hard as possible and keep Duck out. Fortunately Duck can't slide past your projectiles, so he has to either jump or risk using the very unsafe Dancing Dive to beat your zoning. There's not much you can do against Duck up close, so keep your distance and backstep away when needed. | |||
===Vs. Geese Howard=== | ===Vs. Geese Howard=== | ||
3 - 7 | |||
This matchup is a pain mostly due to Geese's Shippuken, as the move is very hard for Axel to avoid and it makes throwing Tornadoes in neutral very risky. Axel's only option is to slowly waddle his way in and challenge Geese up close, which is easier said than done thanks to his excellent projectiles and strong anti-airs. Once Geese's in the range of your 2D the matchup becomes a lot more manageable. Try to score a knockdown, pressure him up close and drive him into a corner if possible. | |||
===Vs. Joe Higashi=== | ===Vs. Joe Higashi=== | ||
3 - 7 | |||
Kind of like a mirror match, but the other side is on steroids. Joe's Hurricane Upper is almost identical to Axel's Tornado, but with one key difference: Joe recovers much faster, so out-spamming him in a projectile war is impossible and you have to somehow get close to deal damage. Axel does have one advantage, though: his pokes have better reach. Try to find that sweet spot where Joe can't safely throw projectiles out of fear of getting hit, but can't reach you with his normals either and keep pressuring him with your long-range 5B and 2D pokes. | |||
===Vs. Jubei Yamada=== | ===Vs. Jubei Yamada=== | ||
4 - 6 | |||
Not quite as bad as you'd expect. Dodge attack works wonders here and allows you to get past Jubei's zoning if your timing is on point. Axel's jump attacks can beat Jubei's usual low profile AA buttons, so jumps carry slightly less risk here than usual. 2B and 2D are perfect pokes for this matchup. | |||
===Vs. Kim Kaphwan=== | ===Vs. Kim Kaphwan=== | ||
3.5 - 6.5 | |||
You better have lightning fast reflexes. Kim's too fast for you to pin down, so this matchup is about reacting to whatever Kim does and choosing your moves accordingly. Throwing projectiles at Kim in neutral is always a huge risk due to his divekick, so use Tornado Upper with extreme caution. Axel's CD is great for punishing divekick attempts, but it's a bit too slow to consistently use on reaction, so be prepared to throw out a lot of anti-airs pre-emptively. On ground, 2D and dodge attack work best to counter Kim's pokes. Don't let your guard down even if you have a big life lead, as Kim can melt your lifebar away with a single super if it hits your weak point, boosting its already huge damage by 25%. | |||
===Vs. Laurence Blood=== | ===Vs. Laurence Blood=== | ||
4 - 6 | |||
Tornado Upper does a decent job at keeping Laurence away, but you'll need to watch out for his Bloody Cutter as it can punish your projectiles even from full screen. Dodge attack beats most of Laurence's key moves, but loses to his slide kick; use 2B/2D against slides. Laurence's anti-airs are mediocre at best, so jumps against him don't carry a lot of risk. | |||
===Vs. Mai Shiranui=== | ===Vs. Mai Shiranui=== | ||
4.5 - 5.5 | |||
Similar to the Jubei matchup. Mastering the use of Axel's amazing dodge attack is essential to winning here, as it allows you to get past Mai's projectile defense. Once you're close enough to hit her with your 2D and 5B pokes, the matchup is in your favor. Avoid excessive jumping as Mai's anti-air damage is terrifying. | |||
===Vs. Ryo Sakazaki=== | ===Vs. Ryo Sakazaki=== | ||
===Vs. Terry Bogard=== | ===Vs. Terry Bogard=== | ||
4 - 6 | |||
Power Wave beats dodge attacks, so sooner or later you'll have to jump if you want to get past Terry's projectiles; pick your timing carefully as Terry's got a plethora of solid anti-airs. You'll ideally want to stay in mid range where you can poke with 5B and 2D, but Terry's fastest normals can't reach you. | |||
===Vs. Tung Fu Rue=== | ===Vs. Tung Fu Rue=== | ||
6 - 4 | |||
Tung at close range is deadly, so play it safe and keep him out at all costs. This is one of the matchups where throwing Tornadoes is relatively safe, so abuse them as much as possible. Backstep to safety if Tung gets too close for comfort, but try to avoid getting cornered. | |||
===Vs. Wolfgang Krauser=== | ===Vs. Wolfgang Krauser=== | ||
4 - 6 | |||
Tornado Upper won't help you much in neutral as Krauser can easily counter it with a high Blitzball, so work your way in past Krauser's defense with well timed dodge attacks and jumps. You'll have the advantage up close where your 2B/2D will beat all of Krauser's main pokes. Krauser has no invulnerable reversal, so try going for close range Axel Dance if you get a knockdown to deal big chip damage. | |||
{{Navbox-FFS}} | |||
[[Category:Fatal Fury Special]] | [[Category:Fatal Fury Special]] | ||
[[Category:Axel Hawk]] | |||
Latest revision as of 02:37, 27 April 2025


Introduction
Previously a boss character in FF2, the heavyweight boxer Axel Hawk is made playable in Special and given a retooled moveset. In boxing terms, Axel's fighting style is closest to the out-boxer, heavily relying on long-range moves and good positioning to counter the opponent's attacks. He's one of the trickier characters to play, often requiring good reads to deal big damage, but can be deadly in the right hands.
| Pros | Cons |
|---|---|
|
|
Move List
General Hurtboxes
Note: Attacks that hit Axel's stomach hurtbox (when present) will do 25% more damage (rounded down)
| Weak Point/Standing/Walking | Crouching | Jumping | Taunting |
 |
 |
  |

|
| Stomach hurtbox (flashing) takes extra damage. | 50F (4+43+3) duration. |
Close Standing Normals
c5A
Body/ボディ

| Damage | Stun | Guard | Startup | Active | Recovery | Total | Hit Adv | Block Adv | Property | |
|---|---|---|---|---|---|---|---|---|---|---|
| 12 | 2 | Mid | 6 | 5 | 7 | 17 | +4 | +5 | Kara Cancel | |
| ||||||||||


c5B
Hook/フック

| Damage | Stun | Guard | Startup | Active | Recovery | Total | Hit Adv | Block Adv | Property | |
|---|---|---|---|---|---|---|---|---|---|---|
| 8x2 | 2x2 | Mid | 6, 10 | 4+7 | 8 | 24 | +1 | +4 | Kara Cancel | |
| ||||||||||


c5C
Under Punch/アンダーパンチ

| Damage | Stun | Guard | Startup | Active | Recovery | Total | Hit Adv | Block Adv | Property | |
|---|---|---|---|---|---|---|---|---|---|---|
| 20 | 4 | Mid | 7 | 7 | 18 | 31 | -1 | -2 | Kara Cancel | |
| ||||||||||


c5D
Upper/アッパー

| Damage | Stun | Guard | Startup | Active | Recovery | Total | Hit Adv | Block Adv | Property | |
|---|---|---|---|---|---|---|---|---|---|---|
| 16 | 4 | Mid | 6 | 4+10 | 23 | 42 | -13 | -14 | Kara Cancel | |
| ||||||||||


Far Standing Normals
f5A
Straight/ストレート

| Damage | Stun | Guard | Startup | Active | Recovery | Total | Hit Adv | Block Adv | Property | |
|---|---|---|---|---|---|---|---|---|---|---|
| 10 | 2 | Mid | 6 | 9 | 6 | 20 | +1 | +2 | Kara Cancel | |
| ||||||||||

f5B
Strike Hook/ストライクフック

| Damage | Stun | Guard | Startup | Active | Recovery | Total | Hit Adv | Block Adv | Property | |
|---|---|---|---|---|---|---|---|---|---|---|
| 6 | 2 | Mid | 3 | 3+4+5 | 27 | 41 | -23 | -22 | Kara Cancel | |
| ||||||||||


f5C
Slash Punch/スラッシュパンチ

| Damage | Stun | Guard | Startup | Active | Recovery | Total | Hit Adv | Block Adv | Property | |
|---|---|---|---|---|---|---|---|---|---|---|
| 18 | 4 | Mid | 6 | 4+5 | 27 | 41 | -13 | -14 | / | |
| ||||||||||


f5D
Step Upper/ステップアッパー

| Damage | Stun | Guard | Startup | Active | Recovery | Total | Hit Adv | Block Adv | Property | |
|---|---|---|---|---|---|---|---|---|---|---|
| 14 | 4 | Mid | 9 | 3+4+4 | 27 | 46 | -15 | -16 | / | |
| ||||||||||


Crouching Normals
2A
Low Light Upper/ローライトアッパー

| Damage | Stun | Guard | Startup | Active | Recovery | Total | Hit Adv | Block Adv | Property | |
|---|---|---|---|---|---|---|---|---|---|---|
| 6 | 2 | Mid | 5 | 6 | 5 | 15 | +5 | +6 | Kara Cancel | |
| ||||||||||
2B
Ducking Jab/ダッキングジャブ

| Damage | Stun | Guard | Startup | Active | Recovery | Total | Hit Adv | Block Adv | Property | |
|---|---|---|---|---|---|---|---|---|---|---|
| 8 | 2 | Low | 5 | 7 | 8 | 19 | +1 | +2 | Kara Cancel | |
| ||||||||||
2C
Wing Upper/ウイングアッパー

| Damage | Stun | Guard | Startup | Active | Recovery | Total | Hit Adv | Block Adv | Property | |
|---|---|---|---|---|---|---|---|---|---|---|
| 14 | 4 | Mid | 8 | 16 | 18 | 41 | -10 | -11 | Kara Cancel | |
| ||||||||||

2D
Ducking Jab/ダッキングジャブ
| Damage | Stun | Guard | Startup | Active | Recovery | Total | Hit Adv | Block Adv | Property | |
|---|---|---|---|---|---|---|---|---|---|---|
| 16 | 4 | Low | 6 | 11 | 11 | 27 | KD | +1 | Kara Cancel | |
| ||||||||||
Jumping Normals
jA/B
Kangaroo Hook/カンガルーフック

| Damage | Stun | Guard | Startup | Active | Recovery | Total | Hit Adv | Block Adv | Property | |
|---|---|---|---|---|---|---|---|---|---|---|
| 8 | 2 | Overhead | 5 | 7 + ∞ | - | - | - | - | - | |
| ||||||||||


jC
Double Kangaroo Punch/ダブルカンガルーパンチ
| Damage | Stun | Guard | Startup | Active | Recovery | Total | Hit Adv | Block Adv | Property | |
|---|---|---|---|---|---|---|---|---|---|---|
| 10x2 | 4x2 | Overhead, Overhead | 5, 16 | 11+8 | - | - | - | - | - | |
| ||||||||||

jD
Double Kangaroo Punch/ダブルカンガルーパンチ
| Version | Damage | Stun | Guard | Startup | Active | Recovery | Total | Hit Adv | Block Adv | Property | |
|---|---|---|---|---|---|---|---|---|---|---|---|
| Diagonal Jump | 10x2 | 4x2 | Overhead, Overhead | 10, 21 | 11+8 | - | - | - | - | - | |
| |||||||||||
| Neutral Jump | 10x2 | 4x2 | Overhead, Overhead | 5, 16 | 11+8 | - | - | - | - | - | |
| |||||||||||
Universal Mechanics
Lane Blast (CD)
Atomic Bomber/アトミックボンバー
C+D


| Version | Damage | Stun | Guard | Startup | Active | Recovery | Total | Hit Adv | Block Adv | Property | |
|---|---|---|---|---|---|---|---|---|---|---|---|
| Front Lane | 22 | 5 | Mid | 9 | 8 | 14 | 30 | KD | -3 | Cancel, Lane Shift | |
| |||||||||||
| Back Lane | 22 | 5 | Mid | 12 | 8 | 8 | 27 | KD | +3 | Cancel, Lane Shift | |
| |||||||||||


Lane Attack
A/B/C/D from opposite lane


Front Lane Attack Recovery
Back Lane Attack Recovery

| Version | Damage | Stun | Guard | Startup | Active | Recovery | Total | Hit Adv | Block Adv | Property | |
|---|---|---|---|---|---|---|---|---|---|---|---|
| A/B | 20 | 2 | Overhead | 13 | - | 4 | - | - | - | / | |
| |||||||||||
| C/D | 20 | 4 | Overhead | 13 | - | 4 | - | - | - | / | |
| |||||||||||
Dodge Attack
6A during proximity guard

| Damage | Stun | Guard | Startup | Active | Recovery | Total | Hit Adv | Block Adv | Property | |
|---|---|---|---|---|---|---|---|---|---|---|
| 11 | 5 | Mid | 14 | 8 | 11 | 32 | Air Reset | 0 | Kara Cancel, Invuln Above Knees 1-13F, Invuln Above Waist 14-21F | |
| ||||||||||


Throws
Hell Bomber (6D)
close 6D

| Damage | Stun | Range | Guard | Startup | Active | Recovery | Total | Hit Adv | Block Adv | Property |
|---|---|---|---|---|---|---|---|---|---|---|
| 16~32 (4 x 4~8) | 0 | 16 | Throw | 1 | 1 | / | - | KD/Air reset | / | / |
| ||||||||||
Head Crush (4D)
close 4D

| Damage | Stun | Range | Guard | Startup | Active | Recovery | Total | Hit Adv | Block Adv | Property |
|---|---|---|---|---|---|---|---|---|---|---|
| 16~32 (4 x 4~8) | 0 | 16 | Throw | 1 | 1 | / | - | KD/Air reset | / | / |
| ||||||||||
Rolling Buster (9D)
close 9D

| Damage | Stun | Range | Guard | Startup | Active | Recovery | Total | Hit Adv | Block Adv | Property |
|---|---|---|---|---|---|---|---|---|---|---|
| 24~52 (4 x 6~13) | 0 | 8 | Throw | 1 | 1 | / | - | KD/Air reset | / | / |
| ||||||||||
Special Moves
Tornado Upper (236P)
236A/C

| Version | Damage | Stun | Guard | Startup | Active | Recovery | Total | Hit Adv | Block Adv | Property | |
|---|---|---|---|---|---|---|---|---|---|---|---|
| A | 16 (4) | 3 | Mid | 15 | - | 43 | 57 | -10 | -13 | / | |
| |||||||||||
| C | 22 (5) | 6 | Mid | 20 | - | 49 | 68 | -8 | -15 | / | |
| |||||||||||


Smash Bomber ([1]6P)
[1]6A/C

| Version | Damage | Stun | Guard | Startup | Active | Recovery | Total | Hit Adv | Block Adv | Property | |
|---|---|---|---|---|---|---|---|---|---|---|---|
| A | 18 (4) | 3 | Mid | 17 | 5+6+6 | 12 | 45 | Air Reset | -7 | - | |
| |||||||||||
| C | 24 (6) | 6 | Mid | 28 | 7+9+9 | 12 | 64 | KD | -19 | - | |
| |||||||||||


Axel Dance (Mash P)
Mash A/C
| Version | Damage | Stun | Guard | Startup | Active | Recovery | Total | Hit Adv | Block Adv | Property | |
|---|---|---|---|---|---|---|---|---|---|---|---|
| A | 12xN (3xN) | 3 | / | 7, 18, 29, 41 ... | 4 (7) 4 (7) 4 (8) 2 ... | 4 | 46+ | -6 | 0 | / | |
| |||||||||||
| C | 18xN (4xN) | 6 | / | 11, 24 ... | 4 (9) 4 ... | 12 | 39+ | +15 | +8 | / | |
| |||||||||||


Desperation Move
Axel Rush (4632149BC)
When health is flashing
4632149B+C

| Damage | Stun | Guard | Startup | Active | Recovery | Total | Hit Adv | Block Adv | Property | |
|---|---|---|---|---|---|---|---|---|---|---|
| 48 (12x2) | 4 | Mid | 27, 37, 53 | 6 (4) 10 (6) 10 | 15 | 77 | KD | -11 | / | |
| ||||||||||


Combos
- jC/D, 2A > Mash A
The Dance will get 2 hits if you jump from the front, or 3 hits if the combo is a crossup.
- c5B > Mash A/C
- 2C > [1]6A
- c5C > 236A
- Lane Attack > c5A > Mash A
Strategy
The Basics
Axel's kit, with its strong projectile and slew of good anti-air moves, is geared towards defensive play and has all the necessary tools for keeping your opponent at bay. However, his Tornado Upper has more recovery than your average projectile, which means that Axel often has to switch to offense when playing against characters who can turtle better than him. This can prove challenging, as Axel's walk speed is atrocious and he doesn't have any anti-projectile tools unique to him. However, his faster than average jump and excellent Dodge Attack make up for most of his flaws and allow him to get in against even the strongest zoners in the game when used correctly.
Axel's normals are an extremely mixed bag, having both some of the best and some of the worst buttons in the game. You'll mostly be using the following moves in neutral:
- 5B: an excellent poke with good reach and a hitbox that even makes it a strong anti-air. You'll always want to cancel the move into a special both on hit and block, though, as the recovery is poor otherwise.
- CD can similarly function both as a poke and anti-air, dealing good damage especially on 1-lane stages and giving great oki on hit.
- 2D: a very fast low with good reach that gives a knockdown on hit, and can be cancelled into specials on block.
- 2C makes for a great anti-air against close range jumps.
Axel's Dodge Attack has by far the best reach in the game and properly utilizing the move is essential to his gameplan. Always do the move with a 46A input, as you might get an accidental Smash Bomber if you do it out of crouch block.
Despite not having many links at all, Axel's combo damage can be explosive up close. None of Axel's combo enders knock down on hit, though, so try to maximize the stun value of your combo and always go for an Axel Dance if you land a jump-in. The heavy version in particular will do a massive amount of stun if it hits twice (6 x 2 = 12 points of stun!). Once your opponent is dizzy, you can go for another combo or Axel's high damage 9D throw. If your jump-in gets blocked, go for light Axel Dance as it's safer and better for dealing chip damage. It's also great for okizeme as Axel can't be grabbed out of it, making it safe against just about everything except for invulnerable reversals.
Axel's super has one of the trickiest inputs in the game but it's worth mastering as the movement boost he gets from it complements his otherwise poor mobility very well. While not quite as spammable as Kim's super, for example, it can be made safe on block if done from the correct distance or if it hits meaty. It hits twice when blocked, so it makes for a good chip kill move as well.
Keep in mind that unlike other characters Axel can't throw with the C button; all of his 3 throws are performed using the D button instead. Axel's throw range is poor, but he's also a bit harder to grab than your average character.
Advanced Strategy
Close B will whiff against most opponents if they're dizzy. To make Axel's 9D throw easier to land, you can buffer it during a whiffed cl.B to avoid accidental jumps.
On Axel's stage, crouch walking past your opponent while they're knocked into the background by your Lane Blast will cause Axel's sprite to rapidly flicker left and right in a glitchy manner. It's customary to use this to style on your enemy and cause psychological damage.
Matchups
Vs. Andy Bogard
3 - 7
Tough, as Andy can run circles around you with his high mobility. Axel is too slow to counter most of Andy's moves on reaction, so the key to winning this matchup is all about being able to read your opponent. Be prepared to throw out a lot of pre-emptive pokes to stop Andy from approaching with his Zaneiken; 2B and 2D are your best normals for that purpose. Use Tornado Upper with caution, as Andy can hit you out of its startup with a heavy Zaneiken, or fly past and punish it with Kuuha Dan. Axel's CD can be used to beat both moves, but it doesn't work as an option select as you have to time it differently depending on which move Andy uses.
Vs. Axel Hawk
5 - 5
The rare Axel mirror match plays like a game of chicken: you'll be throwing Tornadoes at each other until one side yields and decides to go for the jump-in. Keep your eyes peeled and be ready to anti-air any jump attempts.
Vs. Big Bear
6 - 4
The biggest advantage here is that Tornado Upper hits Bear's feet and thus he can't use his Giant Bomb tackle to get past your projectiles. He'll be forced to jump sooner or later, so be always prepared to anti-air and don't let him catch you off guard. Your low hitting 2B and 2D pokes are valuable here as well.
Vs. Billy Kane
3.5 - 6.5
Throwing Tornadoes from a distance unfortunately won't get you very far as Billy has several projectile-destroying specials, so it's better to work your way in. Billy's strong pokes and massive reach don't make things easy, but you can counter his long range moves with a dodge attack if your reads are on point. Once you're close enough, try to score a knockdown with 2D and pressure him with Axel Dance.
This matchup is guaranteed to be 1 lane only, so lane switching is not an option for either player. Landing a CD here will give you massive frame advantage and bring Billy to the brink of getting stunned, so it's a move worth going for.
Vs. Cheng Sinzan
4 - 6
You'll have to watch out for Cheng's balloon as it can easily hit you if you get too carried away throwing projectiles. On block, you can punish it with 5B cancelled into Tornado, or 5D (possibly the only worthwhile use for this button?). Use 2B and 2D a lot, as they can beat Cheng's Hagan Geki.
Vs. Duck King
6 - 4
A matchup where you'll want to turtle as hard as possible and keep Duck out. Fortunately Duck can't slide past your projectiles, so he has to either jump or risk using the very unsafe Dancing Dive to beat your zoning. There's not much you can do against Duck up close, so keep your distance and backstep away when needed.
Vs. Geese Howard
3 - 7
This matchup is a pain mostly due to Geese's Shippuken, as the move is very hard for Axel to avoid and it makes throwing Tornadoes in neutral very risky. Axel's only option is to slowly waddle his way in and challenge Geese up close, which is easier said than done thanks to his excellent projectiles and strong anti-airs. Once Geese's in the range of your 2D the matchup becomes a lot more manageable. Try to score a knockdown, pressure him up close and drive him into a corner if possible.
Vs. Joe Higashi
3 - 7
Kind of like a mirror match, but the other side is on steroids. Joe's Hurricane Upper is almost identical to Axel's Tornado, but with one key difference: Joe recovers much faster, so out-spamming him in a projectile war is impossible and you have to somehow get close to deal damage. Axel does have one advantage, though: his pokes have better reach. Try to find that sweet spot where Joe can't safely throw projectiles out of fear of getting hit, but can't reach you with his normals either and keep pressuring him with your long-range 5B and 2D pokes.
Vs. Jubei Yamada
4 - 6
Not quite as bad as you'd expect. Dodge attack works wonders here and allows you to get past Jubei's zoning if your timing is on point. Axel's jump attacks can beat Jubei's usual low profile AA buttons, so jumps carry slightly less risk here than usual. 2B and 2D are perfect pokes for this matchup.
Vs. Kim Kaphwan
3.5 - 6.5
You better have lightning fast reflexes. Kim's too fast for you to pin down, so this matchup is about reacting to whatever Kim does and choosing your moves accordingly. Throwing projectiles at Kim in neutral is always a huge risk due to his divekick, so use Tornado Upper with extreme caution. Axel's CD is great for punishing divekick attempts, but it's a bit too slow to consistently use on reaction, so be prepared to throw out a lot of anti-airs pre-emptively. On ground, 2D and dodge attack work best to counter Kim's pokes. Don't let your guard down even if you have a big life lead, as Kim can melt your lifebar away with a single super if it hits your weak point, boosting its already huge damage by 25%.
Vs. Laurence Blood
4 - 6
Tornado Upper does a decent job at keeping Laurence away, but you'll need to watch out for his Bloody Cutter as it can punish your projectiles even from full screen. Dodge attack beats most of Laurence's key moves, but loses to his slide kick; use 2B/2D against slides. Laurence's anti-airs are mediocre at best, so jumps against him don't carry a lot of risk.
Vs. Mai Shiranui
4.5 - 5.5
Similar to the Jubei matchup. Mastering the use of Axel's amazing dodge attack is essential to winning here, as it allows you to get past Mai's projectile defense. Once you're close enough to hit her with your 2D and 5B pokes, the matchup is in your favor. Avoid excessive jumping as Mai's anti-air damage is terrifying.
Vs. Ryo Sakazaki
Vs. Terry Bogard
4 - 6
Power Wave beats dodge attacks, so sooner or later you'll have to jump if you want to get past Terry's projectiles; pick your timing carefully as Terry's got a plethora of solid anti-airs. You'll ideally want to stay in mid range where you can poke with 5B and 2D, but Terry's fastest normals can't reach you.
Vs. Tung Fu Rue
6 - 4
Tung at close range is deadly, so play it safe and keep him out at all costs. This is one of the matchups where throwing Tornadoes is relatively safe, so abuse them as much as possible. Backstep to safety if Tung gets too close for comfort, but try to avoid getting cornered.
Vs. Wolfgang Krauser
4 - 6
Tornado Upper won't help you much in neutral as Krauser can easily counter it with a high Blitzball, so work your way in past Krauser's defense with well timed dodge attacks and jumps. You'll have the advantage up close where your 2B/2D will beat all of Krauser's main pokes. Krauser has no invulnerable reversal, so try going for close range Axel Dance if you get a knockdown to deal big chip damage.


